10x Your Development with the Azure CLI

Back in the days of DOS, software developers couldn’t count much on fancy tools. There were no graphical interfaces, and everything was purely text-based. I remember using brief as an editor for my C source files (C++ didn’t exist yet), and compiling the code from the command line with the Aztec C compiler. The most advanced concept of a non-trivial software project was based on makefiles. The idea of grabbing a mouse and moving it around the desk to operate a computer would have been hilarious (or disgusting maybe!). No clicks or taps, only keystrokes - and a lot of them.
With the appearance of the graphical OSs, and point-and-click devices, we grew bored of hitting keys; it annoys us when there is no reason to click or tap, and we are forced to go back to the keyboard. The annoyance escalates sometimes to anger if there is not a shortcut or a copy-and-paste solution and we have to write down the full command, character-by-character!
While graphical interfaces are very convenient and user-friendly, they are not ideal with repetitive sequences of operations. Modern DevOps aims to make faster infrastructure configuration and application deployment. The availability of a tooling system that allows scripting these operations on automated and streamlined workflows is paramount to achieve better performances.
Note: In May 2025, the Okta Integrator Free Plan replaced Okta Developer Edition Accounts, and the Okta CLI was deprecated.
We preserved this post for reference, but the instructions no longer work exactly as written. Replace the Okta CLI commands by manually configuring Okta following the instructions in our Developer Documentation.
Command-Line? Discover Why
With .NET Core and Azure Microsoft aiming to gain a bigger share in the software development industry, non-Windows operating system’s ban policy adopted in the past by the Redmond giant gave way to a new era where different mainstream operating systems and devices (like Linux, macOS, iOS and Android) are embraced as allied, instead of fought against as competitors in the software business.
In addition to the graphical-first approach that characterized .NET Framework, .NET Core and Azure offer complete command-line-oriented tooling, including a built-in Linux integration (WSL, Windows Subsystem for Linux).
In this tutorial I am going to demonstrate how you can create and deploy to the Cloud an application including Okta Security services using the .NET Core and the Azure command-line interface tools, respectively known as dotnet and az.
Requirements
The resources used for this post are:
- A computer with a .NET Core compatible Operating System (I used Windows 10)
- A modern internet browser (I used Google Chrome and Microsoft Edge)
- An Azure account (Free Tier is ok)
- An Okta Development account
- Your favorite text editor (I used Visual Studio Code)
- ASP.NET Core SDK (I am using version 3.1.401)
- The Azure Command Line Interface (Azure CLI) tool
Prep an ASP.NET Core Application for the Azure CLI
In this paragraph you will create a new ASP.NET Core application using dotnet and add the Okta security layer with a text editor.
Create a basic ASP.NET Core MVC application, using the dotnet CLI and the mvc template and Check that it works as expected.
dotnet new mvc -n okta-cli-app
Then run the application.
dotnet run
The output should look like the following:

The application is now served at the two addresses indicated in the log messages; open your browser and navigate to http://localhost:5000. You should get the following page:
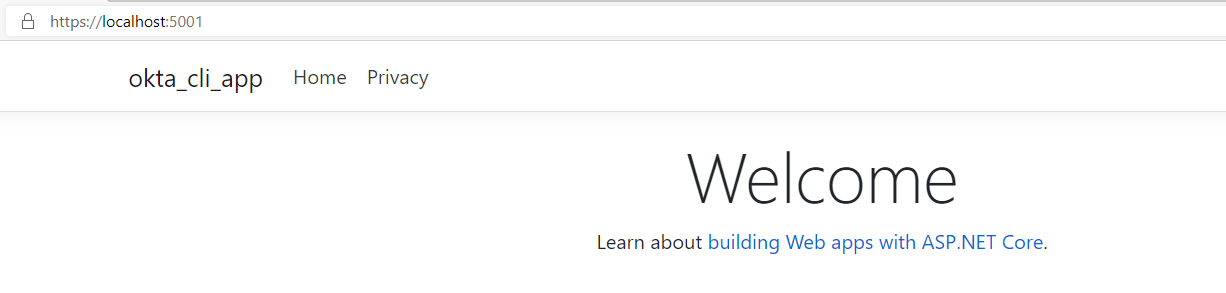
Note that the browser has been redirected to the URL
https://localhost:5001. This is because the standard template includes by default a redirection to to the secure protocol (app.UseHttpsRedirection()is called byConfigure()inStartup.cs)
You are now ready to add the authentication and authorization features: Okta, of course! Stop the running app by pressing CTRL+C in the terminal.
To make the necessary code changes, a simple text editor would be enough. In this case, I am using Visual Studio Code.
Add the Okta.AspNetCore package to the project.
dotnet add package Okta.AspNetCore
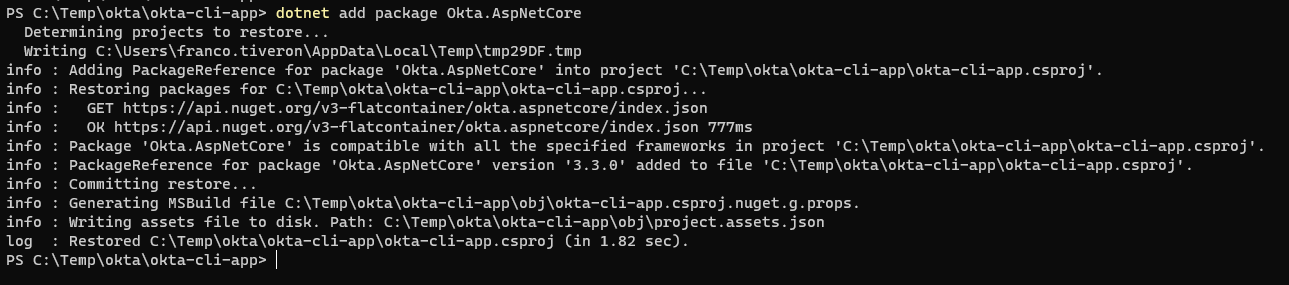
This modifies the project file okta-cli-app.cspro, adding an entry for the dependency.
<ItemGroup>
  <PackageReference Include="Okta.AspNetCore" Version="3.3.0" />
</ItemGroup>
Modify Startup.cs as follows
using Microsoft.AspNetCore.Authentication.Cookies;
using Microsoft.AspNetCore.Authentication.OpenIdConnect;
using Microsoft.AspNetCore.Builder;
using Microsoft.AspNetCore.Hosting;
using Microsoft.Extensions.Configuration;
using Microsoft.Extensions.DependencyInjection;
using Microsoft.Extensions.Hosting;
using Okta.AspNetCore;
using System.Collections.Generic;

namespace okta_cli_app
{
    public class Startup
    {
        public Startup(IConfiguration configuration)
        {
            Configuration = configuration;
        }

        public IConfiguration Configuration { get; }

        // This method gets called by the runtime. Use this method to add services to the container.
        public void ConfigureServices(IServiceCollection services)
        {
            services.AddAuthentication(options =>
            {
                options.DefaultScheme = CookieAuthenticationDefaults.AuthenticationScheme;
                options.DefaultChallengeScheme = OpenIdConnectDefaults.AuthenticationScheme;
            })
           .AddCookie()
           .AddOktaMvc(new OktaMvcOptions
           {
                // Replace these values with your Okta configuration
                OktaDomain = Configuration.GetValue<string>("Okta:OktaDomain"),
               ClientId = Configuration.GetValue<string>("Okta:ClientId"),
               ClientSecret = Configuration.GetValue<string>("Okta:ClientSecret"),
               Scope = new List<string> { "openid", "profile", "email" },
           });

            services.AddControllersWithViews();
        }

        // This method gets called by the runtime. Use this method to configure the HTTP request pipeline.
        public void Configure(IApplicationBuilder app, IWebHostEnvironment env)
        {
            if (env.IsDevelopment())
            {
                app.UseDeveloperExceptionPage();
            }
            else
            {
                app.UseExceptionHandler("/Home/Error");
                app.UseHsts();
            }
            app.UseHttpsRedirection();
            app.UseStaticFiles();

            app.UseRouting();

            app.UseAuthentication();

            app.UseAuthorization();

            app.UseEndpoints(endpoints =>
            {
                endpoints.MapControllerRoute(
                    name: "default",
                    pattern: "{controller=Home}/{action=Index}/{id?}");
            });
        }
    }
}
Now the application is fully equipped with the Okta middleware to manage Authentication and Authorization. However, there isn’t any part of the application using it, yet.
Whenever you put an Authorize attribute declaration on a Controller or Action, The ASP.NET Core runtime verifies that a user is logged in and has been granted the necessary authority. If not, you are redirected to the Okta login page.
In this case, we are going to implement an explicit Sign In/Sign Out feature, with two links in the top bar of the front-end User Interface.
Add AccountControllers.cs to the project, under the Controllers folder.
using Microsoft.AspNetCore.Authentication;
using Microsoft.AspNetCore.Authentication.Cookies;
using Microsoft.AspNetCore.Mvc;
using Okta.AspNetCore;

namespace okta_cli_app.Controllers
{
    public class AccountController : Controller
    {
        public IActionResult SignIn()
        {
            if (!HttpContext.User.Identity.IsAuthenticated)
            {
                return Challenge(OktaDefaults.MvcAuthenticationScheme);
            }

            return RedirectToAction("Index", "Home");
        }

        [HttpPost]
        public IActionResult SignOut()
        {
            return new SignOutResult(
                new[]
                {
                     OktaDefaults.MvcAuthenticationScheme,
                     CookieAuthenticationDefaults.AuthenticationScheme,
                },
                new AuthenticationProperties { RedirectUri = "/Home/" });
        }
    }
}
As you can see, the new controller provides the two actions, one for Signing In and one for Signing Out.
Finally, add two links to the top bar of the UI, with the following razor code in _Layout.cshtml.
<div class="navbar-collapse collapse d-sm-inline-flex flex-sm-row-reverse">
    @if (User.Identity.IsAuthenticated)
    {
        <ul class="nav navbar-nav navbar-right">
            <li><p class="navbar-text">Hello, @User.Identity.Name</p></li>
            <li><a class="nav-link" asp-controller="Home" asp-action="Profile" id="profile-button">Profile</a></li>
            <li>
                <form class="form-inline" asp-controller="Account" asp-action="SignOut" method="post">
                    <button type="submit" class="nav-link btn btn-link text-dark" id="logout-button">Sign Out</button>
                </form>
            </li>
        </ul>
    }
    else
    {
        <ul class="nav navbar-nav navbar-right">
            <li><a asp-controller="Account" asp-action="SignIn" id="login-button">Sign In</a></li>
        </ul>
    }
    <ul class="navbar-nav flex-grow-1">
Set Up Your Okta Application for Azure
The application is now ready to provide its services, enriched with a state-of-the-art security framework, in conjunction with a first-class Cloud-based authentication/authorization provider as Okta. You have probably realized that something is missing: I have done nothing (yet) to inform the provider that my brand new application, okta-cli-app, is going to ask it to manage authentication and authorization matters on its behalf. To fix this I need to set up a proper configuration in Okta and bind my ASP.NET Core project to it.
Before you begin, you’ll need a free Okta developer account. Install the Okta CLI and run okta register to sign up for a new account. If you already have an account, run okta login.
Then, run okta apps create. Select the default app name, or change it as you see fit.
Choose Web and press Enter.
Select ASP.NET Core.
Then, change the Redirect URI to http://localhost:5001/authorization-code/callback and use http://localhost:5001/signout/callback for the Logout Redirect URI.
Note that the TCP port 5001 must be the same used by the application. You can see it in the messages displayed in the terminal when you start the application with
dotnet run.
What does the Okta CLI do?
The Okta CLI will create an OIDC Web App in your Okta Org. It will add the redirect URIs you specified and grant access to the Everyone group. You will see output like the following when it’s finished:
Okta application configuration has been written to: /path/to/app/.okta.env
Run cat .okta.env (or type .okta.env on Windows) to see the issuer and credentials for your app.
export OKTA_OAUTH2_ISSUER="https://dev-133337.okta.com/oauth2/default"
export OKTA_OAUTH2_CLIENT_ID="0oab8eb55Kb9jdMIr5d6"
export OKTA_OAUTH2_CLIENT_SECRET="NEVER-SHOW-SECRETS"
Your Okta domain is the first part of your issuer, before /oauth2/default.
NOTE: You can also use the Okta Admin Console to create your app. See Create a ASP.NET Core App for more information.
Insert your Okta domain, client ID, and client secret in the appsettings.json file in the ASP.NET Core project:
{
  "Logging": {
    "LogLevel": {
      "Default": "Information",
      "Microsoft": "Warning",
      "Microsoft.Hosting.Lifetime": "Information"
    }
  },
  "AllowedHosts": "*",
  "Okta": {
    "OktaDomain": "https://dev-509249.okta.com",
    "ClientId": "0oaq5vf8fzPfAljzy4x6",
    "ClientSecret": "HoGyxgDTrMfNqDp4RO234CEQxDAwuXnZm2FycON-"
  }
}
Go back to the terminal and start it again.
dotnet run
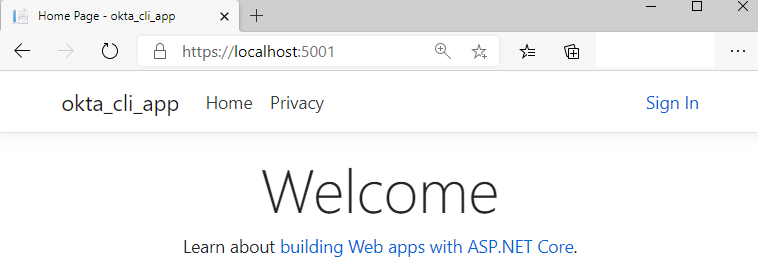
Point your browser to http://localhost:5000 once again and you should see the same page as before but with a Sign In link on the left of the top bar.
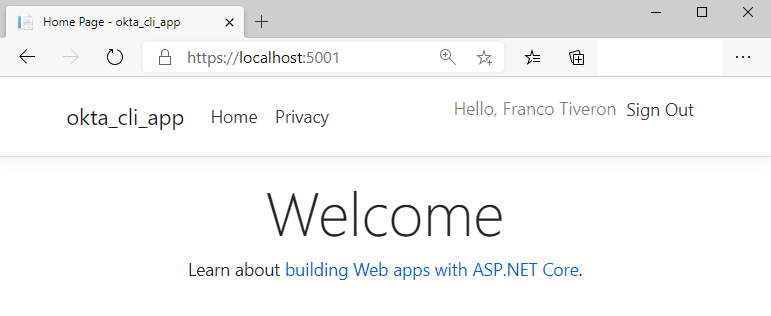
You can now click on Sign In and get redirected to the Okta login page. Once logged in, you’ll see the top bar changing.
Even though this post is about using the command line tooling rather than the IDE’s plugins or the portal user experience, I haven’t done so when creating the Okta application. It’s worth mentioning here that Okta services are offered through the portal, a Web API interface and an SDK (Okta.Sdk) - but the new Okta CLI tool has just been released! This allows DevOps engineers to fully automate the Okta account and application setting management and integrate Okta configurations in the CI/CD pipelines.
The Azure CLI Cloud Deployment Process
Microsoft Azure allows us to setup and configure everything right from the Azure Portal. While this is very convenient while learning, it’s not ideal when the same sequences of operations need to be repeated. Modern DevOps aim to make faster infrastructure configuration and application deployment. The availability of a tooling system that allows you to script these operations on automated and streamlined workflows is necessary in order to achieve better performance. I am now going to demonstrate how you can deploy the application we just created to Azure, using the Azure Command Line Interface (Azure CLI, a.k.a az).
az login
This command opens a browser page where you are requested to login to your Microsoft account. This means, of course, that to proceed with the following steps you need to have an Azure account and a valid (even free-tier) subscription. Once logged in (you only need to do this once), you can begin creating resources.
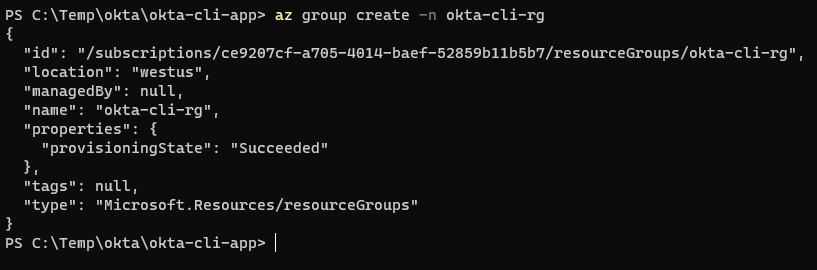
Create a Resource Group:
az group create -n okta-cli-rg
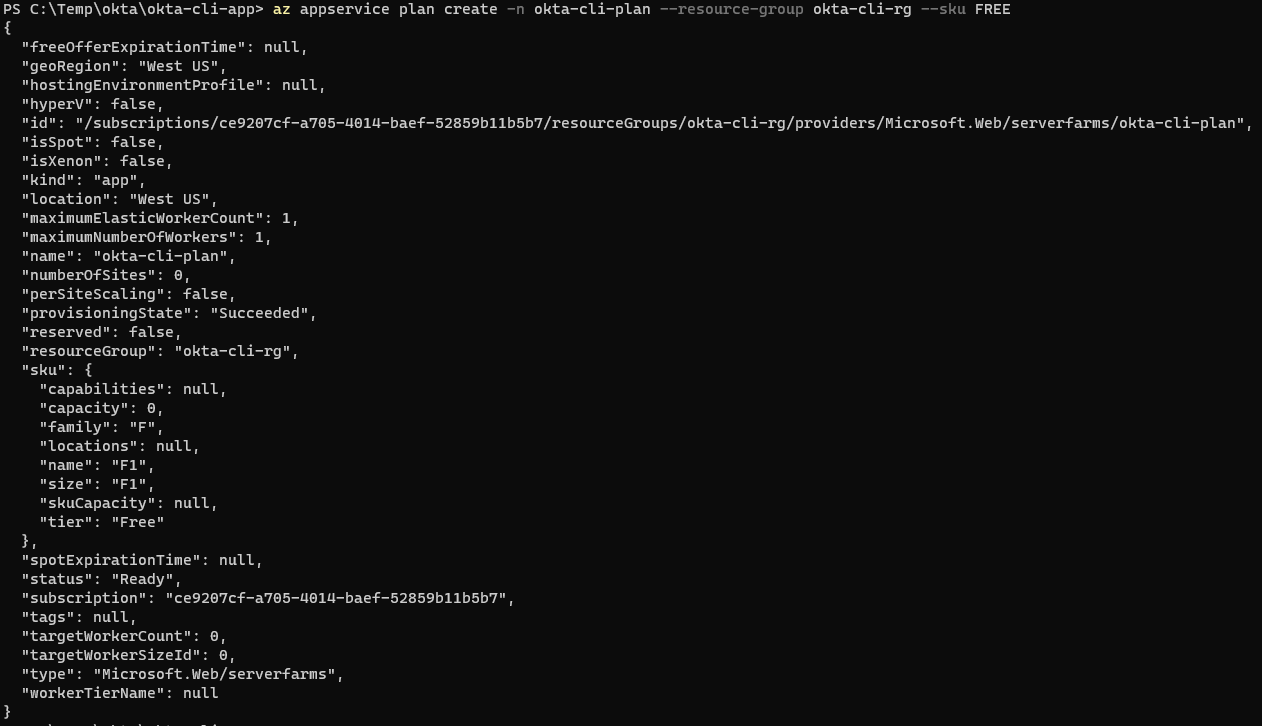
Create an Application Service Plan:
az appservice plan create -n okta-cli-plan --resource-group okta-cli-rg --sku FREE
Create the Application Service Instance:
az webapp create -g okta-cli-rg -p okta-cli-plan -n okta-cli-app
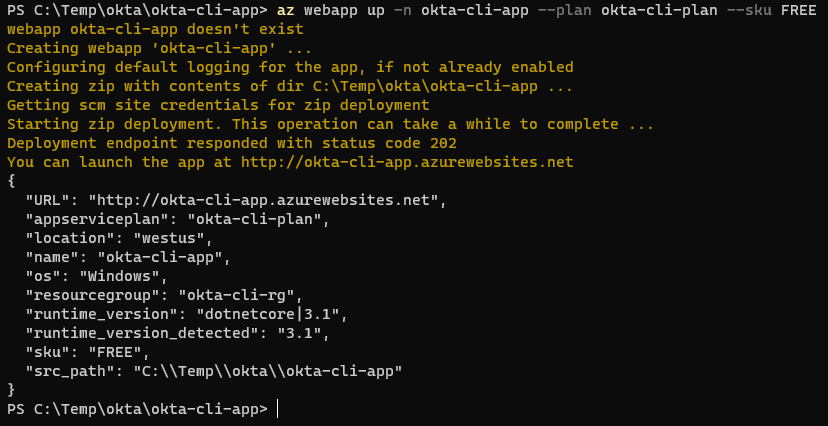
Your application is now deployed to the Cloud and available to the world at the address https://okta-cli-app.azurewebsites.net/. But before trying it, don’t forget that you need to align the URLs in your Okta application to the new address. You do that simply replacing the Okta application page, the old http://localhost:5000 with the new https://okta-cli-app.azurewebsites.net/ in all the fields that contain it (should be three).
You can now open the browser and surf to https://okta-cli-app.azurewebsites.net/. Or, if you prefer, automate this step as well with another console command.
az webapp browse -n okta-cli-app
That’s all there is to it!
Recap
In this article, I explored the basics of two command-line interface utilities (ASP.NET Core CLI and Azure CLI) and showed how to use them to create, build and deploy to the Cloud a web application, without using an IDE or a web portal.
What you learned:
- Create an ASP.NET Core web application with dotnet new
- Add Okta ASP.NET Core package to the application with dotnet add
- Implement a basic Sign In/Sign Out workflow using Okta
- Build and run the application with dotnet run
- Login the local Azure CLI to your Azure account with az login
- Create an Azure resource group with az group create
- Create an Azure application service plan with az appservice plan create
- Create an Azure application service instance with az webapp create
- Launch the browser and point it to an Azure application using az webapp browse
Learn More About Okta, .NET, and Azure
If you are interested in learning more about security and the world of Azure and .NET, check out these other blog posts!
- Secure Your ASP.NET Core App with OAuth 2.0
- Build Single Sign-on for Your ASP.NET MVC App
- Policy-Based Authorization in ASP.NET Core
- Store ASP.NET Secrets Securely with Azure KeyVault
- User Authorization in ASP.NET Core with Okta
- Baking in Security with .NET CLI Templates
Make sure to follow us on Twitter and subscribe to our YouTube Channel so that you never miss any awesome content!
Okta Developer Blog Comment Policy
We welcome relevant and respectful comments. Off-topic comments may be removed.