Policy-Based Authorization in ASP.NET Core
The authorization model in ASP.NET Core got a significant overhaul with the introduction of policy-based authorization. Authorization now uses requirements and handlers, which are decoupled from your controllers and loosely coupled to your data models. The result is a more modular, more testable authorization framework that fits into the modern ASP.NET Core approach nicely.
If you’ve built a web or mobile app before, you know that even without these changes to ASP.NET Core’s authorization model, user management is a royal pain. With Okta, you can have all that user management “stuff”, including authorization, out-of-the-box so you can get on with what you really care about – your app! By the time you’re done with this tutorial (less than 30 minutes, I promise), you’ll have the role-based authorization most ASP.NET devs are familiar with, but that’s only the tip of the iceberg! In this post, I’ll walk you through some of the impressive new features, and how you can combine them with Okta for robust, scalable authorization!
Just getting started with authentication in ASP.NET Core? Check out our quick start documentation!
Note: In May 2025, the Okta Integrator Free Plan replaced Okta Developer Edition Accounts, and the Okta CLI was deprecated.
We preserved this post for reference, but the instructions no longer work exactly as written. Replace the Okta CLI commands by manually configuring Okta following the instructions in our Developer Documentation.
Why Okta?
Before we dig into building our project, I want to tell you a little more about why Okta is the right choice for your ASP.NET Core app. Okta is an API service that allows developers to create, edit, and securely store user accounts and user account data, and connect them with one or multiple applications. Our API enables you to:
- Authenticate and authorize your users
- Store data about your users
- Perform password-based and social login
- Secure your application with multi-factor authentication
- And much more! Check out our Product Documentation
In short: we make user account management a lot easier, more secure, and more scalable than what you’re probably used to.
Ready to get started? Register for a free developer account!
Role-Based Authorization in ASP.NET Core
If you’re familiar with roles in ASP.NET 4.x, you’ll find that the new features start from a familiar place. Specifically, a user can have several roles, and you define what roles are required to perform a specific action, or access to particular sections or resources, within your application. You can specify what roles are authorized to access a specific resource by using the [Authorize] attribute. You can even declare them in such a way that the authorization evaluates at the controller level, action level, or even at a global level.
Let’s take Slack as an example. (Slack is a real-time communication platform that was built to reinvent corporate communication. Our team is obsessed!) With Slack, users can chat, call, share files, and also create and join both public and private channels.
Imagine you’re building a Slack clone for your company. You could have a ChannelAdministrationController to manage channels, restricted to users that have either a WorkspaceAdministrator or ChannelAdministrator role. Any other user that attempts to invoke any action of the controller will be unauthorized and the action will be not invoked.
[Authorize(Roles = "WorkspaceAdministrator, ChannelAdministrator")]
public class ChannelAdministrationController: Controller
{
}
This familiar syntax still works in ASP.NET Core. The ASP.NET Core team maintains it for backward compatibility, but the real improvement comes with the new policy-based model. If you’re ready to try the new hotness, it’s pretty easy to refactor your code and express your role requirement using the new model!
Try the New Policy-Based Authorization in ASP.NET Core
The policy-based model consists of three central concepts: policies, requirements, and handlers.
- A policy is composed of one or more requirements
- A requirement is a collection of data parameters used by the policy to evaluate the user Identity
- A handler is responsible for evaluating the properties of the requirements to determine if the user is authorized to access to a specific resource
Let’s talk about the policy-based model here for a moment. If you were to express the previous example in a policy-based format, you would follow these steps.
First, you have to register your policy in the ConfigureServices() method of the Startup class, as part of the authorization service configuration.
public void ConfigureServices(IServiceCollection services)
{
   services.AddMvc();

   services.AddAuthorization(options =>
   {
       options.AddPolicy("RequireElevatedRights", policy => policy.RequireRole("WorkspaceAdministrator", "ChannelAdministrator"));
   });
}
Then, instead of specifying roles in the [Authorize] attribute, specify the policy you want to assert:
[Authorize(Policy = "RequireElevatedRights")]
public class ChannelAdministrationController: Controller
{
}
And that’s all!
As you can see, the name of the policy is RequireElevatedRights, and any user with either “WorkspaceAdministrator” or “ChannelAdministrator” role will be authorized to invoke any action of the ChannelAdministrationController. Accomplishing the same thing (requiring a particular role to access the controller’s actions), but now the configuration is decoupled from the controller itself.
You didn’t have to write any requirements or handlers, but the RequireRole() method uses them under the hood. If you’re curious, check out the ASP.NET Core Security module source code to see how this is implemented.
Claims-Based Authorization via Policies in ASP.NET Core
Role-based authorization in ASP.NET Core is simple but limited. Imagine you want to validate a user based on other characteristics such as date of birth or employee number? Of course, creating a role for each of these possibilities is not an ideal solution.
ASP.NET Core bases the identity of a user on claims. A claim is a key-value pair which represents characteristics of a subject, such as, name, age, passport number, nationality, company, etc.; and a subject can have multiple of these. A trusted party issues a claim and it tells you about who the subject is and not what a subject can do.
Referring back to the Slack example, let’s say there is a channel called Employees. You’d want this channel to be only accessible to those users that have an employee ID, and not to guests or freelancers.
To do this, you’d have to register a new policy in the ConfigureServices() method of the Startup class, as part of the authorization service configuration:
public void ConfigureServices(IServiceCollection services)
{
 services.AddMvc();

 services.AddAuthorization(options =>
 {
     options.AddPolicy("EmployeesOnly", policy => policy.RequireClaim("EmployeeId"));
 });
}
In this case, the EmployeesOnly policy checks if the subject has an employee ID claim. You can restrict access to a controller by requiring this policy:
[Authorize(Policy = "EmployeesOnly")]
public class EmployeeChannelController : Controller
{
}
If you decide to refactor your code or infrastructure and need to update how the policy works “under the hood”, you only need to edit the policy definition instead of modifying each controller that uses the policy.
Complex Authorization with Custom Policies
Now, you are ready to solve for even more complicated scenarios! If your authorization needs don’t fit into a simple role- or claims-based approach, you can build your own authorization requirements and handlers that work with the policy model.
Let’s suppose you have a Happy Hour channel for employees to discuss their favorite beers. You might want to require employees to be over 21 to access the channel due to the drinking laws in some countries.
Now, suppose you have a date of birth claim, you can use this info to define an “Over21Only” policy. To do this, you have to create a “MinimumAgeRequirement” and the handler with the logic to validate if the employee is meeting the minimum age requirement.
public class MinimumAgeRequirement: IAuthorizationRequirement
{
   public MinimumAgeRequirement(int age)
   {
       MinimumAge = age;
   }

   Public int MinimumAge { get; set; }
}
Any requirement must implement the empty marker IAuthorizationRequirement interface.
In the case of this requirement, the age has to be injected in the constructor.
The requirement class acts as a “model” for the requirement, but it does not contain the authorization logic. For that, you’ll to create a handler and implement the HandleRequirementAsync() method.
public class MinimumAgeHandler : AuthorizationHandler<MinimumAgeRequirement>
{
   protected override Task HandleRequirementAsync(AuthorizationHandlerContext context, MinimumAgeRequirement requirement)
   {
       if (!context.User.HasClaim(c => c.Type ==  ClaimTypes.DateOfBirth))
       {
           return Task.CompletedTask;
       }

       var dateOfBirth = Convert.ToDateTime(context.User.FindFirst(c => c.Type == ClaimTypes.DateOfBirth).Value);

       var userAge = DateTime.Today.Year - dateOfBirth.Year;

       if (dateOfBirth > DateTime.Today.AddYears(-userAge))
       {
           userAge--;
       }

       if (userAge >= requirement.MinimumAge)
       {
           context.Succeed(requirement);
       }
       return Task.CompletedTask;
   }
}
The logic here is easy to read, the only way to succeed and authorize an employee is by evaluating that they have a DateOfBirth claim and that it meets the minimum age required.
But you may ask, why didn’t it fail when it didn’t find the DateOfBirth claim? You may end up having multiple handlers for a requirement, and you’d want the requirement to succeed if any of the handlers succeeded.
For this reason, the typical pattern is to return from the handler without explicitly failing, unless you want to guarantee a failure regardless of any other handlers. Of course, if the it succeeds, it should indicate success!
The next step is to register your policy in the Authorization service configuration in the ConfigureServices() method of the Startup class.
Also, you have to register the handler to be injected later on by the framework:
public void ConfigureServices(IServiceCollection services)
{
 services.AddAuthorization(options =>
 {
     options.AddPolicy("Over21Only",
                       policy => policy.Requirements.Add(new MinimumAgeRequirement(21)));
 });

 // existing code above
   services.AddSingleton<IAuthorizationHandler, MinimumAgeHandler>();
}
Finally, you can add this policy in any action or resource that needs to be restricted by this requirement:
[Authorize(Policy = "EmployeesOnly")]
[Authorize(Policy = "Over21Only")]
public class HappyHourChannelController : Controller
{
}
This approach is better than the role-based approach because the security code is self-documented and you can rapidly check what a policy implies.
It’s also more flexible, as you can easily change what the minimum age required is because the logic is encapsulated in a single place. You can go further, and make a separated library with your company requirements and reuse it in all the applications of the company. Also, you can write your unit tests for your different handlers. Isn’t it awesome?!
Check out the unit tests written by the ASP.NET Core Team.
Policy-Based Authorization in ASP.NET Core with Okta
Now let’s look at how easy it is to use Okta with the policy-based approach.
To quickly get started, clone the ASP.NET Core Example Repository that already has the authentication piece built-in.
git clone https://github.com/oktadeveloper/okta-aspnetcore-mvc-example.git
Create an Okta Application
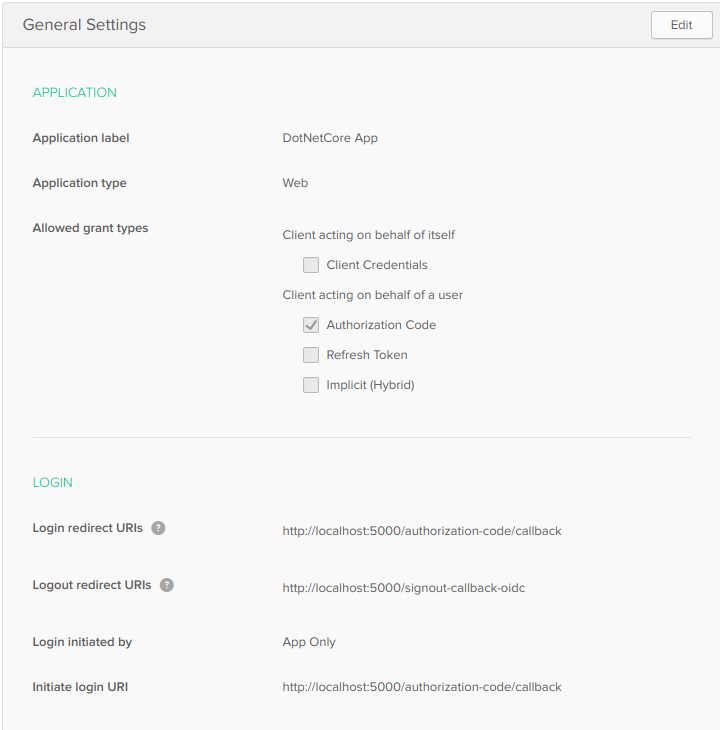
You’ll also need to set up your application in Okta. Start by creating a forever-free developer account, or logging in if you already have one. Once you’re at the dashboard in the Okta developer console, create an application with the following settings:
- Application type: Web
- Allowed grant types: Authorization Code
- Login redirect URI:
http://localhost:5000/authorization-code/callback - Logout redirect URI:
http://localhost:5000/signout-callback-oidc
Note: I am using port 5000 here because I am developing in VS Code on Ubuntu Linux. If you are using Visual Studio, your port will be 60611
Change the appsettings.json file in the cloned project to add your:
- Okta domain (e.g.
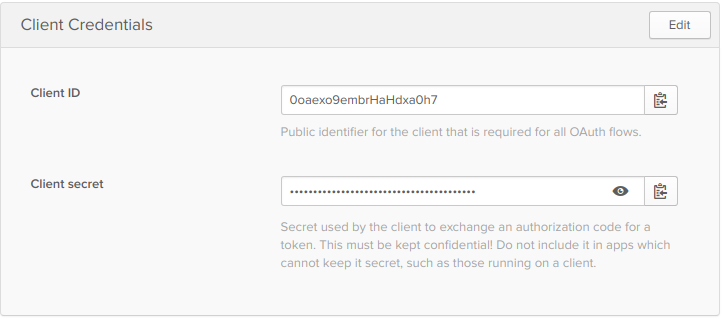
https://{yourOktaDomain}) - Client ID for your application
- Client secret for your application
- API Token for your application
You can get your Okta domain from the developer dashboard on the top right corner.

The client ID and secret you get from the application settings page.
Finally, set up an API token, by hovering over the API menu item and choosing Tokens from the drop-down menu. Then click the Create Token button and name it the same as your application name. Click the Next button and copy the token from the box and put it in your settings, then click *OK, got it** to finish.
Note: You won’t be able to retrieve this again but if you lose it, you can create a new one and change it in your settings.
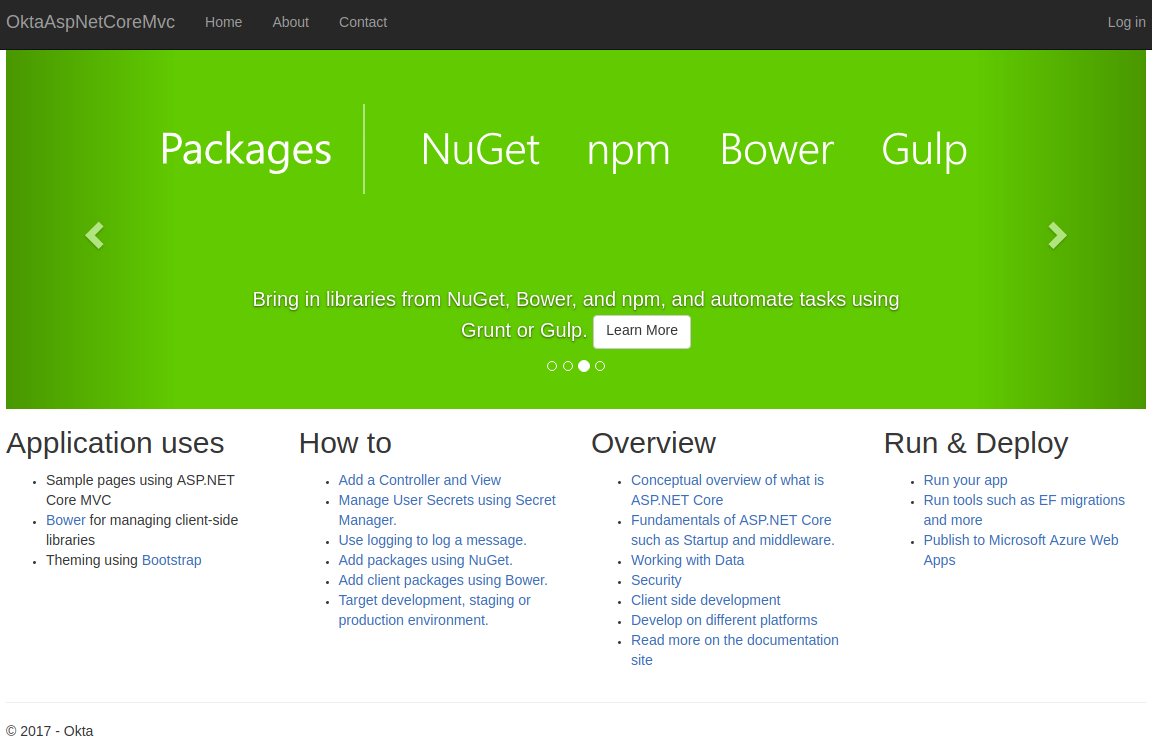
Run the app, and if everything is set up okay, you should see the app running, be able to log in and log out.
Add a Bourbon Policy
I have three users assigned to my application. Of those three users, two have “bourbon.com” email addresses, and one has a “gmail.com” address. I am going to add a policy that only allows access to people with an email address that end with “bourbon.com”.
In the Startup.cs file, add the email scope to the OIDC configuration settings.
// ... previous code omitted for brevity
options.Scope.Add("profile");
options.Scope.Add("email");
options.TokenValidationParameters = new TokenValidationParameters
{
   NameClaimType = "name"
};
//...
Next add a folder to the project called Authorization and add a DomainRequirement.cs file in that folder. The contents of the file are:
using Microsoft.AspNetCore.Authorization;

namespace OktaAspNetCoreMvc.Authorization
{
   public class DomainRequirement: IAuthorizationRequirement
   {
       public DomainRequirement(string domain)
       {
           Domain = domain;
       }

       public string Domain { get; set; }
 }
}
The DomainRequirement class implements the empty interface IAuthorizationRequirement, but the important part is the domain string being passed into the constructor and setting the Domain property, which will be used to pass the desired domain to the handler.
Add a file called DomainRequirementHandler.cs to the same folder. Inside the file, add the code to check the email domain of the currently logged in user.
using System.Security.Claims;
using System.Threading.Tasks;
using Microsoft.AspNetCore.Authorization;

namespace OktaAspNetCoreMvc.Authorization
{
 public class DomainRequirementHandler : AuthorizationHandler<DomainRequirement>
 {
   protected override Task HandleRequirementAsync(AuthorizationHandlerContext context, DomainRequirement requirement)
   {
     if(!context.User.HasClaim(c => c.Type == ClaimTypes.Email))
     {
         return Task.CompletedTask;
     }

     var email = context.User.FindFirst(c => c.Type == ClaimTypes.Email);
     var domain = email.Value.Split('@')[1];
     if(domain == requirement.Domain){
         context.Succeed(requirement);
     }

     return Task.CompletedTask;
   }
 }
}
The code above is pretty straightforward. It merely strips the domain out of the email claim and checks to see if it matches the required domain. If it does, it sets the context of the requirement check to successful.
Next, add the policy to the authorization pipeline be adding this below the services.AddMvc(); line in Startup.cs.
services.AddAuthorization(options => {
   options.AddPolicy("BourbonPolicy", policy =>
       policy.AddRequirements(new DomainRequirement("bourbon.com")));
});

services.AddSingleton<IAuthorizationHandler, DomainRequirementHandler>();
This section tells the authorization middleware to set up a policy called “BourbonPolicy” that uses the DomainRequirement class you set up earlier. Then it tells the dependency injection system to use the DomainRequirementHandler for instances requiring an IAuthorizationHandler, making sure the policy is available for the authorization middleware in ASP.NET.
The last thing left to do is create a route in the HomeController that is restricted by the new policy. Add the new route:
//... inside HomeController.cs
[Authorize(Policy="BourbonPolicy")]
public IActionResult Bourbon()
{
   ViewData["Message"] = "Bourbon Is Life";
   return View();
}
//...
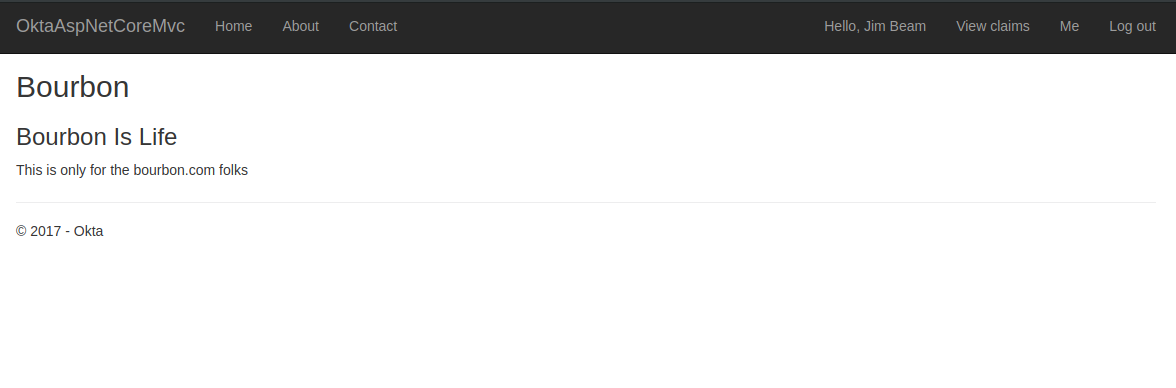
Then the new bourbon view in the Views folder.
@{
   ViewData["Title"] = "Bourbon";
}
<h2>@ViewData["Title"]</h2>
<h3>@ViewData["Message"]</h3>

<p>This is only for the bourbon.com folks<p>
Check Your Work
Now when you fire up the application, log in as a user who has a “bourbon.com” email address, and navigate to the bourbon route, you will be granted access to the bourbon… page. For users that don’t have the right email address domain, you are routed to an access denied route. You could send them to a special unauthorized page that gives them more choices to log out and log in with a user with the proper privileges.
As you can see, this new approach to authorization in ASP.NET Core allows you to separate your requirements, making them easy to combine in different ways. Combining these requirements into custom policies allow you to achieve a scalable approach to fine-grained permissions!
Learn More About Securing Your ASP.NET Core Applications
Didn’t get enough ASP.NET Core goodness? Check out our other cool posts about ASP.NET Core with Angular, Token Authentication in ASP.NET Core 2, and a more in-depth look at roles-based authorization in ASP.NET Core. Don’t forget to checkout Microsoft’s Documentation on policy-based authorization!
As usual, feel free to leave a comment below, and don’t foget to follow us on Twitter @OktaDev and on YouTube too!
Okta Developer Blog Comment Policy
We welcome relevant and respectful comments. Off-topic comments may be removed.