How to Master the Filestream in C#

We live in a world that moves fast. Compared to the mid 90s through early 2000s, we have incredibly intelligent technology. Effectively, we have super-computers in our pockets. Our actual, modern supercomputers would have seemed like works of fiction just two decades ago. Not only is our ability to compute fast, but so is our data - with cellular 4G averaging 18.1 Mbps and 5G coming in at an average of 111.8 Mbps, at the time of writing this.
With all this speed, there has been abstraction after abstraction placed on top of our data and connections to make development easier, but there is a cost to that ease. We send a lot of data over the wire. For all of the assets on a webpage, websites targeting desktops send almost 2.1Mb of data, while mobile sends nearly 1.9Mb. These speeds were not always this ubiquitous. Perhaps it’s time to look back at how applications were able to provide relatively fast interaction with data in a world long forgotten: The world of 56Kbps.
My goal is that, by the end of this article, you have a stronger understanding of some of the low level APIs that make moving large amounts of data possible. Additionally, we’re going to use this knowledge to make a secure streaming service from Amazon Web Services S3 that will let us restrict data to certain roles. We’ll do this using the smallest instance available on AWS, demonstrating the power of streams to move big data with small machines.
To follow along with this guide you’ll need these prerequisites:
- Basic knowledge of .NET
- Visual Studio Code or Visual Studio 2019
- An Okta Developer Account (free forever, to handle your OAuth needs)
- An AWS account (we’ll be using a free tier product)
- AWS Toolkit for Visual Studio
Note: In May 2025, the Okta Integrator Free Plan replaced Okta Developer Edition Accounts, and the Okta CLI was deprecated.
We preserved this post for reference, but the instructions no longer work exactly as written. Replace the Okta CLI commands by manually configuring Okta following the instructions in our Developer Documentation.
How Developers Approach the C# Filestream
How do you eat a 1Gb file? One byte at a time! While funny - in a terrible, dad pun kind of way - it is absolutely true. A large number of developers today think of data as moving over the network in its final transactional form. For example, you as a developer input a URL and get back a JSON object, an image, a CSS file, or one of the countless other types of objects.
For small pieces of data - information from a database, for example - we tend to look at the data like this:
- Query for a small subset of the data
- Bring the data into memory
- Enrich it with other data
- Convert it into JSON
- Give it back to the requester
Now imagine 1Gb of data. Even on a large server with 128Gb of data, and assuming 0 overhead from the OS and system, we could at most only load 128Gb of data into memory before we ran out. So, if we took this same approach, we’d only be able to support at most 128 clients. That wouldn’t be a very good use of resources.
Streaming the data is how we are able to accommodate not just 128, but thousands of concurrent connections.
Ever heard of a bucket brigade? This is when people work together, passing water in a bucket from person to person in a line, to get it to a place that needs it (like a fire). Each person only handles a small amount of the total workload, so it is a very effective use of manpower. This is, effectively, what streams do; break up a large source of data into small manageable pieces that can be loaded into memory effectively and then passed along.
Exploring the Filestream in C# Concepts
To solidify the concept before we move on to files, let’s start with something a little smaller: a few lines of text.
static void Main(string[] args)
{
    var file = "Hello\n.NET\nStreams";
    var fileBytes = Encoding.UTF8.GetBytes(file);
    //request
    using (var requestStream = new MemoryStream(fileBytes))
    using (var requestReader = new StreamReader(requestStream))
    //response
    using (var responseStream = new MemoryStream())
    using (var responseWriter = new StreamWriter(responseStream))
    {
        //Read line from request
        var line = requestReader.ReadLine();
        while (!string.IsNullOrWhiteSpace(line))
        {
            //Write line to response upper cased
            responseWriter.WriteLine(line.ToUpper());
            responseWriter.Flush();

            line = requestReader.ReadLine();
        };

        responseStream.Seek(0, SeekOrigin.Begin);
        using (var responseReader = new StreamReader(responseStream))
        {
            var text = responseReader.ReadToEnd();
            Console.WriteLine(text);
        }
    }
}
Let’s take a moment to break down what is going on.
var file = "Hello\n.NET\nStreams";
var fileBytes = Encoding.UTF8.GetBytes(file);
var requestStream = new MemoryStream(fileBytes);
First, we need some bytes to work with. When working with files, those bytes are stored in your storage media. However, since we are working with bytes, we’re going to convert those files into bytes. Our request stream is initiated from those bytes and we now have access to any part of the string as a byte area.
We need to work with these bytes in a format meaningful to a human. This is where the stream reader comes in. Since we already know we are dealing with text, and that there are line breaks in the text, we can use the built-in StreamReader class to simplify reading the steam. For example, we can read just one line at a time from our “file.” For a file as small as this, it may seem trivial - but imagine a CSV with decades of historical data, 6-20Tb of flat data. All of a sudden being able to read a few lines logically starts to make a lot more sense.
var requestReader = new StreamReader(requestStream);
var line = requestReader.ReadLine();
Generally, when we have lines of text, we want to do something with them - unless our service is just serving content. Let’s take our CSV example. Perhaps we want to aggregate some data or export it to a data warehouse. Maybe we want to add compression to the bytes or modify formatting of dates. There are countless things you may want to do with your data. In this example, we are applying a simple transformation to make our data uppercased.
while (!string.IsNullOrWhiteSpace(line))
{
    //Write line to response upper cased
    responseWriter.WriteLine(line.ToUpper());
    responseWriter.Flush();

    line = requestReader.ReadLine();
};
Lastly, we need to read the converted file. This is comparable to downloading a file via the browser or watching a movie via your favorite streaming service.
var responseReader = new StreamReader(responseStream))
var text = responseReader.ReadToEnd();
Ultimately anything can be a stream. In most cases, if it is moving via the network, your data is a stream somewhere in the pipeline - even if you aren’t active in that low-level operation.
Building Streaming with AspNet Core + S3 FileServer
Let’s move to a more practical example. Cloud providers such as Azure and AWS have some really great offerings when it comes to storing data, and both have great safeguards for that data. Oftentimes, however, business needs don’t intersect with their built-in security systems very well. Frequently, you need to apply business logic around who, when, and under what conditions an individual has rights to read or write an underlying file. If we’re dealing with large files, how can we do this so that we don’t overload our memory? You guessed it: streams!
I’m going to be using Okta for my security concerns. This makes it easy for me to plug into any type of .NET web application and manage users, roles, and other authentication features. I used to do all that stuff by hand but, over the years, I’ve been dealing with a lot of clients in banking, government, and other industries that have pretty demanding requirements around security. Okta takes one more thing off my plate, so I can focus on building business value.
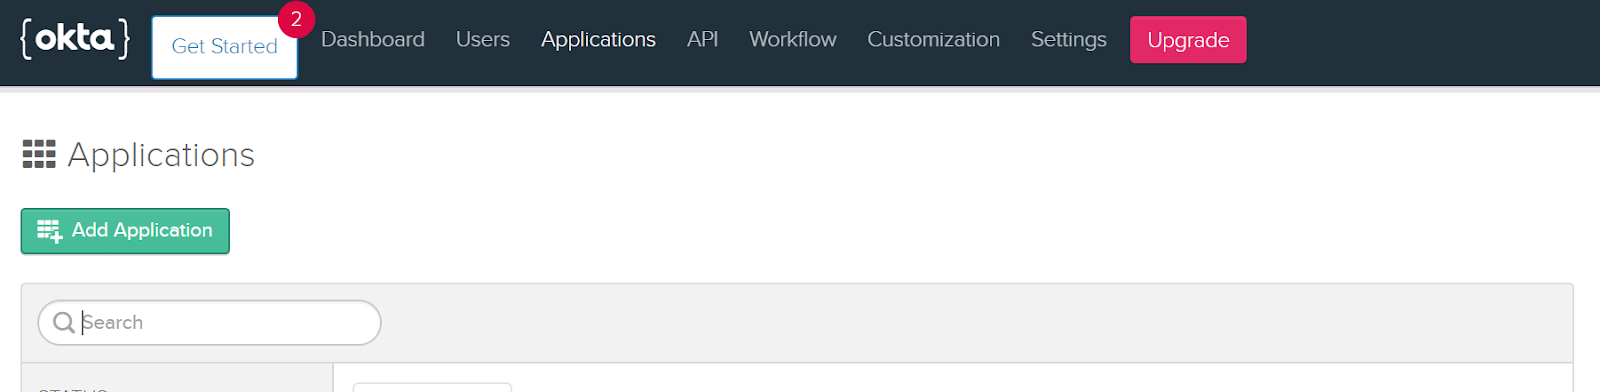
First log into the Okta developer portal with your admin credentials. Select Applications in the menu and from your application list click Add Application.
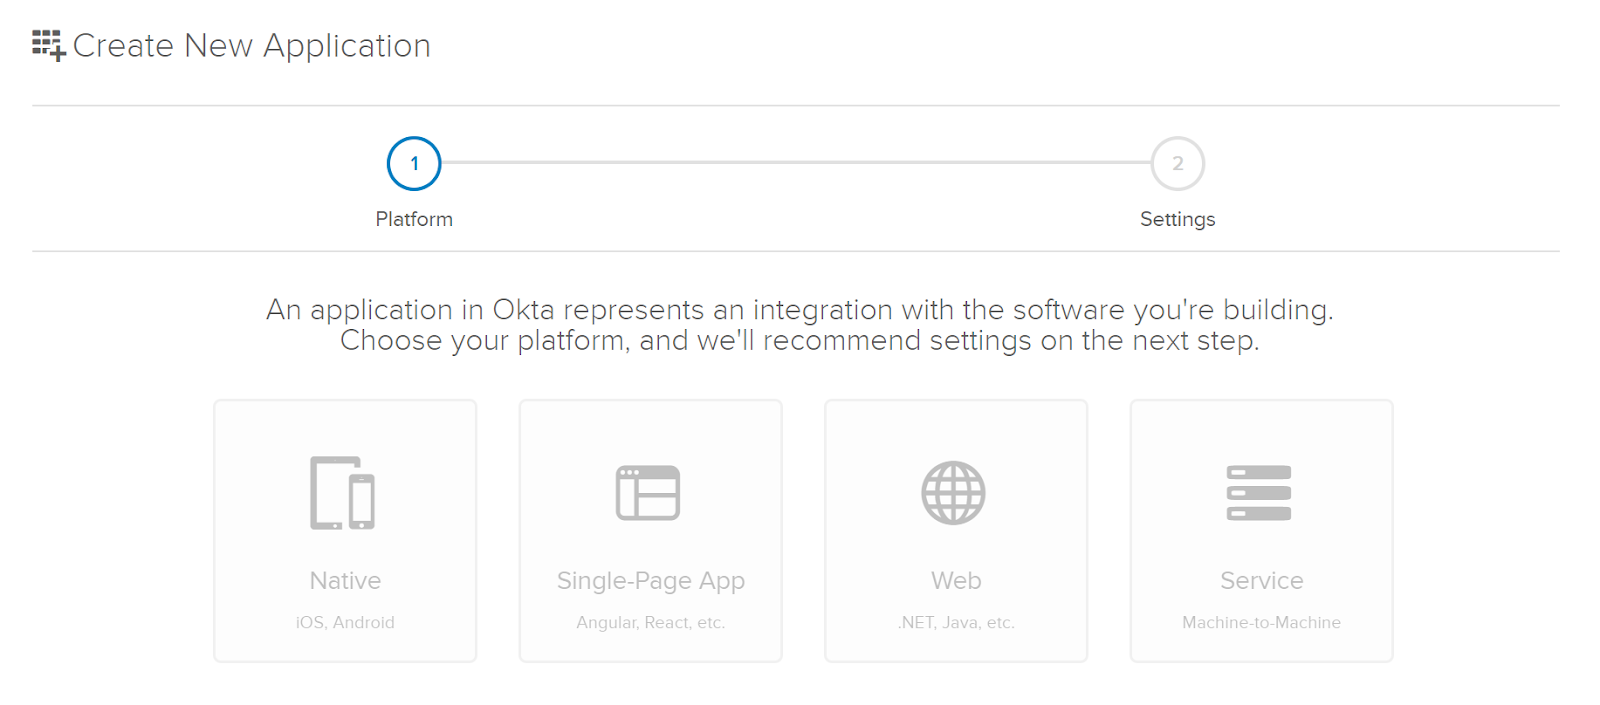
Since this is going to be a customer-facing website I’ll use Okta’s recommended settings for Web.
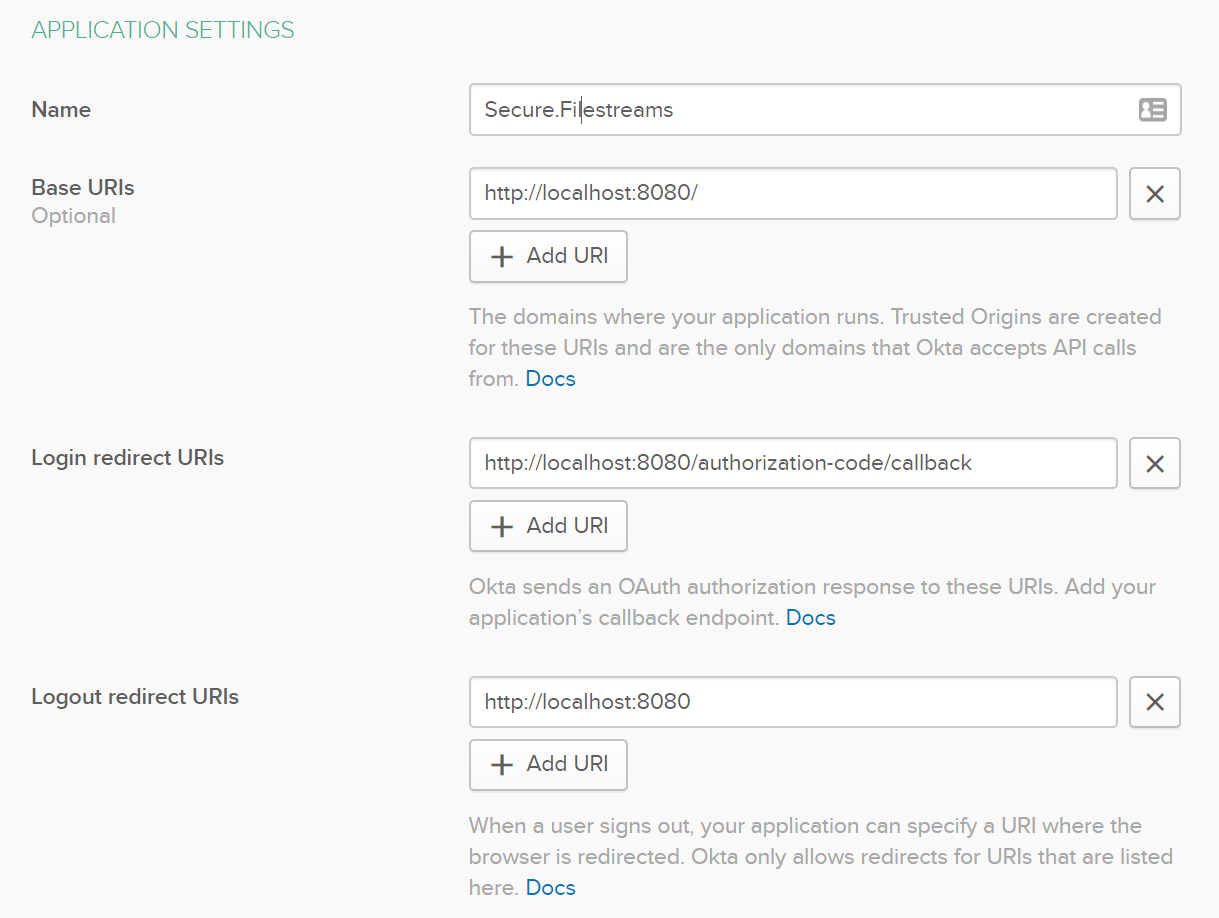
Since this is in development, leave all the urls set to the default localhost urls and name the application “Secure.Filestreams”.
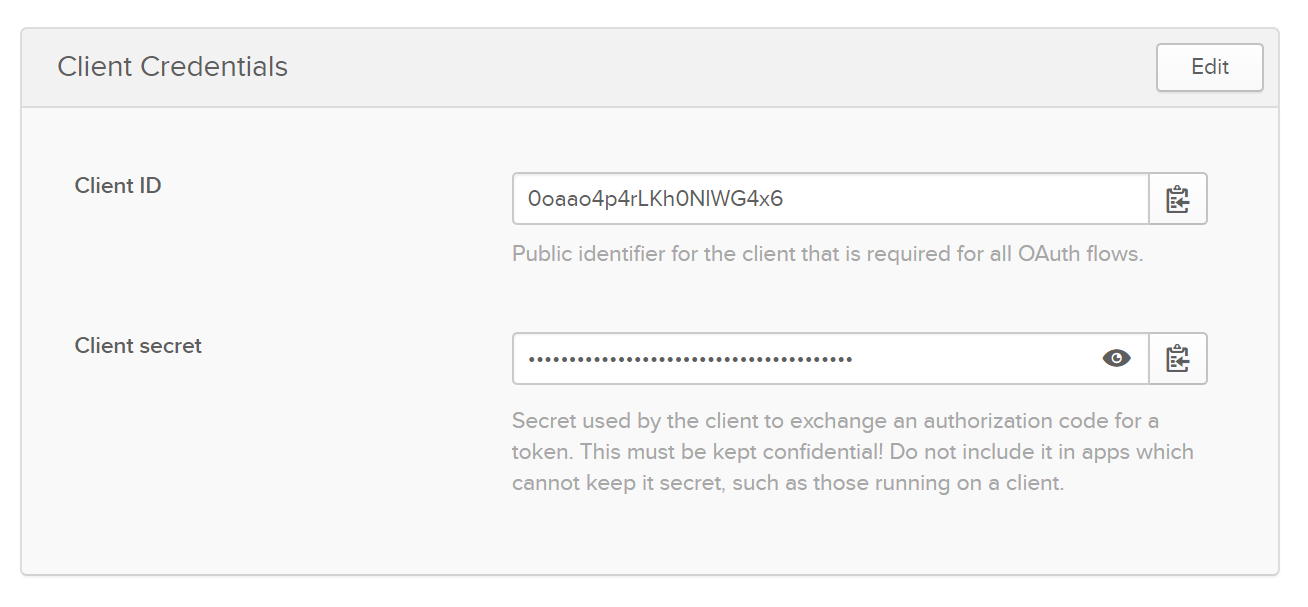
Then on the next screen, take note of the Client ID and Secret for use in the .NET project later.
Creating Your .NET Core 3.1 Web Project
Create a new project in Visual Studio and start a new ASP.NET Core Web Application.

Choose a name for your project, then select your web project type. For this example I’ll be creating a Model-View-Controller project but the setup will be similar for other types of web projects.

Select ASP.NET Core 3.1 as the run-time.
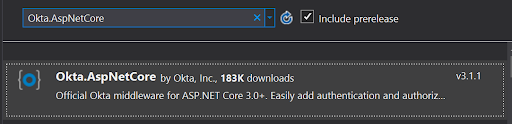
Let’s add the Okta.AspNetCore package. Right-click Dependencies on the project, then click Manage NuGet Packages.
Search for Okta.AspNetCore and click Install.
In the Startup.cs file, add the following using statement to the top of the file.
using Okta.AspNetCore;
In your ConfigureServices method, add the following:
var oktaMvcOptions = new OktaMvcOptions()
{
    OktaDomain = Configuration["Okta:Domain"],
    ClientId = Configuration["Okta:ClientId"],
    ClientSecret = Configuration["Okta:ClientSecret"],
    Scope = new List<string> { "openid", "profile", "email" },
};

services.AddAuthentication(options =>
{
    options.DefaultAuthenticateScheme = CookieAuthenticationDefaults.AuthenticationScheme;
    options.DefaultSignInScheme = CookieAuthenticationDefaults.AuthenticationScheme;
    options.DefaultChallengeScheme = OktaDefaults.MvcAuthenticationScheme;
})
.AddCookie()
.AddOktaMvc(oktaMvcOptions);
Add authorization to the Configure method, like so:
app.UseAuthentication();
Lastly, in your appsettings.json file, make sure you have the following - filling in the brackets with the details of your application settings in Okta.
"Okta": {
    "ClientId": "{ClientId}",
    "ClientSecret": "{ClientSecret}",
    "Domain": "{Domain}"
},
The security layer is all set!
Setting up AWS S3 for the Filestream to Use
Let’s add support now for AWS S3. Following the same set of directions as earlier, we’ll need a couple of Amazon NuGet packages:
With those NuGet packages installed, adding S3 support becomes really easy. In the Startup.cs file, add this line to the ConfigureServices method.
services.AddAWSService<Amazon.S3.IAmazonS3>();
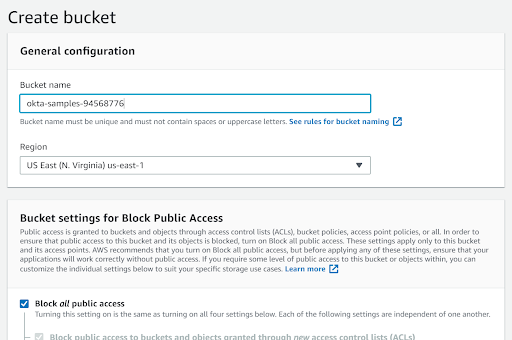
Time to set up our AWS account. First, you need to add a new S3 bucket (if you don’t already have one in mind).
Navigate to S3 in your AWS Console.

Click Create bucket on the right side.
To make sure no one can get to our content by putting in a plain URL, leave the default setting, “no public access.” For certain types of files - such as CSS, certain images, etc. - public access may be warranted, but we are considering confidential information.
With our bucket created, add a new file by dragging it into your S3 bucket from your file system or by clicking upload. It can be any type of file that S3 allows you to store.
Adding an MVC Controller for the Filestream
Now that we have content, it is time to use it.
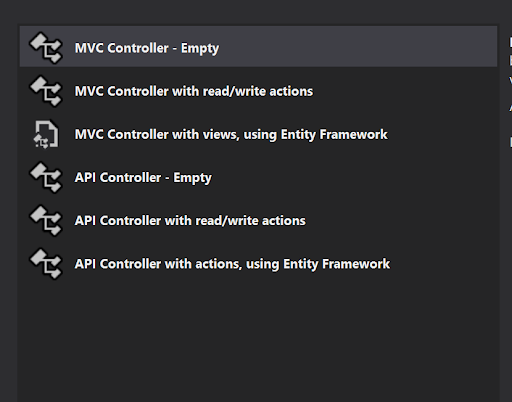
In order to have an endpoint that we can download our stream from, we need to set up a new controller. Make it an empty Controller, like below, and name it FileController.
[Authorize]
public class FileController : ControllerBase
{
    IAmazonS3 _s3Client;

    public FileController(IAmazonS3 s3Client)
    {
        _s3Client = s3Client;
    }

    public async Task Index()
    {
        //Our domain specific security logic would go here
        var emailClaim = User.Claims.FirstOrDefault(x => x.Type == "email");
        var email = emailClaim.Value;

        if (email == "chase@cupcakefactory.net")
        {
            using (var fileStream = await _s3Client.GetObjectStreamAsync("your-bucket", "somefile", null))
            {
                this.Response.ContentType = "application/json";
                this.Response.Headers.Add("Content-Disposition", "attachment; filename=\"filename.json\"");
                this.Response.StatusCode = 200;
                await fileStream.CopyToAsync(this.Response.Body);
            }
        }
    }
}
Let’s break down what the code above is doing. The first thing we want to do is make sure no one that is logged in can access our controller. As Okta is already set up, all we need to do is add the Authorize decorator to the controller class.
[Authorize]
public class FileController : ControllerBase
Next, since the AWS SDK took care of loading our s3 client into our services, we can access it via dependency injection.
IAmazonS3 _s3Client;
public FileController(IAmazonS3 s3Client)
{
    _s3Client = s3Client;
}
Okta gives us access to any information about our user that we ask for. This lets us have pretty robust logic for authorization. In my case, I’m filtering by email, but this could be by domain, role, age, or any other arbitrary claim that helps you determine authorization.
var emailClaim = User.Claims.FirstOrDefault(x => x.Type == "email");
var email = emailClaim.Value;

if (email == "chase@cupcakefactory.net")
Lastly, because of .NET Core, we have direct access to the response body stream and can stream our bytes directly to the output without having to download the whole content first. We can also do any processing of the data before writing to the output stream the way we did in our first example.
using (var fileStream = await _s3Client.GetObjectStreamAsync("your-bucket", "somefile", null))
{
    //Whatever your content type is
    this.Response.ContentType = "application/json";
    this.Response.Headers.Add("Content-Disposition", "attachment; filename=\"myfile.json\"");
    this.Response.StatusCode = 200;
    await fileStream.CopyToAsync(this.Response.Body);
}
Final Thoughts
I’m going to share an anecdote with you that explains a particular time this was very useful to me. I was working with a company that sent tens of millions of emails a month. Some of these emails were very large and we were hitting some massive bottlenecks with our infrastructure. We were able to write our own SMTP client to more efficiently chuck the data and manage memory, allowing us to go from emails being backed up for hours to delivering emails in milliseconds - still using the same hardware. It’s never a great idea to optimize early, but understanding the low-level protocols can be a lifesaver if you are dealing with especially large volumes of data.
Today we’ve learned how to break down large tasks into small chunks and how to build a secure streaming service. I hope this has given you a starting place for working with some lower-level parts of the .NET framework. They can seem scary but, if you just think about them as reading and writing data, it gets a lot less daunting.
A link to the GitHub repository for this tutorial can be found here. Happy coding!
Learn More About .NET Core and AWS
If you’d like some other great .NET tips, tutorials, and information check out our other recent blogs:
- The Most Exciting Promise of .NET 5
- ASP.NET Core 3.0 MVC Secure Authentication
- 5 Minute Serverless Functions Without an IDE
- Create Login and Registration in Your ASP.NET Core App
- Build Secure Microservices with AWS Lambda and ASP.NET Core
- Build a CRUD App with ASP.NET Core and Typescript
- Build a GraphQL API with ASP.NET Core
Want to be notified when we publish more awesome developer content? Follow @oktadev on Twitter, subscribe to our YouTube channel, or follow us on LinkedIn. If you have a question, please leave a comment below!
Okta Developer Blog Comment Policy
We welcome relevant and respectful comments. Off-topic comments may be removed.