Create Login and Registration in Your ASP.NET Core MVC App

User authentication and authorization are common features in web applications, but building these mechanics has the potential to take a lot of time. Doing so requires setting up persistent storage for user information (in some type of database) and paying keen attention to potential security issues around sensitive operations like hashing passwords, password reset workflows, etc. - weeks of development time begin to add up before we ever get to the functionality that delivers value to your users.
In this post, we’ll walk through how Okta simplifies this process for us and set up a simple integration for an ASP.NET Core MVC app using the Okta NuGet package. We’ll build functionality for users to register for new accounts and login with their Okta credentials.
Note: In May 2025, the Okta Integrator Free Plan replaced Okta Developer Edition Accounts, and the Okta CLI was deprecated.
We preserved this post for reference, but the instructions no longer work exactly as written. Replace the Okta CLI commands by manually configuring Okta following the instructions in our Developer Documentation.
Scaffold Your ASP.NET Project
To follow along with this tutorial start by creating a new app in the console:
mkdir MyOktaProject
cd MyOktaProject
dotnet new mvc
Configure User Registration
If you don’t already have one, you’ll need to create an Okta developer account. Doing so will give you a URL for your organization called an “Okta domain”. It will also allow you to create your login credentials for accessing the Okta dashboard.
Upon submission of this form, you will receive an email Okta with instructions to obtain your credentials and complete your registration.
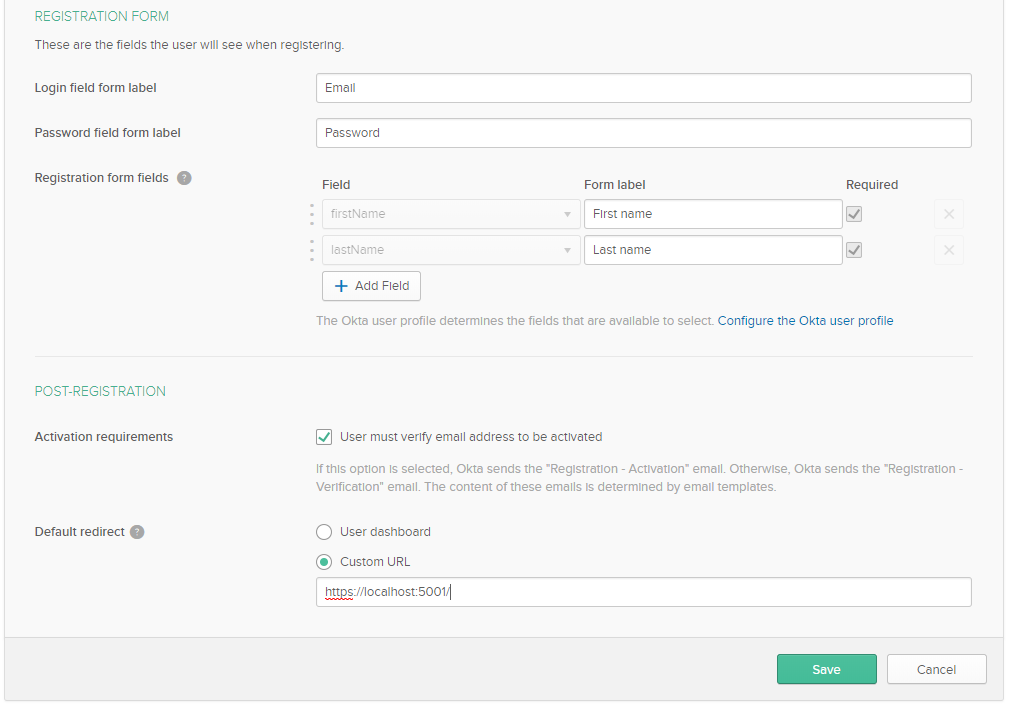
Execute the following steps to configure Okta so that users can register themselves for an account.
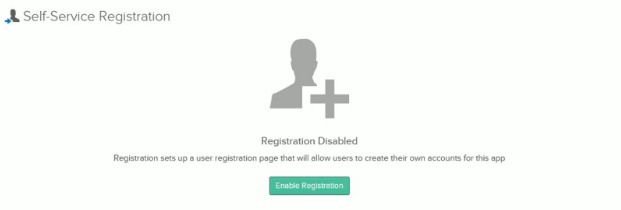
- From the Administrative Dashboard, hover over Users and click Registration
- Click Enable Registration
- Save the changes
Configure Basic User Authentication
Once you have access to your account you can proceed to the Dashboard using a link like the one below:
https://{yourOktaDomain}/admin/dashboard
On the Dashboard, click Applications in the main menu and on the Application screen, click Add Application.

Select Web then click Next.
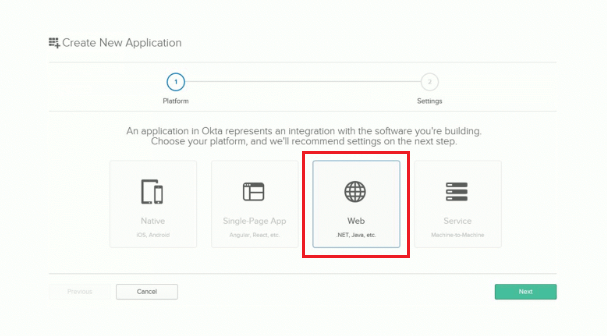
On the Create New Application screen, set the following values:
- Base URIs:
https://localhost:5001/ - Login redirect URIs:
https://localhost:5001/authorization-code/callback
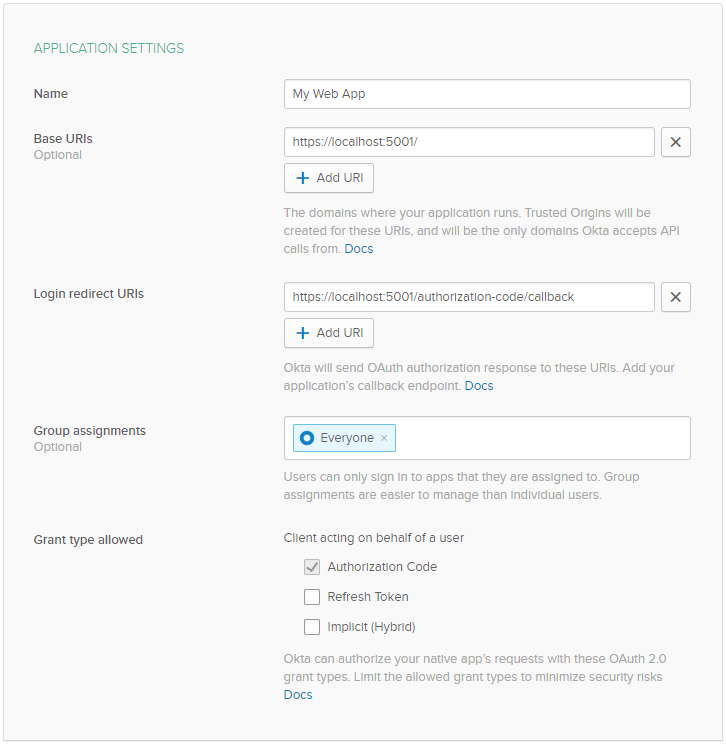
Click Done, then click Edit next to General Settings on your newly created Okta app. Edit the following values:
Logout redirect URIs:
https://localhost:5001/signout-callback-oidc
Initiate login URI:
https://localhost:5001/authorization-code/callback
Add .NET Authentication Dependencies
Once your account is set up you need to add the Okta.Sdk library to your project. This post will take the approach of using the NuGet package, but the GitHub repository for Okta.AspNetCore can be found here.
To proceed simply search for the latest version of the Okta.Sdk NuGet package in your IDE of choice (version 1.2.0 at the time of this publication) and install it. If you’re using Visual Studio you can do this by right-clicking on the project in the solution explorer and selecting Manage NuGet Packages. For those of you not using Visual Studio, add the package via console window using the following command:
dotnet add package Okta.Sdk --version 1.2.0
Configure Your ASP.NET App for Login
Authentication works by redirecting users to the Okta website, where they will log in with their credentials, and then be returned to your site via the URL you configured above.
Add the following code to your appsettings.json file:
  "Okta": {
    "Issuer": "https://{yourOktaDomain}/oauth2/default",
    "ClientId": "{yourClientId}",
    "ClientSecret": "{yourClientSecret}"
  }
You can find each of the actual values needed to replace the settings in the config above in the following places:
ClientId refers to the client ID of the Okta application ClientSecret refers to the client secret of the Okta application Issuer will need the text {yourOktaDomain} replaced with your Okta domain, found at the top-right of the Dashboard page
Add some using statements to your Startup.cs file:
using Microsoft.AspNetCore.Authentication.Cookies;
using Microsoft.AspNetCore.Authentication.OpenIdConnect;
using Microsoft.IdentityModel.Tokens;
Add the following code to the top of the ConfigureServices method in your Startup.cs file:
services.AddAuthentication(sharedOptions =>
{
    sharedOptions.DefaultAuthenticateScheme = CookieAuthenticationDefaults.AuthenticationScheme;
    sharedOptions.DefaultSignInScheme = CookieAuthenticationDefaults.AuthenticationScheme;
    sharedOptions.DefaultChallengeScheme = OpenIdConnectDefaults.AuthenticationScheme;
})
    .AddCookie()
    .AddOpenIdConnect(options =>
    {
        options.ClientId = Configuration["okta:ClientId"];
        options.ClientSecret = Configuration["okta:ClientSecret"];
        options.Authority = Configuration["okta:Issuer"];
        options.CallbackPath = "/authorization-code/callback";
        options.ResponseType = "code";
        options.SaveTokens = true;
        options.UseTokenLifetime = false;
        options.GetClaimsFromUserInfoEndpoint = true;
        options.Scope.Add("openid");
        options.Scope.Add("profile");
        options.TokenValidationParameters = new TokenValidationParameters
        {
            NameClaimType = "name"
        };
    });
In the Configure() method of your Startup.cs file add this line just before the app.UseMvc() method:
app.UseAuthentication();
Add the following MeViewModel to the Models directory:
using System.Collections.Generic;

namespace OktaAspNetCoreMvc.Models
{
    public class MeViewModel
    {
        public string Username { get; set; }

        public bool SdkAvailable { get; set; }

        public dynamic UserInfo { get; set; }

        public IEnumerable<string> Groups { get; set; }
    }
}
Add Login to Your ASP.NET App
Now that all the configuration and plumbing is done, you’re ready to add the code that will actually log users into your application.
Add the following AccountController to the Controller directory.
The controller exposes the Login() action. If the user has already been authenticated, the Login() action will redirect them to the home page. Otherwise, it will redirect them to the Okta login screen.
using Microsoft.AspNetCore.Authentication.OpenIdConnect;
using Microsoft.AspNetCore.Mvc;
using Okta.Sdk;

namespace OktaAspNetCoreMvc.Controllers
{
    public class AccountController : Controller
    {
        private readonly IOktaClient _oktaClient;

        public AccountController(IOktaClient oktaClient = null)
        {
            _oktaClient = oktaClient;
        }

        public IActionResult Login()
        {
            if (!HttpContext.User.Identity.IsAuthenticated)
            {
                return Challenge(OpenIdConnectDefaults.AuthenticationScheme);
            }

            return RedirectToAction("Index", "Home");
        }
    }
}
Add the following code to your _Layout.cshtml file, just below the main menu to add the login button, or a welcome message, based on the current user’s status.:
   @if (User.Identity.IsAuthenticated)
    {
        <ul class="nav navbar-nav navbar-right">
            <li><p class="navbar-text">Hello, @User.Identity.Name</p></li>
        </ul>
    }
    else
    {
        <ul class="nav navbar-nav navbar-right">
            <li><a asp-controller="Account" asp-action="Login">Log in</a></li>
        </ul>
    }
For information on user authorization using Okta groups check out Lee Brandt’s article on user authorization in ASP.NET Core with Okta.
Register Users
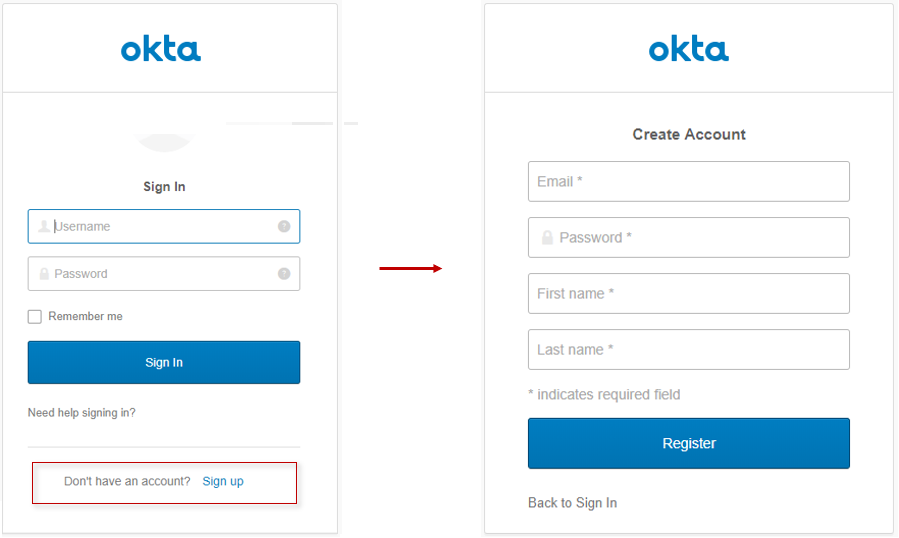
If you following the instructions above to enable self-service registration the “Don’t have an account? Sign Up” message will appear at the bottom of the login form. In the next step, you’ll run the application.
Log In Using ASP.NET
That’s it! To run your solution open up a terminal and enter the following command:
dotnet run
Then navigate to http://localhost:5001 in your browser and enjoy!
In this tutorial, you learned how to add authentication to your ASP.NET Core MVC app and allow users to register for a new account.
The source code for this tutorial is available on GitHub.
Now you have a website with a working login and user registration form. Your website also allows users to recover lost passwords. By repeating these steps you can create a network of tools that your users can access all with the same login.
Learn More about Login and Registration with MVC and ASP.NET Core
Like what you learned today? Here are some other resources that will help learn more about adding secure authentication and user management in your .NET Projects:
- Add Login to Your ASP.NET Core MVC App
- User Authorization in ASP.NET Core with Okta
- Policy-Based Authorization in ASP.NET Core
As always, if you have questions about this post please leave a comment below. Don’t forget to follow us on Twitter, and subscribe to our YouTube channel.
Okta Developer Blog Comment Policy
We welcome relevant and respectful comments. Off-topic comments may be removed.