Build Your First Azure Function in Visual Studio Code

Inevitably it happens. You go to one of those bars that has three trillion beers on tap, and you stare hopelessly at the wall of taps trying to decide what to order. Panic no more! Hop Roulette is here to save you from embarrassment when the bartender asks, “What’ll it be?” Hop Roulette is a simple Azure Function that returns a random beer from an API. What use is this? It gives me a fun way to show you how to create your first Azure Function without making it a boring old “Hello World” example!
Set Up Your Environment to Build Azure Functions
You’ll need a few things installed to make developing Azure Functions locally easier:
- Visual Studio Code
- An Azure Account (There is a Free Trial account)
- The Azure Account VS Code Extension
- The Azure Functions VS Code Extension
- An API Key for BreweryDB
This setup will allow you to code, debug, and deploy your Azure Function super easily.
Create Your Azure Functions Project in Visual Studio Code
First, you’ll need to log in to your Azure account. Open the command palette with CTRL + SHIFT + P and start typing ‘Azure’. You should see Azure: Sign In as one of the options. Choosing that option will open the login screen and allow you to log in to Azure. Once it completes, it will tell you that you can close that window. When you go back to Visual Studio Code, open the Azure Account extension in the sidebar.
![]()
To create your Azure Function, you’ll need an Azure Functions project. On the top of the Azure Functions area, click the New Project icon that looks like a folder with a lightning bolt.
![]()
This will bring up a file window for you to choose the location for your Azure Functions project. Then, you’ll be asked (in VS Code) what language you’d like to use for your function. You’ll choose C#. This will scaffold the Azure Functions project. When it’s finished, you’ll be prompted to Add to workspace. You will likely have to run a restore on the project. If you do, you will see a dialog box in the bottom right-hand corner of VS Code and you can just click the restore button.
Create an HTTP-Triggered Azure Function
Back in the Azure Functions area (click the icon in the sidebar, if it is not open), click the Create Function icon that looks like a lightning bolt with a plus sign.
![]()
The folder you are in should be the default for the folder containing your function app selection. Choose HTTP Trigger from the dropdown at the top of the editor, and name it BeerTrigger. For the namespace, you can use whatever you like. I used Okta.BeerFunction. Finally, choose Anonymous for the Authorization Level setting.
Once it’s been generated, go ahead and run the base function locally (using F5), just to make sure everything went okay.
In the output window at the end of the build output, you should see a line that says:
HttpTrigger: http://localhost:7071/api/BeerTrigger
Go ahead and CTRL + click on that link to open that URL in a browser. You will have to add a query string parameter to make it run completely, so add ?name=Jerry to the end of the URL. You should now be greeted with “Hello Jerry” in the browser window.
Change the Azure Function to Suggest a Beer
Technically, you’ve created your first Azure Function, but this is not going to help you choose a beer and keep you from being embarrassed in front of all the hipsters drinking at the bar. So you’ll need to change the HTTP trigger function to do that.
In the BeerTrigger.cs file, start by changing the name of the endpoint so that it’s a little more interesting than “BeerTrigger”. The endpoint name doesn’t have to be same as the function name, the generator just named it that way by default. So change:
[FunctionName("BeerTrigger")]
to
[FunctionName("{yourGloballyUniqueName}")]
You’ll also want the endpoint to only accept GET requests and call the BreweryDB API’s random endpoint. Change the Run() function to:
public static async Task<IActionResult> Run(
    [HttpTrigger(AuthorizationLevel.Anonymous, "get", Route = null)] HttpRequest req,
    ILogger log)
{
  log.LogInformation("C# HTTP trigger function processed a request.");

  var breweryDbApiKey = Environment.GetEnvironmentVariable("BREWERY_DB_API_KEY");
  var client = new HttpClient();
  var response = await client.GetAsync($"https://sandbox-api.brewerydb.com/v2/beer/random?key={breweryDbApiKey}");
  var responseString = await response.Content.ReadAsStringAsync();
  var responseRoot = JsonConvert.DeserializeObject<Root>(responseString);

  return (ActionResult)new OkObjectResult(responseRoot.Data);
}
You’ll need to add a using statement as well:
using System.Net.Http;
The code will read your API key from the environment variables, create a new HttpClient(), make a GET call to the random API endpoint and return a new object with the data shaped the way you want it for your function.
You’ll need some convenience classes to help shape the response the way you want. In that same file, add three new classes to the namespace.
public class Root
{
  public string Message { get; set; }
  public Beer Data { get; set; }
  public bool Success { get; set; }
}

public class Beer
{
  public string Name { get; set; }
  public string ABV { get; set; }
  public Style Style { get; set; }
}

public class Style
{
  public string Name { get; set; }
  public string Description { get; set; }
}
The Root object is just there to help encapsulate the response data into the objects you’ll need. The Beer and Style object data is all that you’ll return from the function.
Note: Feel free to play around and add more data by looking at what the BreweryDB API returns from the
randomendpoint`.
Once you’ve created a free account on BreweryDB and logged in, choose Developers and My API Keys from the main menu. Copy the Sandbox Key as you’ll be using the sandbox (meaning free) tier. Notice that it is limited to 10,000 calls per day but to be honest, if you need that many beer suggestions in a day, you’ll be dead.
Replace the code in the local.settings.json file so that it is:
{
    "IsEncrypted": false,
    "Values": {
        "AzureWebJobsStorage": "",
        "FUNCTIONS_WORKER_RUNTIME": "dotnet",
        "BREWERY_DB_API_KEY": "{yourApiKey}"
    }
}
Replacing {yourApiKey} with your API key. The local.settings.json file is used to create environment variables when running the function locally.
Run Your Azure Function Locally with Visual Studio Code
Go ahead and run the function again with the F5 key.
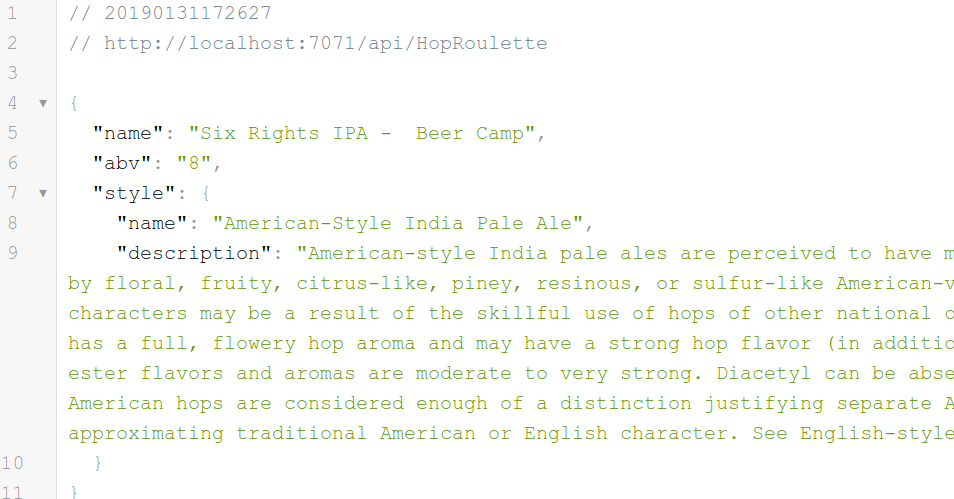
You’ll notice the endpoint has changed. Near the end of the output in the build window, you’ll see the new URL. CTRL + click on it to open it in a browser. You should now see JSON output that describes your randomly selected beer!
Now you’re really close to being able to get a beer suggestion, but it’s not likely you’ll have your computer with you at the bar (or maybe you will, I’m not judging). A better way would be pulling out your mobile phone and getting the suggestion right there at the bar. To do that, you’ll need to deploy this thing to Azure.
Deploy Your New Azure Function
This part is super easy with VS Code. Click on the Azure Functions icon in the sidebar and find the Deploy icon. It is a blue up arrow with a line at the top.
![]()
From the Select Function App input, select Create New Function App and give it a globally unique name (I named mine “HopRoulette”). If you don’t already have a resource group you want to attach it to, choose Create new resource group from the next option, I named mine “BeerResourceGroup”. Next select Create new storage account to store your function. I named mine “hoproulettestorage”. Then choose the region you want your function to run in, I chose Central US. Now VS Code will begin deploying your function to Azure. The first deployment will take a few minutes (remember it’s creating a resource group, a storage account, and a function app).
When it is finished, you will get a pop up in the bottom right corner saying Deployment of “{Your Function}” completed. Click on View Output and in the output window you will see the URL for your deployed function.
You’re not quite finished though! Initially, you put your BreweryDB API key in the local.settings.json file. This doesn’t get deployed, so you’ll have to set up that key as an environment variable in Azure.
Log in to the Azure Portal and on the home page, click on Function Apps. Choose your function from the list of Function Apps. If Function Apps is not listed on your home page, search the portal for “Function” and Function Apps will be listed there. Choose Application settings under Configured features. Scroll down to the Application Settings heading and click on the + Add new setting link below the list. The APP SETTING NAME should be BREWERY_DB_API_KEY and the VALUE will be your BreweryDB API key. You’ll have to scroll back up to the top to find the Save button.
Now you should be able to go to the URL for your new function and get a beer suggestion!! You can also see your URL on the Overview tab for your function in Azure.
NOTE: Don’t forget to add
api/{yourFunctionName}to the URL to get to the endpoint! Cheers!!
Learn More About Azure, Visual Studio, and .NET Apps
If you liked learning about Azure, check out some of these other posts about Azure and .NET!
- Deploy Your ASP.NET Core App to Azure
- Add Login to Your ASP.NET Core MVC App
- Policy-Based Authorization in ASP.NET Core
If you have any questions about the post, feel free to leave me a comment below. Don’t forget to follow us on Twitter, Facebook, and YouTube so you never miss any of our killer content!
Okta Developer Blog Comment Policy
We welcome relevant and respectful comments. Off-topic comments may be removed.