Deploy Your ASP.NET Core Application to Azure
One of the scariest features of Visual Studio is without a doubt right-click to publish. There are very few instances in which you’d actually want to make use of this “feature” and so many more in which it’s a terrible idea. In this post I’ll walk you through the right way to secure and deploy your new ASP.NET Core app to Azure. My method might not be as fast as right clicking to publish, but it’ll keep you, and your users, safe! (And if you’re embracing the cross-platform nature of ASP.NET Core, like I am on my Linux laptop with VS Code, right-click to publish isn’t even an option for you.)
So, let’s dive in. In this tutorial we’ll add secure identity management to your ASP.NET Core app with Okta, and then deploy to Azure.
Note: In May 2025, the Okta Integrator Free Plan replaced Okta Developer Edition Accounts, and the Okta CLI was deprecated.
We preserved this post for reference, but the instructions no longer work exactly as written. Replace the Okta CLI commands by manually configuring Okta following the instructions in our Developer Documentation.
What is Okta?
Why does Okta matter if this post is all about deploying my .NET app to Azure? Well, you wouldn’t mail a letter without sealing the envelope, would you? Similarly, you shouldn’t ship your new app out to the Internet without secure identity management, and Okta makes that a lot easier and more scalable than what you’re probably used to. Okta is a cloud service that allows developers to create, edit, and securely store user accounts and user account data, and connect them with one or multiple applications. Our API enables you to:
- Authenticate and authorize your users
- Store data about your users
- Perform password-based and social login
- Secure your application with multi-factor authentication
- And much more! Check out our product documentation
Are you sold? Register for a forever-free developer account, and when you’re done, come on back so we can get on with our deployment!
Get the ASP.NET Core Starter App
If you don’t already have an ASP.NET Core app, you can get a simple starter from the Okta GitHub repo.
Start by cloning the repo to your local machine:
git clone https://github.com/oktadeveloper/okta-aspnetcore-mvc-example.git
Next, you’ll want to disconnect the GitHub repo, so you can check it in for yourself and start making your changes. To do that, change into the okta-aspnetcore-mvc-example directory and delete the .git folder.
cd okta-aspnetcore-mvc-example
rm -rf .git
Then initialize a Git repository in that same folder and commit the code.
git init
git add -A
git commit -m "Initial Commit"
Create a GitHub Repo for Your ASP.NET Core App
Now you can create your own GitHub repository and check the code in there. Log into your GitHub account and create a new repository. I will call mine “OktaAspNetCoreExample”, but you can call yours whatever you want. Once created, follow the directions to add the remote “origin” and to push your local repo to the remote.
git remote add origin {yourGitHubRepoUrl}
git push -u origin master
Create an Okta Application
If you don’t already have one, make sure to sign up for Okta Developer account. Once you have an account, log in to your dashboard and get your organization URL from the top right-hand corner of the dashboard page.

Then, you’ll need to create an Okta application. So click on the Applications menu item and click the Add Application button.
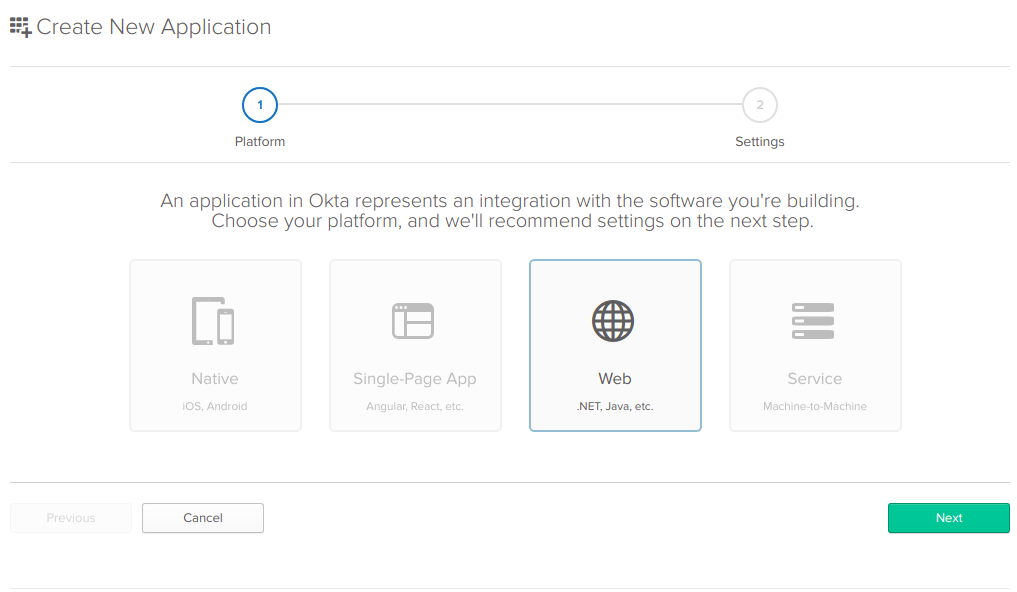
From the new application wizard page, choose the Web button and click next. Name your application whatever you want, but make sure to update the Base URIs, and Login redirect URIs settings changing the port to the local port where your application will be running. If you’re in Visual Studio on Windows, it will likely be 60611. If you’re in VS Code, it will most likely be port 5000 by default. You’ll also need to select the Implicit checkbox under Allowed Grant Types. Then click Done.
Once done, you will go to the application’s General tab. If you scroll down to the bottom, you’ll see a section with your Client ID and Client secret. Copy these to a file for use in your application.
You’ll also need to create an API token so that the sample app can make calls to the API to get the profile page. To get that, hover over the API menu item and choose the Tokens menu item. Then click on the Create Token button at the top and give your new token a name. Click on Create Token and copy the API token into a file to use later. Once you’ve got this successfully copied into your file, click the OK, got it button.
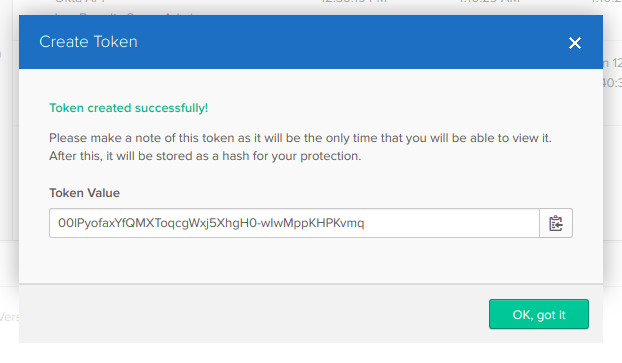
Keep in mind that you can’t see this token again, so make sure you’ve got it copied over before you close the window. If you happen to lose it, you can delete the old one and create a new one.
Secure Your Secrets in ASP.NET Core 2.0
There are several ways to store configuration secrets in ASP.NET Core. The appsettings.json file is the easiest, and you’ll notice in the sample app you cloned from GitHub, that there is a section in the appsettings.json file that already has these placeholders set up. Using application settings is not the most secure way to store these secrets. First, you’ll be checking this file in so that your teammates can clone the repo and run the code. Checking in the secrets is a classic security anti-pattern, and anybody cloning that repository can now get access to your application’s users.
Another, more secure way, is to store those secrets in environment variables. Luckily, Azure and ASP.NET Core make this pretty simple. First of all, ASP.NET Core 2.0 is already set up to use environment variables and override settings in the appsettings.json file. To learn more about what the configuration builder is doing in ASP.NET Core 2.0, you can read Shawn Wildermuth’s excellent blog post on the subject.
Knowing this, you could create two applications. One with development values and test users so that your team can use those values in the appsettings.development.json file and check them into source control. Then create a second “production” app with the Client ID, Client Secret and API token for your production users and set those in environment variables within Azure to keep them safe.
Add Azure Environment Variables
First, move the settings for Okta in your appsettings.json file to the appsettings.Development.json file, so that it is used only in the development environment. Then, change the names to be more idiomatic of environment variables so that your final appsettings.Development.json looks like this.
{
  "Logging": {
    "IncludeScopes": false,
    "LogLevel": {
      "Default": "Debug",
      "System": "Information",
      "Microsoft": "Information"
    }
  },
  "OKTA_ORG_URL": "https://{yourOktaDomain}",
  "OKTA_CLIENT_ID": "{clientId}",
  "OKTA_CLIENT_SECRET": "{clientSecret}",
  "OKTA_API_TOKEN": "{yourApiToken}",
  "OKTA_ISSUER": "https://{yourOktaDomain}"
}
Then change the Startup.cs file to read the values by their new names, so that the final ConfigureServices() method in the file looks like below.
 // This method gets called by the runtime. Use this method to add services to the container.
public void ConfigureServices(IServiceCollection services)
{
    services.AddAuthentication(sharedOptions =>
    {
        sharedOptions.DefaultAuthenticateScheme = CookieAuthenticationDefaults.AuthenticationScheme;
        sharedOptions.DefaultSignInScheme = CookieAuthenticationDefaults.AuthenticationScheme;
        sharedOptions.DefaultChallengeScheme = OpenIdConnectDefaults.AuthenticationScheme;
    })
    .AddCookie()
    .AddOpenIdConnect(options =>
    {
        // Configuration pulled from appsettings.json by default:
        options.ClientId = Configuration["OKTA_CLIENT_ID"];
        options.ClientSecret = Configuration["OKTA_CLIENT_SECRET"];
        options.Authority = Configuration["OKTA_ISSUER"];
        options.CallbackPath = "/authorization-code/callback";
        options.ResponseType = "code";
        options.SaveTokens = true;
        options.UseTokenLifetime = false;
        options.GetClaimsFromUserInfoEndpoint = true;
        options.Scope.Add("openid");
        options.Scope.Add("profile");
        options.TokenValidationParameters = new TokenValidationParameters
        {
            NameClaimType = "name"
        };
    });

    services.AddSingleton<IOktaClient>
    (
        new OktaClient(new OktaClientConfiguration()
        {
            OrgUrl = Configuration["OKTA_ORG_URL"],
            Token = Configuration["OKTA_API_TOKEN"]
        })
    );

    services.AddMvc();
}
Finally, commit your changes and push them to your GitHub repository.
git commit -am "Added development creds"
Create an Azure Web App
In the Azure portal, click on the App Services menu item on the left, then click the Add button on that page to create a new app service, and click Create on the right-hand pop-out. The page to create a web app will open up.
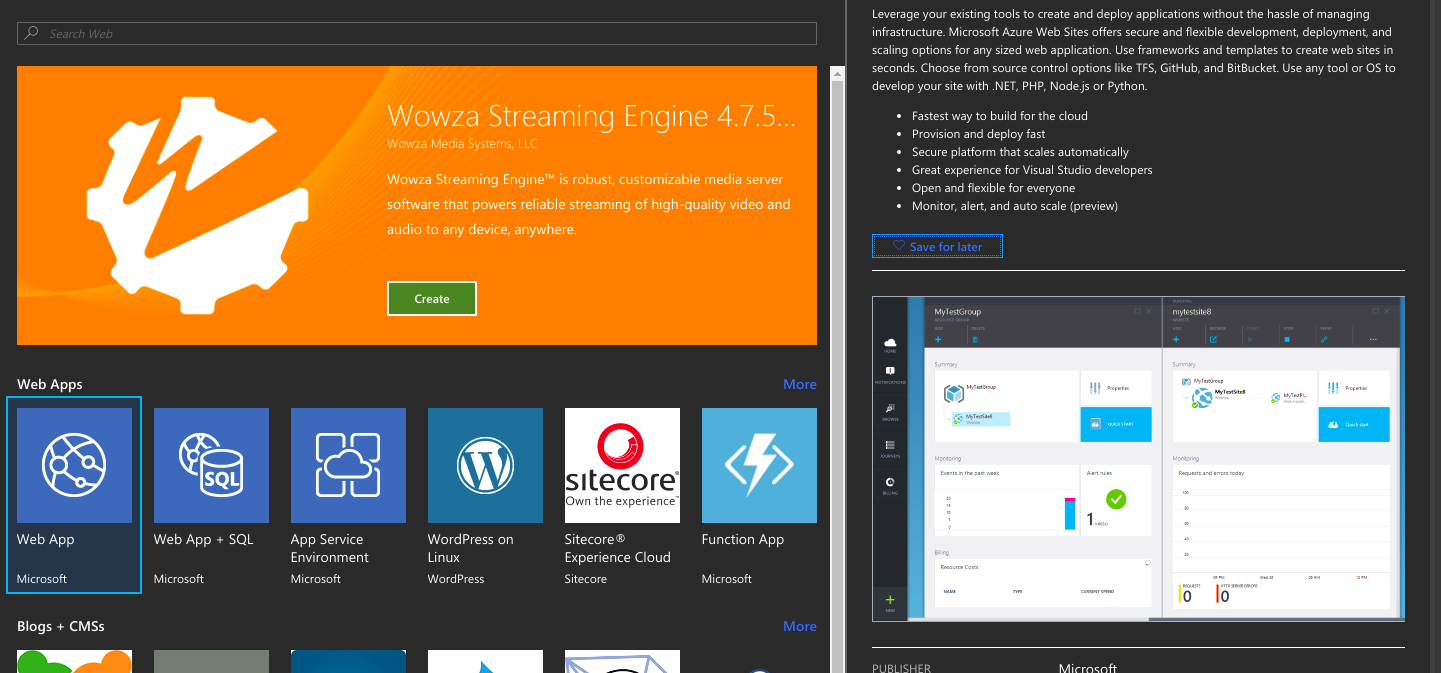
Choose a name for your application, choose Windows as the OS setting (even if you’re developing on macOS or Linux). Check the Pin to Dashboard checkbox and click Create.
You’ll be redirected to the dashboard. It may take a bit to create the web application. When it is done, go to the information tab for the newly created app and copy the URL for the app. Then go to the Okta dashboard and to your application and add it to the Login redirect URIs list, keeping the /authorization-code/callback part of the localhost URI. Then add it to the Logout redirect URIs keeping the signout-callback-oidc portion in the General Settings tab of your Okta application.
Set the Azure Environment Variables
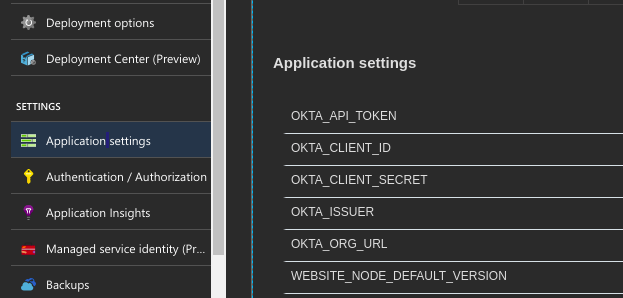
Choose your application from the dashboard, and that will take you to the settings for the newly created web app. Under Settings choose Application Settings to set up the environment variables. You may need to scroll down to see the Application settings header, and there may be some already set. For me, the WEBSITE_NODE_DEFAULT_VERSION already had a value of 6.9.1.
Click the + Add new setting link at the bottom of the section and add each setting for your OKTA_ORG_URL, OKTA_ISSUER, OKTA_CLIENT_SECRET, OKTA_CLIENT_ID and OKTA_API_TOKEN. For the demo, you can go ahead and set the values to be the same ones you used in the appsettings.Development.json file unless you want to create another application like you did above and use different values.
Set Up the Azure Deployment
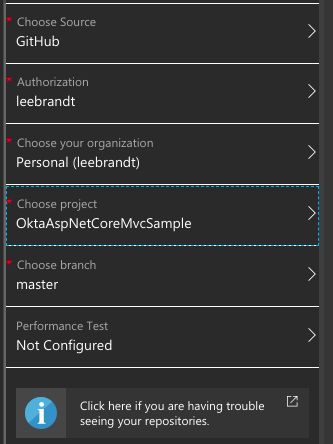
Under your new application’s DEPLOYMENT section, there is a setting called Deployment options. Choose that menu item, and that should open up the settings for the deployment. Choose GitHub as the deployment source. You may need to authorize Azure to access your GitHub account so that it can fetch code from the repository.
Once that’s done, you should be presented with a list of repositories in your GitHub account. You may have to choose the organization if you have more than one attached to your GitHub account. Choose the repo for the application, and it should automatically set the master branch as the deployment branch, then click OK at the bottom.
Deploy Your ASP.NET Core App to Azure
Once you’ve set the deployment options, click on the Deployment options menu item again to display the settings page for that option.
At the top, there will be a Sync link. Click it, and a pop out will slide down and ask you if you want to sync with source control. Click Yes and wait. Fetching, building and deploying the application may take a few minutes to complete, but a box should show on the screen with an activity indicator and a small blurb to the right telling you what Azure is doing.
Once it is complete, the activity indicator will change to a checkmark, and the status will say that the site is “Active”.
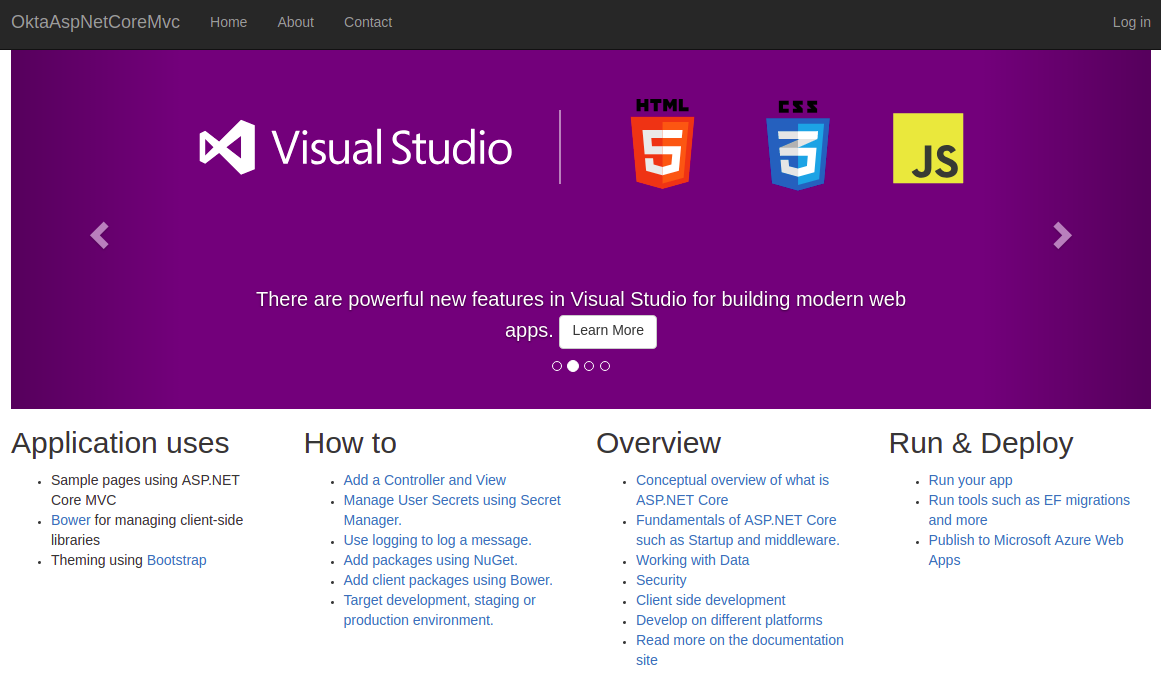
You can now click on the Overview link in the menu on the left to show the application settings, and in the top section on the right will be the link to your new web application. Click on that link, and you should see your application come up and run like a boss!
Troubleshoot Azure Deployment Problems
I ran into a couple of problems while deploying:
- GitHub fetch failed during the deployment.
- The problem seemed to be the way I checked in the new repository. Formerly, I just disconnected the origin from Okta’s sample repository and set the
originto be the new repository. Deleting the.gitfolder from the source on my local machine seemed to fix this problem.
- The problem seemed to be the way I checked in the new repository. Formerly, I just disconnected the origin from Okta’s sample repository and set the
- Deploy says it worked, but when I went to the URL for my app, I got a “Service Unavailable” or a 404 error.
- Originally, I had chosen Linux as the OS for my web app and told it I was deploying an ASP.NET Core 2.0 application. It could be that I am using ASP.NET Core 2.1 technically on my Linux laptop, and the Linux Web App environment only supports up to 2.0. Whatever the case, these both went away when I chose Windows as the OS.
Learn More About ASP.NET Core and Okta
Learn more about securing your ASP.NET Core applications on our developer blog:
- Policy-Based Authorization in ASP.NET Core
- Token Authentication in ASP.NET Core 2.0 - A Complete Guide
- Build a Secure To-Do App with Vue, ASP.NET Core, and Okta
As always, feel free to hit me up in the comments or on Twitter @leebrandt and don’t forget to follow @OktaDev on Twitter, Facebook, and YouTube!
Okta Developer Blog Comment Policy
We welcome relevant and respectful comments. Off-topic comments may be removed.