Deploy Your Secure Spring Boot + Angular PWA as a Single Artifact
I’ve written several posts on this blog that show you how to develop an Angular SPA (single-page application) that talks to a Spring Boot API. In almost all of them, I’ve used OAuth 2.0’s implicit flow and built, tested, and deployed them as separate applications. IMHO, this is the way many applications (outside of the Java world) are built and deployed.
What if you could combine the two applications for production, and still get all the benefits of separate applications during development? That’s what I’m here to show you today! You’ll learn how to take an existing Angular PWA (progressive web app) and a Spring Boot API, combine them with the Maven Frontend Plugin and switch from using OAuth 2.0’s implicit flow to its gold standard: authorization code flow.
Note: In May 2025, the Okta Integrator Free Plan replaced Okta Developer Edition Accounts, and the Okta CLI was deprecated.
We preserved this post for reference, but the instructions no longer work exactly as written. Replace the Okta CLI commands by manually configuring Okta following the instructions in our Developer Documentation.
Get the Source for Angular PWA and Spring Boot API
To begin, please clone the following project to your hard drive.
git clone https://github.com/oktadeveloper/okta-ionic-crypto-java-sdk-example.git
This project was featured in The Hitchhiker’s Guide to Testing Spring Boot APIs and Angular Components with WireMock, Jest, Protractor, and Travis CI. It contains an Ionic/Angular frontend and a Spring Boot API that allows you to track your cryptocurrency holdings. You enter in your cryptocurrency holdings, pricing data is fetched from Cryptonator, and data is stored in Okta’s custom profile attributes. You can read how everything was developed and secured in the following blog posts:
- Protect Your Cryptocurrency Wealth Tracking PWA with Okta
- Use Okta (Instead of Local Storage) to Store Your User’s Data Securely
If you’re not familiar with these posts, it might make sense for you to look at the completed project from this tutorial. There is no authentication in the client, it all happens on the server, and cookies are used to track the session and provide CSRF protection.
Remove Authentication from the Angular Client
To begin, open the cloned project in your favorite IDE and get ready to rip out some code! Open crypto-pwa/package.json and delete the line that specifies angular-oauth2-oidc as a dependency:
"angular-oauth2-oidc": "^3.1.4",
This dependency has an OAuthModule and an OAuthService that are used in the client to 1) authenticate the user, and 2) determine if the user is authenticated. You’ll replace this with a UserProvider that handles login and determining authenticated status.
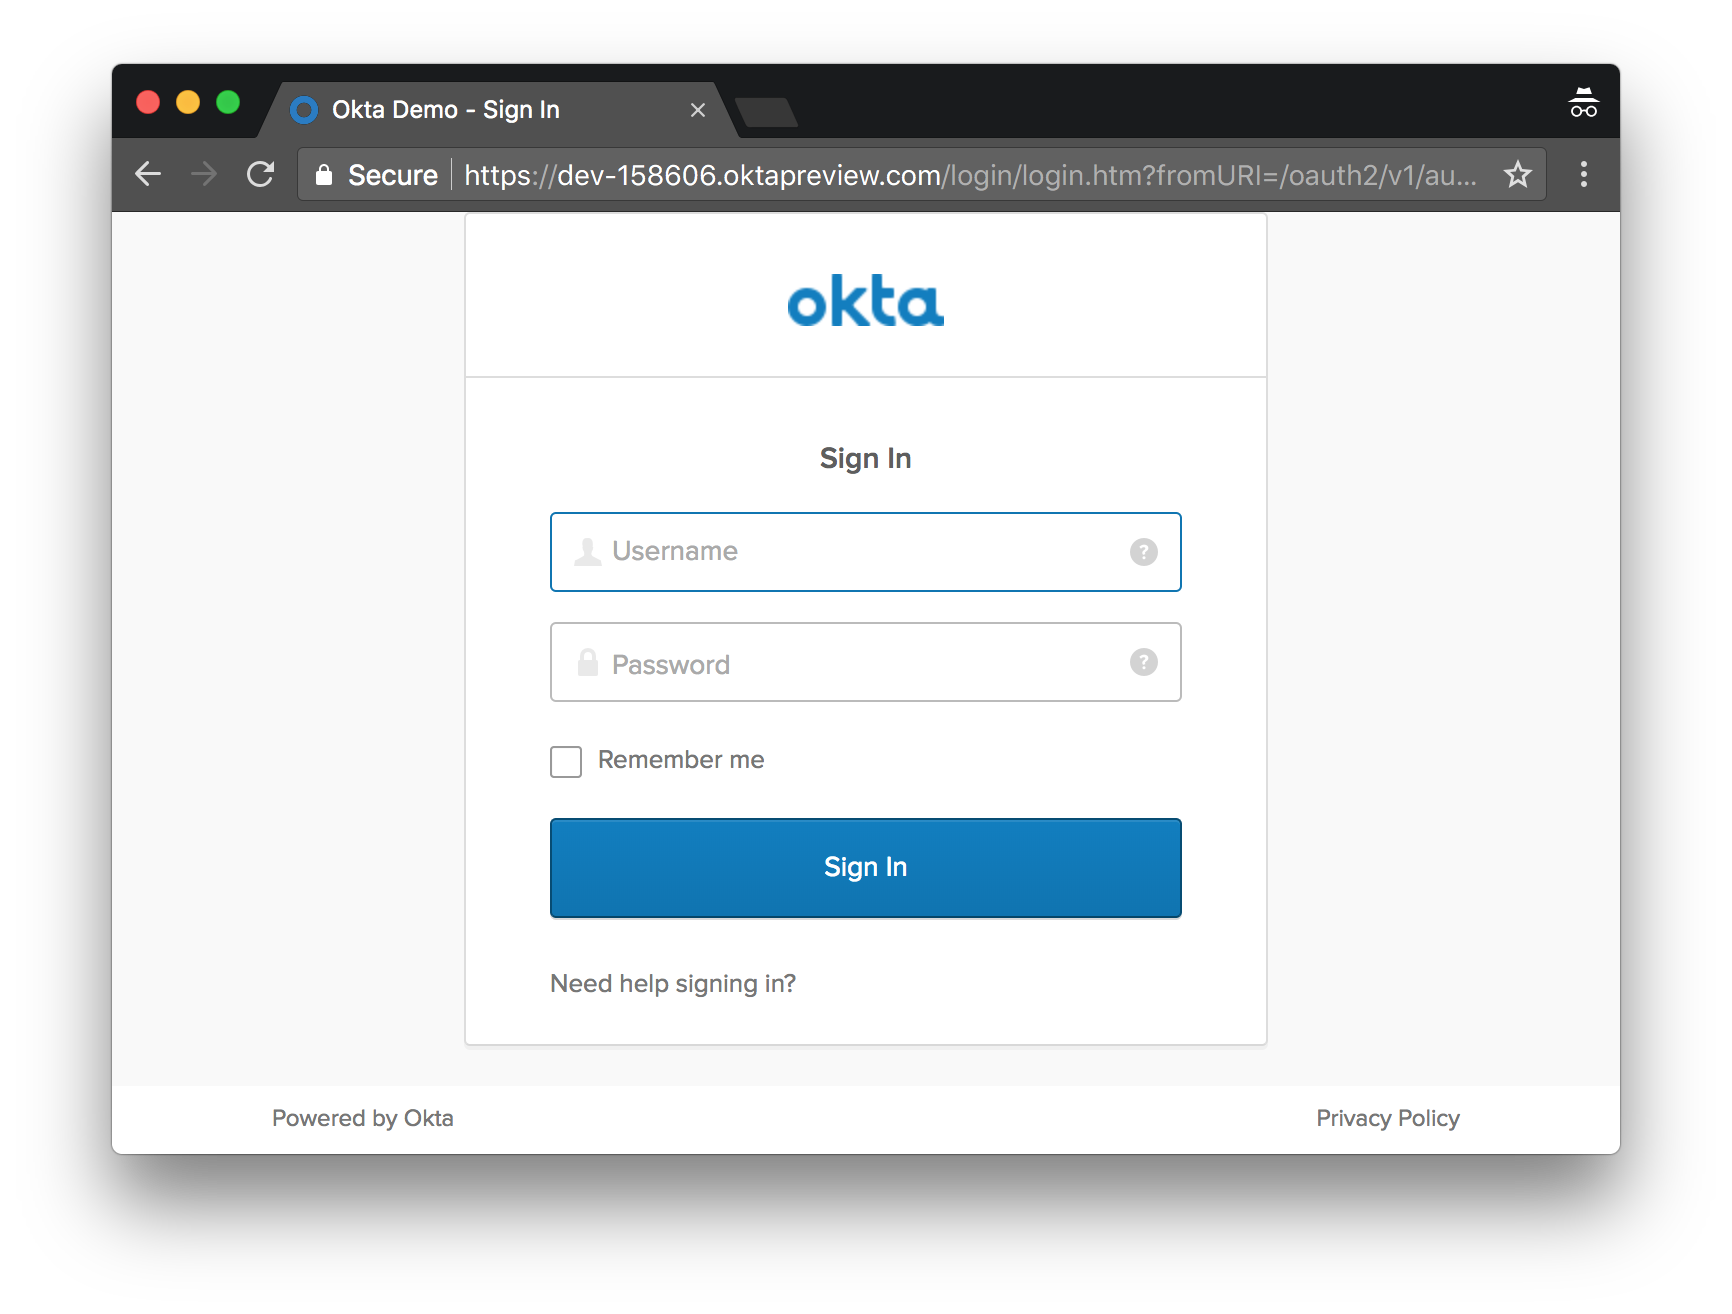
Create UserProvider by running ionic g provider user (in the crypto-pwa directory), then populate crypto-pwa/src/providers/user/user.ts with the following code. You might notice the login() method redirects to the server for authentication now. The server will not only perform an authorization code flow, but it will also establish a session (tracked with cookies), send a CSRF cookie in the header (that Angular will handle automatically), and redirect back to the client URL.
import { HttpClient } from '@angular/common/http';
import { Injectable } from '@angular/core';

@Injectable()
export class UserProvider {

  constructor(public http: HttpClient) {
  }

  login() {
    let port = (location.port ? ':' + location.port : '');
    if (port === ':8100') {
      port = ':8080';
    }
    location.href = '//' + location.hostname + port + '/login';
  }

  getUser() {
    return this.http.get('/api/user');
  }

  logout() {
    return this.http.post('/api/logout', {});
  }
}
In crypto-pwa/src/app/app.module.ts, remove the references to OAuthModule:
@@ -8,7 +8,7 @@ import { StatusBar } from '@ionic-native/status-bar';

 import { MyApp } from './app.component';
 import { HoldingsProvider } from '../providers/holdings/holdings';
-import { OAuthModule } from 'angular-oauth2-oidc';
+import { UserProvider } from '../providers/user/user';

 @NgModule({
   declarations: [
@@ -20,8 +20,7 @@ import { OAuthModule } from 'angular-oauth2-oidc';
       preloadModules: true
     }),
     IonicStorageModule.forRoot(),
-    HttpClientModule,
-    OAuthModule.forRoot()
+    HttpClientModule
   ],
   bootstrap: [IonicApp],
   entryComponents: [
@@ -31,7 +30,8 @@ import { OAuthModule } from 'angular-oauth2-oidc';
     StatusBar,
     SplashScreen,
     {provide: ErrorHandler, useClass: IonicErrorHandler},
-    HoldingsProvider
+    HoldingsProvider,
+    UserProvider
   ]
 })
 export class AppModule {}
In crypto-pwa/src/app/app.component.ts, change from using OAuthService to determine authenticated status to using UserProvider:
import { Component } from '@angular/core';
import { UserProvider } from '../providers/user/user';

@Component({
  templateUrl: 'app.html'
})
export class MyApp {
  rootPage: any = 'HomePage';

  constructor(userProvider: UserProvider) {
    userProvider.getUser().subscribe((user) => {
      if (user == null) {
        this.rootPage = 'LoginPage';
      }
    });
  }
}
In crypto-pwa/src/app/app.component.spec.ts, mock the UserProvider instead of OAuthService:
import { UserProvider } from '../providers/user/user';
import { Observable } from 'rxjs/Rx';

describe('MyApp Component', () => {
  ...
  let userProvider = {
    getUser() {
      return Observable.of(null);
    }
  };

  beforeEach(
    async(() => {
      TestBed.configureTestingModule({
        declarations: [MyApp],
        imports: [IonicModule.forRoot(MyApp)],
        providers: [
          ...
          {provide: UserProvider, useFactory: () => userProvider}
        ]
      });
    })
  );

  ...
});
Remove the bearer token from the headers in crypto-pwa/src/providers/holdings/holdings.ts, and shorten the URLs, so they’re relative.
-import { HttpClient, HttpHeaders } from '@angular/common/http';
+import { HttpClient } from '@angular/common/http';
...
-import { OAuthService } from 'angular-oauth2-oidc';
...

export class HoldingsProvider {

-  public HOLDINGS_API = 'http://localhost:8080/api/holdings';
+  public HOLDINGS_API = '/api/holdings';

-  constructor(private http: HttpClient, private oauthService: OAuthService) {
+  constructor(private http: HttpClient) {

-  getHeaders(): HttpHeaders {
-    return new HttpHeaders().set('Authorization', this.oauthService.authorizationHeader())
-  }
-
   saveHoldings(): void {
-    this.http.post(this.HOLDINGS_API, this.holdings, {headers: this.getHeaders()}).subscribe(data => {
+    this.http.post(this.HOLDINGS_API, this.holdings).subscribe(data => {
       console.log('holdings', data);
     }, this.onError);
   }

   loadHoldings(): void {
-    this.http.get(this.HOLDINGS_API, {headers: this.getHeaders()}).subscribe((holdings: Holding[]) => {
+    this.http.get(this.HOLDINGS_API).subscribe((holdings: Holding[]) => {
In the same directory, removing references to OAuthService in holdings.spec.ts.
-import { OAuthService } from 'angular-oauth2-oidc';

 describe('HoldingsProvider', () => {
   let injector: TestBed;
   let provider: HoldingsProvider;
   let httpMock: HttpTestingController;
-  let oauthService = {
-    hasValidIdToken() {
-      return true;
-    },
-    authorizationHeader() {
-      return "random-string";
-    }
-  };

   beforeEach(() => {
     TestBed.configureTestingModule({
       imports: [HttpClientTestingModule],
-      providers: [HoldingsProvider,
-        {provide: OAuthService, useValue: oauthService}
-      ]
+      providers: [HoldingsProvider]
Since it’s probably easier to copy/paste than to read diff’s, I’ll post the modified source code from now on.
Remove OAuthService in crypto-pwa/src/app/pages/home.ts and replace it with UserProvider.
import { Component } from '@angular/core';
import { NavController, IonicPage } from 'ionic-angular';
import { HoldingsProvider } from '../../providers/holdings/holdings';
import { UserProvider } from '../../providers/user/user';

@IonicPage()
@Component({
  selector: 'page-home',
  templateUrl: 'home.html'
})
export class HomePage {
  name;

  constructor(private navCtrl: NavController, private holdingsProvider: HoldingsProvider,
              private userProvider: UserProvider) {
  }

  ionViewDidLoad(): void {
    this.userProvider.getUser().subscribe((user: any) => {
      if (user === null) {
        this.navCtrl.push('LoginPage');
      } else {
        this.name = user.name;
        this.holdingsProvider.loadHoldings();
      }
    })
  }

  addHolding(): void {
    this.navCtrl.push('AddHoldingPage');
  }

  goToCryptonator(): void {
    window.open('https://www.cryptonator.com/api', '_system');
  }

  refreshPrices(refresher): void {
    this.holdingsProvider.fetchPrices(refresher);
  }

  logout() {
    this.userProvider.logout().subscribe(() => this.navCtrl.push('LoginPage'));
  }
}
And fix its test in home.spec.ts:
import { IonicModule, NavController } from 'ionic-angular';
import { async, ComponentFixture, TestBed } from '@angular/core/testing';
import { HomePage } from './home';
import { HoldingsProvider } from '../../providers/holdings/holdings';
import { By } from '@angular/platform-browser';
import { Observable } from 'rxjs/Rx';
import { UserProvider } from '../../providers/user/user';

describe('HomePage', () => {
  let fixture: ComponentFixture<HomePage>;
  let component: HomePage;
  let userProvider = {
    getUser() {
      return Observable.of({name: "Cool User"});
    }
  };
  let holdingsProvider = {
    holdings: [{crypto: 'BTC', currency: 'USD', amount: 5, value: '10000'}],
    loadHoldings() {
      return this.holdings;
    }
  };
  let loadHoldings;

  beforeEach(async(() => {
    TestBed.configureTestingModule({
      declarations: [HomePage],
      imports: [IonicModule.forRoot(HomePage)],
      providers: [NavController,
        {provide: UserProvider, useValue: userProvider},
        {provide: HoldingsProvider, useValue: holdingsProvider}
      ]
    });
  }));

  beforeEach(() => {
    fixture = TestBed.createComponent(HomePage);
    component = fixture.componentInstance;
    loadHoldings = jest.spyOn(holdingsProvider, 'loadHoldings');
  });

  it('should be created', () => {
    expect(component).toBeDefined()
  });

  it('should call loadHoldings', () => {
    component.ionViewDidLoad();
    fixture.detectChanges();
    expect(loadHoldings).toHaveBeenCalled();
  });

  it('should show list of currencies', () => {
    component.ionViewDidLoad();
    fixture.detectChanges();
    const list: HTMLDivElement = fixture.debugElement.query(By.css('ion-list')).nativeElement;
    expect(list.innerHTML).toMatch(/ion-item/);
    const amount = fixture.debugElement.query(By.css('.amount')).nativeElement;
    expect(amount.innerHTML).toMatch(/<strong>Coins:<\/strong> 5 <strong>Value:<\/strong> 10000/)
  });
});
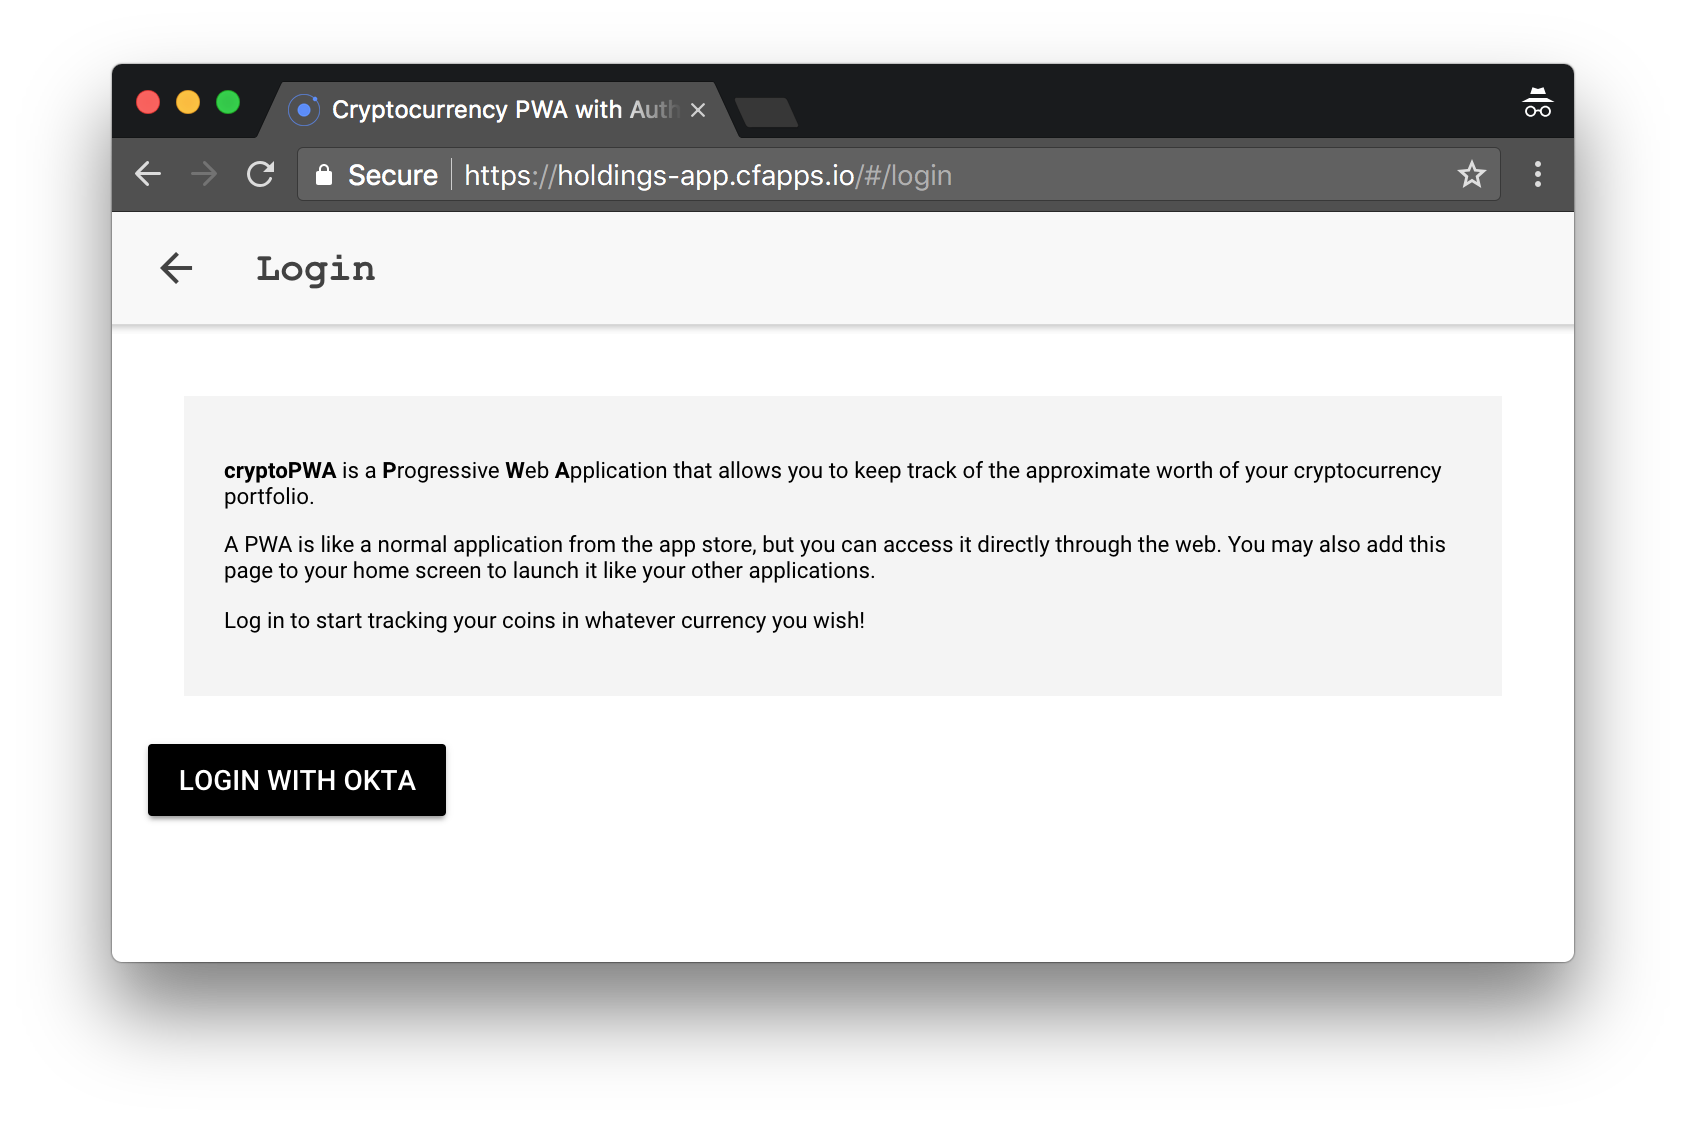
Then update crypto-pwa/src/pages/login/login.ts to use UserProvider to log in.
import { Component } from '@angular/core';
import { App, IonicPage } from 'ionic-angular';
import { UserProvider } from '../../providers/user/user';

@IonicPage({
  name: 'LoginPage'
})
@Component({
  selector: 'page-login',
  templateUrl: 'login.html'
})
export class LoginPage {

  constructor(private userProvider: UserProvider, private app: App) {
    userProvider.getUser().subscribe((user) => {
      if (user !== null) {
        this.app.getRootNavs()[0].setRoot('HomePage');
      }
    });
  }

  login() {
    this.userProvider.login();
  }
}
To make it so you can talk to the API when using ionic serve modify crypto-pwa/ionic.config.json to have proxy information for the API.
{
  "name": "cryptopwa",
  "app_id": "",
  "type": "ionic-angular",
  "integrations": {},
  "proxies": [
    {
      "path": "/api",
      "proxyUrl": "http://localhost:8080/api"
    }
  ]
}
The last – important – step is to change crypto-pwa/src/service-worker.js so it checks the network before its local cache for /login and calls to /api.
// attempt to use network for /login and /api calls
self.toolbox.router.any('/login', self.toolbox.networkFirst);
self.toolbox.router.any('/api/*', self.toolbox.networkFirst);

// dynamically cache any other local assets
self.toolbox.router.any('/*', self.toolbox.fastest);
If you forget this step, you’ll get an error when logging in every-so-often. You can recognize it because it’ll have something like /error?code=vNA4kwBK8D-pEqOeAGSJ&state=Qg5wPe in the URL.
Before updating the API project, run npm i to install all the dependencies required by the client.
Upgrade Spring Boot API to use Spring Boot 2.0
This first thing you’ll want to do to the API project is the upgrade to Spring Boot 2.0. Open holdings-api/pom.xml and change its parent to use version 2.0.2.RELEASE.
<parent>
    <groupId>org.springframework.boot</groupId>
    <artifactId>spring-boot-starter-parent</artifactId>
    <version>2.0.2.RELEASE</version>
    <relativePath/> <!-- lookup parent from repository -->
</parent>
Change the Okta version property to use the latest 0.5.0 release too:
<okta.version>0.5.0</okta.version>
Spring Boot 2.0 uses a new autoconfiguration module; add it to the dependencies section.
<dependency>
    <groupId>org.springframework.security.oauth.boot</groupId>
    <artifactId>spring-security-oauth2-autoconfigure</artifactId>
    <version>2.0.1.RELEASE</version>
</dependency>
You can remove the dependencyManagement section since Spring Boot 2.0 doesn’t need it.
<dependencyManagement>
    <dependencies>
        <dependency>
            <groupId>org.springframework.security.oauth</groupId>
            <artifactId>spring-security-oauth2</artifactId>
            <version>2.2.0.RELEASE</version>
        </dependency>
    </dependencies>
</dependencyManagement>
Due to a bug in Okta’s Spring Boot Starter where the Principal doesn’t resolve with Spring Boot 2.0, you’ll need to change your configuration to use Spring Security’s properties instead of Okta’s.
Rename holdings-api/src/main/resources/application.properties to application.yml and populate it with the following properties.
okta:
  client:
    orgUrl: https://{yourOktaDomain}
    token: XXX
security:
    oauth2:
        client:
            access-token-uri: https://{yourOktaDomain}/oauth2/default/v1/token
            user-authorization-uri: https://{yourOktaDomain}/oauth2/default/v1/authorize
            client-id: {clientId}
            client-secret: {clientSecret}
        resource:
            user-info-uri: https://{yourOktaDomain}/oauth2/default/v1/userinfo
You’ll notice there are variables that need to be substituted for everything to work. That’s where Okta comes in!
What is Okta?
In short, we make identity management a lot easier, more secure, and more scalable than what you’re probably used to. Okta is a cloud service that allows developers to create, edit, and securely store user accounts and user account data, and connect them with one or multiple applications. Our API enables you to:
- Authenticate and authorize your users
- Store data about your users
- Perform password-based and social login
- Secure your application with multi-factor authentication
- And much more! Check out our product documentation
Are you sold? Register for a forever-free developer account, and when you’re done, come on back so we can learn more about building a secure app with Angular and Spring Boot 2.0!
Create a Web Application in Okta for Your Spring Boot + Angular PWA
After you’ve completed the setup process, log in to your account and navigate to Applications > Add Application. Click Web and Next. On the next page, enter the following values and click Done.
- Application Name:
Spring Boot Rocks! - Base URIs:
http://localhost:8080 - Login redirect URIs:
http://localhost:8080/login
Take note of the clientId and client secret values as you’ll need these to configure your Spring Boot apps.
You need to add a roles claim to your ID token, if you want your groups in Okta to be translated to Spring Security authorities. In your Okta developer console, navigate to API > Authorization Servers, and click the default one. Click the Claims tab and Add Claim. Name it “groups” and include it in the ID token. Set the value type to “Groups” and set the filter to be a Regex of .*.
You’ll need to add a holdings attribute to your organization’s user profiles to store your cryptocurrency holdings in Okta. Navigate to Users > Profile Editor. Click on Profile for the first profile in the table. You can identify it by its Okta logo. Click Add Attribute and use the following values:
- Display name:
Holdings - Variable name:
holdings - Description:
Cryptocurrency Holdings
For the Okta Java SDK to talk to Okta’s API (to store your cryptocurrency holdings), you’ll need to create an API token.
- Navigate to API > Tokens and click Create Token
- Give your token a name, then set its value as an
OKTA_CLIENT_TOKENenvironment variable.
Adjust Java Code to Resolve Principal
I mentioned earlier that there’s a bug in Okta’s Spring Boot Starter. The problem is that it doesn’t resolve java.security.Principal the same way does for Spring Boot 1.5.x. Until our team can squash this one, there’s a simple fix you can deploy: Just update HoldingsController.java to extract the sub to call Okta’s API. Add a getUser(Principal principal) method to this class.
import org.springframework.security.oauth2.provider.OAuth2Authentication;
...

@SuppressWarnings("unchecked")
private User getUser(Principal principal) {
    if (principal instanceof OAuth2Authentication) {
        OAuth2Authentication authentication = (OAuth2Authentication) principal;
        Map<String, Object> details = (Map<String, Object>) authentication.getUserAuthentication().getDetails();
        return client.getUser(details.get("sub").toString());
    } else {
        return client.getUser(principal.getName());
    }
}
Then change the two instances of client.getUser(principal.getName()) to be getUser(principal).
Create a UserController for Your Spring Boot + Angular PWA
Create a UserController.java file in the same package as HoldingsController.java. Populate it with the code below to return an empty string when the user isn’t authenticated, and to allow tests to pass still.
package com.okta.developer.holdingsapi;

import org.springframework.http.HttpStatus;
import org.springframework.http.ResponseEntity;
import org.springframework.security.oauth2.provider.OAuth2Authentication;
import org.springframework.web.bind.annotation.GetMapping;
import org.springframework.web.bind.annotation.PostMapping;
import org.springframework.web.bind.annotation.RestController;

import javax.servlet.http.HttpServletRequest;
import java.security.Principal;
import java.util.Map;

@RestController
public class UserController {

    @GetMapping("/api/user")
    @SuppressWarnings("unchecked")
    public ResponseEntity<?> getUser(Principal principal) {
        if (principal == null) {
            return new ResponseEntity<>("", HttpStatus.OK);
        }
        if (principal instanceof OAuth2Authentication) {
            OAuth2Authentication authentication = (OAuth2Authentication) principal;
            Map<String, Object> details = (Map<String, Object>) authentication.getUserAuthentication().getDetails();
            return ResponseEntity.ok().body(details);
        } else {
            return ResponseEntity.ok().body(principal.getName());
        }
    }

    @PostMapping("/api/logout")
    public void logout(HttpServletRequest request) {
        request.getSession(false).invalidate();
    }
}
You can also write a test for this class to prove it all works. Create holdings-api/src/test/java/com/okta/developer/holdingsapi/UserControllerTest.java and add the code below to it.
package com.okta.developer.holdingsapi;

import org.junit.Before;
import org.junit.Test;
import org.junit.runner.RunWith;
import org.springframework.beans.factory.annotation.Autowired;
import org.springframework.boot.test.context.SpringBootTest;
import org.springframework.http.MediaType;
import org.springframework.security.authentication.TestingAuthenticationToken;
import org.springframework.security.core.Authentication;
import org.springframework.security.core.GrantedAuthority;
import org.springframework.security.core.authority.AuthorityUtils;
import org.springframework.security.core.userdetails.User;
import org.springframework.test.context.junit4.SpringRunner;
import org.springframework.test.web.servlet.MockMvc;
import org.springframework.test.web.servlet.setup.MockMvcBuilders;
import org.springframework.web.context.WebApplicationContext;

import java.util.HashMap;
import java.util.List;

import static org.springframework.security.test.web.servlet.request.SecurityMockMvcRequestPostProcessors.authentication;
import static org.springframework.security.test.web.servlet.setup.SecurityMockMvcConfigurers.springSecurity;
import static org.springframework.test.web.servlet.request.MockMvcRequestBuilders.get;
import static org.springframework.test.web.servlet.result.MockMvcResultMatchers.content;
import static org.springframework.test.web.servlet.result.MockMvcResultMatchers.status;

@RunWith(SpringRunner.class)
@SpringBootTest(classes = HoldingsApiApplication.class,
                properties = {
                    "okta.client.token=FAKE_TEST_TOKEN",
                    "okta.client.orgUrl=https://example.com/not-used"})
public class UserControllerTest {

    private MockMvc restUserMockMvc;

    @Autowired
    private WebApplicationContext context;

    @Before
    public void setup() {
        restUserMockMvc = MockMvcBuilders
                .webAppContextSetup(context)
                .apply(springSecurity())
                .build();
    }

    @Test
    public void testNonAuthenticatedUser() throws Exception {
        restUserMockMvc.perform(get("/api/user")
                .accept(MediaType.APPLICATION_JSON))
                .andExpect(status().isOk())
                .andExpect(content().string(""));

    }

    @Test
    public void testAuthenticatedUser() throws Exception {
        restUserMockMvc.perform(get("/api/user")
                .with(authentication(getAuthentication()))
                .accept(MediaType.APPLICATION_JSON))
                .andExpect(status().isOk())
                .andExpect(content().string("mraible"));
    }

    private Authentication getAuthentication() {
        List<GrantedAuthority> authorities = AuthorityUtils.createAuthorityList("Everyone");

        User userPrincipal = new User("mraible", "", true, true, true, true, authorities);

        HashMap<String, String> details = new HashMap<>();
        details.put("user_name", "mraible");
        details.put("email", "matt.raible@okta.com");
        details.put("name", "Matt Raible");

        TestingAuthenticationToken token = new TestingAuthenticationToken(userPrincipal, null, authorities);
        token.setAuthenticated(true);
        token.setDetails(details);

        return token;
    }
}
Previously, the Spring Boot API was a resource server. Now it acts as the gateway to our Angular app. Remove @EnableResourceServer and the simpleCorsFilter bean from HoldingsApiApplication.
Create a SecurityConfiguration.java file in the same directory. This configuration enables OAuth login, allows CSRF to be read from cookies (for Angular), and makes /api/user public.
package com.okta.developer.holdingsapi;

import org.springframework.boot.autoconfigure.security.oauth2.client.EnableOAuth2Sso;
import org.springframework.context.annotation.Configuration;
import org.springframework.security.config.annotation.web.builders.HttpSecurity;
import org.springframework.security.config.annotation.web.builders.WebSecurity;
import org.springframework.security.config.annotation.web.configuration.EnableWebSecurity;
import org.springframework.security.config.annotation.web.configuration.WebSecurityConfigurerAdapter;
import org.springframework.security.web.csrf.CookieCsrfTokenRepository;

@Configuration
@EnableOAuth2Sso
@EnableWebSecurity
public class SecurityConfiguration extends WebSecurityConfigurerAdapter {

    @Override
    public void configure(WebSecurity web) {
        web.ignoring().antMatchers("/**/*.{js,html,css}");
    }

    @Override
    protected void configure(HttpSecurity http) throws Exception {
        http
                .csrf().csrfTokenRepository(CookieCsrfTokenRepository.withHttpOnlyFalse())
            .and()
                .authorizeRequests()
                .antMatchers("/", "/api/user").permitAll()
                .anyRequest().authenticated();
    }
}
It also allows serving static assets by overriding configure(WebSecurity web) and using web.ignoring().
Configure Maven to Combine Build Artifacts
The frontend-maven-plugin allows you to build frontend applications with Maven. If you’re using Gradle instead of Maven, you can use the gradle-node-plugin to accomplish the same thing.
In this example, I’ll add the frontend-maven-plugin to a prod profile, so the frontend is only built and tested when you run mvn package -Pprod.
Add properties to set the version of the plugin, as well as the version of Node to use.
<properties>
    ...
    <frontend-maven-plugin.version>1.6</frontend-maven-plugin.version>
    <node.version>v8.10.0</node.version>
</properties>
Then add dev and prod profiles where dev is the default. The prod profile uses Maven’s Resources Plugin to copy the built files from the frontend app. It also installs Node and npm, runs the tests, and builds it for production.
<profiles>
    <profile>
        <id>dev</id>
        <activation>
            <activeByDefault>true</activeByDefault>
        </activation>
        <properties>
            <spring.profiles.active>dev</spring.profiles.active>
        </properties>
    </profile>
    <profile>
        <id>prod</id>
        <build>
            <plugins>
                <plugin>
                    <artifactId>maven-resources-plugin</artifactId>
                    <executions>
                        <execution>
                            <id>copy-resources</id>
                            <phase>prepare-package</phase>
                            <goals>
                                <goal>copy-resources</goal>
                            </goals>
                            <configuration>
                                <outputDirectory>${basedir}/target/classes/static</outputDirectory>
                                <resources>
                                    <resource>
                                        <directory>../crypto-pwa/www</directory>
                                    </resource>
                                </resources>
                            </configuration>
                        </execution>
                    </executions>
                </plugin>
                <plugin>
                    <groupId>com.github.eirslett</groupId>
                    <artifactId>frontend-maven-plugin</artifactId>
                    <version>${frontend-maven-plugin.version}</version>
                    <configuration>
                        <workingDirectory>../crypto-pwa</workingDirectory>
                    </configuration>
                    <executions>
                        <execution>
                            <id>install node and npm</id>
                            <goals>
                                <goal>install-node-and-npm</goal>
                            </goals>
                            <configuration>
                                <nodeVersion>${node.version}</nodeVersion>
                            </configuration>
                        </execution>
                        <execution>
                            <id>ionic test</id>
                            <goals>
                                <goal>npm</goal>
                            </goals>
                            <phase>test</phase>
                            <configuration>
                                <arguments>run test</arguments>
                            </configuration>
                        </execution>
                        <execution>
                            <id>ionic build prod</id>
                            <goals>
                                <goal>npm</goal>
                            </goals>
                            <phase>compile</phase>
                            <configuration>
                                <arguments>run build --prod</arguments>
                            </configuration>
                        </execution>
                    </executions>
                </plugin>
            </plugins>
        </build>
        <properties>
            <spring.profiles.active>prod</spring.profiles.active>
        </properties>
    </profile>
</profiles>
Enable Redirect in Spring Boot Back to Your Angular Client
The one missing piece at this point is the server will not redirect back to the client when you’re running ionic serve and try to log in. To fix that, create an OAuth2Configuration.java class (alongside the other classes you created). This class grabs the referer header (yes, it’s spelled wrong), saves it as a session variable, then uses a success handler to redirect back to the referrer. You’ll notice that this class only activates when using the “dev” profile (triggered by @Profile("dev")).
package com.okta.developer.holdingsapi;

import org.slf4j.Logger;
import org.slf4j.LoggerFactory;
import org.springframework.beans.BeansException;
import org.springframework.beans.factory.config.BeanPostProcessor;
import org.springframework.boot.web.servlet.FilterRegistrationBean;
import org.springframework.context.annotation.Bean;
import org.springframework.context.annotation.Configuration;
import org.springframework.context.annotation.Profile;
import org.springframework.core.Ordered;
import org.springframework.core.PriorityOrdered;
import org.springframework.security.oauth2.client.filter.OAuth2ClientAuthenticationProcessingFilter;
import org.springframework.security.web.FilterChainProxy;
import org.springframework.security.web.SecurityFilterChain;
import org.springframework.util.StringUtils;
import org.springframework.web.filter.OncePerRequestFilter;

import javax.servlet.Filter;
import javax.servlet.FilterChain;
import javax.servlet.ServletException;
import javax.servlet.http.HttpServletRequest;
import javax.servlet.http.HttpServletResponse;
import java.io.IOException;

/**
 * Development only configuration that is Browsersync-aware and redirects to the origin you clicked "login" from.
 * If you split your application into client and server into separate domains, you might want to enable this for prod
 * mode too.
 */
@Configuration
@Profile("dev")
public class OAuth2Configuration {
    public static final String SAVED_LOGIN_ORIGIN_URI = OAuth2Configuration.class.getName() + "_SAVED_ORIGIN";

    private final Logger log = LoggerFactory.getLogger(OAuth2Configuration.class);

    @Bean
    public FilterRegistrationBean<OncePerRequestFilter> saveLoginOriginFilter() {
        OncePerRequestFilter filter = new OncePerRequestFilter() {
            @Override
            protected void doFilterInternal(HttpServletRequest request, HttpServletResponse response,
                                            FilterChain filterChain)
                throws ServletException, IOException {
                if (request.getRemoteUser() == null && request.getRequestURI().endsWith("/login")) {
                    String referrer = request.getHeader("referer");
                    if (!StringUtils.isEmpty(referrer) &&
                        request.getSession().getAttribute(SAVED_LOGIN_ORIGIN_URI) == null) {
                        log.info("Saving login origin URI: {}", referrer);
                        request.getSession().setAttribute(SAVED_LOGIN_ORIGIN_URI, referrer);
                    }
                }
                filterChain.doFilter(request, response);
            }
        };
        FilterRegistrationBean<OncePerRequestFilter> bean = new FilterRegistrationBean<>(filter);
        bean.setOrder(Ordered.HIGHEST_PRECEDENCE);
        return bean;
    }

    @Bean
    public static DefaultRolesPrefixPostProcessor defaultRolesPrefixPostProcessor() {
        return new DefaultRolesPrefixPostProcessor();
    }

    public static class DefaultRolesPrefixPostProcessor implements BeanPostProcessor, PriorityOrdered {

        @Override
        public Object postProcessAfterInitialization(Object bean, String beanName) throws BeansException {
            if (bean instanceof FilterChainProxy) {

                FilterChainProxy chains = (FilterChainProxy) bean;

                for (SecurityFilterChain chain : chains.getFilterChains()) {
                    for (Filter filter : chain.getFilters()) {
                        if (filter instanceof OAuth2ClientAuthenticationProcessingFilter) {
                            OAuth2ClientAuthenticationProcessingFilter oAuth2ClientAuthenticationProcessingFilter =
                                (OAuth2ClientAuthenticationProcessingFilter) filter;
                            oAuth2ClientAuthenticationProcessingFilter
                                .setAuthenticationSuccessHandler(new OAuth2AuthenticationSuccessHandler());
                        }
                    }
                }
            }
            return bean;
        }

        @Override
        public Object postProcessBeforeInitialization(Object bean, String beanName) throws BeansException {
            return bean;
        }

        @Override
        public int getOrder() {
            return PriorityOrdered.HIGHEST_PRECEDENCE;
        }
    }
}
Create OAuth2AuthenticationSuccessHandler.java too.
package com.okta.developer.holdingsapi;

import org.slf4j.Logger;
import org.slf4j.LoggerFactory;
import org.springframework.security.core.Authentication;
import org.springframework.security.web.DefaultRedirectStrategy;
import org.springframework.security.web.RedirectStrategy;
import org.springframework.security.web.WebAttributes;
import org.springframework.security.web.authentication.AuthenticationSuccessHandler;

import javax.servlet.http.HttpServletRequest;
import javax.servlet.http.HttpServletResponse;
import javax.servlet.http.HttpSession;
import java.io.IOException;

import static com.okta.developer.holdingsapi.OAuth2Configuration.SAVED_LOGIN_ORIGIN_URI;

/**
 * AuthenticationSuccessHandler that looks for a saved login origin and redirects to it if it exists.
 */
public class OAuth2AuthenticationSuccessHandler implements AuthenticationSuccessHandler {

    private final Logger log = LoggerFactory.getLogger(OAuth2AuthenticationSuccessHandler.class);

    private RedirectStrategy redirectStrategy = new DefaultRedirectStrategy();

    @Override
    public void onAuthenticationSuccess(HttpServletRequest request, HttpServletResponse response,
                                        Authentication authentication)
        throws IOException {

        handle(request, response);
        clearAuthenticationAttributes(request);
    }

    private void handle(HttpServletRequest request, HttpServletResponse response)
        throws IOException {

        String targetUrl = determineTargetUrl(request);

        if (response.isCommitted()) {
            log.error("Response has already been committed. Unable to redirect to " + targetUrl);
            return;
        }

        redirectStrategy.sendRedirect(request, response, targetUrl);
    }

    private String determineTargetUrl(HttpServletRequest request) {
        Object savedReferrer = request.getSession().getAttribute(SAVED_LOGIN_ORIGIN_URI);
        if (savedReferrer != null) {
            String savedLoginOrigin = request.getSession().getAttribute(SAVED_LOGIN_ORIGIN_URI).toString();
            log.info("Redirecting to saved login origin URI: {}", savedLoginOrigin);
            request.getSession().removeAttribute(SAVED_LOGIN_ORIGIN_URI);
            return savedLoginOrigin;
        } else {
            return "/";
        }
    }

    private void clearAuthenticationAttributes(HttpServletRequest request) {
        HttpSession session = request.getSession(false);
        if (session == null) {
            return;
        }
        session.removeAttribute(WebAttributes.AUTHENTICATION_EXCEPTION);
    }
}
Make Spring Profiles work with Maven
To make Spring profiles (a runtime configuration) work with Maven profiles (a build time configuration), you need to add the currently configured profile as a key and replaceable value in application.yml:
spring:
  profiles:
    active: @spring.profiles.active@
Then add the Maven Resources Plugin in the main <build> section of your pom.xml to filter when copying, which will replace the value.
<plugin>
    <artifactId>maven-resources-plugin</artifactId>
    <executions>
        <execution>
            <id>default-resources</id>
            <phase>validate</phase>
            <goals>
                <goal>copy-resources</goal>
            </goals>
            <configuration>
                <outputDirectory>target/classes</outputDirectory>
                <resources>
                    <resource>
                        <directory>src/main/resources</directory>
                        <filtering>true</filtering>
                    </resource>
                </resources>
            </configuration>
        </execution>
    </executions>
</plugin>
To make the “dev” profile the default, you can update HoldingsApiController with the following code. Hat tip to JHipster, who uses a similar configuration to print out URLs and profiles.
package com.okta.developer.holdingsapi;

import org.slf4j.Logger;
import org.slf4j.LoggerFactory;
import org.springframework.boot.SpringApplication;
import org.springframework.boot.autoconfigure.SpringBootApplication;
import org.springframework.core.env.Environment;

import java.net.InetAddress;
import java.util.HashMap;
import java.util.Map;

@SpringBootApplication
public class HoldingsApiApplication {
    private static final Logger log = LoggerFactory.getLogger(HoldingsApiApplication.class);

    public static void main(String[] args) {
        SpringApplication app = new SpringApplication(HoldingsApiApplication.class);
        addDefaultProfile(app);
        Environment env = app.run(args).getEnvironment();
        String protocol = "http";
        if (env.getProperty("server.ssl.key-store") != null) {
            protocol = "https";
        }
        String hostAddress = "localhost";
        try {
            hostAddress = InetAddress.getLocalHost().getHostAddress();
        } catch (Exception e) {
            log.warn("The host name could not be determined, using `localhost` as fallback");
        }
        log.info("\n----------------------------------------------------------\n\t" +
                        "Application '{}' is running! Access URLs:\n\t" +
                        "Local: \t\t{}://localhost:{}\n\t" +
                        "External: \t{}://{}:{}\n\t" +
                        "Profile(s): \t{}\n----------------------------------------------------------",
                env.getProperty("spring.application.name", "Crypto Wealth Tracker"),
                protocol,
                env.getProperty("server.port", "8080"),
                protocol,
                hostAddress,
                env.getProperty("server.port", "8080"),
                env.getActiveProfiles());
    }

    /**
     * Set a default to use when no profile is configured.
     *
     * @param app the Spring application
     */
    private static void addDefaultProfile(SpringApplication app) {
        Map<String, Object> defProperties = new HashMap<>();
        /*
         * The default profile to use when no other profiles are defined
         * This cannot be set in the <code>application.yml</code> file.
         * See https://github.com/spring-projects/spring-boot/issues/1219
         */
        defProperties.put("spring.profiles.default", "dev");
        app.setDefaultProperties(defProperties);
    }
}
Now when you start the app from your the command line, or your IDE, you’ll see that “dev” is the default.
----------------------------------------------------------
    Application 'Crypto Wealth Tracker' is running! Access URLs:
    Local:        http://localhost:8080
    External:     http://198.105.254.104:8080
    Profile(s):   [dev]
----------------------------------------------------------
Run your app with mvn -Pprod, and you’ll see that “prod” is used instead. If you build your app with the production profile, you can still override the active profile property too. For example:
java -jar -Dspring.profiles.active=dev target/*.jar
To make sure everything works on your machine, run the following command in the holdings-api directory.
./mvnw
Then in the crypto-pwa directory, run:
ionic serve
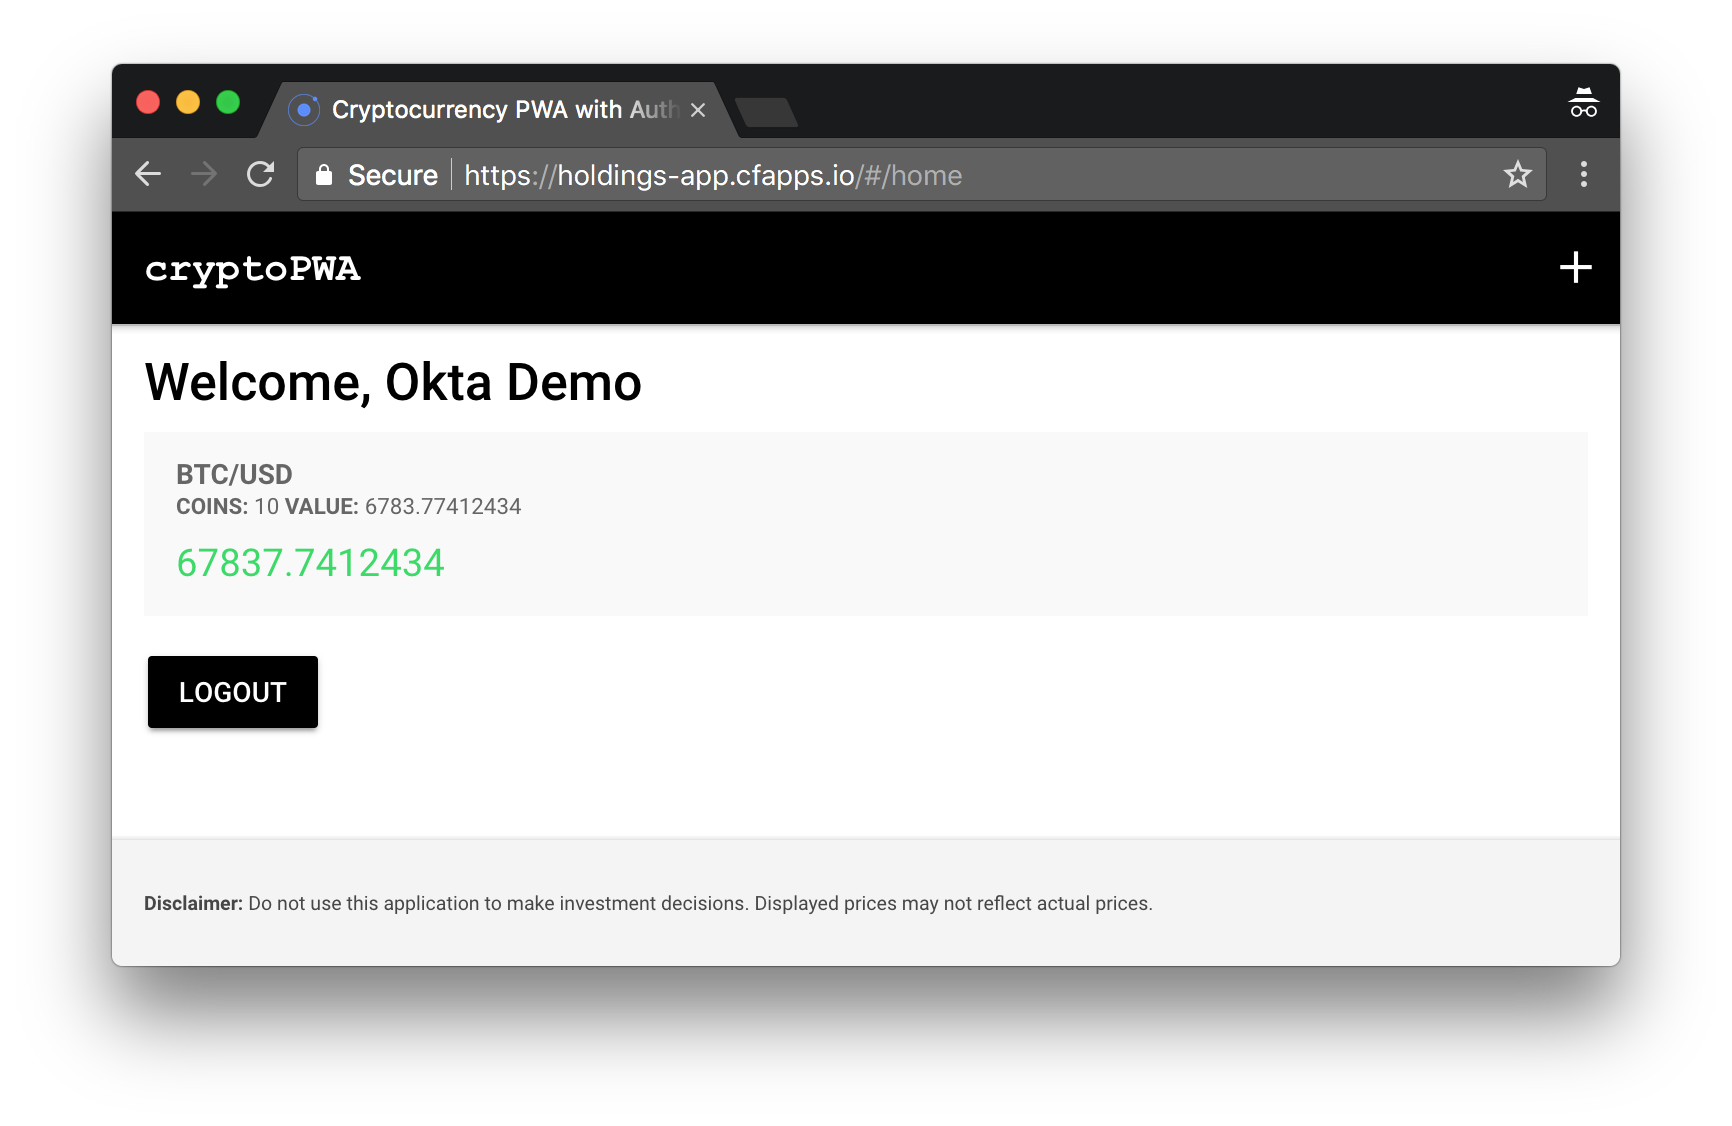
You should be able to log in and add/view cryptocurrency holdings.
Push Your Spring Boot + Angular App to Production on Cloud Foundry
After making all these changes, you can build your application using mvn package -Pprod and deploy it as a single artifact! As shown above, can still develop as you did before, starting the Spring Boot app and the Ionic client separately.
Let’s look at how to deploy it on Cloud Foundry with Pivotal Web Services. The instructions below assume you have an account and have logged in (using cf login).
It’s rather simple really. In the holdings-api directory, run:
mvn package -Pprod
cf push -p target/*jar holdings-app
Run cf apps to see the URL for the app after you deploy it. You might have to change holdings-app to something unique if it’s already in use.
NOTE: You will need to update your Okta app to add a redirect URI for the deployed URL (e.g. https://holdings-app.cfapps.io/login).
If you still have XXX for your API token in application.yml, you’ll need to set an environment variable for that:
cf set-env holdings-app OKTA_CLIENT_TOKEN "$OKTA_CLIENT_TOKEN"
If you want to force HTTPS on this app, you can update your SecurityConfiguration to require a secure channel when the x-forwarded-proto header exists. Thanks for the tip Stefan Falk!
@Override
protected void configure(HttpSecurity http) throws Exception {
    http
            .csrf().csrfTokenRepository(CookieCsrfTokenRepository.withHttpOnlyFalse())
        .and()
            .authorizeRequests()
            .antMatchers("/", "/home", "/api/user").permitAll()
            .anyRequest().authenticated()
        .and()
            .requiresChannel()
            .requestMatchers(r -> r.getHeader("x-forwarded-proto") != null)
            .requiresSecure();
}
That’s it! Witness the glory of your awesome Angular app and Spring Boot API that uses OAuth 2.0’s more secure flow: authorization code flow.
NOTE: This app supports logout, but it only logs out from Spring Security, not from Okta. This is normal. If you sign in to a website with Facebook or Google, you don’t expect to be logged out of them when you logout of the app. When I first implemented this in JHipster, there was a lot of debate.
Verify Your Angular PWA with Lighthouse
After deploying this app, I used Lighthouse to see what the PWA score was. Unfortunately, it dropped from 100 (in my previous post) to 91.
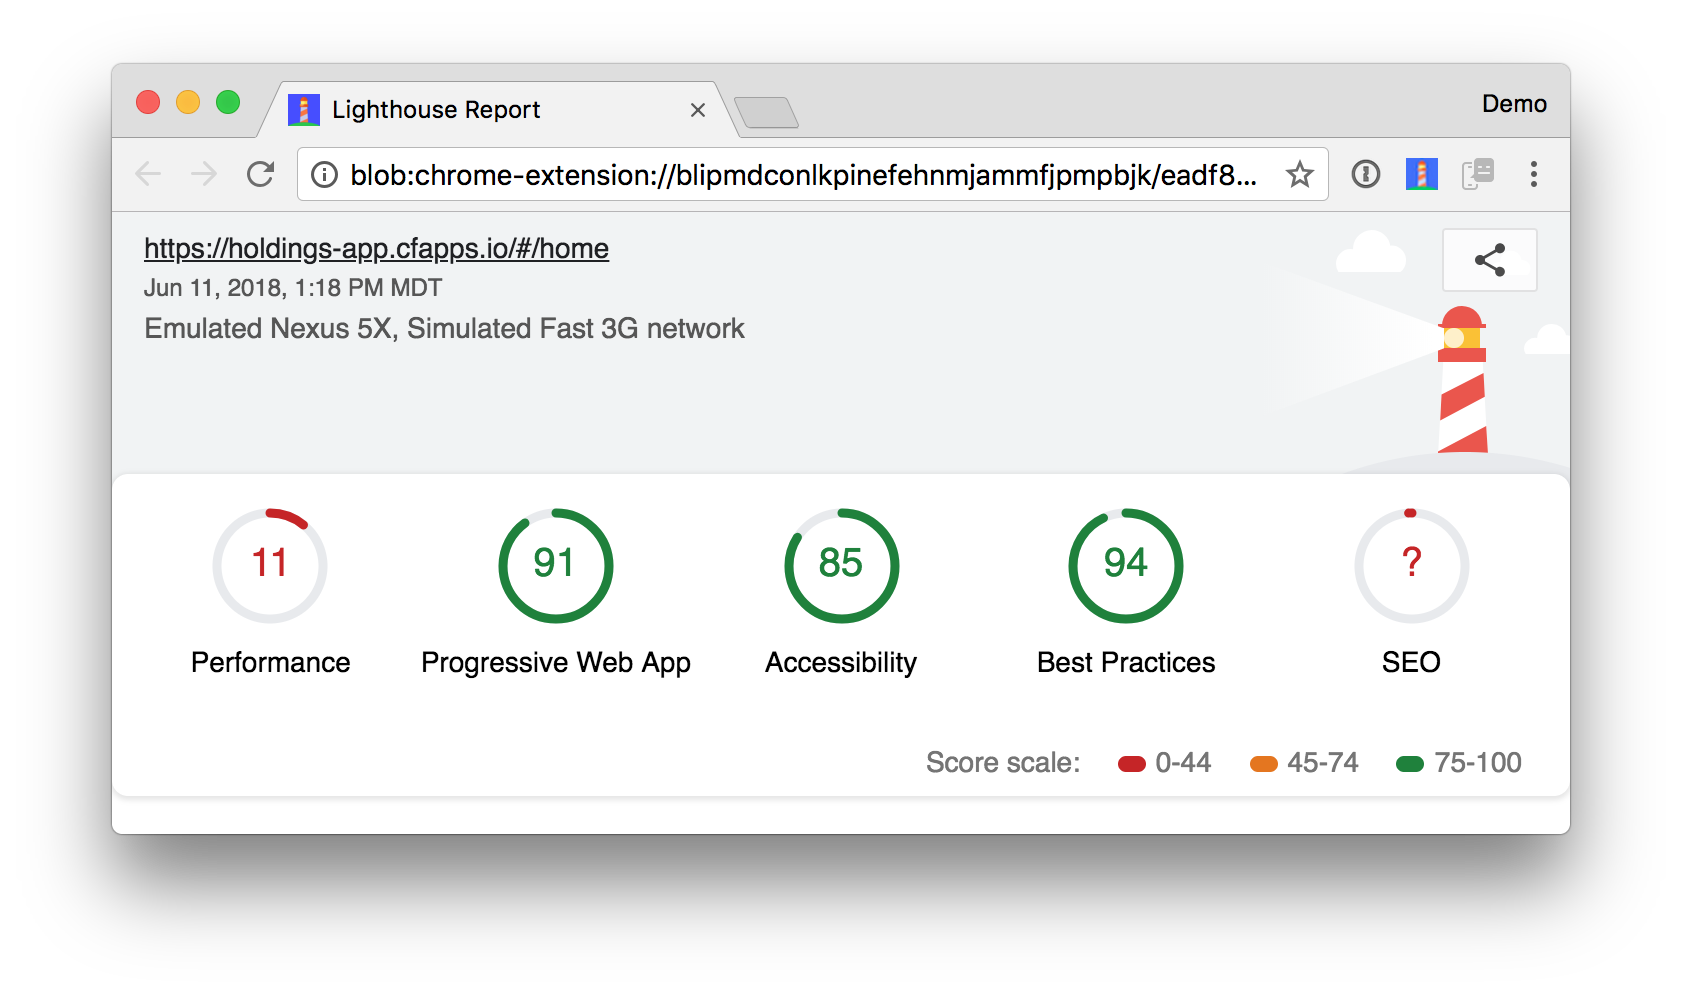
The reason from the report: your page loads too slowly and is not interactive within 10 seconds.
I imagine performance could be improved if you rendered the Angular app server-side initially. This should be possible with Simon Wächter’s Angular Universal for Java. I haven’t tried it myself.
Logout with Okta
I mentioned earlier that invalidating the session in Spring Boot does not log you out from Okta. I decided to try and fix this and found some interesting information. First of all, I discovered that Okta doesn’t support backchannel logout, which is an OIDC spec that’s still in draft form. It does have a logout API though.
To implement it, modify UserController.java and its logout() method to send a logout URL and the ID token back to the client.
package com.okta.developer.holdingsapi;

import org.slf4j.Logger;
import org.slf4j.LoggerFactory;
import org.springframework.beans.factory.annotation.Value;
import org.springframework.boot.autoconfigure.security.oauth2.resource.UserInfoRestTemplateFactory;
import org.springframework.http.HttpStatus;
import org.springframework.http.ResponseEntity;
import org.springframework.security.core.Authentication;
import org.springframework.security.oauth2.client.OAuth2RestTemplate;
import org.springframework.security.oauth2.provider.OAuth2Authentication;
import org.springframework.web.bind.annotation.GetMapping;
import org.springframework.web.bind.annotation.PostMapping;
import org.springframework.web.bind.annotation.RestController;

import javax.servlet.http.HttpServletRequest;
import java.security.Principal;
import java.util.HashMap;
import java.util.Map;

@RestController
public class UserController {
    private final UserInfoRestTemplateFactory templateFactory;

    @Value("${security.oauth2.client.access-token-uri}")
    String accessTokenUri;

    public UserController(UserInfoRestTemplateFactory templateFactory) {
        this.templateFactory = templateFactory;
    }

    @GetMapping("/api/user")
    @SuppressWarnings("unchecked")
    public ResponseEntity<?> getUser(Principal principal) {
        if (principal == null) {
            return new ResponseEntity<>("", HttpStatus.OK);
        }
        if (principal instanceof OAuth2Authentication) {
            OAuth2Authentication authentication = (OAuth2Authentication) principal;
            Map<String, Object> details = (Map<String, Object>) authentication.getUserAuthentication().getDetails();
            return ResponseEntity.ok().body(details);
        } else {
            return ResponseEntity.ok().body(principal.getName());
        }
    }

    @PostMapping("/api/logout")
    public ResponseEntity<?> logout(HttpServletRequest request, Authentication authentication) {
        // send logout URL to client so they can initiate logout - doesn't work from the server side

        OAuth2RestTemplate oauth2RestTemplate = this.templateFactory.getUserInfoRestTemplate();
        String idToken = (String) oauth2RestTemplate.getAccessToken().getAdditionalInformation().get("id_token");

        // logout URI can be derived from accessTokenUri
        String logoutUrl = accessTokenUri.replace("token", "logout");

        Map<String, String> logoutDetails = new HashMap<>();
        logoutDetails.put("logoutUrl", logoutUrl);
        logoutDetails.put("idToken", idToken);
        request.getSession(false).invalidate();
        return ResponseEntity.ok().body(logoutDetails);
    }
}
Then replace the logout() method in crypto-pwa/src/pages/home/home.ts with the following:
 logout() {
    this.userProvider.logout().subscribe((response: any) => {
      if (response.logoutUrl) {
        location.href = response.logoutUrl + "?id_token_hint=" + response.idToken + "&post_logout_redirect_uri=" + window.location.origin;
      } else {
        this.app.getRootNavs()[0].setRoot('LoginPage')
      }
    });
  }
You’ll need to add App as a constructor dependency for everything to compile.
import { NavController, IonicPage, App } from 'ionic-angular';
...
constructor(private navCtrl: NavController, private holdingsProvider: HoldingsProvider,
            private userProvider: UserProvider, private app: App) {
}
You’ll also need to add http://localhost:8100 and http://localhost:8080 to your Okta app’s Logout redirect URIs in order for this to work.
Fix Travis Tests
Changing from implicit flow and a resource server to authorization code flow broke a lot of the tests that Brian Demers and I wrote for the Hitchhiker’s Guide to Testing. We spent many hours fixing them and finally got everything to pass.
I won’t bore you with the details, but you can look at the pull requests we created for the Angular client and the Spring Boot API.
I would like to point out that the combined PR had 42 commits! Sometimes things are just meant to be. 😁
Learn More about Spring Boot and Angular
I hope you’ve enjoyed this (lengthy) tour of how to switch from using OAuth 2.0’s implicit flow with Angular to authorization code flow with Spring Security and Spring Boot.
You can find the source code for this completed application on GitHub at https://github.com/oktadev/okta-spring-boot-angular-auth-code-flow-example.
JHipster uses this same setup for its OAuth 2.0/OIDC support. I helped write it, that’s how I know! I especially like how Spring Boot and Spring Security allow you to switch OAuth providers simply by overriding environment variables.
If you want to learn more about Spring Boot and Angular, as well as OAuth 2.0, check out the following posts.
- Protect Your Cryptocurrency Wealth Tracking PWA with Okta
- Use Okta (Instead of Local Storage) to Store Your User’s Data Securely
- The Hitchhiker’s Guide to Testing Spring Boot APIs and Angular Components with WireMock, Jest, Protractor, and Travis CI
- Build a Basic CRUD App with Angular 5.0 and Spring Boot 2.0
- What is the OAuth 2.0 Implicit Grant Type?
If you have any questions, please leave a comment below, or hit us up on Twitter @oktadev.
Matt Raible is a well-known figure in the Java community and has been building web applications for most of his adult life. For over 20 years, he has helped developers learn and adopt open source frameworks and use them effectively. He's a web developer, Java Champion, and Developer Advocate at Okta. Matt has been a speaker at many conferences worldwide, including Devnexus, Devoxx Belgium, Devoxx France, Jfokus, and JavaOne. He is the author of The Angular Mini-Book, The JHipster Mini-Book, Spring Live, and contributed to Pro JSP. He is a frequent contributor to open source and a member of the JHipster development team. You can find him online @mraible and raibledesigns.com.
Okta Developer Blog Comment Policy
We welcome relevant and respectful comments. Off-topic comments may be removed.