Build an Incredibly Fast Website with Dapper + C#

If you have been doing .NET development professionally for any length of time, you are probably familiar with Entity Framework for data access. At the time of this post, both Entity Framework and Entity Framework Core have over 85 million downloads on Nuget so it is definitely a popular framework.
People love Entity Framework because it abstracts the way you interact with the database to make development easier. The problem, though, is that you trade that easier development experience for heavy operations and very little control over the way you interact with your data.
Sometimes you need to be able to be specific about how you access data or you need a lightweight solution for getting data. Dapper was born out of this need, and today we’ll be exploring how you can use Dapper to make working with databases easy, while getting a significant boost in performance.
Note: In May 2025, the Okta Integrator Free Plan replaced Okta Developer Edition Accounts, and the Okta CLI was deprecated.
We preserved this post for reference, but the instructions no longer work exactly as written. Replace the Okta CLI commands by manually configuring Okta following the instructions in our Developer Documentation.
Prerequisites
- Visual Studio Code or Visual Studio 2019
- SQL Server 2019 Standard or Developer Edition - With full-text indexing installed
- Some experience with SQL and C#
- An Okta Developer Account (free forever, to handle your OAuth needs)
First, Acquire the Data
First, we’ll need some data to work with. There are a plethora of options, but given that our focus today is building a performant data access service, let’s use some real data—some real big data.
Stack Overflow makes its database publicly available and is a great option. Brent Ozar has gone to the trouble of making a few versions available.
- 1GB 2008-2010 expands to 10GB
- 10GB 2008-2013 expands to 50GB
- 52GB Up to 2020 expands to 361GB (only available as torrent)
Alternatively, you can get the data dump directly from archive.org, but this will require your own parsing of the data.
I’m using the 1GB zip that expands to a 10GB database, but please feel free to get one of the larger ones and play with it, assuming you have the bandwidth and space available.
Setup Your Data
With data in hand, now we need to attach it to our SQL Server. To do this, open up SQL Server Management Studio (referred to as SSMS going forward) on the machine that has SQL Server. I installed a local instance of SQL Server using the default configuration.
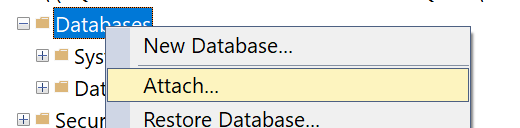
In SSMS, right-click Databases and click attach from the menu.
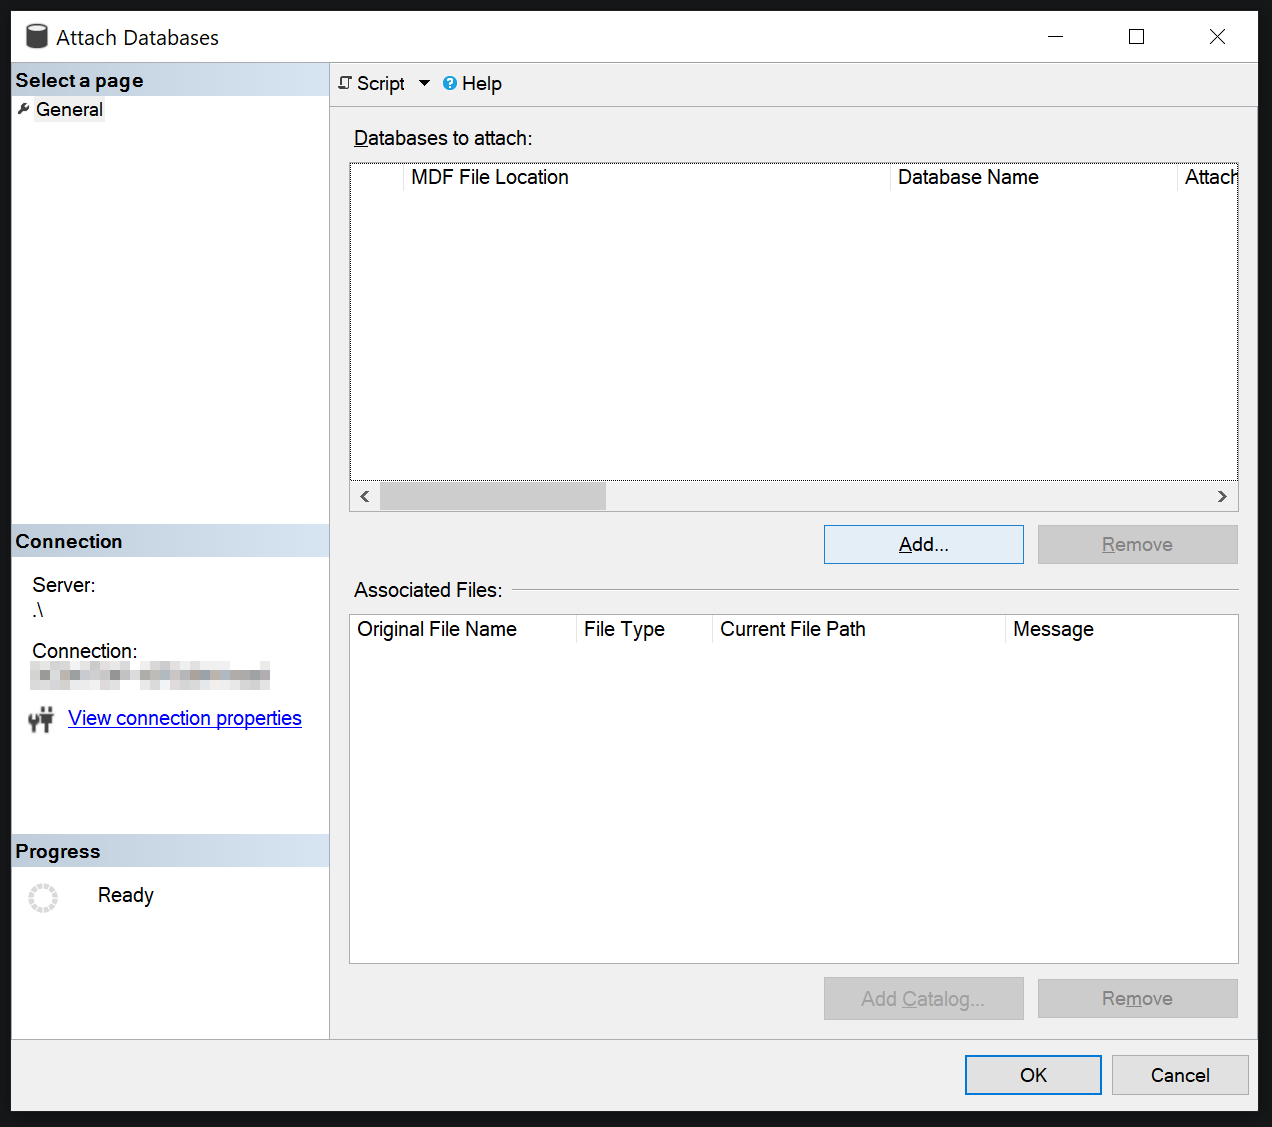
The attach database dialog will pop up, and from here click Add.
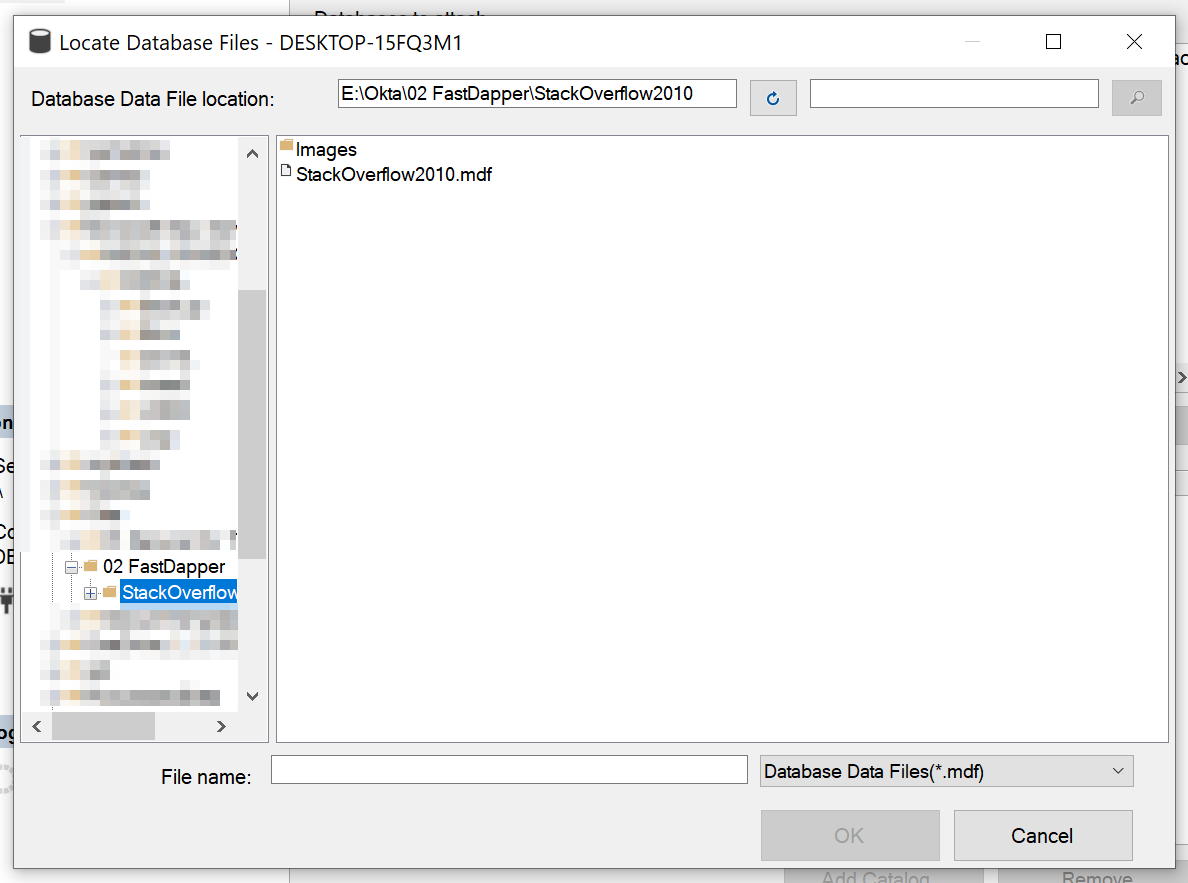
Navigate to the folder where you unzipped the database on the left panel, then select StackOverflow2010.mdf and click OK.
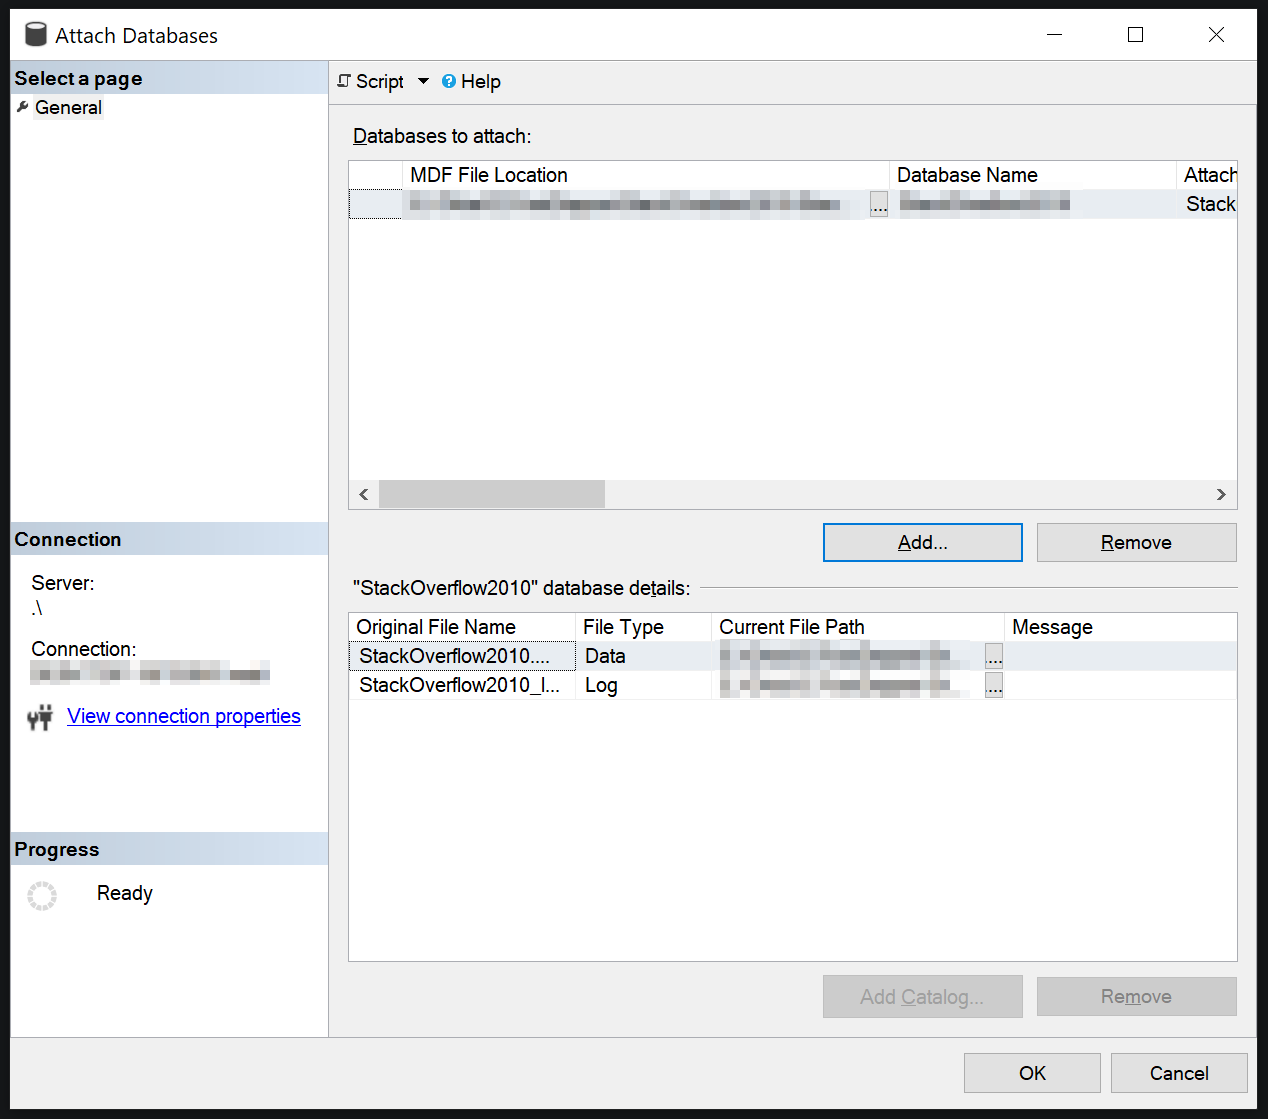
After clicking OK, SSMS will bring you back to the attach database dialog. Then press OK.
After SSMS completes the attachment, you will have a new database named StackOverflow2010 that has nine tables.
- Badges
- Comments
- LinkTypes
- PostLinks
- Posts
- PostTypes
- Users
- Votes
- VoteTypes
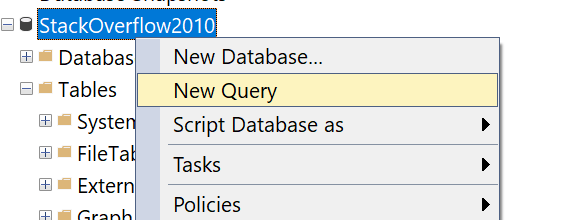
To see the structure of posts, run the following SQL script by right-clicking on your database and clicking new query on the context menu.
SELECT TOP(10)
 *
FROM
 Posts
Analyzing the Data Structure
So now that we have some data, we need to decide what we want to do with it.
Performance Tip: For any given business use case, where possible try to limit the total amount of data to what you need to fulfill a given request.
For this exercise, we’re going to use the following business use case.
As a user, I would like to do the following:
- Get a list of similar questions to my question
- After selecting a question, get the answers for it ranked by score
If we look at the Posts table in SQL Server, we can see that there are a few columns that can help us achieve our business goals.
The ones that stand out to me are:
- Body
- Tags
- Title
- ParentId
- PostTypeId
If we look at the data, we can start to see that the ParentId self-references to the Posts table. We can also see what our post types are by running the following command:
SELECT * FROM PostTypes
The two types we are going to be most interested in are “Question” and “Answer.”
So our goal is to provide an endpoint that can:
- Take in an arbitrary text question
- Query for posts of type “Question”
- Rank the results
- Paginate for speed
We will also have an endpoint that can:
- Take a Question post Id
- Grab the Question and its child Answers
- Get the usernames for the Questions and Answers
Set Up the .NET Core 3.1 Web Project
Now that we understand our business case and have our data analysis in hand, we can start putting together a useful API and website. We want to make sure our website is secure, but developing our own security protocols and managing them to keep our data secure and our users safe is a massive undertaking. Fortunately Okta has made that process super easy, so I’ll be using that to make sure our web application is secure. I’ll be using a security flow that is tailored for sites that are actively engaging consumers with server-side rendered pages, but there are other security flows for service-to-service APIs and client-rendered single-page applications that are just as easy to use.
Create a new project in Visual Studio and start a new ASP.NET Core Web Application.
Choose a name for your project, then select your web project type. For this example, I’ll be creating a Model-View-Controller project, but the setup will be similar for the other types of web projects.
Select ASP.NET Core 3.1 as the run-time.

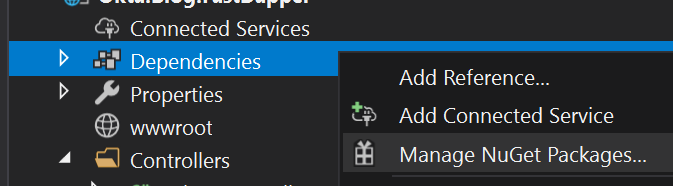
Let’s add the Okta.AspNetCore package. Right-click on dependencies on the project and click Manage NuGet Packages.
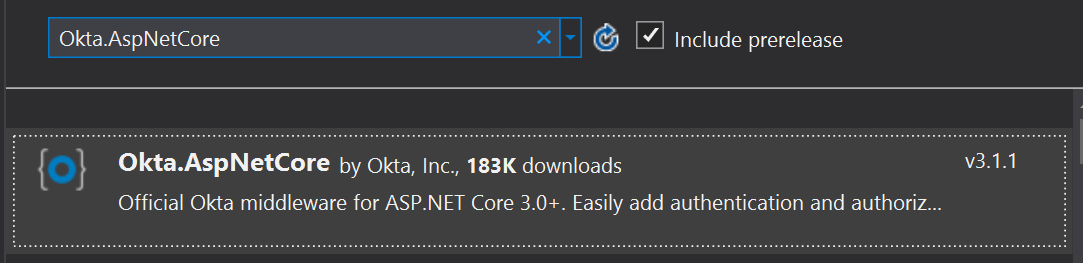
The search for Okta.AspNetCore and click Install.
In the startup.cs file, add the following using statement to the top of the file.
using Okta.AspNetCore;
In your ConfigureServices method, add the following:
var oktaMvcOptions = new OktaMvcOptions()
{
    OktaDomain = Configuration["Okta:Domain"],
    ClientId = Configuration["Okta:ClientId"],
    ClientSecret = Configuration["Okta:ClientSecret"],
    Scope = new List<string> { "openid", "profile", "email" }
};

services.AddAuthentication(options =>
{
    options.DefaultAuthenticateScheme = CookieAuthenticationDefaults.AuthenticationScheme;
    options.DefaultSignInScheme = CookieAuthenticationDefaults.AuthenticationScheme;
    options.DefaultChallengeScheme = OktaDefaults.MvcAuthenticationScheme;
})
.AddCookie()
.AddOktaMvc(oktaMvcOptions);
Add authorization to the Configure method like so:
app.UseAuthentication();
Lastly, in your appsettings.json make sure you have the following (filling in the brackets with the details of your application settings in Okta):
"Okta": {
    "ClientId": "{ClientId}",
    "ClientSecret": "{ClientSecret}",
    "Domain": "{Domain}"
},
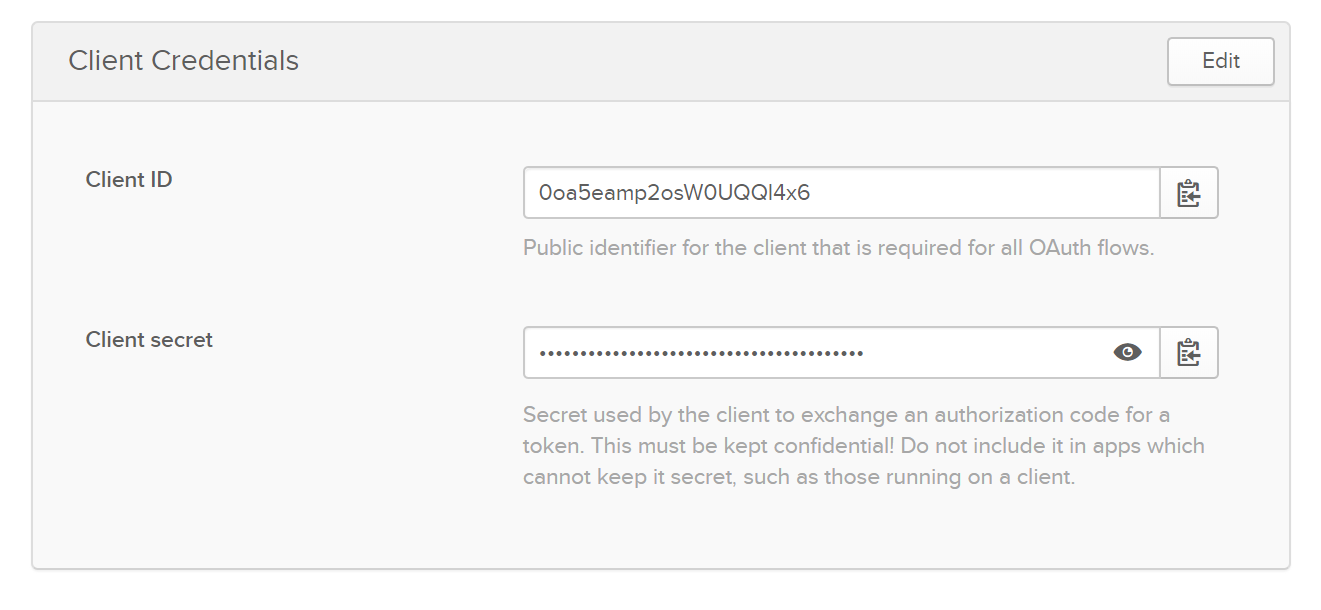
You can get your client Id and secret by logging in to https://developer.okta.com/, selecting Applications and clicking on the name of your application.
Then, go to the general tab for your application and scroll to the bottom.
Adding the Question Service
With the authentication set up and our application ready to go, let’s add a new service.
First, create a new folder in the root of the project called Services.

I like to create my interfaces before I start creating classes. This allows me to validate my thought processes and gather any models I might need. By taking this approach, the cost to change ideas becomes very low compared to getting halfway through implementation and realizing I’m building the wrong thing.
Let’s add a new file to our services folder called IQuestionService.cs.
/// <summary>
/// Interface for the Question service
/// </summary>
public interface IQuestionService
{
/// <summary>
/// Ask a question and get a list of similar questions ranked by similarity.
/// </summary>
/// <param name="question">The question.</param>
/// <param name="take">How many to take.</param>
/// <param name="skip">How many to skip.</param>
/// <returns>Task<IEnumerable<Question>>.</returns>
Task<IEnumerable<Question>> AskAQuestion(string question, int take = 10, int skip = 0);
/// <summary>
/// Gets the question details.
/// </summary>
/// <param name="questionId">The question identifier.</param>
/// <returns>Task<QuestionDetails>.</returns>
Task<QuestionDetails> GetQuestionDetails(int questionId);
}
I think this will meet the requirements well. At this point in a business setting, I could validate with stakeholders or peers to verify that this will indeed meet the use case.
Adding the Models
Now that I’m happy with the service, I can begin creating the models.
Under the models folder, I will add five files:
- Post.cs
- User.cs
- Question.cs
- Answer.cs
- QuestionDetails.cs
Post.cs
/// <summary>
/// Base Type, represents a post.
/// </summary>
public class Post
{
    /// <summary>
    /// Gets or sets the identifier.
    /// </summary>
    /// <value>The identifier.</value>
    public long Id { get; set; }

    /// <summary>
    /// Gets or sets the body.
    /// </summary>
    /// <value>The body.</value>
    public string Body { get; set; }

    /// <summary>
    /// Gets or sets the post type identifier.
    /// </summary>
    /// <value>The post type identifier.</value>
    public int PostTypeId { get; set; }

    /// <summary>
    /// Gets or sets the name of the post type.
    /// </summary>
    /// <value>The name of the post type.</value>
    public string PostTypeName { get; set; }

    /// <summary>
    /// Gets or sets the score.
    /// </summary>
    /// <value>The score.</value>
    public int Score { get; set; }

    /// <summary>
    /// Gets or sets the view count.
    /// </summary>
    /// <value>The view count.</value>
    public int ViewCount { get; set; }

    /// <summary>
    /// Gets or sets the comment count.
    /// </summary>
    /// <value>The comment count.</value>
    public int CommentCount { get; set; }

    /// <summary>
    /// Gets or sets the favorite count.
    /// </summary>
    /// <value>The favorite count.</value>
    public int FavoriteCount { get; set; }

    /// <summary>
    /// Gets or sets the user.
    /// </summary>
    /// <value>The user.</value>
    public User User { get; set; }
}
User.cs
/// <summary>
/// Represents a user of Stack Overflow.
/// </summary>
public class User
{
    /// <summary>
    /// Gets or sets the identifier.
    /// </summary>
    /// <value>The identifier.</value>
    public int Id { get; set; }

    /// <summary>
    /// Gets or sets the name of the user.
    /// </summary>
    /// <value>The name of the user.</value>
    public string DisplayName { get; set; }
}
Question.cs
Note the mapping function. We’ll be using this later to map objects via Dapper.
/// <summary>
/// Represents a question post.
/// </summary>
public class Question : Post
{
    /// <summary>
    /// Gets or sets the title.
    /// </summary>
    /// <value>The title.</value>
    public string Title { get; set; }

    /// <summary>
    /// Gets or sets the tags.
    /// </summary>
    /// <value>The tags.</value>
    public string Tags { get; set; }

    /// <summary>
    /// Gets or sets the accepted answer identifier.
    /// </summary>
    /// <value>The accepted answer identifier.</value>
    public long AcceptedAnswerId { get; set; }
    /// <summary>
    /// Maps a user to a question
    /// </summary>
    public static Func<Question, User, Question> UserMap = (question, user) => {
        question.User = user;
        return question;
    };
}
Answer.cs
/// <summary>
/// Represents an answer post
/// </summary>
public class Answer : Post
{
    /// <summary>
    /// Gets or sets the question identifier.
    /// </summary>
    /// <value>The question identifier.</value>
    public long QuestionId { get; set; }
    /// <summary>
    /// Maps a user to an answer
    /// </summary>
    public static Func<Answer, User, Answer> UserMap = (answer, user) =>
    {
        answer.User = user;
        return answer;
    };
}
QuestionDetails.cs
/// <summary>
/// A question with all of its associated answers
/// </summary>
public class QuestionDetails
{
/// <summary>
/// Gets or sets the question.
/// </summary>
/// <value>The question.</value>
public Question Question { get; set; }

/// <summary>
/// Gets or sets the answers.
/// </summary>
/// <value>The answers.</value>
public IEnumerable<Answer> Answers { get; set; }
}
Making The Data More Useable
Now that we figured out the use cases and models, it’s time to head back to the database and create a view that will help us do most of the heavy lifting of joining our post type and user data. This will make it easier for us to query the data without having to add joins in each one of our select statements. It also gives us a more standardized view of our data that helps us keep uniformity across usage.
CREATE OR ALTER VIEW PostWithUser
AS
SELECT
 Posts.*,
 PostTypes.[Type] as PostTypeName,
 Users.Id as UserId,
 Users.DisplayName

FROM Posts
    INNER JOIN PostTypes
    ON
    Posts.PostTypeId = PostTypes.Id

    INNER JOIN Users
    ON
    Posts.OwnerUserId = Users.Id
Note that in our model we have a user object that is separate from the post data. We can use Dapper to help separate this data into discrete classes.
Implementing the Service
Let’s add a class named QuestionService.
public class QuestionService : IQuestionService
{
    IDbConnection _database;

    public QuestionService(IDbConnection databaseConnection)
    {
        _database = databaseConnection;
    }
    public async Task<IEnumerable<Question>> AskAQuestion(string question, int take = 10, int skip = 0)
    {
        throw new NotImplementedException();
    }
    public async Task<QuestionDetails> GetQuestionDetails(int questionId)
    {
        throw new NotImplementedException();
    }
}
Dapper extends the IDbConnection interface and lets us query our database using SQL Statements that we define. It gives us more control than Entity Framework but requires less verbosity than using plain ADO.NET (.NET’s database connection protocol).
We’ll be using the built-in dependency injection in .NET to handle connection lifetime management.
Add the following to your startup.cs file in ConfigureServices:
services.AddTransient<IDbConnection, SqlConnection>(x =>
    new SqlConnection("Data Source=.\\;Initial Catalog=StackOverflow2010;Integrated Security=true"));

services.AddTransient<IQuestionService, QuestionService>();
Now we can inject our service into the HomeController:
private readonly ILogger<HomeController> _logger;
IQuestionService _questionService;

public HomeController(ILogger<HomeController> logger, IQuestionService questionService)
{
    _questionService = questionService;
    _logger = logger;
}
Let’s do a first pass at the AskAQuestion method using a naive search leveraging the SQL LIKE function.
public async Task<IEnumerable<Question>> AskAQuestion(string question, int take = 10, int skip = 0)
{
    //enforce a hard max limit of 100 results
    take = Math.Min(take, 100);

    var sql =
    @"SELECT *
    FROM
    PostWithUser
    WHERE
    [PostTypeId] = 1
    AND
    [Title] LIKE '%@Question%'
    ORDER BY
    ViewCount DESC

    OFFSET @Skip ROWS FETCH NEXT @Take ROWS ONLY;";

    //Our query is going to map 2 models then return a third.
    //In this case it will map question and user
    //then use our mapping function to join them together.
    var questions = await _database.QueryAsync<Question, User, Question>(
    sql,
    //This is how we define data relationships with dapper
    map: Question.UserMap,
    //These are the inputs that dapper will parameterize
    param: new { Question = question, Skip = skip, Take = take },
    //This tells dapper that the second model starts at this column
    splitOn: "UserId");

    return questions.ToList();
}
One of the nice things with Dapper is that we can make multiple queries in one call to the database and map all the responses. This reduces round trips to the data and allows us to write highly efficient queries that do not duplicate data.
In this use case, imagine if we were to join the question data with every answer. This would give us back a LOT more data than we need, and most of the bytes we transferred would be duplicate body, tag, and title.
If we wanted to continue improving bytes return instead of doing * selects, we could declare only the properties we are mapping, but I will leave that to you.
public async Task<QuestionDetails> GetQuestionDetails(int questionId)
{
    var sql =
    @"SELECT * FROM PostWithUser WHERE Id = @QuestionId
    SELECT * FROM PostWithUser WHERE ParentId = @QuestionId";

    var questionDetails = new QuestionDetails();
    using (var multi = await _database.QueryMultipleAsync(sql, new { QuestionId = questionId }))
    {
        questionDetails.Question = multi.Read<Question, User, Question>(Question.UserMap, splitOn: "UserId")
        .FirstOrDefault();

        if (questionDetails.Question != null)
        questionDetails.Answers = multi.Read<Answer, User, Answer>(Answer.UserMap, splitOn: "UserId")
        .ToList();
    }

    return questionDetails;
}
Creating the Views
To make things simple, we’re just going to use some basic get and posts using forms and skipping JavaScript all together. That said, you could easily transfer these same techniques to a single-page application.
Index.cshtml
@{
ViewData["Title"] = "Home Page";
}

<div class="text-center">
    <form name="searchForm" action="/Search" method="get" onSubmit="formAction(this)">
        <input type="text" name="q" />
        <br />
        <button type="submit">Submit</button>
    </form>
</div>
Search.cshtml
@model IEnumerable<Okta.Blog.DapperExample.Models.Question>

<h1>@ViewData["Title"]</h1>

@foreach (var item in Model)
{
    <div>
    <a href="/QuestionDetails/@item.Id"><h2>@item.Title</h2></a>
    @Html.Raw(item.Body)
    </div>
}
QuestionDetails.cshtml
@model Okta.Blog.DapperExample.Models.QuestionDetails

<h1>@Model.Question.Title</h1>

@Html.Raw(Model.Question.Body)

<hr />

<h1>Answers</h1>

<style>
.answer {
    padding: 1rem;
    padding-left: 3rem;
}

.answer.alt {
    background-color: #eee;
}
</style>

@{
    var i = 0;
    var style = "alt";
}

@foreach (var item in Model.Answers)
{
    <div class="answer @style">
    @Html.Raw(item.Body)

    <p style="font-weight:bold; font-style:italic;">
    @item.User.DisplayName
    </p>
    </div>

    {
        i++;
        style = i % 2 == 0 ? "alt" : "";
    }
}
Adding the Controller Methods
Let’s go back to our HomeController where we added our service earlier and add two methods. Since the service does all the heavy lifting, our controller winds up being pretty simple.
[Route("/Search")]
public async Task<IActionResult> Search([FromQuery]string q)
{
    var questions = await _questionService.AskAQuestion(q);

    ViewData["Title"] = q;

    return View(questions);
}

[Route("/QuestionDetails/{id}")]
public async Task<IActionResult> QuestionDetails(int id)
{
    var questionDetails = await _questionService.GetQuestionDetails(id);

    ViewData["Title"] = questionDetails.Question.Title;

    return View(questionDetails);
}
With all of this in place, we should now be able to ask some questions.
Testing
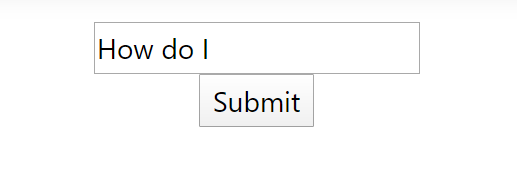
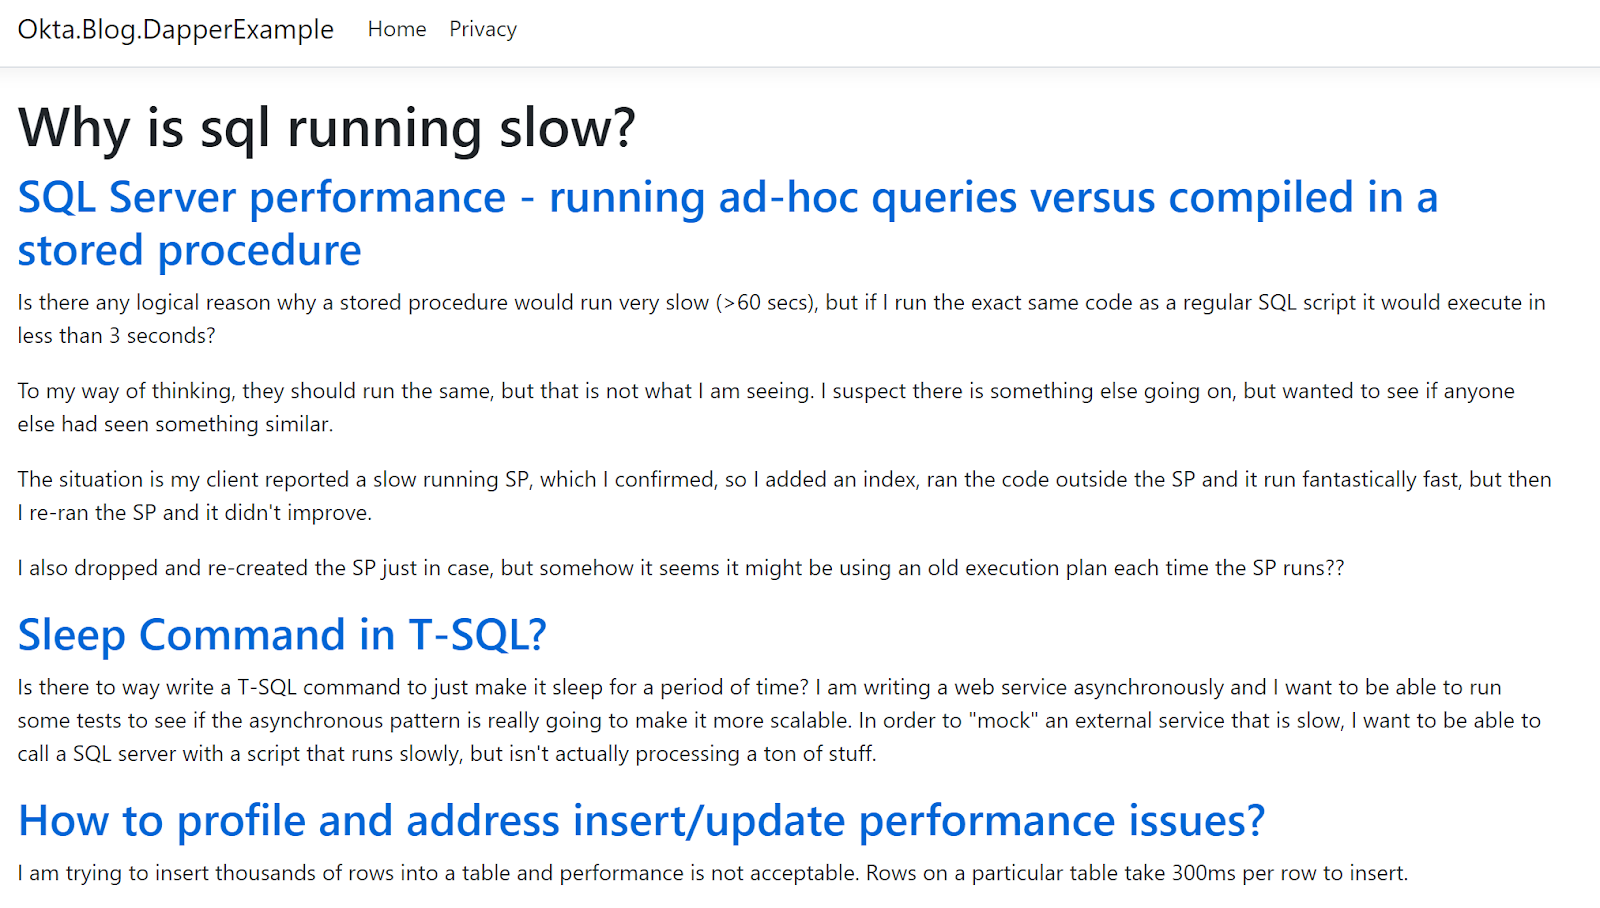
Press F5 to debug the solution. On the homepage there should be an input box and a submit button. Try searching for “How do I” minus the quotes in the box.
You can see we get some results:
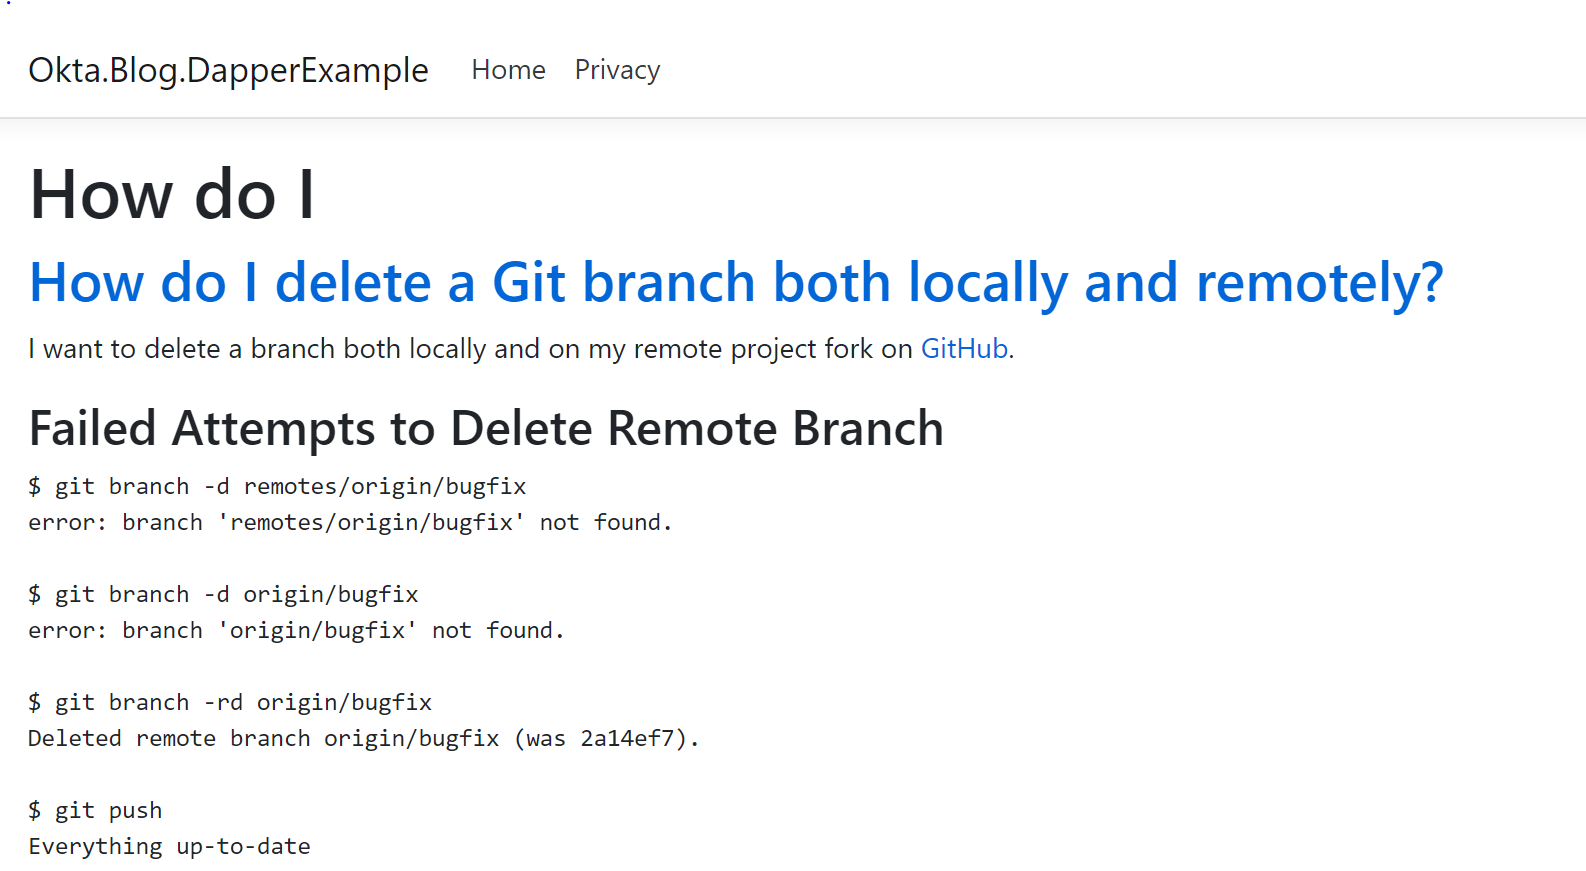
The problem is as soon as we try to add any complexity to the question we get nothing. Likewise, at this point your queries are probably running very slowly.
Optimization
Now it is time to optimize. To do that, we’ll be using Full-Text Indexes from SQL Server to improve our results and our speed.
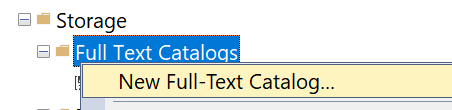
Go back to SQL Server Management Studio. In the StackOverflow2010 database, open Storage, right-click on Full-Text Catalogs and click new Full-Text Catalog.
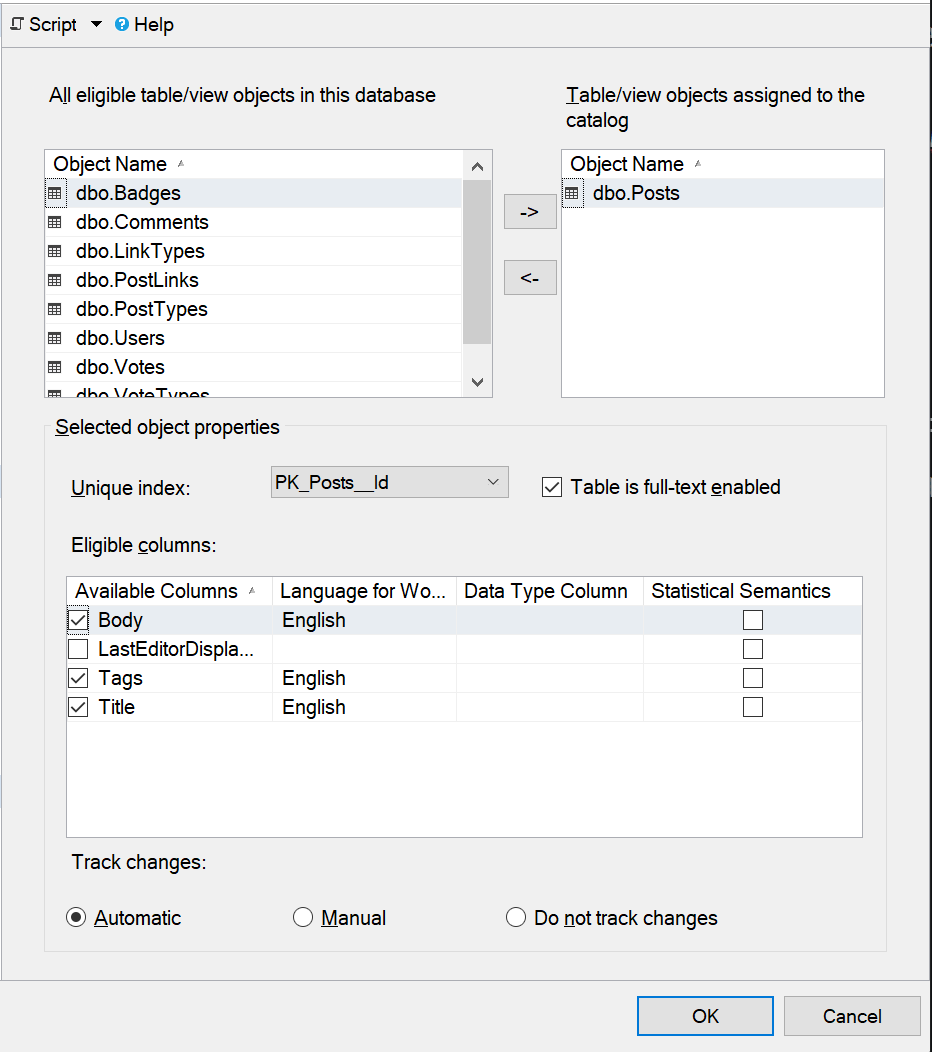
In this window, go to Tables/Views and click dbo.Posts on the left window and click the move to the right button. Then click Body, Tags, and Title for our indexed columns.
Since we are in SQL, let’s go ahead and add a few more indexes that will be useful given our business requirements.
Right-click dbo.Posts and click Design.

Right-click anywhere and click Indexes/Keys.
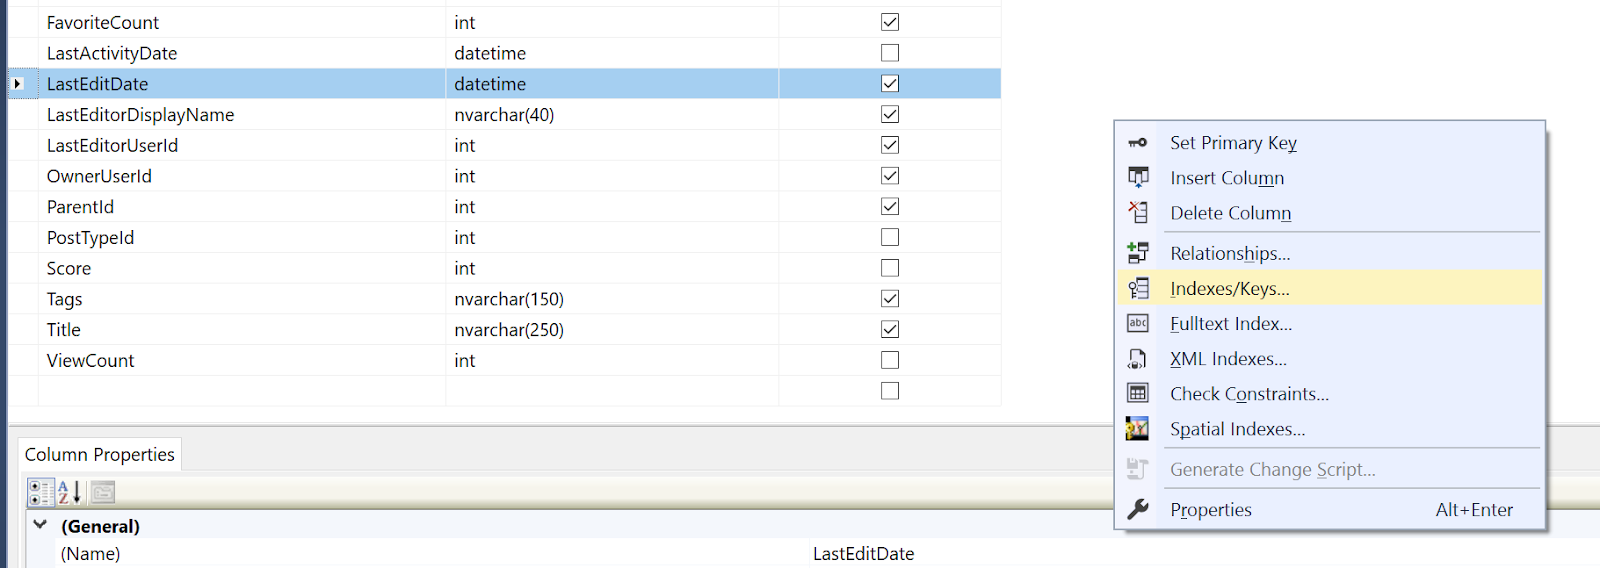
Click Add and under the name field call it IX_Posts_Type_Owner.
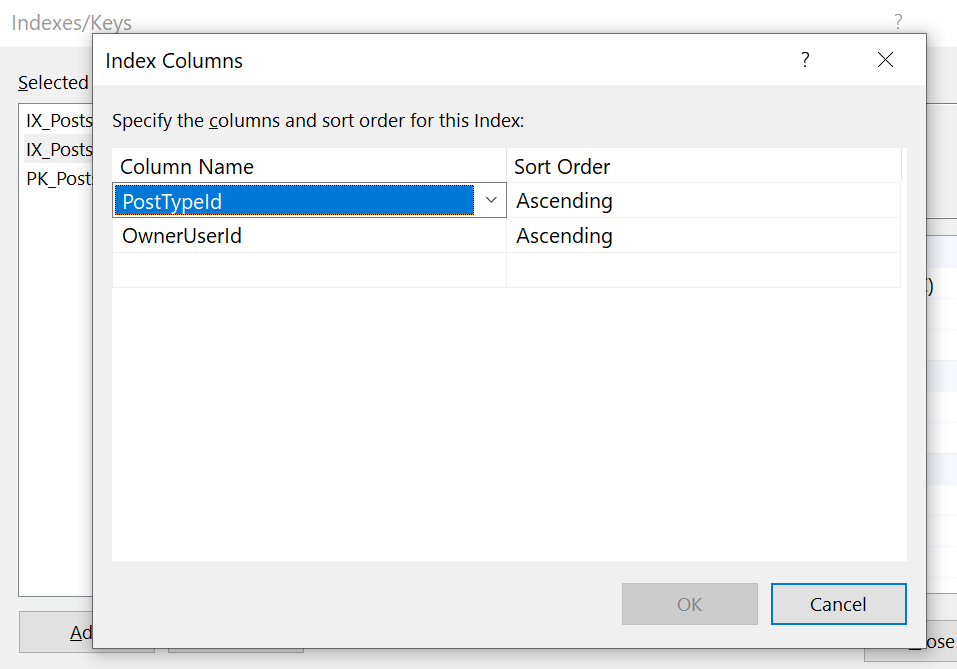
Then click on the Columns field, then click the ellipsis.

We’re going to add two columns: PostTypeId and OwnerUserId. This will let us quickly sort the table into questions or answers and then filter down to a specific user if we want. This is advantageous because we effectively get two performance boosts for the price of one. If we don’t include the OwnerUserId in a query but do specify the PostTypeId, we can quickly filter to just questions or answers which then makes for fewer rows SQL has to search through for any subsequent filters.
Let’s add one more index. This time only for ParentId. This will let us rapidly filter down to the answers for a given question.
Update the service
Let’s update the query we are using in our AskAQuestion method to the following;
var v2sql =
    @"SELECT *
    FROM
    PostWithUser

    INNER JOIN
    FREETEXTTABLE(Posts, (Body,Tags,Title), @Question) textSearch
    ON
    PostWithUser.Id = textSearch.[Key]

    WHERE
    [PostTypeId] = 1

    ORDER BY
    textSearch.Rank DESC

    OFFSET @Skip ROWS FETCH NEXT @Take ROWS ONLY;";
The FREETEXTABLE is a part of the FullText service in SQL and lets us specify a table, columns, and an arbitrary set of text that it then uses to rank the members of the table. We can then sort by that rank and filter to the questions like before.
Let’s see how our results perform now:
MUCH BETTER! Now the service is running really fast and is providing some great results.
Recap
To recap of what you’ve learned:
- Use smaller sets of data when defining your methods
- Multiple result sets are often faster because you can better tailor them to your use case
- Your query will only ever be as fast as your data design will allow
- Use multi-column indexes for double dipping performance in certain use cases
- Okta makes it easy to add security to your websites
What a ride! I hope with some of these tools you’ll be making your services faster than ever.
Learn More About ASP.NET and Okta
If you are interested in learning more about how Okta can help speed up your development workflow and enhance your security, check out some of these other helpful articles:
- ASP.NET Core 3.0 MVC Secure Authentication
- 5 Minute Serverless Functions Without an IDE
- Create Login and Registration in Your ASP.NET Core App
- Build Secure Microservices with AWS Lambda and ASP.NET Core
- Build a CRUD App with ASP.NET Core and Typescript
- Build a GraphQL API with ASP.NET Core
Want to be notified when we publish more of these? Follow @oktadev on Twitter, subscribe to our YouTube channel, or follow us on LinkedIn. If you have a question, please leave a comment below!
Okta Developer Blog Comment Policy
We welcome relevant and respectful comments. Off-topic comments may be removed.