Add Authentication to Your Xamarin App with OpenID Connect
Here at Okta we ❤️ Xamarin – it’s so much fun to build with! If you’re a Xamarin developer today, there’s a solid chance you’ll have to develop an app that requires users to sign in. Once you start doing that, you need to keep two things in mind: keep the authentication process simple for users, and keep their personal information secure. It would be nice if those things were easy, but it’s not always straightforward. Adding authentication to your Xamarin app with OpenID Connect assures that you achieve both.
If you’ve built a web or mobile app before, you know that all the user management pieces are a royal pain. With Okta, you can have all that user management “stuff” out-of-the-box so you can get on with what you really care about – your app! By the time you’re done with this tutorial (less than 30 minutes, I promise), you’ll have a fully-working Xamarin app with authentication via OpenID Connect.
This blog post focuses on developing a Xamarin.Forms mobile app, with authentication via Okta, OpenID Connect, and AppAuth. If you aren’t familiar with Xamarin, follow our post about building a simple app to learn the basics. Since the app will run on both iOS and Android, we’ll need to write our Xamarin authentication code for both platforms, and this can be hard to do from scratch. As you’ll see, OpenID Connect and Okta make this easy!
Although we’ll develop a Xamarin.Forms solution that uses Okta, the authentication code can be easily copy-pasted into a traditional (non-Forms) Xamarin app, too.
If you want to skip straight to a demo, you can download our whole Xamarin authentication with OpenID Connect example from GitHub!
Let’s get started. First, you’ll need to create an Okta developer account to store your users.
Note: In May 2025, the Okta Integrator Free Plan replaced Okta Developer Edition Accounts, and the Okta CLI was deprecated.
We preserved this post for reference, but the instructions no longer work exactly as written. Replace the Okta CLI commands by manually configuring Okta following the instructions in our Developer Documentation.
What is Okta?
Okta is an API service that allows developers to create, edit, and securely store user accounts and user account data, and connect them with one or multiple applications. Our API enables you to:
- Authenticate and authorize your users
- Store data about your users
- Perform password-based and social login
- Secure your application with multi-factor authentication
- And much more! Check out our Product Documentation
In short: we make user account management a lot easier, more secure, and more scalable than what you’re probably used to.
This blog post focuses on developing a Xamarin.Forms mobile app, with authentication via Okta, OpenID Connect, and AppAuth. If you aren’t familiar with Xamarin, check out our post about building a simple app to learn the basics.
Since the app will run on both iOS and Android, we’ll need to write our Xamarin authentication code for both platforms, and this can be hard to do from scratch. As you’ll see, OpenID Connect and Okta make this easy! Although we’ll develop a Xamarin.Forms solution that uses Okta, the authentication code can be easily copy-pasted into a traditional (non-Forms) Xamarin app, too.
Ready to get started? Register for a free developer account!
Get Started with Xamarin Forms: Add Okta for Authentication
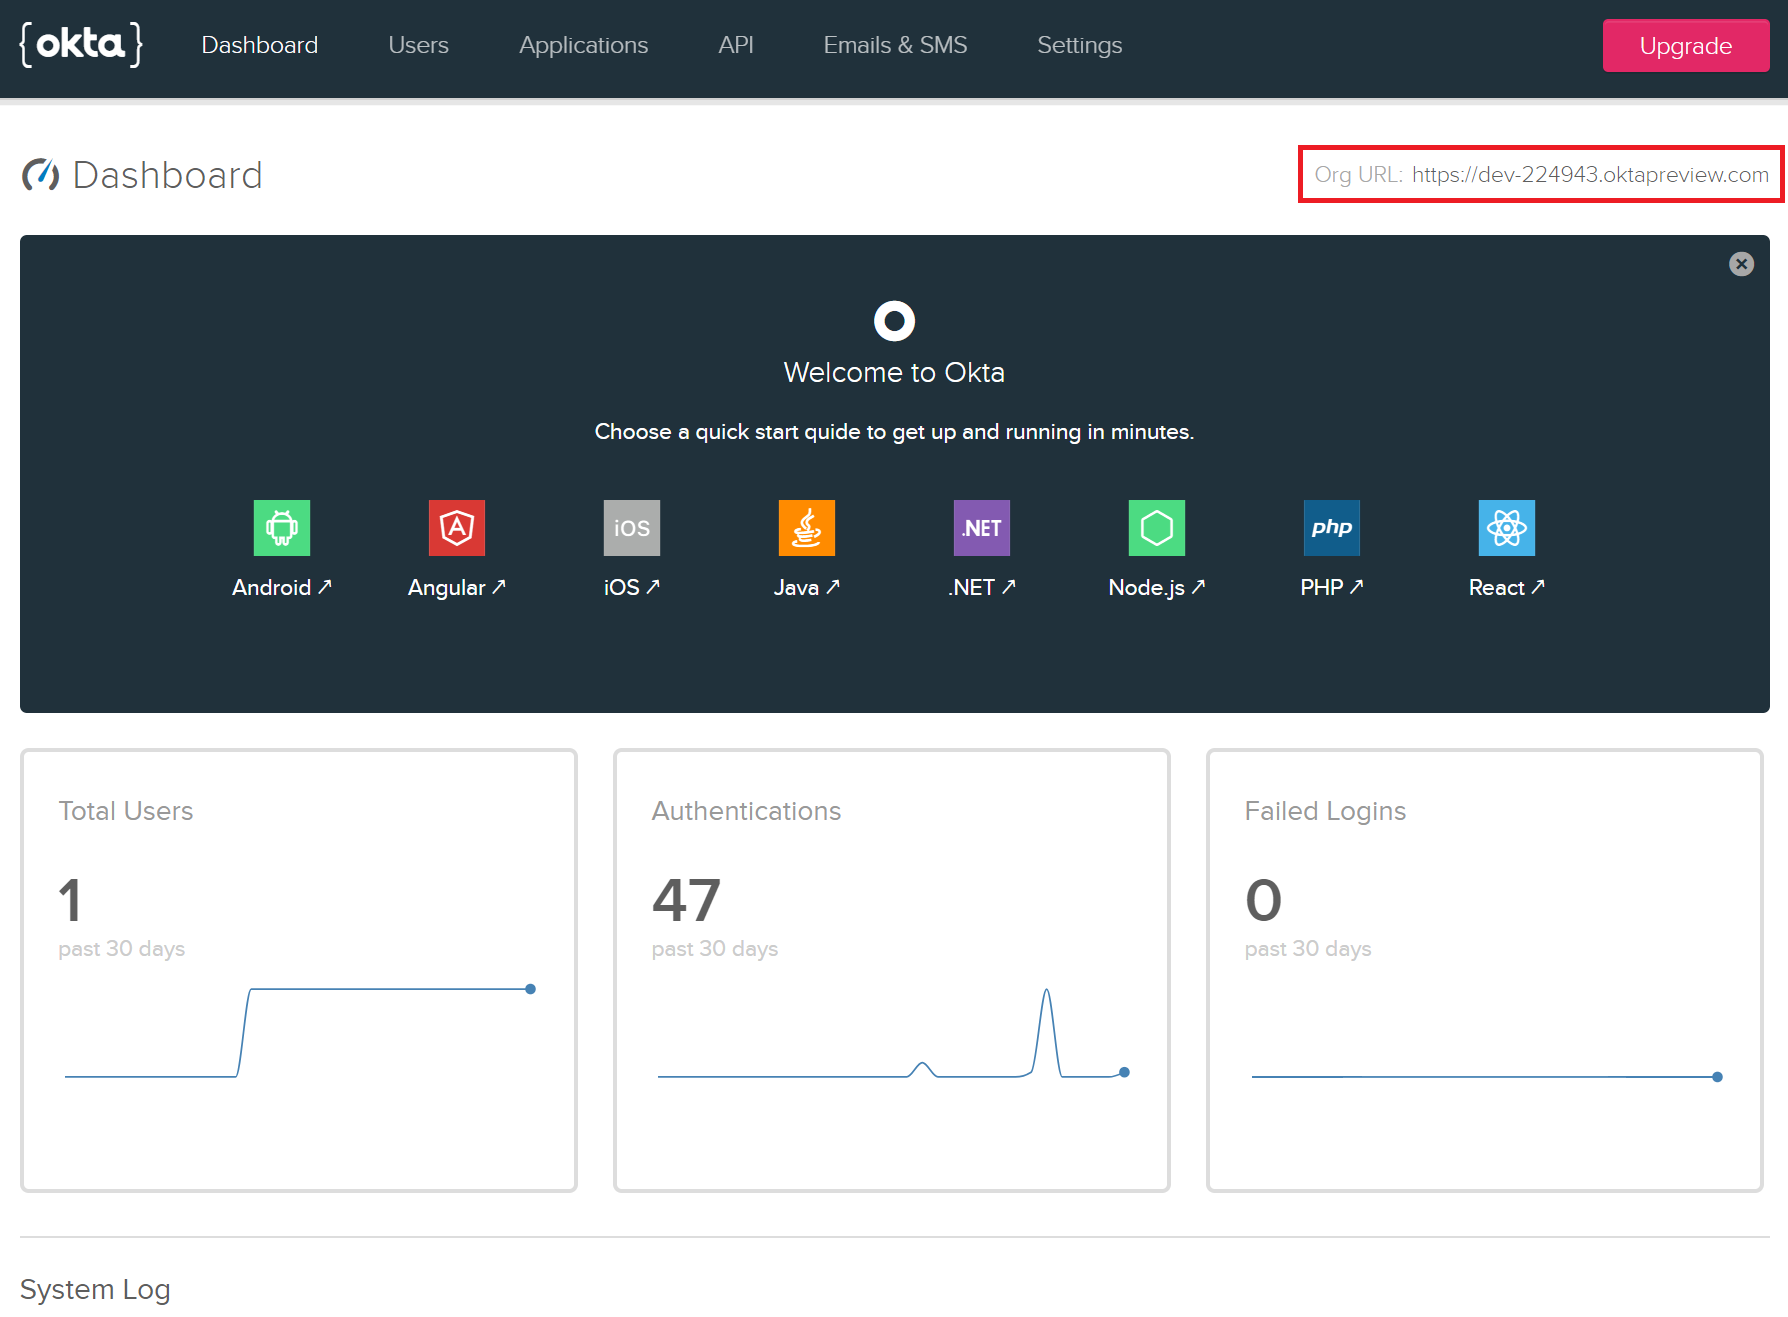
Once you’re in your account, create a new native app in the Applications tab. From there you need to collect these values which you’ll need when implementing authentication in your mobile app:
- Client ID: get this from the “General” tab of the app you’ve made.
- Redirect URI: you can also get this from the “General” tab of the app you’ve made. Example:
{yourOktaScheme}:/callback - Redirect Scheme: this is the Redirect URI without the “:/callback” suffix. Example:
{yourOktaScheme} - The Org URL value from the Okta Dashboard page. Example:
https://{yourOktaDomain}
AppAuth for Authentication in Xamarin Forms
Next, you need to create a new Xamarin Forms project, with Android and iOS support. You can read more about these steps in our getting started with Xamarin blog post. For this tutorial, choose the .NET Standard code sharing strategy.
Once you have the project ready, you need to install the System.IdentityModel.Tokens.Jwt package in the shared project. You’ll need it to extract the data from token you receive once the user logs in.
You’ll be using a library called AppAuth to help you perform the actual authentication flow on each platform. AppAuth makes it easy to use industry-standard best practices for OpenID Connect in Xamarin. You don’t have to worry about differences between device versions, OS versions, etc. You just use the AppAuth library. AppAuth is compatible with OIDC, so it’s also compatible with Okta!
Since you have to implement the authentication process on each platform separately, and the AppAuth response is a different type on each platform, you’ll declare a class with enough info for your sample to return authentication process results to your shared code.
Create an AuthInfo class in the shared project:
public class AuthInfo
{
    public bool IsAuthorized { get; set; }
    public string AccessToken { get; set; }
    public string RefreshToken { get; set; }
    public string Scope { get; set; }
    public string IdToken { get; set; }
}
Now that you’ve declared the AuthInfo class, you can declare the interface that is an essential part of the whole exercise. This interface will be implemented with platform-specific code on each platform.
public interface ILoginProvider
{
    Task<AuthInfo> LoginAsync();
}
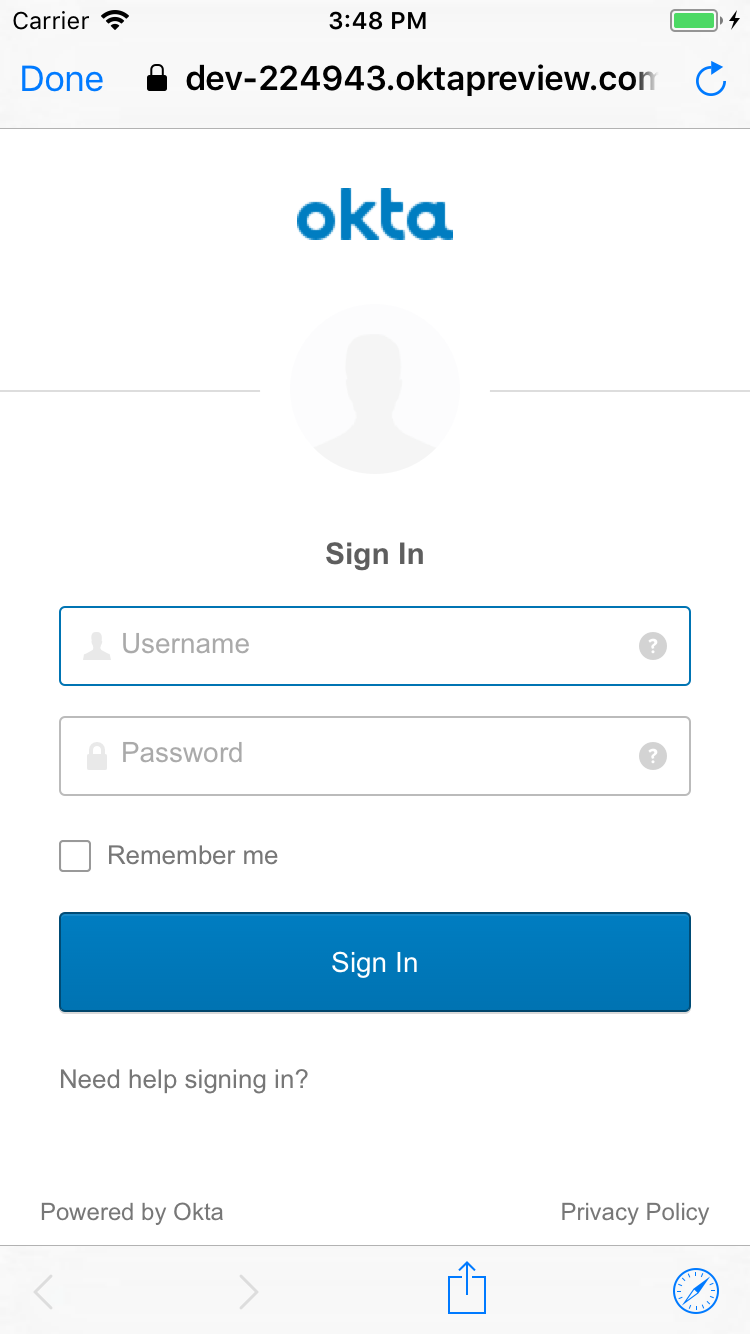
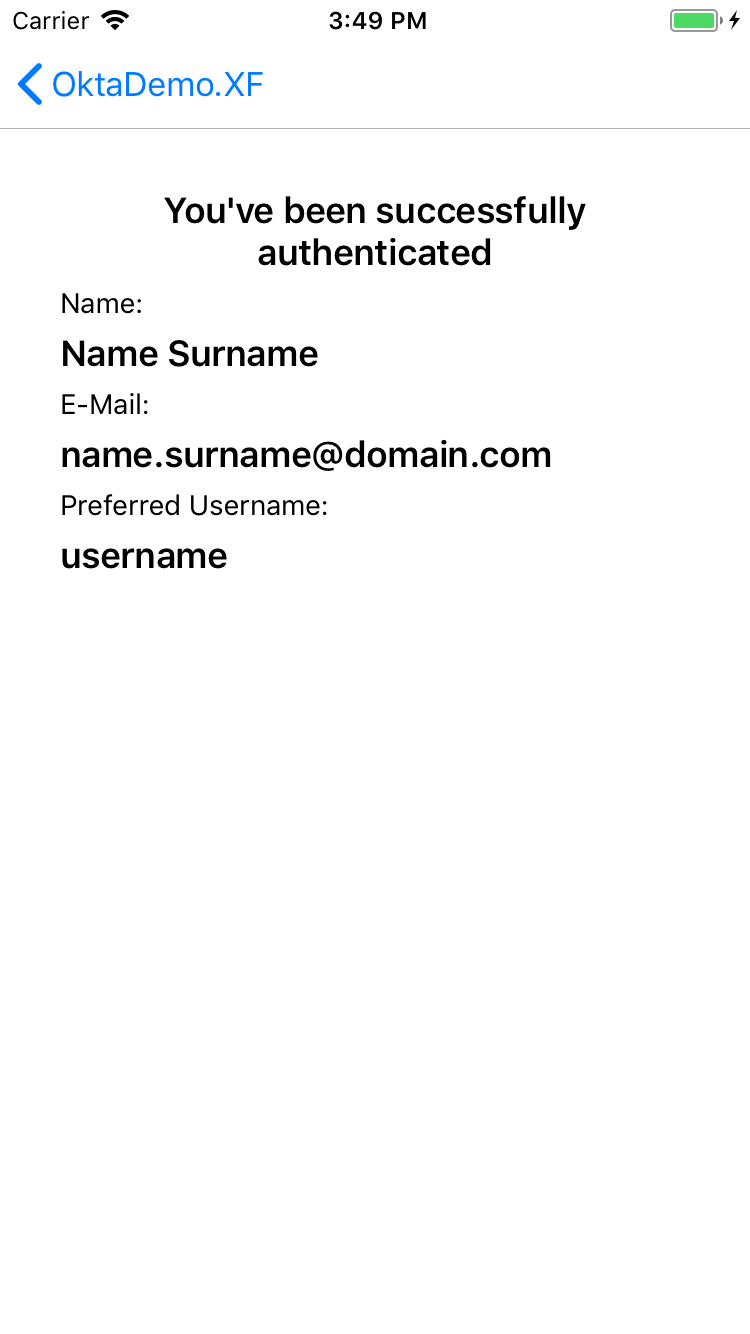
Our sample consists of two pages. The first has a button that starts the authentication process, and the second displays data about the user after they log in. You can take a look at their source code on GitHub.
On iOS, it looks like:
 |
 |
 |
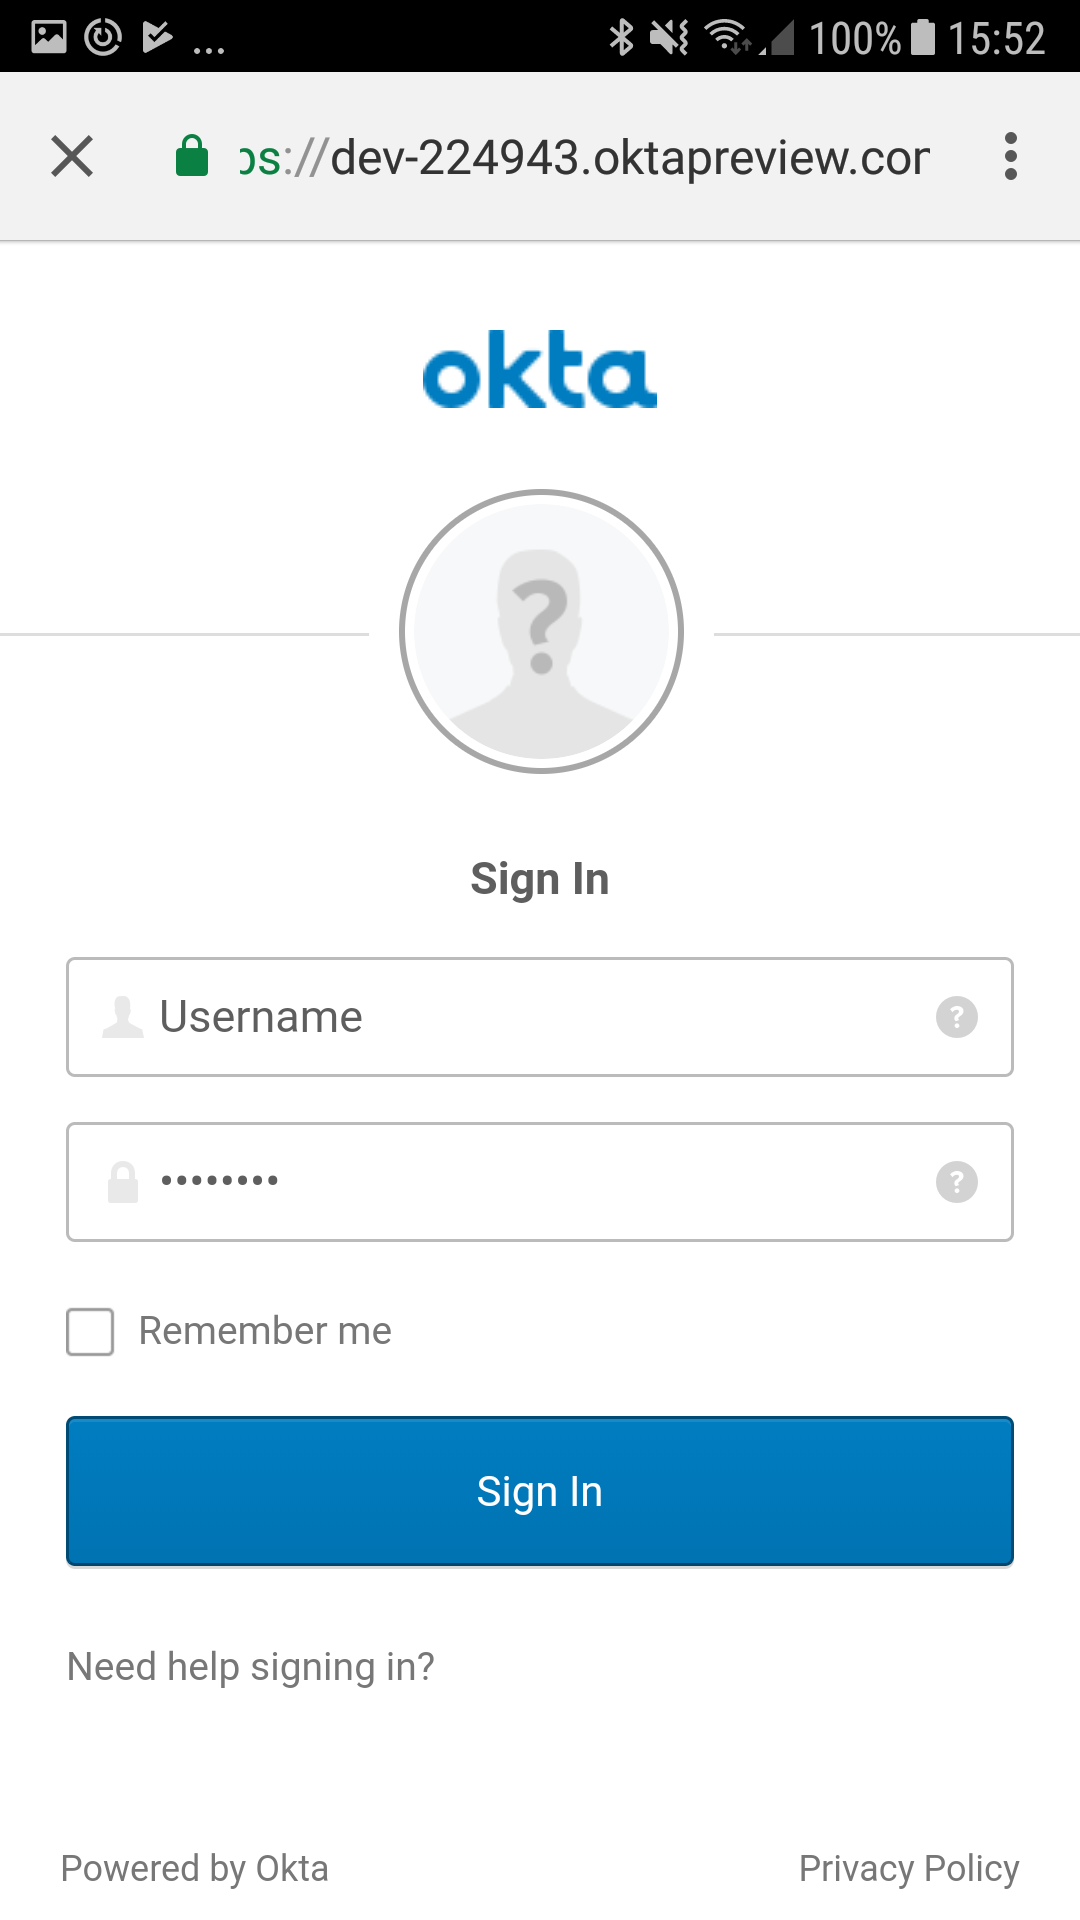
On Android, it looks like:
 |
 |
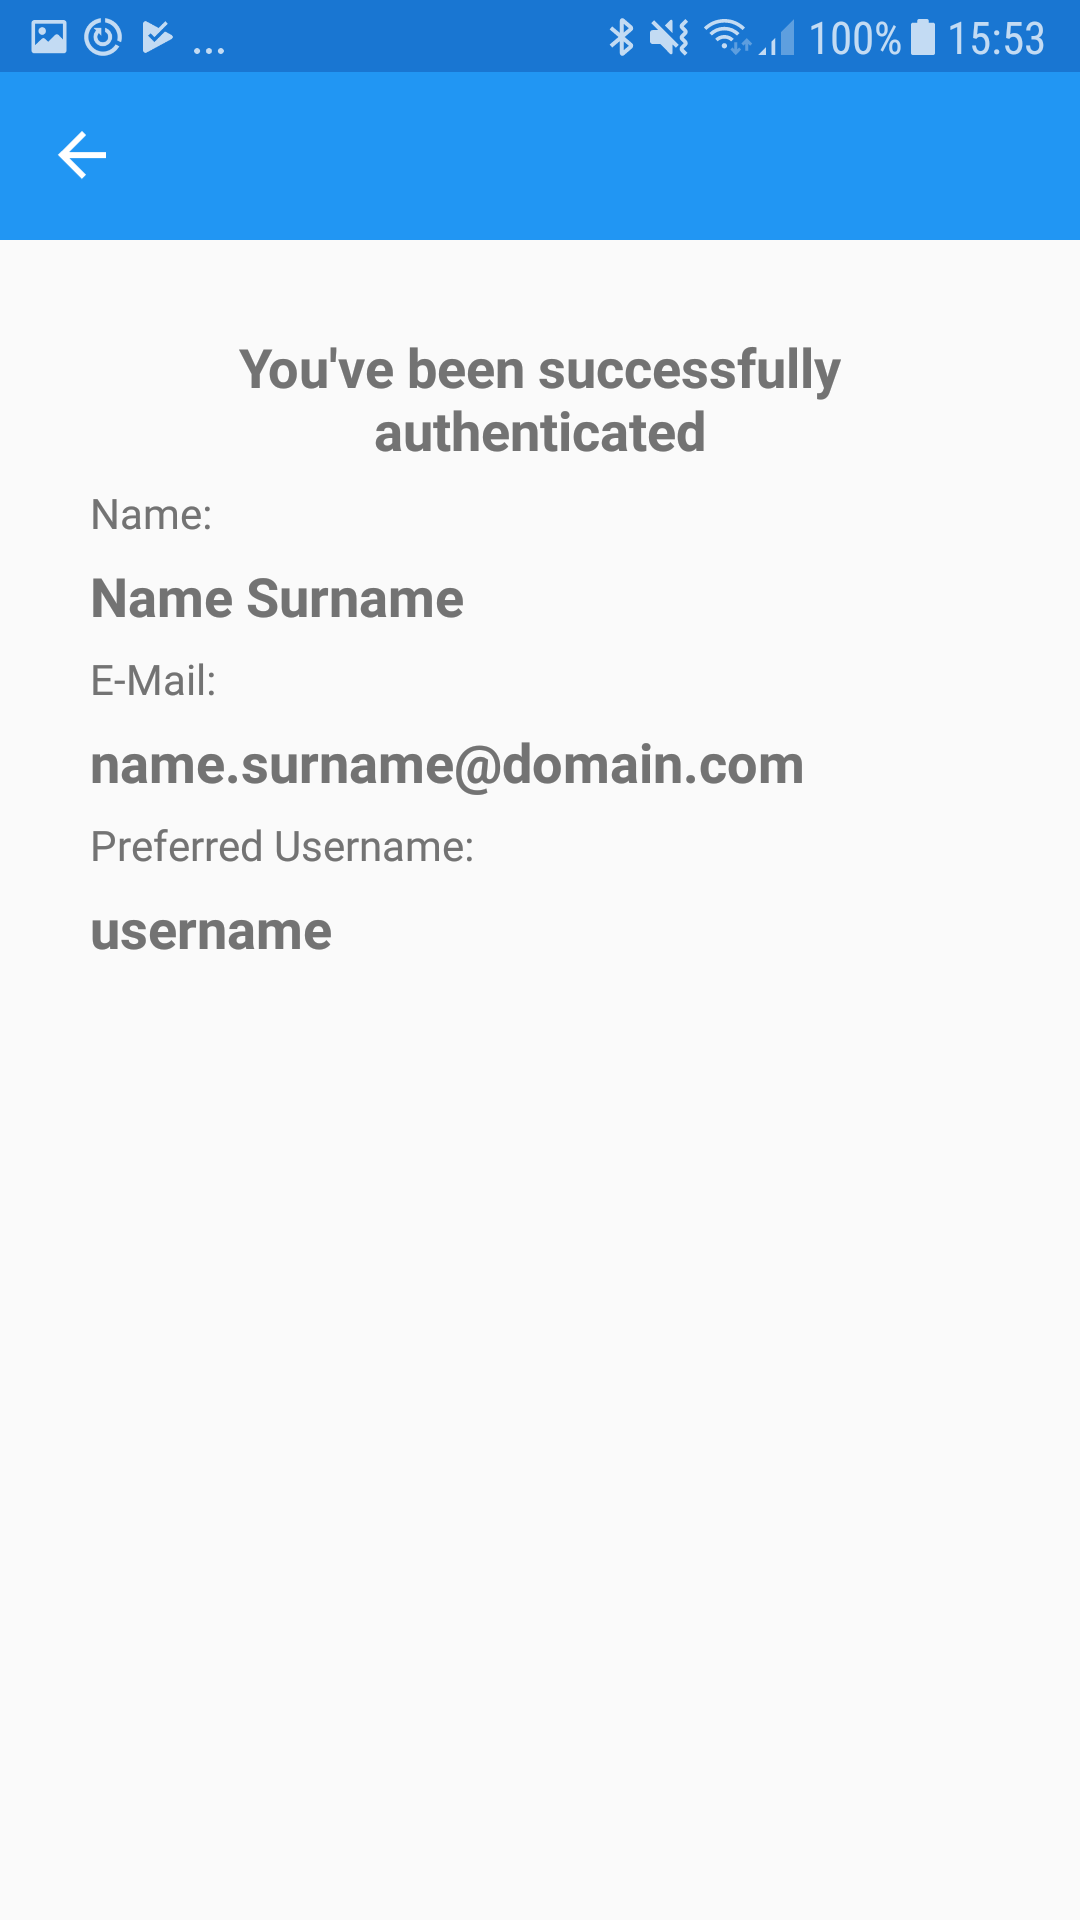 |
The only important code snippet from those two pages is the one that gets triggered when someone clicks on Log in. In that code snippet you’re using the DependencyService to get an instance of a class that implemented your ILoginProvider interface. After that, you call the LoginAsync method, and await the result. If the process was a success you’ll use the JwtSecurityTokenHandler package to decode the JWTs you’ve received from Okta, and try to extract some info about the user from them.
private async void OnLogInButtonClicked(object sender, EventArgs e)
{
    var loginProvider = DependencyService.Get<ILoginProvider>();
    IsBusy = true;
    var authInfo = await loginProvider.LoginAsync();
    IsBusy = false;

    if (string.IsNullOrWhiteSpace(authInfo.AccessToken) || !authInfo.IsAuthorized)
    {
        Device.BeginInvokeOnMainThread(async () =>
        {
            await DisplayAlert("Error", "The app can't authenticate you", "OK");
        });
    }
    else
    {
        //TODO: Save the access and refresh tokens somewhere secure

        var handler = new JwtSecurityTokenHandler();
        var jsonToken = handler.ReadJwtToken(authInfo.IdToken);
        var claims = jsonToken?.Payload?.Claims;

        var name = claims?.FirstOrDefault(x => x.Type == "name")?.Value;
        var email = claims?.FirstOrDefault(x => x.Type == "email")?.Value;
        var preferredUsername = claims?
            .FirstOrDefault(x => x.Type == "preferred_username")?.Value;

        Device.BeginInvokeOnMainThread(async () =>
        {
            await Navigation.PushAsync(new AuthInfoPage(name, email, preferredUsername));
        });
    }
}
You also need to declare a class with constants that are used in the authentication process. Create another class in the shared project called Constants:
public class Constants
{
    public const string AuthStateKey = "authState";
    public const string AuthServiceDiscoveryKey = "authServiceDiscovery";

    public const string ClientId = "{clientId}";
    public const string RedirectUri = "{redirectUri}";
    public const string OrgUrl = "https://{yourOktaDomain}";
    public const string AuthorizationServerId = "default";

    public static readonly string DiscoveryEndpoint =
        $"{OrgUrl}/oauth2/{AuthorizationServerId}/.well-known/openid-configuration";


    public static readonly string[] Scopes = new string[] {
        "openid", "profile", "email", "offline_access" };
}
Xamarin Authentication on Android
First of all, we need to install three NuGet packages:
- Nito.AsyncEx
- Xamarin.Android.Support.CustomTabs
- Xamarin.OpenId.AppAuth.Android
You’ll start by creating a class that implements the ILoginProvider interface from the shared project. One important thing to note is the attribute above the namespace line, which you’ll use to register this implementation with the DependencyService.
[assembly: Xamarin.Forms.Dependency(typeof(LoginProvider))]
namespace OktaDemo.XF.Droid.Implementations
{
    public class LoginProvider : ILoginProvider
    {
        private readonly AuthorizationService _authService;
        private AuthState _authState;
        internal static LoginProvider Current;
        private readonly AsyncAutoResetEvent _loginResultWaitHandle
            = new AsyncAutoResetEvent(false);

        public LoginProvider()
        {
            Current = this;
            _authService = new AuthorizationService(MainActivity.Instance);
        }

        public async Task<AuthInfo> LoginAsync()
        {
            // TODO
        }

        private void MakeAuthRequest(
            AuthorizationServiceConfiguration serviceConfig
            AuthState authState)
        {
            // TODO
        }


        private PendingIntent CreatePostAuthorizationIntent(
            Context context,
            AuthorizationRequest request,
            AuthorizationServiceDiscovery discoveryDoc,
            AuthState authState)
        {
            // TODO
        }

        internal void NotifyOfCallback(Intent intent)
        {
            // TODO
        }

        private void ReceivedTokenResponse(
            TokenResponse tokenResponse,
            AuthorizationException authException)
        {
            // TODO
        }
    }
}
The whole process starts when you call LoginAsync. The workflow is to fetch a service configuration using the discovery endpoint, make an authentication request, and await the result.
public async Task<AuthInfo> LoginAsync()
{
    try
    {
        var serviceConfiguration = await AuthorizationServiceConfiguration.FetchFromUrlAsync(
            Android.Net.Uri.Parse(Constants.DiscoveryEndpoint));

        MakeAuthRequest(serviceConfiguration, new AuthState());
        await _loginResultWaitHandle.WaitAsync();
    }
    catch (AuthorizationException ex)
    {
        Console.WriteLine("Failed to retrieve configuration:" + ex);
    }

    return new AuthInfo()
    {
        IsAuthorized = _authState?.IsAuthorized ?? false,
        AccessToken = _authState?.AccessToken,
        IdToken = _authState?.IdToken,
        RefreshToken = _authState?.RefreshToken,
        Scope = _authState?.Scope
    };
}
The previous method relies on MakeAuthRequest(), which creates an authentication request, creates an intent using it, and starts the authentication request:
private void MakeAuthRequest(
    AuthorizationServiceConfiguration serviceConfig,
    AuthState authState)
{
    var authRequest = new AuthorizationRequest.Builder(
            serviceConfig, Constants.ClientId,
            ResponseTypeValues.Code,
            Android.Net.Uri.Parse(Constants.RedirectUri))
        .SetScope(string.Join(" ", Constants.Scopes))
        .Build();

    var postAuthorizationIntent = CreatePostAuthorizationIntent(
        MainActivity.Instance, authRequest, serviceConfig.DiscoveryDoc, authState);

    _authService.PerformAuthorizationRequest(authRequest, postAuthorizationIntent);
}
The MakeAuthRequest() method calls the CreatePostAuthorizationIntent() method to create an Intent that will guide us back to our app, after Okta logs the user in:
private PendingIntent CreatePostAuthorizationIntent(
    Context context,
    AuthorizationRequest request,
    AuthorizationServiceDiscovery discoveryDoc,
    AuthState authState)
{
    var intent = new Intent(context, typeof(MainActivity));
    intent.PutExtra(Constants.AuthStateKey, authState.JsonSerializeString());

    if (discoveryDoc != null)
    {
        intent.PutExtra(
            Constants.AuthServiceDiscoveryKey,
            discoveryDoc.DocJson.ToString());
    }

    return PendingIntent.GetActivity(context, request.GetHashCode(), intent, 0);
}
The redirect from Okta back to your Xamarin app will happen using a custom URL scheme. This means the OS will switch back to your app, which needs to be be able to handle the incoming callback from Okta. This will be handled by the NotifyOfCallback method (and some code you’ll write later):
internal void NotifyOfCallback(Intent intent)
{
    try
    {
        if (!intent.HasExtra(Constants.AuthStateKey))
        {
            _authState = null;
        }
        else
        {
            try
            {
                _authState = AuthState.JsonDeserialize(intent.GetStringExtra(Constants.AuthStateKey));
            }
            catch (JSONException ex)
            {
                Console.WriteLine("Malformed AuthState JSON saved: " + ex);
                _authState = null;
            }
        }
        if (_authState != null)
        {
            AuthorizationResponse response = AuthorizationResponse.FromIntent(intent);
            AuthorizationException authEx = AuthorizationException.FromIntent(intent);
            _authState.Update(response, authEx);

            if (response != null)
            {
                Console.WriteLine("Received AuthorizationResponse.");
                try
                {
                    var clientAuthentication = _authState.ClientAuthentication;
                }
                catch (ClientAuthenticationUnsupportedAuthenticationMethod ex)
                {
                    _loginResultWaitHandle.Set();

                    Console.WriteLine(
                        "Token request cannot be made, client authentication for the token endpoint could not be constructed: " +
                        ex);

                    return;
                }

                _authService.PerformTokenRequest(response.CreateTokenExchangeRequest(), ReceivedTokenResponse);
            }
            else
            {
                Console.WriteLine("Authorization failed: " + authEx);
            }
        }
        else
        {
            _loginResultWaitHandle.Set();
        }
    }
    catch (Exception)
    {
        _loginResultWaitHandle.Set();
    }
}
The final method to write is ReceivedTokenResponse(), where you try updating the AuthState, and finally tell the LoginAsync method that it may proceed with returning the result.
private void ReceivedTokenResponse(TokenResponse tokenResponse, AuthorizationException authException)
{
    try
    {
        _authState.Update(tokenResponse, authException);
    }
    catch (Exception ex)
    {
        Console.WriteLine($"Exception: {ex.Message}");
    }
    finally
    {
        _loginResultWaitHandle.Set();
    }
}
Next, you need to refactor our MainActivity a bit. Since we don’t instantiate a new MainActivity when Okta calls back to your app, you need to set the LaunchMode to SingleTask in the attribute above your MainActivity class. The LoginProvider implementation needs access to your MainActivity, so you’re going to add a static property to MainActivity to your class, which will be a “pointer” to your MainActivity instance:
[Activity(Label = "OktaDemo.XF", Icon = "@drawable/icon", Theme = "@style/MainTheme", MainLauncher = true, ConfigurationChanges = ConfigChanges.ScreenSize | ConfigChanges.Orientation,
    LaunchMode = LaunchMode.SingleTask)]
public class MainActivity : global::Xamarin.Forms.Platform.Android.FormsAppCompatActivity
{
    internal static MainActivity Instance { get; private set; }

    protected override void OnCreate(Bundle bundle)
    {
        Instance = this;

        // Rest of code...
    }

    protected override void OnNewIntent(Intent intent)
    {
        // TODO
    }
}
You need to override the OnNewIntent method, so that you can forward the Intent to NotifyOfCallback method in your LoginProvider:
protected override void OnNewIntent(Intent intent)
{
    base.OnNewIntent(intent);

    if (intent != null && LoginProvider.Current != null)
    {
        LoginProvider.Current.NotifyOfCallback(intent);
    }
}
The last thing you need to tweak on Android is the AndroidManifest.xml file in which you need to add details about the AppAuth activity under your application node, and set the Okta callback scheme:
<?xml version="1.0" encoding="utf-8"?>
<manifest xmlns:android="http://schemas.android.com/apk/res/android" android:versionCode="1" android:versionName="1.0" package="com.companyname.OktaDemo.XF">
	<uses-sdk android:minSdkVersion="15" />
	<application android:label="OktaDemo.XF.Android">
	  <!-- Callback from authentication screen -->
    <activity android:name="net.openid.appauth.RedirectUriReceiverActivity">
      <!-- Filter which captures custom scheme based redirects for Okta authorization requests. -->
      <intent-filter>
        <action android:name="android.intent.action.VIEW" />
        <category android:name="android.intent.category.DEFAULT" />
        <category android:name="android.intent.category.BROWSABLE" />
        <data android:scheme="{reverseDomainName}"/>
      </intent-filter>
    </activity>
  </application>
</manifest>
That’s it! You can test the Android project in an emulator to see how the authentication flow works.
NOTE: There is a known issue with native redirects on Android. For more information, see this issue.
Xamarin Authentication on iOS
For Xamarin authentication for iOS with OpenID Connect you only need to install two packages:
- Nito.AsyncEx
- Xamarin.OpenId.AppAuth.iOS
On iOS, you’ll start by modifying the AppDelegate class. You need to add a property of type IAuthorizationFlowSession which you’ll use to resume the authentication process, and you need to override the OpenUrl method to resume the authentication flow:
    [Register("AppDelegate")]
    public partial class AppDelegate : global::Xamarin.Forms.Platform.iOS.FormsApplicationDelegate
    {
        public IAuthorizationFlowSession CurrentAuthorizationFlow { get; set; }


        public override bool FinishedLaunching(UIApplication app, NSDictionary options)
        // ... (existing code

        public override bool OpenUrl(
            UIApplication application, NSUrl url,
            string sourceApplication, NSObject annotation)
        {
            if (CurrentAuthorizationFlow?.ResumeAuthorizationFlow(url) == true)
            {
                return true;
            }

            // Your additional URL handling (if any) goes here.

            return false;
        }
    }
You’ll continue by creating a class that implements the ILoginProvider interface, with the Dependency attribute at the top that registers it with the DependencyService:
[assembly: Xamarin.Forms.Dependency(typeof(LoginProvider))]
namespace OktaDemo.XF.iOS.Implementations
{
    public class LoginProvider : IAuthStateChangeDelegate, IAuthStateErrorDelegate, ILoginProvider
    {
        private AuthState _authState;

        private readonly AsyncAutoResetEvent _loginResultWaitHandle
            = new AsyncAutoResetEvent(false);

        public async Task<AuthInfo> LoginAsync()
        {
            var redirectUri = new NSUrl(Constants.RedirectUri);

            try
            {
                var configuration = await AuthorizationService
                    .DiscoverServiceConfigurationForDiscoveryAsync(
                        new NSUrl(Constants.DiscoveryEndpoint));

                var request = new AuthorizationRequest(
                    configuration, Constants.ClientId,
                    Constants.Scopes, redirectUri, ResponseType.Code, null);

                // Performs authentication request
                var appDelegate = (AppDelegate) UIApplication.SharedApplication.Delegate;
                appDelegate.CurrentAuthorizationFlow = AuthState.PresentAuthorizationRequest(request,
                    UIKit.UIApplication.SharedApplication.KeyWindow.RootViewController, (authState, error) =>
                    {
                        if (authState != null)
                        {
                            _authState = authState;
                        }
                        else
                        {
                            Console.WriteLine($"Authorization error: {error.LocalizedDescription}");
                            _authState = null;
                        }

                        _loginResultWaitHandle.Set();
                    });
            }
            catch (Exception ex)
            {

                Console.WriteLine($"Error retrieving discovery document: {ex}");
                _authState = null;
                _loginResultWaitHandle.Set();
            }

            await _loginResultWaitHandle.WaitAsync();
            return new AuthInfo()
            {
                IsAuthorized = _authState?.IsAuthorized ?? false,
                AccessToken = _authState?.LastTokenResponse?.AccessToken,
                IdToken = _authState?.LastTokenResponse?.IdToken,
                RefreshToken = _authState?.LastTokenResponse?.RefreshToken,
                Scope = _authState?.LastTokenResponse?.Scope
            };
        }

        public IntPtr Handle { get; }

        public void Dispose()
        {
        }

        void IAuthStateChangeDelegate.DidChangeState(AuthState state)
        {
        }

        void IAuthStateErrorDelegate.DidEncounterAuthorizationError(AuthState state, NSError error)
        {
            Console.WriteLine($"Received authorization error: {error}.");
        }
    }
}
The whole process starts when we call LoginAsync. The workflow is to create a service configuration using the discovery endpoint, make an authentication request, register a callback on the IAuthorizationFlowSession property in AppDelegate, and await the result. Once the callback executes, the LoginAsync method will return the authentication result to the its caller.
The last thing you need to do is to add a code snippet to the Info.plist file so that iOS knows to which app should it return the results from our Okta authentication process:
<key>CFBundleURLTypes</key>
<array>
    <dict>
        <key>CFBundleTypeRole</key>
        <string>Editor</string>
        <key>CFBundleURLSchemes</key>
        <array>
            <string>{reverseDomainName}</string>
        </array>
    </dict>
</array>
That’s it! You can test the iOS project in iOS Simulator to see how the authentication flow works.
Learn More About Xamarin Authentication, and OpenID Connect with Okta
The samples presented here are the basis for implementing authentication into your Xamarin Forms app, as well as “traditional” Xamarin mobile apps. All you have to do to use the code in a non-Forms Xamarin apps is to remove the Xamarin Forms UI, and add your own which will call the same methods.
You can get the full sample code for this Xamarin authentication project from GitHub.
To learn more about Xamarin authentication, OpenID Connect with Xamarin, and Okta, we encourage you to check out the following resources from our developer blog:
- Build an App for iOS and Android with Xamarin
- Build a CRUD App with ASP.NET Core and Angular
- Use OpenID Connect for Authorization in Your ASP.NET Core MVC 4.x App
- Our OpenID Connect Primer in three parts:
- Token Authentication in ASP.NET Core – A Complete Guide
Happy authenticating! 😉
Okta Developer Blog Comment Policy
We welcome relevant and respectful comments. Off-topic comments may be removed.