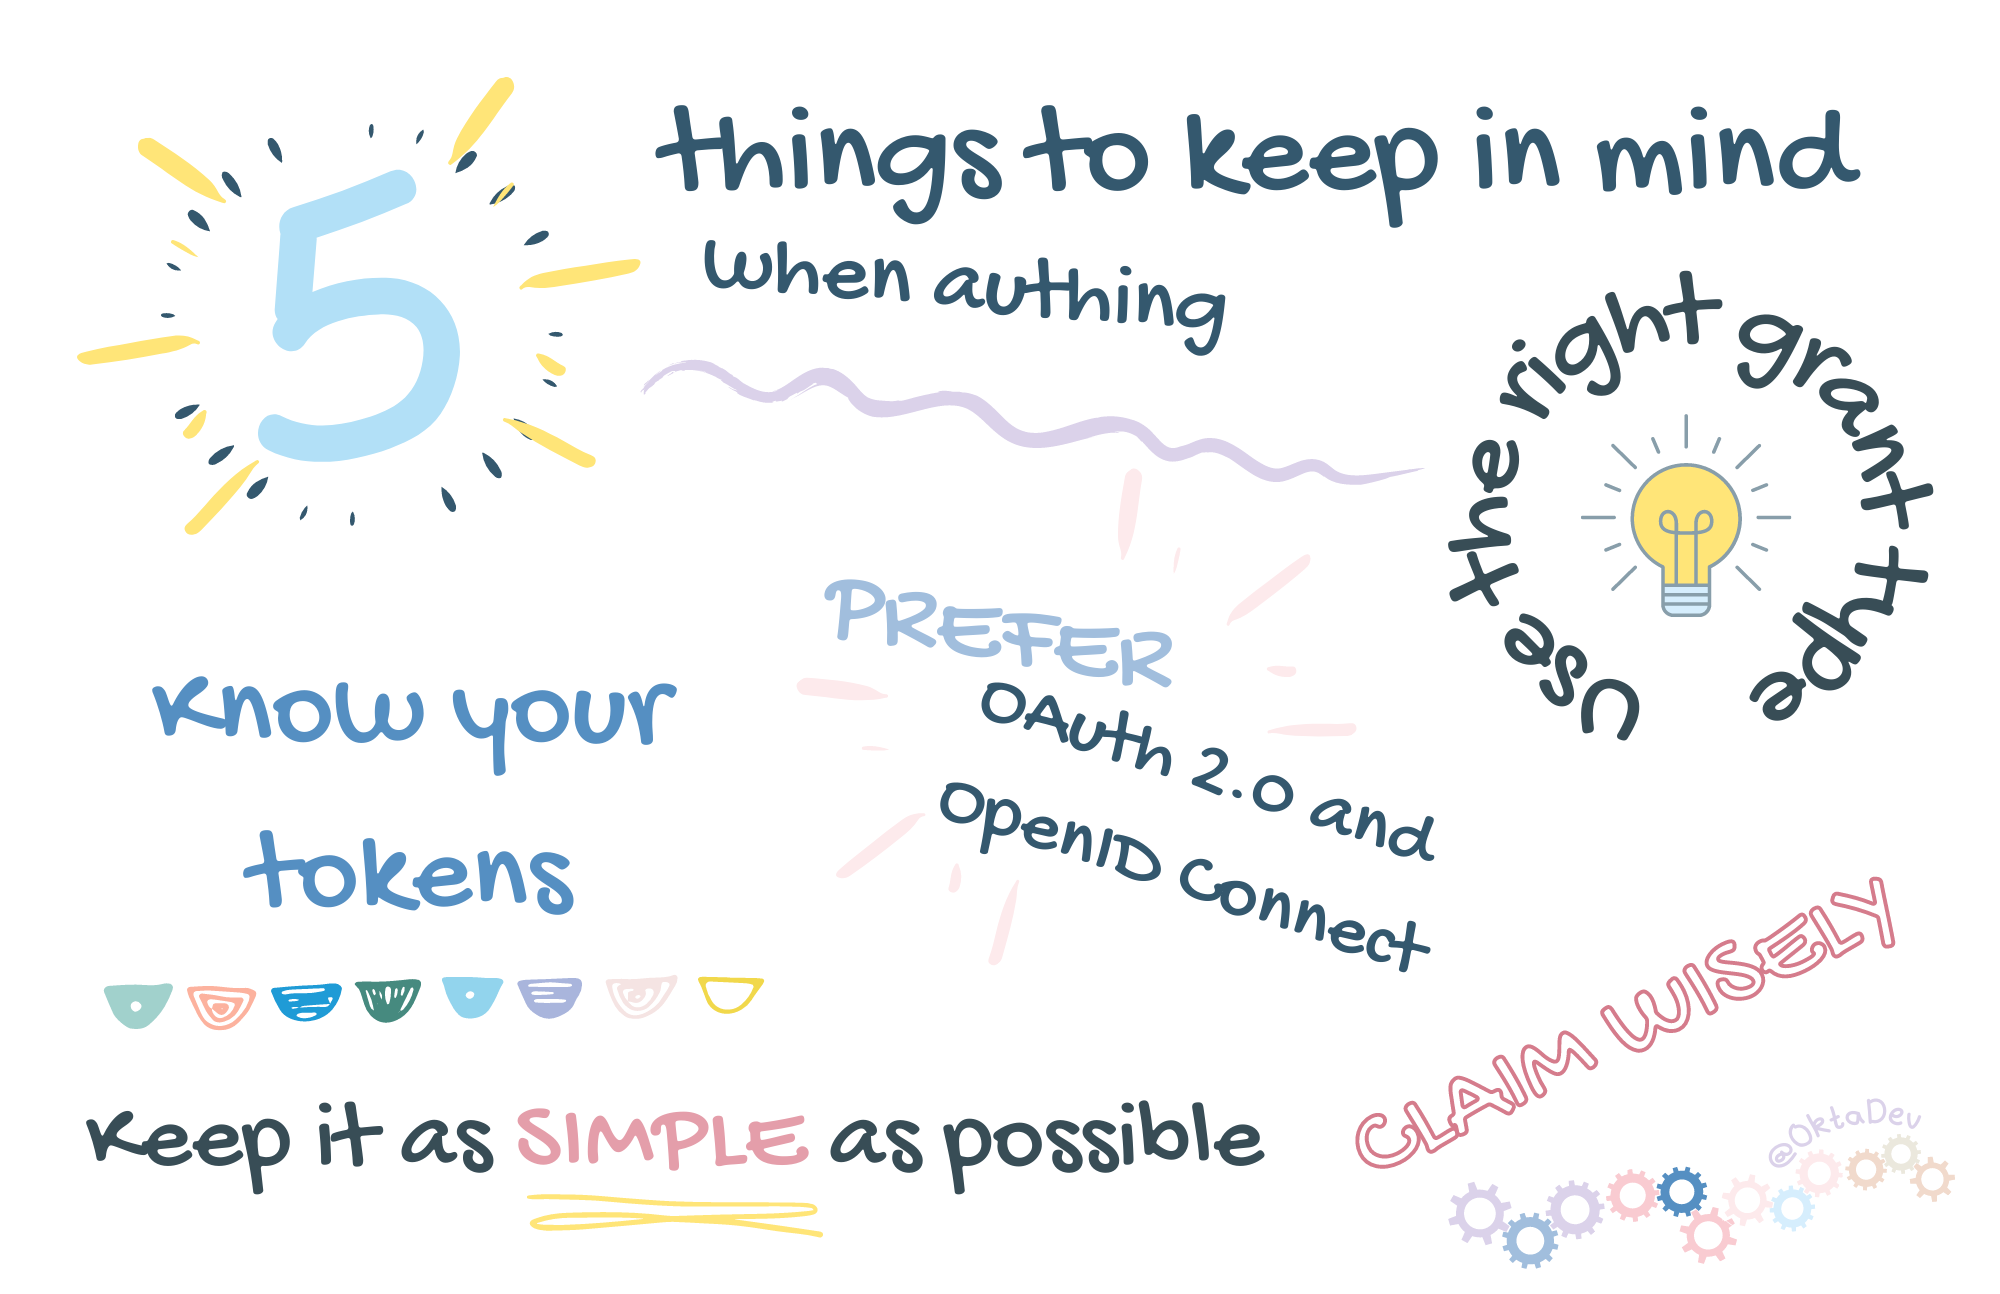
The Things to Keep in Mind about Auth
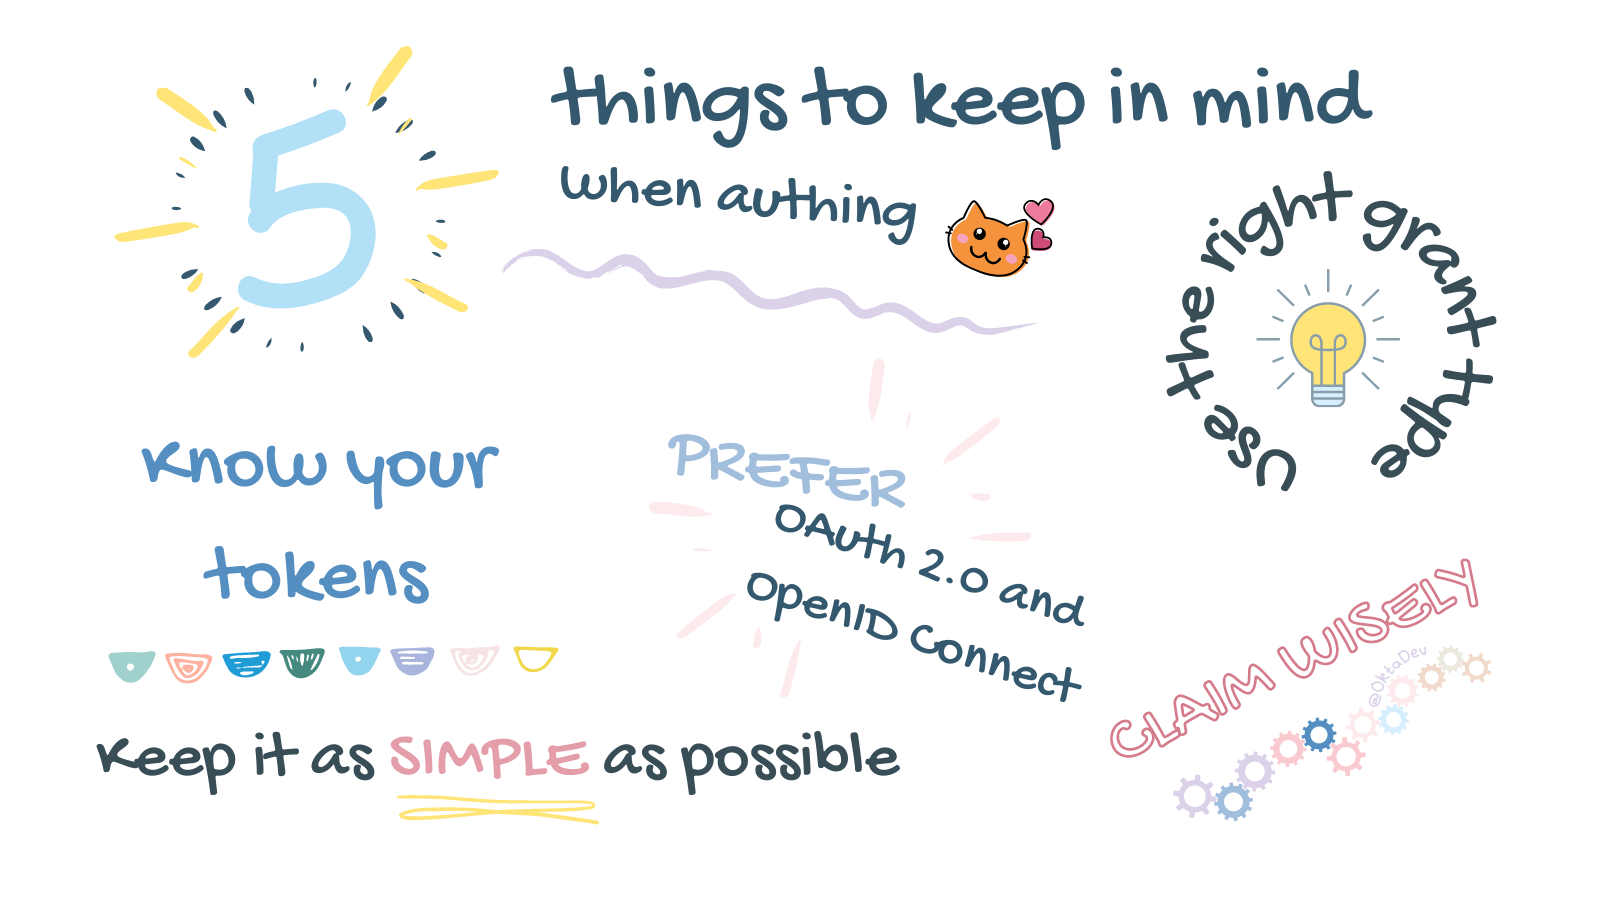
There’s a lot of information out there about adding authentication to your app, which is helpful! But also overwhelming. It can be hard to find relevant and up-to-date information. Security best practices and technologies change, so refreshing your understanding and keeping up with current best practices is a good thing. Here are some notes I took while I reviewed my knowledge and applied my experience implementing auth.
Prefer OAuth 2.0 and OpenID Connect
If you’re implementing authentication to a new application, the best practice is to use OAuth 2.0 with OpenID Connect (OIDC). The combination of OAuth 2.0 with OIDC provides consistency across many integration providers, standardized ways to access information, and security.
Let’s establish a baseline for the rest of this post by familiarizing ourselves with the basics. This Illustrated Guide to OAuth and OpenID Connect is excellent.
What I really like about using OAuth 2.0 and OpenID Connect together is that it separates “the auths” and adds structure to each. We learned from the blog post above that OAuth 2.0 is designed for authorization – access to data (resources). And we learned that OIDC is a thin layer on top of OAuth 2.0 that adds login and profile information. Thus, authentication is the act of establishing the login session that confirms the user logging in is who they say they are. Now we can be specific in our vocabulary and understand how each standard complements the other.
When you’re using OpenID Connect, don’t forget that you can inspect the OpenID Connect Discovery document to get a listing of endpoints and supported usages. You’ll see references to some of the metadata available in the discovery response below.
Armed with this knowledge, let’s continue!
Know your tokens
There are three different tokens at play in OAuth 2.0 and OpenID Connect. Depending on the grant type you use (more on that coming up), you might not have all three tokens. It’s good to remember the kinds of tokens you’re working with and what each does. This makes documentation even easier to parse and team conversations less confusing by specifying the exact type of token instead of only using the word “token”.
 |
ID token: The token returned from OpenID Connect containing information about the authentication of the end-user in JSON Web Token (JWT) format. |
 |
Access token: The token returned from OAuth flows that allows you to access the resource. Access tokens returned from Okta are in JWT format. |
 |
Refresh token: A long-lived token that you exchange for the short-lived access token. Not all grant types support refresh tokens. |
Claim wisely
A JWT has the capability to add custom claims to it. Adding custom metadata directly to the payload of access and ID tokens means you can get properties tailored for your application right from the get-go, right? What a great idea! Or is it?
Custom claims are powerful, but remember that the contents of a JWT are visible to anyone who has one, such as an external developer calling your system and potentially the end user. You don’t want to add private information with the expectation that it’s safe from prying eyes. You also don’t want to overload the token with a bunch of custom claims that will bloat the token. Keep your tokens lightweight and make adding custom claims a considered decision.
Use the right grant type
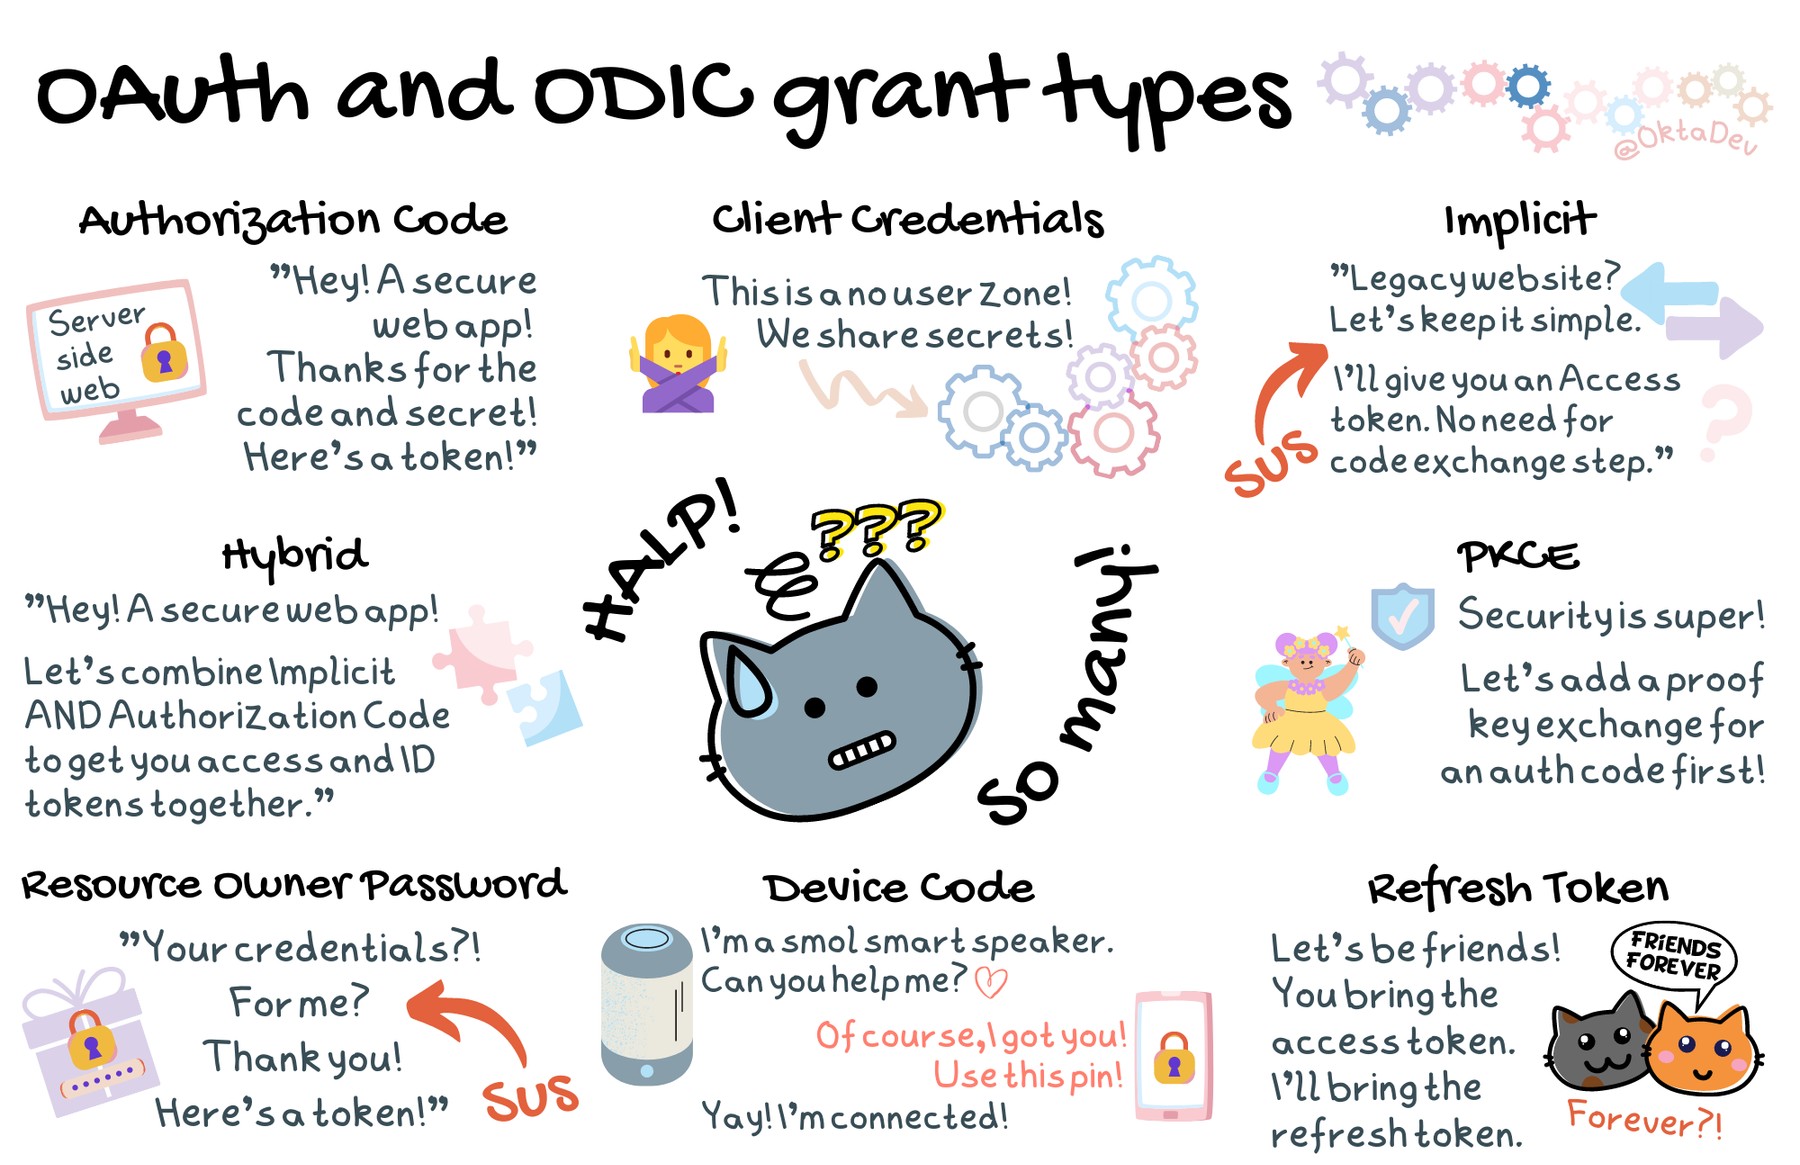
I think this is where developers start feeling detail overload. There are different grant types, and depending on who the caller is and what sort of software process you’re working on, the optimal grant type changes. To add further confusion, some grant types (or flows) are OAuth 2.0 standards, and some are from OpenID Connect. Plus, there are updated security practices, and not all blog posts reflect the current recommendations. Yikes! Let’s cut out the extraneous stuff and focus on the need-to-knows.
First, let’s start with listing all the available grant types. We’ll define a high-level overview of each:
 |
Authorization Code is a grant type used by web apps where the source code is private, such as a server-side web app. An authorization code and a client secret are required to get an access token. You can make the authorization code grant type even more secure for server-side web apps by using PKCE as well! More on that below. |
 |
Client Credentials is a grant type used for back-end communications, such as API to API. Users aren’t involved in this flow, so there isn’t an ID token available. |
 |
Device Code is a grant type primarily used for IoT and smart devices. The flow delegates user authentication and authorization through an external device, such as a smartphone app or browser. Device Code is available as an early access feature in Okta, or follow the steps in this post to add OAuth device flow to any server. |
 |
Refresh Token is not a grant type, per se. It’s a long-lived token the application may receive to get longer access to resources. Authorization Code, Device Code, Hybrid, and Resource Owner Password flows support refresh tokens if the authorization server is configured to give the app refresh tokens. |
 |
Proof Key for Code Exchange (PKCE) is a flow to create a secret to use before exchanging the authorization code for tokens. This is not a grant type used on its own, but as an extra layer of security to the Authorization Code flow. |
 |
Hybrid is a set of grant types from the OpenID Connect spec. The code id_token flow is the most common and combines two grants. It returns an access token via the Authorization Code grant and an ID token via the Implicit grant. |
 |
Implicit is a grant type that used to be recommended for native and JavaScript apps. It is a simplified version of the Authorization Code grant but doesn’t require the authorization code exchange for the access token. Because of the security risks, OAuth 2.0 no longer recommends this grant type and it will be dropped in the upcoming OAuth 2.1 spec. |
 |
Resource Owner Password grant type is a flow used by trusted first-party clients. Because of the risks involved in applications directly handling credentials, OAuth 2.0 no longer recommends this grant type and it will be dropped in the upcoming OAuth 2.1. There might be legacy applications requiring this flow, but that’s the only reason to use it. |
That’s still a lot of flows! And a lot to keep in mind. We’re busy developers! So let’s distill this down to the preferred grants.
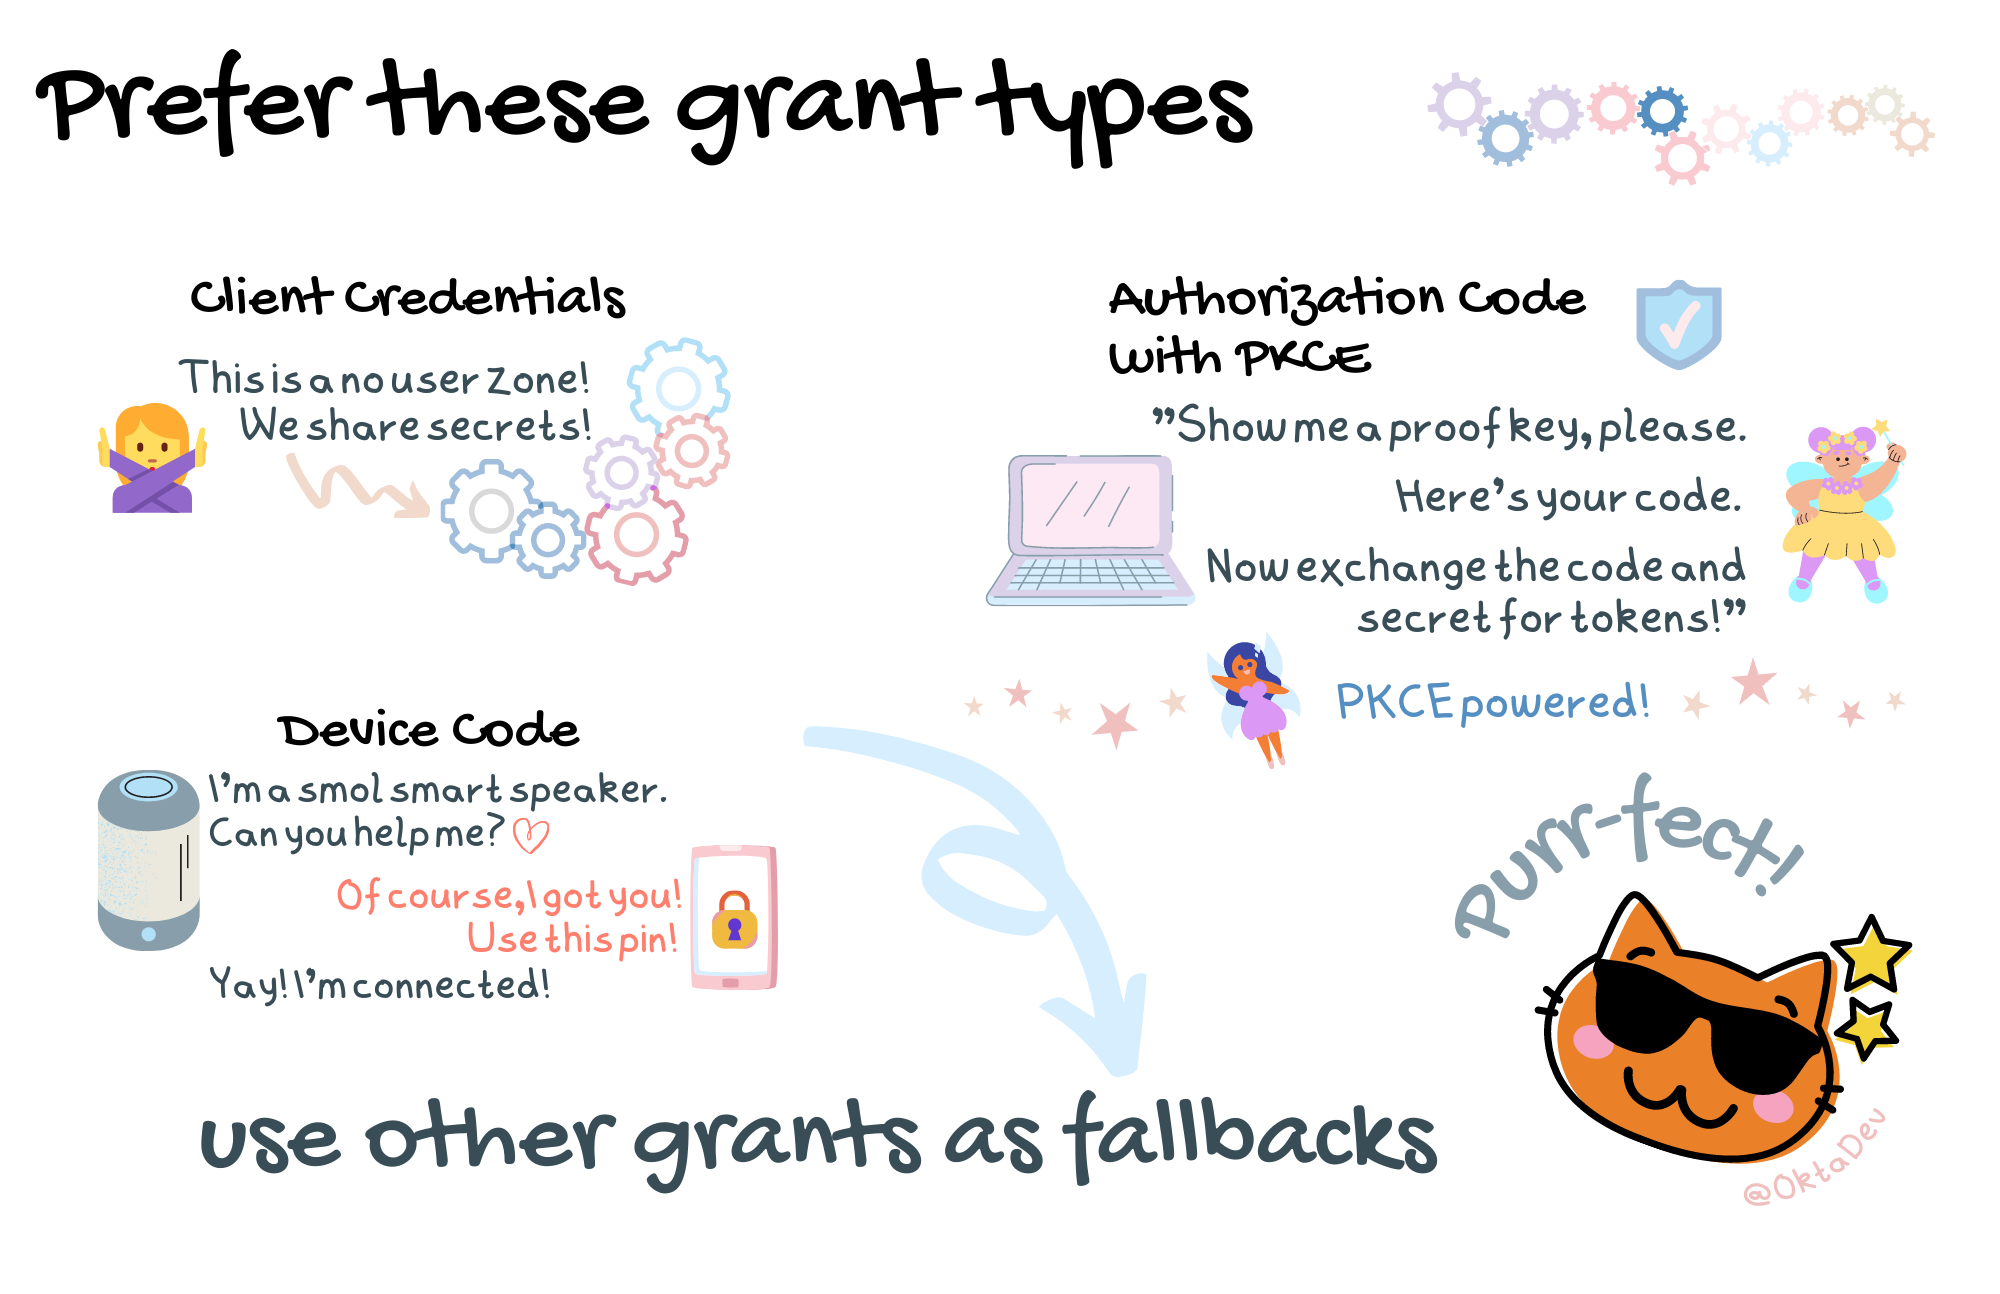
That’s much better! We now have a reasonable number of grant types to work with: Device Code, Client Credentials, and a combination grant type – Authorization Code with PKCE.
 |
Authorization Code with PKCE is the Authorization Code grant type powered by |
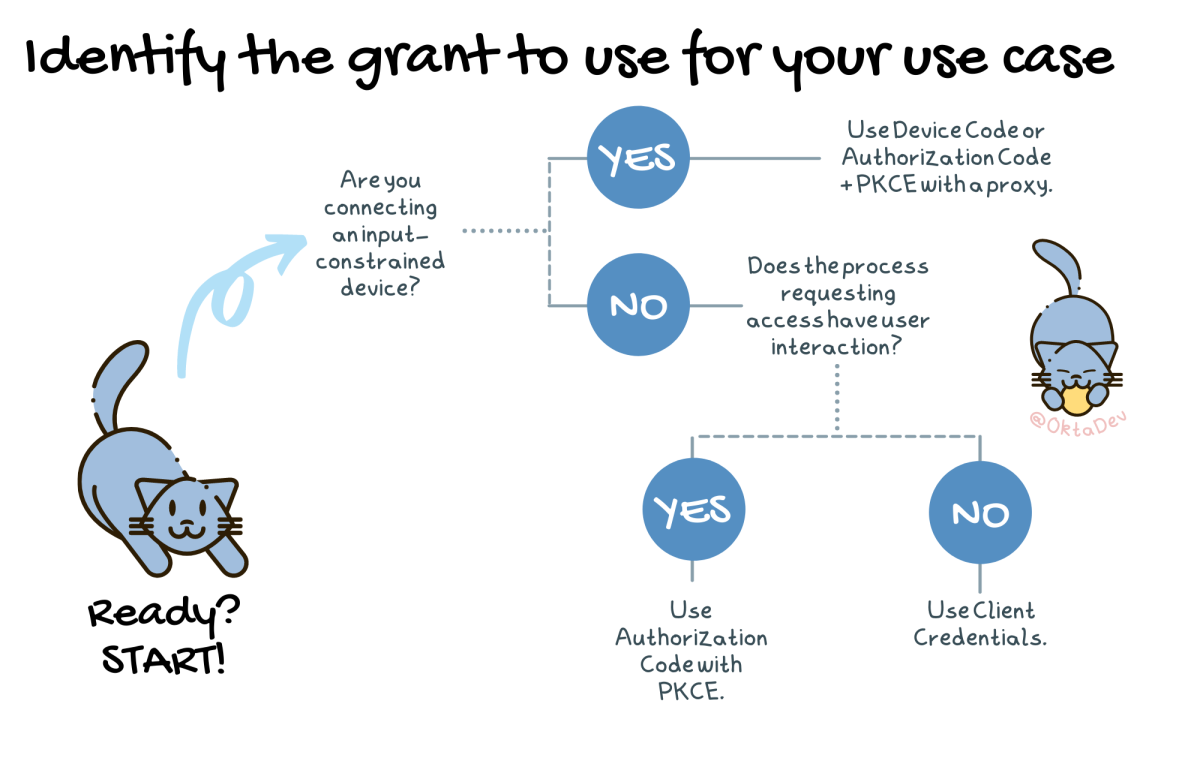
Now that we have an updated list of recommended grant types, how do we know which one to use? You may need to use multiple grant types in a complete software system depending on the scenario and actors involved. You may have a SPA, a native application, back-end services and processes, and integrations with external parties. Each of these requires consideration for which grant type to use. Don’t worry; by checking the discovery endpoint you’ll know if your identity provider is up to the task of securely handling your needs!
We can use this handy-dandy flow chart to identify which grant type to use:
Keep it as simple as possible
We’re busy. And adding authentication and access security to our software is foundational, but it’s not the only feature of the software. As product developers, we need to get auth into the system and have the peace of mind that we’re covered without having to worry about all the details. To keep adding auth simple, use SDKs that already handle all those nitty-gritty details. Okta has SDKs for mobile, front-end, and back-end languages to get going quickly.
What’s that? You say that your needs are a little more complicated than simply adding an Okta SDK to your software system? When you need something more customized, incorporate OIDC certified libraries into your system that allow you to still follow auth best practices while implementing custom needs.
Next steps
These are the key takeaways that helped me better understand auth and incorporate team discussion points we had when implementing auth in the software system I worked on. This post skims over the surface though and provides just the bare essentials for busy developers. If you want to dig in further and learn more, please check out the following links
- OAuth 2.0
- OpenID Connect Foundation
- It’s Time for OAuth 2.1
- OAuth 2.0 Simplified
- OAuth 2.0 and OpenID Connect Overview
Don’t forget to follow us on Twitter and subscribe to our YouTube channel for more great tutorials. We’d also love to hear from you! If you have any questions or want to share what tutorial you’d like to see next, please comment below.
Alisa Duncan is a Senior Developer Advocate at Okta, a full-stack developer, and a community builder who loves the thrill of learning new things. She is a Google Developer Expert in Angular and organizes coding workshops and community events locally and internationally. Her background is primarily working on enterprise software platforms, and she is a fan of all things TypeScript and JavaScript.
Okta Developer Blog Comment Policy
We welcome relevant and respectful comments. Off-topic comments may be removed.