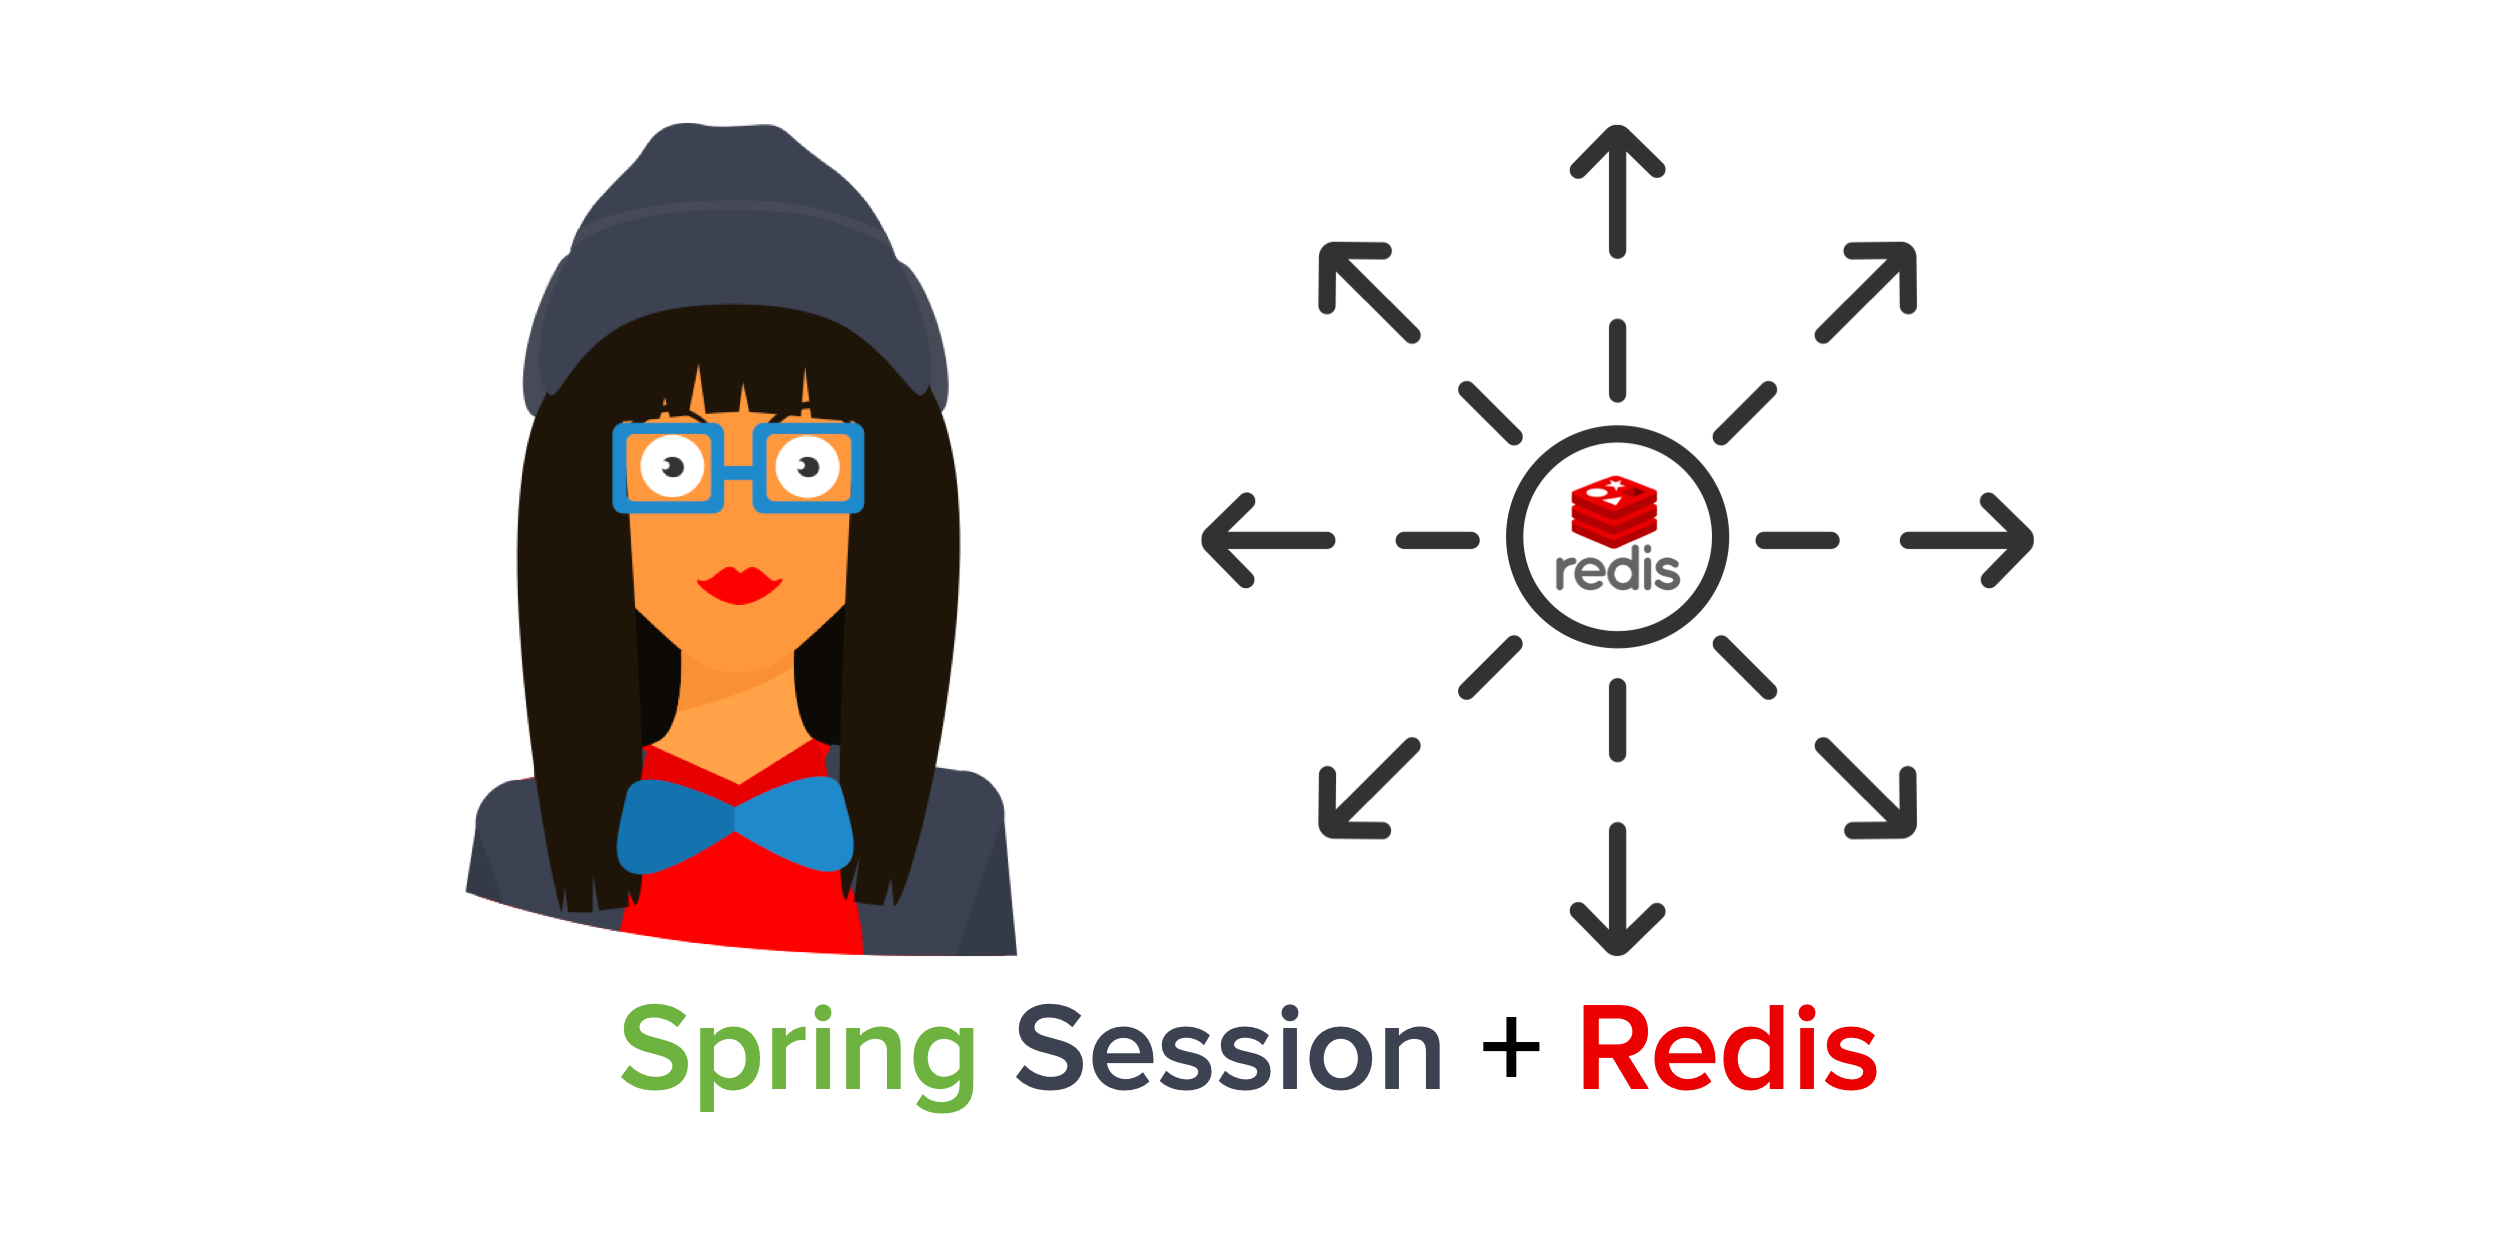
Scaling Secure Applications with Spring Session and Redis
Spring Boot and Spring Security have delighted developers with their APIs for quite some time now. Spring Security has done an excellent job of implementing OAuth and OpenID Connect (OIDC) standards for the last few years.
If you’re using Spring Security’s default authorization code flow with OIDC, it’ll establish a session on the server and serve up old fashion session cookies. If you want to scale your services, you’ll need to share session information. This tutorial shows you how to configure a Spring Boot application to store sessions in Redis with Spring Session, so the session can be shared among multiple gateway nodes and is preserved when a node failure happens.
Prerequisites:
Table of Contents
- Build a Microservices Architecture with Spring Session and Redis
- Add Authentication with OpenID Connect
- Configure Spring Session and Redis
- Spring Session Redis with HAProxy Load Balancing
- Learn More About Spring Session, Redis, and JHipster
You can also watch a video of this tutorial.
Note: In May 2025, the Okta Integrator Free Plan replaced Okta Developer Edition Accounts, and the Okta CLI was deprecated.
We preserved this post for reference, but the instructions no longer work exactly as written. Replace the Okta CLI commands by manually configuring Okta following the instructions in our Developer Documentation.
Build a Microservices Architecture with Spring Session and Redis
Let’s start by building a microservices architecture. With JHipster and JHipster Domain Languange (JDL) you can generate a microservices architecture from a file that describes the applications and entities.
Install JHipster:
npm install -g generator-jhipster@7.7.0
For this tutorial, you can use the JDL sample microservice-ecommerce-store-4-apps from the JDL samples repository.
Create a folder for the project:
mkdir spring-session-redis
cd spring-session-redis
TIP: If you’re using Oh My Zsh, you can run take spring-session-redis as an alternative.
Copy microservice-ecommerce-store-4-apps.jdl to the project folder and rename it to jhipster-redis.jdl.
wget https://raw.githubusercontent.com/jhipster/jdl-samples/main/microservice-ecommerce-store-4-apps.jdl -O jhipster-redis.jdl
Update the store, product, invoice, and notification configs to use OAuth 2.0 / OIDC for authentication and Maven as the build tool (shortcut: replace jwt with oauth2 and gradle with maven):
application {
  config {
    ...
    authenticationType oauth2,
    buildTool maven,
    ...
  }
}
Run the jdl command:
jhipster jdl jhipster-redis.jdl
After the generation completes, you will see folders invoice, notification,product, and store—one for each generated application.
Next, create the Docker Compose configuration for all the applications using JHipster’s docker-compose sub-generator.
Create a folder docker-compose in the project root and run the sub-generator:
mkdir docker-compose
cd docker-compose
jhipster docker-compose
Choose the following options:
- Type of application: Microservice application
- Type of gateway: JHipster gateway based on Spring Cloud Gateway
- Root directory for microservices:
../(the default) - Choose all applications with your spacebar and arrow keys (invoice, notification, product, store)
- Don’t select any application for clustered databases
- Setup monitoring: No
- Enter an admin password for JHipster Registry
You will see the following WARNING:
WARNING! Docker Compose configuration generated, but no Jib cache found
This means the application images have yet to be built. Go through each application folder and build the images with Maven:
./mvnw -ntp -Pprod verify jib:dockerBuild
The architecture you generated uses OAuth 2.0 for authorization and OpenID Connect (OIDC) for authentication. By default, it’s configured to work with Keycloak in a Docker container. It’s also quite easy to make it work with an Okta developer account.
I’ll show you how to configure Okta as the authentication provider for the store application, which will act as a gateway to the other services and provides a simple UI to manage the entities.
Add Authentication with OpenID Connect
In a terminal, navigate into the docker-compose directory.
Before you begin, you’ll need a free Okta developer account. Install the Okta CLI and run okta register to sign up for a new account. If you already have an account, run okta login.
Then, run okta apps create jhipster. Select the default app name, or change it as you see fit.
Accept the default Redirect URI values provided for you.
What does the Okta CLI do?
The Okta CLI streamlines configuring a JHipster app and does several things for you:
- Creates an OIDC app with the correct redirect URIs:
- login:
http://localhost:8080/login/oauth2/code/oidcandhttp://localhost:8761/login/oauth2/code/oidc - logout:
http://localhost:8080andhttp://localhost:8761
- login:
- Creates
ROLE_ADMINandROLE_USERgroups that JHipster expects - Adds your current user to the
ROLE_ADMINandROLE_USERgroups - Creates a
groupsclaim in your default authorization server and adds the user’s groups to it
NOTE: The http://localhost:8761* redirect URIs are for the JHipster Registry, which is often used when creating microservices with JHipster. The Okta CLI adds these by default.
You will see output like the following when it’s finished:
Okta application configuration has been written to: /path/to/app/.okta.env
Run cat .okta.env (or type .okta.env on Windows) to see the issuer and credentials for your app. It will look like this (except the placeholder values will be populated):
export SPRING_SECURITY_OAUTH2_CLIENT_PROVIDER_OIDC_ISSUER_URI="https://{yourOktaDomain}/oauth2/default"
export SPRING_SECURITY_OAUTH2_CLIENT_REGISTRATION_OIDC_CLIENT_ID="{clientId}"
export SPRING_SECURITY_OAUTH2_CLIENT_REGISTRATION_OIDC_CLIENT_SECRET="{clientSecret}"
NOTE: You can also use the Okta Admin Console to create your app. See Create a JHipster App on Okta for more information.
Edit the file docker-compose/docker-compose.yml and override the default OAuth 2.0 settings for the services invoice, notification, product, and store with the following values (you will need to update these properties under the environment key):
- SPRING_SECURITY_OAUTH2_CLIENT_PROVIDER_OIDC_ISSUER_URI=${OKTA_OAUTH2_ISSUER}
- SPRING_SECURITY_OAUTH2_CLIENT_REGISTRATION_OIDC_CLIENT_ID=${OKTA_OAUTH2_CLIENT_ID}
- SPRING_SECURITY_OAUTH2_CLIENT_REGISTRATION_OIDC_CLIENT_SECRET=${OKTA_OAUTH2_CLIENT_SECRET}
By default, the JHipster Registry is configured to use Keycloak in this same file. You don’t need to change anything for this to work, but you will be using Keycloak for the JHipster Registry and Okta for the rest of your apps. To fix this, you can update this file with the same settings as above, or remove the oauth2 profile which will cause it to use JWT for authentication (and the default admin/admin credentials).
Create a file docker-compose/.env and set the value of the OKTA_OAUTH_* environment variables for Docker Compose, copying the values from .okta.env:
OKTA_OAUTH2_ISSUER=https://{yourOktaDomain}/oauth2/default
OKTA_OAUTH2_CLIENT_ID={clientId}
OKTA_OAUTH2_CLIENT_SECRET={clientSecret}
NOTE: You can also set the OAuth 2.0 configuration for all the applications in a single place, using the JHipster Registry, since it’s also a Spring Cloud Config Server. See Java Microservices with Spring Cloud Config and JHipster for more information.
Run the services with Docker Compose:
docker compose up
The JHipster Registry will log the following message once it is ready:
... | 2022-03-08 17:44:26.245  INFO 1 --- [           main] t.jhipster.registry.JHipsterRegistryApp  :
... | ----------------------------------------------------------
... | 	Application 'jhipster-registry' is running! Access URLs:
... | 	Local: 		http://localhost:8761/
... | 	External: 	http://172.19.0.11:8761/
... | 	Profile(s): 	[composite, dev, api-docs, oauth2]
... | ----------------------------------------------------------
... | 2022-03-08 17:44:26.246  INFO 1 --- [           main] t.jhipster.registry.JHipsterRegistryApp  :
... | ----------------------------------------------------------
... | 	Config Server: 	Connected to the JHipster Registry running in Docker
... | ----------------------------------------------------------
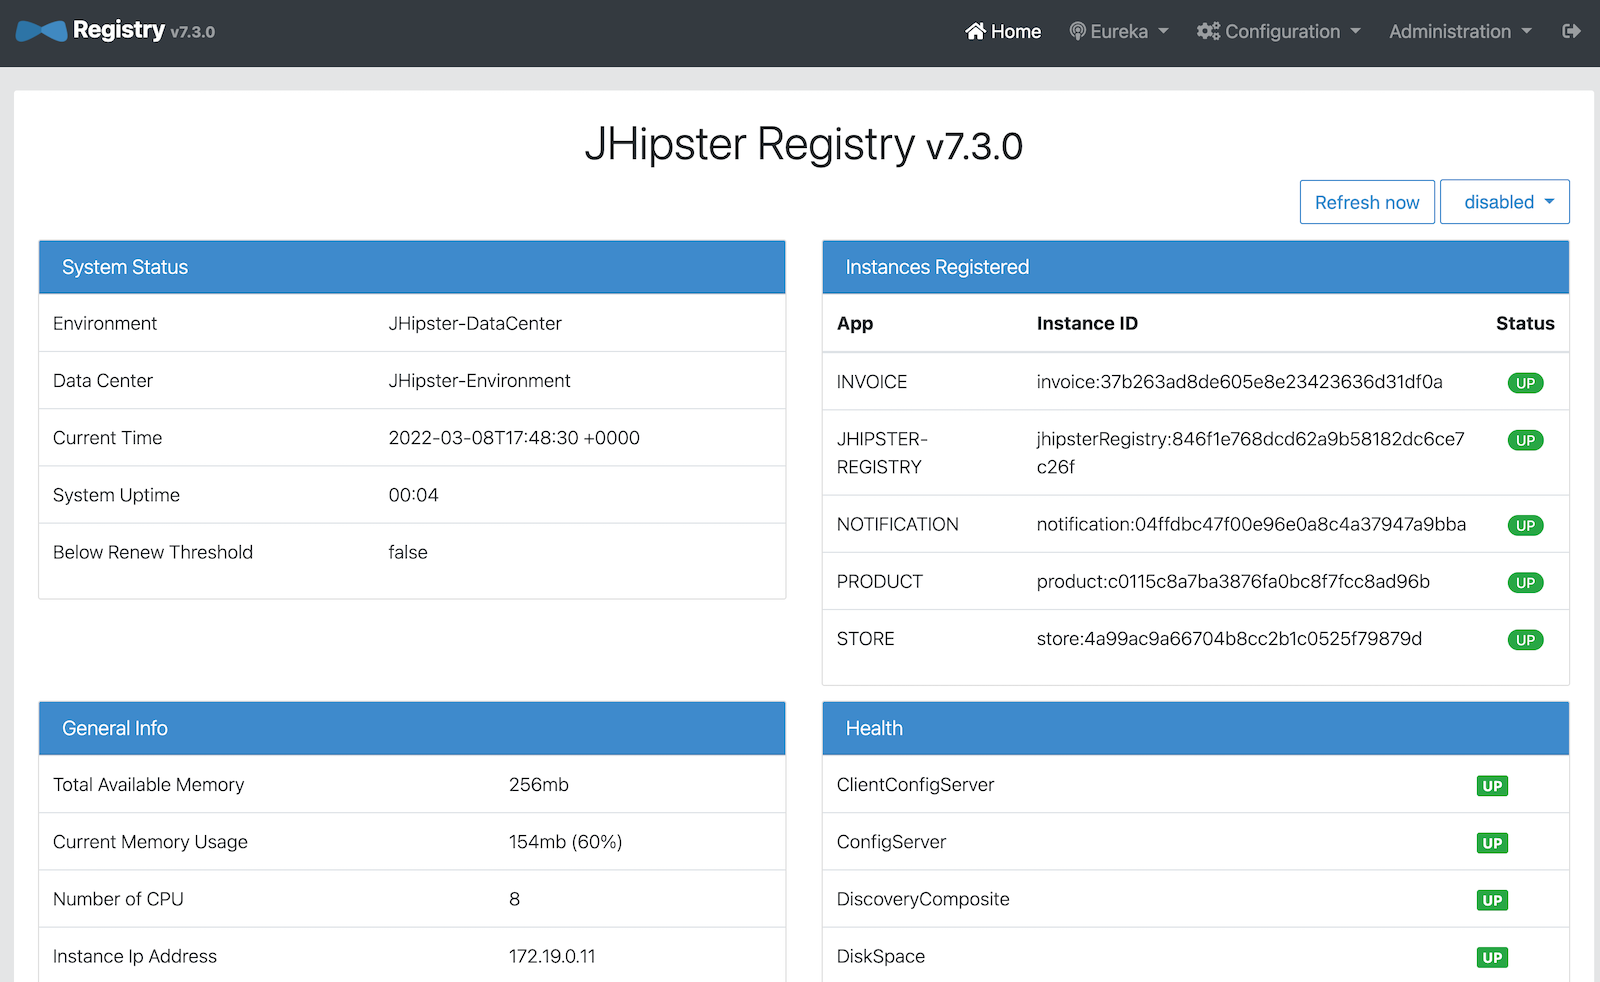
You can sign in to the JHipster Registry at http://localhost:8761 to check if all services are up:
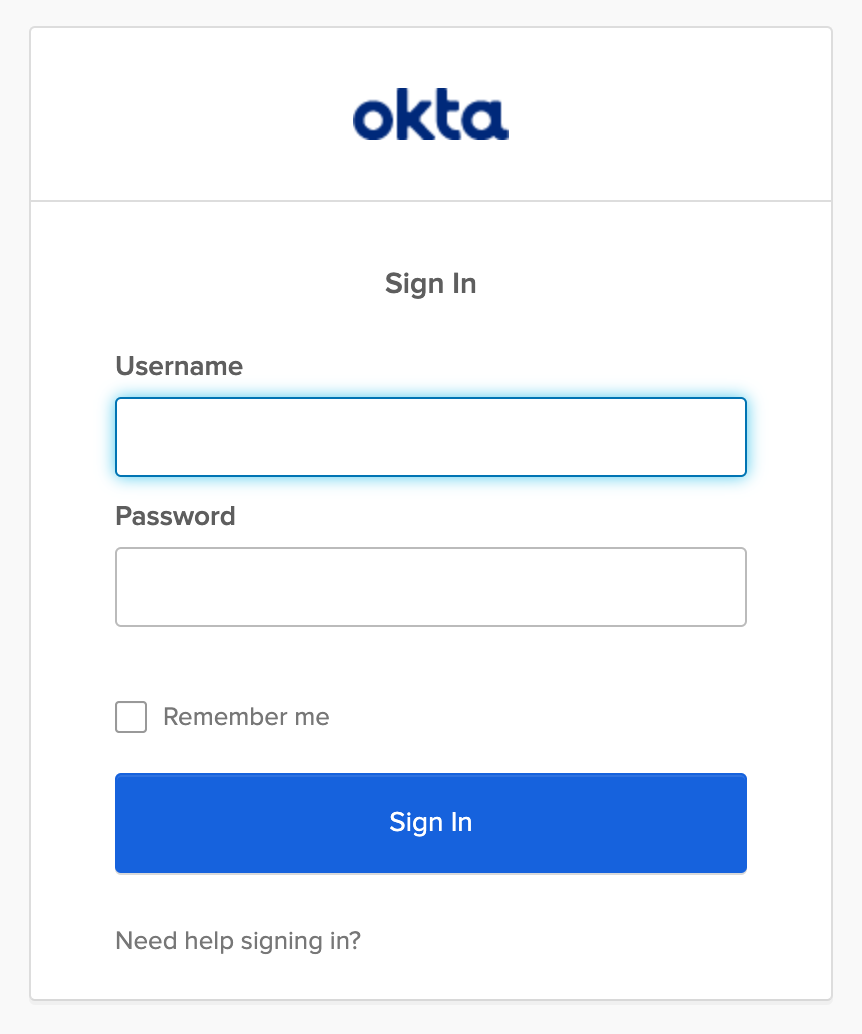
Once all services are up, access the store at http://localhost:8080 and sign in with your Okta user:
Configure Spring Session and Redis
The store application maintains a user session in memory, identified with a session ID that is sent in a cookie to the client. If the store instance crashes, the session is lost. One way to avoid losing the session is by adding Spring Session with Redis for the session storage and sharing among store nodes.
![]()
Redis is an open-source, in-memory data structure store—used as a database, cache and message broker. It supports many data structures, has built-in replication, provides high availability, and supports partitioning. A session store requires high availability and durability to support uninterrupted user engagement. Redis is the most loved database of 2020 according to Stack Overflow, and it is a popular choice for session management due to its low latency, scalability, and resilience.
Before making the modifications to the store application, stop all services with CTRL+C and remove the containers:
cd docker-compose
docker compose down
Delete the store image:
docker rmi store --force
Edit store/pom.xml and add the Spring Session + Redis dependencies:
<dependency>
    <groupId>org.springframework.session</groupId>
    <artifactId>spring-session-data-redis</artifactId>
</dependency>
<dependency>
    <groupId>io.lettuce</groupId>
    <artifactId>lettuce-core</artifactId>
    <version>6.1.6.RELEASE</version>
</dependency>
Spring Session Data Redis depends on Spring Data Redis, which integrates with Lettuce and Jedis, two popular open-source Java clients for Redis. Spring Data Redis does not pull any client by default, so you need to add the Lettuce dependency explicitly.
To enable Redis for your Spring profiles, add the following configuration to store/src/main/resources/config/application-dev.yml and store/src/main/resources/config/application-prod.yml:
spring:
  ...
  session:
    store-type: redis
For this example, disable Redis in the store’s test configuration, so the existing tests don’t require a Redis instance. Edit src/test/resources/config/application.yml and add the following:
spring:
  ...
  autoconfigure:
    exclude:
      ...
      - org.springframework.boot.autoconfigure.data.redis.RedisAutoConfiguration
  session:
    store-type: none
Rebuild the store application image:
cd ../store
./mvnw -ntp -Pprod verify jib:dockerBuild
Edit docker-compose/docker-compose.yml to set the Redis configuration. Under the store service entry, add the following variables to the environment:
- LOGGING_LEVEL_COM_JHIPSTER_DEMO_STORE=TRACE
- SPRING_REDIS_HOST=store-redis
- SPRING_REDIS_PASSWORD=password
- SPRING_REDIS_PORT=6379
Add the store-redis instance as a new service (at the bottom of the file, and indent two spaces):
store-redis:
  image: 'redis:6.2'
  command: redis-server --requirepass password
  ports:
    - '6379:6379'
Run the service again with Docker Compose:
cd ../docker-compose
docker compose up
Once all services are up, sign in to the store application with your Okta account. Then, confirm Redis has stored new session keys:
docker exec docker-compose-store-redis-1 redis-cli -a password KEYS \*
The output should look like this:
spring:session:sessions:0847fe57-fe63-40b4-8e86-40f000844280
Spring Session Redis with HAProxy Load Balancing
Load balancing in a JHipster microservices architecture is handled at the client-side, where the client is the Spring Boot instance. The JHipster Registry is a Eureka discovery server, maintaining a dynamic list of available service instances, for the service clients to do request routing and load balancing. The store service, which acts as a gateway and also as a Eureka client, requests the available instances to the JHipster registry for service routing.
As you want to test session sharing among multiple store nodes, you need load balancing for the store service as well. You’ll need to run an HAProxy container and two instances of the store service for this test.
Stop all services and remove the store container with docker rm docker-compose-store-1 before starting the modifications below.
First, extract the docker-compose store base configuration to its own docker-compose/store.yml file:
version: '3'
services:
  store:
    image: store
    environment:
      - _JAVA_OPTIONS=-Xmx512m -Xms256m
      - SPRING_PROFILES_ACTIVE=prod,api-docs
      - MANAGEMENT_METRICS_EXPORT_PROMETHEUS_ENABLED=true
      - EUREKA_CLIENT_SERVICE_URL_DEFAULTZONE=http://admin:$${jhipster.registry.password}@jhipster-registry:8761/eureka
      - SPRING_CLOUD_CONFIG_URI=http://admin:$${jhipster.registry.password}@jhipster-registry:8761/config
      - SPRING_R2DBC_URL=r2dbc:mysql://store-mysql:3306/store?useUnicode=true&characterEncoding=utf8&useSSL=false&useLegacyDatetimeCode=false&serverTimezone=UTC&createDatabaseIfNotExist=true
      - SPRING_LIQUIBASE_URL=jdbc:mysql://store-mysql:3306/store?useUnicode=true&characterEncoding=utf8&useSSL=false&useLegacyDatetimeCode=false&serverTimezone=UTC&createDatabaseIfNotExist=true
      - SPRING_SECURITY_OAUTH2_CLIENT_PROVIDER_OIDC_ISSUER_URI=${OKTA_OAUTH2_ISSUER}
      - SPRING_SECURITY_OAUTH2_CLIENT_REGISTRATION_OIDC_CLIENT_ID=${OKTA_OAUTH2_CLIENT_ID}
      - SPRING_SECURITY_OAUTH2_CLIENT_REGISTRATION_OIDC_CLIENT_SECRET=${OKTA_OAUTH2_CLIENT_SECRET}
      - JHIPSTER_SLEEP=60
      - JHIPSTER_REGISTRY_PASSWORD=admin
      - LOGGING_LEVEL_COM_JHIPSTER_DEMO_STORE=TRACE
      - SPRING_REDIS_HOST=store-redis
      - SPRING_REDIS_PASSWORD=password
      - SPRING_REDIS_PORT=6379
Then, edit docker-compose/docker-compose.yml and remove the store service. Instead, create store1 and store2 services, extending the base configuration. Add the HAProxy service as well.
services:
  ...
  store1:
    extends:
      file: store.yml
      service: store
    hostname: store1
    ports:
      - '8080:8080'
  store2:
    extends:
      file: store.yml
      service: store
    hostname: store2
    ports:
      - '8081:8080'
  haproxy:
    extends:
      file: haproxy.yml
      service: haproxy
Create the HAProxy base configuration at docker-compose/haproxy.yml with the following content:
version: '3'
services:
  haproxy:
    build:
      context: .
      dockerfile: Dockerfile-haproxy
    image: haproxy
    ports:
      - '80:80'
Create a docker-compose/Dockerfile-haproxy file to specify how Docker should build the HAProxy image:
FROM haproxy:2.5
COPY haproxy.cfg /usr/local/etc/haproxy/haproxy.cfg
Create a docker-compose/haproxy.cfg file with the HAProxy service configuration:
global
    daemon
    maxconn 2000

defaults
    mode http
    timeout connect 5000ms
    timeout client 50000ms
    timeout server 50000ms

frontend http-in
    bind *:80
    default_backend servers

backend servers
    balance roundrobin
    cookie SERVERUSED insert indirect nocache
    option httpchk GET /
    option redispatch
    default-server check
    server store1 store1:8080 cookie store1
    server store2 store2:8080 cookie store2
In the configuration above, store1 and store2 are the backend servers to load balance with a round-robin strategy. With option redispatch, HAProxy will re-dispatch the request to another server if the selected server fails.
HAProxy listens on port 80, so you’ll need to update your Okta application. Run okta login, open the resulting URL in your browser, and go to Applications. Select your application and add http://localhost/login/oauth2/code/oidc as a Login redirect URI, and http://localhost as a Logout redirect URI.
Run all your Spring services again:
docker compose up
Once all services are up, sign in to http://localhost with your credentials and navigate to Entities > Product. In your browser’s developer console, check the SERVERUSED cookie by typing document.cookie. You should output like the following:
'XSRF-TOKEN=e594183a-8eb6-4eec-9e26-200b29c4beec; SERVERUSED=store2'
Stop the container of that store instance:
docker stop docker-compose-store2-1
TIP: If you get a “No such container” error, run docker ps --format '{{.Names}}' to print your container names. For example, it might be named docker-compose-store2-1.
Create a new entity and inspect the cookies in the POST request to verify that a different server responds, without losing the session:
SERVERUSED=store1
Did it work? If so, give yourself a big pat on the back!
Learn More About Spring Session, Redis, and JHipster
I hope you enjoyed this tutorial and helped you understand one possible approach to session sharing in JHipster with Spring Session. Keep learning and check the following links for more:
You can find all the code for this tutorial in our okta-spring-session-redis-example repository.
If you liked this tutorial, you might like these:
- Easy Session Sharing in Spring Boot with Spring Session and MySQL
- Build a Secure Micronaut and Angular App with JHipster
- OAuth 2.0 Patterns with Spring Cloud Gateway
- Secure Secrets With Spring Cloud Config and Vault
- Communicate Between Microservices with Apache Kafka
If you have any questions about this post, please leave a comment below. For more hipster content, follow @oktadev on Twitter, like us on LinkedIn, or subscribe to our YouTube channel.
Changelog:
- Mar 8, 2022: Updated to use JHipster 7.7.0. See the changes to this post in okta-blog#1082. You can see the updates to the example app in okta-spring-session-redis-example#2.
Okta Developer Blog Comment Policy
We welcome relevant and respectful comments. Off-topic comments may be removed.