Easy Session Sharing in Spring Boot with Spring Session and MySQL
Session management in multi-node applications presents multiple challenges. When the architecture includes a load balancer, client requests might be routed to different servers each time, and the HTTP session might be lost. In this tutorial, I’ll walk you through the configuration of session sharing in a multi-node Spring Boot application.
Prerequisites:
Table of Contents
- Session Persistence
- Session Sharing with Spring Session
- Learn More about Spring Session and OAuth 2.0
Session Persistence
Session Persistence is a technique for sticking a client to a single server, using application layer information—like a cookie, for example. In this tutorial, we will implement session persistence with the help of HAProxy, a reliable, high performance, TCP/HTTP load balancer.

First, let’s create a web application with Okta authentication and run three nodes with HAProxy load balancing using Docker Compose.
Create a Maven project using the Spring Initializr’s API.
curl https://start.spring.io/starter.zip \
 -d bootVersion=2.3.4.RELEASE \
 -d dependencies=web,okta \
 -d groupId=com.okta.developer \
 -d artifactId=webapp \
 -d name="Web Application" \
 -d description="Demo Web Application" \
 -d packageName=com.okta.developer.webapp \
 -d javaVersion=11 \
 -o web-app.zip
Unzip the project:
unzip web-app.zip -d web-app
cd web-app
Run the Okta Maven Plugin from your app’s folder:
./mvnw com.okta:okta-maven-plugin:register
Answer a few questions (name, email, and company), and it will generate a new Okta developer account for you. If you already have an Okta account registered, use login instead of register.
Then, configure your Spring Boot application to use Okta for authentication:
./mvnw com.okta:okta-maven-plugin:spring-boot
This will set up a new OIDC application for you and write your Okta settings to your src/main/resources/application.properties file.
NOTE: You can also use the Okta Admin Console to create your app. See Create a Spring Boot App for more information.
Create a GreetingController at src/main/java/com/okta/developer/webapp/controller:
package com.okta.developer.webapp.controller;

import org.slf4j.Logger;
import org.slf4j.LoggerFactory;
import org.springframework.security.core.annotation.AuthenticationPrincipal;
import org.springframework.security.oauth2.core.oidc.user.OidcUser;
import org.springframework.stereotype.Controller;
import org.springframework.web.bind.annotation.GetMapping;
import org.springframework.web.bind.annotation.ResponseBody;
import org.springframework.web.context.request.RequestContextHolder;

import java.net.InetAddress;

@Controller
public class GreetingController {

    private static final Logger logger = LoggerFactory.getLogger(GreetingController.class);

    @GetMapping(value = "/greeting")
    @ResponseBody
    public String getGreeting(@AuthenticationPrincipal OidcUser oidcUser) {
        String serverUsed = "unknown";
        try {
            InetAddress host = InetAddress.getLocalHost();
            serverUsed = host.getHostName();
        } catch (Exception e){
            logger.error("Could not get hostname", e);
        }
        String sessionId = RequestContextHolder.currentRequestAttributes().getSessionId();
        logger.info("Request responded by " + serverUsed);
        return "Hello " + oidcUser.getFullName() + ", your server is " + serverUsed + ", with sessionId " + sessionId;
    }
}
Run the application with:
./mvnw spring-boot:run
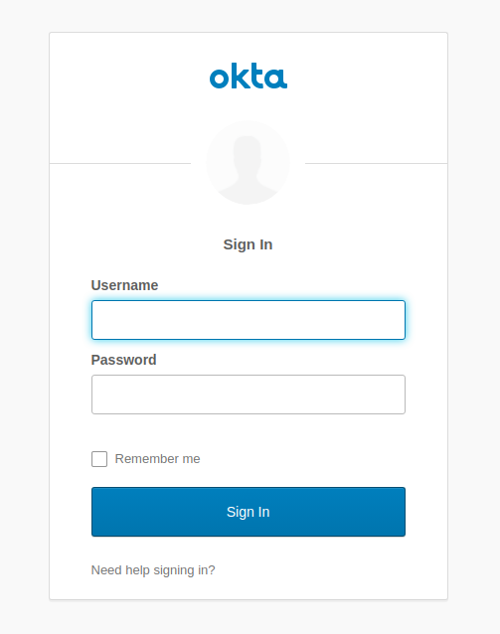
Go to http://localhost:8080 in an incognito window and you should be redirected to the Okta sign-in page.
If you sign in, you will get a 404 error when you’re redirected back to your Spring Boot app. This is expected because there’s no controller mapped to the / endpoint. You can fix this if you want by adding a method like the following to your WebApplication.java.
@RestController
@SpringBootApplication
public class WebApplication {

    public static void main(String[] args) {
        SpringApplication.run(WebApplication.class, args);
    }

    @GetMapping("/")
    public String hello(@AuthenticationPrincipal OidcUser user) {
        return "Hello, " + user.getFullName();
    }
}
Now, let’s configure three Docker containers, one for each application node, and an HAProxy container. In the project root folder, create a docker/docker-compose.yml file, with the following content:
version: '3.1'
services:
  webapp1:
    environment:
      - OKTA_OAUTH2_ISSUER=${OKTA_OAUTH2_ISSUER}
      - OKTA_OAUTH2_CLIENT_ID=${OKTA_OAUTH2_CLIENT_ID}
      - OKTA_OAUTH2_CLIENT_SECRET=${OKTA_OAUTH2_CLIENT_SECRET}
    image: webapp
    hostname: webapp1
    ports:
      - 8081:8080
  webapp2:
    environment:
      - OKTA_OAUTH2_ISSUER=${OKTA_OAUTH2_ISSUER}
      - OKTA_OAUTH2_CLIENT_ID=${OKTA_OAUTH2_CLIENT_ID}
      - OKTA_OAUTH2_CLIENT_SECRET=${OKTA_OAUTH2_CLIENT_SECRET}
    image: webapp
    hostname: webapp2
    ports:
      - 8082:8080
  webapp3:
    environment:
      - OKTA_OAUTH2_ISSUER=${OKTA_OAUTH2_ISSUER}
      - OKTA_OAUTH2_CLIENT_ID=${OKTA_OAUTH2_CLIENT_ID}
      - OKTA_OAUTH2_CLIENT_SECRET=${OKTA_OAUTH2_CLIENT_SECRET}
    image: webapp
    hostname: webapp3
    ports:
      - 8083:8080
  haproxy:
    build:
      context: .
      dockerfile: Dockerfile-haproxy
    image: my-haproxy
    ports:
      - 80:80
    depends_on:
      - "webapp1"
      - "webapp2"
      - "webapp3"
Create adocker/.env file with the following content:
OKTA_OAUTH2_ISSUER={issuer}
OKTA_OAUTH2_CLIENT_ID={clientId}
OKTA_OAUTH2_CLIENT_SECRET={clientSecret}
You can find the issuer, clientId, and clientSecret in the src/main/resources/application.properties, after running the Okta Maven Plugin. Remove the \ in the issuer’s URL after you paste the value. Also, make sure to remove the curly braces around the values.
Create a Dockerfile for the HAProxy container, at docker/Dockerfile-haproxy and add the following:
FROM haproxy:2.2
COPY haproxy.cfg /usr/local/etc/haproxy/haproxy.cfg
Create the configuration file for the HAProxy instance at docker/haproxy.cfg:
global
    debug
    daemon
    maxconn 2000

defaults
    mode http
    timeout connect 5000ms
    timeout client 50000ms
    timeout server 50000ms

frontend http-in
    bind *:80
    default_backend servers

backend servers
    balance roundrobin
    cookie SERVERUSED insert indirect nocache
    option httpchk /
    option redispatch
    default-server check
    server webapp1 webapp1:8080 cookie webapp1
    server webapp2 webapp2:8080 cookie webapp2
    server webapp3 webapp3:8080 cookie webapp3
I’m not going to dive deep into how to configure HAProxy but take note that, in the backend servers section, there are the following options:
balance roundrobinsets round-robin as the load balancing strategy.cookie SERVERUSEDadds a cookie SERVERUSED to the response, indicating the server responding to the request. The client requests will stick to that server.option redispatchmakes the request be re-dispatched to a different server if the current server fails.
Edit the pom.xml to add the Jib Maven Plugin to the <build> section to create a webapp Docker image.
<plugin>
    <groupId>com.google.cloud.tools</groupId>
    <artifactId>jib-maven-plugin</artifactId>
    <version>2.5.2</version>
    <configuration>
        <to>
            <image>webapp</image>
        </to>
    </configuration>
</plugin>
Build the webapp container image:
./mvnw compile jib:dockerBuild
Start all the services with docker-compose:
cd docker
docker-compose up
NOTE: If you get a URISyntaxException on startup, remove the \ in the issuer in application.properties.
HAProxy will be ready after you see the following lines in the logs:
haproxy_1  | [WARNING] 253/130140 (6) : Server servers/webapp2 is UP, reason: Layer7 check passed, code: 302, check duration: 5ms. 1 active and 0 backup servers online. 0 sessions requeued, 0 total in queue.
haproxy_1  | [WARNING] 253/130141 (6) : Server servers/webapp3 is UP, reason: Layer7 check passed, code: 302, check duration: 4ms. 2 active and 0 backup servers online. 0 sessions requeued, 0 total in queue.
haproxy_1  | [WARNING] 253/130143 (6) : Server servers/webapp1 is UP, reason: Layer7 check passed, code: 302, check duration: 7ms. 3 active and 0 backup servers online. 0 sessions requeued, 0 total in queue.
Before you can sign in to your application, you’ll need to go to your Okta developer console and add a Login redirect URI for http://localhost/login/oauth2/code/okta. Otherwise, you’ll get a 400 error in the next step. While you’re in there, add a Logout redirect URI for http://localhost.
In a browser, go to http://localhost/greeting. After you sign in, inspect the request cookie SERVERUSED. An example value is:
Cookie: SERVERUSED=webapp3; JSESSIONID=5AF5669EA145CC86BBB08CE09FF6E505
Shut down the current node with the following Docker command:
docker stop docker_webapp3_1
Refresh your browser and wait a few seconds. Check the SERVERUSED cookie to verify that HAProxy re-dispatched the request to a different node, and the sessionId has changed, meaning the old session was lost.
You can stop the services with CTRL+C.
Session Sharing with Spring Session
Storing sessions in an individual node can affect scalability. When scaling up, active sessions will remain in the original nodes and traffic will not be spread equally among nodes. Also, when a node fails, the session in that node is lost. With session sharing, the user session lives in a shared data storage that all server nodes can access.
Next, for a transparent failover with the redispatch option in HAProxy, let’s add session sharing between nodes with Spring Session. For this tutorial, I’ll show you how to use MySQL for storing the session.
First, add the following dependencies to the pom.xml:
<dependency>
    <groupId>mysql</groupId>
    <artifactId>mysql-connector-java</artifactId>
    <scope>runtime</scope>
</dependency>
<dependency>
    <groupId>org.springframework.session</groupId>
    <artifactId>spring-session-core</artifactId>
</dependency>
<dependency>
    <groupId>org.springframework.session</groupId>
    <artifactId>spring-session-jdbc</artifactId>
</dependency>
<dependency>
    <groupId>com.zaxxer</groupId>
    <artifactId>HikariCP</artifactId>
    <version>3.2.0</version>
</dependency>
<dependency>
    <groupId>com.h2database</groupId>
    <artifactId>h2</artifactId>
    <scope>test</scope>
</dependency>
Rename src/main/resources/application.properties to application.yml, change your okta.* properties to be in YAML syntax, and add the following key-value pairs:
okta:
  oauth2:
    issuer: {issuer}
    client-secret: {client-secret}
    client-id: {client-id}

spring:
  session:
    jdbc:
      initialize-schema: always
  datasource:
    url: jdbc:mysql://localhost:3306/webapp
    username: root
    password: example
    driverClassName: com.mysql.cj.jdbc.Driver
    hikari:
      initializationFailTimeout: 0

logging:
  level:
    org.springframework: INFO
    com.zaxxer.hikari: DEBUG
In this example, you are using HikariCP for the database connection pooling. The option initializationFailTimeout is set to 0, meaning if a connection cannot be obtained, the pool will start anyways.
You are also instructing Spring Session to always create the schema with the option spring.session.jdbc.initialize-schema=always.
The application.yml file you just created contains the default datasource properties for the MySQL session storage. As the MySQL database is not up when the tests run, set up an in-memory H2 database so the application tests don’t fail.
Create asrc/test/resources/application-test.yml file with the following content:
spring:
  datasource:
    url: jdbc:h2:mem:testdb
    username: sa
    password: passord
    driverClassName: org.h2.Driver
Modify the WebApplicationTests.java class to add the @ActiveProfiles annotation:
package com.okta.developer.webapp;

import org.junit.jupiter.api.Test;
import org.springframework.boot.test.context.SpringBootTest;
import org.springframework.test.context.ActiveProfiles;

@SpringBootTest
@ActiveProfiles("test")
class WebApplicationTests {

    @Test
    void contextLoads() {
    }
}
Modify docker/docker-compose.yml to add the database container and the admin application to inspect the session tables. The final configuration should look like the following:
version: '3.1'
services:
  webapp1:
    environment:
      - SPRING_DATASOURCE_URL=jdbc:mysql://db:3306/webapp
      - OKTA_OAUTH2_ISSUER=${OKTA_OAUTH2_ISSUER}
      - OKTA_OAUTH2_CLIENT_ID=${OKTA_OAUTH2_CLIENT_ID}
      - OKTA_OAUTH2_CLIENT_SECRET=${OKTA_OAUTH2_CLIENT_SECRET}
    image: webapp
    hostname: webapp1
    ports:
      - 8081:8080
    depends_on:
      - "db"
  webapp2:
    environment:
      - SPRING_DATASOURCE_URL=jdbc:mysql://db:3306/webapp
      - OKTA_OAUTH2_ISSUER=${OKTA_OAUTH2_ISSUER}
      - OKTA_OAUTH2_CLIENT_ID=${OKTA_OAUTH2_CLIENT_ID}
      - OKTA_OAUTH2_CLIENT_SECRET=${OKTA_OAUTH2_CLIENT_SECRET}
    image: webapp
    hostname: webapp2
    ports:
      - 8082:8080
    depends_on:
      - "db"
  webapp3:
    environment:
      - SPRING_DATASOURCE_URL=jdbc:mysql://db:3306/webapp
      - OKTA_OAUTH2_ISSUER=${OKTA_OAUTH2_ISSUER}
      - OKTA_OAUTH2_CLIENT_ID=${OKTA_OAUTH2_CLIENT_ID}
      - OKTA_OAUTH2_CLIENT_SECRET=${OKTA_OAUTH2_CLIENT_SECRET}
    image: webapp
    hostname: webapp3
    ports:
      - 8083:8080
    depends_on:
      - "db"

  db:
    image: mysql
    command: --default-authentication-plugin=mysql_native_password
    restart: always
    environment:
      MYSQL_ROOT_PASSWORD: example
      MYSQL_DATABASE: webapp
    ports:
      - 3306:3306

  adminer:
    image: adminer
    restart: always
    ports:
      - 8090:8080

  haproxy:
    build:
      context: .
      dockerfile: Dockerfile-haproxy
    image: my-haproxy
    ports:
      - 80:80
    depends_on:
      - "webapp1"
      - "webapp2"
      - "webapp3"
Delete the previous containers and previous webapp Docker image with the following commands:
docker-compose down
docker rmi webapp
In the root folder of the project, rebuild the webapp docker image with Maven:
./mvnw compile jib:dockerBuild
Start all the services again (docker-compose up from the docker directory), and repeat the re-dispatch test (go to http://localhost/greeting then shutdown the active node with docker stop docker_webapp#_1). You might see a lot of connection errors until the database is up.
Now the session should be the same after changing the node. How cool is that?!
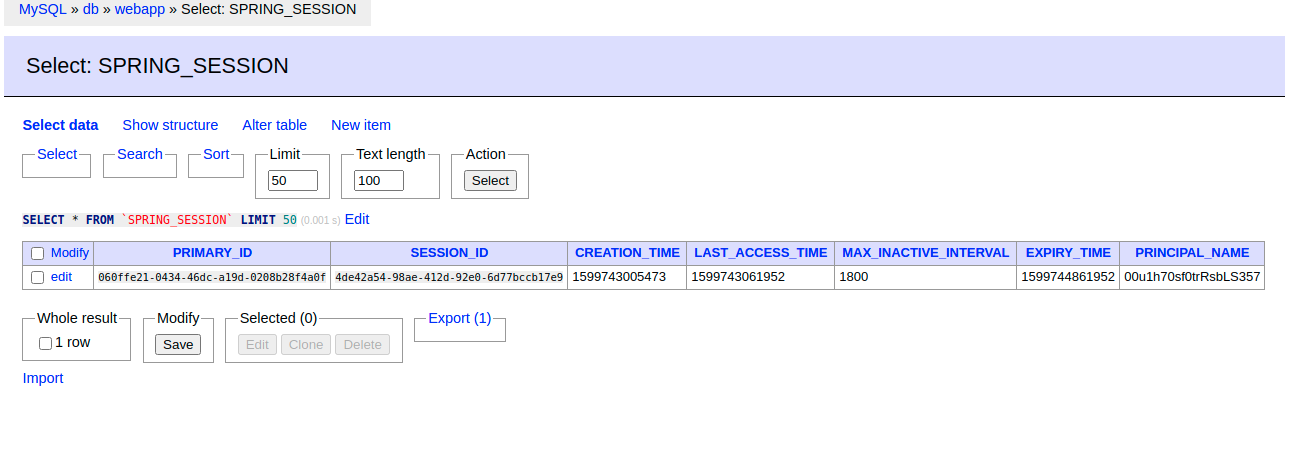
You can inspect the session data in the admin UI at http://localhost:8090. Log in with root and the MYSQL_ROOT_PASSWORD value that you set indocker-compose.yml.
Learn More about Spring Session and OAuth 2.0
I hope you enjoyed this tutorial and could see the advantages of the session sharing technique for multi-node applications. You can find all the code for this tutorial in GitHub.
Know that there are multiple options for session storage—we selected a database because of the ease of setup—but it might slow down your application. To learn more about session management, check out the following links:
If you liked this post, follow @oktadev on Twitter to see when we publish similar ones. We have a YouTube channel too! You should subscribe. 😊
We’re also streaming on Twitch, follow us to be notified when we’re live.
Okta Developer Blog Comment Policy
We welcome relevant and respectful comments. Off-topic comments may be removed.