Build Single Sign-on in Java
In modern app development, you quite frequently have a single resource server that provides data to multiple client applications. These applications may share a similar set of users, but need to enforce different permissions. For example, it’s possible that not all users of the first application should be allowed to access the second (think of, for example, an admin console application versus a client or user application). How would you implement this?
One way to do this is to use Okta, a software-as-service software security provider. Not only does Okta provide a quick and easy OAuth 2.0 single sign-on implementation, it also allows you to set access policies and user permissions via OAuth scopes that span multiple applications.
In this post, you are going to use Okta and Spring Boot to implement single sign-on with two client applications and a single resource server. You will see how to use access policies to enforce authentication and authorization policies. You will also restrict access to the resource server based on application scopes.
The first step, before you dive into the code, is to get the user authentication configurations in place. As mentioned, you’ll be using Okta as the OAuth 2.0 and OIDC (OpenID Connect) provider. With Okta you can manage users and groups, as well as easily implement features like social login and multi-factor authentication.
If you haven’t already, head over to register and create a free Okta developer account. Look for an email with instructions to complete the initialization of your Okta account.
Once you have an account, log in because you need to set up your web applications, users, resource server, and authorization server! You may need to click the yellow Admin button on your first login to get to the developer’s console.
Note: In May 2025, the Okta Integrator Free Plan replaced Okta Developer Edition Accounts, and the Okta CLI was deprecated.
We preserved this post for reference, but the instructions no longer work exactly as written. Replace the Okta CLI commands by manually configuring Okta following the instructions in our Developer Documentation.
Create Two OpenID Connect Applications
The first step is to create two OIDC applications. OpenID Connect is an authentication protocol built on top of OAuth 2.0, which is an authorization protocol. Each OIDC application defines an authentication provider endpoint for each web application instance.
In the Okta Admin Console, navigate to Applications and click Add Application. Choose Web, select OpenID Connect and click Create. Populate the fields with these values:
| Field | Value |
|---|---|
| Name | OIDC App 1 |
| Base URIs | http://localhost:8080 |
| Login redirect URIs | http://localhost:8080/login/oauth2/code/okta |
Click Save.
Scroll down and make a note of the Client ID and Client Secret. You’ll use those values shortly.
Repeat these steps for your second application with these values:
| Field | Value |
|---|---|
| Name | OIDC App 2 |
| Base URIs | http://localhost:8081 |
| Login redirect URIs | http://localhost:8081/login/oauth2/code/okta |
Click Save.
You’ll also need the Client ID and Client Secret from this OIDC application as well.
Create Test Users for your Java Application
Next, you need to create two users. The first will be a user that can only log into the first application (OIDC App 1) and the second user will be one that can log into both applications.
In the Admin Console, go to Directory > People and then click on Add Person. Fill out the form with the information for the first user using the table below. Repeat this for the second user, also using the table below.
| First User | Second User | Comments | |
|---|---|---|---|
| First Name | Amanda | Tanya | Can be anything you like |
| Last Name | Tester | Tester | Can be anything you like |
| Username | amandaTester@mail.com | tanyaTester@mail.com | Might prefer to test with an email you can actually access |
| Primary Email | amandaTester@mail.com | tanyaTester@mail.com | |
| Secondary Email | |||
| Groups | |||
| Password | Set by Admin | Set by Admin | This is to simplify the demo. In a production environment, you will likely want this set to “set by user” |
| Password Value | Test1234 | Test1234 | Complexity requirements: - at least 8 characters - a lowercase letter - an uppercase letter - a number - no parts of your username |
| User must change password | unchecked | unchecked | This is to simplify the demo. In a production environment, you will likely want this checked if you have admin set password. |
Take note of the username and password for both users (you’ll be testing the app with them later).
Once you have the user created, you can click on the user name, then click on profile and then click on edit. In here, add some info to each user for the following fields: middle name and nickname. This will allow you to see this info from the application later.
Create a Service Application for Your Resource Server
Now you need to create an OIDC application for your resource server. This will configure access to the REST API.
In the Okta Admin Console, navigate to Applications and click Add Application. Choose OAuth Service and click Create. Populate the fields with these values:
| Field | Value |
|---|---|
| Name | OIDC Resource Server |
Click Save.
Scroll down and copy the Client ID and Client Secret. You’ll use those values shortly.
Create an Authorization Server
The last step in Okta is to create and configure an authorization server. This allows you to configure custom claims and to set custom access policies. This determines whether or not Okta will issue a token when one is requested, which governs a user’s ability to access the client applications and the resource server.
Navigate to Security > API > Authorization Servers. Click Add Authorization Server and fill in the values as follows:
| Field | Value |
|---|---|
| Name | OIDC Auth Server |
| Audience | api://oidcauthserver |
| Description | OIDC Auth Server |
Click Save and then click the Claims tab. In Claims, click Add Claim, fill in the fields with the values for Claim 1 below, and click Create. You can leave any value not mentioned below as default. When done, repeat and create a second claim with the values under Claim 2 below.
| Field | Claim 1 | Claim 2 |
|---|---|---|
| Name | fullName | userEmail |
| Include in token type | Access Token Always | Access Token Always |
| Value | user.fullName | user.email |
| Include in -> The following scopes | profile |
Next, you will add an Access Policy for the first application. This application will allow both users access to it. Click the Access Policies tab, Add New Access Policy, fill in the fields with these values, and click Create Policy.
| Field | Value |
|---|---|
| Name | OIDC App 1 |
| Description | OIDC App 1 |
| Assign to | The following clients |
| Assign to clients | Start typing: OIDC in the input area below The following clients and click Add to the right of OIDC App 1. |
This binds the policy to your OIDC app.
Next click Add Rule. Set OIDC App 1 for the Rule Name field. Deselect all the grant types except for Authorization Code and click Create Rule.
This ensures that the request must use the authorization code flow in order for Okta to create tokens. This is the most secure flow of all the available OAuth flows. It ensures that all sensitive information (like tokens) are delivered via a response to a POST request.
Next, you will add an Access Policy for the second application. This application will allow only the second user, Tanya Tester to access it. From the Access Policies tab, Add Policy, fill in the fields with these values and click Create Policy.
| Field | Value |
|---|---|
| Name | OIDC App 2 |
| Description | OIDC App 2 |
| Assign to | The following clients |
| Assign to clients | Start typing: OIDC in the input area below The following clients and click Add to the right of OIDC App 2. |
This binds the policy to your OIDC app.
Next click Add Rule. Set OIDC App 2 for the Rule Name field. Deselect all the grant types except for Authorization Code. Find the User Is section and select the second radio button labeled “Assigned the app and a member of one of the following:” In the Users box that appears, start typing Tanya and select Tanya Tester from the list. This tells it that only this user can log in to the OIDC App 2 application.
Click Create Rule.
Click the Settings tab and copy the Issuer URL. You’ll make use of this value shortly.
You’re all done configuring things in Okta. On to the code!
Create the OAuth 2.0 Resource App
You will be working with two different code bases. The first is the code base for the resource server, which will be used to provide the client application with additional user information if the client is authorized to get such information.
Start by downloading the code for the resource server available in this GitHub repository.
git clone https://github.com/oktadeveloper/okta-java-spring-sso-example.git
cd okta-java-spring-sso-example/oauth2-resource-server
You will need to configure the resource application with the values from the “OIDC Resource Server” application you created in Okta. Open the src/main/resources/application.properties file.
okta.oauth2.issuer={issuerUri}
okta.oauth2.clientId={clientId}
okta.oauth2.clientSecret={clientSecret}
okta.oauth2.audience=api://oidcauthserver
server.port=8082
Replace the {clientId} and {clientSecret} with the ones you wrote down for the resource server above. The {issuerUri} is the Issuer URI for the authorization server you created above. go to API and Authorization Servers and look in the table next to OIDC Auth Server.
To see what the resource server does, take a look at the code in the DemoResourceServer class.
src/main/java/com/okta/examples/sso/DemoResourceServer.java
package com.okta.examples.sso;

import java.security.Principal;
import java.util.ArrayList;
import java.util.HashMap;
import java.util.List;
import java.util.Map;

import org.springframework.boot.SpringApplication;
import org.springframework.boot.autoconfigure.SpringBootApplication;
import org.springframework.security.access.prepost.PreAuthorize;
import org.springframework.security.config.annotation.method.configuration.EnableGlobalMethodSecurity;
import org.springframework.security.oauth2.provider.OAuth2Authentication;
import org.springframework.security.oauth2.server.resource.authentication.JwtAuthenticationToken;
import org.springframework.web.bind.annotation.GetMapping;
import org.springframework.web.bind.annotation.RestController;

@RestController
@SpringBootApplication
@EnableGlobalMethodSecurity(prePostEnabled = true)
public class DemoResourceServer  {

    public static void main(String[] args) {
        SpringApplication.run(DemoResourceServer.class, args);
    }

    @GetMapping("/welecomeMessage")
    @PreAuthorize("hasAuthority('SCOPE_profile')")
    public String getWelcomeMessage(Principal principal) {
        JwtAuthenticationToken jwtAuth = (JwtAuthenticationToken) principal;
        String fullName = jwtAuth.getToken().getClaimAsString("fullName");
        return "Welcome " + fullName + "!";
    }

    @GetMapping("/userEmail")
    @PreAuthorize("hasAuthority('SCOPE_email')")
    public String getUserEmail(Principal principal) {
        JwtAuthenticationToken jwtAuth = (JwtAuthenticationToken) principal;
        String email = jwtAuth.getToken().getClaimAsString("userEmail");
        return email;
    }
}
This code sets up both a spring boot application and controller all at once. The @SpringBootApplication annotation tells the application that it should support auto-configuration, component scanning, and bean registration.
The @RestController annotation tells the system that this file is a Rest API controller which simply means that it contains a collection of API endpoints.
The @EnableGlobalMethodSecurity annotation tells the system that the endpoints may have security put on the method level, which both of the methods do. Each of the get endpoints uses the @PreAuthorize annotation to tell the system that the calling application must have a particular scope specified in order to be authorized. For instance, if the /userEmail endpoint gets called without the email scope, it will throw an error.
The getWelcomeMessage method returns a welcome message with the user’s full name in it. The getUserEmail method will return the user’s email. Both of these pieces of data are pulled from the token claims, which you set up from the Okta console earlier.
Open a shell and launch an instance of the resource server using Maven.
./mvnw spring-boot:run
It will now be listening on port 8082.
Create the OAuth 2.0 Client App
The second codebase you will use is the code base for the two different client applications. Both client applications will use the same code but be launched with different configurations.
When you run the client application, you will run it first for OIDC App 1, which has the profile scope set.
You will also run it for OIDC App 2, but for this application, you will run it with both the profile and email scopes set.
This is one of the key differences in configuration between these two applications.
For both instance of the client applications, start with the code in the oauth2-client directory of the example project.
This web application is pretty simple. It imports the needed Okta and Spring dependencies and then just defines a client application that can be launched given certain parameters. The complete code for this application is in the SingleSignOnApplication class.
src/main/java/com/okta/examples/sso/SingleSignOnApplication.java
package com.okta.examples.sso;

import java.util.HashMap;
import java.util.Map;

import org.springframework.beans.factory.annotation.Value;
import org.springframework.boot.SpringApplication;
import org.springframework.boot.autoconfigure.SpringBootApplication;
import org.springframework.context.annotation.Bean;
import org.springframework.context.annotation.Configuration;
import org.springframework.security.core.annotation.AuthenticationPrincipal;
import org.springframework.security.oauth2.client.registration.ClientRegistrationRepository;
import org.springframework.security.oauth2.client.web.OAuth2AuthorizedClientRepository;
import org.springframework.security.oauth2.client.web.reactive.function.client.ServletOAuth2AuthorizedClientExchangeFilterFunction;
import org.springframework.security.oauth2.core.oidc.user.OidcUser;
import org.springframework.stereotype.Controller;
import org.springframework.web.bind.annotation.GetMapping;
import org.springframework.web.reactive.function.client.WebClient;
import org.springframework.web.servlet.ModelAndView;

@Controller
@SpringBootApplication
public class SingleSignOnApplication {

    private WebClient webClient;
    @Value("#{ @environment['resourceServer.url'] }")
    private String resourceServerUrl;

    public static void main(String[] args) {
        SpringApplication.run(SingleSignOnApplication.class, args);
    }

    public SingleSignOnApplication(WebClient webClient) {
        this.webClient = webClient;
    }

    @GetMapping("/")
    public ModelAndView home(@AuthenticationPrincipal OidcUser user) {
        ModelAndView mav = new ModelAndView();
        mav.addObject("user", user.getUserInfo());
        Map<String,String> userBasicProfile = new HashMap<String,String>();
        userBasicProfile.put("First Name",user.getGivenName());
        userBasicProfile.put("Middle Initial",user.getMiddleName());
        userBasicProfile.put("Last Name",user.getFamilyName());
        userBasicProfile.put("Nick Name",user.getNickName());
        String welcomeMessage = this.webClient.get()
                .uri(this.resourceServerUrl + "/welecomeMessage").retrieve()
                .bodyToMono(String.class).block();
        mav.addObject("welcomeMessage",welcomeMessage);

        try {
            String email = this.webClient.get()
                    .uri(this.resourceServerUrl + "/userEmail").retrieve()
                    .bodyToMono(String.class).block();

            if (email != null) {
                userBasicProfile.put("Email", email);
            }
        } catch (Exception e) {
            mav.addObject("emailError", true);
        }

        mav.addObject("profile", userBasicProfile);
        mav.setViewName("home");
        return mav;
    }

    @Configuration
    public static class OktaWebClientConfig {

        @Bean
        WebClient webClient(ClientRegistrationRepository clientRegistrations,
                            OAuth2AuthorizedClientRepository authorizedClients) {
            ServletOAuth2AuthorizedClientExchangeFilterFunction oauth2 = new ServletOAuth2AuthorizedClientExchangeFilterFunction(
                    clientRegistrations, authorizedClients);
            oauth2.setDefaultOAuth2AuthorizedClient(true);
            oauth2.setDefaultClientRegistrationId("okta");
            return WebClient.builder().apply(oauth2.oauth2Configuration()).build();
        }
    }
}
This file is annotated with both the @Controller and @SpringBootApplication annotations. The @SpringBootApplication annotation tells the application that it should support auto-configuration, component scanning, and bean registration.
The @Controller annotation tells the system that this file is a Rest API controller. In this case, there is only one endpoint, which handles GET requests to the base / URL.
That endpoint calls the code in the home method, which in the simplest terms, builds up a bunch of data to be displayed on the page and tells the page which template to use to display this data.
Within the home method, there are two calls to a resource server. First, it calls the resource server to get the welcome message to display on the page. This message will be returned successfully as long as the application is configured with the profile scope set, which as I mentioned earlier, it will be set for both instances of the client application. The next call gets the email for the user. The email is only successfully returned if the email scope is set for the application.
Remember, only the second instance of the client application will have the email scope set, so for the first instance, it will throw an error. This is an example of failed authorization using scopes to determine authorization.
If the email can’t be retrieved, it instead sets a flag that tells the template (configured in the home.html file) to display a message saying that the application is not authorized to get the email for the user.
Configure the Client Apps Using Spring Run Profiles
Now you need to configure the two different instances of the client application in the oauth2-client project folder. You need to be able to run two different instances of the client app using two different configuration values. To accomplish this, you’re going to take advantage of Spring Boot’s run profiles. This is typically used to separate things like test and dev and production, but there’s no reason we can’t use it here.
If you look under oauth2-client/src/main/resources, you’ll see three .properties files.
application.properties is common to all three profiles
application-client1.properties has the config values for client 1
application-client2.properties has the config values for client 2
Open oauth2-client/src/main/resources/application.properties and fill in the Issuer URI for the resource server you created above.
To find the Issuer URI (if you didn’t write it down) go to API and Authorization Servers. Look in the table next to OIDC Auth Server under Issuer URI.
okta.oauth2.issuer={yourIssuerUri}
resourceServer.url=http://localhost:8082
Open oauth2-client/src/main/resources/application-client1.properties and fill in the Client ID and Client Secret for the first OIDC client app.
If you need to find these values again, from the Okta Developer’s console, go to Applications, click on the OIDC application name (OIDC App 1) in the table, and click on the General tab. The Client ID and Client Secret are at the bottom.
okta.oauth2.clientId={yourClient1Id}
okta.oauth2.clientSecret={yourClient1Secret}
okta.oauth2.scopes=openid,profile
server.port=8080
Open oauth2-client/src/main/resources/application-client2.properties and fill in the Client ID and Client Secret for the second OIDC client app.
okta.oauth2.clientId={yourClient2Id}
okta.oauth2.clientSecret={yourClient2Secret}
okta.oauth2.scopes=openid,profile,email
server.port=8081
The last step is to run two instances of this client application. Run the following commands in two separate shell windows. This loads a client with each run profile.
Run client app 1 at http://localhost:8080:
./mvnw spring-boot:run -Dspring-boot.run.profiles=client1
Run client app 2 at http://localhost:8081:
./mvnw spring-boot:run -Dspring-boot.run.profiles=client2
That was a whole lot of configuration of things, so lets recap quickly what you’ve just set up and run.
- http://localhost:8082 is your local resource server
- http://localhost:8080 is client app 1 (any authenticated user can access)
- http://localhost:8081 is client app 2 (access policy set to only allow Tany Tester to access)
On the Okta side:
- You created matching OIDC applications for the server and the two client apps. This generates unique Client IDs and Client Secrets for each application, which allows Okta to authenticate the applications and allows you to use Okta to configure them.
- You also created a custom authorization server. This will manage all the authentication and authorization requests from the applications.
- Within the authorization server, you created two access policies, one for each of the client applications. Both access policies restrict access to the authorization code flow. The first client app is open to any authenticated user (any user authenticated through Okta’s single sign-on). The second app is restricted to the user Tanya Tester.
Thus you have created a pretty typical production scenario where you have a resource server that serves data to multiple client applications and you are using Okta’s dashboard to provide single sign-on, manage users, and set access policies to the client apps and the resource server.
Got it? Time to try it out.
Test Your Java Single Sign-On
In the next few steps, you will be logging in and out of different Okta accounts on the two different applications. Using an incognito window will avoid the need to log out of the Okta Admin Console or the single sign-on account.
Open a new incognito browser window and enter the URL http://localhost:8080. This is the URL to the first application OIDC App 1.
Log in with the tanyaTester@mail.com user. You should be able to successfully log in!
Next, you can change the URL to http://localhost:8081. This is the URL to the second application OIDC App 2. You will notice that you don’t have to log in again. This is because you already logged into OIDC App 1 and this is single sign-on!
If you were to close the browser window, open a new incognito browser, and log in to OIDC App 2 again, you would be prompted to log in again, since it will no longer have your session.
Test Your Access Policy
You have already seen that Tanya Tester can log in to both applications. Next, you’ll see what happens when you log in to each application with the amandaTester@mail.com user. If you haven’t already, close any incognito browser windows that you were already using for testing.
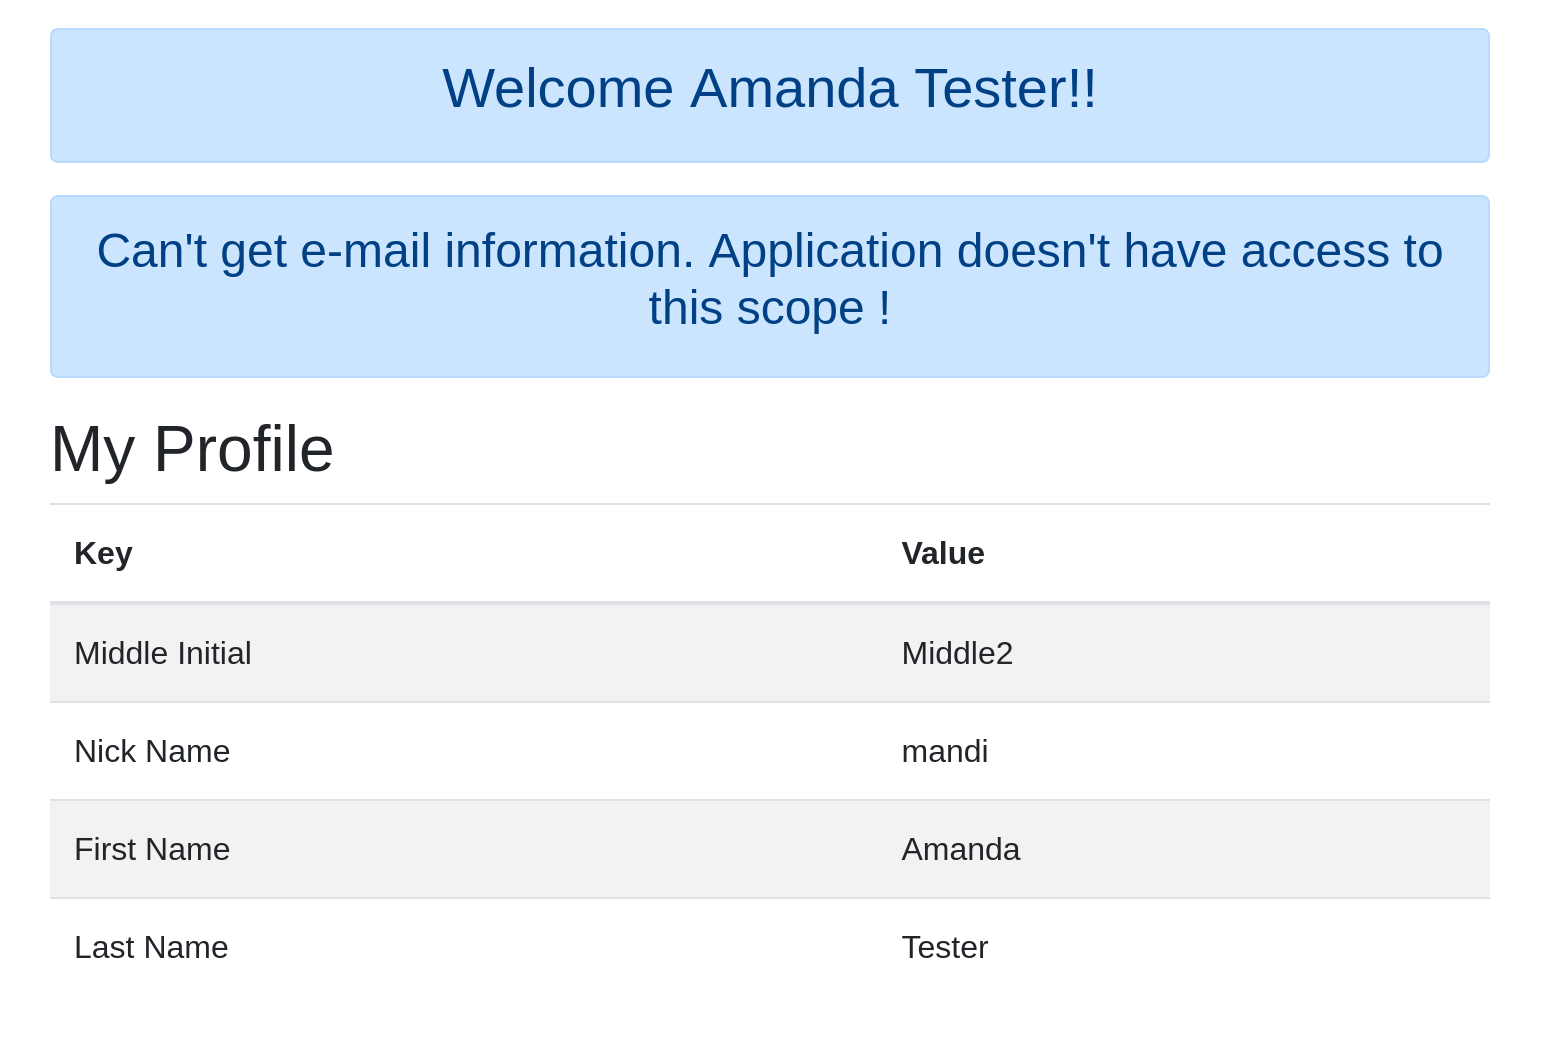
Open a new incognito browser window and enter the URL http://localhost:8080. Log in with the amandaTester@mail.com user. You should be able to successfully login!
Close that browser window and open a new incognito browser window and enter the URL http://localhost:8081.
Log in with the amandaTester@mail.com user. You will get an “access denied” error.
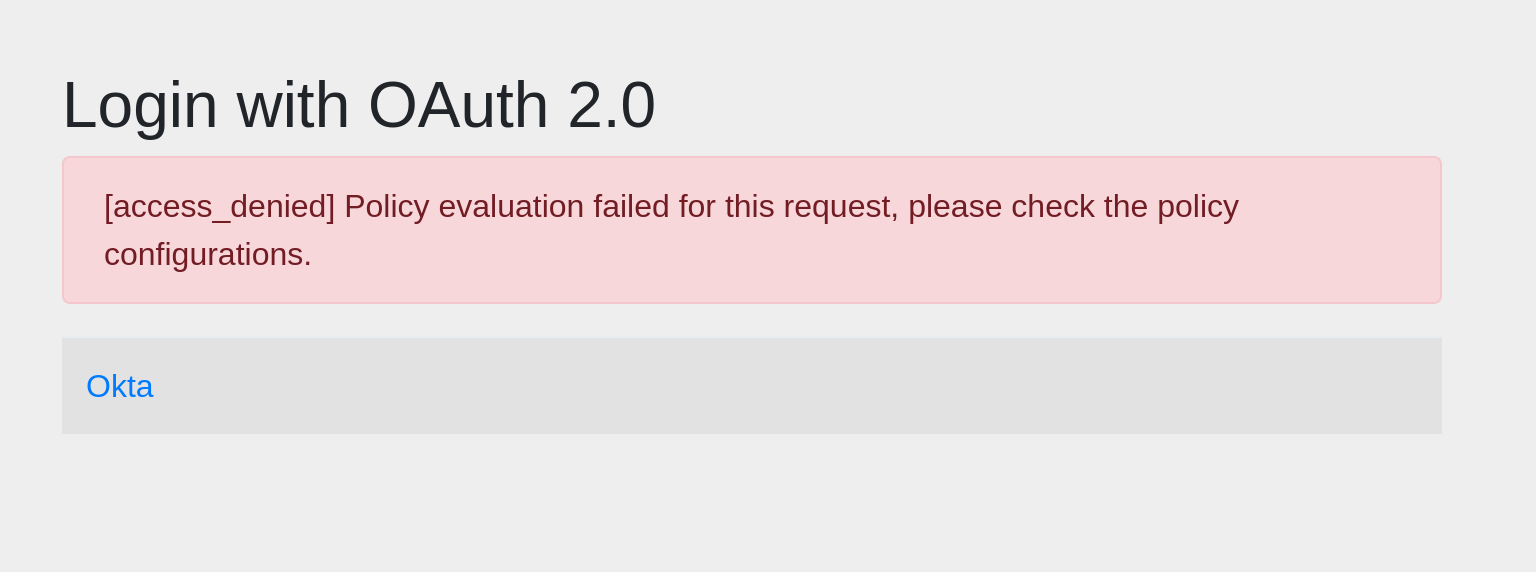
This error is because you set up the access policy so that only Tanya Tester could log in to OIDC App 2.
Test Your Scope Authorization
Lastly, you are going to test how the resource server handled the authorization of each of the applications.
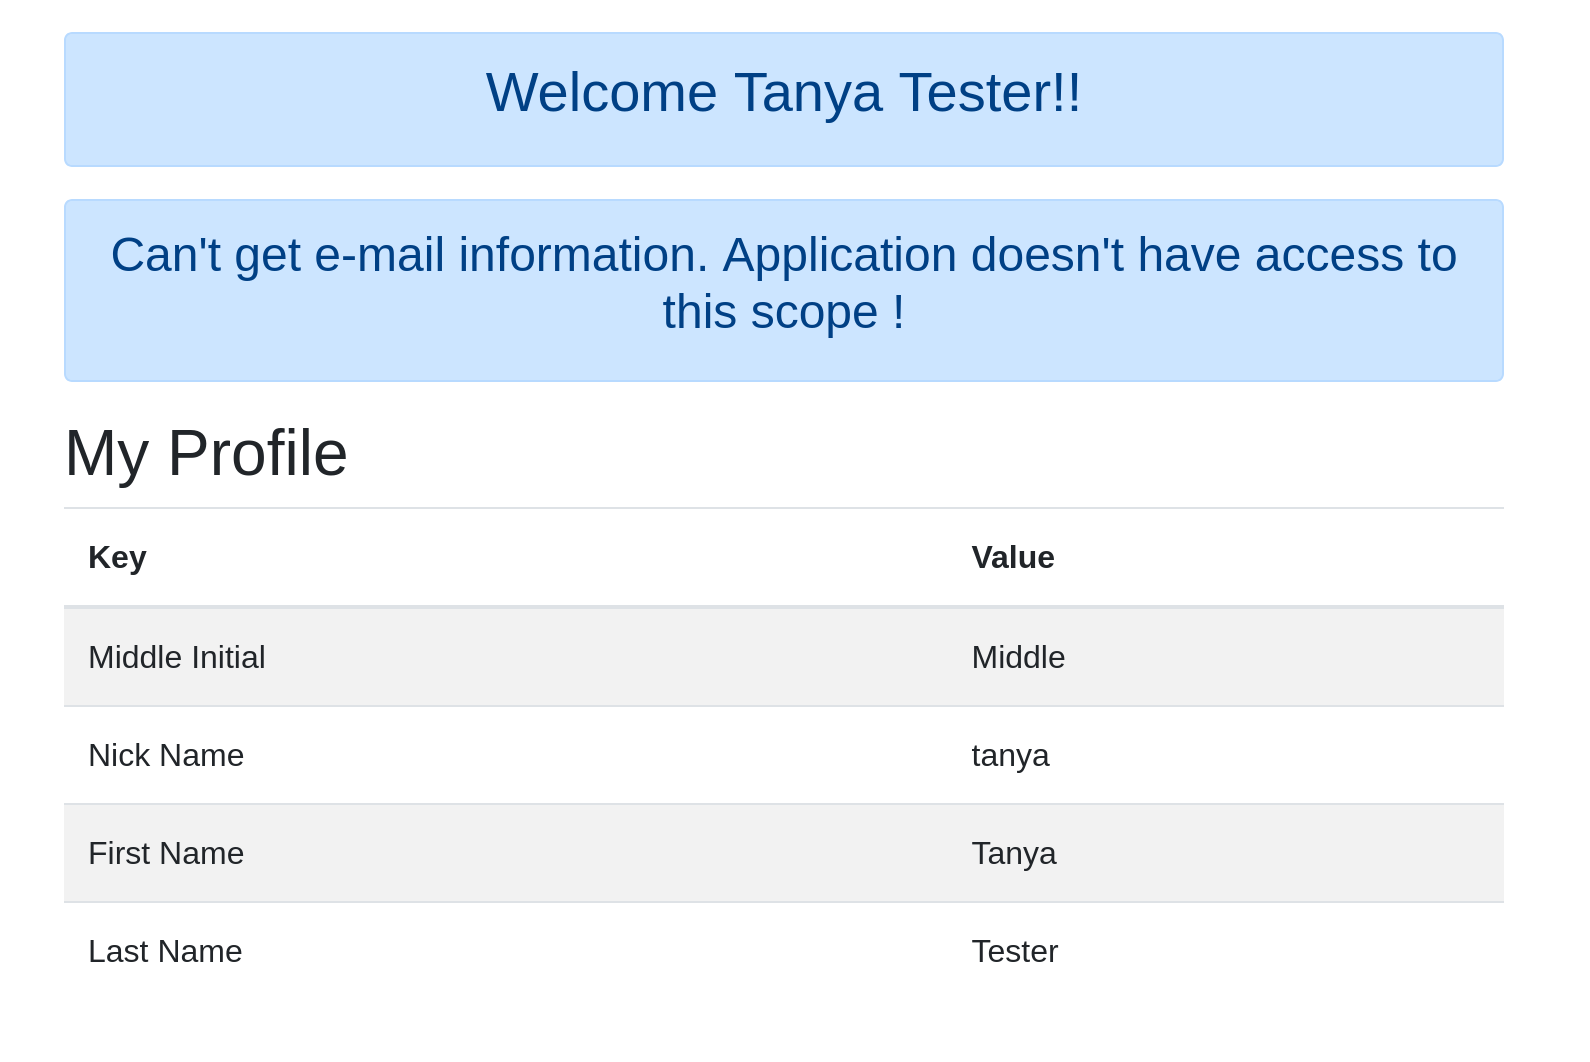
Open a new incognito browser window and enter the URL http://localhost:8080. Log in with the tanyaTester@mail.com user. You should be able to successfully log in.
Notice that you will see a message at the top with the user-specific welcome message. This is because the application was using the profile scope and was therefore allowed to access the welcome message endpoint. Below that, you will see a message saying that the application does NOT have access to the email information. This is because this instance of the application is NOT running with the email scope.
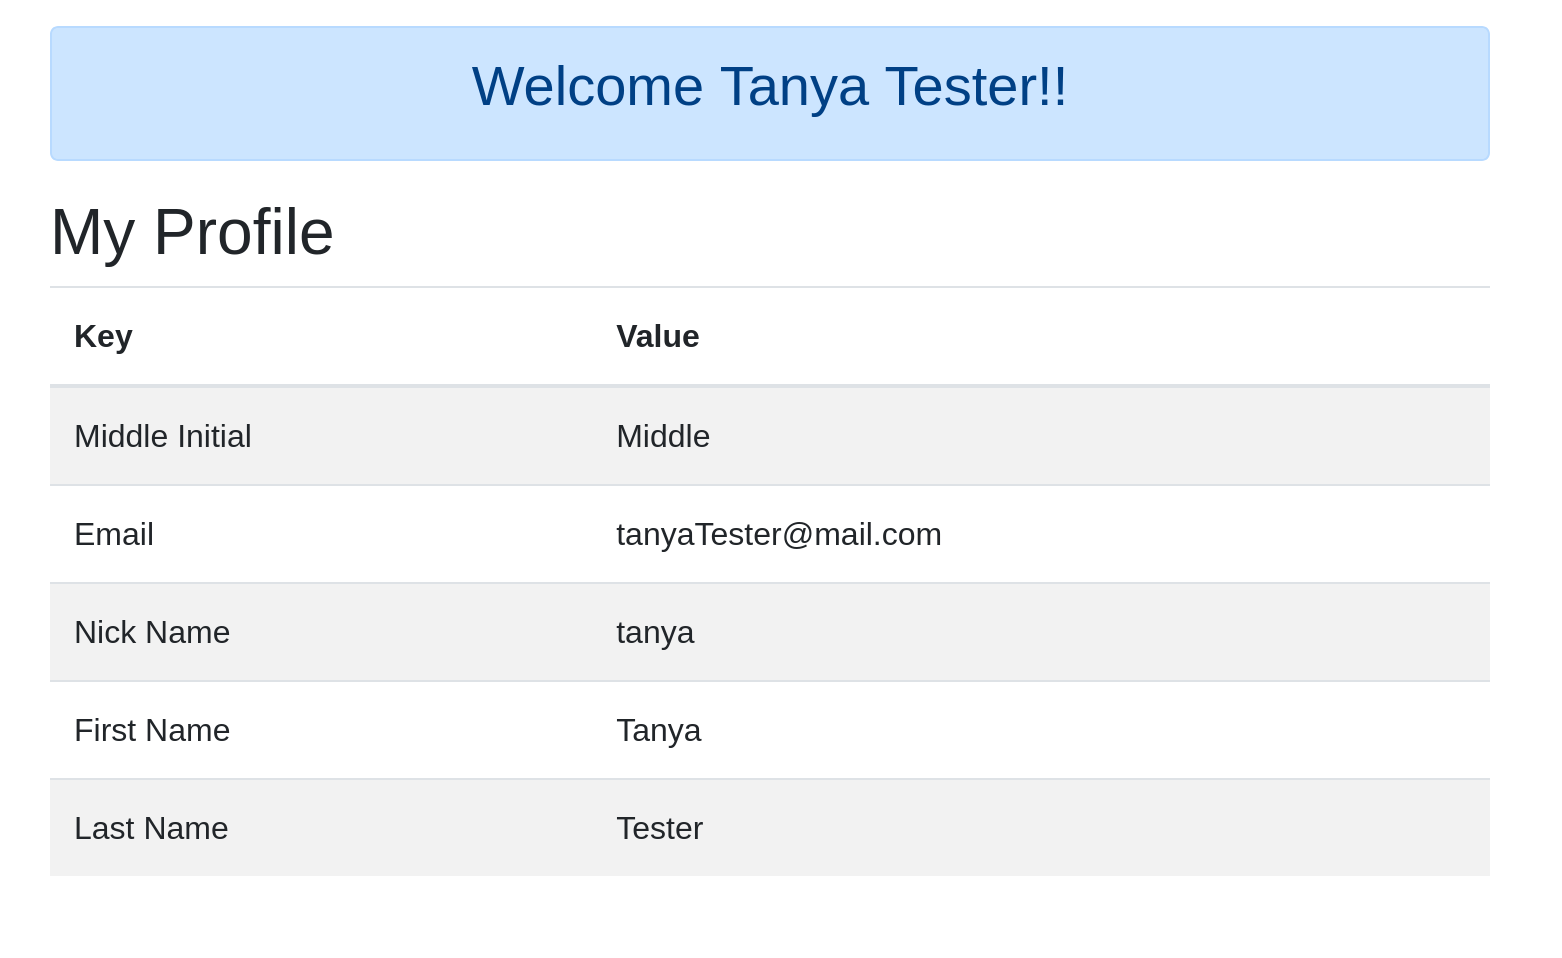
Next, you can change the URL to http://localhost:8081. Remember, this is the URL to the second application OIDC App 2. When you go to this page, you will notice that you do NOT see the message about not having access to the email. Instead, you will see the email as part of the profile information.
Learn More About Secure Single Sign-On in Java
I sincerely hope you enjoyed going through this tutorial, setting up a Spring Boot app, and finding out how easy it is to configure single sign-on with Okta.
To learn more about Spring Boot, OpenID Connect, and other topics, you might find these links helpful:
- Spring Boot and Okta in 2 Minutes
- Easy Single Sign-On with Spring Boot and OAuth 2.0
- Java Microservices with Spring Boot and Spring Cloud
- OAuth 2.0 and OpenID Connect
Don’t hesitate to drop me a note in the comments below and please follow @OktaDev on Twitter for more technical posts like this one!
Okta Developer Blog Comment Policy
We welcome relevant and respectful comments. Off-topic comments may be removed.