Deploy a .NET Container with Azure DevOps

When I began programming (in the ’80s), computers weren’t equipped with a network card by default. The internet was almost unknown and modems were slow and noisy. The software was installed from stacks of flexible floppy disks.
Today, computing resources are virtual. The internet is vital and there is an URL for everything. We live in the *aaS (* as a Service) era, where if you want something, there is likely one or more something as a Service providers you can easily get out of your favorite search engine.
In the software industry, a new type of figure has emerged and is gaining more and more importance; I am speaking of the *aaS expert, a.k.a. DevOps.
In this post, you’ll put on your DevOps suit and set up a CI/CD automation solution!
Note: In May 2025, the Okta Integrator Free Plan replaced Okta Developer Edition Accounts, and the Okta CLI was deprecated.
We preserved this post for reference, but the instructions no longer work exactly as written. Replace the Okta CLI commands by manually configuring Okta following the instructions in our Developer Documentation.
The Application
You are going to start by using this already existing ASP.NET Core MVC Web application. This post is not about the application itself though, so here I will only refer to some aspects that are needed to complete the topic. You can find more information in GitHub and in the Okta developers’ blog.
Requirements
You’ll need a machine with Window 10 (at least Professional edition, I am using version 10.0.18363) and the following resources (all are free or offer free editions):
- A local copy of the example application
- A GitHub account
- An Azure account (Free Tier is ok)
- An Azure DevOps account
- An Okta Developer account
- Visual Studio 2019 (I am using version 16.6.5), with .NET Core and Docker workloads
- Docker Desktop
- Git
This application is an example of how to extend a basic ASP.NET Core MVC application with Okta’s implementation of Open ID Connect (OIDC).
The building blocks in this integration are as follows:
Call AddOktaMvc() in Startup.ConfigureServices().
services.AddOktaMvc(new OktaMvcOptions
{
    // Replace these values with your Okta configuration
    OktaDomain = Configuration.GetValue<string>("Okta:OktaDomain"),
    ClientId = Configuration.GetValue<string>("Okta:ClientId"),
    ClientSecret = Configuration.GetValue<string>("Okta:ClientSecret"),
    Scope = new List<string> { "openid", "profile", "email" },
});
Add a Configuration Entry Object in appsettings.json.
"Okta": {
    "OktaDomain": "https://{yourOktaDomain}",
    "ClientId": "{ClientId}",
    "ClientSecret": "{ClientSecret}"
}
Ensure UseAuthentication() and UseAuthorization() are Called in Startup.Configure().
app.UseAuthentication();
app.UseAuthorization();
These calls are not part of the Okta package (they are .NET Core methods) and are required to tell the framework that you want our app to use the authentication and authorization features. The ASP.NET Core runtime automatically manages auth{entication/orization} scenarios, in this case using the Okta middleware, as per your instructions in ConfigureServices().
Finally, there are multiple ways to trigger the authentication/authorization process from your application. In the example I used for this post, there are two triggers:
Explicit (User Requests Sign In/Out From the UI)
The standard top bar created from the .NET Core Template project (_Layout.cshtml) has been enriched with Sign In and Sign Out hyperlinks
<div class="navbar-collapse collapse d-sm-inline-flex flex-sm-row-reverse">
    @if (User.Identity.IsAuthenticated)
    {
        <ul class="nav navbar-nav navbar-right">
            <li><p class="navbar-text">Hello, @User.Identity.Name</p></li>
            <li><a class="nav-link" asp-controller="Home" asp-action="Profile" id="profile-button">Profile</a></li>
            <li>
<!-- Sign Out --><form class="form-inline" asp-controller="Account" asp-action="SignOut" method="post">
                    <button type="submit" class="nav-link btn btn-link text-dark" id="logout-button">Sign Out</button>
                </form>
            </li>
        </ul>
    }
    else
    {
        <ul class="nav navbar-nav navbar-right">
<!-- Sign In --><li><a asp-controller="Account" asp-action="SignIn" id="login-button">Sign In</a></li>
        </ul>
    }
Implicit (User Navigates to Protected Resources)
When the user accesses a protected feature without being logged-in, she’s automatically redirected to the authentication flow. To achieve this in our example, it is sufficient to mark the protected resource with the standard Authorize attribute (in this case, an MVC controller action):
public class HomeController : Controller
{
...
    [Authorize]
    public IActionResult Profile()
    {
        return View(HttpContext.User.Claims);
    }
...
}
Note: To trigger the implicit flow before logging in, you need to manually access the profile page, typing the ../Home/Profile path suffix in the browser address bar. This is because the only link available to the page is visible only when the user is logged-in.
Prep Your .NET Core application for Azure DevOps
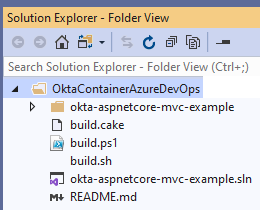
By now, you should have your fresh copy of the application somewhere in your local hard disk. Open the folder in Visual Studio; your solution explorer should appear as in the following picture:
Although not strictly necessary, to avoid confusion I prefer to change the name. The new name is okta-aspnetcore-container-example. Changing the Solution and Project name can be a challenge, especially in big projects. References to files or folders can break, making it impossible for the IDE to load the project correctly. A good way to mitigate this risk is to use the IDE itself to do the renaming. In this case, though, there is only one rename operation that Visual Studio cannot perform automatically: renaming the directory okta-aspnetcore-mvc-example. Even if you do this in Solution Explorer, Visual Studio does not automatically change the solution file. Therefore, you need to manually edit the solution file to make it right:

Now, double-click the solution file, and the solution will open as expected; without modifying the solution file manually, this operation would not succeed.
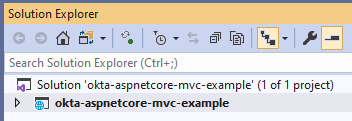
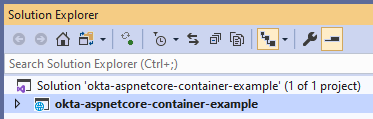
To complete the rename consistently, rename the Solution and the Project in Solution Explorer.
Change the default namespace for the project.
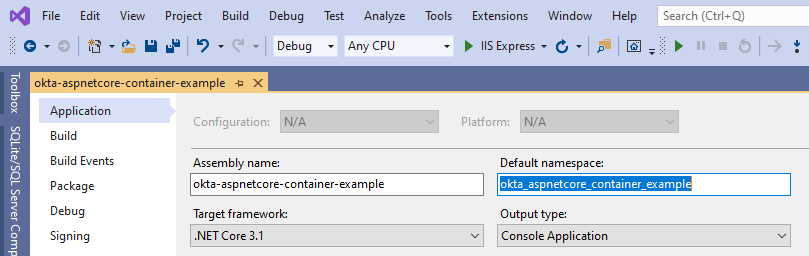
Change Namespace for the Existing Source Code (Using Visual Studio Rename Feature)
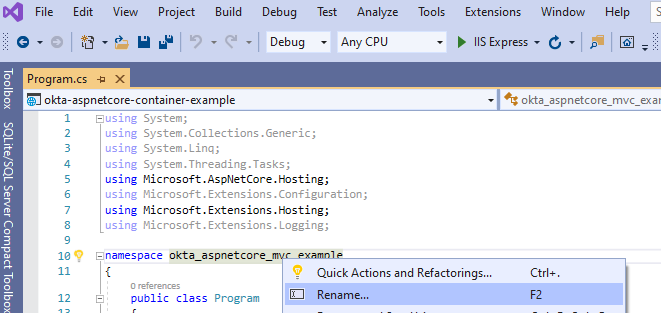
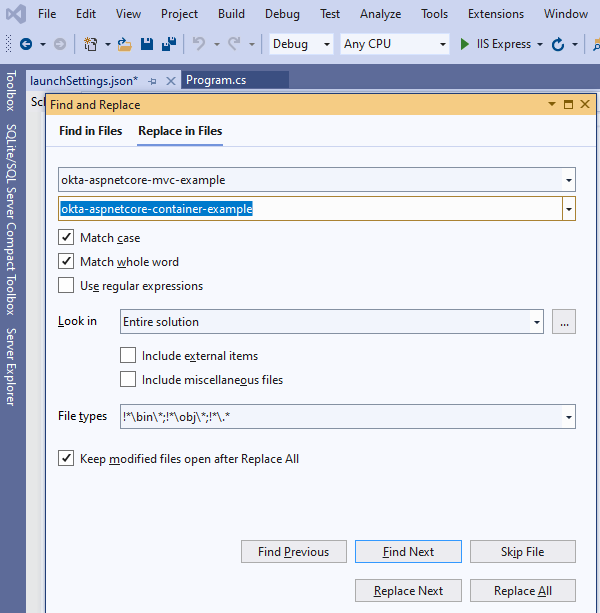
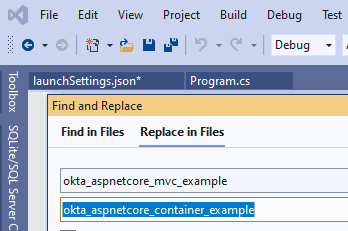
Replace all occurrences of okta-aspnetcore-mvc-example and okta_aspnetcore_mvc_example with the new values.
Now, you should be able to build and run the application without any error. However, the Okta auth flows have not been configured yet.
Create the Okta Application and Bind it to the Project
Okta strives to offer a first-class quality service with tools that make the integration process as easy as possible for your development environment. Specifically, for .NET Core, Okta offers a NuGet package that seamlessly integrates with the middleware pattern popular for this framework. With a few additions to the source files, the full Single Sign On (SSO) experience is nicely embedded in a purely declarative syntax.
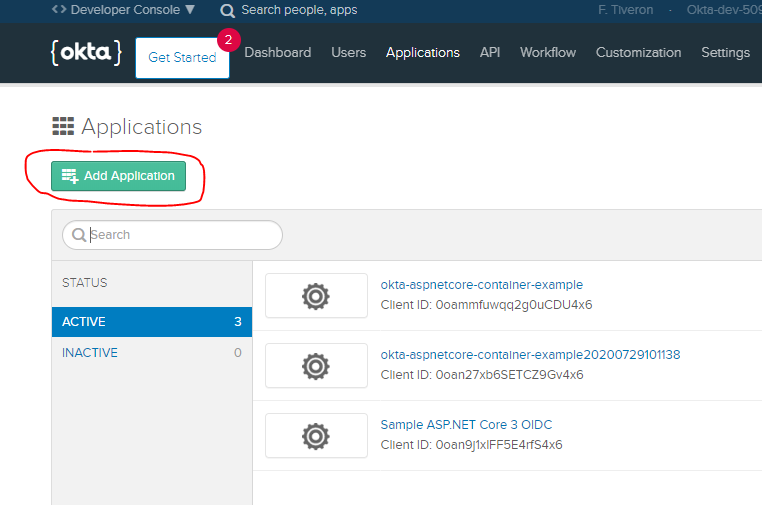
In the Okta console, login to your developer account and create an application.
Select the .NET Platform Finally, provide settings as per the following image
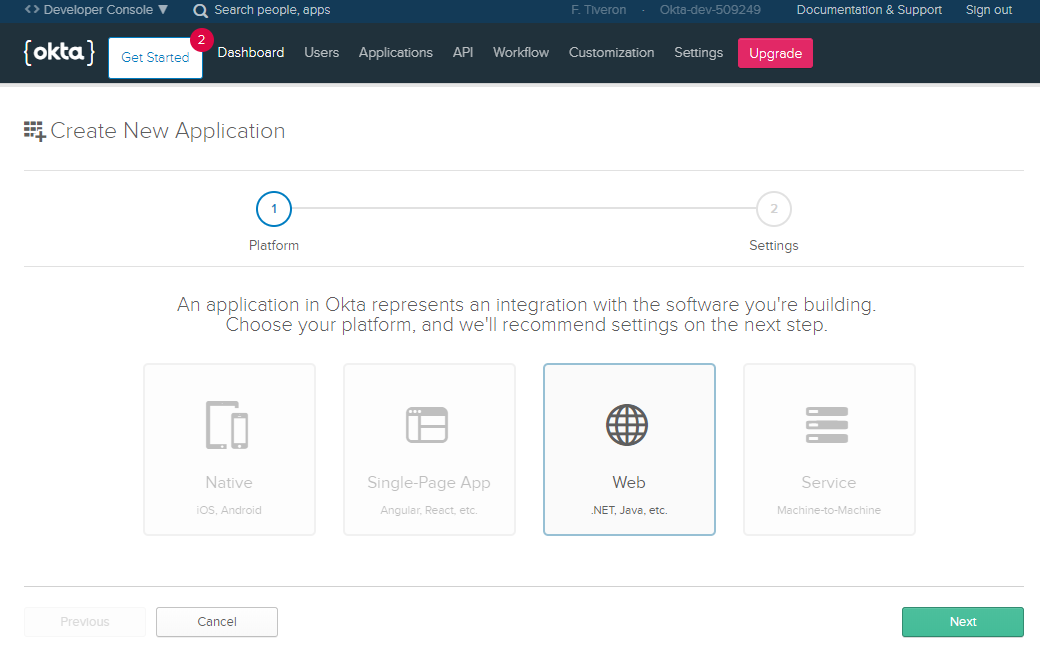
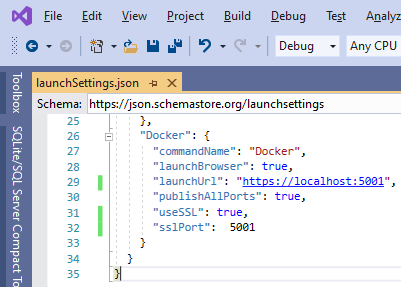
The TCP port (5001 here) must be the same value present in launchSettings.json.
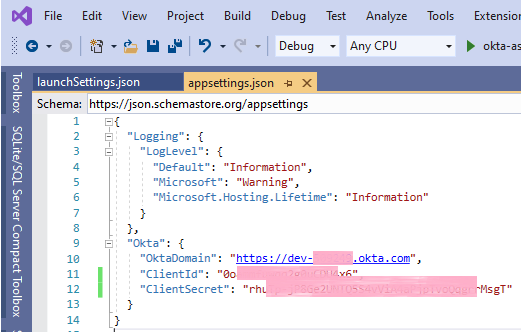
Last but not least, the Okta domain assigned to your Okta account, the Client ID, and secret generated by Okta for the new Okta application need to be copied into the placeholders in appsettings.json.
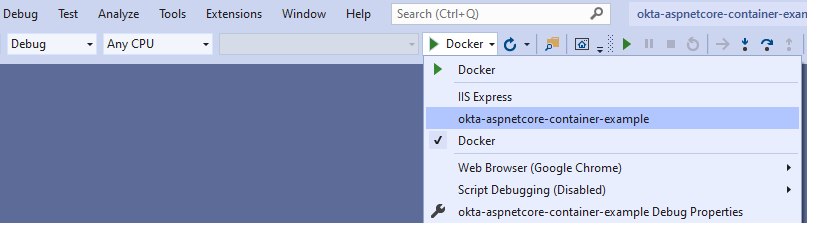
With this, you should be now able to sign in, sign out, and see the user profile.
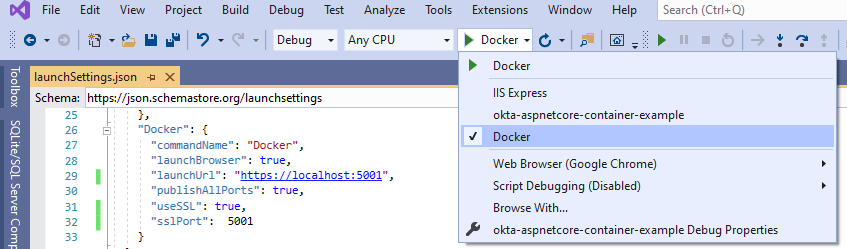
Note that to have Visual Studio launch the correct environment, you must select the correct profile
Containerize Your Application With Docker
Getting familiar with all the nuances of the Docker CLI and the DOCKERFILE can take some time. Fortunately, Visual Studio offers a scaffolding feature for Docker support. It can be selected when the project is created or added to an already existing project; this is the option to select here:
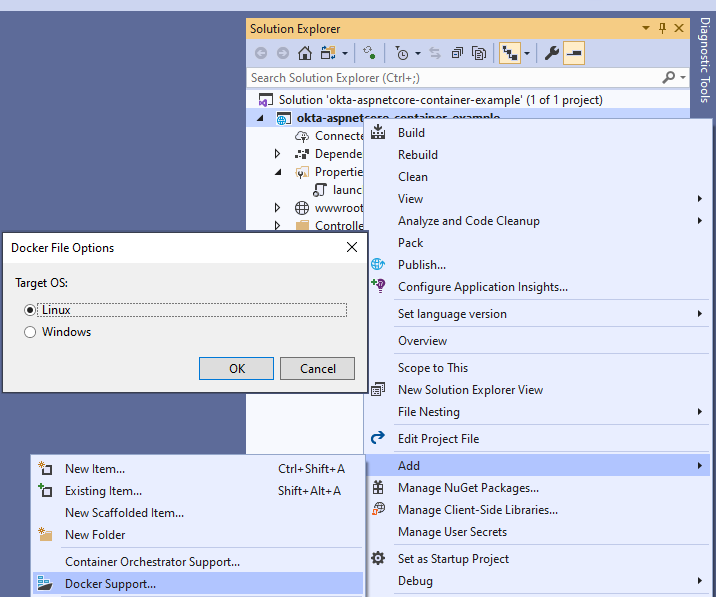
Since this is a project in .NET Core, Linux or Windows can be selected as the Operating System. I chose Linux here, as normally Linux images have a smaller footprint. As a result of this operation, Visual Studio makes some changes to the project, like adding a DOCKERFILE and a template entry object to launchSettings.json. The only thing you need to do to obtain a locally testable Docker version of your application is to customize the template JSON object.
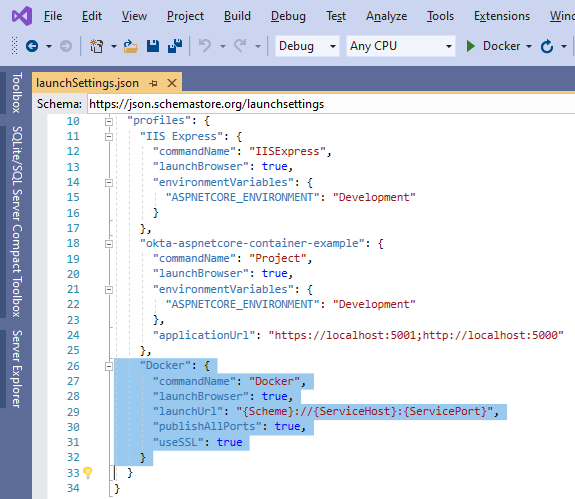
With this, you can launch and debug your new Docker container in Visual Studio, just by selecting the correct profile.
Deploy Your .NET container with Azure DevOps
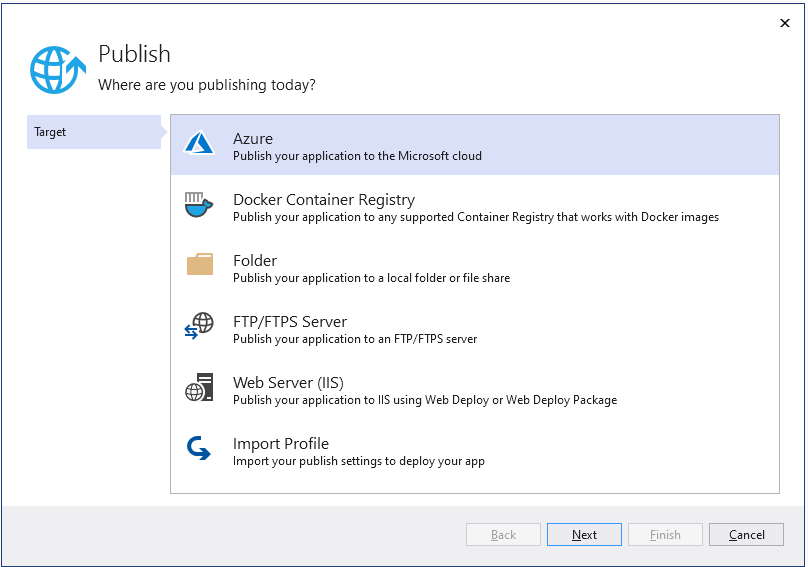
Deploying to Azure is also easy with Visual Studio support. Right-click the project in Solution Explorer, and select “Publish…“. You’ll be presented with the Publish Wizard (for good guidance of when to right-click publish your project, check out this article). See below the steps to deploy your container as a Cloud Web Application:
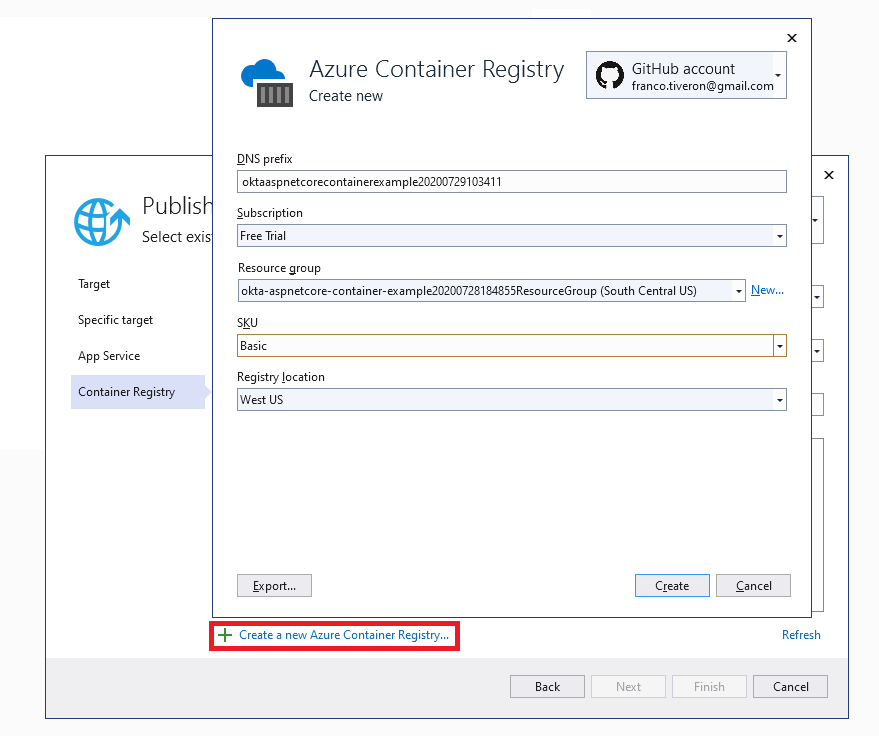
Your Publish page will be populated with the new Publish profile. Note that I did not have to set any value in the wizard forms, I just accepted the default values. Of course in production scenarios, there should be a naming scheme for the resources.
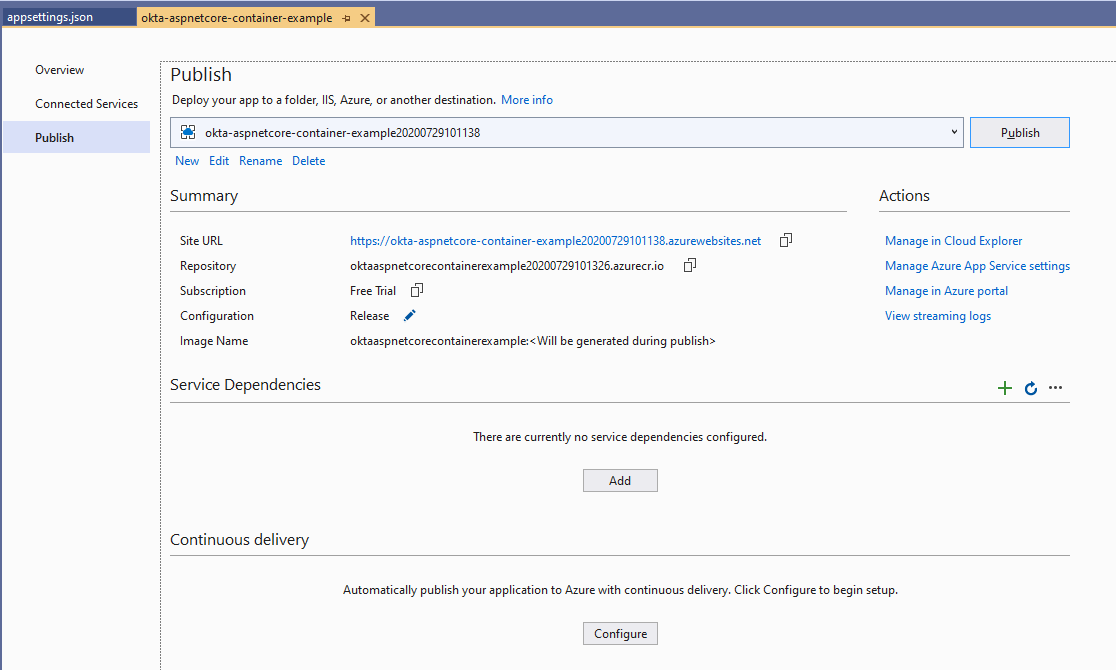
Click the Publish button and, in a short time (roughly 2 minutes in my laptop), your Azure account will be fully instrumented with all re resources needed to have your application up and running:
- The resource group containing the newly created resources
- The Azure Container Registry
- The Docker image
- An app service plan
- The application instance itself, up and running
Last but not least, remember that you need to set up your Okta application with the newly published endpoint. The easiest way is probably to create another application like the one you created at the beginning of this post and use the Azure endpoint (in the example https://localhost/5001 becomes https://okta-aspnetcore-container-example20200729101138.azurewebsites.net)
OAuth Redirection Note
If you try your application from the Azure deployment, you could encounter a problem when the security workflow runs. There is a little nuance occurring in a very specific scenario: ASP.NET Core applications hosted in Linux containers seem to not use the https scheme when redirecting the browser in the middle of an OAuth flow. I did actually have this issue, but only in the Azure deployment, not while running locally on my laptop.
Luckily, there is an easy solution. (ASP.NET Core passing HTTP (not HTTPS) redirect URL in OAuth challenge when hosted in Linux container).
Simply add this code in your Startup.cs/Configure
app.UseForwardedHeaders(new ForwardedHeadersOptions
{
      ForwardedHeaders = ForwardedHeaders.XForwardedProto
});
Create an Azure DevOps CI/CD Pipeline For Your Containerised Application
This could be a microservice component of a larger Service Oriented Application solution or a standalone e-commerce web portal. Either way, it would be cool to be able to automate building and deployment. This is what modern DevOps is all about!
At the end of this section, you’ll have automation that—as soon as you push changes to your source control repo—will rebuild and deploy your application! In a few minutes, the changes will be fully deployed and available to your customers.
Note that I didn’t mention testing as part of the pipeline. Good practice in Test Driven Development is to include in the solution automated tests to be executed after a successful build and establish rules to avoid deployment if the results of the tests are unsatisfactory. In this post I am not developing any tests, being the scope to show how to deploy using Azure DevOps.
Visual Studio has a built-in wizard to get you up with a templated pipeline.
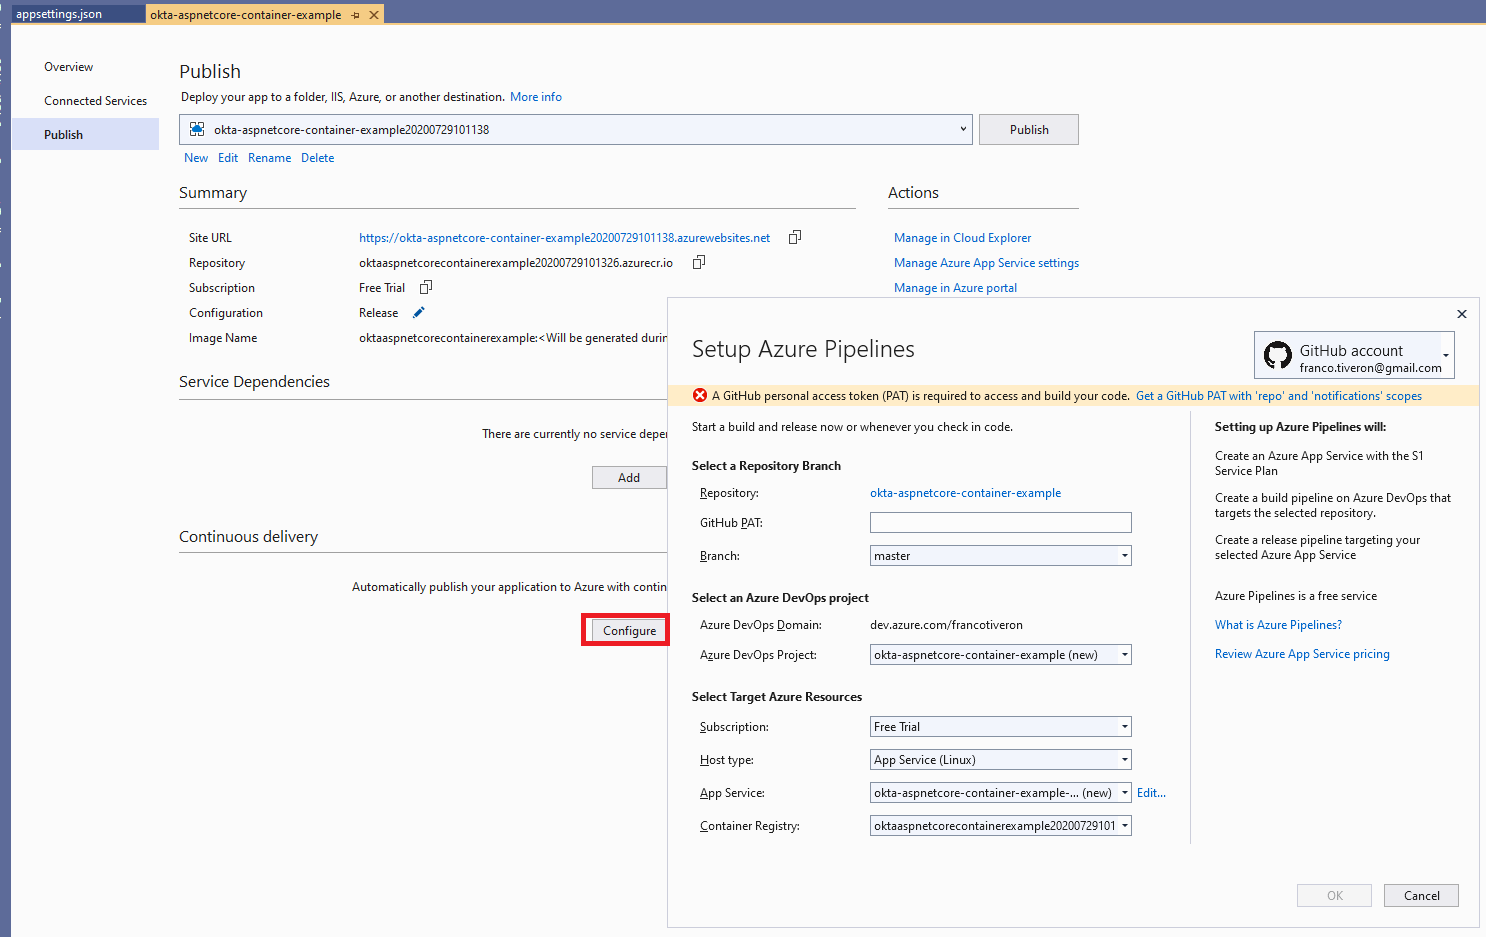
The wizard form is fully pre-populated with suitable values. The only missing value is the GitHub Personal Access Token. The wizard shows this miss and provides a handy link to jump directly to your GitHub repo, where you will generate a new PAT token and copy-paste it in the form.
Note that, by default, the wizard would create a new App Service. In this case, you have previously published the application and created an App Service for it, so go ahead and select that App service from the dropbox. To start the process confirm clicking on OK.
After a few minutes, you can open your Azure DevOps account and explore the freshly scaffolded CI/CD Pipeline.
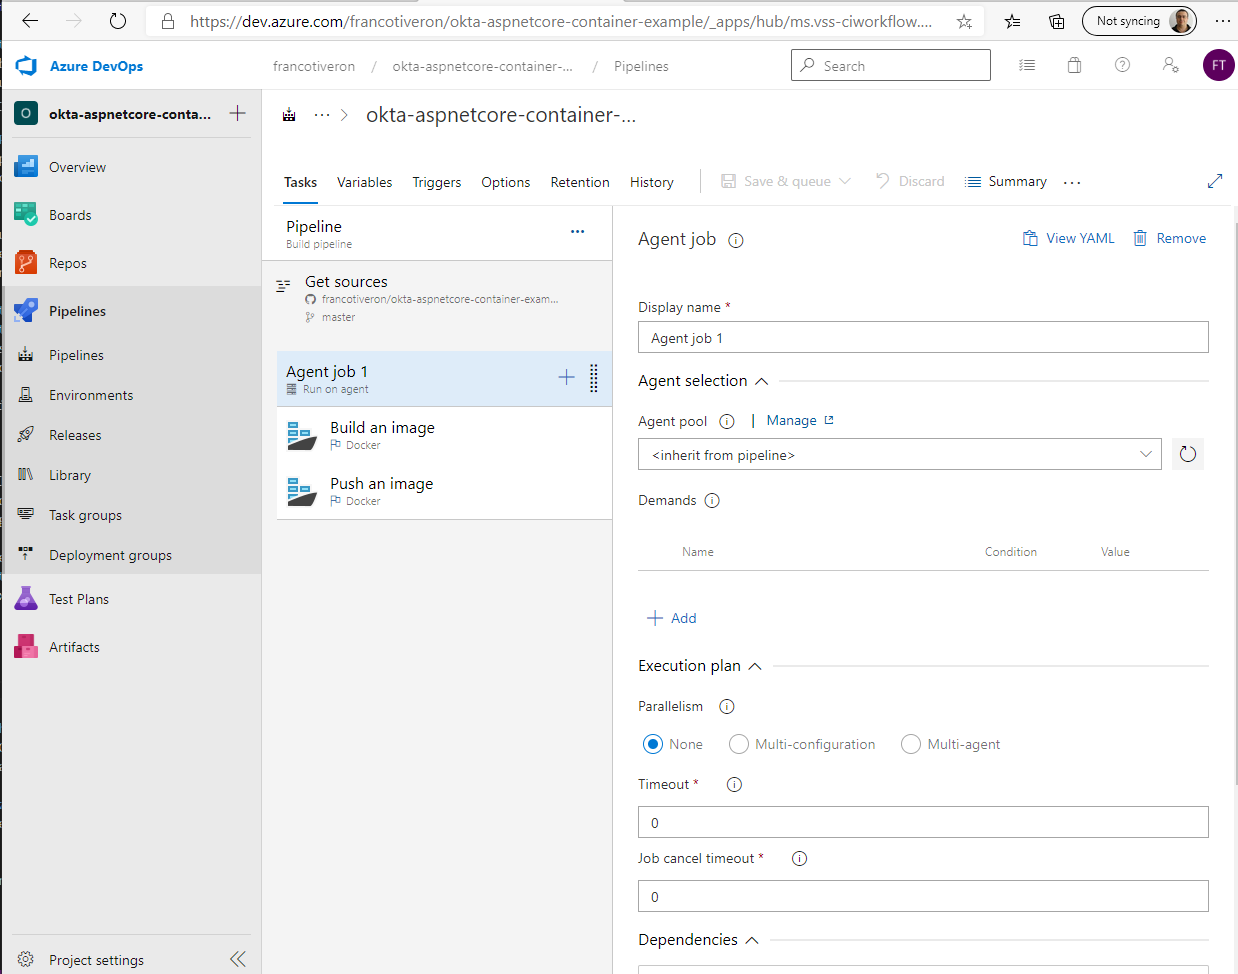
CI Pipeline (Build)
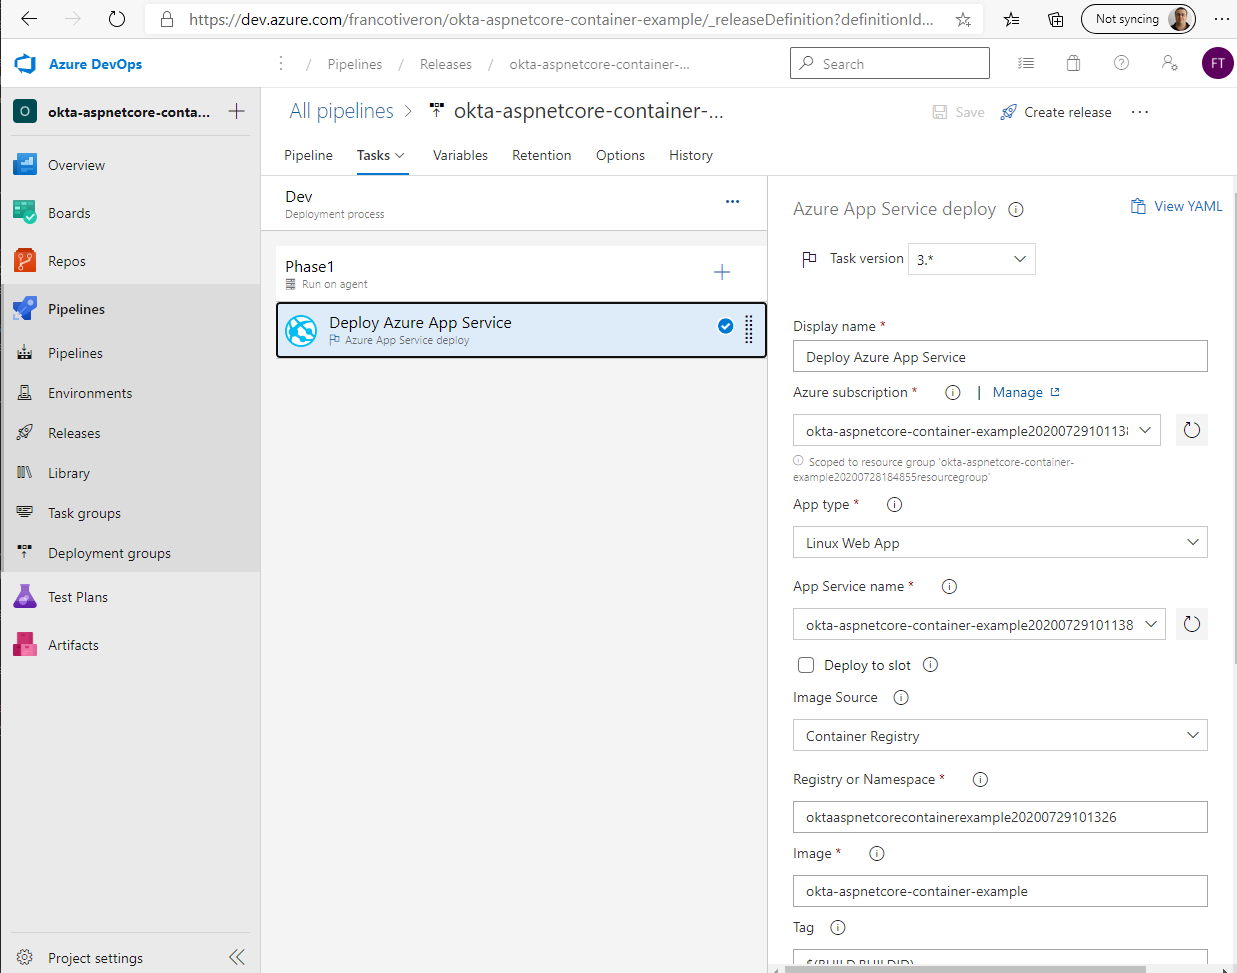
CD Pipeline (Deploy)
Now, as soon as you push changes to your GitHub repo Azure DevOps will detect it, proceed to build, and then deploy the updated application automatically.
Note: You will likely need to tweak some parameters to align the pipeline to your particular situation.
Recap
In this post you’ve seen the basics on how to apply two modernization patterns to a .NET Core application:
- Containerisation
- DevOps CI/CD
Okta authentication/authorization support works just fine. The only thing to remember is that the base URL of the deployed application is different from the URL used when testing locally, and consequently the Okta application configuration must support both scenarios.
What you learned:
- How to add Docker support to your ASP.NET Core application
- Manually deploy your containerized application to Azure App Service
- Create an Azure DevOps CI/CD pipeline to automate build and deploy workflows
Learn More About .NET and OAuth
If you are interested in learning more about security and .NET check out these other great articles:
- Deploy Your ASP.NET Core Application to Azure
- Okta ASP.NET Core MVC Quickstart
- Deploy a .NET Container with AWS Fargate
- The Most Exciting Promise of .NET 5
- Goodbye Javascript! Build an Authenticated Web App in C# with Blazor + ASP.NET Core 3.0
- Create a CI/CD pipeline for .NET with the Azure DevOps Project
Make sure to follow us on Twitter, subscribe to our YouTube Channel and check out our Twitch channel so that you never miss any awesome content!
Okta Developer Blog Comment Policy
We welcome relevant and respectful comments. Off-topic comments may be removed.