Test in Production with Spring Security and Feature Flags

Okta is an Identity and Access Management platform. The TL;DR: you offload the responsibility for secure authentication and authorization to Okta so you can focus on the business logic of the app you’re building.
Okta and Spring Boot already go together like peanut butter and chocolate. Add in feature flags care of Split, and you can test new capabilities for your app without having to redeploy. That’s testing in production the smart way! And, you can leverage Okta’s groups to easily manage who should see the new stuff and who sees the old stuff.
In this post, I start with setting up an Okta org and configuring an OpenID Connect app. Next, I integrate Okta into a simple Spring Boot and Spring Security app. Finally, I add feature flags to deliver a new UI experience for select users - those that belong to a particular group.
Table of Contents
- Get Started with Okta
- Get Started with Spring Boot
- Get Started with Feature Flags
- Learn More About Building Secure Applications
Note: In May 2025, the Okta Integrator Free Plan replaced Okta Developer Edition Accounts, and the Okta CLI was deprecated.
We preserved this post for reference, but the instructions no longer work exactly as written. Replace the Okta CLI commands by manually configuring Okta following the instructions in our Developer Documentation.
Get Started with Okta
OpenID Connect (OIDC) rides on top of OAuth 2.0 for a modern Single Sign-on, authentication and authorization standard. Okta provides these standards as a service. Don’t know anything about these standards yet? Good news - You don’t have to! By following some simple instructions to provision an Okta org and setup a hosted instance of OIDC, you can easily integrate a Spring Boot app with just configuration. Let’s get started with 3 easy steps:
If you’re interested in learning more about OIDC and OAuth 2.0, here and here are good places to start. Look for more links to posts on OIDC and OAuth 2.0 at the end of this post.
Register for an Okta Org and Create an OIDC App
Before you begin, you’ll need a free Okta developer account. Install the Okta CLI and run okta register to sign up for a new account. If you already have an account, run okta login.
Then, run okta apps create. Select the default app name, or change it as you see fit.
Choose Web and press Enter.
Select Other.
Then, change the Redirect URI to http://localhost:8080/login/oauth2/code/okta and use http://localhost:8080 for the Logout Redirect URI.
What does the Okta CLI do?
The Okta CLI will create an OIDC Web App in your Okta Org. It will add the redirect URIs you specified and grant access to the Everyone group. You will see output like the following when it’s finished:
Okta application configuration has been written to: /path/to/app/.okta.env
Run cat .okta.env (or type .okta.env on Windows) to see the issuer and credentials for your app.
export OKTA_OAUTH2_ISSUER="https://dev-133337.okta.com/oauth2/default"
export OKTA_OAUTH2_CLIENT_ID="0oab8eb55Kb9jdMIr5d6"
export OKTA_OAUTH2_CLIENT_SECRET="NEVER-SHOW-SECRETS"
Your Okta domain is the first part of your issuer, before /oauth2/default.
NOTE: You can also use the Okta Admin Console to create your app. See Create a Web App for more information.
Add Users to your Okta Org
Run okta login and open the resulting URL in your browser. Sign in to the Okta Admin Console.
Then, go to Directory > People. Here, you’ll see the user already created for you with the name and email you submitted to create the Okta org.
Click Add Person. This will bring you to the input form for adding a new user:
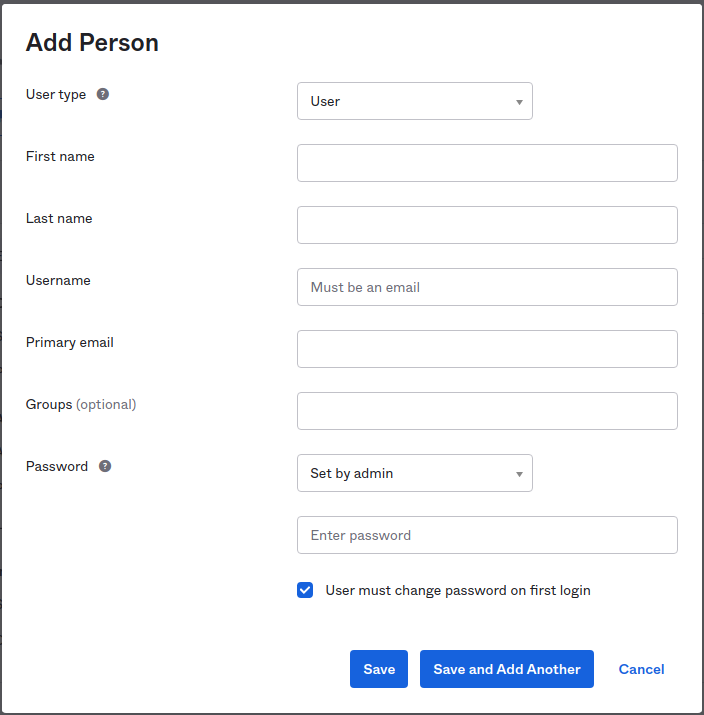
Change the Password field to Set by admin and uncheck User must change password on first login. Create the following users by filling out the form and clicking on Save and Add Another for each:
| First name | Last name | Username | Primary email | Password |
|---|---|---|---|---|
| Bob | Belcher | bob@belcher.com | bob@belcher.com | 123456aA$ |
| Linda | Belcher | linda@belcher.com | linda@belcher.com | 123456aA$ |
| Tina | Belcher | tina@belcher.com | tina@belcher.com | 123456aA$ |
| Gene | Belcher | gene@belcher.com | gene@belcher.com | 123456aA$ |
| Louise | Belcher | louise@belcher.com | louise@belcher.com | 123456aA$ |
Next, you’ll add some groups and assign some users to those groups.
Add Groups to your Okta Org
Navigate to Directory > Groups. Here, you’ll see the built-in Everyone group. As you might imagine, every current and new user is automatically added to this group.
Click Add Group. This will bring you to the input form for adding a new group:
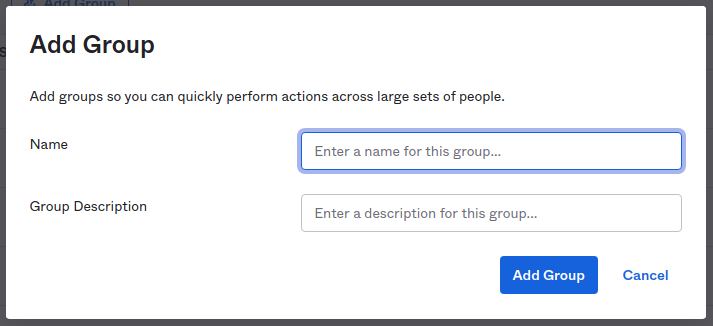
Enter BETA_TESTER in both the Name and Group Description fields. Click Add Group.
Click the link to the newly created BETA_TESTER group. Click Manage People. Click on each of Tina, Gene, and Louise on the left. Notice that those users are moved from the left to the right, indicating that they will be members of the group. Click Save to finalize these changes.
Now, you’re Okta org is configured with five users (the Belcher family), 3 of whom belong to the BETA_TESTER group.
Configure the OIDC App to Return Groups Claim
The last Okta configuration step is to make sure that the list of groups a user belongs to is returned when a user authenticates. You’ll see below that this integrates very easily with Spring Security.
Go to Security > API and select the default authorization server (it should be the only one right now).
Click the Claims tab. Click Add Claim:
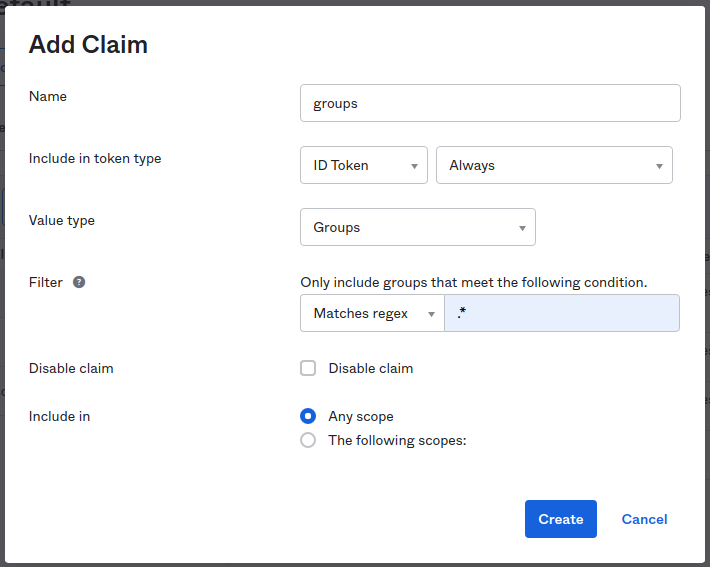
Fill the form in with the following (leave anything not named as default):
| Field | value |
|---|---|
| Name | groups |
| Include in token type | ID Token Always |
| Value type | Groups |
| Filter | Matches regex .* |
Click Create to finish.
Your Okta org is all ready to go to provide authentication and authorization services to your application. This is the great thing about Okta - with a little bit of configuration, you get all the services you need for auth allowing you to focus on the primary mission of your app.
All of the configuration you did in this section can be done via the Okta Management API. If this is something that interests you, check out the documentation here.
Next up, you’ll wire up Spring Boot with Spring Security to your Okta org. When you see how easy it is, your mind might just get blown.
Get Started with Spring Boot
The Spring team over at Pivotal has done an amazing job of making getting started with Spring Boot super easy. The Spring Initializr project over at https://start.spring.io allows you to select everything you need for the app you want to build.
For our purposes (and to keep things simple), you just need:
| Component | Description |
|---|---|
| Spring Web | RESTful APIs and Spring MVC |
| Thymeleaf | Server-side Java templating engine |
| Okta | Easy integration with Okta; includes Spring Security |
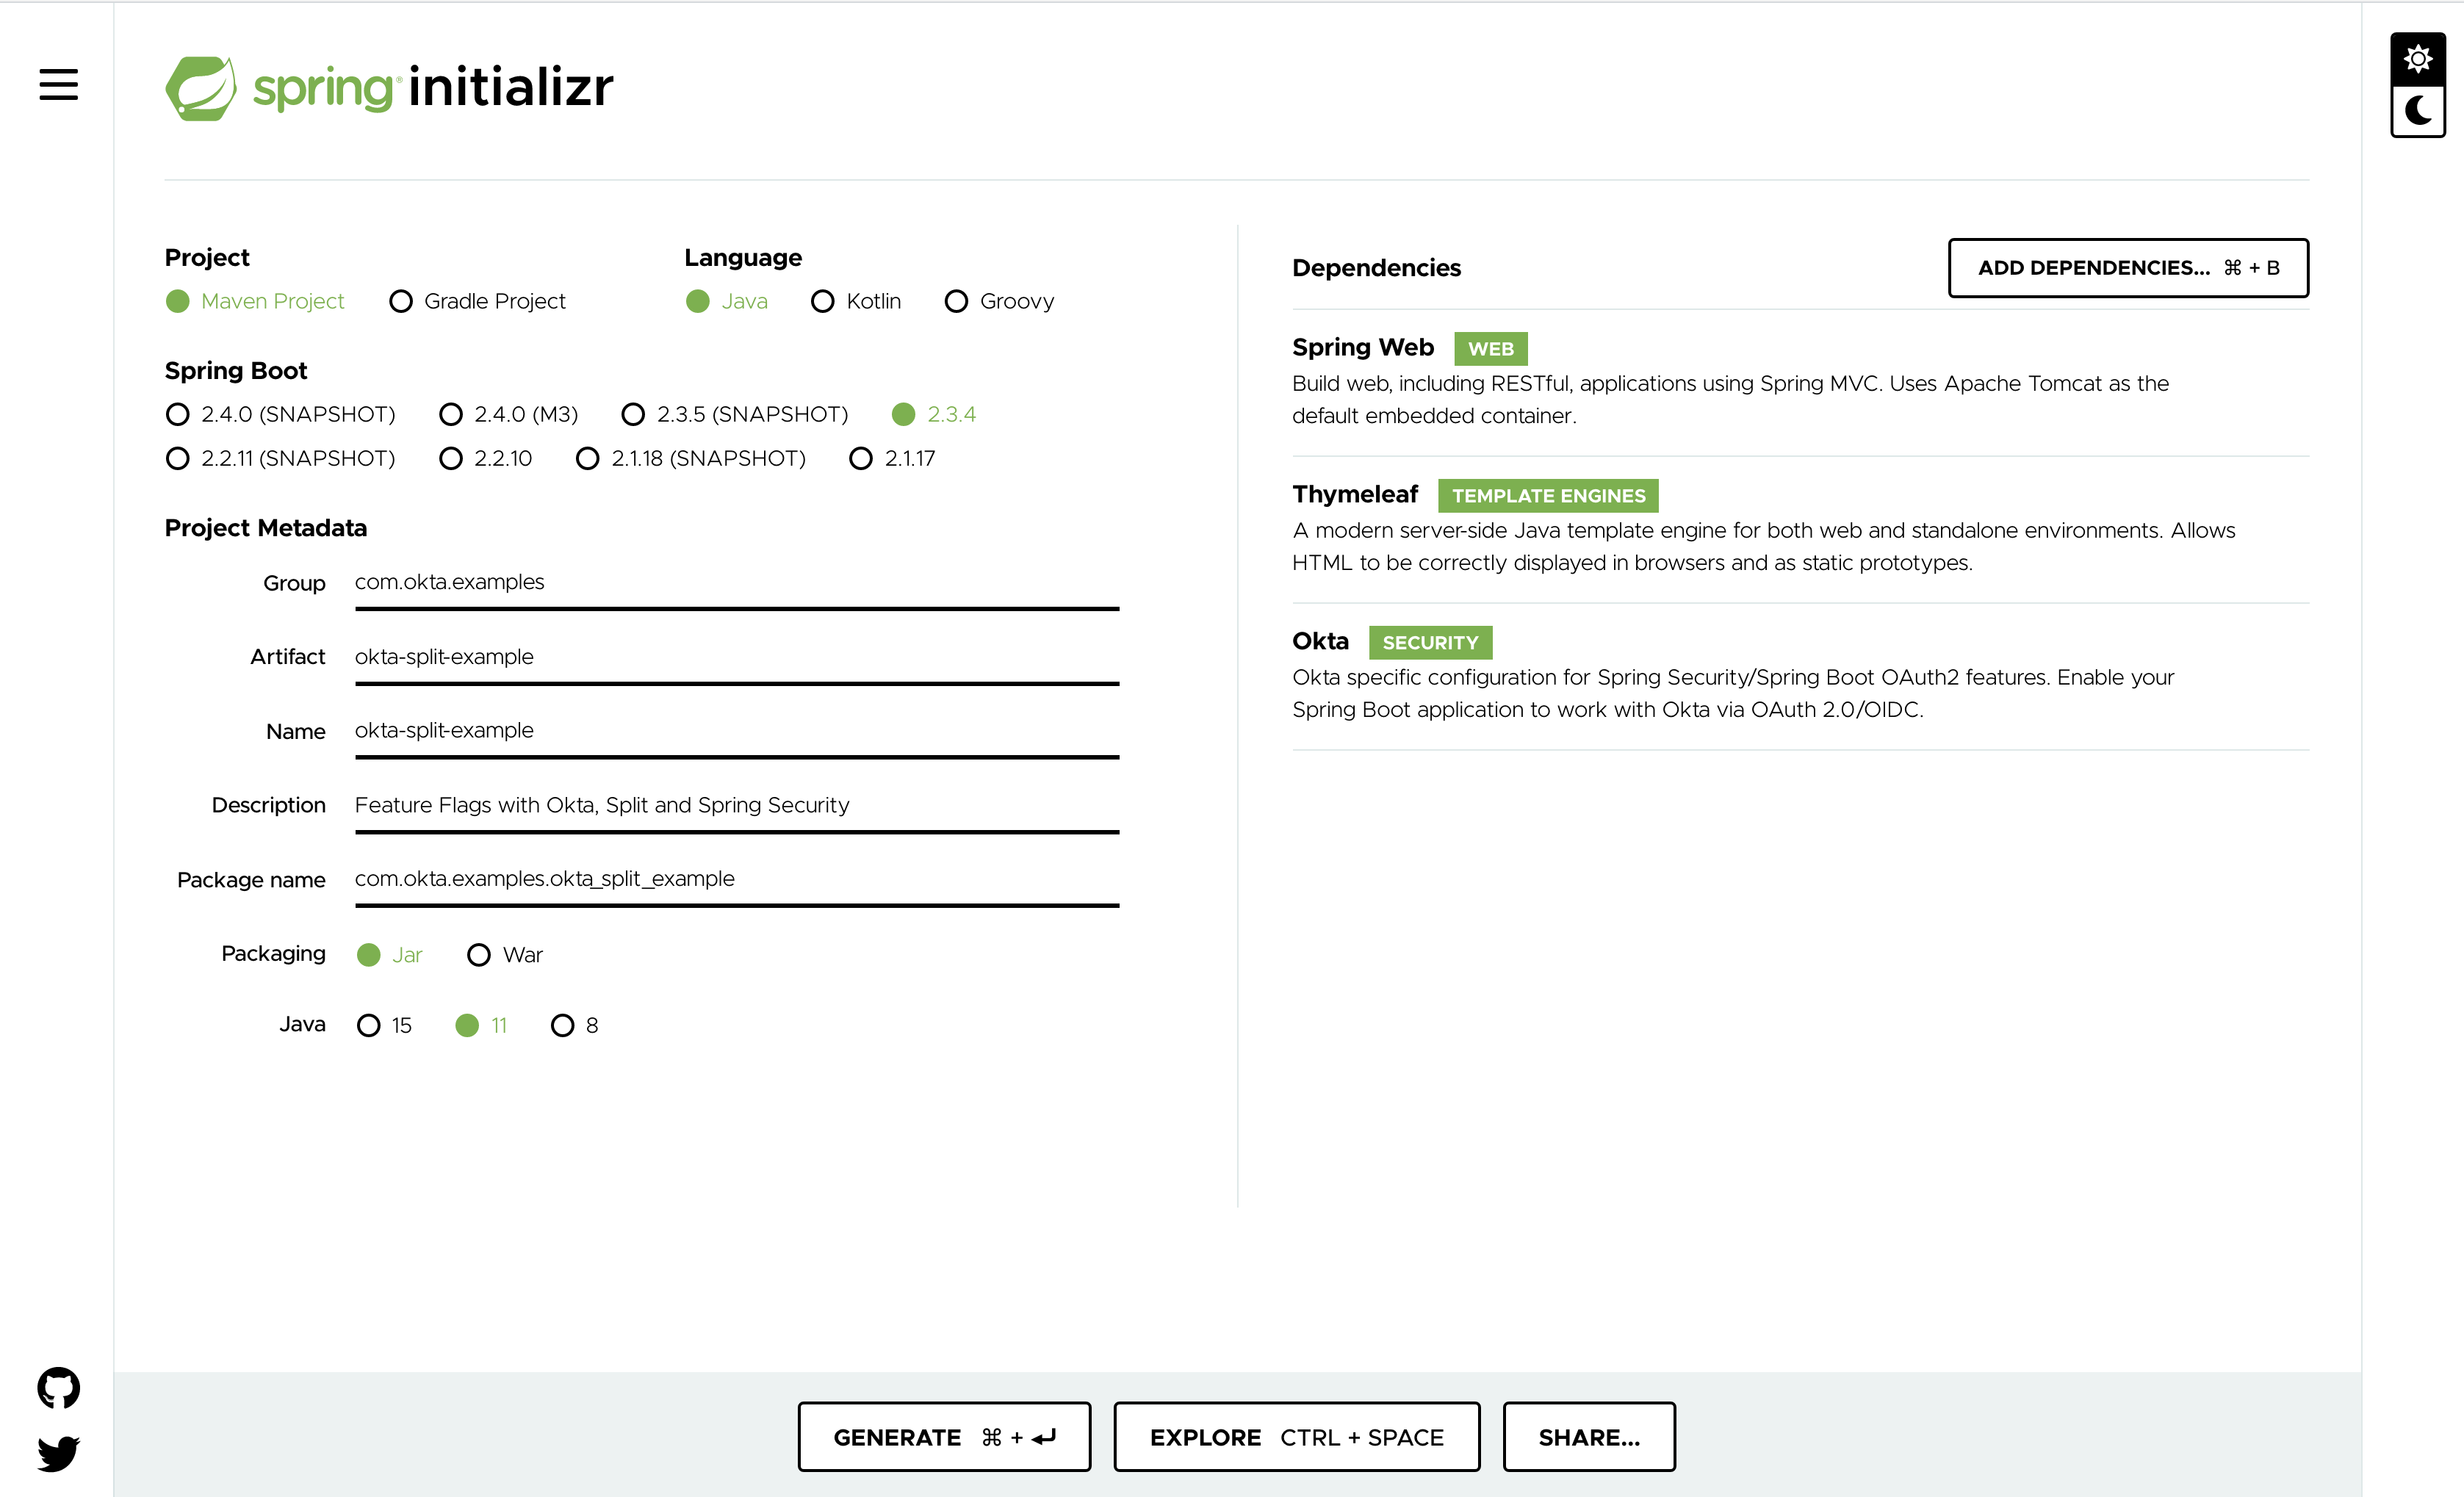
Spring Initializr even makes it easy to load a pre-configured project from a direct link.
And, you can download the project from the command line with:
curl -G \
--data 'type=maven-project' \
--data 'language=java' \
--data 'bootVersion=2.3.4.RELEASE' \
--data 'baseDir=okta-split-example' \
--data 'groupId=com.okta.examples' \
--data 'artifactId=okta-split-example' \
--data 'name=okta-split-example' \
--data 'packageName=com.okta.examples.okta_split_example' \
--data 'packaging=jar' \
--data 'javaVersion=11' \
--data 'dependencies=web,thymeleaf,okta' \
--data-urlencode 'description=Feature Flags with Okta, Split and Spring Security' \
https://start.spring.io/starter.zip  \
-o okta-split-example.zip
Expand the downloaded zip archive and open it in the IDE of your choice.
You can also find the completed application over on the Okta Developer GitHub repo.
Integrate with Okta
In order for this Spring Boot app to connect to your Okta org you need to rename src/main/resources/application.properties to src/main/resources/application.yml, and just set the three configuration parameters you got before when creating the OIDC app with the Okta CLI:
okta:
  oauth2:
    issuer: <yourOktaDomain>/oauth2/default
    clientId: <oidc client id>
    clientSecret: <oidc client secret>
At this point, the Spring Boot app is ready to run! Execute:
./mvnw spring-boot:run
Navigate to: http://localhost:8080. You should immediately be redirected to Okta to authenticate. After authenticating, you should end up with a 404 error, as you haven’t added any content to your app yet. You’ll do that next.
Create a Basic Thymeleaf Template
The last two pieces that are needed for a basic Model-View-Controller (MVC) app are a controller and a view in Spring Boot.
Create a Controller
Add a file called HomeController with the following:
@Controller
public class HomeController {

    @GetMapping("/")
    public String home(@AuthenticationPrincipal OidcUser user, Model model) {
        model.addAttribute("username", user.getPreferredUsername());
        model.addAttribute("roles", user.getAuthorities());
        return "home";
    }
}
Using the @AuthenticationPrincipal annotation, the authenticated OidcUser is autowired into the home method. A Model object is passed into the method as well.
The Model object is updated with the authenticated user’s username and a list of the Spring Security authorities associated with that user.
Since the project is configured with the Thymeleaf templating engine, returning a String at the end of the controller method will automatically return a template with that name. In this case, Thymeleaf will look for a template named: home.html.
Create a View
Create a file called: src/main/resources/templates/home/html with the following:
<html xmlns:th="http://www.w3.org/1999/xhtml">
    <head></head>
    <body>
        <h2>
            <span th:inline="text">Hello, [[${username}]]!</span>
        </h2>
        <p/>
        Here are your roles:
        <br/>
        <ul th:each="role : ${roles}">
            <li th:inline="text">[[${role}]]</li>
        </ul>
    </body>
</html>
This template displays the username from the model. It then uses the Thymeleaf construct th:each to iterate over the list of roles from the model.
Restart the application, navigate once again to http://localhost:8080 and login as: tina@belcher.com.
Amongst a number of default roles and scopes, you should see that she has the BETA_TESTER role.
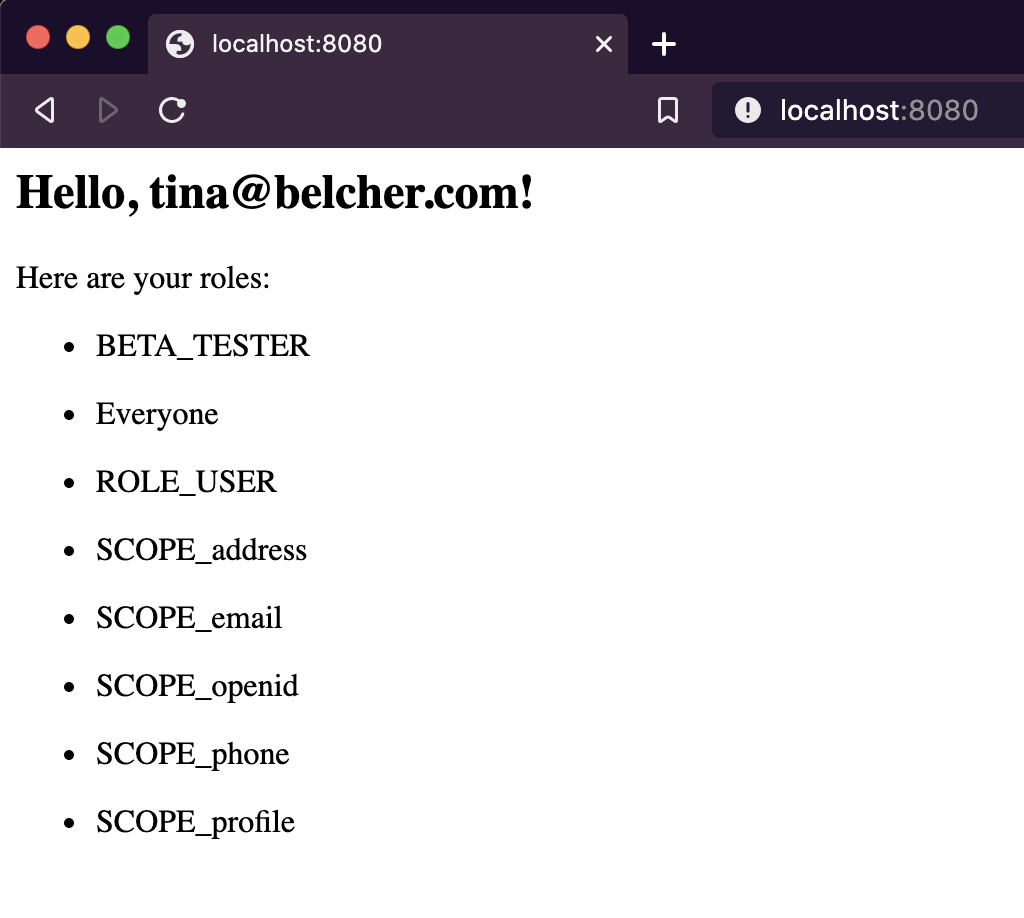
At this point, the Spring Boot + Spring Security application is fully functional (such as it is).
Next, I talk about feature flags with Split and then I bring Spring and Split together.
Get Started with Feature Flags
Split is a platform for combining feature flags and experiments with data, giving you more confidence in releases of your app.
In the example for this post, you integrate a split treatment such that a select group of users sees a new ‘beta’ interface for your app while ordinary users see the current production interface.
When our imaginary beta testing is complete, you can enable the new interface for all users.
Best of all, you could repeat this process, creating new beta experiences to be tested by your group and eventually making that generally available.
Getting setup with a free developer account for Split is as easy as 1, 2, 3:
- Go to: https://split.io, click: Free Account
- Fill out the registration form and click: CREATE FREE ACCOUNT
- Follow the link you receive in email and set a password.
Create the Treatment in Split
Treatments allow you to define settings and behaviors for what you want to test. For my example, we want to setup a treatment that will return on or off depending on whether or not you are part of the beta tester group.
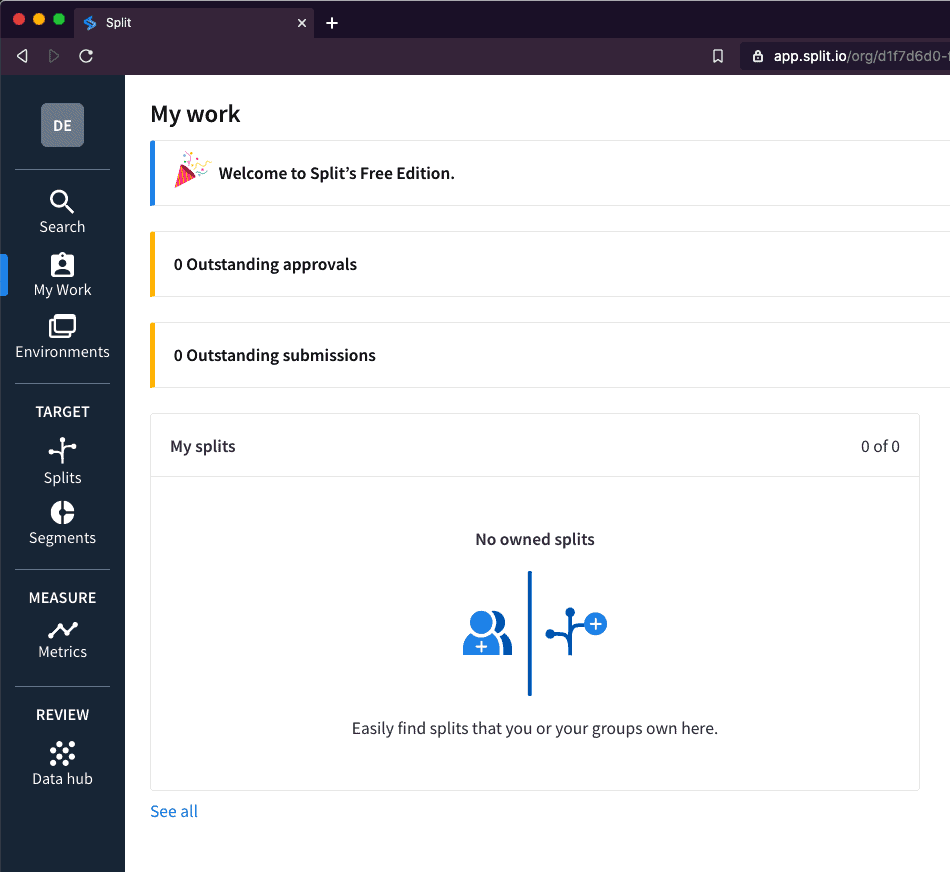
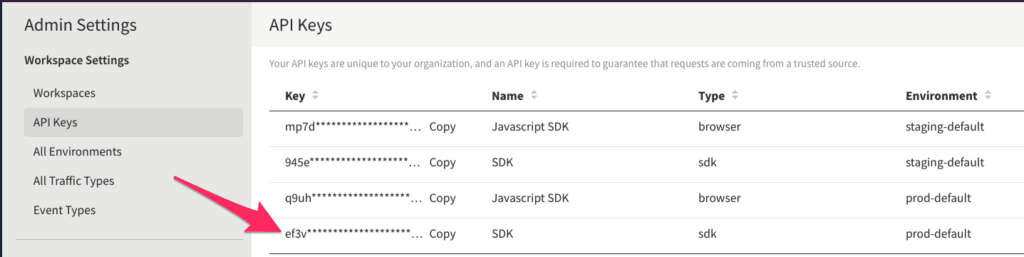
To start, click DE in the upper left. Choose Admin Settings and API Keys. Copy the value for sdk Type in the prod-default Environment. You’ll need this in the Spring Boot app shortly.
NOTE: If you’re new to using Split and/or on the free tier, the button in the upper left will say
DEfor default. If you’ve set up multiple workspaces, then the button will be labeled with the first two letters of the workspace name.
Next, Click Splits on the left-hand side and click Create Split. Give it a Name. Leave the other defaults and click Create.

Next, click Add Rules on the Targeting Rules tab. Split automatically adds on and off treatment definitions and sets off as the default.
For the use-case in this example, we want to add a group for which the treatment will return a value of on.
Click Add Rule in the Set Targeting Rules section. Here, we want to have the treatment return on if the user is in the group of beta testers. To accomplish this, enter groups in the Add attribute field. From the Select matcher dropdown, choose Set > has any of and enter BETA_TESTER in the field. Change the serve dropdown to on.
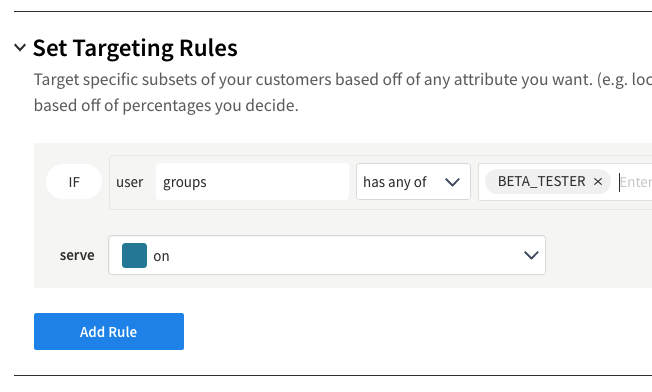
This now makes it read like an english sentence: “If the user has an attribute called groups and the groups list contains the value BETA_TESTER, then serve ‘on’ for the treatment”
Click Save Changes.
Click Confirm on the summary screen.
Integrate the Treatment with Spring Security
Edit the pom.xml file in the project. Add the following dependency:
<dependency>
    <groupId>io.split.client</groupId>
    <artifactId>java-client</artifactId>
    <version>4.0.1</version>
</dependency>
You can get the complete application, including the integration with Split over at the Okta Developer GitHub repo.
This brings the Split Java SDK into scope for the project.
Next, add a configuration to the project to make the Split Java Client available to the application. Here’s SplitConfig.java:
@Configuration
public class SplitConfig {

    @Value("#{ @environment['split.api-key'] }")
    private String splitApiKey;

    @Bean
    public SplitClient splitClient() throws Exception {
        SplitClientConfig config = SplitClientConfig.builder()
            .setBlockUntilReadyTimeout(1000)
            .enableDebug()
            .build();

        SplitFactory splitFactory = SplitFactoryBuilder.build(splitApiKey, config);
        SplitClient client = splitFactory.client();
        client.blockUntilReady();

        return client;
    }
}
Add the following to the src/main/resources/application.yml file:
split:
  api-key: <your Split API Key>
Notice that it’s using the
@Valueannotation to pull in the Split API Key from the environment. This is a best practice. You should never hardcode an API Key into an application nor commit it in a git repo. In this case,application.ymlis listed in the.gitignorefile to ensure it’s not added to the git repo.
This is the key line that sets up the Split Client for use elsewhere in the code:
SplitFactory splitFactory = SplitFactoryBuilder.build(splitApiKey, config);
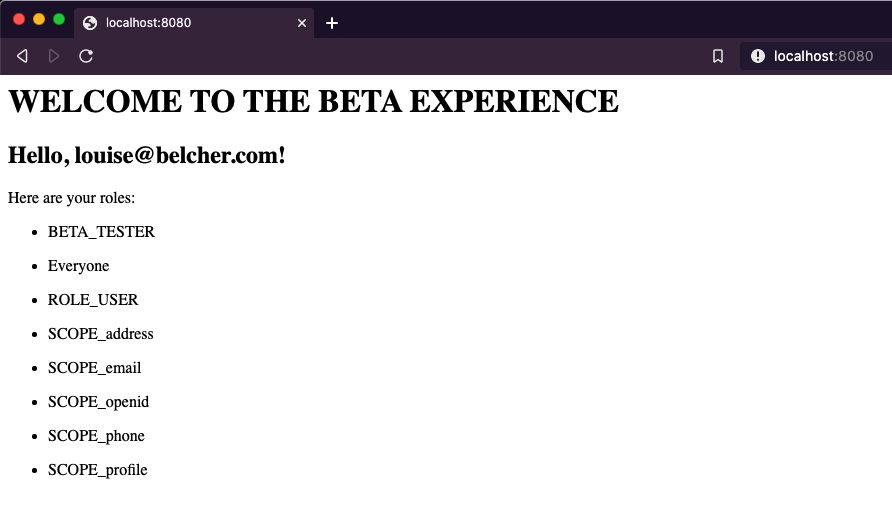
Let’s set up a new template called home-beta.html (It’s mostly copypasta from the original template and should be located in: src/main/resources/templates):
<html xmlns:th="http://www.w3.org/1999/xhtml">
    <head></head>
    <body>
        <h1>WELCOME TO THE BETA EXPERIENCE</h1>
        <h2>
            <span th:inline="text">Hello, [[${username}]]!</span>
        </h2>
        <p/>
        Here are your roles:
        <br/>
        <ul th:each="role : ${roles}">
            <li th:inline="text">[[${role}]]</li>
        </ul>
    </body>
</html>
The last piece of the puzzle is in the HomeController. I want to have the app render the new home-beta template if the authenticated user is in the BETA_TESTER group. Here’s the updated controller:
@Controller
public class HomeController {

    SplitClient splitClient;

    public HomeController(SplitClient splitClient) {
        this.splitClient = splitClient;
    }

    @GetMapping("/")
    public String home(@AuthenticationPrincipal OidcUser user, Model model) {
        model.addAttribute("username", user.getPreferredUsername());
        model.addAttribute("roles", user.getAuthorities());

        List<String> groups =  user.getAuthorities().stream()
            .map(GrantedAuthority::getAuthority).collect(Collectors.toList());

        String inBeta = splitClient.getTreatment(
            user.getPreferredUsername(),
            "BETA_UI_EXPERIENCE",
            Map.of("groups", groups)
        );

        return "on".equals(inBeta) ? "home-beta" : "home";
    }
}
The first thing to notice is that I am injecting the SplitClient using constructor dependency injection.
The real magic happens with the splitClient.getTreatment call. The first parameter is the username provided by Spring Security for the authenticated user.
Note that in much of the Split documentation, this first parameter is referred to as a
key. Don’t confuse this with the API Key, which should NEVER be used as the first parameter to thegetTreatmentcall.
The second parameter is the name of the treatment in Split that we want to target.
The third parameter sends a map where the key is groups and the value is the list of group names that the authenticated user belongs to. In the case of our user linda, this will be Everyone (among some other defaults). In the case of our user louise, this will be Everyone and BETA_TESTER.
The last line of the controller method now returns the home-beta template if the result of getTreatment is on and the home template otherwise.
Fire up the app and try to login as linda in an incognito window. You should see the same home template as before. Kill that incognito window, open another one and login as louise. You should see the new beta template.
Make Your New Functionality Generally Available
Now that we have different treatments of our home template for regular users and beta testers, you may be wondering how to go about making the beta template available to everyone?
Split makes it easy-peasy. Go back to your Split definition for BETA_UI_EXPERIENCE and switch the serve setting in the Set The Default Rule section from off to on. Save and Confirm the change.
Without restarting the Spring Boot application, login as linda again. You should now see the same page that you saw for louise earlier.
Pretty cool, eh?
How to Repeat the Beta / Release Cycle
With this architecture in place, it’s now very easy to set up a new beta cycle. The steps would be something like this:
- Copy the
home-beta.htmltemplate tohome.html(now that it’s ready for production) - Create a new
home-beta.htmltemplate - Set the default rule back to off in Split
- Redeploy the app
- Let your beta testers test the new experience
- When ready, set the default rule back to on in Split
- NO NEED TO REDEPLOY
You could do this over and over again and never touch the controller code. The only thing that’s changing are the templates and the settings in split.
This approach also lends itself to changing who is in your beta test program without having to change your code.
In a real application, you’d be working with a database or an Identity Management system where you could add and remove users from the BETA_TESTER group. With Okta, you can easily manage who belongs to the group from the admin console or via the Okta Management API. Those users would always see the latest and greatest beta while ordinary users would see only the current release.
Learn More About Building Secure Applications
I hope you’ve seen how useful it can be to set up different experiences for different users using Okta, Split and the native functionality built into Spring Security.
To continue learning about authentication, authorization and feature flags and experimentation, check out these links:
- Easy Session Sharing in Spring Boot with Spring Session and MySQL
- Deploy a Secure Spring Boot App to Heroku
- Use PKCE with OAuth 2.0 and Spring Boot for Better Security
- Leverage Spring Security to Test in Production
- Build a CRUD App with Spring Boot and MongoDB
- 7 Ways Feature Flags Improve Software Development
If you like this blog post and want to see more like it, follow @oktadev on Twitter, subscribe to our YouTube channel, or follow us on LinkedIn. As always, please leave a comment below if you have any questions.
Micah Silverman is a Senior Security H@X0R. With 25 years of Java Experience (yup, that's from the beginning), he's authored numerous articles, co-authored a Java EE book and spoken at many conferences. He's a maker, who's built full size MAME arcade cabinets and repaired old electronic games. He brings his love of all things Java and Developer Advocacy to you!
Okta Developer Blog Comment Policy
We welcome relevant and respectful comments. Off-topic comments may be removed.