Simple Authentication with Spring Security

Authentication is vital to all but the most basic web applications. Who is making the request, wanting data, or wanting to update or delete data? Can you be sure that the request is coming from the stated user or agent? Answering this question with certainty is hard in today’s computer security environment. Fortunately, there is absolutely no reason to reinvent the wheel.
Spring Boot with Spring Security is a powerful combination for web application development. With relatively few lines of code, you can implement a variety of authentication systems. These systems are tested, updated, and implemented according to specifications by experts.
In this tutorial, you are going to build a very simple Spring Boot app that starts with basic-auth and progresses through form-based authentication, custom form-based authentication, and OAuth 2.0 / OpenID Connect using Okta as the OAuth provider. We will also look at SAML auth. The Spring Security SAML implementation, however, is currently in transition and not updated to the most current version of Spring Boot.
This tutorial looks specifically at authentication, leaving authorization for another day. Authentication answers the question: who is making the request. Authorization comes after authentication and answers the question: is the authenticated user allowed to make the specific request?
Table of Contents
- Requirements and Assumptions for Authentication with Spring Security
- Download the Spring Security Example Apps
- Dive Into Basic Authentication with Spring Security
- Step-up To Form-Based Authentication with Spring Security
- It’s (almost) SAML Time!
- Add OAuth 2.0 + OpenID Connect Authentication
- Finish Up Your Spring Boot + Spring Security App with Authentication
Note: In May 2025, the Okta Integrator Free Plan replaced Okta Developer Edition Accounts, and the Okta CLI was deprecated.
We preserved this post for reference, but the instructions no longer work exactly as written. Replace the Okta CLI commands by manually configuring Okta following the instructions in our Developer Documentation.
Requirements and Assumptions for Authentication with Spring Security
This tutorial assumes a basic familiarity with Java and Spring Boot. The project utilizes the Gradle build system (because I find Groovy DSL endlessly preferable to XML). You do not need Gradle installed, however, since all projects include the Gradle wrapper.
You do not need a comprehensive understanding of OAuth 2.0 and OpenID Connect (OIDC) - thankfully, because it’s complex, detailed, and sprawling at times. I’m still working to understand many aspects of it. However, a basic understanding would be helpful. If you want to go deeper, there are some links at the end of the article that can help you.
Very (very) briefly, OAuth 2.0 is the second major version of Open Authorization, an open-source authorization specification. From the OAuth spec committee: “OAuth 2.0 focuses on client developer simplicity while providing specific authorization flows for web applications, desktop applications, mobile phones, and living room devices.” Notice two things: 1) it’s authorization only, so no authentication; and 2) it’s a specification, so there’s no implementation. OIDC builds on top of OAuth 2.0 to add an identity layer (authentication) using a well-defined token.
Spring Security Authentication with Okta
Okta is an identity access and management company that provides a whole host of software-as-service identity products. We have an implementation of OAuth 2.0 and OpenID Connect that makes adding single sign-on (SSO) to a Spring Boot app easy.
Our API enables you to:
- Authenticate and authorize your users
- Store data about your users
- Perform password-based and social login
- Secure your application with multi-factor authentication
- And much more! Check out our product documentation for more information
Register for a forever-free developer account, and when you’re done, come back to learn more about building authentication with Spring Boot and Spring Security.
Other than that, you need a computer and a web browser. And if you didn’t have those, well, how would you be here?
Download the Spring Security Example Apps
Go ahead and download the example apps from this tutorial’s GitHub repository.
git clone https://github.com/oktadeveloper/okta-spring-security-authentication-example.git
In the project you will see three directories:
basic-authform-authokta-oauth
Dive Into Basic Authentication with Spring Security
Basic authentication is by far the easiest method. Unfortunately, it was designed for simpler times on the internet. It’s not really functional for professional applications. I’ve used it for in-house tools on occasion when I needed something simple and quick to keep casual surfers off of a page. However, basic auth sends a users credentials in essentially plain text (base64 encoded) in the HTTP authentication header. Thus basic auth should always be combined with SSL to protect the user credentials. Basic auth also uses a browser-generated popup panel for retrieving the user credentials. The panel cannot be styled or customized.
First, take a look at the build.gradle file.
plugins {
  id 'org.springframework.boot' version '2.1.5.RELEASE'
  id 'java'
}

apply plugin: 'io.spring.dependency-management'

group = 'com.okta.springsecurityauth'
version = '0.0.1-SNAPSHOT'
sourceCompatibility = '1.8'

repositories {
  mavenCentral()
}

dependencies {
  implementation 'org.springframework.boot:spring-boot-starter-security'
  implementation 'org.springframework.boot:spring-boot-starter-web'
  testImplementation 'org.springframework.boot:spring-boot-starter-test'
  testImplementation 'org.springframework.security:spring-security-test'
}
This line sets the Spring Boot version:
id 'org.springframework.boot' version '2.1.5.RELEASE'
These are the two dependencies that include Spring Security and Spring MVC.
implementation 'org.springframework.boot:spring-boot-starter-security'
implementation 'org.springframework.boot:spring-boot-starter-web'
The rest is pretty much boilerplate.
Here is the main application file (src/main/java/com/okta/springsecurityauth/Application.java).
package com.okta.springsecurityauth;

import org.springframework.boot.SpringApplication;
import org.springframework.boot.autoconfigure.SpringBootApplication;

@SpringBootApplication
public class Application {

    public static void main(String[] args) {
        SpringApplication.run(Application.class, args);
    }
}
This is the entry point for the Java application. The main thing to note is how little is there. The @SpringBootApplication annotation tells Spring to bootstrap in all of the Spring Boot goodness.
Next take a look at the WebController, src/main/java/com/okta/springsecurityauth/WebController.java.
package com.okta.springsecurityauth;

import org.springframework.stereotype.Controller;
import org.springframework.web.bind.annotation.RequestMapping;
import org.springframework.web.bind.annotation.ResponseBody;

@Controller
public class WebController {

    @RequestMapping("/")
    @ResponseBody
    public String index() {
        return "Welcome home!";
    }
}
The web controller file has a little more action. This is where the only HTTP endpoint of the project is defined. This file defines a simple home controller that returns a text string.
The @Controller annotation tells Spring that the file is defining web controller endpoints. The @RequestMapping annotation defines the mapping between the HTTP requests and the controller methods. And the @ResponseBody annotation tells Spring that the method is going to return the request body directly as a String, as opposed to returning the name of a template file.
The last file is where all of the security is defined. Cleverly it’s named SecurityConfiguration.java.
Take a look, src/main/java/com/okta/springsecurityauth/SecurityConfiguration.java
package com.okta.springsecurityauth;

import org.springframework.context.annotation.Configuration;
import org.springframework.security.config.annotation.authentication.builders.AuthenticationManagerBuilder;
import org.springframework.security.config.annotation.web.builders.HttpSecurity;
import org.springframework.security.config.annotation.web.configuration.WebSecurityConfigurerAdapter;

@Configuration
public class SecurityConfiguration extends WebSecurityConfigurerAdapter {

    @Override
    public void configure(HttpSecurity http) throws Exception {
        http
            .authorizeRequests()
            .anyRequest().authenticated()
            .and()
            .httpBasic();
    }

    @Override
    protected void configure(AuthenticationManagerBuilder auth) throws Exception {
        auth.inMemoryAuthentication()
            .withUser("user")
            .password("{noop}pass") // Spring Security 5 requires specifying the password storage format
            .roles("USER");
    }

}
You can see how little configuration is required. In the first method, the fluent API is used with the HttpSecurity object to configure Spring Security: security is activated, all requests are authenticated, and HTTP basic is used.
The second method is really just a bit of a hack for this tutorial. It configures an in-memory authentication manager and creates a user with credentials user:pass.
Let’s give it a try! From a terminal, go to the root directory of the project.
Run the project using: ./gradlew bootRun.
Navigate to http://localhost:8080.
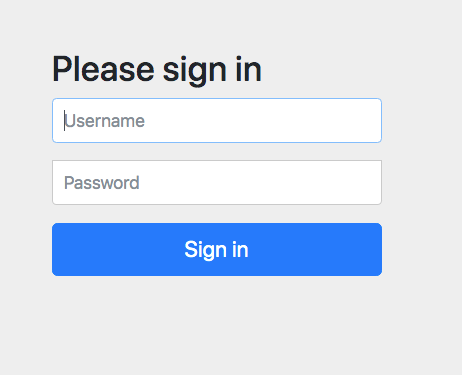
You’ll see the browser-generated login form. Enter the credentials user and pass. You’ll see the wonderful success page that says, “Welcome home!”
Step-up To Form-Based Authentication with Spring Security
HTTP Basic authentication is about as simple as it gets and really isn’t all that useful in the real world. Form-based authentication is a lot more realistic. Open the /form-auth folder in your IDE.
The build.gradle file is the same. So are the Application.java and the WebController.java files. The only significant change is in the SecurityConfiguration.java file (and in this file, only one line has changed).
src/main/java/com/okta/springsecurityauth/SecurityConfiguration.java:
package com.okta.springsecurityauth;

...

@Configuration
public class SecurityConfiguration extends WebSecurityConfigurerAdapter {

    @Override
    public void configure(HttpSecurity http) throws Exception {
        http
            .authorizeRequests()
            .anyRequest().authenticated()
            .and()
            .formLogin();  // <-- this was changed
    }

    ...
}
See how ridiculously simple Spring is making things for us. All you had to do was change the httpBasic() fluent method to formLogin() and Spring Boot automatically generates a login form for you.
Run it using ./gradlew bootRun.
You’ll see the auto-generated Spring Boot login form.
But what if you want to style your own custom form instead of using the Spring-generated one? It’s not much more work.
First, add the Thymeleaf dependency to your build.gradle file:
dependencies {
  ...
  implementation 'org.springframework.boot:spring-boot-starter-thymeleaf'
  ...
}
Update the WebController.java file with two new controller methods:
package com.okta.springsecurityauth;

import org.springframework.stereotype.Controller;
import org.springframework.ui.Model;
import org.springframework.web.bind.annotation.RequestMapping;
import org.springframework.web.bind.annotation.ResponseBody;

@Controller
public class WebController {

    @RequestMapping("/")
    @ResponseBody
    public String index() {
        return "You made it!";
    }

    @RequestMapping("/login.html")
    public String login() {
        return "login.html";
    }

    @RequestMapping("/login-error.html")
    public String loginError(Model model) {
        model.addAttribute("loginError", true);
        return "login.html";
    }

}
Notice that the /login-error.html path uses the same template as the /login.html path, but adds a loginError attribute to the Model. This is simply a way of handling errors.
Also, notice that the new controller methods do not have the @ResponseBody annotation. This, combined with the new Thymeleaf dependency, means that these methods are returning the name of the template to be rendered (as opposed to the raw response). The templates are assumed by default to be in the src/main/resources/templates folder.
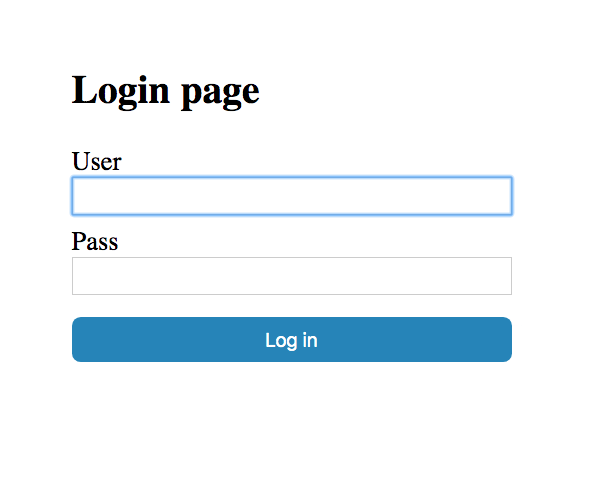
Add a new file: src/main/resources/templates/login.html:
<!DOCTYPE html>
<html xmlns:th="http://www.thymeleaf.org">
<head>
    <title>Login page</title>
    <style>
        #container {
            padding-top:50px;
            width:400px;
            margin: 0 auto;
            font-size:1.5rem;
        }
        input {
            width: 100%;
            display:block;
            padding: 5px;
            font-size: 1.1rem;
            box-sizing: border-box;
        }
        label {
            margin-top:10px;
            display:block;
        }
        #submit, #submit:focus {
            margin-top: 20px;
            border-radius: 8px;
            padding: 10px;
            color: white;
            background-color: #2084ba;
            border: none;
        }
        .error {
            color: white;
            background-color: indianred;
            opacity: 0.7;
            padding: 10px;
            width: 100%;
            text-align: center;
            box-sizing: border-box;
            border-radius: 8px;
        }
    </style>
</head>
<body>
<div id="container">
    <h2>Login page</h2>
    <form th:action="@{/login.html}" method="post">
        <label for="username">User</label>
        <input type="text" id="username" name="username" autofocus="autofocus" />
        <label for="password">Pass</label>
        <input type="password" id="password" name="password" />
        <input id="submit" type="submit" value="Log in" />
    </form>
    <p th:if="${loginError}" class="error">There was a problem logging you in</p>
</div>
</body>
</html>
This is the Thymeleaf template file used for the login page. Thymeleaf is the standard templating system used with Spring Boot. It’s a fully-featured templating system with tons of features. Check out the project website for more info.
The last change you need to make is to update the configure(HttpSecurity http) method in the SecurityController.java file:
package com.okta.springsecurityauth;

...

@Configuration
public class SecurityConfiguration extends WebSecurityConfigurerAdapter {

    @Override
    public void configure(HttpSecurity http) throws Exception {
        http
            .authorizeRequests()
            .anyRequest().authenticated()
            .and()
            .formLogin()
            .loginPage("/login.html")
            .failureUrl("/login-error.html")
            .permitAll();
    }

...
}
These three lines were added:
.loginPage("/login.html")
.failureUrl("/login-error.html")
.permitAll();
They define the custom login endpoint, the login error endpoint, and instruct Spring Security to permit all requests to those endpoints.
Run the app again using ./gradlew bootRun.
This time you’ll see the custom login form.
It’s (almost) SAML Time!
The Spring Security SAML extension is currently in flux. There are some unofficial 2.x releases that work, but they’re not officially supported.
From the Spring Security SAML GitHub page:
This project is being rewritten. There is a base implementation in the develop including milestone releases in the milestone repository.
In the develop-3.0 branch we are creating a solution that builds on top of the milestones and is better aligned with Spring Security. The intent with this branch is to merge it with the Spring Security project and release as part of Spring Security core.
For that reason, we will not be publishing any official releases of the 2.0.0 milestones, but will maintain it until all feature functionality that exists in the milestones are part of Spring Security.
If you want to venture into the current state of Spring Boot SAML, the Spring SAML Extension Docs are a good place to start.
Matt Raible at Okta also has a great tutorial for implementing SAML with Spring Boot 1.x.
Vincenzo De Notari has an example Service Provider implementation using SAML 2.0 and Spring Boot 2.1.3.
NOTE: If you want to test out SAML with Okta, you’ll need to request a trial of Okta’s Enterprise Edition.
Add OAuth 2.0 + OpenID Connect Authentication
Before you begin, you’ll need a free Okta developer account. Install the Okta CLI and run okta register to sign up for a new account. If you already have an account, run okta login.
Then, run okta apps create. Select the default app name, or change it as you see fit.
Choose Web and press Enter.
Select Okta Spring Boot Starter.
Accept the default Redirect URI values provided for you. That is, a Login Redirect of http://localhost:8080/login/oauth2/code/okta and a Logout Redirect of http://localhost:8080.
What does the Okta CLI do?
The Okta CLI will create an OIDC Web App in your Okta Org. It will add the redirect URIs you specified and grant access to the Everyone group. You will see output like the following when it’s finished:
Okta application configuration has been written to:
  /path/to/app/src/main/resources/application.properties
Open src/main/resources/application.properties to see the issuer and credentials for your app.
okta.oauth2.issuer=https://dev-133337.okta.com/oauth2/default
okta.oauth2.client-id=0oab8eb55Kb9jdMIr5d6
okta.oauth2.client-secret=NEVER-SHOW-SECRETS
NOTE: You can also use the Okta Admin Console to create your app. See Create a Spring Boot App for more information.
Great! That’s all you have to do to configure Okta as an OIDC provider.
Open the oauth-okta directory from the example repository.
Copy your Okta settings from the application.properties file the Okta CLI generated.
Paste them in to src/main/resources/application.yml. You need to fill in three values:
- Okta URL, something like
https://dev-123456.okta.com/oauth2/default - Client ID (from the OIDC app you just created)
- Client Secret (also from the OIDC app you just created)
okta:
  oauth2:
    issuer: https://{yourOktaDomain}/oauth2/default
    client-id: {yourClientID}
    client-secret: {yourClientSecret}
spring:
  thymeleaf:
    cache: false
You can delete the application.properties file now.
Next, take a look at the dependencies section of the build.gradle file.
dependencies {
  implementation 'com.okta.spring:okta-spring-boot-starter:1.2.0'
  implementation 'org.springframework.boot:spring-boot-starter-web'

  ...
}
You’ll notice one new dependency as well as no longer needing spring-boot-starter-security:
okta-spring-boot-starter
The Okta Spring Boot Starter is an extension by Okta that simplifies some of the dependency management and configuration associated with OAuth and Spring Security. You can check out the project GitHub page for more info.
The rest of the project, honestly, is beguilingly simple. The Application.java file is the same.
The WebController.java file has a few new methods added. This could actually have been the same as the first couple of examples, simply returning a string, but I thought it would be nice to demonstrate how to access some of the authenticated user information.
package com.okta.springsecurityauth;

...

@Controller
public class WebController {

    @RequestMapping("/")
    @ResponseBody
    public String home(@AuthenticationPrincipal OidcUser oidcUser) {
        return "Welcome, " + oidcUser.getFullName();
    }

    @RequestMapping("/attributes")
    @ResponseBody
    public String attributes(@AuthenticationPrincipal OidcUser oidcUser) {
        return oidcUser.getAttributes().toString();
    }

    @RequestMapping("/authorities")
    @ResponseBody
    public String authorities(@AuthenticationPrincipal OidcUser oidcUser) {
        return oidcUser.getAuthorities().toString();
    }

}
The / home endpoint returns a welcome message and the full name of the OIDC user.
The /attributes endpoint returns the user attributes that the app received from Okta.
The /authorities endpoint returns the user authorities (roles and scopes). These have to do with authorization, defining what actions the user is permitted to execute or what resources the user can access and modify.
You’ll notice that there is no SecurityConfiguration.java file. In this simple example, it’s unnecessary because OAuth is the default authentication scheme and by default, all paths require authentication (which is what we want).
Great! Now give it a try. Run the app in the oauth-okta directory using ./gradlew bootRun.
Navigate to http://localhost:8080/.
You may need to use an incognito window or log out of the Okta developer dashboard if you want to see Okta’s hosted login screen.
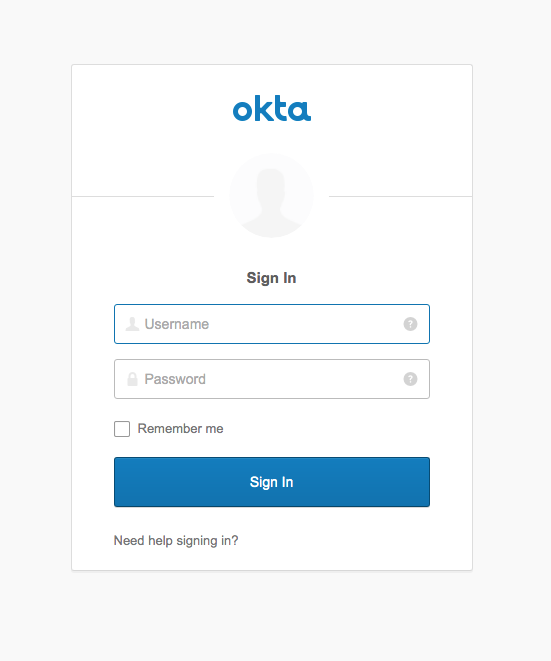
Log in with your Okta login, and you’ll be taken to a screen that says something like:
Welcome, Andrew Hughes
You can also try out the http://localhost:8080/attributes endpoint and the http://localhost:8080/authorities endpoint.
Finish Up Your Spring Boot + Spring Security App with Authentication
In this tutorial, you went through a selection of Spring Boot and Spring Security authentication methods. You started with HTTP basic; moved on to form-based auth with the auto-generated form; and then customized the app to use a Thymeleaf template for the login form. Next, you implemented an OAuth/OIDC single sign-on app using Okta and Spring Boot.
You can find the source code for all the examples in this tutorial on GitHub.
If you’d like to learn more about Spring Boot, Spring Security, or secure authentication, check out any of these great tutorials:
- Get Started with Spring Boot, OAuth 2.0, and Okta
- Add Single Sign-On to Your Spring Boot Web App in 15 Minutes
- Secure Your Spring Boot Application with Multi-Factor Authentication
- Build a Secure API with Spring Boot and GraphQL
If you want to dive deeper, take a look at the Okta Spring Boot Starter GitHub page.
If you have any questions about this post, please add a comment below. For more awesome content, follow @oktadev on Twitter, like us on Facebook, or subscribe to our YouTube channel.
Okta Developer Blog Comment Policy
We welcome relevant and respectful comments. Off-topic comments may be removed.