AWS Lambda vs Azure Functions for C# Serverless

As a C# developer, I became interested in how using a serverless function could complement existing projects I had done in ASP.NET 4.x. Enhancing ecosystems by using it for new requirements - without starting over from scratch - really had appeal. AWS Lambda came along first, with Azure Functions emerging onto the scene a couple of years later. In this post, we will briefly examine my experience getting started on both after using the .NET framework for many years.
AWS Lambda and Azure Functions: First Impressions
Here at Okta, we have several blog posts on working with identity management on Lambda with .NET Core and Azure Functions with .NET Core microservices - and even another using AWS Lambda integration for Alexa (albeit done in Node.js).
A brief summary of the options these cloud providers offer:
Both: Node.js, Python, C#, F#; dynamic service plan, configurable triggers based on their respective cloud services.
Azure: App Service plan (paying per app, rather than per function), Azure Functions (resources provisioned as needed rather than loaded from the zip file), Windows environment.
AWS: Dynamic Service plan only. Triggers configured via an API gateway, proprietary, Linux environment, AWS step functions for modeling.
Serverless HTTP Triggers in C#: A Comparison
With all of the various ways these independent functions can be used, I settled on a task familiar to me in order to compare them. After consideration, I settled on HTTP Triggers, which mimic the API behavior I was used to doing. To be honest, all I wanted to do was get some sort of a GET or POST endpoint to work in this serverless environment. Surely that was easy enough, and I found lots of tutorials in-depth about this.
A note for the ASP.NET 4.x developers: the serverless environment in Azure gives you the option to create a function in C# with the .NET or .NET Core runtime, while AWS only offers C# supported by .NET Core. For this reason, I chose to do this with .NET Core libraries.
To test out the functions, I used Postman to ensure it could be reached with an HTTP request.
Setting Up an Azure Function in C# in Visual Studio
After signing up for an Azure account, I made the decision to do my development locally in Visual Studio instead of typing code directly into the function editor inside of the Azure portal. All that we are looking to accomplish is setting up whatever comes out of the box with the template and publishing it for testing.
In Visual Studio I made sure the Azure Functions and Web Jobs Tools extension was installed. Since I used Visual Studio 2019 and selected the Azure development environment option upon initial IDE installation, this was already set up for me. If you are using Visual Studio 2017, make sure that your Visual Studio is up-to-date and that you are using the most recent version of the Azure Functions tools.
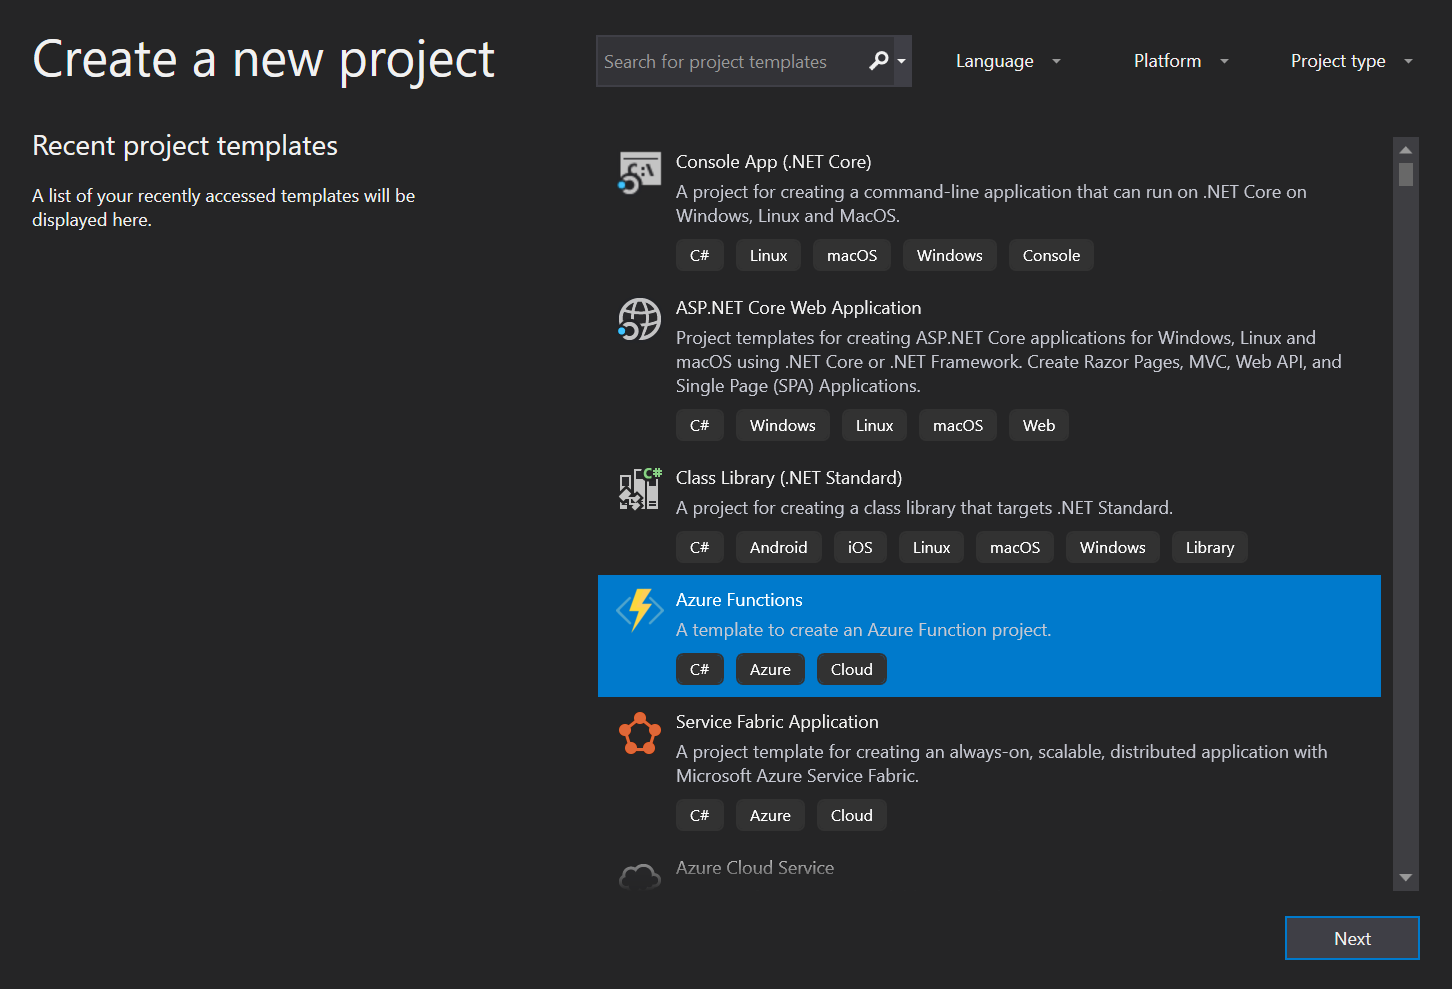
I created a new project and selected the Azure Functions template, gave the project a name and clicked Create. After being presented with an array of options, I selected Http trigger and set the Access Rights to Anonymous - as Okta would be the option to secure this function later if necessary. For now, we just want to be able to hit this in Postman or Fiddler.

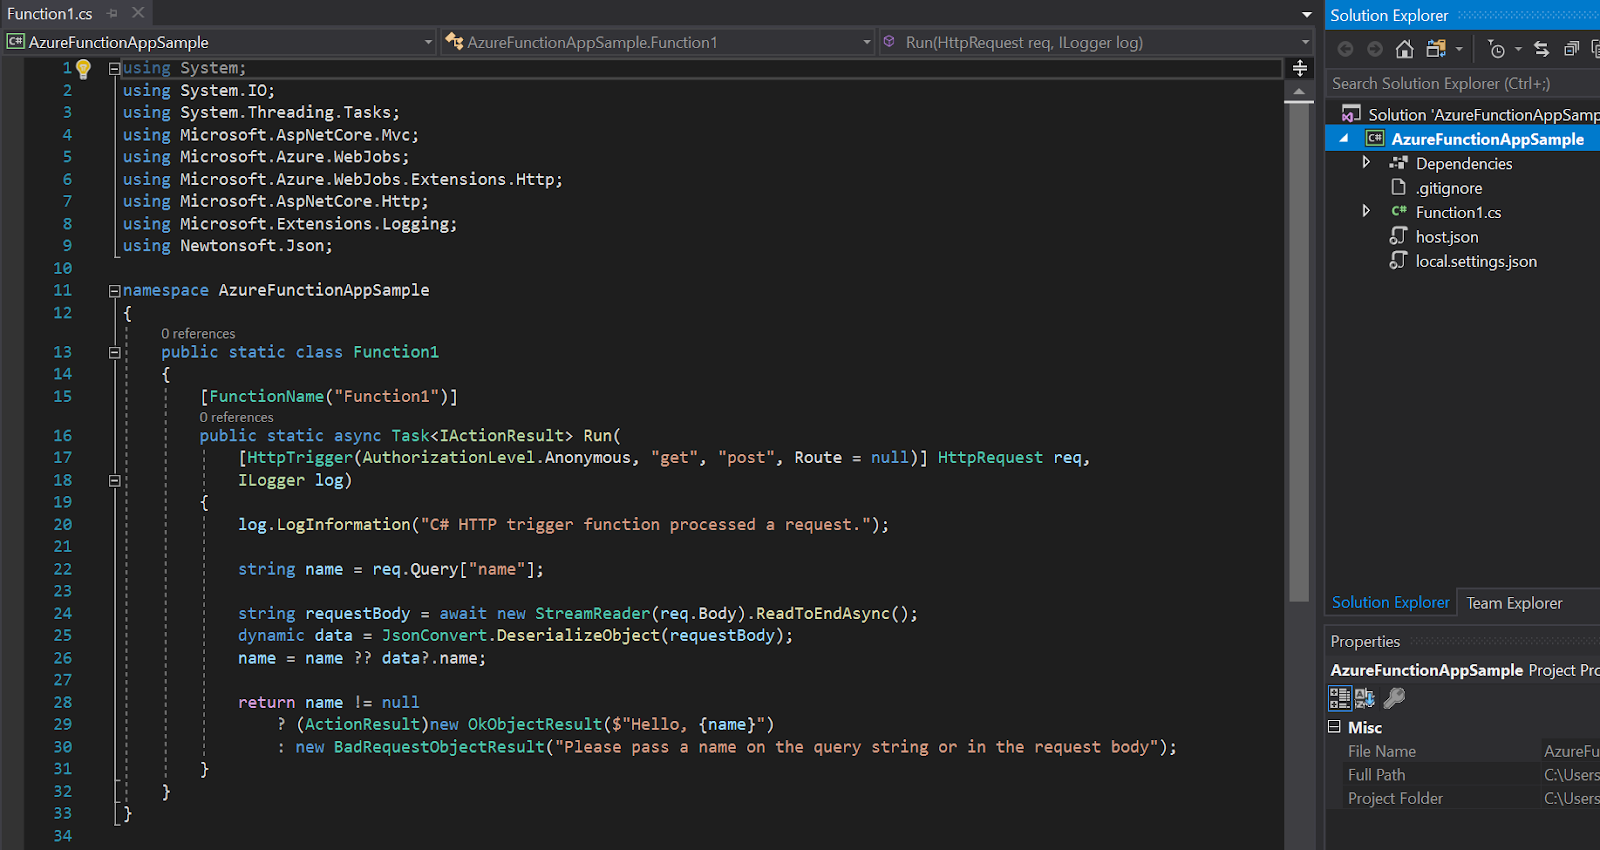
After the project was set up, the default code would have an initial sample function. I did not alter any of the generated code. I noticed there was already a GET and POST set up, so I was good to publish directly to Azure at this point to test it out.
After right-clicking on the project to publish it, I signed in with my Azure account, chose Azure App Service as the target, checked the box to Run from the package (zip) file, hit Create and waited for the function to upload. I got a congratulatory browser screen saying that my Function 2.0 app was up and running, so it was time to launch Postman and try out the new GET endpoint.
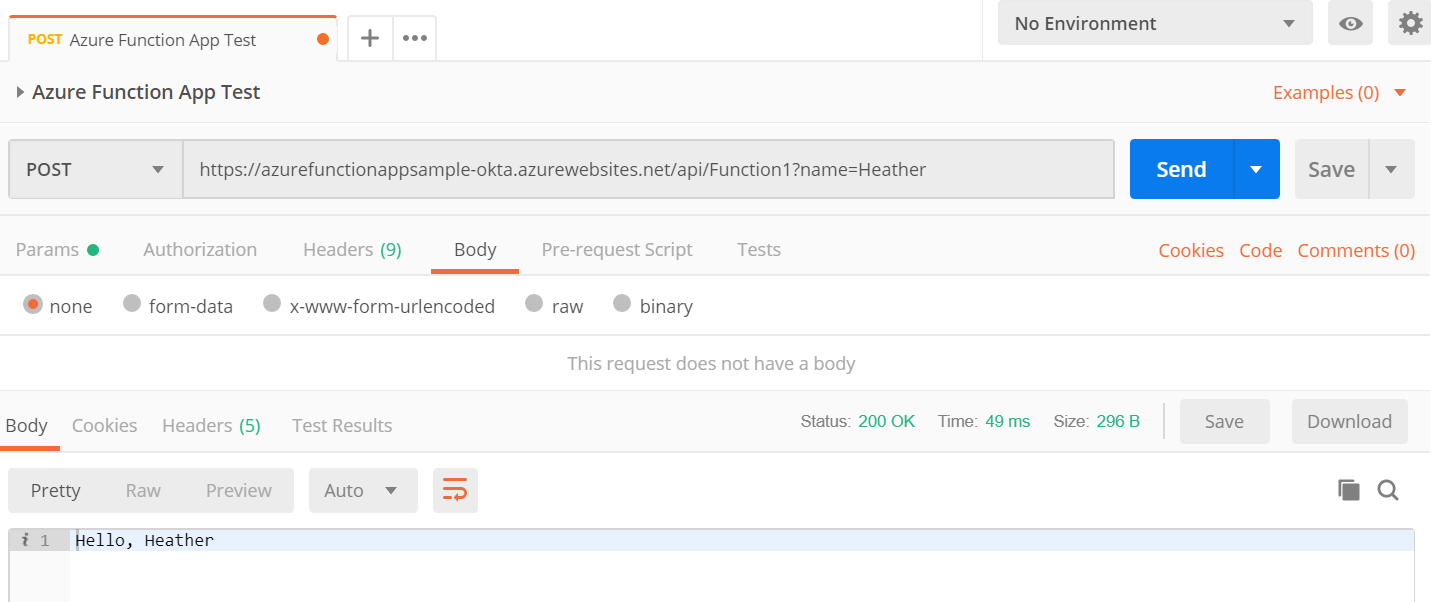
Success! Didn’t seem too bad.
Setting up an AWS Lambda Function in C# in Visual Studio
To get this function up and running, I signed up for an AWS account. There are also options to edit code directly from the Lambda editor, but I also opted to build it locally. In order to use AWS with Visual Studio, next I needed to install the AWS Toolkit for Visual Studio 2017 and 2019 extension.
Next, I created a new project selecting the AWS Lambda Project with Tests (.NET Core - C#), naming the project and then selecting a Blueprint with an Empty Function. Once the code was generated, it looked something like this:
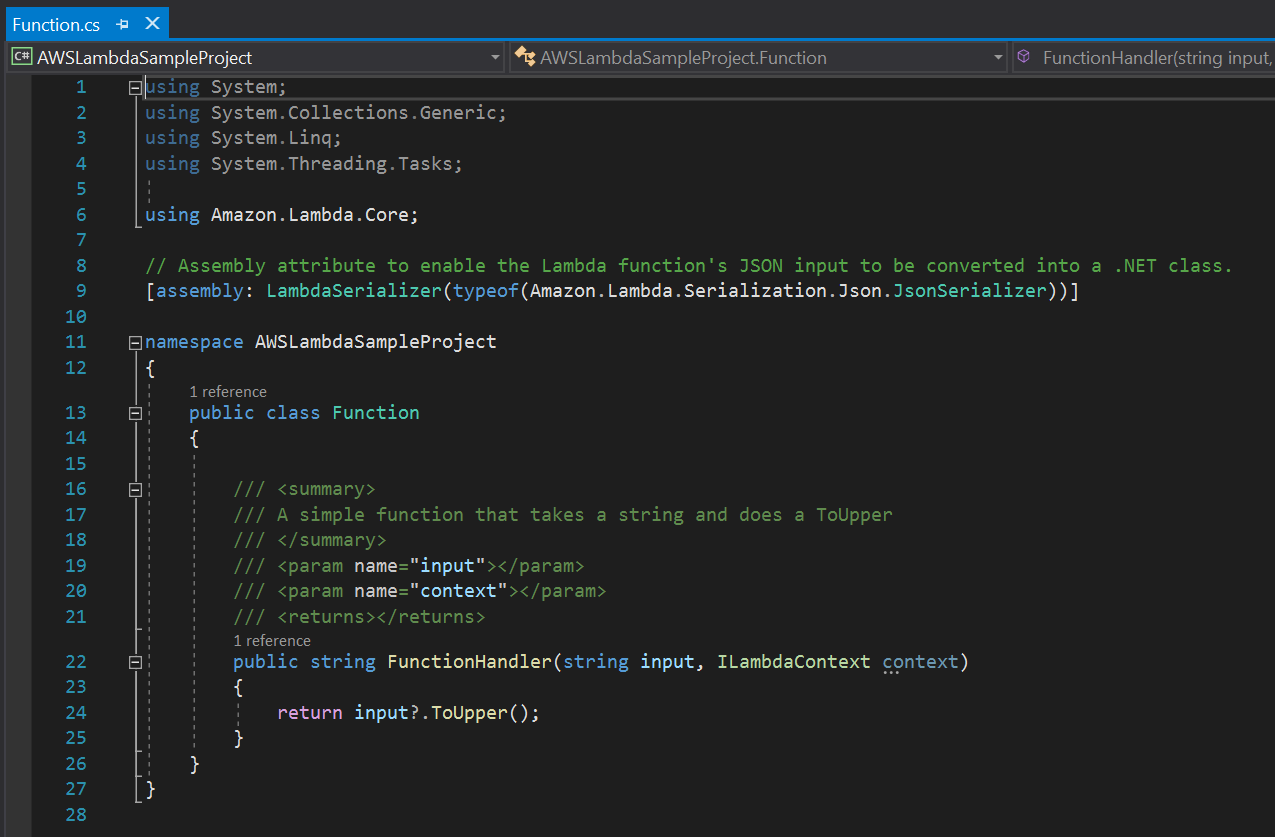
This time I did not notice any indication of GET or POST, but the tutorial did not specify that I needed to make any changes yet. Next, I published the function by right-clicking on the project and selecting Publish to AWS Lambda. Since it was my first time using AWS with this account, I had to set up a Profile Name, Access Key ID and Secret Access Key - which I could import from a CSV file. Only, that part was not specified in the tutorial, so I went to the AWS console in search of it - and eventually just Googled to discover the location. Turns out I needed to create an IAM user for this Lambda upload permission.
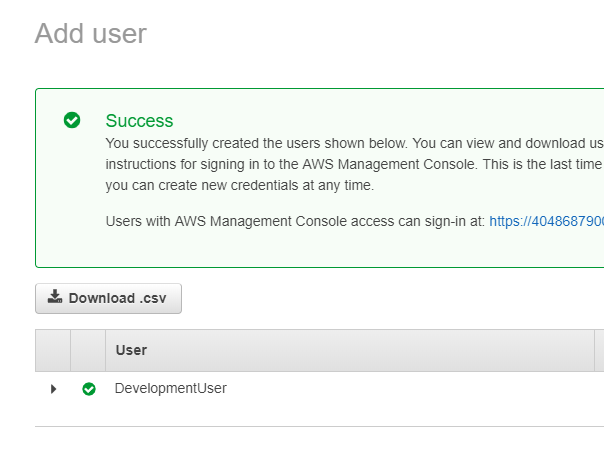
By navigating to the IAM Users screen in the console, I added a user with the permission level I was comfortable with. For now, I gave it full admin access and downloaded the credentials as a CSV upon successful creation. At this point, I also took note of my AWS account number.
After importing the CSV and naming my function in the AWS Lambda publishing wizard in Visual Studio, the Advanced Function Details screen asked which role the IAM user would have for this function. I set it to AWSLambdaRole and left all the other defaults before clicking Upload.

After getting a success message in the output window, I visited the AWS console, selected Lambda, and verified that my function did, indeed, make it.

Only this time there was not an HTTP trigger set up for it by default as Azure had done before. Most of the Visual Studio tutorials ended with testing out the lambda function in the console, and yes, it did work when I did it there - but I was interested in externally calling it in Postman. Upon investigation, I discovered that there are Blueprints (Amazon’s version of project templates) available for Node.js that sets it up partially for you, but the Toolkit extension in Visual Studio did not offer it. A quick search ‘round the internet indicated that I needed to set up an API gateway to trigger my newly created lambda function with an HTTP request.
In the AWS console, I clicked on the new lambda function and selected API Gateway from the list of triggers to add to it on the left side. I gave it a name and set the access to Open and saved the function. That generated an endpoint URL I could call. I copied and pasted the URL into Postman and was able to receive a response from the Lambda function. Granted, I needed to change the code to be fit an API call, but at least I was able to get a response directly from it now, and that’s enough to get going.
The ‘Gotchas’ Discovered During this Experiment
Azure Functions:
No option for direct integration with third-party systems like Alexa (something that Amazon made painless with Lambda), but that just meant I needed to set the function up as I would any other API endpoint and configure Alexa to point to it. A couple of extra steps there.
AWS Lambda Functions:
You can’t just deploy the Lambda function from Visual Studio into AWS and then magically call it from an external source. The function will be uploaded, but there is no path to it that you can hit it from something like Postman. It requires a setup with Amazon’s API Gateway trigger. Then, there are additional security permissions to configure for the AWS user specific to that function. There are lots of options for the seasoned serverless professional, but it just surprised me there was no set up by default for developers new to the platform. AWS is a provider first and foremost and leaves configurations up to you.
Final Thoughts
Even for someone who has been developing Alexa skills, (like myself), AWS Lambda is still not that intuitive for someone with an ASP.NET 4.x background exclusively - at least not in my opinion. This makes it less preferable to Azure, which makes initial setup significantly easier as Microsoft intimately knows the kinds of projects .NET developers have traditionally worked with, and ease the barrier to entry for an HTTP triggered function.
From a C# perspective at least, this makes Azure seem like the better choice - especially when integrated with Okta identity management for a serverless option. Now I’ll turn the question over to you: what did you find easy or difficult about doing C# serverless? Try experimenting with both and leave a comment below!
Learn More About ASP.NET, .NET Core, and Serverless
If you’d like to learn more about using secure OAuth 2.0 and user management in ASP.NET, we’ve also published a number of posts that might interest you:
- Build a CRUD App with ASP.NET MVC and Entity Framework Authentication
- Add Login to your ASP.NET Core MVC App
- Spread Serverless Holiday Cheer with Lambda and API Gateway
- Build a REST API with ASP.NET Web API
For other great content from the Okta Dev Team, follow us on Twitter and Facebook!
Okta Developer Blog Comment Policy
We welcome relevant and respectful comments. Off-topic comments may be removed.