Secure Your ASP.NET Web Forms Application with OpenID Connect and Okta
We talk a lot about ASP.NET Core on this blog, but the .NET ecosystem is much much more than just Core. Microsoft is still updating and supporting .NET Framework, and will continue to do so for the foreseeable future. The same is the case with Web Forms, which even got some new features recently. In this post, we’ll take a look at how to easily secure existing ASP.NET Web Forms with via an external provider — Okta.
To follow along, you’ll need .NET Framework 4.7.1 and Visual Studio 2017.
Note: In May 2025, the Okta Integrator Free Plan replaced Okta Developer Edition Accounts, and the Okta CLI was deprecated.
We preserved this post for reference, but the instructions no longer work exactly as written. Replace the Okta CLI commands by manually configuring Okta following the instructions in our Developer Documentation.
Get Started with ASP.NET and Web Forms
First, you need to create a new Web Forms application using one of the built-in templates that ship with Visual Studio. Choose the Web Forms template with Individual User Accounts authentication.
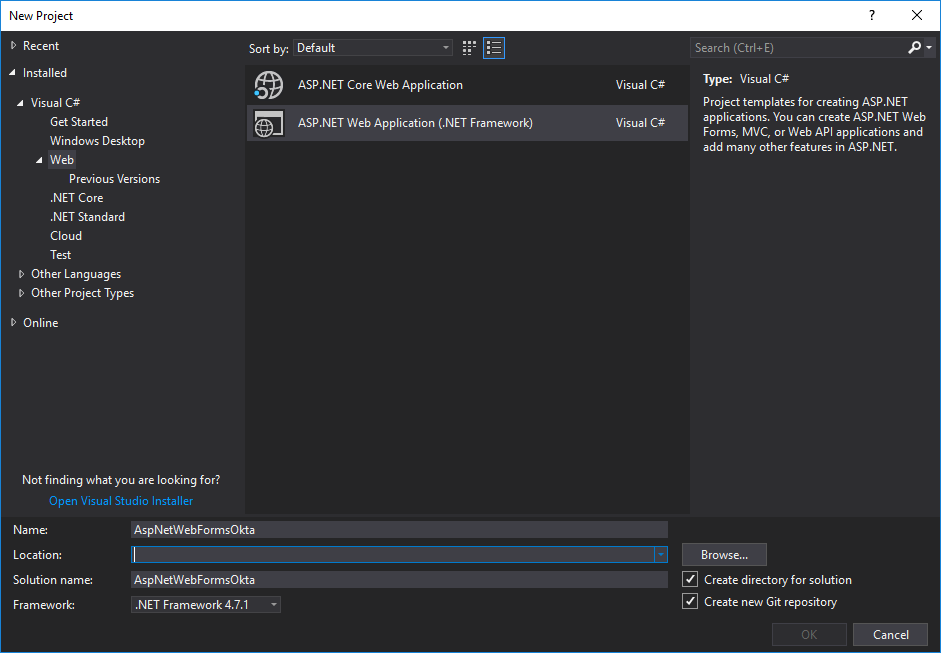
In Visual Studio, select File -> New Project -> Name the project AspNetWebFormsOkta
You want the default template for Web Forms without authentication.
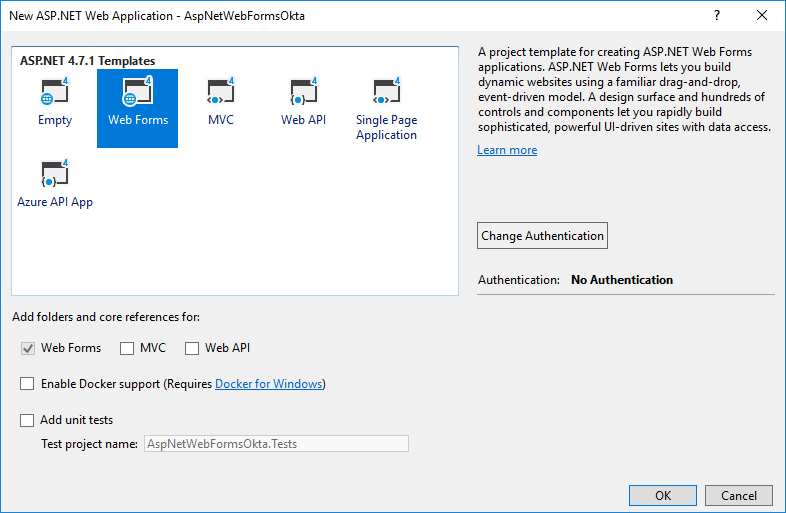
After confirming, you get a Web Forms application with Bootstrap on UI. Now you can clean up the project. Start by deleting some of the NuGet packages. You can simply copy and paste this code to your Package Manager Console:
Uninstall-Package Microsoft.ApplicationInsights.Web
Uninstall-Package Microsoft.ApplicationInsights.WindowsServer
Uninstall-Package Microsoft.ApplicationInsights.WindowsServer.TelemetryChannel
Uninstall-Package Microsoft.ApplicationInsights.PerfCounterCollector
Uninstall-Package Microsoft.ApplicationInsights.DependencyCollector
Uninstall-Package Microsoft.ApplicationInsights.Agent.Intercept
Uninstall-Package Microsoft.ApplicationInsights
Uninstall-Package Microsoft.AspNet.TelemetryCorrelation
You can also delete ApplicationInsights.config file.
You’ll want to specify the port that your app will be running on, so you can use it later during your Okta configuration. To do so, right click on the project in the solution explorer and click Properties. In the main properties window, choose Web from the left-hand menu and set the Project Url property to http://localhost:8080.
Install the Necessary NuGet Packages for Your ASP.NET Web Forms App
After a cleanup, you can now install needed dependencies. Use the Package Manager Console:
Install-Package IdentityModel
Install-Package Microsoft.Owin.Security.OpenIdConnect
Install-Package Microsoft.Owin.Security.Cookies
Install-Package Microsoft.Owin.Host.SystemWeb
Install-Package Microsoft.AspNet.Identity.Owin
Set Up Secure Authentication with Okta
Authentication is always a big issue for developers, and to be honest it’s one of those things that should be baked into templates and frameworks. Some developers prefer to use a working solution without having to configure all the details, and rightly so. Sometimes the client you’re working with requires you to set up authentication for existing or new projects as soon as possible. These are all great reasons to try Okta and get authentication set up in a few simple steps
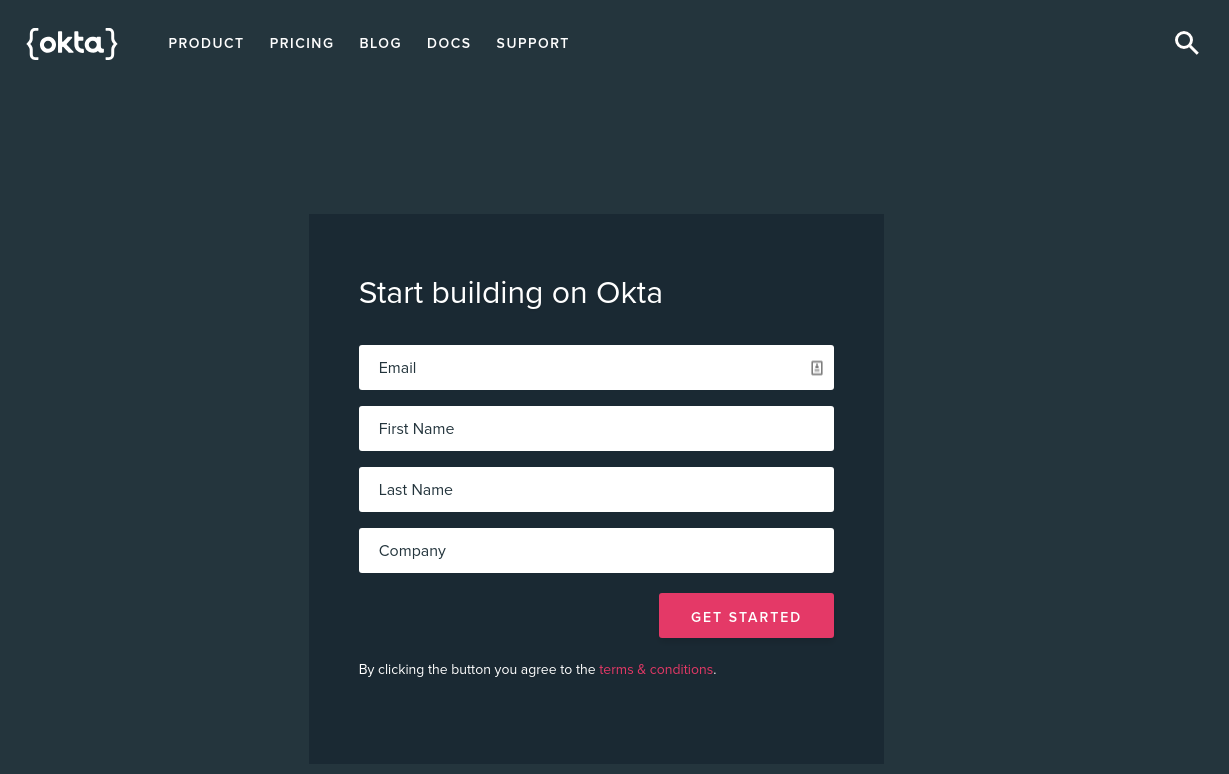
To get started with Okta, you’ll need to create an OpenID Connect application in Okta. Sign up for a forever-free developer account or simply log in if you already have one.
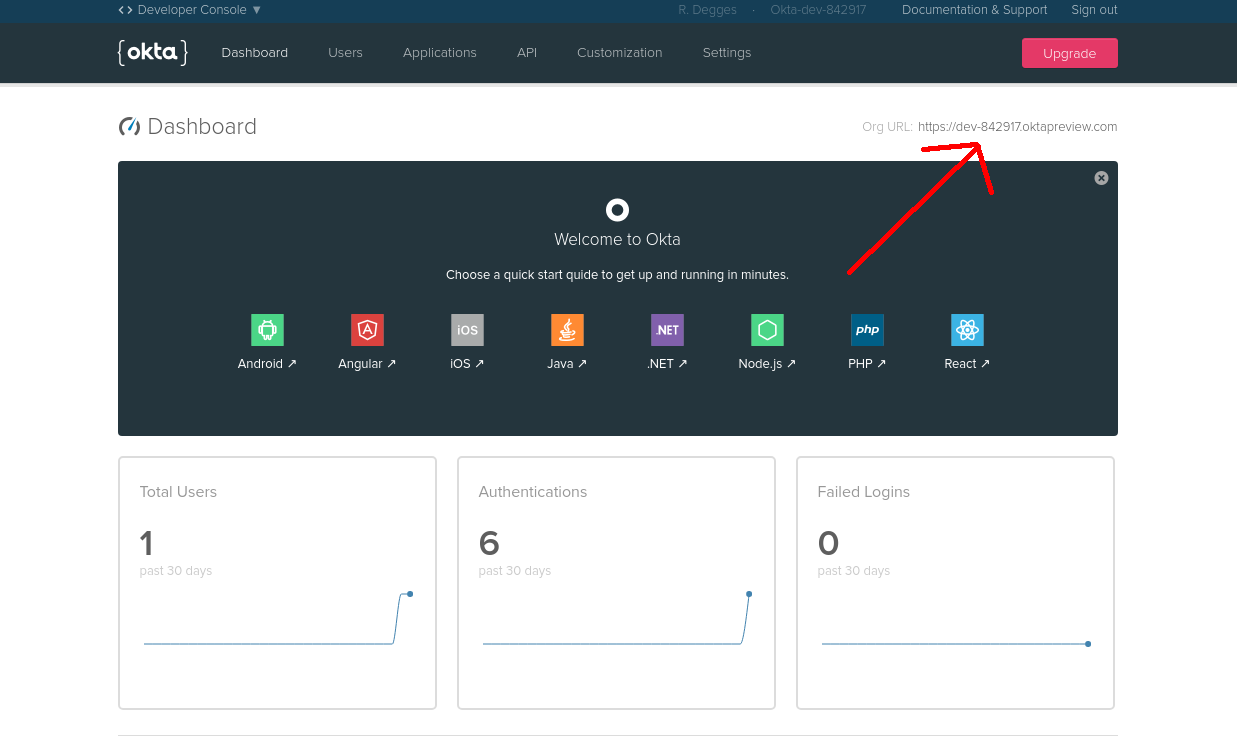
Once you’ve logged in and landed on the dashboard page, copy down the Org URL pictured below. You will need this later.
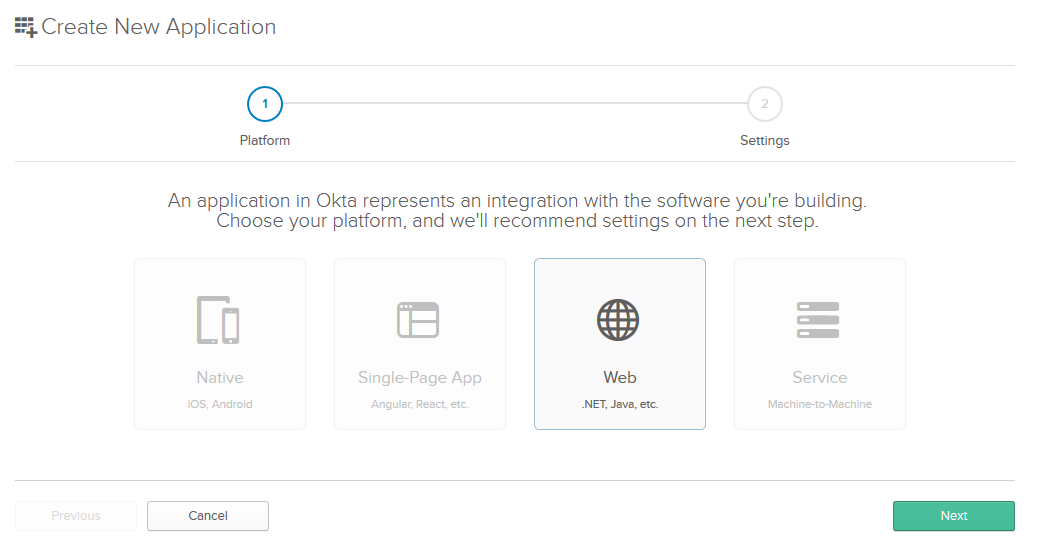
Then create a new application by browsing to the Applications tab and clicking Add Application, and from the first page of the wizard choose Web, then click Next.
On the settings page, enter the following values:
- Name: OktaWebForms
- Grant type allowed: Implicit (Hybrid)
You can leave the other values unchanged, and click Done.
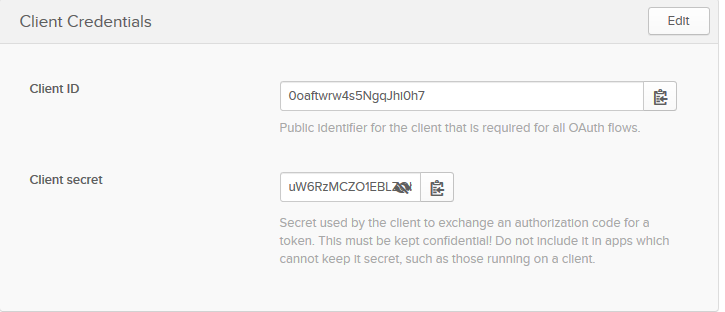
Now that your application has been created, copy down the Client ID and Client secret values on the following page, you’ll need them soon (of course, yours will be different).
Why Okta for Secure User Management?
You just saw how easy it was to add Okta to your app to handle authentication, but that’s not all Okta brings to the table. Our goal is to make all aspects of user management a lot easier, more secure, and more scalable than what you’re used to. Okta is a cloud service that allows developers to create, edit, and securely store user accounts and user account data, and connect them with one or multiple applications. Our API enables you to:
- Authenticate and authorize your users
- Store data about your users
- Perform password-based and social login
- Secure your application with multi-factor authentication
And much more! Check out our product documentation
Secure Your ASP.NET Application
You should store your Okta details inside your Web.config, so you can use those later on in our code. To do this, make use of the appSettings section of the configuration.
You want to add a connection string to Web.config file. Make sure to add it inside of <configuration>, before the <system.web></system.web> section:
<appSettings>
  <add key="okta:ClientId" value="{yourClientId}" />
  <add key="okta:ClientSecret" value="{yourClientSecret}" />
  <add key="okta:OrgUri" value="https://{yourOktaDomain}/oauth2/default" />
  <add key="okta:RedirectUri" value="http://localhost:8080/authorization-code/callback" />
</appSettings>
Create a Startup Class
If you don’t already have a Startup.cs file (OWIN Startup class), create one by right-clicking on your project and choosing Add - Owin Startup Class. Make sure to name the new class Startup.
Make sure you have these using statements at the top of your Startup.cs file:
using IdentityModel.Client;
using Microsoft.AspNet.Identity;
using Microsoft.IdentityModel.Protocols.OpenIdConnect;
using Microsoft.IdentityModel.Tokens;
using Microsoft.Owin;
using Microsoft.Owin.Security;
using Microsoft.Owin.Security.Cookies;
using Microsoft.Owin.Security.OpenIdConnect;
using Owin;
using System;
using System.Collections.Generic;
using System.Configuration;
using System.Security.Claims;
Here is the content of Startup class:
public class Startup
{
  // These values are stored in Web.config. Make sure you update them!
  private readonly string _clientId = ConfigurationManager.AppSettings["okta:ClientId"];

  private readonly string _redirectUri = ConfigurationManager.AppSettings["okta:RedirectUri"];
  private readonly string _authority = ConfigurationManager.AppSettings["okta:OrgUri"];
  private readonly string _clientSecret = ConfigurationManager.AppSettings["okta:ClientSecret"];

  public void Configuration(IAppBuilder app)
  {
    ConfigureAuth(app);
  }

  public void ConfigureAuth(IAppBuilder app)
  {
    app.UseExternalSignInCookie(DefaultAuthenticationTypes.ExternalCookie);

    app.SetDefaultSignInAsAuthenticationType(CookieAuthenticationDefaults.AuthenticationType);
    app.UseCookieAuthentication(new CookieAuthenticationOptions());

    app.UseOpenIdConnectAuthentication(new OpenIdConnectAuthenticationOptions
    {
      ClientId = _clientId,
      ClientSecret = _clientSecret,
      Authority = _authority,
      RedirectUri = _redirectUri,
      ResponseType = OpenIdConnectResponseType.CodeIdToken,
      Scope = OpenIdConnectScope.OpenIdProfile,
      TokenValidationParameters = new TokenValidationParameters { NameClaimType = "name" },
      Notifications = new OpenIdConnectAuthenticationNotifications
      {
        AuthorizationCodeReceived = async n =>
        {
          // Exchange code for access and ID tokens
          var tokenClient = new TokenClient($"{_authority}/v1/token", _clientId, _clientSecret);

          var tokenResponse = await tokenClient.RequestAuthorizationCodeAsync(n.Code, _redirectUri);
          if (tokenResponse.IsError)
          {
            throw new Exception(tokenResponse.Error);
          }

          var userInfoClient = new UserInfoClient($"{_authority}/v1/userinfo");
          var userInfoResponse = await userInfoClient.GetAsync(tokenResponse.AccessToken);

          var claims = new List<Claim>(userInfoResponse.Claims)
          {
            new Claim("id_token", tokenResponse.IdentityToken),
            new Claim("access_token", tokenResponse.AccessToken)
          };

          n.AuthenticationTicket.Identity.AddClaims(claims);
        },
      },
    });
  }
}
Next, you will make use of your Okta credentials and Okta’s UseOpenIdConnectAuthentication middleware to connect to an externally hosted authorization server. You definitely don’t want to build and maintain your own authorization server, so Okta will handle token generation for you.
Display a Login Button
Next you’ll add a Login button to your existing navigation bar. Inside of the Site.Master file, after the existing <ul> tag, add the following:
<asp:LoginView runat="server" ViewStateMode="Disabled">
<AnonymousTemplate>
  <ul class="nav navbar-nav navbar-right">
    <li>
      <a
        href="Site.Master"
        runat="server"
        onserverclick="btnLogin_Click">Login</a>
    </li>
  </ul>
  </AnonymousTemplate>
  <LoggedInTemplate>
    <ul class="nav navbar-nav navbar-right">
      <li>
        <asp:LoginStatus runat="server"
          LogoutAction="Redirect"
          LogoutText="Logout"
          LogoutPageUrl="~/"
        OnLoggingOut="Unnamed_LoggingOut" />
      </li>
    </ul>
  </LoggedInTemplate>
</asp:LoginView>
Let’s add the code for these two events (button clicks). Update the Site.Master.cs by making sure you have the following namespaces inside your file:
using System;
using System.Web;
using System.Web.UI;
using System.Web.UI.WebControls;
using Microsoft.Owin.Security;
using Microsoft.Owin.Security.OpenIdConnect;
using System.Web.Security;
using Microsoft.Owin.Security.Cookies;
Now you can add the functions for the events. Inside of the existing SiteMaster class, add these two functions:
protected void btnLogin_Click(object sender, EventArgs e)
{
  if (!Request.IsAuthenticated)
  {
    HttpContext.Current.GetOwinContext().Authentication.Challenge(
      new AuthenticationProperties { RedirectUri = "/" },
      OpenIdConnectAuthenticationDefaults.AuthenticationType);
  }
}

protected void Unnamed_LoggingOut(object sender, LoginCancelEventArgs e)
{
  Context.GetOwinContext().Authentication.SignOut(CookieAuthenticationDefaults.AuthenticationType);
}
Secure Your About Page
Let’s use the About page to demonstrate the authentication of the user. Inside of the About.aspx file clean up everything and make sure that you have only the following code:
<%@ Page Title="About" Language="C#" MasterPageFile="~/Site.Master" AutoEventWireup="true" CodeBehind="About.aspx.cs" Inherits="AspNetWebFormsOkta.About" %>

<asp:Content ID="BodyContent" ContentPlaceHolderID="MainContent" runat="server">

</asp:Content>
After that, you can use the code to show a simple message based on the authentication status of the user. You can dynamically add a label inside your main content, and simply fill out the label content.
Add the following code inside the Page_Load method of your About.aspx.cs file:
string labelText;
if (Request.IsAuthenticated)
{
  labelText = "Some hidden resource";
}
else
{
  labelText = "You are not authenticated!";
}

var label = new Label
{
  Text = labelText
};

var mainContent = (ContentPlaceHolder)Page.Form.FindControl("MainContent");
mainContent.Controls.Add(label);
Now you can start the application! After the page loads click on Login button, you will be redirected to the Okta login page. After entering your login details and signing in, you will be redirected back to the application.
Now go to the About page to see if you can see the protected data you added:

The complete and working sample that backs this tutorial is available on GitHub as AspNetWebFormsOkta.
Learn More
Want to learn more about integrating authentication with Okta? Check out these resources for using Okta in other development stacks!
- Using OpenID Connect in ASP.NET Core
- Build a React App with Authentication in 15 Minutes
- Build a Simple CRUD App with ASP.NET Core and Vue
- Build a Secure ReST API with Node and OAuth 2.0
If you have any questions about the tutorial, please leave them in the comments below. Don’t forget to follow us on Twitter and Facebook! You can also find video tutorials on our YouTube channel!
Okta Developer Blog Comment Policy
We welcome relevant and respectful comments. Off-topic comments may be removed.