Upgrade your ASP.NET Core 2.1 App to Angular 6
With the release of ASP.NET Core, there are several templates in the DotNet CLI. One of those templates is an Angular template that scaffolds a single page application built with Angular and ASP.NET Core. The problem with that template is that it scaffolds an Angular 4.2.5 project and Angular released Angular 6 in May of 2018!
In this post, not only will I show you how to build a base CRUD app with ASP.NET Core 2.1 and Angular, but I will show you how to update the Angular project to the latest and greatest, which is Angular 6 as of this writing! Let’s get right to it!
Note: In May 2025, the Okta Integrator Free Plan replaced Okta Developer Edition Accounts, and the Okta CLI was deprecated.
We preserved this post for reference, but the instructions no longer work exactly as written. Replace the Okta CLI commands by manually configuring Okta following the instructions in our Developer Documentation.
Update the DotNet CLI Angular Project to Angular 6
The project that the DotNet CLI for Core 2.1 scaffolds is using Angular 4.2.5, which will work. But if you’re looking to use Angular version 6, there are a few steps you’ll need to complete to get there.
Update the DotNet CLI Template Packages
Start by updating the SPA project templates:
dotnet new --install Microsoft.DotNet.Web.Spa.ProjectTemplates::2.1.0
Then run:
dotnet new --install Microsoft.AspNetCore.SpaTemplates::2.1.0-preview1-final
Scaffold an Angular App
Now you can scaffold a new project:
dotnet new angular -o dotnet-angular-crud-example
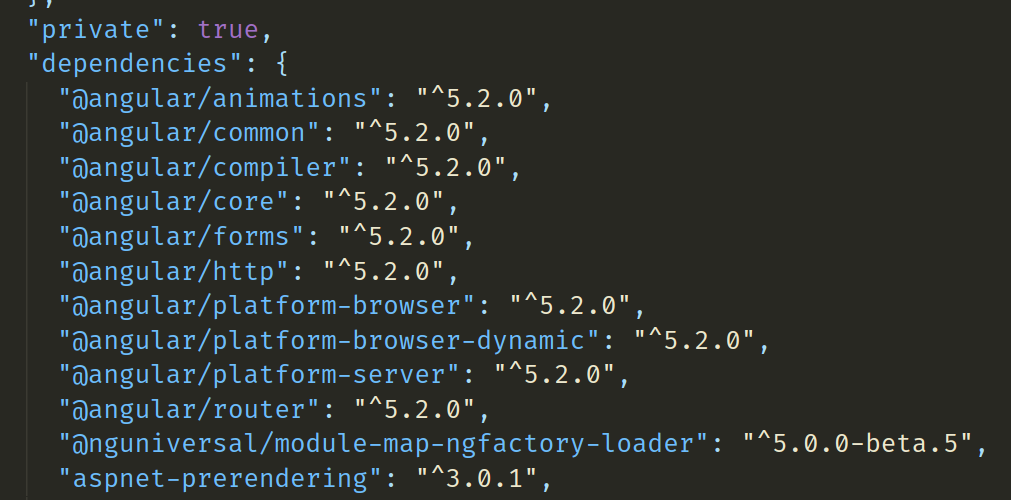
If you then open the app with VS Code, you can allow VS Code to add the .vscode folder that will allow you to run the application with a press of the F5 key. But the closest that gets you is Angular v5.2.0.
Upgrade to Angular 6
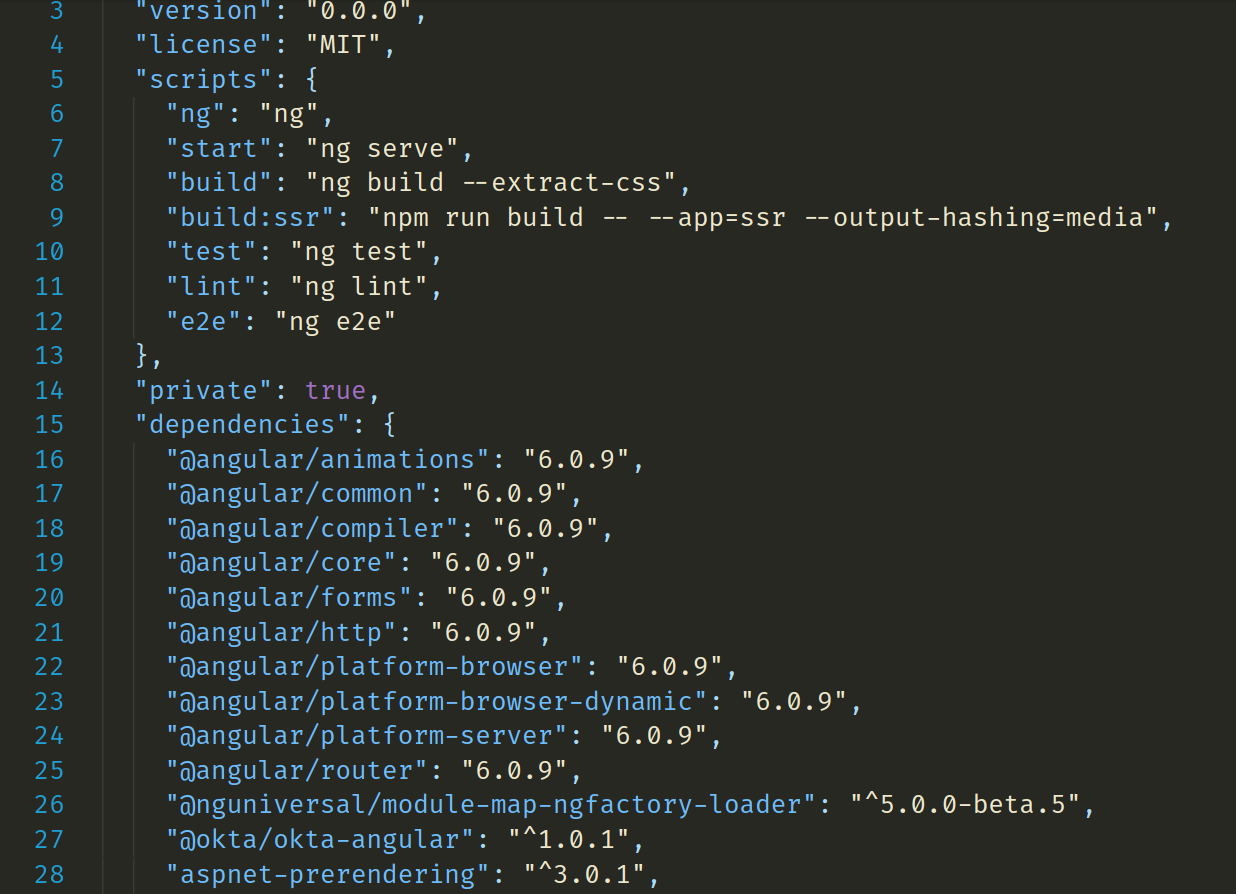
To update Angular to the latest version (v6.0.9 as of this writing) switch to the ClientApp directory and run:
ng update --all
This will update the package.json file; then you need to run:
npm install
If you get a message about @angular/cli you can update it by running:
ng update @angular/cli
You may now see some vulnerabilities in your NPM packages. To fix them run:
npm audit fix
You may have to run this several times as some of the fixes introduce new vulnerabilities. I was only able to get my vulnerability list down to 6. I still have one low and five moderate vulnerabilities. You could hunt them each down and fix them manually.
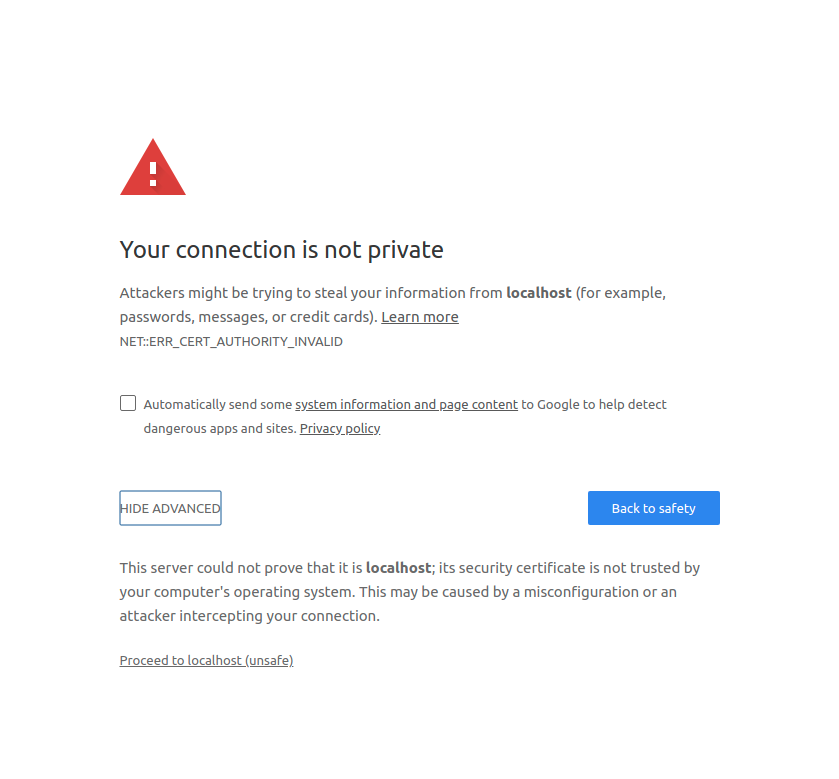
Now you should be able to run the app by pressing the F5 key and see the example app running as before.
You may be presented with a warning page talking about security. This is because the new Angular app runs on port 5001 under TLS, and there is no certificate. You could create a certificate, or just go to advanced settings and tell the browser to proceed anyway. This is the much easier option and it doesn’t warn you every time.
Create and Okta Application and API Token
Dealing with user authentication in web apps is a massive pain for every developer. This is where Okta shines: it helps you secure your web applications with minimal effort.
Why Okta?
At Okta, our goal is to make identity management a lot easier, more secure, and more scalable than what you’re used to. Okta is a cloud service that allows developers to create, edit, and securely store user accounts and user account data, and connect them with one or multiple applications. Our API enables you to:
- Authenticate and authorize your users
- Store data about your users
- Perform password-based and social login
- Secure your application with multi-factor authentication
- And much more! Check out our product documentation
Add Okta to Your ASP.NET Core + Angular App
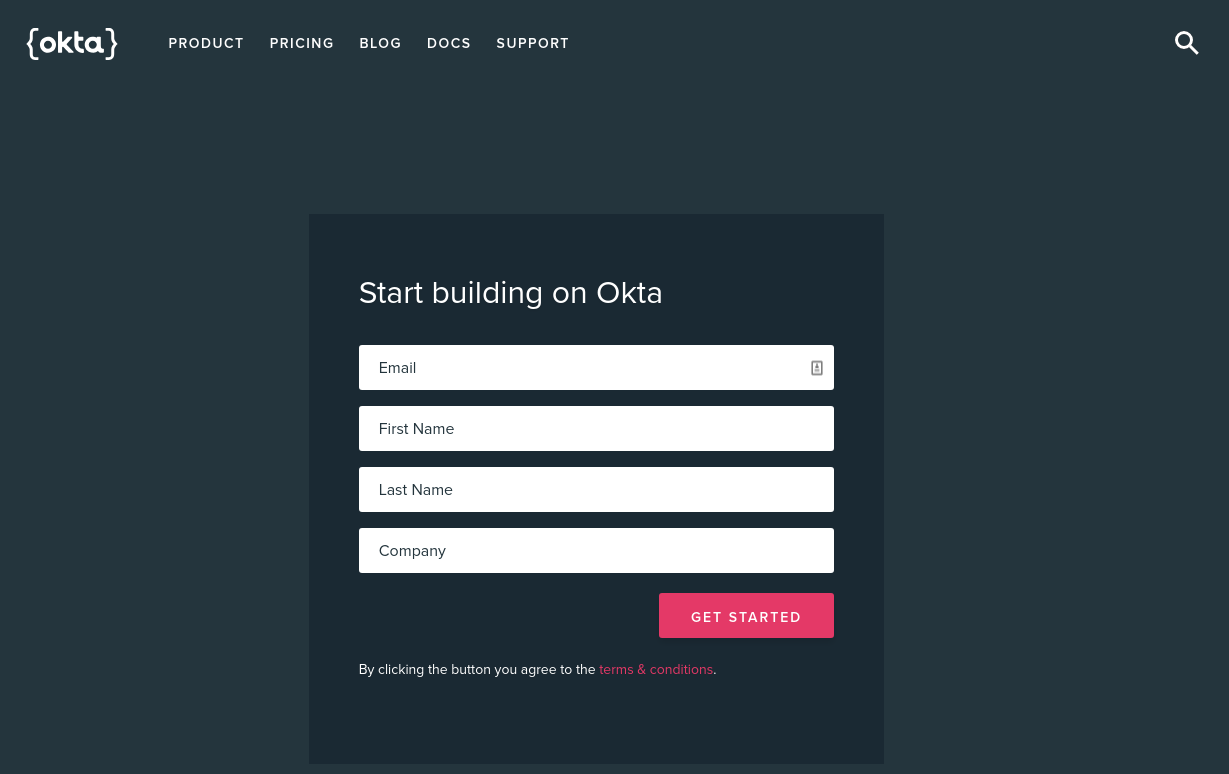
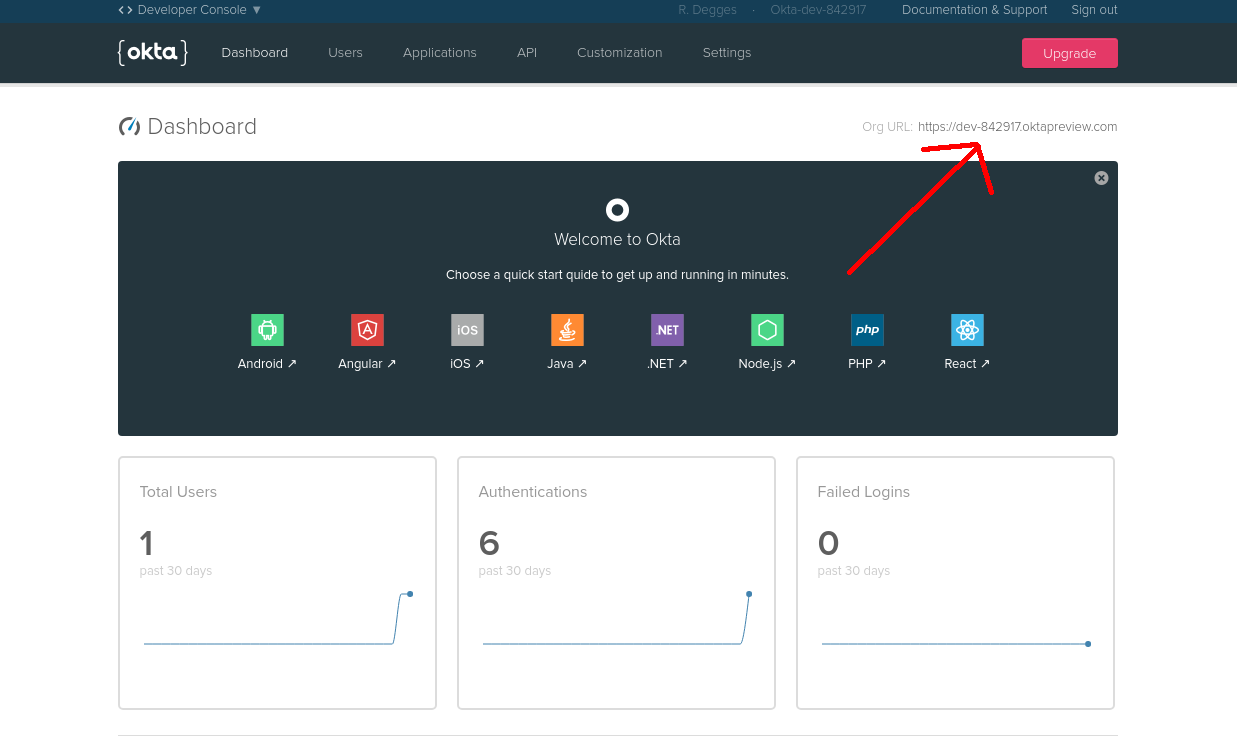
To get started, you’ll need to create an OpenID Connect application in Okta. Sign up for a forever-free developer account (or log in if you already have one).
Once you’ve logged in and landed on the dashboard page, copy down the Org URL pictured below. You will need this later.
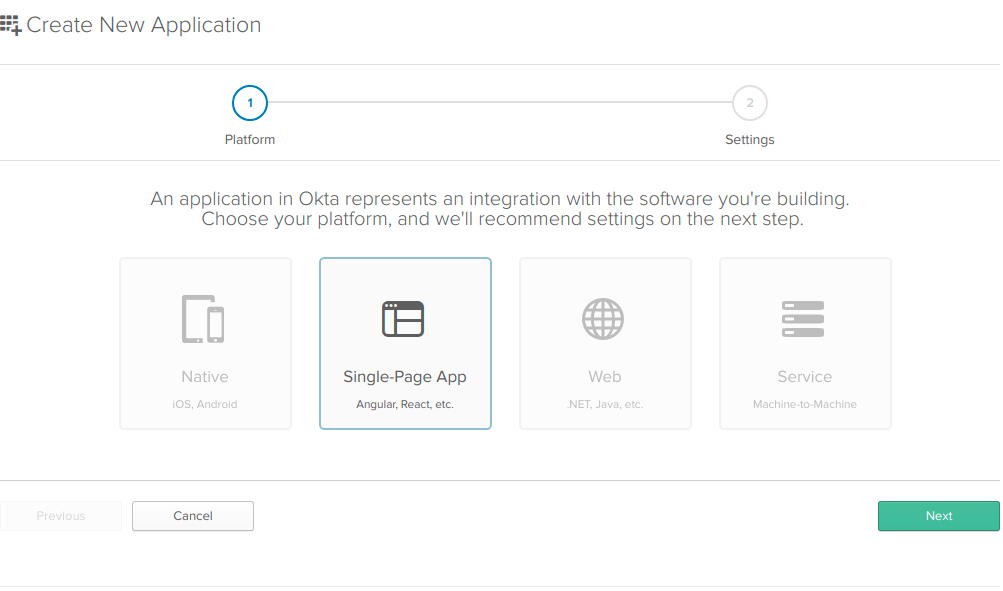
Then create a new application by browsing to the Applications tab and clicking Add Application, and from the first page of the wizard choose Single-Page App.
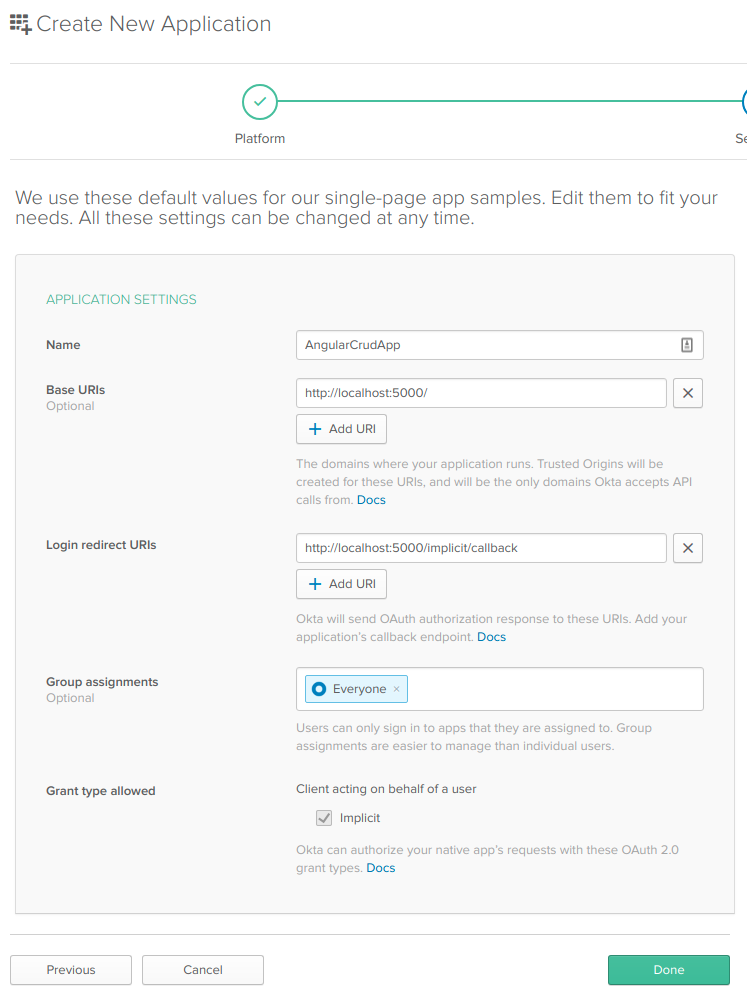
On the settings page, enter the following values:
- Name: AngularCrudApp
- Base URIs: http://localhost:5000
- Login redirect URIs: http://localhost:5000/implicit/callback
You can leave the other values unchanged, and click Done.
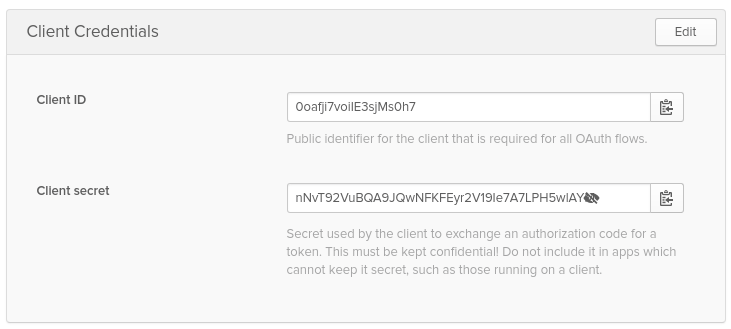
Now that your application has been created copy down the Client ID and Client secret values on the following page, you’ll need them soon.
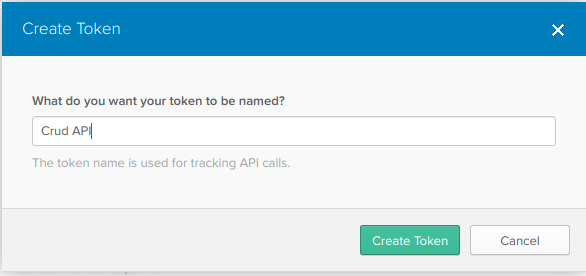
Finally, create a new authentication token. This will allow your app to talk to Okta to retrieve user information, among other things. To do this, click the API tab at the top of the page followed by the Create Token button. Give your token a name, in this case, “Crud API” would be a good name, then click Create Token. Copy down this token value as you will need it soon.
Add Okta to Your Angular Application
You’ll need a couple of dependencies to set up Okta in your Angular app, so run:
npm install @okta/okta-angular rxjs-compat@6 --save
This installs Okta’s Angular SDK and the rxjs compatibility library for rxjs 6. Since the Angular SDK is still using rxjs 5 internally, this package provides backward compatibility for it.
Now you’ll want to store the configuration information in your Angular application.
In the ClientApp/src/app/app.module.ts file, you’ll need to import some Okta modules and components and configure Okta as your identity provider. First, import the OktaAuthModule and the OktaCallbackComponent.
import { OktaAuthModule, OktaCallbackComponent } from '@okta/okta-angular';
Then, right below the import statements, add a config variable that will hold your Okta configuration, replacing you okta domain and client id as needed.
const config = {
  issuer: 'https://{yourOktaDomain}/oauth/default',
  redirectUri: 'http://localhost:5000/implicit/callback',
  clientId: '{clientId}'
};
To the imports property of the main @NgModule add the OktaAuthModule.
OktaAuthModule.initAuth(config);
finally, add the OktaCallbackComponent as the handler for the callback path in the routing.
{ path: 'implicit/callback', component: OktaCallbackComponent }
Ultimately, your app.module.ts file will look like:
import { BrowserModule } from '@angular/platform-browser';
import { NgModule } from '@angular/core';
import { FormsModule } from '@angular/forms';
import { HttpClientModule } from '@angular/common/http';
import { RouterModule } from '@angular/router';
import { OktaAuthModule, OktaCallbackComponent } from '@okta/okta-angular';

import { AppComponent } from './app.component';
import { NavMenuComponent } from './nav-menu/nav-menu.component';
import { HomeComponent } from './home/home.component';
import { CounterComponent } from './counter/counter.component';
import { FetchDataComponent } from './fetch-data/fetch-data.component';
import { ProfileComponent } from './profile/profile.component';

const config = {
  issuer: 'https://{yourOktaDomain}/oauth/default',
  redirectUri: 'http://localhost:5000/implicit/callback',
  clientId: '{clientId}'
};

@NgModule({
  declarations: [
    AppComponent,
    NavMenuComponent,
    HomeComponent,
    CounterComponent,
    FetchDataComponent,
    ProfileComponent
  ],
  imports: [
    BrowserModule.withServerTransition({ appId: 'ng-cli-universal' }),
    HttpClientModule,
    FormsModule,
    RouterModule.forRoot([
      { path: '', component: HomeComponent, pathMatch: 'full' },
      { path: 'counter', component: CounterComponent },
      { path: 'fetch-data', component: FetchDataComponent },
      { path: 'implicit/callback', component: OktaCallbackComponent }
    ]),
    OktaAuthModule.initAuth(config)
  ],
  providers: [],
  bootstrap: [AppComponent]
})
export class AppModule {}
In the ClientApp/src/app/nav-menu/nav-menu.component.ts file, add the navigation for the login and logout functionality. Change the component code so that it looks like:
import { Component } from '@angular/core';
import { OktaAuthService } from '@okta/okta-angular';

@Component({
  selector: 'app-nav-menu',
  templateUrl: './nav-menu.component.html',
  styleUrls: ['./nav-menu.component.css']
})
export class NavMenuComponent {
  isExpanded = false;
  isAuthenticated: boolean;

  constructor(public oktaAuth: OktaAuthService) {
    this.oktaAuth.$authenticationState.subscribe(
      (isAuthenticated: boolean) => (this.isAuthenticated = isAuthenticated)
    );
  }

  async ngOnInit() {
    this.isAuthenticated = await this.oktaAuth.isAuthenticated();
  }

  login() {
    this.oktaAuth.loginRedirect('/profile');
  }

  logout() {
    this.oktaAuth.logout('/');
  }

  collapse() {
    this.isExpanded = false;
  }

  toggle() {
    this.isExpanded = !this.isExpanded;
  }
}
Then add login and logout buttons to the component’s template. To the navbar-nav unordered list element, add a new list item:
<li>
    <button *ngIf="!isAuthenticated" (click)="login()"> Login </button>
    <button *ngIf="isAuthenticated" (click)="logout()"> Logout </button>
</li>
Finally, add a profile page to the Angular application. You can take advantage of the Angular CLI here, by changing into the ClientApp/src/app folder and running:
ng g c profile
This uses the Angular CLI (ng) and tells it to generate (g) a new component (c) called profile. The CLI will generate all the files needed with the base templates in each.
In the profile directory, open the profile component and paste in the following code replacing all that is there.
import { Component, OnInit } from '@angular/core';
import { OktaAuthService } from '@okta/okta-angular';

@Component({
  selector: 'app-profile',
  templateUrl: './profile.component.html',
  styleUrls: ['./profile.component.css']
})
export class ProfileComponent implements OnInit {
  user: any;
  constructor(private oktaAuth: OktaAuthService) {}

  async ngOnInit() {
    this.user = await this.oktaAuth.getUser();
  }
}
This profile component code gets the user using the OktaAuthService provided by the Angular SDK and puts it into a component-level variable to use in the template.
In the profile.component.html file, paste the following code in replacing what’s currently there.
<h1>
  Welcome {{user ? user.email : null}}!
</h1>
You’ll need a way for users to navigate to the profile page, so add it to the nav menu and routing. In the nav-menu component, add a new list item.
<li #ngIf='isAuthenticated' [routerLinkActive]='["link-active"]'>
    <a [routerLink]='["/profile"]' (click)='collapse()'>
        <span class='glyphicon glyphicon-user'></span> Profile
    </a>
</li>
The *ngIf will make sure the navigation only shows if the user is logged in.
Then add a protected route to the app.module.ts file for the profile page. First, add the OktaAuthGuard component to the imports from the @okta/okta-angular package to protect the route so that your import statement now looks like this.
import {
  OktaAuthModule,
  OktaCallbackComponent,
  OktaAuthGuard
} from '@okta/okta-angular';
then add the protected route to the profile page.
{ path: 'profile', component: ProfileComponent, canActivate: [OktaAuthGuard] },
Now you can fire up the application (with F5) and see the application, login, view the profile page and logout.
Add Authentication to the ASP.NET Core API
For the ASP.NET Core application, the best thing to do is set up a file in your home folder to store the configuration. Okta’s SDK will pick the settings up for you, and you’ll never accidentally check them into source control!
In your home directory, create an .okta folder and add a file called okta.yaml. Your home folder will depend on your operating system. For *nix variants like Linux or macOS it is:
~/.okta/okta.yaml
for Windows environments it is:
%userprofile%\.okta\okta.yaml
YAML is just a file format for configuration. The okta.yaml file looks like:
okta:
  client:
    orgUrl: "https://{yourOktaDomain}"
    token: "{yourApiToken}"
In the ConfigureServices() method before the services.AddMvc() line, add:
services.AddAuthentication(sharedOptions =>
{
  sharedOptions.DefaultAuthenticateScheme = JwtBearerDefaults.AuthenticationScheme;
  sharedOptions.DefaultChallengeScheme = JwtBearerDefaults.AuthenticationScheme;
})
.AddJwtBearer(options =>
{
  options.Authority = "https://{yourOktaDomain}/oauth2/default";
  options.Audience = "api://default";
});
And in the Configure() method before the app.UseMvc() line add:
app.UseAuthentication();
That’s it! Now your ASP.NET Core app will take that bearer token, get the user’s information from Okta add them to the User object so you can get the currently requesting user’s data.
Set Up The ASP.NET Core API Database
You can use just about any database with DotNet Core and EntityFramework, but for the tutorial you’ll use EntityFramework’s in-memory database, a small database kept in memory. It is a great way to do development and then switch to the production database is as easy as changing the configuration!
In the ConfigureService() method of Startup.cs, add one line right after the services.AddMvc() set up.
services.AddDbContext<RestaurantRatingContext>(options => options.UseInMemoryDatabase("RestaurantRatingDb"));
You’ll also need to create the RestaurantRatingContext that you just referred to there. I put mine in the Models folder for ease of use.
using Microsoft.EntityFrameworkCore;

namespace okta_dotnetcore_react_example.Data
{
  public class RestaurantRatingContext : DbContext
  {
    public RestaurantRatingContext(DbContextOptions<RestaurantRatingContext> options) :
      base(options)
    { }

    public DbSet<RestaurantRating> Sessions { get; set; }
  }
}
While you’re in the Models folder, go ahead and create the model for the restaurant rating in a file called RestaurantRating.cs.
using System.ComponentModel.DataAnnotations;

namespace okta_dotnetcore_react_example.Data
{
  public class RestaurantRating
  {
    [Key]
    public int ID { get; set; }
    public string UserID { get; set; }
    public string RestarauntName { get; set; }
    public string RestaurantType { get; set; }
    public int Rating { get; set; }
  }
}
Now, create a controller to handle all the requests for creating, reading, updating, and deleting restaurant ratings. In the Controllers folder, create a file called RestaurantRatingController.cs.
using Microsoft.AspNetCore.Authorization;
using Microsoft.AspNetCore.Mvc;

namespace dotnet_angular_crud_example.Controllers
{
  [Authorize]
  [Route("/api/[controller]")]
  public class RestaurantRatingController : Controller
  {

  }
}
The Authorize attribute on the controller will ensure that only logged in users can work with restaurant ratings. Now, you just need to add the actions that will handle the CRUD operations, so that your final controller looks like this:
using System.Linq;
using System.Threading.Tasks;
using Microsoft.AspNetCore.Authorization;
using Microsoft.AspNetCore.Mvc;
using Microsoft.EntityFrameworkCore;
using okta_dotnetcore_react_example.Data;

namespace dotnet_angular_crud_example.Controllers
{
  [Authorize]
  [Route("/api/[controller]")]
  public class RestaurantRatingController : Controller
  {
    private readonly RestaurantRatingContext context;

    public RestaurantRatingController(RestaurantRatingContext context)
    {
      this.context = context;
    }

    [HttpGet]
    public async Task<ActionResult> GetAsync()
    {
      var userId = this.GetUserId();
      var ratings = await context.RestaurantRatings
        .Where(rr => rr.UserID == userId).ToListAsync();
      return Ok(ratings);
    }

    [HttpGet("{id}")]
    public async Task<ActionResult> GetByIdAsync(int id)
    {
      var userId = this.GetUserId();
      var rating = await context.RestaurantRatings
        .SingleOrDefaultAsync<RestaurantRating>(rr => rr.ID == id);
      if (rating.UserID != userId)
      {
        return Unauthorized();
      }
      else
      {
        return Ok(rating);
      }
    }

    [HttpPost]
    public async Task<ActionResult> PostAsync([FromBody] RestaurantRating rating)
    {
      var userId = this.GetUserId();
      if (rating.ID > 0)
      {
        var savedRating = await context.RestaurantRatings
          .SingleOrDefaultAsync<RestaurantRating>(rr => rr.ID == rating.ID);

        if (savedRating == null)
        {
          return NotFound(rating);
        }

        if (savedRating.UserID != userId)
        {
          return Unauthorized();
        }

        savedRating.RestaurantName = rating.RestaurantName;
        savedRating.RestaurantType = rating.RestaurantType;
        savedRating.Rating = rating.Rating;
        await context.SaveChangesAsync();
        return Ok(rating);
      }
      else
      {
        rating.UserID = userId;
        await context.AddAsync<RestaurantRating>(rating);
        await context.SaveChangesAsync();
        return CreatedAtAction("GetByIdAsync", rating);
      }

    }

    [HttpDelete("{id}")]
    public async Task<ActionResult> DeleteAsync(int id)
    {
      var ratingToDelete = new RestaurantRating { ID = id };
      context.RestaurantRatings.Attach(ratingToDelete);
      context.Entry(ratingToDelete).State = EntityState.Deleted;
      await context.SaveChangesAsync();
      return Ok();
    }

    private string GetUserId()
    {
      return User.Claims.SingleOrDefault(u => u.Type == "uid")?.Value;
    }
  }
}
There are a couple of things of note here:
First, all of the controller actions are asynchronous. This will help prevent performance bottlenecks. I am also using some ActionResult helper methods like Ok() and NotFound(). These are super helpful in making sure the right HTTP status is set in the return headers. You may also notice a rather odd helper being returned in the PostAsync() method called CreatedAtAction(). Not only does this helper send the right HTTP status, but it adds a URL for getting the newly created resource in proper ReST form!
Second, I created a method for getting the logged in user’s ID from their claims. This makes things a bit more readable and maintainable.
Add Ratings From the Angular 6 App
Now that your API is ready to save all the ratings to the database, you need to create the user interface that will allow users to enter their restaurant ratings.
In this case, just about everything can happen in the profile page. Part of the beauty of a single page app is that all of the CRUD operations for a single resource can be handled on a single page and the interface feels intuitive.
Start by creating a TypeScript object that will define the RestaurantRating type. In the src/app folder, create a file called RestaurantRating.ts and add the following contents:
export class RestaurantRating {
  id: number;
  userId: string;
  restaurantName: string;
  restaurantType: string;
  rating: number;
}
The type creates a class with all the properties needed for a restaurant rating. Then add an Angular service that will be the main point of interaction with the API.
import { Injectable } from '@angular/core';
import { HttpClient } from '@angular/common/http';
import { Observable } from 'rxjs/Observable';
import { RestaurantRating } from './RestaurantRating';

@Injectable({
  providedIn: 'root'
})
export class RestaurantRatingsService {
  apiUrl = '/api/restaurantrating';

  constructor(private http: HttpClient) {}

  getAll(): Observable<Array<RestaurantRating>> {
    return this.http.get<Array<RestaurantRating>>(this.apiUrl);
  }

  addOrUpdate(rating: RestaurantRating): Observable<RestaurantRating> {
    return this.http.post<RestaurantRating>(this.apiUrl, rating);
  }

  delete(id: number): Observable<any> {
    return this.http.delete<RestaurantRating>(`${this.apiUrl}/${id}`);
  }
}
This is the service you’ll call from the Angular application to interact with the ASP.NET Core Web API. It uses the RestaurantRating type to enforce typing in the calls to the API and uses the HttpClient from Angular’s @angular/common/http package to make HTTP calls, and returns observables from the rxjs package.
The next step is to inject this new service into the profile component, so you’ll need to import it and the RestaurantRating type:
import { RestaurantRatingsService } from '../shared/restaurant-ratings.service';
import { RestaurantRating } from '../shared/RestaurantRating';
The constructor of the profile component also changes to take in the rating service you just created:
constructor(
    private oktaAuth: OktaAuthService,
    private ratingService: RestaurantRatingsService
  ) {}
Add to the ngOnInit() method a call to the service that gets all restaurant ratings. First, you’ll need a value in the component to put them in once they’ve been returned from the API, so add to the profile.component.ts:
ratings: Array<RestaurantRating> = [];
Then change the ngOnInit() so that it looks like:
  async ngOnInit() {
    this.user = await this.oktaAuth.getUser();
    await this.ratingService
      .getAll()
      .subscribe(ratings => (this.ratings = ratings));
  }
Finally, add the HTML to the component’s template to display all the ratings:
<ul class="list-group" *ngIf="ratings.length">
  <li class="list-group-item" *ngFor="let rating of ratings">
    {{rating.restaurantName}} is a type of {{rating.restaurantType}} with a rating of {{rating.rating}}
  </li>
</ul>
This is all well and good, but there still is no way to add ratings. So for now, there will never be any ratings in the list. Fix that by adding the “Create” and “Update” parts of the CRUD flow.
In the profile.component.ts add a new method below the ngOnInit() function:
async addUpdateRating() {
  await this.ratingService
    .addOrUpdate(this.currentRating)
    .subscribe(rating => {
      if (!this.currentRating.id) {
        this.ratings.push(rating);
      }
      this.currentRating = new RestaurantRating();
    });
}
This method will handle adding and updating the ratings. It will subscribe to the service call, and if the currentRating property has an ID, it will push the “new” rating onto the ratings array. You’ll need a currentRating property to allow the user to select a rating for editing, so add it to the component class.
currentRating: RestaurantRating = new RestaurantRating();
As well as a way to select a rating into the currentRating property. So below the addUpdateRating() function add:
selectRating(rating: RestaurantRating) {
  this.currentRating = rating;
}
You’ll need a form for users to fill out to add and edit ratings, so add to the component’s HTML template below the ul:
<form class="form-inline">
  <label class="sr-only" for="restaurantName">Restaurant</label>
  <input type="text" class="form-control" [(ngModel)]="currentRating.restaurantName" name="restaurantName" placeholder="Restaurant Name">

  <label class="sr-only" for="restaurantType">Restaurant Type</label>
  <input type="text" class="form-control" [(ngModel)]="currentRating.restaurantType" name="restaurantType" placeholder="Restaurant Type">

  <label class="sr-only" for="rating">Rating</label>
  <input type="number" class="form-control" [(ngModel)]="currentRating.rating" name="rating" placeholder="Rating (1-10)">

  <button type="submit" class="btn btn-primary" (click)="addUpdateRating()">Rate It!</button>
</form>
You’ll also need something for the user to click on to select a rating to edit, so add to the rating list in the template:
<ul class="list-group" *ngIf="ratings.length">
  <li class="list-group-item" *ngFor="let rating of ratings">
    <button (click)="selectRating(rating)" class="btn btn-default btn-xs">
      <i class="glyphicon glyphicon-pencil"></i>
    </button>
    {{rating.restaurantName}} is a type of {{rating.restaurantType}} with a rating of {{rating.rating}}
  </li>
</ul>
Now the user can add and edit ratings, as well as the ability to view a list of the ratings they’ve entered. All that is left is a way to delete ratings from the list (and database). To do this, add a method in the profile.component.ts file.
async deleteRating(rating: RestaurantRating) {
  await this.ratingService.delete(rating.id).subscribe(response => {
    var idx = this.ratings.indexOf(rating);
    this.ratings.splice(idx, 1);
  });
}
The only other thing is a user interface element for the user to click on to delete a rating. Inside the li for ratings add:
<button (click)="deleteRating(rating)" class="btn btn-danger btn-xs">
  <i class="glyphicon glyphicon-remove"></i>
</button>
In the end, the final profile.component.ts code is:
import { Component, OnInit } from '@angular/core';
import { OktaAuthService } from '@okta/okta-angular';
import { RestaurantRatingsService } from '../shared/restaurant-ratings.service';
import { RestaurantRating } from '../shared/RestaurantRating';

@Component({
  selector: 'app-profile',
  templateUrl: './profile.component.html',
  styleUrls: ['./profile.component.css']
})
export class ProfileComponent implements OnInit {
  user: any;
  ratings: Array<RestaurantRating> = [];
  currentRating: RestaurantRating = new RestaurantRating();

  constructor(
    private oktaAuth: OktaAuthService,
    private ratingService: RestaurantRatingsService
  ) {}

  async ngOnInit() {
    this.user = await this.oktaAuth.getUser();
    await this.ratingService
      .getAll()
      .subscribe(ratings => (this.ratings = ratings));
  }

  async addUpdateRating() {
    await this.ratingService
      .addOrUpdate(this.currentRating)
      .subscribe(rating => {
        if (!this.currentRating.id) {
          this.ratings.push(rating);
        }
        this.currentRating = new RestaurantRating();
      });
  }

  async deleteRating(rating: RestaurantRating) {
    await this.ratingService.delete(rating.id).subscribe(response => {
      var idx = this.ratings.indexOf(rating);
      this.ratings.splice(idx, 1);
    });
  }

  selectRating(rating: RestaurantRating) {
    this.currentRating = rating;
  }
}
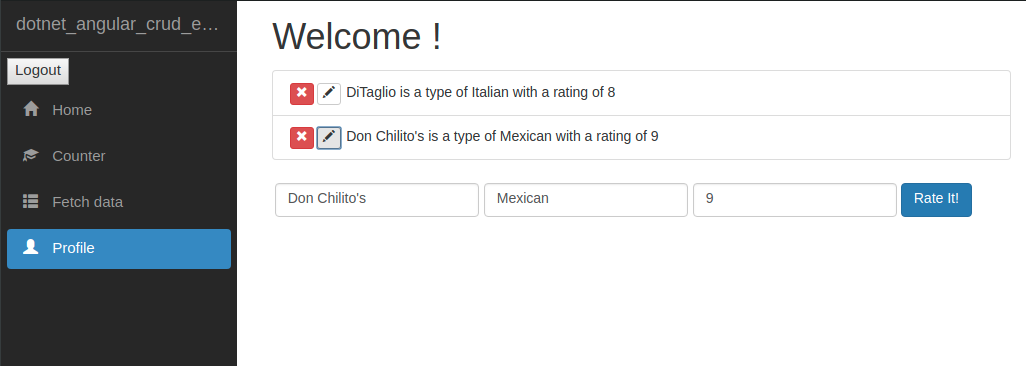
The completed ‘profile.component.html` file contents are:
<h1>
  Welcome {{user ? user.name : null}}!
</h1>
<ul class="list-group" *ngIf="ratings.length">
  <li class="list-group-item" *ngFor="let rating of ratings">
    <button (click)="deleteRating(rating)" class="btn btn-danger btn-xs">
      <i class="glyphicon glyphicon-remove"></i>
    </button>
    <button (click)="selectRating(rating)" class="btn btn-default btn-xs">
      <i class="glyphicon glyphicon-pencil"></i>
    </button>
    {{rating.restaurantName}} is a type of {{rating.restaurantType}} with a rating of {{rating.rating}}
  </li>
</ul>
<form class="form-inline">
  <label class="sr-only" for="restaurantName">Restaurant</label>
  <input type="text" class="form-control" [(ngModel)]="currentRating.restaurantName" name="restaurantName" placeholder="Restaurant Name">

  <label class="sr-only" for="restaurantType">Restaurant Type</label>
  <input type="text" class="form-control" [(ngModel)]="currentRating.restaurantType" name="restaurantType" placeholder="Restaurant Type">

  <label class="sr-only" for="rating">Rating</label>
  <input type="number" class="form-control" [(ngModel)]="currentRating.rating" name="rating" placeholder="Rating (1-10)">

  <button type="submit" class="btn btn-primary" (click)="addUpdateRating()">Rate It!</button>
</form>
That’s it! You should be able to fire up the application and Create, Read, Update, and Delete restaurant ratings in your new application, once you’ve logged in of course.
Learn More CRUD!
Check out our other CRUD posts on the Okta developer blog:
- Ibrahim creates a CRUD app with an ASP.NET Framework 4.x API in his post
- If you would like to use React instead of Angular for your CRUD app, I’ve got you covered
- If you want to go Node and React, Braden’s got a post for you
- Randall’s got your Python and Flask CRUD post here
As always, if you have any comments or concerns, feel free to leave a comment below. Don’t forget to follow us on Twitter and on Facebook!
Okta Developer Blog Comment Policy
We welcome relevant and respectful comments. Off-topic comments may be removed.