Use AWS CloudFormation to Automate Static Site Deployment with S3
Getting started with CloudFormation can be intimidating, but once you get the hang of it, automating tasks is easy. While CloudFormation might seem like overkill for something as simple as deploying a static site (for example you could just copy HTML files to a S3 bucket using the Amazon Console or from the CLI), if your shop uses continuous integration and you have multiple deployments happening at the same time, it’s more efficient for you to automate deployment.
The other benefit of CloudFormation is that if anything fails during a rollout or postdeployment, you won’t have to be concerned about reverting all the changes in AWS as CloudFormation will take care of all of that for you.
The Mission
- Pull an HTML file from a public GitHub repo
- Create an S3 Bucket
- Make it public
- Place the HTML file in that bucket
- Clean up when a CloudFormation Stack is deleted
A Simple CloudFormation Template
Here’s the CloudFormation Template we’ll be using:
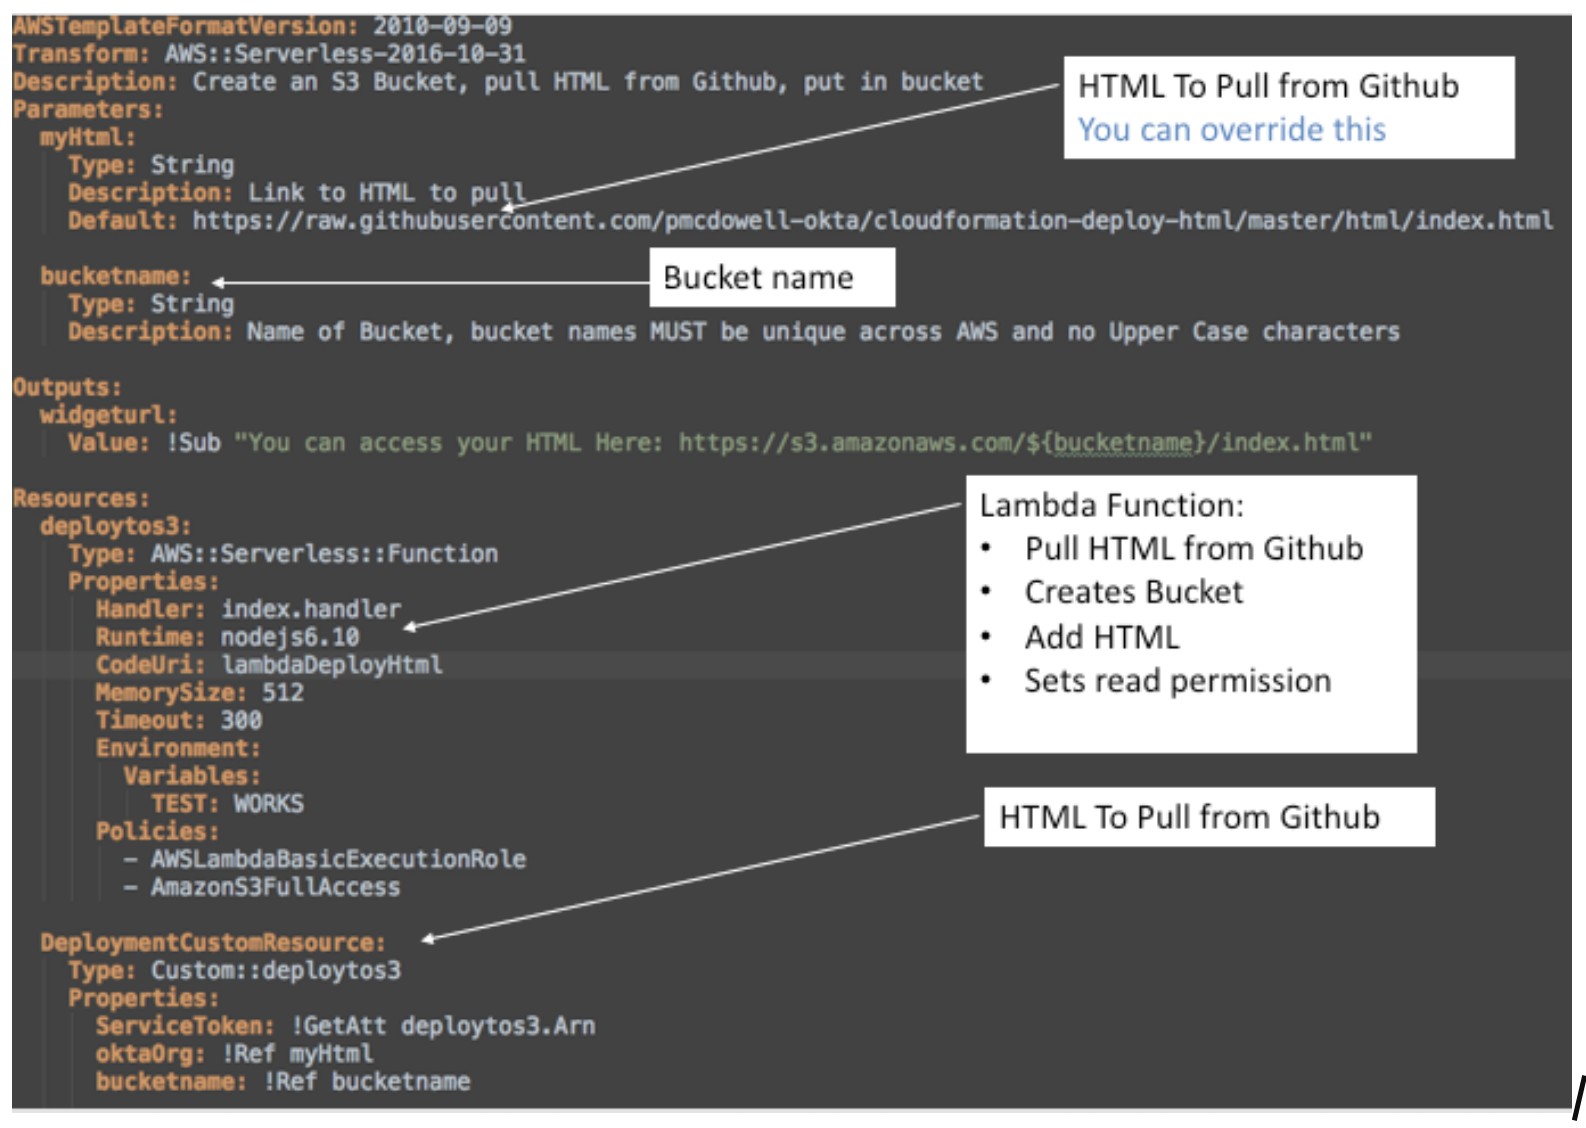
CloudFormation is a language into itself, so it will take a little time to get used to it.
This basic CloudFormation Template invokes a Lambda using something called a custom resource. More information is available here.
This Lambda function is triggered during the Creation, Update, and Deletion of a CloudFormation Stack. So, when the Stack is deleted, the Lambda function will take care of the cleanup for you!
The Lambda Function to Automatically Deploy Static Sites
The Lambda function we’re using is very basic, but because this article is all about CloudFormation I won’t go into much detail on how the Lambda function works. If you’d like to experiment with it using a local Lambda, I’ve included a sample event that you can test with.
You can invoke the lambda locally like this:
lambda-local -l index.js -h handler -e sampleCreateEvent.json
How to Run an AWS CloudFormation Template
You can deploy a CloudFormation Template two ways:
- Launch it from the AWS CloudFormation Stack console
- Launch it from the command-line using the AWS CLI
Launch From the AWS CloudFormation Stack Console (the easy way)
The easiest option is to put your Template and required code in an S3 bucket and launch it from the AWS Console. If you’re sharing code this is great, since anyone can click on a Template you share and launch your CloudFormation Stack.
Before you read the instructions on how to do this, you can try running the CloudFormation Stack if you have already activated your Amazon AWS Account. Just click the link below:
Launch this CloudFormation Template:
https://console.aws.amazon.com/cloudformation/home?region=us-east-1#/stacks/new?stackName=HTMLtoS3&templateURL=https://s3.amazonaws.com/<your-s3bucket-name>/s3template.yml
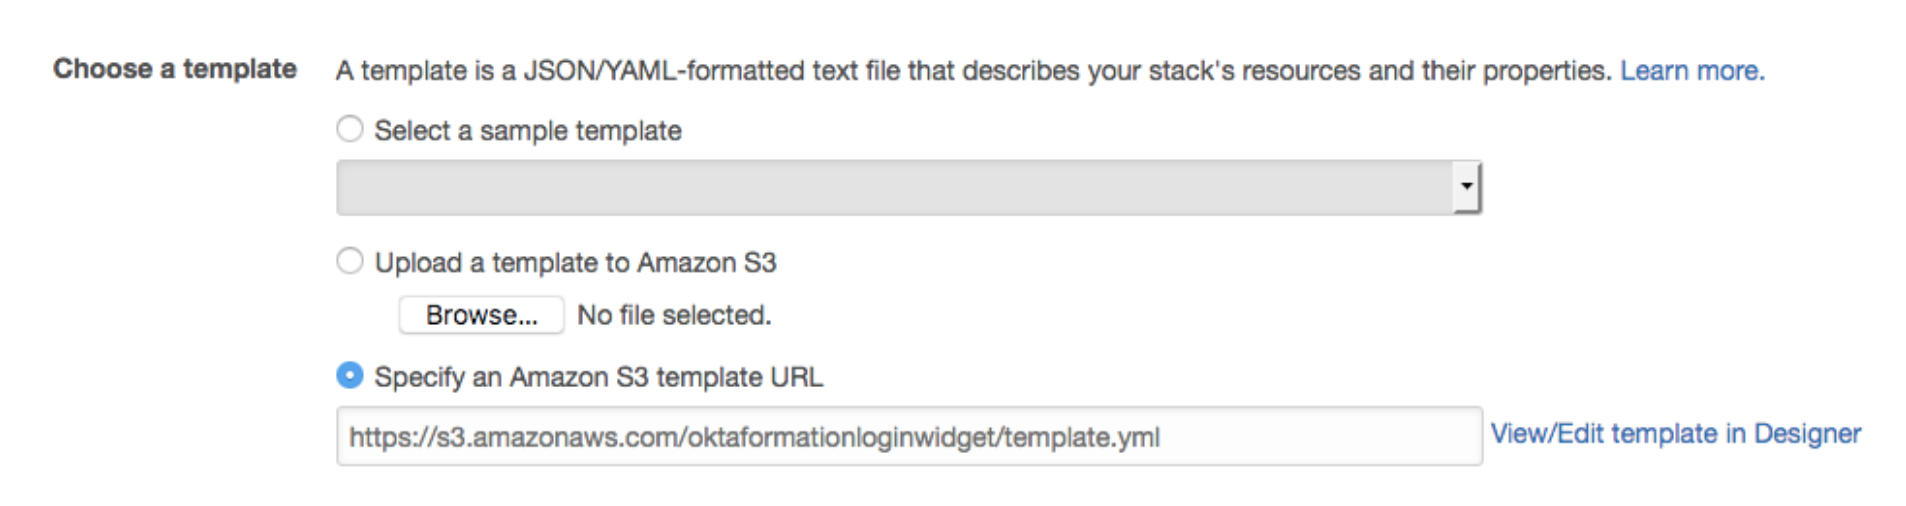
If you substitute your S3 bucket name into the above URL and navigate to it, it will load this Stack from your Amazon S3 Bucket and configure the Stack for you.
You will now see that the Template can be loaded into CloudFormation.
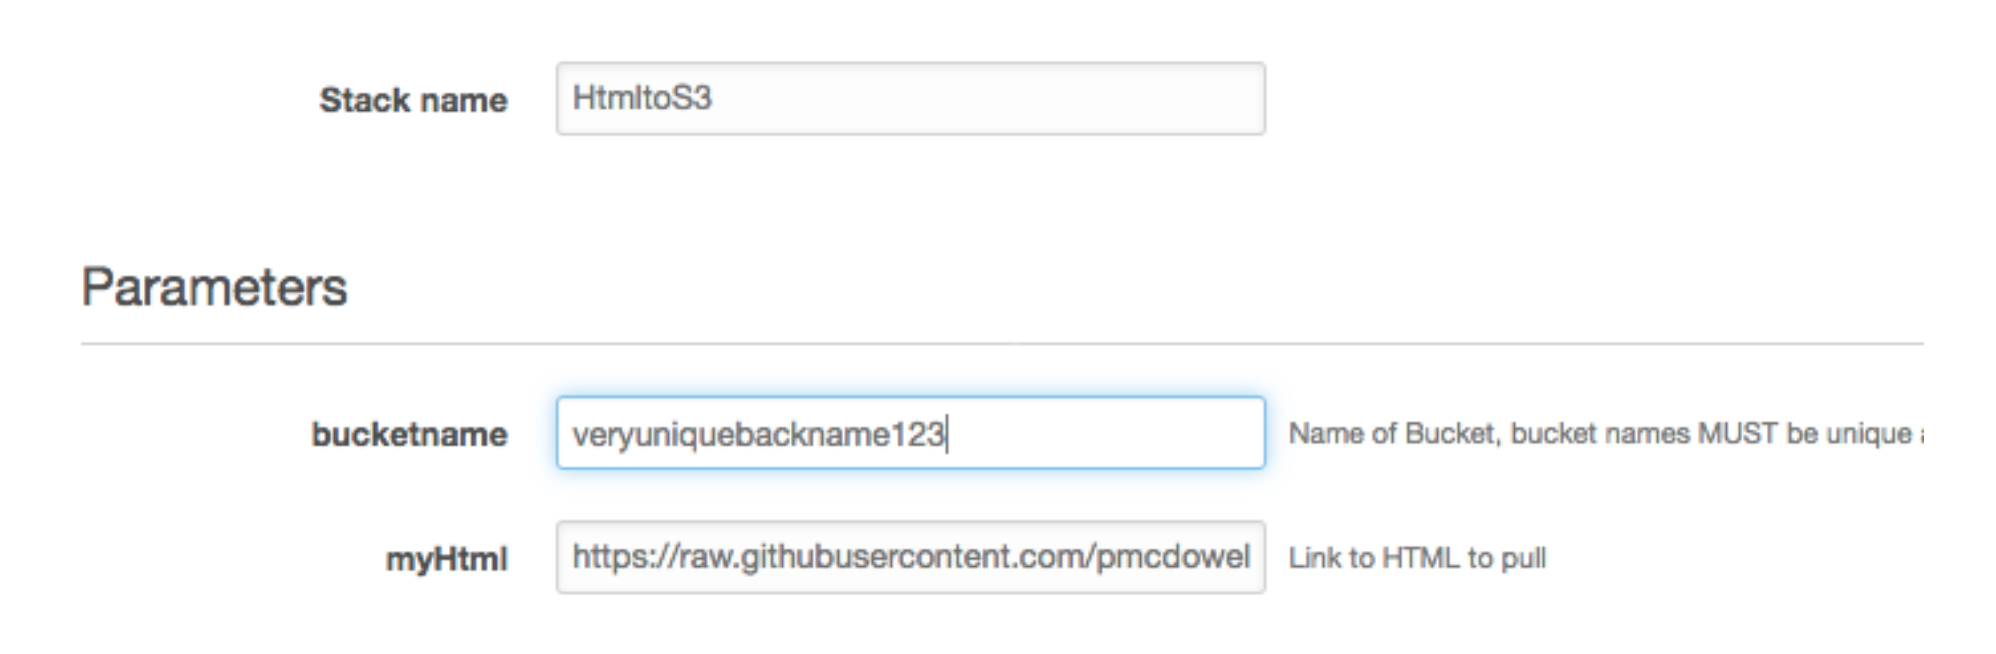
Click NEXT and give your bucket a unique name & no Uppercase characters or non-alphanumerics (Remember names must be unique across all of Amazon Web Services), and the URL of your HTML. I provided a fun example for you.
When you see an options screen just press NEXT.
NOTE: You will need to check the boxes to allow CloudFormation to create these resources for you. This Template uses a role to create and delete this bucket and a Lambda Execute Role to pull the source code from GitHub and create the S3 bucket with the index.html file for you.

You will need to press Create Change Set then Execute.
When this is finished, can can click on the Stack in CloudFormation and see the output for where you new custom Okta Hosted login page will be. You can also click on that URL in the description to be taken to your new custom hosted login page on S3.

Now you can click on that link and see the HTML file that you pushed to Amazon S3.
Launch a CloudFormation Stack From the Command-line Using the AWS CLI
First you need to package your CloudFormation Template for AWS to consume it. Don’t worry, this is really easy.
You will need to create an S3 bucket which is where AWS will temporarily store this package before deployment. If you are new to the AWS CLI, run the following command to create an S3 Bucket:
aws mb s3://veryuniquebucketname
NOTE: This is where the package will be stored before it is deployed. It does not need to be public, this just puts the package somewhere that AWS can pull it from.
Next, package the Template and all the required resources. Run this command:
aws cloudformation package --template-file template.yml --s3-bucket veryuniquebucketname --output-template-file output.yml
Finally, deploy the Template using the following command:
aws cloudformation deploy --template-file output.yml --stack-name htmlFromGitHubtoS3 --capabilities CAPABILITY_IAM --parameter-overrides bucketname=nameofbuckettosharehtmlin
When you create a stack you need to give it a name, this is what the htmlFromGitHubtoS3 field is for, as well as the name of the S3 Bucket that you want this Template to create to put your static assets in and make public.
NOTE: The name of your S3 Bucket must be unique across all of Amazon Web Services** (*although, I’m guessing that if you’re using the command-line you know this*).
This will take about a minute to complete, but once it does you will see something like this:

I also included a bash shell script called deploy.sh that will automate much of this for you. If you want to use the shell script (which is the way I do it), you can invoke the script like this.
./deploy.sh buckettostoresource stackname template.yml --parameter-overrides bucketname=veryuniquebucketname1223
How to Uninstall a CloudFormation Stack
One of the great things about CloudFormation is that you can uninstall everything very easily.
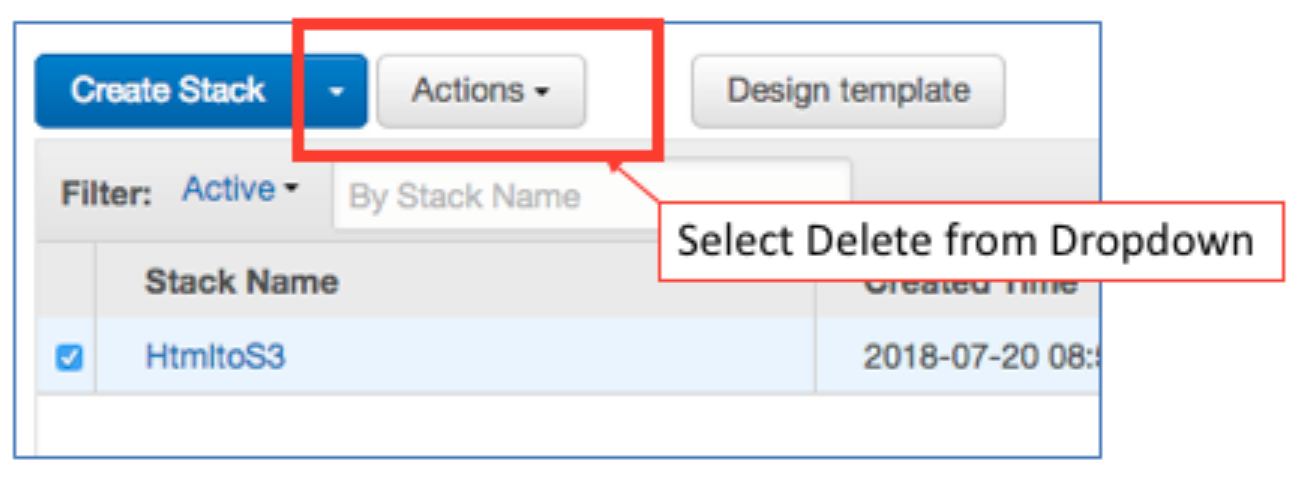
To uninstall everything from the AWS Console, go to CloudFormation, click on Stack, and Select the Stack that you created earlier. Then use the Actions dropdown to delete the Stack.
To uninstall everything from the command line do this:
aws cloudformation delete-stack --stack-name nameOfYourStack
More Advanced CloudFormation Examples
If you found this tutorial useful, you might want to take a look at my other repository, which takes this example, makes changes to the HTML, and configures the Okta Login Widget in the HTML automatically.
And if you’re debating between building a static site or using a content management system, you may find my colleague’s thoughts on the subject interesting.
As always, if you liked this post, please follow our team on Twitter @oktadev or Facebook.
Okta Developer Blog Comment Policy
We welcome relevant and respectful comments. Off-topic comments may be removed.