Use Multi-factor Authentication from the Command Line
Multi-factor authentication is an important tool in your security arsenal. If your password is compromised, your account can still be protected by using high quality second factors, such as Authy, Google Authenticator, or Okta Verify. In this tutorial, I’ll show you how to authenticate, enroll in multi-factor authentication with Okta Verify, and process push notifications – all from the command line using a bash shell script.
Why would you ever want to do this? A) Because you can, and B) see A. Additionally, this approach has utility to DevOps teams who are interested in automation scripts as well as developers who want to get a better understanding of the API. The code for this post can be found on our Okta Developer GitHub.
Note: At this time, the instructions below are organized around the Apple Mac platform. However, it is a simple Bash shell script with few dependencies. It should run on any *nix platform style platform. It should also run on Windows with the Linux Subsystem, which includes bash.
Note: In May 2025, the Okta Integrator Free Plan replaced Okta Developer Edition Accounts, and the Okta CLI was deprecated.
We preserved this post for reference, but the instructions no longer work exactly as written. Replace the Okta CLI commands by manually configuring Okta following the instructions in our Developer Documentation.
Get Started with Okta + Okta Verify for MFA
Okta Verify is just a part of the suite of tools Okta provides, and it’s the focus of this tutorial. Okta makes it super-simple to add all kinds of secure user management features, including MFA, to any application. Okta is a cloud service that allows developers to create, edit, and securely store user accounts and user account data, and connect them with one or multiple applications. Our API enables you to:
- Authenticate and authorize your users
- Store data about your users
- Perform password-based and social login
- Secure your application with Okta Verify for multi-factor authentication
- And much more! Check out our product documentation
Ready to dig in? Register for a forever-free developer account and come on back so we can get into using MFA.
Configure MFA Enrollment
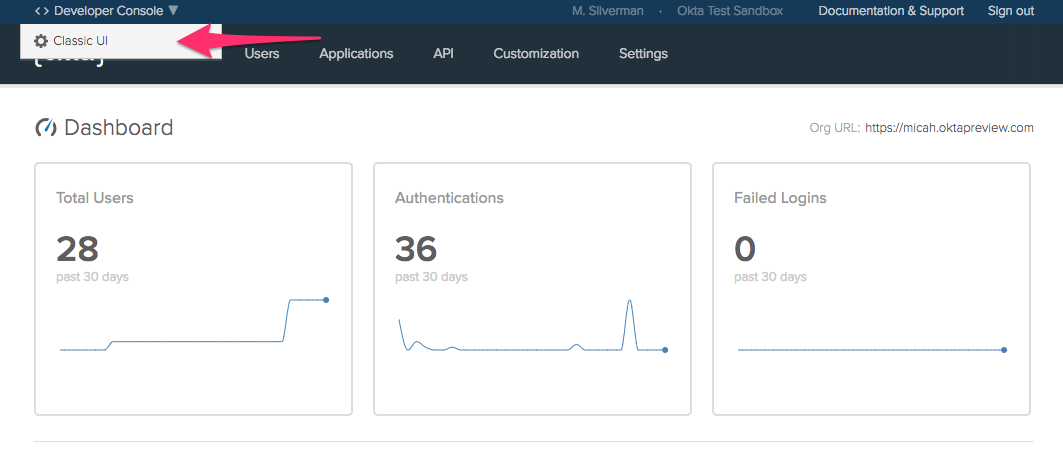
In order to enroll in and enforce MFA with Okta Verify, you need to configure your newly minted org. Log in to your Okta Org and switch to the Classic UI by clicking on the Developer Console dropdown at the top left of the screen.
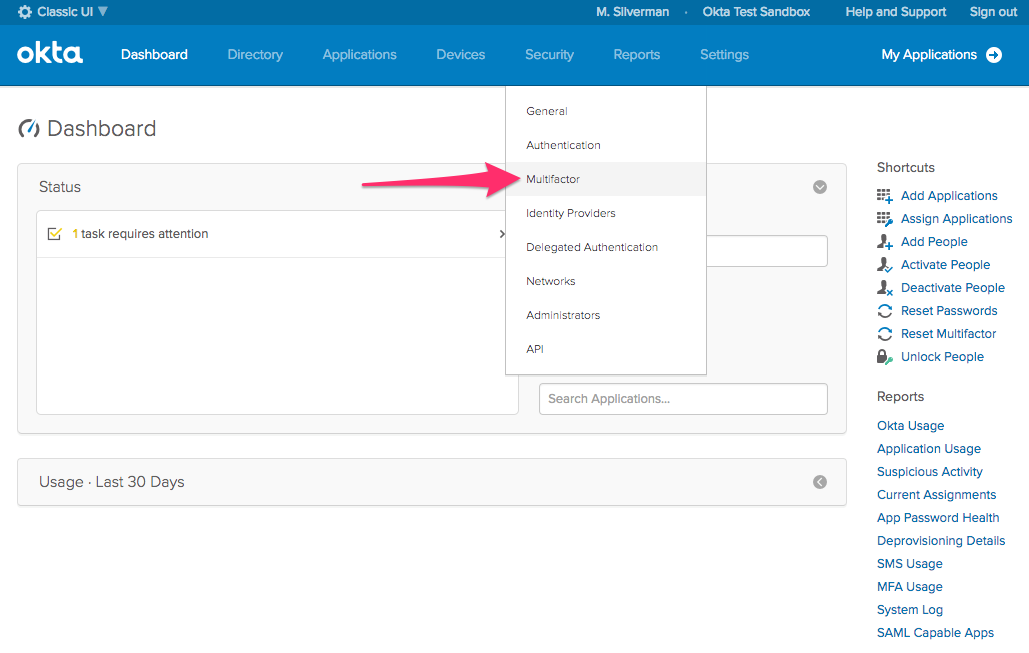
Next, choose Security > Multifactor from the menu.
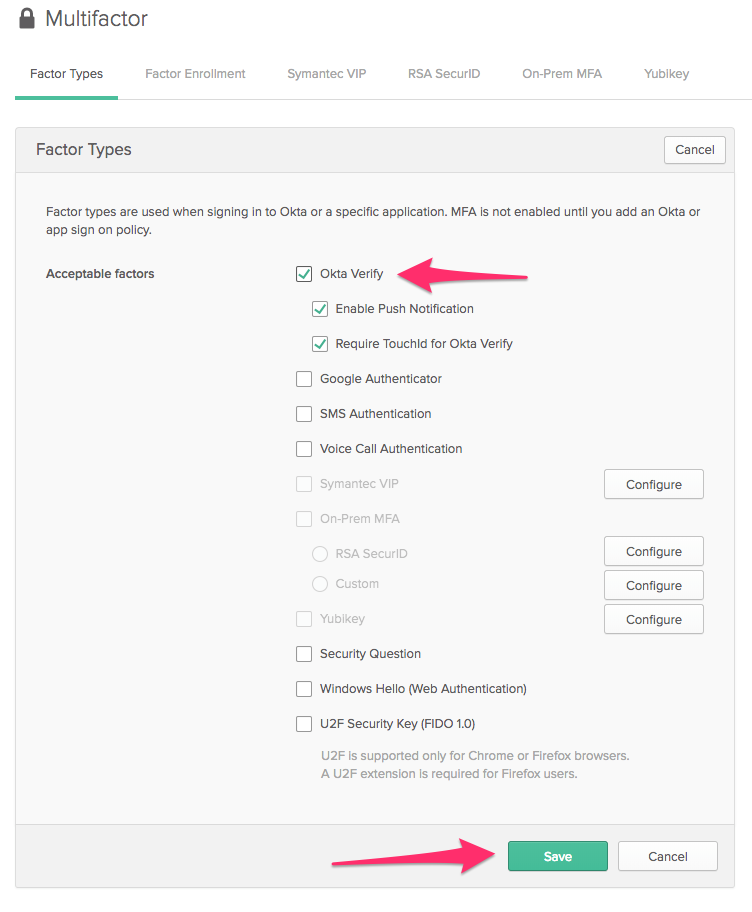
Before you can configure MFA enrollment for your Okta org, you need to choose which factors you will support. For the purposes of this post, we are going to enable Okta Verify only. On the Factors tab, click Edit. Enable the Okta Verify and Enable Push Notification checkboxes and click Save.
Click on the Factor Enrollment tab, click Edit to change the default policy and change Optional to Required. Click Update to save the default policy.

Click Add Rule, give it a name, and choose the first time the user signs in from the dropdown. Click Create Rule.

You now have configured MFA enrollment so that the next time any user logs in, they must enroll in Okta Verify. This is only one piece of the puzzle, though. Next, you’ll configure an enforcement policy so that each time a user logs in, they get a push notification for a second factor.
Configure MFA Enforcement
MFA Enforcement ensures that, under the conditions you specify, a user will have to deal with a second factor after authentication.
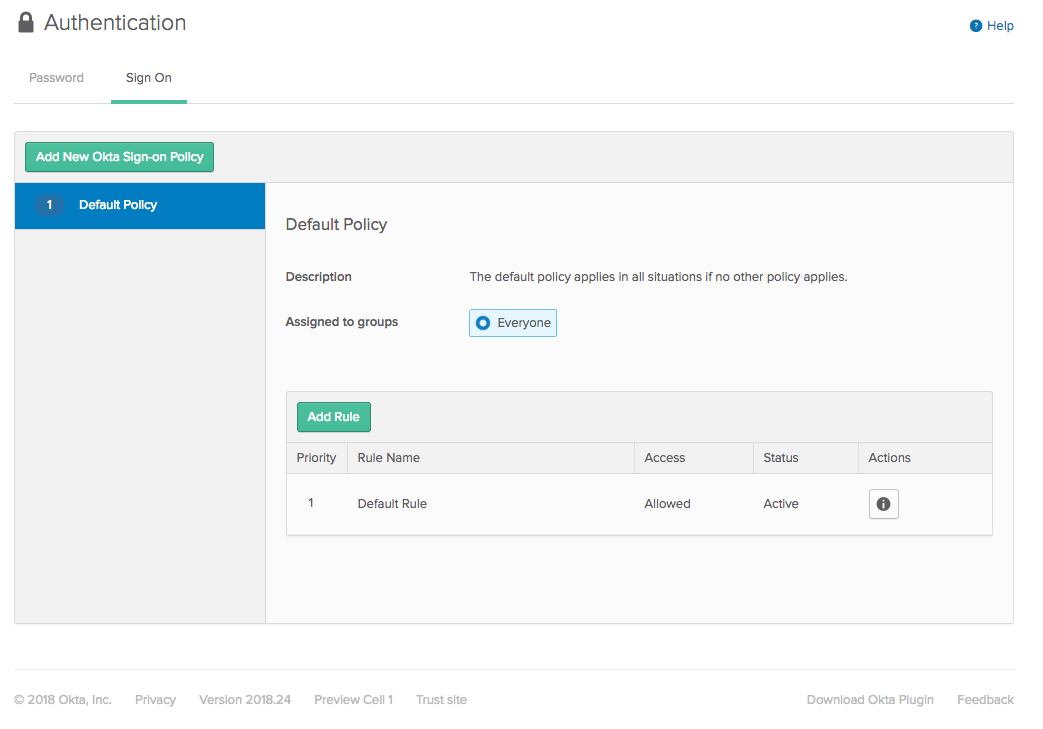
Choose Security > Authentication from the menu bar and click the Sign On tab.
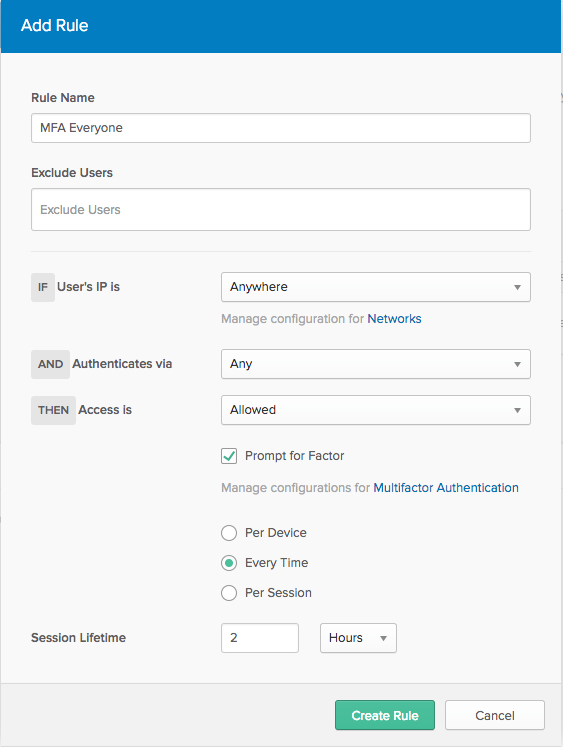
Click Add Rule. Give the rule a name and check the Prompt for Factor checkbox. Choose Every Time. This makes it so that every time a user logs in, they must acknowledge the push notification in Okta Verify.
At this point, you’ve completed all of the Okta configuration. Let’s jump into your local configuration so that you can use multi-factor authentication from the command line.
Add Local Configuration
The configuration for your local system is very straightforward. The Bash shell is a core requirement.
Beyond that, two other utilities are required. Curl is used to make API calls to Okta. Curl is built into Macs and most *nix platforms. On Windows, you’ll need to install the Linux Subsystem, which includes bash and curl.
The other requirement is jq. This is a lightweight command line JSON parser. All the responses from the Okta API are JSON, and so this utility makes it easy to parse these responses.
Install the jq utility
On Mac, run:
brew install jq
Note: This presumes that you’ve installed Homebrew on Mac.
On Windows, run:
choco install jq
Note: This presumes that you’ve install Chocolatey on Windows.
There are instructions to install jq on other platforms on jq’s GitHub download page.
Install the Okta Verify App
You’ll also need to install the free Okta Verify mobile app.
It’s on the Google Play Store for Android and the Apple App Store for iOS.
Try Okta Verify from the Command Line
Now that Okta is set up and local dependencies are installed, let’s use multi-factor authentication from the command line!
Primary Authentication
The okta_authn_mfa.sh shell script has two required parameters: a username and an Okta org subdomain. You can see this by running the script from the command line without any parameters:
./okta_authn_mfa.sh
-u <username> is required

Usage: okta_authn_mfa -u <username> -o <okta org subdomain>
For my Okta domain, I run the command like so:
./okta_authn_mfa.sh -u micah.silverman@okta.com -o zork-new
Enter Password for micah.silverman@okta.com on https://zork-new.oktapreview.com:
Notice that the script waits for me to enter my password. You won’t see the characters you type (or paste) when entering the password.
You’ll see output like this:
Doing primary authentication...
Congratulations! You got a stateToken: 002qJwKJ_...
That's used in a multi-step authentication flow, like MFA.

Sending Okta Verify enroll request...
First, the script sends your username and password to Okta’s primary authentication endpoint:
local raw=`curl -s -H "Content-Type: application/json" -d "{\"username\": \"${username}\", \"password\": \"${password}\"}" ${orgUrl}/api/v1/authn`
It then uses jq to extract the status from the response:
local status=`echo $raw | jq -r '.status'`
The first status you’ll get back is: MFA_ENROLL. The script responds to that status by sending an enroll request using additional values pulled out of the response using jq:
local enroll=`curl -s -H "Content-Type: application/json" -d "{\"stateToken\": \"${stateToken}\", \"factorType\": \"push\", \"provider\": \"OKTA\"}" ${orgUrl}/api/v1/authn/factors`
Enrolling in and enforcing MFA requires multiple steps. Okta tracks your progress and current state using a stateToken. For each subsequent api call involved in the multi-factor flow, the script will reuse the stateToken.
You should see a QR code printed out right in the terminal window:
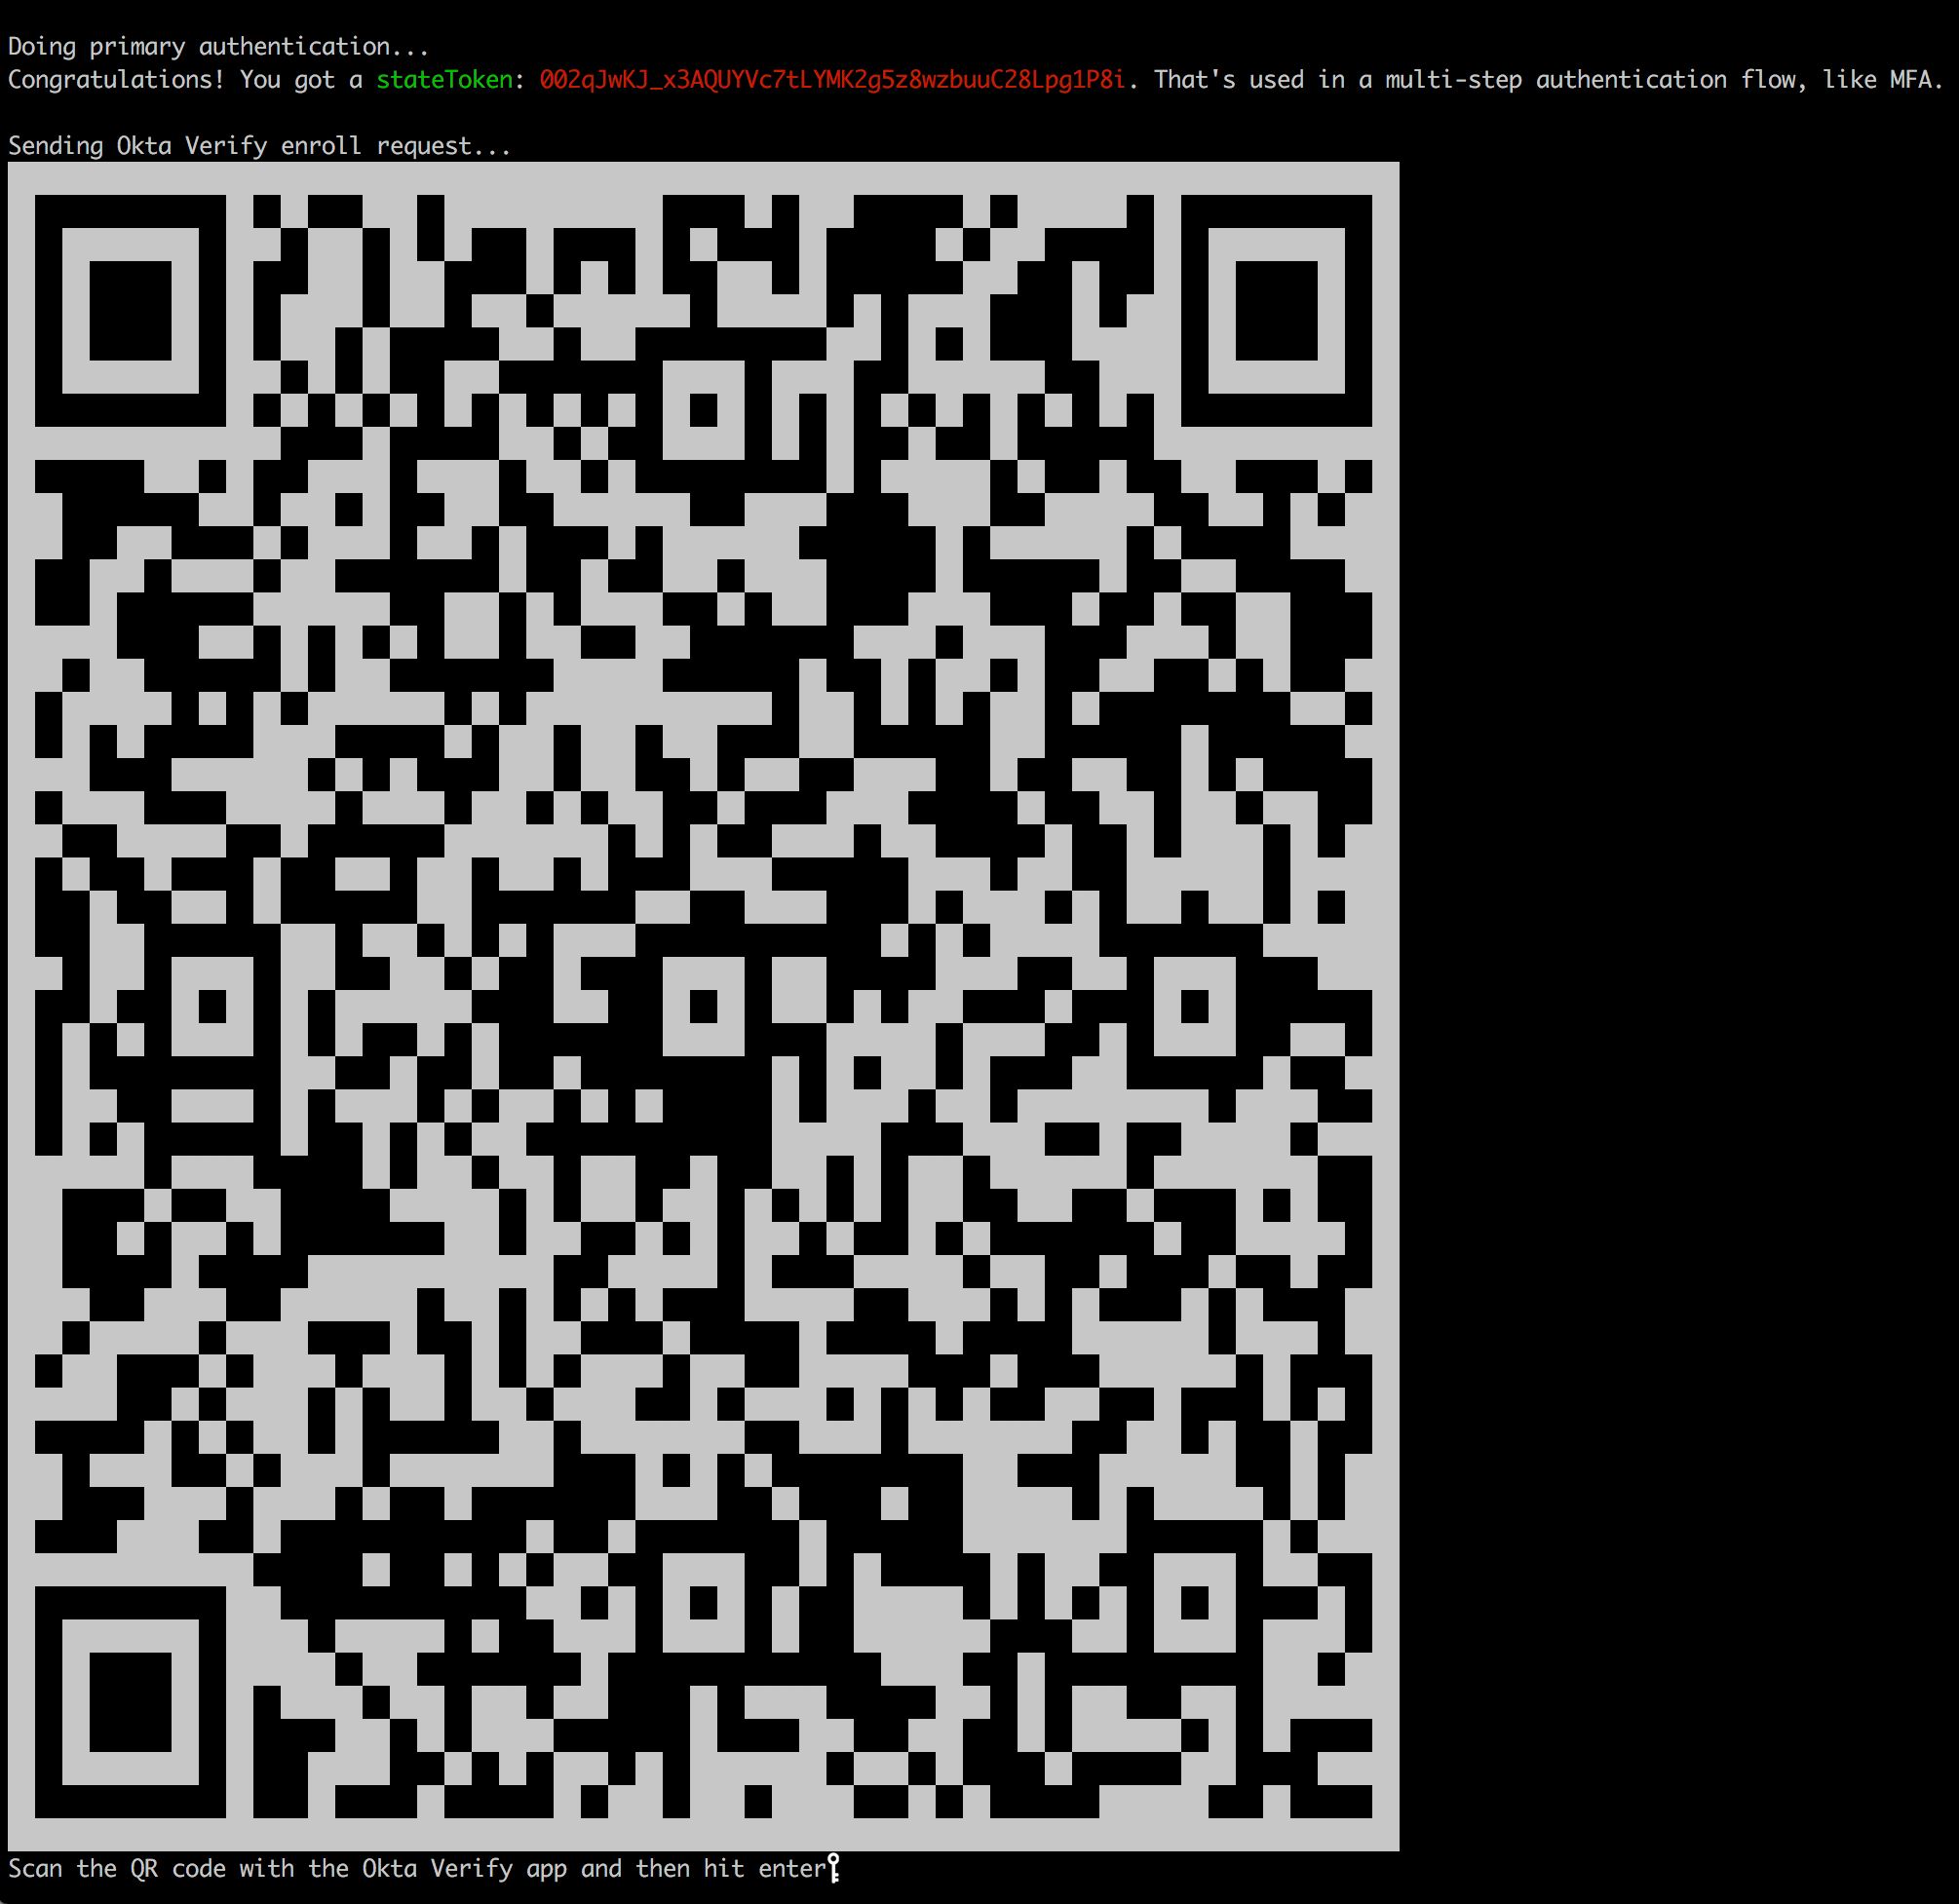
Note: You may need to shrink the font size in your terminal to display the entire QR code at once.
Enroll in Okta Verify
Launch the Okta Verify app on your mobile device. Click Add Account to scan the QR code shown on your terminal window. Here’s a little video of this in action.
When you’ve completed enrollment, you should see something like this in the Okta Verify app:
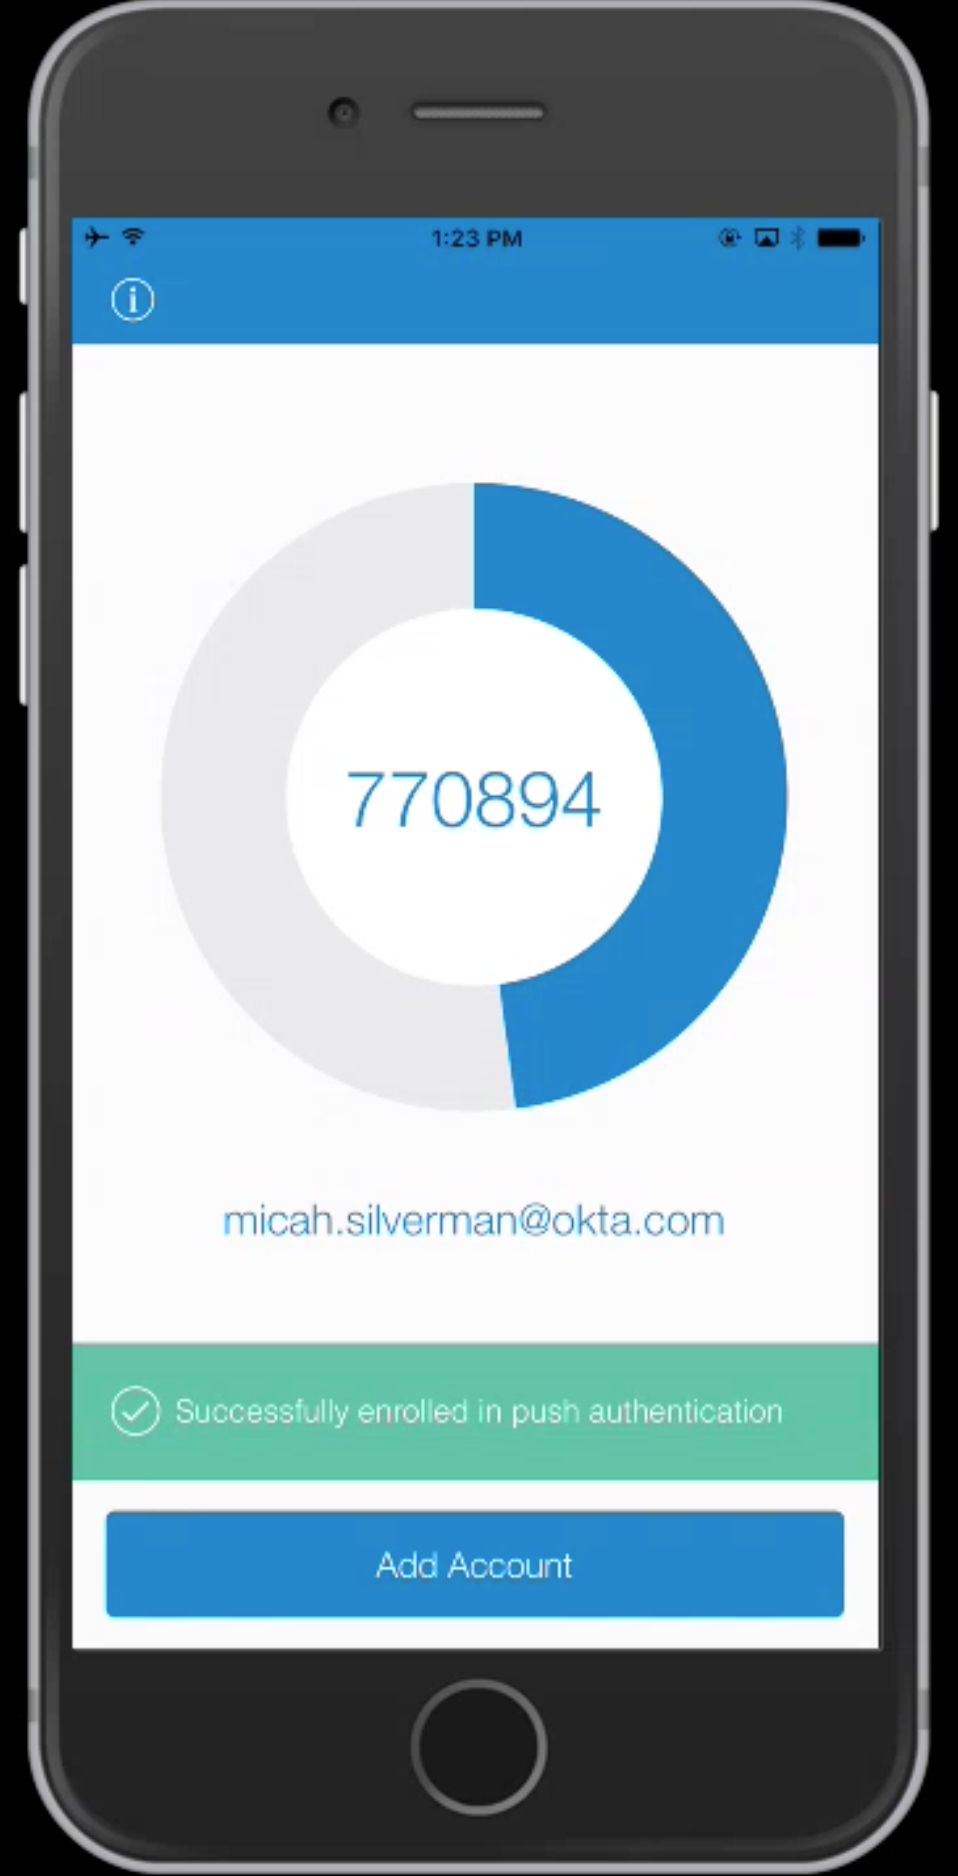
Back in the shell script, hit enter once you see the “Successfully enrolled in push authentication” message in Okta Verify.
Note: It’s important that you hit enter only after seeing the green status message in Okta Verify. This is because the shell script makes an API call to Okta to confirm that you have successfully enrolled in Okta Verify. If you hit enter before enrollment is complete, this API call will fail.
You should see output like this:
Congratulations! You got a sessionToken: 20111C4qkcE3dbOsaJwcj35n....
That will be exchanged for a sessionId next.
Exchanging sessionToken for sessionId...
Congratulations! You've established a session with https://zork-new.oktapreview.com.
Here's your sessionId: 102DTlA16XmRkiwsF0d1JYIg
Behind the scenes, the script is calling another Okta API call to confirm that the enrollment was successful:
local factorEnroll=`curl -s -H "Content-Type: application/json" -d "{\"stateToken\": \"${stateToken}\", \"factorType\": \"push\", \"provider\": \"OKTA\"}" ${orgUrl}/api/v1/authn/factors/${factorId}/lifecycle/activate/poll`
The status from the response should be SUCCESS at this point.
Upon successful multi-factor enrollment, Okta returns a sessionToken. Typically, this will be exchanged for a sessionId that middleware such as a .NET or Spring Boot app could use to remote control the Okta session on your behalf. Or, it can be set as a session cookie in your browser when interacting with Okta directly. For the purposes of our bash shell script, it’s merely displayed.
Cheating - Just a Little
One element of this process that is cheating a little is showing the QR Code in the terminal window. In order to accomplish this, I created a little API “shim” service that takes a URL to a QR code, parses the image and sends back the text representation of it that you see in your terminal window.
The code for this service can be found on the qrcode-term GitHub repository. It uses some great node.js libraries, including jimp to read the QR code image, qrcode-reader to parse the QR code image, and qrcode-terminal to send back an ascii version of the QR code. It’s not Okta-specific. It simply takes a publicly available URL for a QR code and returns the terminal version of it.
Behind the scenes, once the QR code is accessed, Okta will not show it again. This is a built-in security feature. So, if something goes wrong in showing the QR code in the terminal, you’ll need to re-run the bash shell script.
The script executes this API call to parse the QR code and send the result to the terminal:
curl -s -H "Content-Type: application/json" -d "{\"qrUrl\": \"${qrUrl}\"}" ${QRCODE_URL}
Okta Verify Push Notification
Now that you’ve enrolled in MFA, you can see what it looks like to respond to the MFA challenge. Run the script as before. You’ll see output like this:
./okta_authn_mfa.sh -u micah.silverman@okta.com -o zork-new
Enter Password for micah.silverman@okta.com on https://zork-new.oktapreview.com:

Doing primary authentication...
Congratulations! You got a stateToken: 00ZPMY2qoBv5qyUD-fzeZo5u7ckny6IvnElq-mL_G8. That's used in a multi-step authentication flow, like MFA.

Sending Okta Verify push notification...
Polling for push approve...
Polling for push approve...
Polling for push approve...
On your mobile device, you should get a push notification:
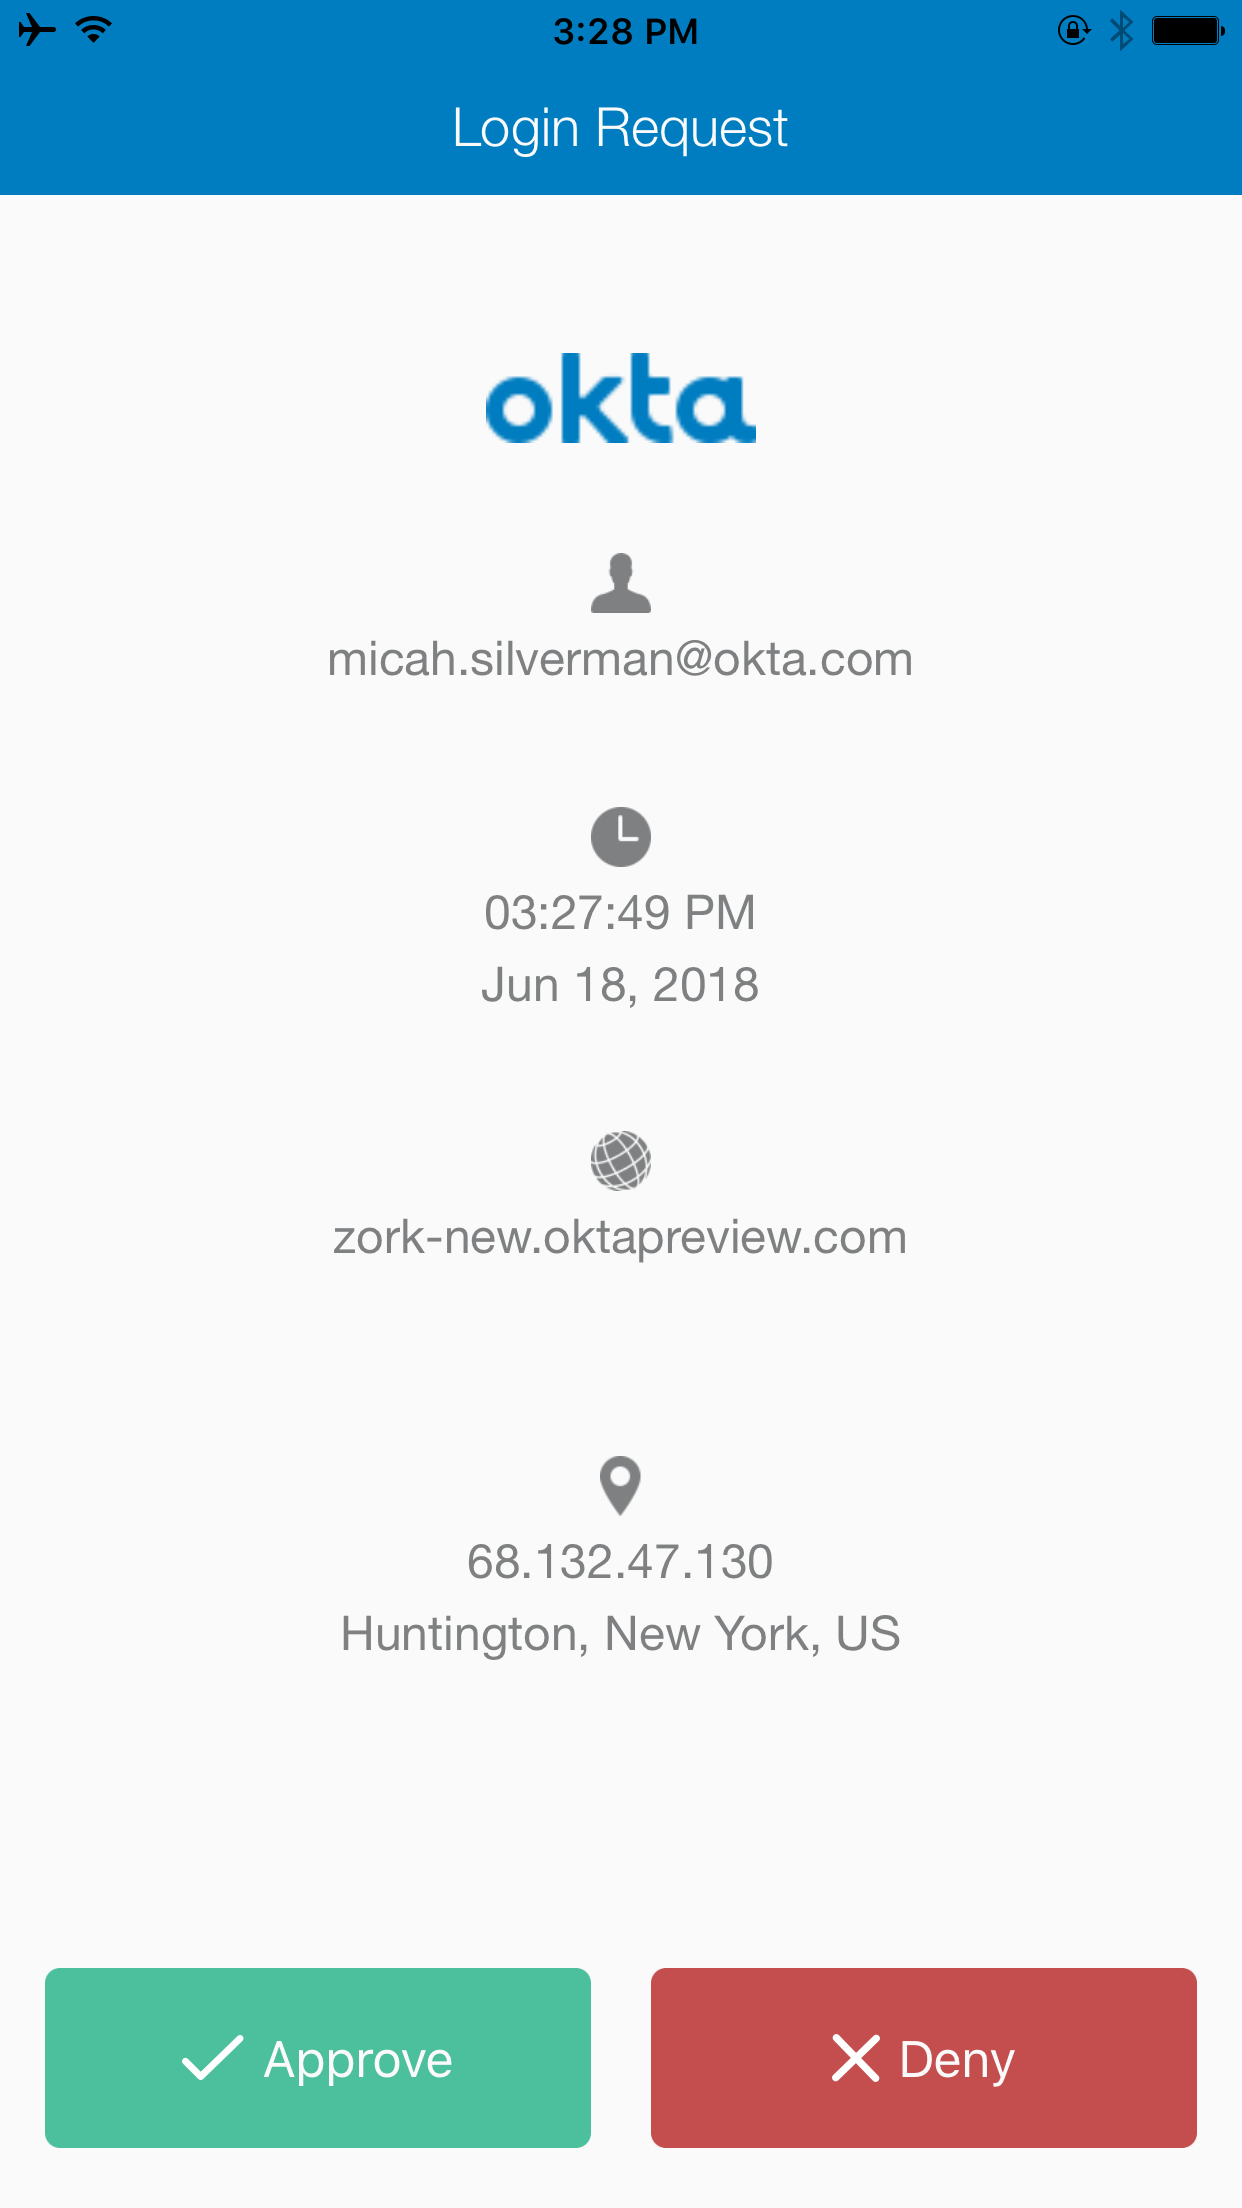
The polling for push approve... message will continue to repeat in your terminal (every 10 seconds for up to a minute) until you touch the green Approve button in the push notification.
Then, you’ll see the operation complete in your terminal window:
Polling for push approve...
Congratulations! You got a sessionToken: 20111thSKXInw_w-EA9Fk4iz7zE05qCBgkyK3_DUdR6ZOJ9wVVX4Up2.
That will be exchanged for a sessionId next.
Exchanging sessionToken for sessionId...
Congratulations! You've established a session with https://zork-new.oktapreview.com.
Here's your sessionId: 1027Hhk_KGlSZOyUcf-OdoqWQ
Now, you’ve experienced multi-factor enforcement from the command line.
The script executes this code to poll (wait) for you to touch the Approve button:
local status="MFA_CHALLENGE"
  local tries=0
  while [[ ${status} == "MFA_CHALLENGE" && ${tries} -lt 10 ]]
    do
      local verifyAndPoll=`curl -s -H "Content-Type: application/json" -d "{\"stateToken\": \"${stateToken}\"}" ${orgUrl}/api/v1/authn/factors/${pushFactorId}/verify`
      local status=`echo ${verifyAndPoll} | jq -r .status`
      local tries=$((tries+1))
      echo "Polling for push approve..."
      sleep 6
  done
Until you touch the Approve button, the response status will be MFA_CHALLENGE. Once you have touched the Approve button, the response status is SUCCESS and the loop exits.
Bringing us ~/
(~/ is usually the file system path for your home folder on *nix systems, including Mac. See what I did there?)
If you’re anything like me, you like to get “close to the metal” when working with a new API to understand how everything works and hangs together. Later, I’ll use more efficient and effective tools, like the Okta Java SDK to streamline development.
In this post, we took a little stroll through the Okta Primary Authentication API and did some gymnastic feats not commonly seen in a shell script by enrolling in and responding to multi-factor authentication using Okta Verify.
Learn More About Multi-Factor Authentication and Secure User Management
I hope you’ve enjoyed this tour of the the multi-factor API for Okta Verify. There’s a lot more to see and if you’re interested in more multi-factor resources, check out these links:
- Secure Your Spring Boot Application with Multi-Factor Authentication
- Simple Multi-Factor Authentication in Node
- Multi-Factor Authentication: 4 Challenges Faced by Developers
- Set Up and Enforce Multi-Factor Authentication with the Okta API
- Multi-factor Authentication Developer docs
If you have any questions, please leave a comment below, or hit us up on Twitter @oktadev.
Micah Silverman is a Senior Security H@X0R. With 25 years of Java Experience (yup, that's from the beginning), he's authored numerous articles, co-authored a Java EE book and spoken at many conferences. He's a maker, who's built full size MAME arcade cabinets and repaired old electronic games. He brings his love of all things Java and Developer Advocacy to you!
Okta Developer Blog Comment Policy
We welcome relevant and respectful comments. Off-topic comments may be removed.