Create a Secure Serverless Application with FaunaDB

Fauna is a transactional database that is delivered to your application as a secure cloud API. Fauna hosts your database and then allows your application to make calls against it. Typically, to secure such an API, you would establish a relationship between your users and the database in your code. This would mean signing in your users using your authentication provider, in this case, Okta. Then you would need to convert that user to an authorized user to connect to your API.
Fauna cuts out the intermediary by directly accepting Okta as an authentication provider, thus securing your application and your database using your Okta login alone.
In this tutorial, you will learn how to create a new Okta application, a new authorization server for that application, and a Fauna database. You will secure the Fauna database with OpenID Connect (OIDC) authentication.
Table of Contents
- Create an OpenID Connect application and authorization server
- Create a Fauna database
- Create a React app with FaunaDB
- Run your React + FaunaDB application
- Learn more about FaunaDB and React
Note: In May 2025, the Okta Integrator Free Plan replaced Okta Developer Edition Accounts, and the Okta CLI was deprecated.
We preserved this post for reference, but the instructions no longer work exactly as written. Replace the Okta CLI commands by manually configuring Okta following the instructions in our Developer Documentation.
Create an OpenID Connect application and authorization server
Before you begin, you’ll need a free Okta developer account. Install the Okta CLI and run okta register to sign up for a new account. If you already have an account, run okta login.
Then, run okta apps create. Select the default app name, or change it as you see fit.
Choose Single-Page App and press Enter.
Use http://localhost:3000/callback for the Redirect URI and accept the default Logout Redirect URI of http://localhost:3000.
What does the Okta CLI do?
The Okta CLI will create an OIDC Single-Page App in your Okta Org. It will add the redirect URIs you specified and grant access to the Everyone group. It will also add a trusted origin for http://localhost:3000. You will see output like the following when it’s finished:
Okta application configuration:
Issuer:    https://dev-133337.okta.com/oauth2/default
Client ID: 0oab8eb55Kb9jdMIr5d6
NOTE: You can also use the Okta Admin Console to create your app. See Create a React App for more information.
Make a note of the issuer and client ID as you will need them in your application.
Once you have created the application you will need to set up a custom authorization server. FaunaDB will provide the appropriate audience to supply with your access token. However, Okta will not allow you to change the audience on the default authorization server.
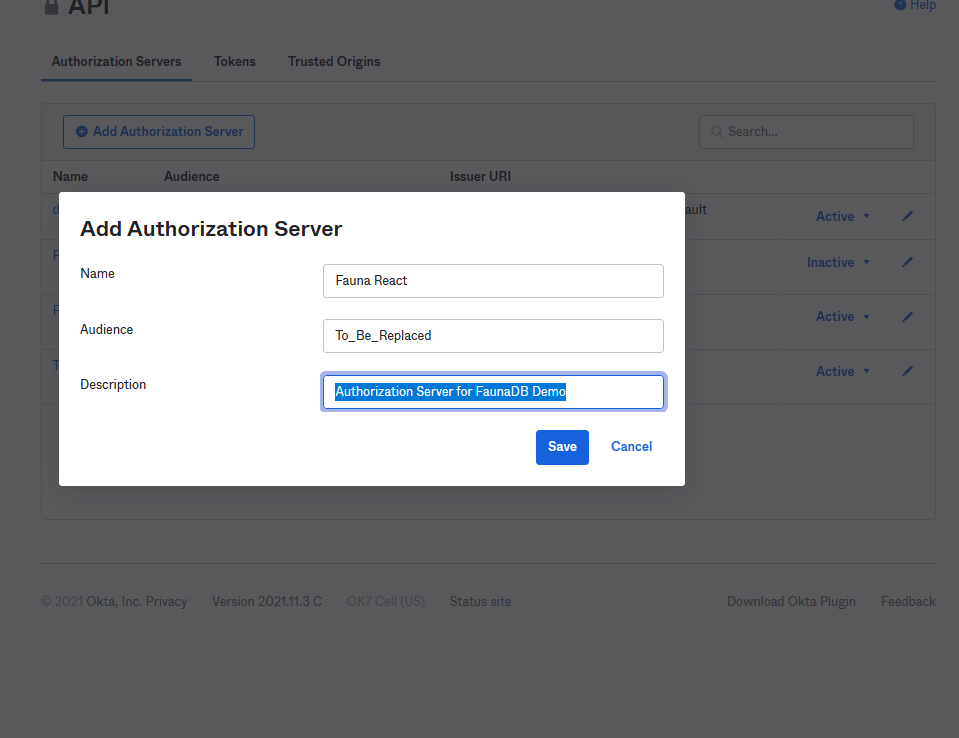
Run okta login and open the resulting URL in your favorite browser. Log in and navigate to Security > API. Select Add Authorization Server and give it a meaningful name and description. You can set your audience to anything (it cannot be left blank), but you will need to change this after setting up your FaunaDB database.
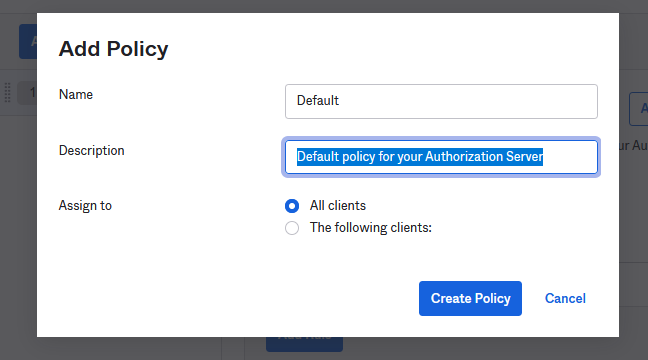
Next, click on Access Policies > Add Policy. Name it “Default” and give it a description.
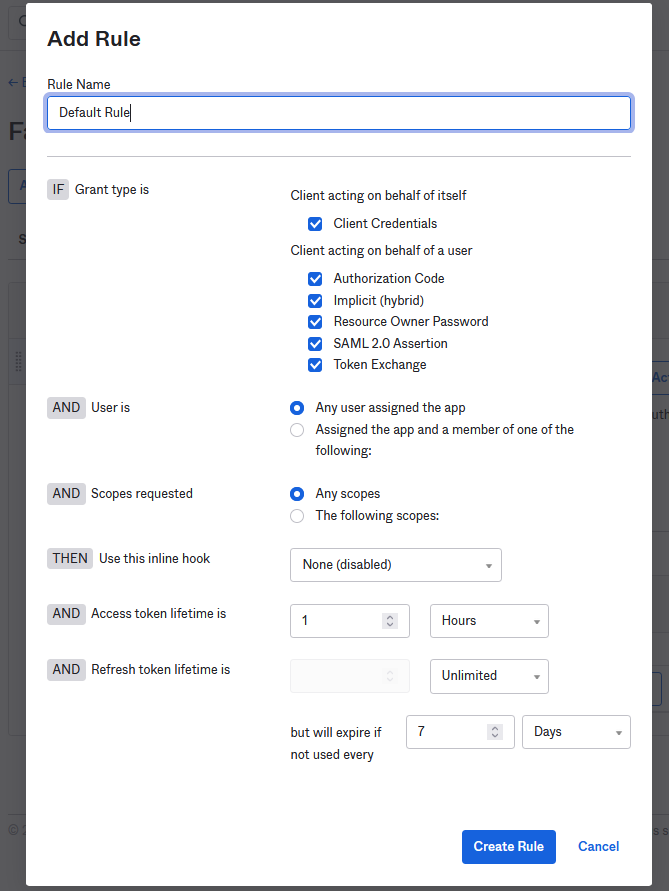
Press Create Policy and then click Add Rule. Name the rule “Default Rule” and make sure Authorization Code is selected in the Grant Type section. You can leave the rest of the rule as it is, but I encourage you to review these settings should you need to change them in the future.
Finally, return to the Settings tab and open the Metadata URI link. You will need the jwks_uri and issuer values from this page.
You can now create your Fauna database but leave the Okta Admin Console open as you will need to change the audience in your authorization server after setting up the Fauna database.
Create a Fauna database
Next, head over to Fauna and sign up for a new account. After you’ve registered and authenticated, click on Create Database and name your database “Products”. Select the Classic Region Group for this tutorial. Click on the Use demo data checkbox and click Create. Fauna will automatically build a new database for you with data collections for customers, managers, orders, products, and stores. You can click on any of these collections to see the same data behind them.
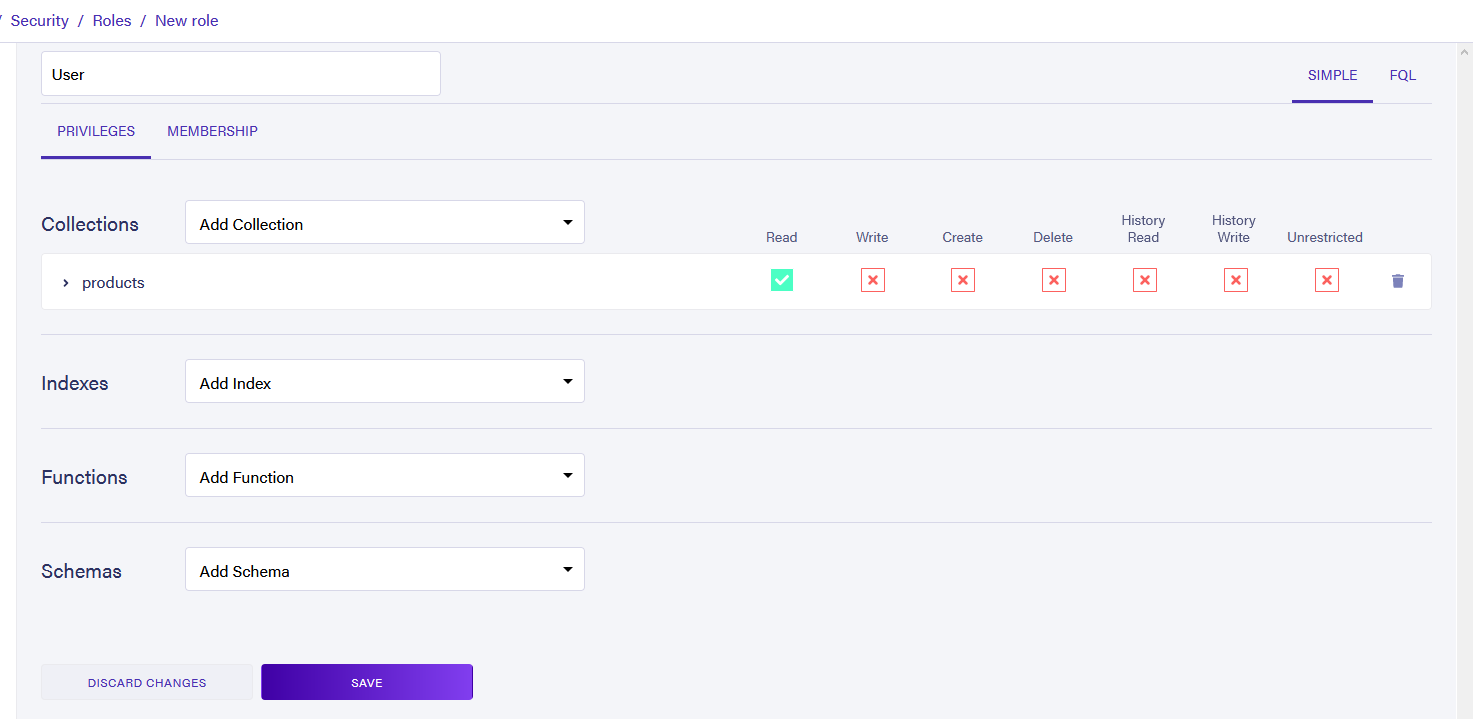
Now you will need to add a new role to the database. Fauna requires that you assign a custom role to your provider. Under the Security tab, navigate to Roles. Click New Role. Name your role “User” and add the products collection to it. Give this role Read access. Click Save to save the changes.
Now you will want to list Okta as a registered provider for this database. Select the Providers tab and select New Access Provider. Name the new provider “Okta” and add the details for your Issuer and JSON Web Key Secret URI that you retrieved from Okta earlier. Add the User role to the provider and click Save. Now Fauna will accept the token from Okta and treat the user as though they are part of the User role, giving that user access to read the product’s collection.
Finally, under the Providers tab click the settings wheel next to Okta. Copy the audience URL from here and return to your Okta Admin Console. Under your authorization server click Edit and replace the placeholder audience value with the one you copied from Fauna.
Create a React app with FaunaDB
Now that Okta and Fauna are set up to work with each other it’s time to create your site that will make use of both. Start by using the task runner npx create-react-app products to scaffold a new React application. Once the task runner has completed, type in cd products to navigate in to your new project.
For this project, you will need to install a few packages from npm. First, you will want to include the packages to make securing your application with Okta quick and easy.
npm i @okta/okta-auth-js@6.0.0 @okta/okta-react@6.4.2
Next, you will need the FaunaDB JavaScript driver to make calls against your database.
npm i faunadb@4.5.2
Finally, you need to include react-router-dom.
npm i react-router-dom@5.3.0
Now you can set up a .env file with your environment variables. Create a file named .env in the root of your application. Open the file and add the following code to it.
REACT_APP_OKTA_CLIENTID={yourClientId}
REACT_APP_OKTA_URL_BASE=https://{yourOktaDomain}
REACT_APP_OKTA_AUTHORIZATION_SERVER_ID={yourAuthorizationServerId}
REACT_APP_OKTA_APP_BASE_URL=http://localhost:3000
Next, add a new file to your src directory called AppWithRouterAccess.jsx. Add the following code to it.
import React from 'react';
import { Route, useHistory } from 'react-router-dom';
import { Security, LoginCallback } from '@okta/okta-react';
import { OktaAuth, toRelativeUrl } from '@okta/okta-auth-js';

import Home from './Pages/Home';

const AppWithRouterAccess = () => {
  const issuer = process.env.REACT_APP_OKTA_URL_BASE + '/oauth2/' +
    process.env.REACT_APP_OKTA_AUTHORIZATION_SERVER_ID;
  const clientId = process.env.REACT_APP_OKTA_CLIENTID;
  const redirect = process.env.REACT_APP_OKTA_APP_BASE_URL + '/callback';

  const oktaAuth = new OktaAuth({
    issuer: issuer,
    clientId: clientId,
    redirectUri: redirect,
  });

  const history = useHistory();

  const restoreOriginalUri = async (_oktaAuth, originalUri) => {
    history.replace(toRelativeUrl(originalUri || '/', window.location.origin));
  };

  return (
    <Security oktaAuth={oktaAuth} restoreOriginalUri={restoreOriginalUri}>
      <Route path='/' exact={true} component={Home}/>
      <Route path='/callback' component={LoginCallback}/>
    </Security>
  );
};

export default AppWithRouterAccess;
This file sets up your Okta authentication and wraps your routes with the <Security> node. This will provide access to the oktaAuth object in those routes.
You will need to add it to your stock App.js file to make this file work. Open src/App.js and replace the code there with the following.
import React from 'react';
import { BrowserRouter as Router } from 'react-router-dom';
import AppWithRouterAccess from './AppWithRouterAccess';
import 'bootstrap/dist/css/bootstrap.min.css';

const App = () => {
  return (
    <Router>
      <AppWithRouterAccess/>
    </Router>
  );
}

export default App;
Along with using the AppWithRouterAccess, this file also imports Bootstrap, which you will use for styling.
npm i react-bootstrap@2.1.2 bootstrap@5.1.3
Add the pages and components that will bring your application to life. Then add two new folders to your src directory; Components and Pages. In the Pages directory, add a file called Home.jsx and put the following code in it.
import React, { Component } from 'react';
import { Container } from 'react-bootstrap';
import faunadb from 'faunadb';

import { withOktaAuth } from '@okta/okta-react';

import Header from '../Components/Header';
import Products from '../Components/Products';

export default withOktaAuth(
  class Home extends Component {
    constructor(props, context) {
      super(props, context);

      this.getProducts = this.getProducts.bind(this);
      this.handleResult = this.handleResult.bind(this);

      this.state = {
        products: undefined,
        pendingProducts: false,
      };
    }

    async getProducts(accessToken, cb) {
      this.setState({
        pendingProducts: true,
      });

      const client = new faunadb.Client({
        domain: 'db.fauna.com',
        secret: accessToken,
        scheme: 'https',
      });
      const q = faunadb.query;

      const {Documents, Collection} = q;

      client
        .query(
          q.Map(
            q.Paginate(Documents(Collection('products'))),
            q.Lambda((x) => q.Get(x))
          )
        )
        .then((result) => {
          cb(null, result);
        })
        .catch((err) => {
          cb(err, null);
        });
    }

    handleResult = (err, result) => {
      if (err) {
        console.log(err);
      } else {
        this.setState({
          products: result.data,
          pendingProducts: false,
        });
      }
    };

    componentDidMount = () => {
      if (
        this.props.authState?.isAuthenticated &&
        !this.state.pendingProducts &&
        !this.state.products
      ) {
        this.getProducts(
          this.props.authState.accessToken.accessToken,
          this.handleResult
        );
      }
    };

    render() {
      return (
        <Container>
          <Header
            authState={this.props.authState}
            oktaAuth={this.props.oktaAuth}
          ></Header>
          <Products
            authState={this.props.authState}
            products={this.state.products}
          ></Products>

          <footer className='text-muted'>
            <div className='container'>
              <p>A Small demo using Okta to authentication calls to FaunaDB</p>
              <p>By Nik Fisher</p>
            </div>
          </footer>
        </Container>
      );
    }
  }
);
NOTE: If you chose US or EU for your database’s region, the domain will need to be db.us.fauna.com or db.eu.fauna.com.
Your application will only have one page. Depending on the state of the application, you will display different messages to the user. If the user isn’t logged in, present them with a message telling them such and a login button. When the user clicks the login button, Okta takes care of the authentication process, and signs in the user. You can access information about the user’s state using this.props.authState.
If the user is logged in but the data hasn’t loaded from Fauna, you can display a simple loading message. Once the data is received then you can present the products to the user. This will happen in the Products component that you will write shortly. To retrieve the data from Fauna, you need to import the faunadb library and provide it with the accessToken from Okta.
Next, in your Components folder add a file named Header.jsx. Add the following code for it.
import React from 'react';
import { Navbar, Nav, Form, Button } from 'react-bootstrap'

const Header = ({authState, oktaAuth}) => {

  if (authState?.isPending) {
    return <div>Loading...</div>;
  }

  const button = authState?.isAuthenticated ?
    <Button variant='secondary' onClick={() => {
      oktaAuth.signOut('/');
    }}>Logout</Button> :
    <Button variant='secondary' onClick={() => {
      oktaAuth.signInWithRedirect()
    }}>Login</Button>

  return (
    <Navbar bg='light' expand='lg'>
      <Navbar.Brand href='/'>Products with FaunaDB</Navbar.Brand>
      <Navbar.Toggle aria-controls='basic-navbar-nav'/>
      <Navbar.Collapse id='basic-navbar-nav'>
        <Nav className='mr-auto'>
        </Nav>
        <Form className='d-flex'>
          {button}
        </Form>
      </Navbar.Collapse>
    </Navbar>
  );
};

export default Header;
This file gives a home button for the user as well as a logout button for logged-in users or a login button for those who need it.
Finally, add a file for Products.jsx in your Components folder and add the following code.
import React from 'react';

const Products = ({authState, products}) => {
  if (!authState?.isAuthenticated) {
    return (
      <div className='row'>
        <div className='col-lg-12'>
          <p>
            Hey there, it looks like you aren't logged in yet. To log in, click
            here.
          </p>
        </div>
      </div>
    );
  } else if (!products) {
    return (
      <div className='row'>
        <div className='col-lg-12'>
          <p>
            Loading...
          </p>
        </div>
      </div>
    );
  }

  return (
    <div>
      <table className='table table-striped'>
        <thead>
        <tr>
          <th>Product</th>
          <th>Description</th>
          <th>Price</th>
        </tr>
        </thead>
        <tbody>
        {products.map((product, i) => {
          return (
            <tr key={i}>
              <td>{product.data.name}</td>
              <td>{product.data.description}</td>
              <td>
                {'$ ' +
                  product.data.price
                    .toFixed(2)
                    .replace(/(\d)(?=(\d{3})+(?!\d))/g, '$1,')}
              </td>
            </tr>
          );
        })}
        </tbody>
      </table>
    </div>
  );
};

export default Products;
This component handles the presentation of the products once they have returned and provides the loading message for the user.
Run your React + FaunaDB application
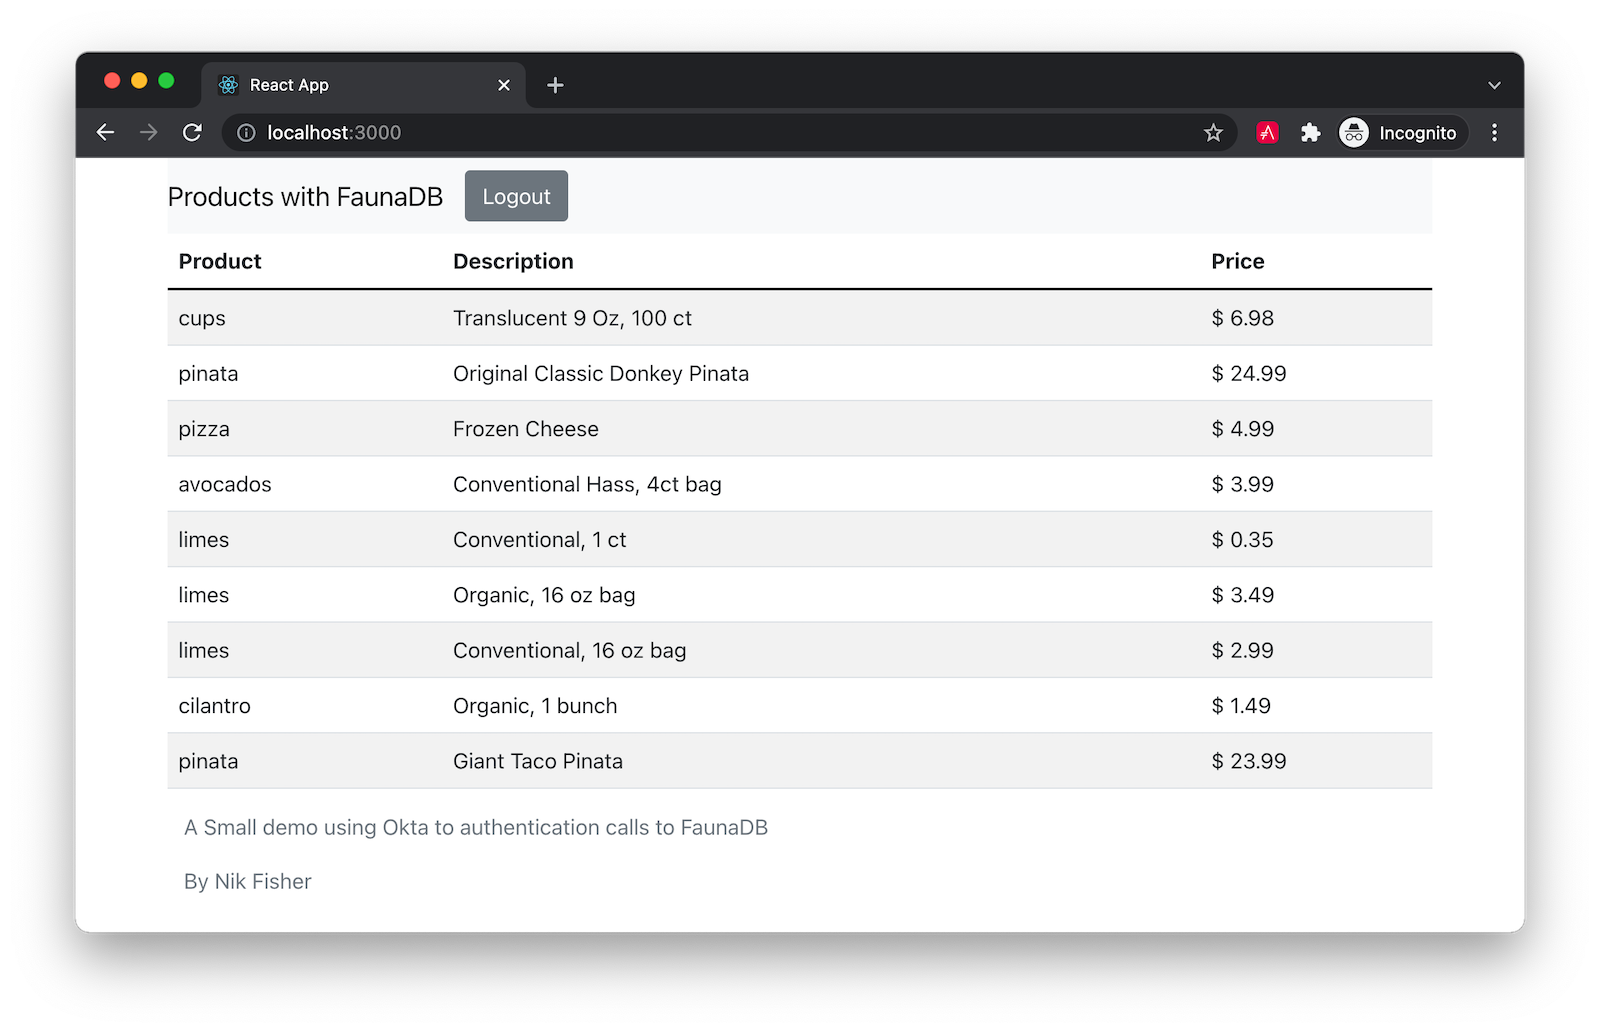
With your application ready you can execute the command npm start to see your application. Log in using your Okta credentials and wait a moment for the data to be returned from FaunaDB.
Learn more about FaunaDB and React
This is just the beginning of what you can do with FaunaDB and custom providers. The best part is you don’t have to move away from Okta to properly secure your application. You can now manage access and authorization levels to your database from Okta rather than on the FaunaDB side. And using the libraries provided by Fauna and Okta, it’s fast and easy to set up a secure web application with a FaunaDB backend.
You can find the source code for this example on GitHub in the @oktadev/okta-faunadb-react-example repository.
If you liked this post, you might like these others:
- JWTs in React for Secure Authentication
- Quickly Consume a GraphQL API from React
- Build a Simple React Application Using Hooks
Make sure you follow us on Twitter and subscribe to our YouTube channel. If you have any questions, or you want to share what tutorial you’d like to see next, please comment below.
Okta Developer Blog Comment Policy
We welcome relevant and respectful comments. Off-topic comments may be removed.