A Developer's Guide to Elasticsearch with Laravel
Elasticsearch is a search engine that can be integrated into any of your tech stacks using its REST APIs and its wide selection of libraries.
By installing and integrating Elasticsearch into your system, you can add a search engine to your website, add autocomplete functionalities, use its machine learning functionalities to perform analysis on your data and provide better results for your users, and much more.
In this tutorial, you’ll learn how to integrate Elasticsearch into a Laravel blog. You’ll also add authentication to your blog using Okta and allow authenticated users to create new blog posts.
What is Elasticsearch?
Elasticsearch allows you to index your data and perform searches quickly and efficiently. It also allows you to better understand your data, and to track your query load times using tools like Kibana, a visualization dashboard for your data .
If you have an e-commerce website, it’s important to add a search engine that will allow your users to search through thousands of products, including multiple fields like titles, descriptions, and categories in the search. Elasticsearch is a versatile search engine that not only makes the process easy for you, but also indexes and caches data to provide a faster and more optimized response to your queries.
Integrate Elasticsearch with Laravel
In this section, you’ll create a blog with Laravel that shows posts for unauthenticated users and allows users authenticated with Okta to add posts. Then you’ll integrate Elasticsearch, adding search functionality to the blog.
You can find the code for this tutorial in this GitHub repository.
Prerequisites
Before you start with this tutorial, you’ll need PHP version 7.3 or higher. If you’re running Windows, you’ll also need to enable the use of the SQLite3 extension by adding a DLL to the system PATH, following the directions in the SQLite3 installation guide. You also need to have Composer installed.
To use Elasticsearch, you need to have it installed and running on your machine. You can follow the installation steps in this guide from Elastic, and then learn the basics here.
If you have a fresh PHP installation, or haven’t worked with Laravel before, you might need to install some extensions, such as php-dom, php-zip, and php-curl. For more detail on how to install any of these extensions, you can follow this guide on how to install the PHP extensions necessary for Laravel. Please note that the linked guide uses PHP version 7.3—if you’re using PHP version 7.4, be sure to replace 7.3 in the commands with 7.4.
Creating your project
In your terminal, run the following command to create a Laravel 8 project:
composer create-project laravel/laravel laravel-es '^8'
Navigate to the directory of the newly created project:
cd laravel-es
Build your database
To manage the blog data, you’ll need a database. To keep this tutorial simple, you’ll be using SQLite. Run the following command to create the database:
touch database/db.sqlite
Then change the database configuration in .env:
DB_CONNECTION=sqlite
DB_DATABASE=/absolute/path/to/laravel-es/database/db.sqlite
For DB_DATABASE, make sure you set the absolute path to the SQLite database you just created.
Now you’ll prepare the migrations to create the tables in the database.
By default, Laravel comes with a migration for the users table, which you can find in database/migrations. The file name should be 2014_10_12_000000_create_users_table.php. Open the file and change the content of the up method:
Schema::create('users', function (Blueprint $table) {
    $table->bigIncrements('id');
    $table->string('email')->unique();
    $table->string('name');
    $table->text('token');
    $table->timestamps();
});
This change will allow you to integrate with Okta later. Because the authentication will be done through Okta, all you have to do is store the user’s token, though you can also store other details, like name and email, for easy access to user details.
You also need a posts table. Run the following command to create a migration for it:
php artisan make:migration create_posts_table
This will create a new file in database/migrations, starting with a timestamp and ending with create_posts_table.php. Open the file and replace the content of the up method with the following:
Schema::create('posts', function (Blueprint $table) {
    $table->id();
    $table->string('title');
    $table->longText('content');
    $table->foreignId('user_id')->constrained('users')->cascadeOnUpdate()->cascadeOnDelete();
    $table->timestamps();
});
This will create a posts table that has the fields id, title, content, and user_id. These are the essential fields for a blog post, but you can add other fields if you wish.
Run the following command to create the tables in the database:
php artisan migrate
Create your models
Next, you need to create models that you’ll use to interact with the tables in the database.
By default, Laravel has the User model created for you in app/Models. However, because you modified the migration file earlier, you also need to modify the model.
Open app/Models/User.php and change the content of the User class:
protected $fillable = [
    'email', 'name', 'token'
];

protected $hidden = [
    'token'
];
This will change the fillable fields to email, name, and token, and will keep the token private by adding it to the hidden array.
Let’s now create the Post model. Create the file app/Models/Post.php and add the following content:
<?php

namespace App\Models;

use Illuminate\Database\Eloquent\Model;

class Post extends Model
{
    protected $fillable = [
        'title', 'content', 'user_id'
    ];
}
The Post model has the fillable fields of title, content, and user_id.
Create a home page for your blog
. Nearly all blogs begin with a website of some sort. You’ll start by creating a home page to display all the posts that have been added to the blog.
Create the controller to handle incoming requests using this command:
php artisan make:controller BlogController
This will create the file app/Http/Controllers/BlogController.php. Open it and import the class Post at the beginning of the file:
use App\Models\Post;
Then add the following method inside the BlogController class:
public function home (Request $request) {
    $posts = Post::all();

    return view('home', ['posts' => $posts]);
}
This retrieves the posts and sends them to the home view.
Now create the file resources/views/home.blade.php with the following content:
@extends('layout')

@section('content')
    @forelse ($posts as $post)
      <div class="card mt-3">
        <div class="card-body">
          <h5 class="card-title">{{ $post->title }}</h5>
          <span class="small">{{ $post->summary }}</span>
          <p class="card-text">
            {!! $post->content !!}
          </p>
        </div>
      </div>
    @empty
      <div class="card mt-3">
        <div class="card-body">
          There are no posts available
        </div>
      </div>
    @endforelse
@endsection
This code will show the posts, if there are any, viewed as cards. Notice that this extends another view, called layout, which you’ll create now.
Make the file resources/views/layout.blade.php with the following content:
<!DOCTYPE html>
<html lang="en">
<head>
  <meta charset="UTF-8">
  <meta name="viewport" content="width=device-width, initial-scale=1.0">
  <meta http-equiv="X-UA-Compatible" content="ie=edge">
  <title>Laravel Blog</title>
  <link href="https://cdn.jsdelivr.net/npm/bootstrap@5.1.3/dist/css/bootstrap.min.css" rel="stylesheet" integrity="sha384-1BmE4kWBq78iYhFldvKuhfTAU6auU8tT94WrHftjDbrCEXSU1oBoqyl2QvZ6jIW3" crossorigin="anonymous">
  @stack('scripts')
</head>
<body>
  <nav class="navbar navbar-expand-lg navbar-light bg-light">
    <div class="container-fluid">
      <a class="navbar-brand" href="/">Laravel Blog</a>
      <div class="collapse navbar-collapse" id="navbarNav">
        <ul class="navbar-nav me-auto">
          <li class="nav-item">
            @guest
              <a class="nav-link active" aria-current="page" href="#">Sign In</a>
            @endguest
            @auth
              <a class="nav-link active" aria-current="page" href="#">Add Post</a>
            @endauth
          </li>
        </ul>
        @auth
          <span>{{ Auth::user()->name }}</span>
        @endauth
      </div>
    </div>
  </nav>
  <div class="container mt-4">
    @yield('content')
  </div>
  <script src="https://cdn.jsdelivr.net/npm/bootstrap@5.1.3/dist/js/bootstrap.bundle.min.js"
    integrity="sha384-ka7Sk0Gln4gmtz2MlQnikT1wXgYsOg+OMhuP+IlRH9sENBO0LRn5q+8nbTov4+1p" crossorigin="anonymous"></script>
</body>
</html>
This eliminates repeated code by creating a layout view that other views can extend. For ease of styling, you’re using Bootstrap to create your layout.
All pages will have a navigation bar. When the user is not authenticated, they’ll see a sign-in link. Otherwise, they’ll see a link to add a post.
The last step to creating your home page is registering the new route. Open routes/web.php and replace the current / route with the following:
Route::get('/', [App\Http\Controllers\BlogController::class, 'home']);
Let’s test it out now. In your terminal, run the server with the following command:
php artisan serve
This will run your server, typically on localhost:8000. Open it in your browser, and you’ll see that there are currently no posts on your website.

Add authentication with Okta
You’re going to add user authentication to your website using Okta.
Set up Okta
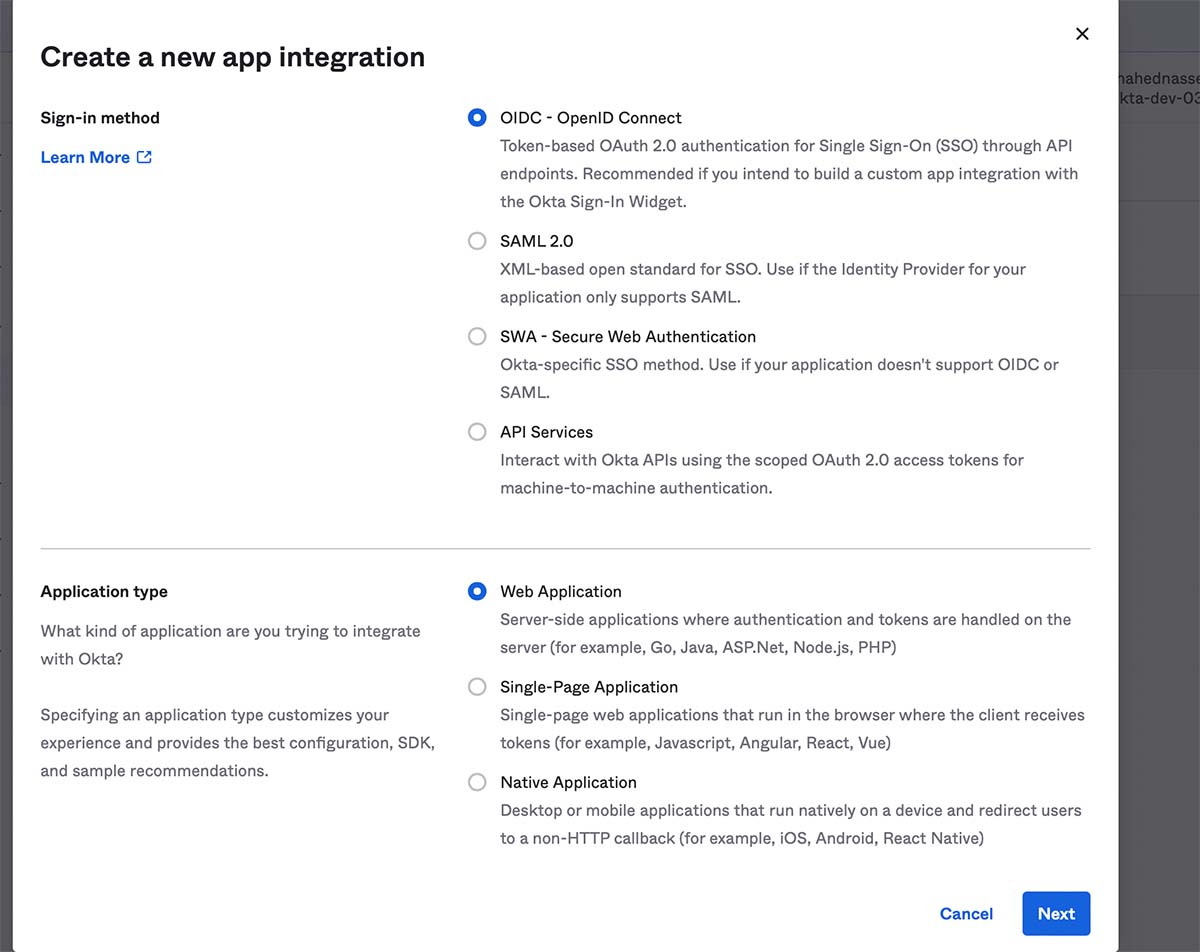
If you don’t already have an Okta account, go ahead and create one—otherwise, just log in. From the sidebar, click Applications, then Applications in the sub-menu. After that, click on Create App Integration.
In the pop-up, select OIDC - OpenID Connect and Web Application, then click Next.
Next, on the page that opens, you’ll enter details about the new integration. In the first section, you need to enter the app’s name. For Grant Type, choose Client Credentials, and for Sign-in redirect URIs, enter http://localhost:8000/login/redirect. Later, this is where you’ll handle the authentication.
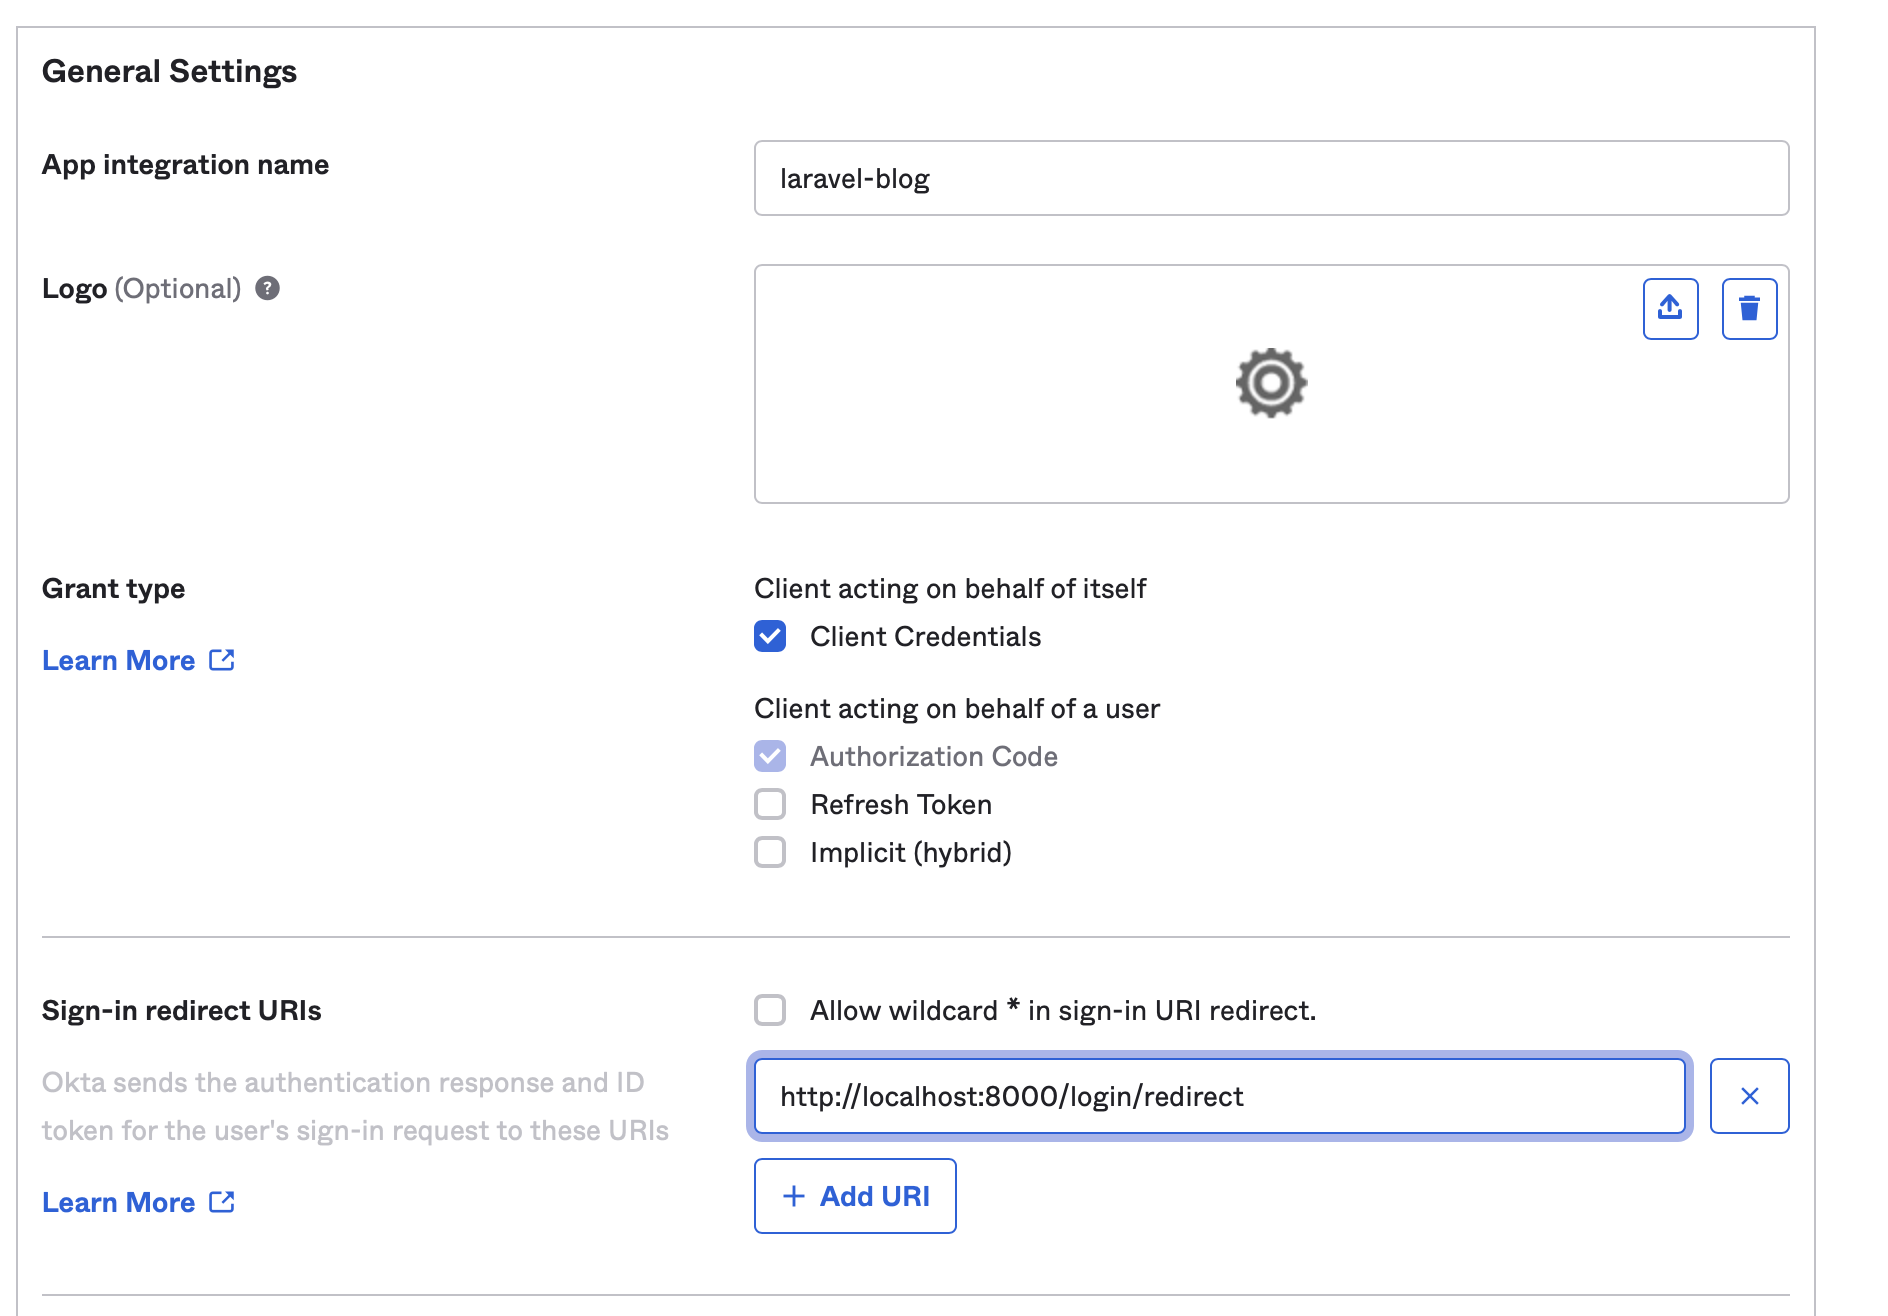
At the bottom of the form, under Assignments, choose Allow everyone in your organization to access. This allows any user in your Okta organization to log in to the blog.
Once you’re done, click on Save. You’ll be redirected to the page of the app you just created. On that page, you can see Client ID and Client Secret keys. Copy them and add them as new keys in .env:
OKTA_BASE_URL=
OKTA_CLIENT_ID=
OKTA_CLIENT_SECRET=
OKTA_REDIRECT_URI=http://localhost:8000/login/redirect
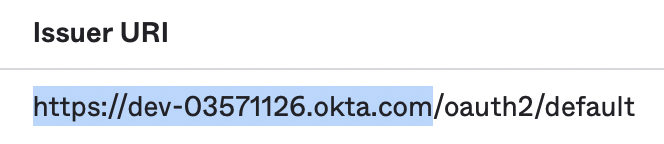
The last thing you need is your organization’s Okta base URL, which can be found by going to Security, then API. It’ll be in the table under Issuer URI. You only need the authority, not the full path.
Okta is now ready to be used for authentication!
Add authentication in Laravel
Back in Laravel, you’ll add the authentication with Okta by using Socialite. Socialite allows you to add social logins, as well as OAuth providers like Okta, to your Laravel app.
Install the package for authentication with Okta using Socialite:
composer require laravel/socialite socialiteproviders/okta
After installing the package, you need to add Okta in the config/services.php so that Socialite can find and use its keys:
'okta' => [
        'base_url' => env('OKTA_BASE_URL'),
        'client_id' => env('OKTA_CLIENT_ID'),
        'client_secret' => env('OKTA_CLIENT_SECRET'),
        'redirect' => env('OKTA_REDIRECT_URI'),
        'auth_server_id' => env('OKTA_SERVER_ID')
      ],
You also need to configure Socialite’s listener to listen to the SocialiteWasCalled event to use Okta. In app/Providers/EventServiceProvider.php add the event in the $listen array inside the EventServiceProvider class:
$listen = [
  ...,
  \SocialiteProviders\Manager\SocialiteWasCalled::class => [
              \SocialiteProviders\Okta\OktaExtendSocialite::class.'@handle',
        ],
]
You can now use Socialite to authenticate with Okta.
Start by first importing the Socialite facade at the beginning of app/Http/Controllers/BlogController.php:
use Laravel\Socialite\Facades\Socialite;
Then add a new method in the BlogController class:
public function redirectToLogin () {
    return Socialite::driver('okta')->redirect();
}
When the user clicks the Sign In link in the navigation bar, they’ll be taken into the login page in your Laravel blog, which is handled by redirectToLogin. On the login page, Socialite will make use of the keys you added to .env to redirect users to Okta’s authentication page.
Add the route to this login route in routes/web.php:
Route::get('/login', [App\Http\Controllers\BlogController::class, 'redirectToLogin'])->name('login');
Change the URL of the Sign In link in resources/views/layout.blade.php:
<a class="nav-link active" aria-current="page" href="{{ route('login') }}">Sign In</a>
Now when you open the home page again and click the Sign In link in the navigation bar, you’ll be taken to Okta’s authentication screen.
Before you can test the authentication, you need to add the redirect route that will handle the response of the successful authentication.
In app/Http/Controllers/BlogController.php, add the necessary import at the beginning of the file for Auth, which you’ll be using for authentication:
use Illuminate\Support\Facades\Auth;
use App\Models\User;
Then, add the following method inside the BlogController class:
public function handleLogin () {
    $oktaUser = Socialite::driver('okta')->user();

    $user = User::where('email', $oktaUser->email)->first();

    if (!$user) {
        $user = User::create([
            'email' => $oktaUser->email,
            'name'  => $oktaUser->name,
            'token' => $oktaUser->token,
        ]);
    } else {
        $user->token = $oktaUser->token;
        $user->save();
    }

    try {
        Auth::login($user);
    } catch (\Throwable $e) {
        return redirect()->route('login');
    }

    return redirect('/');
}
This tells Socialite to retrieve the Okta user, then checks if the user’s email address is in the database. If it is, the token field is changed to reflect the user’s token. If it isn’t, a new user is created, and the token field updates with their information. The user is then authenticated on your Laravel blog using Auth::login and is redirected to the home page.
Next, add the route in routes/web.php:
Route::get('/login/redirect', [App\Http\Controllers\BlogController::class, 'handleLogin']);
You can now test the authentication. Fill out the Okta form with your name and password.
After logging in, you’ll be redirected to the home page, and you’ll see that the link in the navigation bar has changed to Add Post. You’ll also see your name on the right side of the navigation bar.

Add your post page
Now that users can log in, you’ll need to add a page where authenticated users can create new blog posts.
Create the file resources/views/post-form.blade.php with the following content:
@extends('layout')

@section('content')
    <form method="POST" action="#">
      <h1>New Post</h1>
      @csrf
      <div class="mb-3">
        <label for="title" class="form-label">Title</label>
        <input type="text" class="form-control" id="title" name="title">
      </div>
      <div class="mb-3">
        <label for="content" class="form-label">Content</label>
        <textarea id="content" name="content"></textarea>
      </div>
      <div class="text-center">
        <button type="submit" class="btn btn-primary">Submit</button>
      </div>
    </form>
@endsection

@push('scripts')
  <script src="https://cdn.tiny.cloud/1/no-api-key/tinymce/5/tinymce.min.js" referrerpolicy="origin"></script>
  <script>
    tinymce.init({
      selector: '#content'
    });
  </script>
@endpush
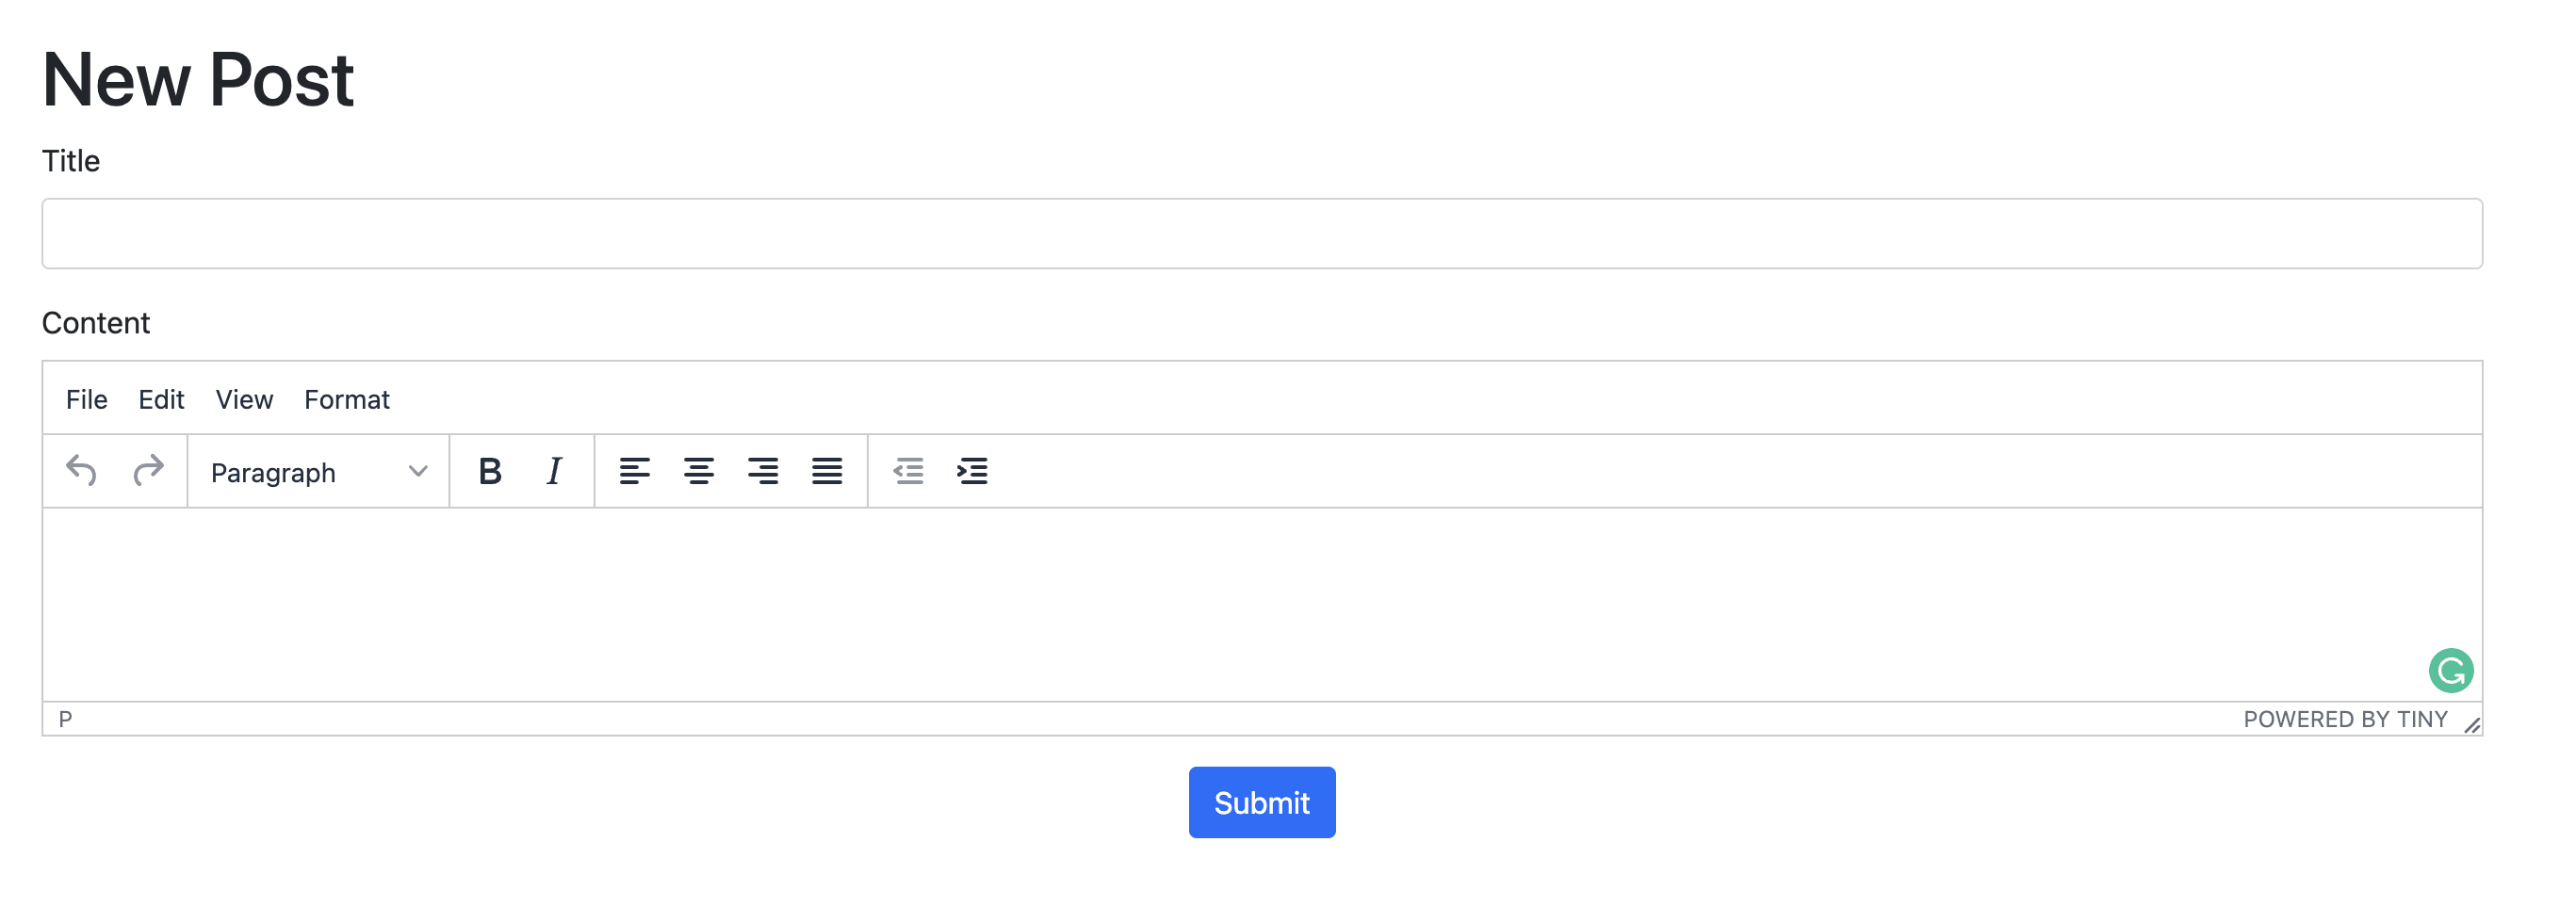
This will create the new post form, with a textbox to add the title and a tinyMCE rich text editor to add the content.
Add the new route in routes/web.php:
Route::get('/post/new', function () {
    return view('post-form');
})->name('post.new.form')->middleware('auth');
Change the URL of the Add Post link in the navigation bar in resources/views/layout.blade.php:
<a class="nav-link active" aria-current="page" href="{{ route('post.new.form') }}">Add Post</a>
If you go to the home page and click on Add Post, you’ll be taken to the form you just created.
To add the form POST request handler route, add the following to app/Http/Controllers/BlogController.php:
public function savePost (Request $request) {
    //save post
    $user = Auth::user();

    $post = new Post([
        'title' => $request->get('title'),
        'content' => $request->get('content'),
        'user_id' => $user->id
    ]);
    $post->save();

    return redirect('/');
}
This will save the new post and redirect you back to the home page.
Add the new route in routes/web.php:
Route::post('/post/new', [App\Http\Controllers\BlogController::class, 'savePost'])->name('post.new')->middleware('auth');
Change the value for the action attribute of the form in post-form.blade.php:
<form method="POST" action="{{ route('post.new') }}">
Open the page with the Add Post form again, enter a title and body content, then submit the form. You’ll be redirected to the home page, which will now display the post you added.
Add search functionality
The last part of this project is adding a search bar and integrating it with Elasticsearch to index data and fetch results.
You’ll need to install the laravel-elasticsearch package, which wraps Elasticsearch’s PHP package so it can be used easily in Laravel:
composer require cviebrock/laravel-elasticsearch
Add configurations to connect to the Elasticsearch server on your machine.
In .env add the following new keys:
ELASTICSEARCH_HOST=127.0.0.1
ELASTICSEARCH_PORT=9200
ELASTICSEARCH_SCHEME=http
ELASTICSEARCH_USER=
ELASTICSEARCH_PASS=
These are the default configuration values for Elasticsearch configurations, and will set the host, port, and scheme, as well as user and password, if you choose to configure them.
Use the following command to create a command in Laravel that will allow you to easily index the data:
php artisan make:command IndexPosts
Then open app/Console/Commands/IndexPosts.php and change $signature:
protected $signature = 'index:posts';
Add use statements before the IndexPost class:
use App\Models\Post;
use Elasticsearch;
And change the content of handle:
$posts = Post::all();

foreach ($posts as $post) {
    try {
        Elasticsearch::index([
            'id' => $post->id,
            'index' => 'posts',
            'body' => [
                'title' => $post->title,
                'content' => $post->content
            ]
        ]);
    } catch (Exception $e) {
        $this->info($e->getMessage());
    }
}

$this->info("Posts were successfully indexed");
This will loop through the posts on the blog, then index the data in Elasticsearch. All posts will be indexed under the posts index, and the body will include the title and content of the post. This means that both the title and content fields are searchable.
In your console, run the following command:
php artisan index:posts
You should see a message that posts were successfully indexed.
Finally, you’ll add a search bar to the home page so users can search the posts. In resources/views/home.blade.php, add the following before the @forelse loop:
<form method="GET" action="/">
  @csrf
  <div class="mb-3">
    <input type="search" class="form-control" id="q" name="q" value={{ request()->get('q', '') }}>
  </div>
  <button type="submit" class="btn btn-primary">Search</button>
</form>
Then, in app/Http/Controllers/BlogController.php, change the home method to the following:
public function home (Request $request) {
    $q = $request->get('q');
    if ($q) {
        $response = Elasticsearch::search([
            'index' => 'posts',
            'body'  => [
                'query' => [
                    'multi_match' => [
                        'query' => $q,
                        'fields' => [
                            'title',
                            'content'
                        ]
                    ]
                ]
            ]
        ]);

        $postIds = array_column($response['hits']['hits'], '_id');
        $posts = Post::query()->findMany($postIds);
    } else {
        $posts = Post::all();
    }

    return view('home', ['posts' => $posts]);
}
This change will retrieve the search term from the parameter q. If it’s found, the search is run using Elasticsearch’s search method. This method receives an array that accepts the index key for the name of the index to search through. It also accepts the body key, which holds the Elasticsearch query. In the query, you can use the multi_match option to search multiple fields; in this example our fields are title and content.
The post IDs are retrieved from the response, and the associated post models are sent to the home view.
Remember to add the use statement at the beginning of the file to use Elasticsearch:
use Elasticsearch;
Opening the home page now, you’ll see a search bar. If you enter a search term, the results will show posts with the term you entered in their title or content.

Learn more about Elasticsearch, Laravel, and Okta
In this tutorial, you learned how to create a blog with Laravel, then integrate Elasticsearch into your blog. You also added authentication into your new Laravel blog using Okta. Don’t hesitate to reach out in the comments section if you have any questions, or if there are future tutorials that you’d like to see.
If you enjoyed this tutorial, you might also be interested in some of these related posts:
- PHP Authorization with OAuth 2.0 and Okta
- Build a Simple Laravel App with Authentication
- Comparing Authentication in Laravel Versions 6, 7, and 8
- Get Started with the ELK Stack
Be sure to follow Okta on Twitter and YouTube so that you don’t miss any of our fantastic tutorials and other resources.
Shahed is a full-stack developer with high expertise in web development. She also loves writing technical articles, as they help her learn, become better, and spread her knowledge in the hopes that it will help someone out there.
Okta Developer Blog Comment Policy
We welcome relevant and respectful comments. Off-topic comments may be removed.