Build a Simple Laravel App with Authentication
PHP remains the single most popular language choice when creating the backend of a new web application. Within the PHP ecosystem, there are many options when starting a new project: you can use a content management system (CMS) like Wordpress or Drupal, or one of the many frameworks with large user bases and active communities in the PHP world (such as Symfony, CakePHP, CodeIgniter, Yii, Zend Framework). However, if you look at the PHP framework trends of the past several years, there is one framework that stands above them all - Laravel!
Laravel is a clean and modern framework with a vast ecosystem of learning resources. The creators of Laravel provide a number of first-party tools such as Forge/Envoyer/Spark/Nova/Vapor and the vibrant Laravel community produces and supports tons of third-party packages. It’s easy to get started with Laravel but not at the expense of available features or performance. It’s an opinionated framework that allows you to move quickly if you follow its conventions, but with enough breathing room to deviate from the standards when you need to.
In this article, I’ll show you how to get started with Laravel and quickly build an application with user authentication (using Okta as your identity management provider).
Prerequisites: Please ensure you have already installed PHP, Composer, and have signed up for a free Okta developer account.
Note: In May 2025, the Okta Integrator Free Plan replaced Okta Developer Edition Accounts, and the Okta CLI was deprecated.
We preserved this post for reference, but the instructions no longer work exactly as written. Replace the Okta CLI commands by manually configuring Okta following the instructions in our Developer Documentation.
Understand the Laravel Model-View-Controller (MVC) Architecture and Middlewares
Laravel’s architecture is based on the Model-View-Controller (MVC) pattern. MVC emerged from research of the development of graphical user interfaces and it’s not particularly suited to Web applications which are based on a request-response cycle with a noticeable latency and a strict delineation between the frontend and backend. There are certain shortcomings of the pattern when applied to the Web:
- There is some debate in the community about the proper way to handle data validation, user authentication/authorization, session management and other specifics of a Web application in a traditional MVC model.
- The MVC model needs to be expanded (usually with an additional Service layer) if you want to separate the business logic of the application cleanly while maintaining lean controllers and pure models.
However, MVC is a very popular pattern in many web-related languages and frameworks and it has some merit since it does allow you to separate the application’s internal representation of data from the UI presentation and the request/response control code.
Middlewares are an additional layer that sits between the web server and your application’s controllers. They provide a convenient way of filtering the incoming HTTP requests or modifying the generated responses. Middlewares can be applied globally or conditionally (just to specific parts of the application). There are many use cases for middlewares:
- User authentication and authorization
- Logging and profiling
- Sanitizing user inputs
- Applying or parsing common HTTP headers, dealing with cookies
- Various security checks, rate limiting, filtering bot traffic, etc.
There are two types of middleware: request middlewares (applied before the HTTP request goes to the controller) and response middlewares (applied after the controller generates a response and before the response goes to the Web server). Middlewares are applied sequentially (like pipes in Unix). When each middleware is applied, the framework calls its handle() which allows you to read the request, modify/tweak it if necessary and continue with the next middleware (or, under certain conditions, redirect the user or deny access). Once all active middlewares are applied, the request (which might be modified at this point) arrives at the controller that’s responsible for handling it. When the controller returns a response, the response again goes through all response middlewares in sequence before it’s passed to the web server.
Laravel handles user authentication by default through its ‘auth’ middleware. When you start a new application, Laravel provides a way to include boilerplate code for user registration/login/forgot password functionality, plus the authentication middleware and an easy way to protect routes so they’re only available to logged-in users.
Add Identity Management to Laravel
Okta is an API Identity service that allows you to create, edit, and securely store user accounts and user account data, and connect them with one or more applications. We might be biased, but we think Okta makes identity management easier, more secure, and more scalable than what you’re used to.
To complete this tutorial, you’ll need to register for a forever-free developer account.
You’ll replace some of the Laravel boilerplate code in your application so it uses Okta to authenticate users. The Socialite package for Laravel will help make it easier - it can handle integration with a large number of social login providers (including Okta) out-of-the-box.
Laravel Project Setup
The tutorial assumes your development environment already has PHP and Composer. Pull up the Laravel installer as a global Composer package, initialize a new Laravel project, and add the authentication boilerplate (with the make:auth command below):
composer global require laravel/installer
laravel new okta-laravel-auth && cd okta-laravel-auth
php artisan make:auth
php artisan serve
Load http://localhost:8000/ and you’ll see the default Laravel page with Login and Register links. However, these links will not work yet because you haven’t run the database migrations yet, and the boilerplate code uses the local database for user registration/authorization.
In the next two sections, you’ll set up a new Okta account/web application and connect Okta to the Laravel project so you can use it for authentication.
Add Authentication to Laravel with Okta
Before you proceed, you need to log into your Okta account (or create a new one for free) and create a new application to get a client ID and a client secret to use with Laravel.
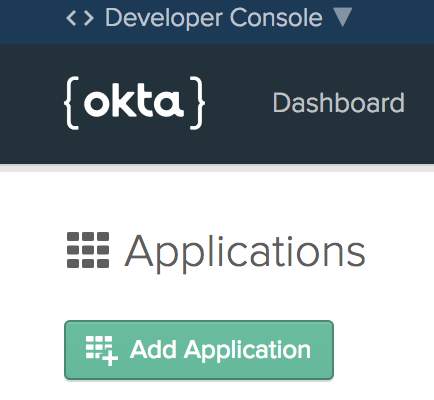
Start by going to the Applications menu item and clicking the Add Application button:
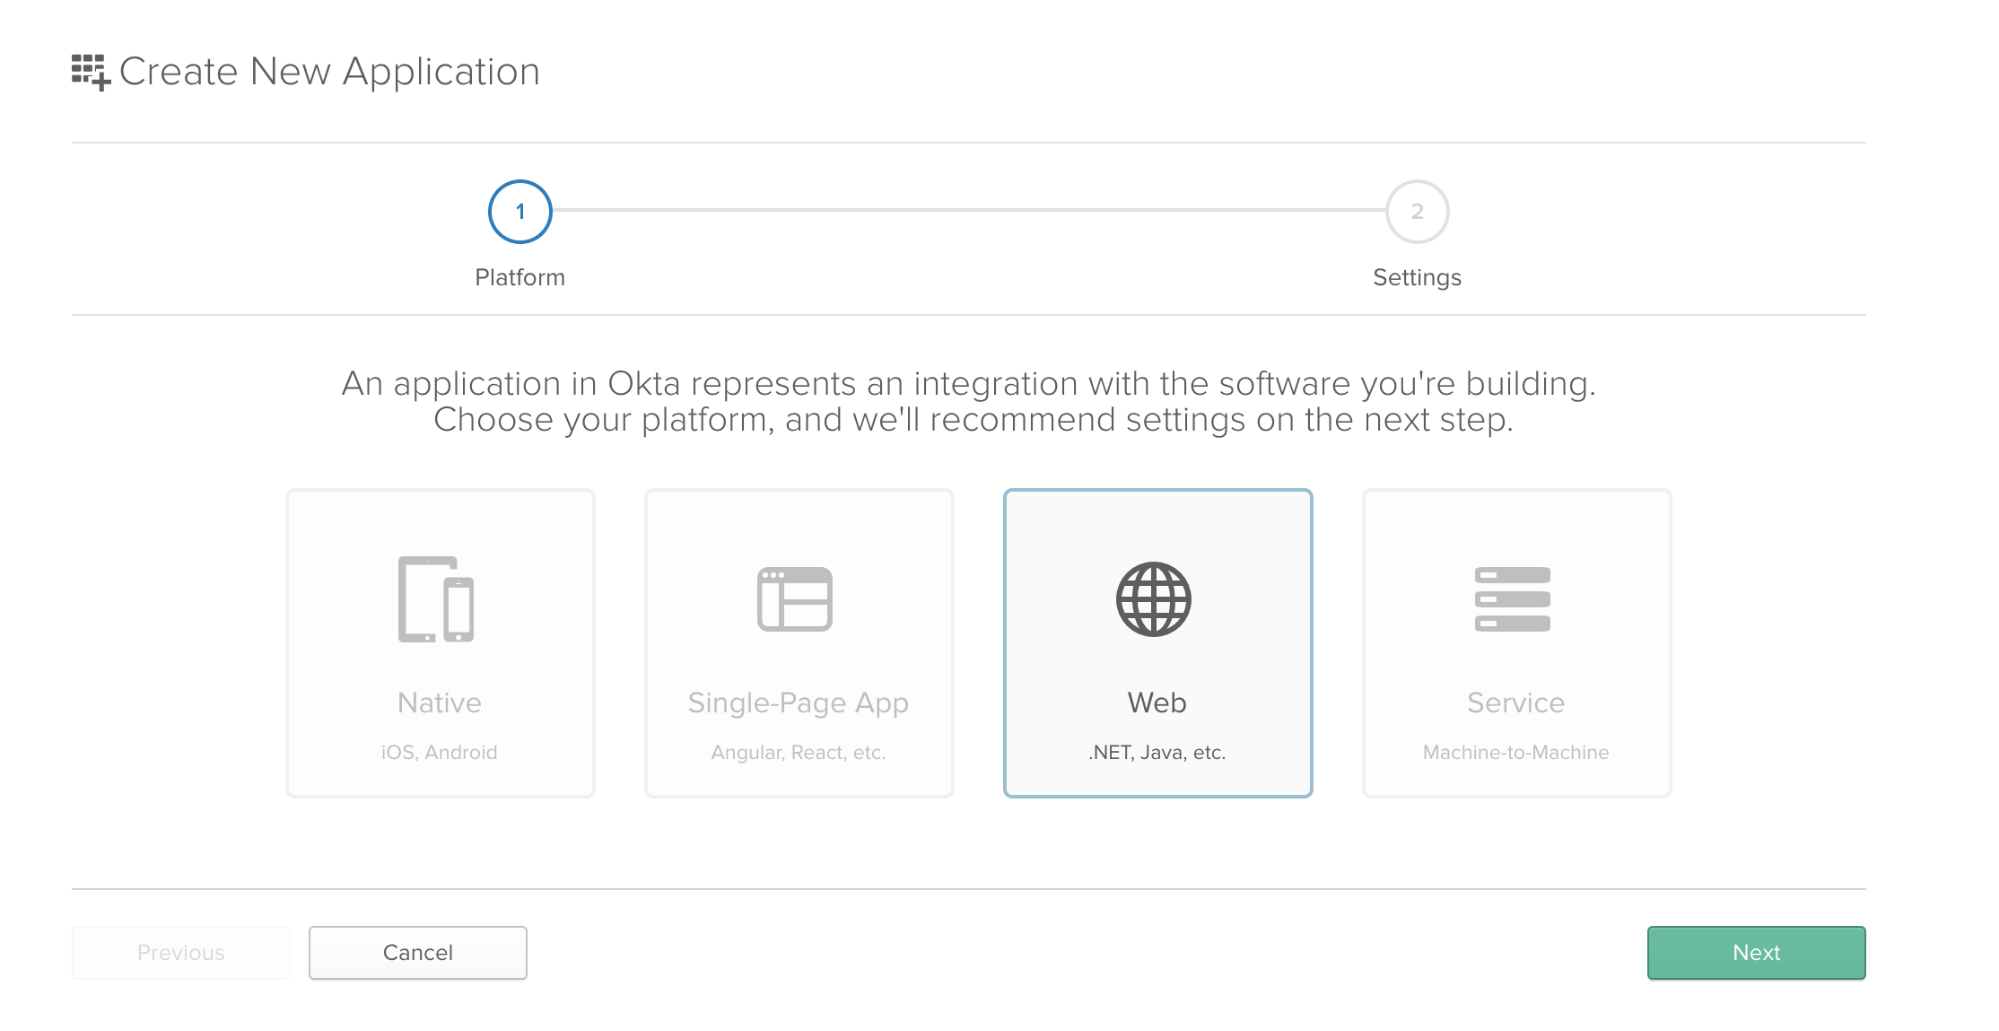
Select Web and click Next.
Enter a title, set http://localhost:8000/ as the Base URI and http://localhost:8000/login/okta/callback as the Login Redirect URI, then click Done. You can leave the rest of the settings as they are.
Copy the Client ID and Client Secret values from the application settings. Go to API > Authorization Servers, and copy just the hostname part of the Issuer URI field (without the /oauth2/default part) - this is your Okta Base URL (it looks like https://).
Connect Okta to the Laravel Project
Edit .env.example and add the following:
OKTA_CLIENT_ID=
OKTA_CLIENT_SECRET=
OKTA_BASE_URL=
OKTA_REDIRECT_URI=http://localhost:8000/login/okta/callback
Copy .env.example to .env to start filling out your own details.
Edit .env, add the Okta keys and input the values you copied in the previous section.
Next, add the Laravel Socialite and socialiteproviders/okta packages to the project:
composer require laravel/socialite socialiteproviders/okta
Before running the database migrations, you need to make some changes to the migrations and the User model (to cope with the fact that account verifications/password resets will not be handled by your app anymore):
Delete the database/migrations/2014_10_12_100000_create_password_resets_table.php file.
Replace database/migrations/2014_10_12_000000_create_users_table.php with:
<?php

use Illuminate\Support\Facades\Schema;
use Illuminate\Database\Schema\Blueprint;
use Illuminate\Database\Migrations\Migration;

class CreateUsersTable extends Migration
{
    /**
     * Run the migrations.
     *
     * @return void
     */
    public function up()
    {
        Schema::create('users', function (Blueprint $table) {
            $table->bigIncrements('id');
            $table->string('email')->unique();
            $table->string('name');
            $table->text('token');
            $table->timestamps();
        });
    }

    /**
     * Reverse the migrations.
     *
     * @return void
     */
    public function down()
    {
        Schema::dropIfExists('users');
    }
}
Replace app/User.php with:
<?php

namespace App;

use Illuminate\Notifications\Notifiable;
use Illuminate\Contracts\Auth\MustVerifyEmail;
use Illuminate\Foundation\Auth\User as Authenticatable;

class User extends Authenticatable
{
    use Notifiable;

    /**
     * The attributes that are mass assignable.
     *
     * @var array
     */
    protected $fillable = [
        'email', 'name', 'token'
    ];
}
You can use sqlite as the database engine (it’s perfectly fine for this tutorial). Update .env and set the database connection to sqlite:
DB_CONNECTION=sqlite
(remove the rest of the DB_… environment settings from the file).
Then initialize an empty database file in the database directory:
touch database/database.sqlite
Run the database migrations:
php artisan migrate
Migration table created successfully.
Migrating: 2014_10_12_000000_create_users_table
Migrated:  2014_10_12_000000_create_users_table (0 seconds)
Configure Socialite for Okta Authentication
Add to the $providers array in config/app.php to configure the Socialite provider:
$providers = [
    ...
    \SocialiteProviders\Manager\ServiceProvider::class,
    ...
]
Add the following to the $listen array in app/Providers/EventServiceProvider.php:
protected $listen = [
    ...
    \SocialiteProviders\Manager\SocialiteWasCalled::class => [
        'SocialiteProviders\\Okta\\OktaExtendSocialite@handle',
    ],
    ...
];
Next, update config/services.php:
'okta' => [
    'client_id' => env('OKTA_CLIENT_ID'),
    'client_secret' => env('OKTA_CLIENT_SECRET'),
    'redirect' => env('OKTA_REDIRECT_URI'),
    'base_url' => env('OKTA_BASE_URL')
],
Add to routes/web.php:
Route::get('login/okta', 'Auth\LoginController@redirectToProvider')->name('login-okta');
Route::get('login/okta/callback', 'Auth\LoginController@handleProviderCallback');
Replace app/Http/Controllers/Auth/LoginController.php with:
<?php

namespace App\Http\Controllers\Auth;

use App\User;
use App\Http\Controllers\Controller;
use Illuminate\Support\Facades\Auth;
use Socialite;

class LoginController extends Controller
{
    /**
     * Redirect the user to the Okta authentication page.
     *
     * @return \Illuminate\Http\Response
     */
    public function redirectToProvider()
    {
        return Socialite::driver('okta')->redirect();
    }

    /**
     * Obtain the user information from Okta.
     *
     * @return \Illuminate\Http\Response
     */
    public function handleProviderCallback(\Illuminate\Http\Request $request)
    {
        $user = Socialite::driver('okta')->user();

        $localUser = User::where('email', $user->email)->first();

        // create a local user with the email and token from Okta
        if (! $localUser) {
            $localUser = User::create([
                'email' => $user->email,
                'name'  => $user->name,
                'token' => $user->token,
            ]);
        } else {
            // if the user already exists, just update the token:
            $localUser->token = $user->token;
            $localUser->save();
        }

        try {
            Auth::login($localUser);
        } catch (\Throwable $e) {
            return redirect('/login-okta');
        }

        return redirect('/home');
    }

    public function logout()
    {
        Auth::logout();
        return redirect('/');
    }
}
Modify the section of resources/views/welcome.blade.php that displays the top right menu:
@if (Route::has('login'))
    <div class="top-right links">
        @auth
            <a href="{{ url('/home') }}">Home</a>
        @else
            <a href="{{ url('/login/okta') }}">Log in with Okta</a>
        @endauth
    </div>
@endif
Update app/Http/Middleware/Authenticate.php, replace return route('login'); with return route('login-okta');
Run the development web server again with php artisan serve and load up http://localhost:8000. Click Login with Okta and after a successful login you will see the dashboard and the Okta user’s name in the top right corner.
Modify Home Page For Logged-in Users
Open resources/views/welcome.blade.php and update the section that contains the ‘Laravel’ text so it shows some additional information if a user is logged in:
<div class="title m-b-md">
    Laravel
    @auth
        <p>You are logged in as {{ Auth::user()->name }}!</p>
    @endauth
</div>
Go back to the home page at http://localhost:8000/. If you’re logged in, you will see the text with your name in it.
Add a Page For Logged-in Users Only
Next, create a new route and controller method in HomeController for a new personal home page that will only be accessible to logged-in users.
routes/web.php
Route::get('/personal-home', 'HomeController@personal')->name('personal-home')->middleware('auth');
app/Http/Controllers/HomeController.php
...
public function personal()
{
    return view('personal');
}
...
Create a new file resources/views/personal.blade.php
@extends('layouts.app')

@section('content')
<div class="container">
    <div class="row justify-content-center">
        <div class="col-md-8">
            <div class="card">
                <div class="card-header">Personal Home Page</div>
                <div class="card-body">
                    You are logged in as {{ Auth::user()->name }}! <br>
                    Your email address is {{ Auth::user()->email }}!
                </div>
            </div>
        </div>
    </div>
</div>
@endsection
Add a link to the home page that will only show to logged-in users in the Links section of resources/views/welcome.blade.php:
<div class="links">
    @auth
        <a href="{{ route('personal-home') }}">Personal Home Page</a>
    @endauth
    <a href="https://laravel.com/docs">Docs</a>
    <a href="https://laracasts.com">Laracasts</a>
    <a href="https://laravel-news.com">News</a>
    <a href="https://blog.laravel.com">Blog</a>
    <a href="https://nova.laravel.com">Nova</a>
    <a href="https://forge.laravel.com">Forge</a>
    <a href="https://github.com/laravel/laravel">GitHub</a>
</div>
Reload the home page and you will see the Personal Home Page link. Click on it to see the new page which displays your name and email address from Okta.
That’s how easy it is to create a new Laravel application with secure user authentication via Okta!
You can find the completed project on GitHub.
Learn More About Laravel, Authentication, and Okta
If you are interested in other Laravel tutorials that build a single-page application and use Okta for authentication, check out this series and build an example application with an Angular, React, or Vue frontend:
- Build a Basic CRUD App with Laravel and Angular
- Build a Basic CRUD App with Laravel and React
- Build a Basic CRUD App with Laravel and Vue
- Build Simple Login in PHP
If you find any issues or have questions, please add a comment below! And if you liked this tutorial, follow us on Twitter or our YouTube channel where we publish screencasts and other videos.
Okta Developer Blog Comment Policy
We welcome relevant and respectful comments. Off-topic comments may be removed.