Kubernetes to the Cloud with Spring Boot and JHipster
When your business or application is successful, it needs to scale. Not just technology-wise, but human-wise. When you’re growing rapidly, it can be difficult to hire developers fast enough. Using a microservices architecture for your apps can allow you to divide up ownership and responsibilities, and scale teams along with your code.
Kubernetes is an open-source platform for managing containerized workloads and services. Kubernetes traces its lineage directly from Borg, Google’s long-rumored internal container-oriented cluster-management system.
Note: In May 2025, the Okta Integrator Free Plan replaced Okta Developer Edition Accounts, and the Okta CLI was deprecated.
We preserved this post for reference, but the instructions no longer work exactly as written. Replace the Okta CLI commands by manually configuring Okta following the instructions in our Developer Documentation.
Spring Boot and Spring Cloud were some of the pioneering frameworks in Javaland. However, even they stood on the shoulders of giants when they leveraged Netflix’s open-source projects to embrace and extend. In 2018, Netflix OSS announced they’d come full circle, and adopted Spring Boot.
Today, I’d like to show you how to build and deploy (with Kubernetes) a reactive microservice architecture with Spring Boot, Spring Cloud, and JHipster. Why reactive? Because Spring Cloud Gateway is now the default for JHipster 7 gateways, even if you choose to build your microservices with Spring MVC.
Spring Cloud Gateway is a library for building an API Gateway on top of Spring WebFlux. It easily integrates with OAuth to communicate between microservices. You just need to add a TokenRelay filter.
spring:
  cloud:
    gateway:
      default-filters:
- TokenRelay| Spring Cloud no longer supports Netflix Zuul. An open issue adds Spring MVC/Servlet support to Spring Cloud Gateway. It’s scheduled for implementation before the end of 2021. |
Prerequisites
-
A Google Cloud Account
- A Brief Intro to Kubernetes (K8s)
- Create a Kubernetes-Ready Microservices Architecture
- Generate Kubernetes Deployment Descriptors
- Install Minikube to Run Kubernetes Locally
- Create Docker Images with Jib
- Register an OIDC App for Auth
- Start Your Spring Boot Microservices with K8s
- Encrypt Your Secrets with Spring Cloud Config
- Deploy Spring Boot Microservices to Google Cloud (aka GCP)
- Encrypt Your Kubernetes Secrets
- Scale Your Reactive Java Microservices
- Monitor Your Kubernetes Cluster with K9s
- Continuous Integration and Delivery of JHipster Microservices
- Spring on Google Cloud Platform
- Why Not Istio?
- Learn More About Kubernetes, Spring Boot, and JHipster
You can also watch this tutorial as a screencast.
A Brief Intro to Kubernetes (K8s)
Kubernetes is an open-source project from Google that provides an API for deploying your apps and making them talk with each other. It helps automate deployments and updates, and manages your apps and services with limited downtime. You use Docker containers and YAML to make it all work.
The YAML can be burdensome, but that’s where JHipster comes in. It can generate the YAML for you!
Create a Kubernetes-Ready Microservices Architecture
I showed you how to build Reactive Java microservices with Spring Boot and JHipster in a previous post. Today, I’ll show you how to generate K8s deployment descriptors, use Spring Cloud Config with Git, encrypt your secrets, and make it all work on Google Cloud (GKE to be specific).
Start by cloning the JHipster 7 { Vue, Spring Boot, WebFlux } reactive microservices project from GitHub:
git clone https://github.com/oktadeveloper/java-microservices-examples.git
cd java-microservices-examples/reactive-jhipster|
If you just want to see the completed project, just cd into the project’s |
This project has four directories:
-
gateway: a Spring Boot + Spring Cloud Gateway project configured for OpenID Connect (OIDC) login. It’s also configured as an OAuth 2.0 resource server. It contains a front-end application built with Vue. -
blog: a Spring Boot + WebFlux microservice that talks to a Neo4j database. -
store: a Spring Boot + WebFlux microservice that uses MongoDB. -
docker-compose: a set of Docker files that describe how to run all containers together.
| The SPA app on the gateway is currently a monolith. The JHipster team is still working on micro frontends support. |
If you don’t have JHipster installed, install it.
npm i -g generator-jhipster@7Generate Kubernetes Deployment Descriptors
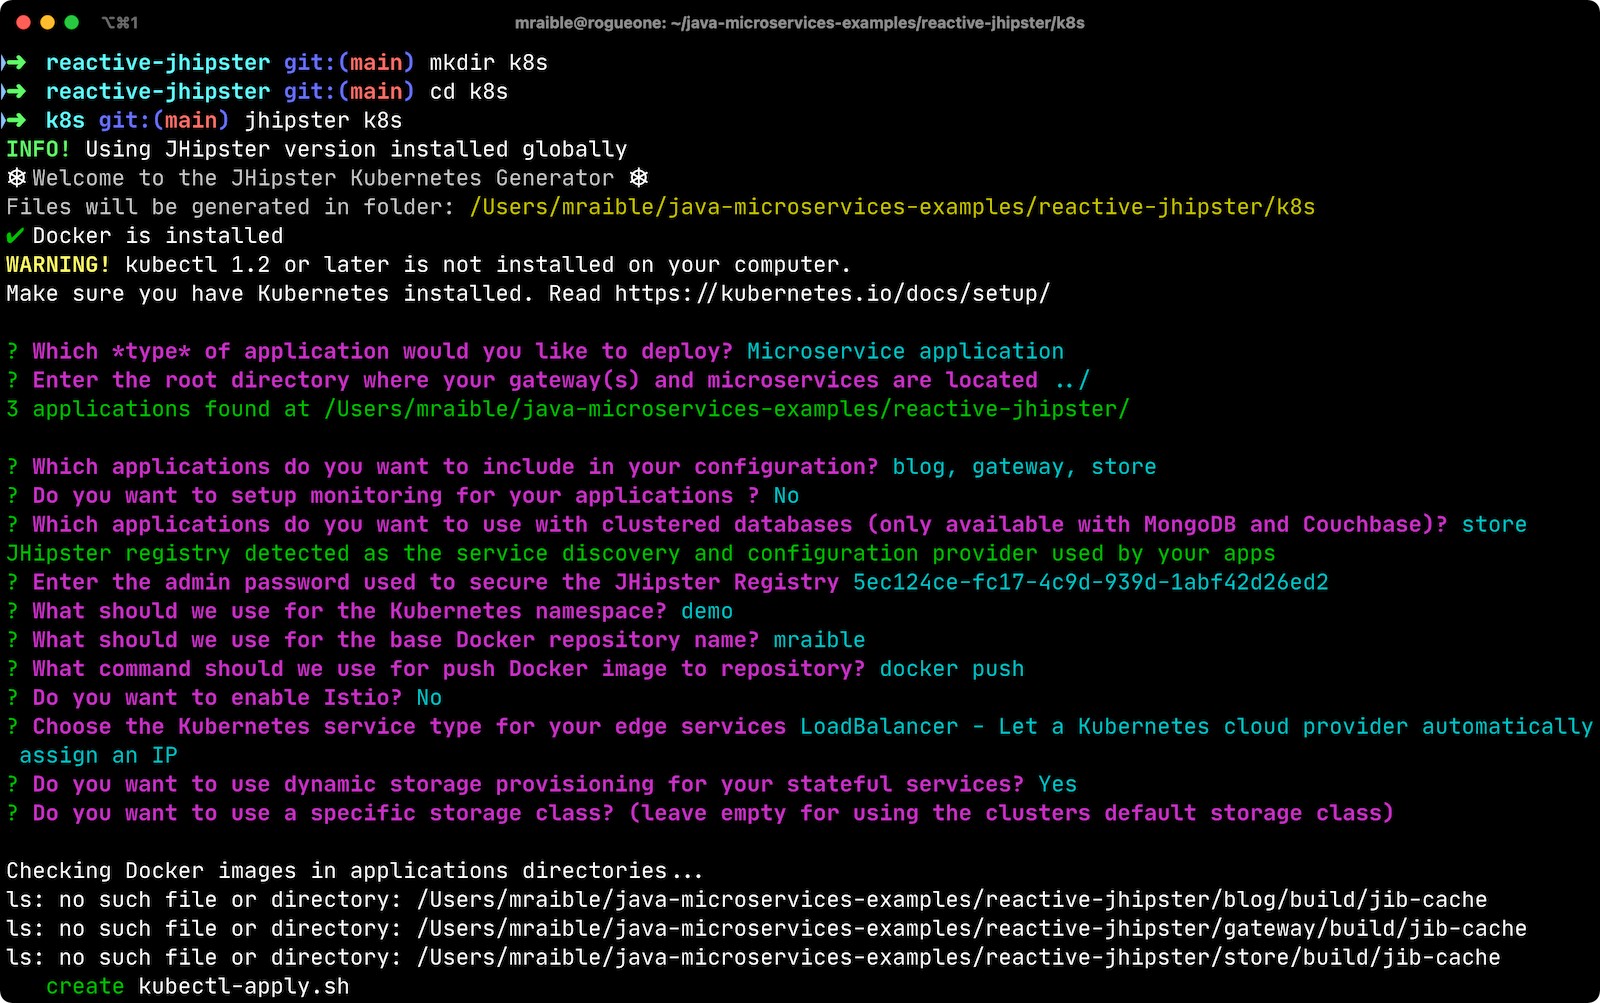
Navigate to the reactive-jhipster directory. Next, create a k8s directory, cd into it, and run JHipster’s Kubernetes sub-generator.
mkdir k8s
cd k8s
jhipster k8s
You’ll be prompted with several questions. Answer them as I did below:
-
Type of application: Microservice application
-
Root directory: ../
-
Which applications? <select all>
-
Set up monitoring? No
-
Which applications with clustered databases? select store
-
Admin password for JHipster Registry: <generate one>
-
Kubernetes namespace: demo
-
Docker repository name: <your docker hub username>
-
Command to push Docker image:
docker push -
Enable Istio? No
-
Kubernetes service type? LoadBalancer
-
Use dynamic storage provisioning? Yes
-
Use a specific storage class? <leave empty>
| If you don’t want to publish your images on Docker Hub, leave the Docker repository name blank. |
After I answered these questions, my k8s/.yo-rc.json file had the following contents:
{
  "generator-jhipster": {
    "appsFolders": ["blog", "gateway", "store"],
    "directoryPath": "../",
    "clusteredDbApps": ["store"],
    "serviceDiscoveryType": "eureka",
    "jwtSecretKey": "NDFhMGY4NjF...",
    "dockerRepositoryName": "mraible",
    "dockerPushCommand": "docker push",
    "kubernetesNamespace": "demo",
    "kubernetesServiceType": "LoadBalancer",
    "kubernetesUseDynamicStorage": true,
    "kubernetesStorageClassName": "",
    "ingressDomain": "",
    "monitoring": "no",
    "istio": false
  }
}
I already showed you how to get everything working with Docker Compose in the previous tutorial. So today, I’d like to show you how to run things locally with Minikube.
Install Minikube to Run Kubernetes Locally
If you have Docker installed, you can run Kubernetes locally with Minikube. Run minikube start to begin.
minikube --cpus 8 start
If this doesn’t work, use brew install minikube, or see Minikube’s installation instructions.
|
This command will start Minikube with 16 GB of RAM and 8 CPUs. Unfortunately, the default, which is 16 GB RAM and two CPUs, did not work for me.
You can skip ahead to creating your Docker images while you wait for this to complete.
After this command executes, it’ll print out a message and notify you which cluster and namespace are being used.
🏄 Done! kubectl is now configured to use "minikube" cluster and "default" namespace by default
You can stop Minikube with minikube stop and start over with minikube delete.
|
Create Docker Images with Jib
Now, you need to build Docker images for each app. In the {gateway, blog, store } directories, run the following Gradle command (where <image-name> is gateway, store, or blog).
This command should also be in the window where you ran jhipster k8s, so you can copy them from there.
./gradlew bootJar -Pprod jib -Djib.to.image=<docker-repo-name>/<image-name>Register an OIDC App for Auth
You’ve now built Docker images for your microservices, but you haven’t seen them running. First, you’ll need to configure Okta for authentication and authorization.
Before you begin, you’ll need a free Okta developer account. Install the Okta CLI and run okta register to sign up for a new account. If you already have an account, run okta login.
Then, run okta apps create jhipster. Select the default app name, or change it as you see fit.
Accept the default Redirect URI values provided for you.
What does the Okta CLI do?
The Okta CLI streamlines configuring a JHipster app and does several things for you:
- Creates an OIDC app with the correct redirect URIs:
- login:
http://localhost:8080/login/oauth2/code/oidcandhttp://localhost:8761/login/oauth2/code/oidc - logout:
http://localhost:8080andhttp://localhost:8761
- login:
- Creates
ROLE_ADMINandROLE_USERgroups that JHipster expects - Adds your current user to the
ROLE_ADMINandROLE_USERgroups - Creates a
groupsclaim in your default authorization server and adds the user’s groups to it
NOTE: The http://localhost:8761* redirect URIs are for the JHipster Registry, which is often used when creating microservices with JHipster. The Okta CLI adds these by default.
You will see output like the following when it’s finished:
Okta application configuration has been written to: /path/to/app/.okta.env
Run cat .okta.env (or type .okta.env on Windows) to see the issuer and credentials for your app. It will look like this (except the placeholder values will be populated):
export SPRING_SECURITY_OAUTH2_CLIENT_PROVIDER_OIDC_ISSUER_URI="https://{yourOktaDomain}/oauth2/default"
export SPRING_SECURITY_OAUTH2_CLIENT_REGISTRATION_OIDC_CLIENT_ID="{clientId}"
export SPRING_SECURITY_OAUTH2_CLIENT_REGISTRATION_OIDC_CLIENT_SECRET="{clientSecret}"
NOTE: You can also use the Okta Admin Console to create your app. See Create a JHipster App on Okta for more information.
JHipster ships with JHipster Registry. It acts as a Eureka service for service discovery and contains a Spring Cloud Config server for distributing your configuration settings.
Update k8s/registry-k8s/application-configmap.yml to contain your OIDC settings from the .okta.env file the Okta CLI just created. The Spring Cloud Config server reads from this file and shares the values with the gateway and microservices.
data:
  application.yml: |-
    ...
    spring:
      security:
        oauth2:
          client:
            provider:
              oidc:
                issuer-uri: https://<your-okta-domain>/oauth2/default
            registration:
              oidc:
                client-id: <client-id>
                client-secret: <client-secret>
To configure the JHipster Registry to use OIDC for authentication, modify k8s/registry-k8s/jhipster-registry.yml to enable the oauth2 profile.
- name: SPRING_PROFILES_ACTIVE
  value: prod,k8s,oauth2
Now that you’ve configured everything, it’s time to see it in action.
Start Your Spring Boot Microservices with K8s
In the k8s directory, start your engines!
./kubectl-apply.sh -fYou can see if everything starts up using the following command.
kubectl get pods -n demoYou can use the name of a pod with kubectl logs to tail its logs.
kubectl logs <pod-name> --tail=-1 -n demoYou can use port-forwarding to see the JHipster Registry.
kubectl port-forward svc/jhipster-registry -n demo 8761Open a browser and navigate to http://localhost:8761. You’ll need to sign in with your Okta credentials.
Once all is green, use port-forwarding to see the gateway app.
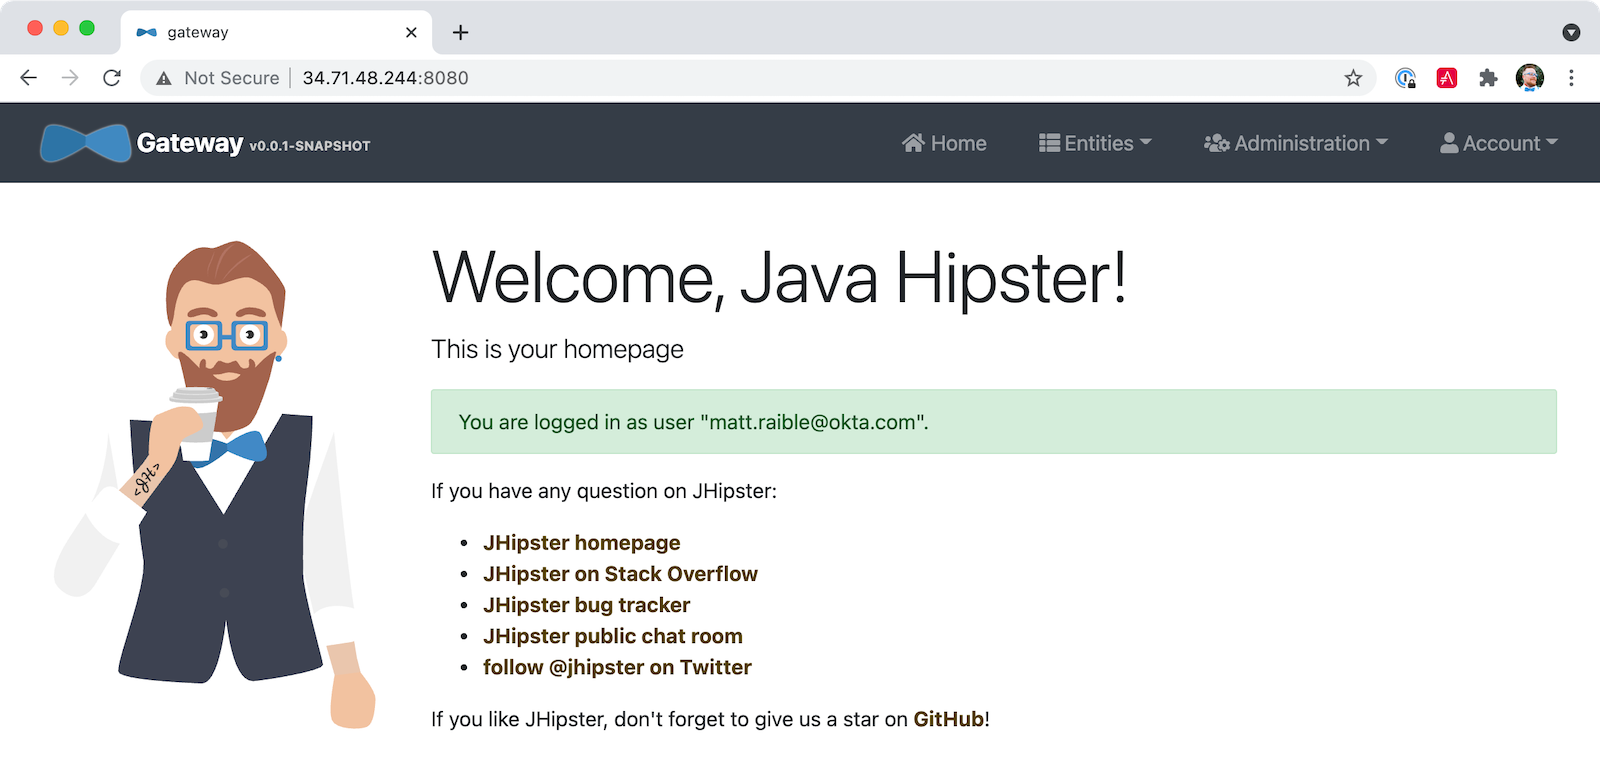
kubectl port-forward svc/gateway -n demo 8080Then, go to http://localhost:8080, and you should be able to add blogs, posts, tags, and products.
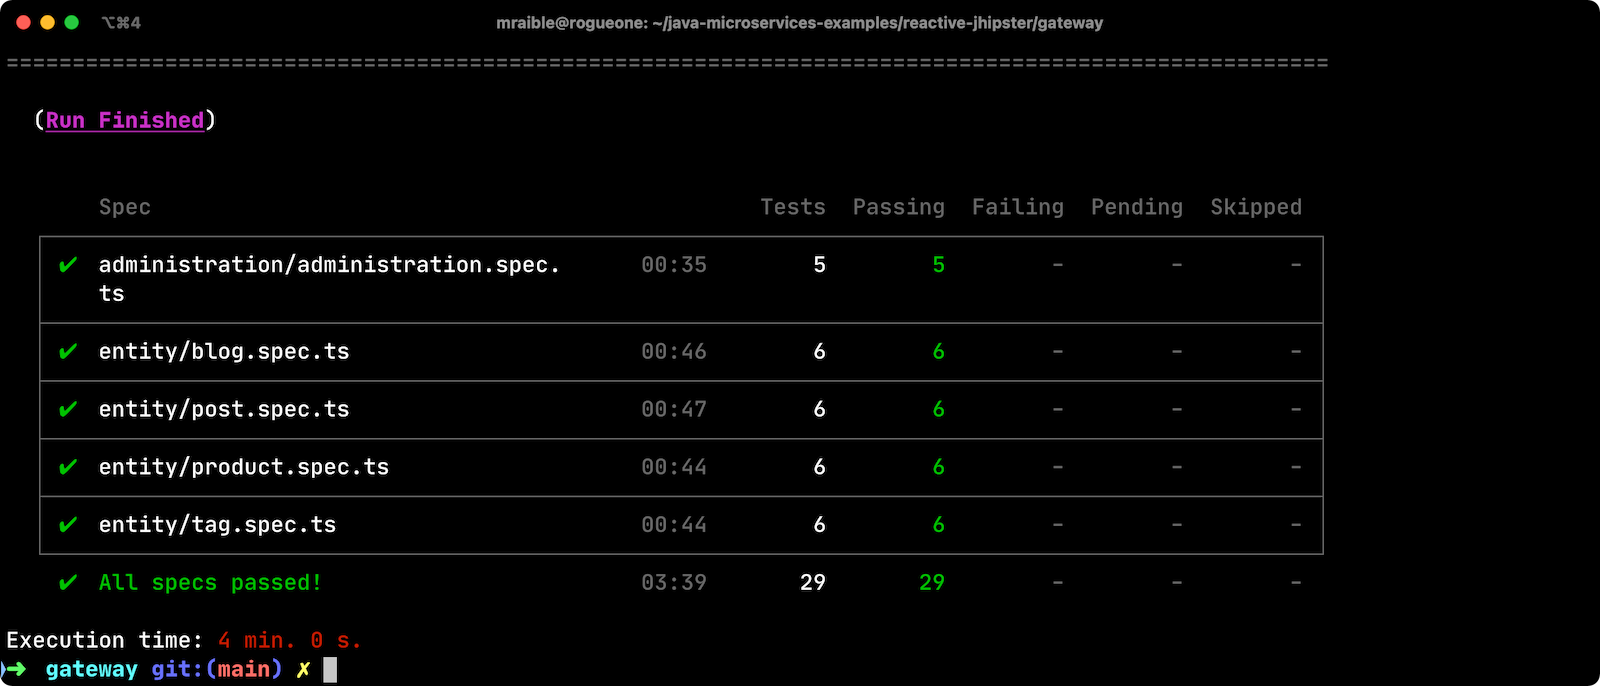
You can also automate testing to ensure that everything works. Set your Okta credentials as environment variables and run end-to-end tests using Cypress (from the gateway directory).
export CYPRESS_E2E_USERNAME=<your-username>
export CYPRESS_E2E_PASSWORD=<your-password>
npm run e2e
Proof it worked for me:
Plain Text Secrets? Uggh!
You may notice that I used a secret in plain text in the application-configmap.yml file. Secrets in plain text are a bad practice! I hope you didn’t check everything into source control yet!!
Encrypt Your Secrets with Spring Cloud Config
The JHipster Registry has an encryption mechanism you can use to encrypt your secrets. That way, it’s safe to store them in public repositories.
Add an ENCRYPT_KEY to the environment variables in k8s/registry-k8s/jhipster-registry.yml.
- name: ENCRYPT_KEY
value: really-long-string-of-random-charters-that-you-can-keep-safe|
You can use JShell to generate a UUID you can use for your encrypt key. 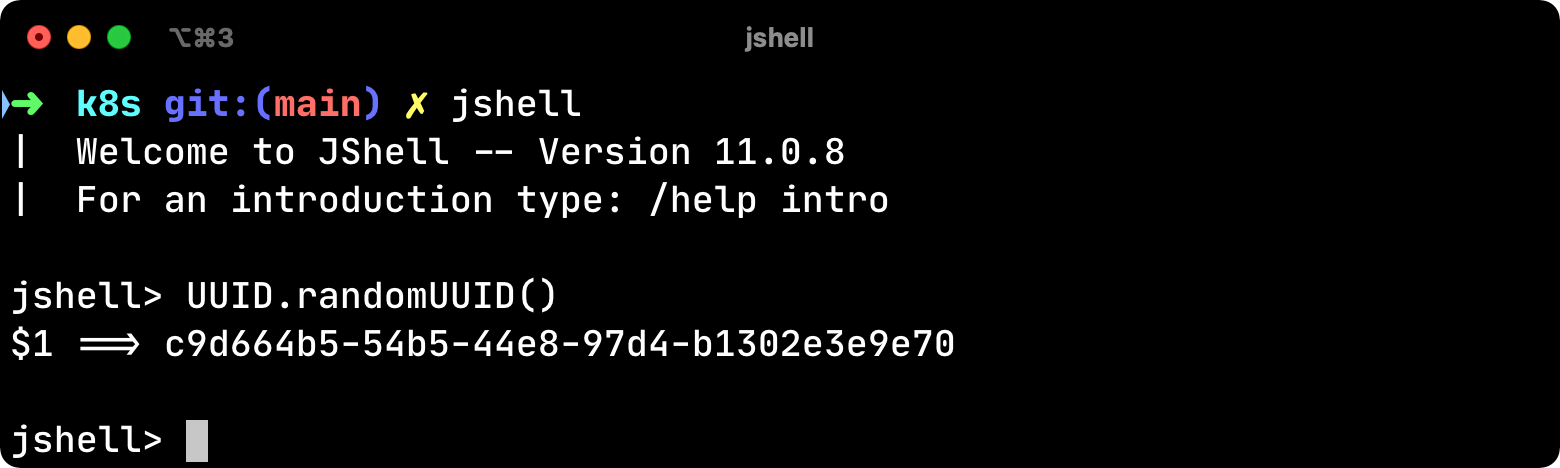
You can quit by typing |
Restart your JHipster Registry containers from the k8s directory.
./kubectl-apply.sh -fEncrypt Your OIDC Client Secret
You can encrypt your client secret by logging into http://localhost:8761 and going to Configuration > Encryption. If this address doesn’t resolve, you’ll need to port-forward again.
kubectl port-forward svc/jhipster-registry -n demo 8761Copy and paste your client secret from application-configmap.yml (or .okta.env) and click Encrypt.
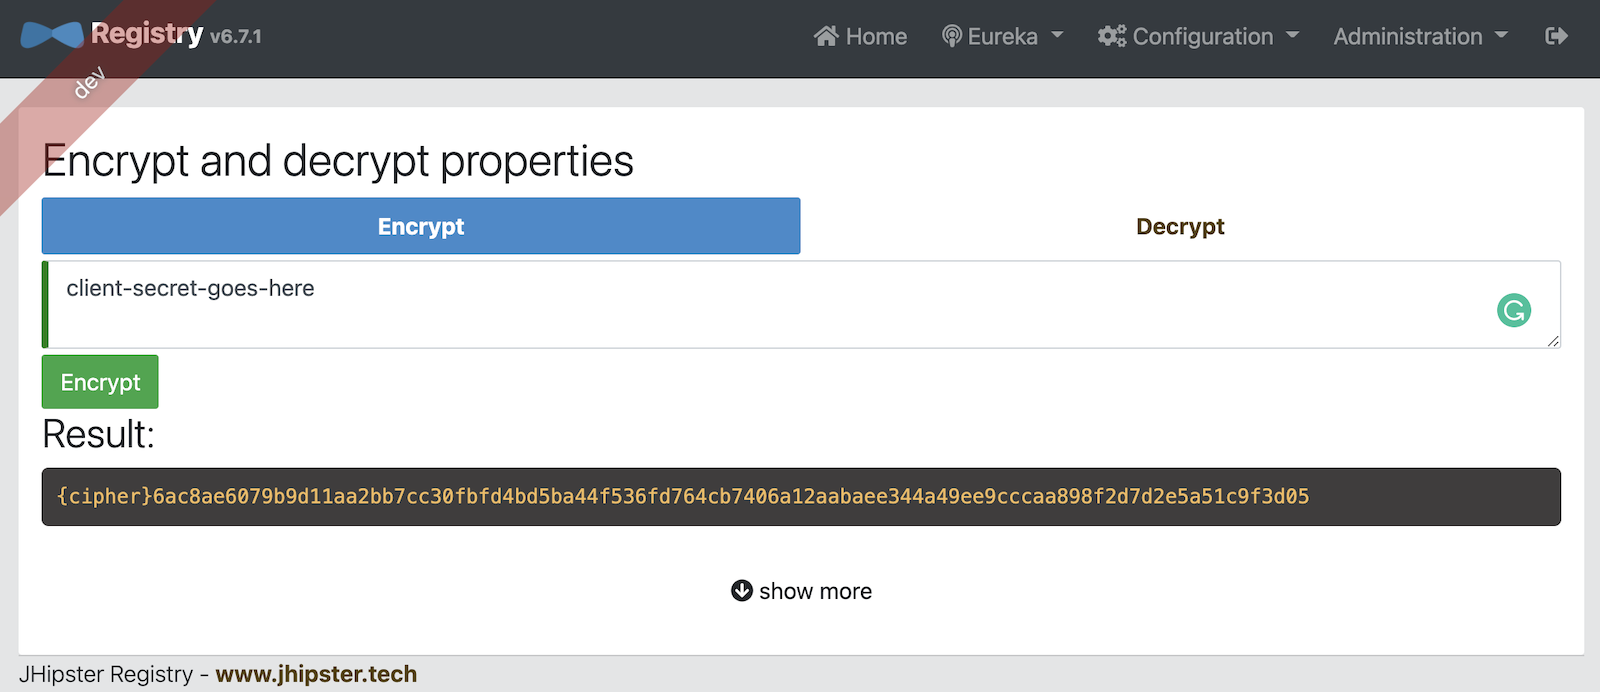
Then, copy the encrypted value back into application-configmap.yml. Make sure to wrap it in quotes!
You can also use curl:
curl -X POST http://admin:<password-you-set-earlier>@localhost:8761/config/encrypt -d your-client-secretIf you use curl, make sure to add {cipher} to the beginning of the string. For example:
client-secret: "{cipher}1b12934716c32d360c85f651a0793df2777090c..."Apply these changes and restart all deployments.
./kubectl-apply.sh -f
kubectl rollout restart deploy -n demo
Verify everything still works at http://localhost:8080.
| If you don’t want to restart the Spring Cloud Config server when you update its configuration, see Refresh the Configuration in Your Spring Cloud Config Server. |
Change Spring Cloud Config to use Git
You might want to store your app’s configuration externally. That way, you don’t have to redeploy everything to change values. Good news! Spring Cloud Config makes it easy to switch to Git instead of the filesystem to store your configuration.
In k8s/registry-k8s/jhipster-registry.yml, find the following variables:
- name: SPRING_CLOUD_CONFIG_SERVER_COMPOSITE_0_TYPE
  value: native
- name: SPRING_CLOUD_CONFIG_SERVER_COMPOSITE_0_SEARCH_LOCATIONS
  value: file:./central-config
Below these values, add a second lookup location.
- name: SPRING_CLOUD_CONFIG_SERVER_COMPOSITE_1_TYPE
  value: git
- name: SPRING_CLOUD_CONFIG_SERVER_COMPOSITE_1_URI
  value: https://github.com/mraible/reactive-java-ms-config/
- name: SPRING_CLOUD_CONFIG_SERVER_COMPOSITE_1_SEARCH_PATHS
  value: config
- name: SPRING_CLOUD_CONFIG_SERVER_COMPOSITE_1_LABEL
  value: main
Create a GitHub repo that matches the URI, path, and branch you entered.
In my case, I created reactive-java-ms-config and added a config/application.yml file in the main branch. Then, I added my spring.security.* values to it and removed them from k8s/registry-k8s/application-configmap.yml.
See Spring Cloud Config’s Git Backend docs for more information.
Deploy Spring Boot Microservices to Google Cloud (aka GCP)
It’s nice to see things running locally on your machine, but it’s even better to get to production! In this section, I’ll show you how to deploy your containers to Google Cloud.
First, stop Minikube if you were running it previously.
minikube stopYou can also use kubectl commands to switch clusters.
kubectl config get-contexts
kubectl config use-context XXX
The cool kids use kubectx and kubens to set the default context and namespace. You can learn how to install and use them via the kubectx GitHub project.
Create a Container Registry on Google Cloud
Before the JHipster 7.0.0 release, I tested this microservice example with Kubernetes and Google Cloud. I found many solutions in Ray Tsang’s Spring Boot on GCP Guides. Thanks, Ray!
To start with Google Cloud, you’ll need an account and a project. Sign up for Google Cloud Platform (GCP), log in, and create a project. Open a console in your browser. A GCP project contains all cloud services and resources—such as virtual machines, network, load balancers—that you might use.
You can also download and install the gcloud CLI if you want to run things locally.
|
Enable the Google Kubernetes Engine API and Container Registry:
gcloud services enable container.googleapis.com containerregistry.googleapis.comCreate a Kubernetes Cluster
Run the following command to create a cluster for your apps.
gcloud container clusters create CLUSTER_NAME \
--zone us-central1-a \
--machine-type n1-standard-4 \
--enable-autorepair \
--enable-autoupgrade
I called my cluster reactive-ms. See GCP’s zones and machine-types for other options. I found the n1-standard-4 to be the minimum for JHipster.
You created Docker images earlier to run with Minikube. Then, those images were deployed to Docker Hub or your local Docker registry. If you deployed to Docker Hub, you can use your deployment files as-is.
For Google Cloud and its Kubernetes engine (GKE), you can also publish your images to your project’s registry. Thankfully, this is easy to do with Jib.
Navigate to the gateway directory and run:
./gradlew bootJar -Pprod jib -Djib.to.image=gcr.io/<your-project-id>/gatewayYou can get your project ID by running gcloud projects list.
Repeat the process for blog and store. You can run these processes in parallel to speed things up.
cd ../blog
./gradlew bootJar -Pprod jib -Djib.to.image=gcr.io/<your-project-id>/blog
cd ../store
./gradlew bootJar -Pprod jib -Djib.to.image=gcr.io/<your-project-id>/store
You might have to run gcloud auth configure-docker for Jib to publish to your GCP container registry.
|
Then, in your k8s/*/-deployment.yml files, add gcr.io/<your-project-id> as a prefix. Remove the imagePullPolicy if you specified it earlier. For example:
containers:
  - name: gateway-app
    image: gcr.io/jhipster7/gateway
    env:
In the k8s directory, apply all the deployment descriptors to run all your images.
./kubectl-apply.sh -fYou can monitor the progress of your deployments with kubectl get pods -n demo.
|
If you make a mistake configuring JHipster Registry and need to deploy it, you can do so with the following command: You’ll need to restart all your deployments if you changed any configuration settings that services need to retrieve. |
Access Your Gateway on Google Cloud
Once everything is up and running, get the external IP of your gateway.
kubectl get svc gateway -n demoYou’ll need to add the external IP address as a valid redirect to your Okta OIDC app. Run okta login, open the returned URL in your browser, and sign in to the Okta Admin Console. Go to the Applications section, find your application, and edit it.
Add the standard JHipster redirect URIs using the IP address. For example, http://34.71.48.244:8080/login/oauth2/code/oidc for the login redirect URI, and http://34.71.48.244:8080 for the logout redirect URI.
You can use the following command to set your gateway’s IP address as a variable you can curl.
EXTERNAL_IP=$(kubectl get svc gateway -ojsonpath="{.status.loadBalancer.ingress[0].ip}" -n demo)
curl $EXTERNAL_IP:8080
Run open http://$EXTERNAL_IP:8080, and you should be able to sign in.
Great! Now that you know things work, let’s integrate better security, starting with HTTPS.
Add HTTPS to Your Reactive Gateway
You should always use HTTPS. It’s one of the easiest ways to secure things, especially with the free certificates offered these days. Ray Tsang’s External Load Balancing docs was a big help in figuring out all these steps.
You’ll need a static IP to assign your TLS (the official name for HTTPS) certificate.
gcloud compute addresses create gateway-ingress-ip --globalYou can run the following command to make sure it worked.
gcloud compute addresses describe gateway-ingress-ip --global --format='value(address)'Then, create a k8s/ingress.yml file:
apiVersion: networking.k8s.io/v1
kind: Ingress
metadata:
  name: gateway
  annotations:
    kubernetes.io/ingress.global-static-ip-name: "gateway-ingress-ip"
spec:
  rules:
  - http:
      paths:
      - path: /*
        pathType: ImplementationSpecific
        backend:
          service:
            name: gateway
            port:
              number: 8080
Deploy it and make sure it worked.
kubectl apply -f ingress.yml -n demo

# keep running this command displays an IP address
# (hint: up arrow recalls the last command)
kubectl get ingress gateway -n demo
To use a TLS certificate, you must have a fully qualified domain name and configure it to point to the IP address. If you don’t have a real domain, you can use nip.io.
Set the IP in a variable, as well as the domain.
EXTERNAL_IP=$(kubectl get ingress gateway -ojsonpath="{.status.loadBalancer.ingress[0].ip}" -n demo)
DOMAIN="${EXTERNAL_IP}.nip.io"

# Prove it works
echo $DOMAIN
curl $DOMAIN
To create a certificate, create a k8s/certificate.yml file.
cat << EOF > certificate.yml
apiVersion: networking.gke.io/v1
kind: ManagedCertificate
metadata:
  name: gateway-certificate
spec:
  domains:
  # Replace the value with your domain name
  - ${DOMAIN}
EOF
Add the certificate to ingress.yml:
...
metadata:
  name: gateway
  annotations:
    kubernetes.io/ingress.global-static-ip-name: "gateway-ingress-ip"
    networking.gke.io/managed-certificates: "gateway-certificate"
...
Deploy both files:
kubectl apply -f certificate.yml -f ingress.yml -n demoCheck your certificate’s status until it prints Status: ACTIVE:
kubectl describe managedcertificate gateway-certificate -n demoWhile you’re waiting, you can proceed to forcing HTTPS in the next step.
Force HTTPS with Spring Security
Spring Security’s WebFlux support makes it easy to redirect to HTTPS. However, if you redirect all HTTPS requests, the Kubernetes health checks will fail because they receive a 302 instead of a 200.
Crack open SecurityConfiguration.java in the gateway project and add the following code to the springSecurityFilterChain() method.
http.redirectToHttps(redirect -> redirect
    .httpsRedirectWhen(e -> e.getRequest().getHeaders().containsKey("X-Forwarded-Proto"))
);
Rebuild the Docker image for the gateway project.
./gradlew bootJar -Pprod jib -Djib.to.image=gcr.io/<your-project-id>/gatewayRun the following commands to start a rolling restart of gateway instances:
kubectl rollout restart deployment gateway -n demo
Run kubectl get deployments to see your deployment names.
|
Now you should get a 302 when you access your domain. HTTPie is a useful alternative to curl.
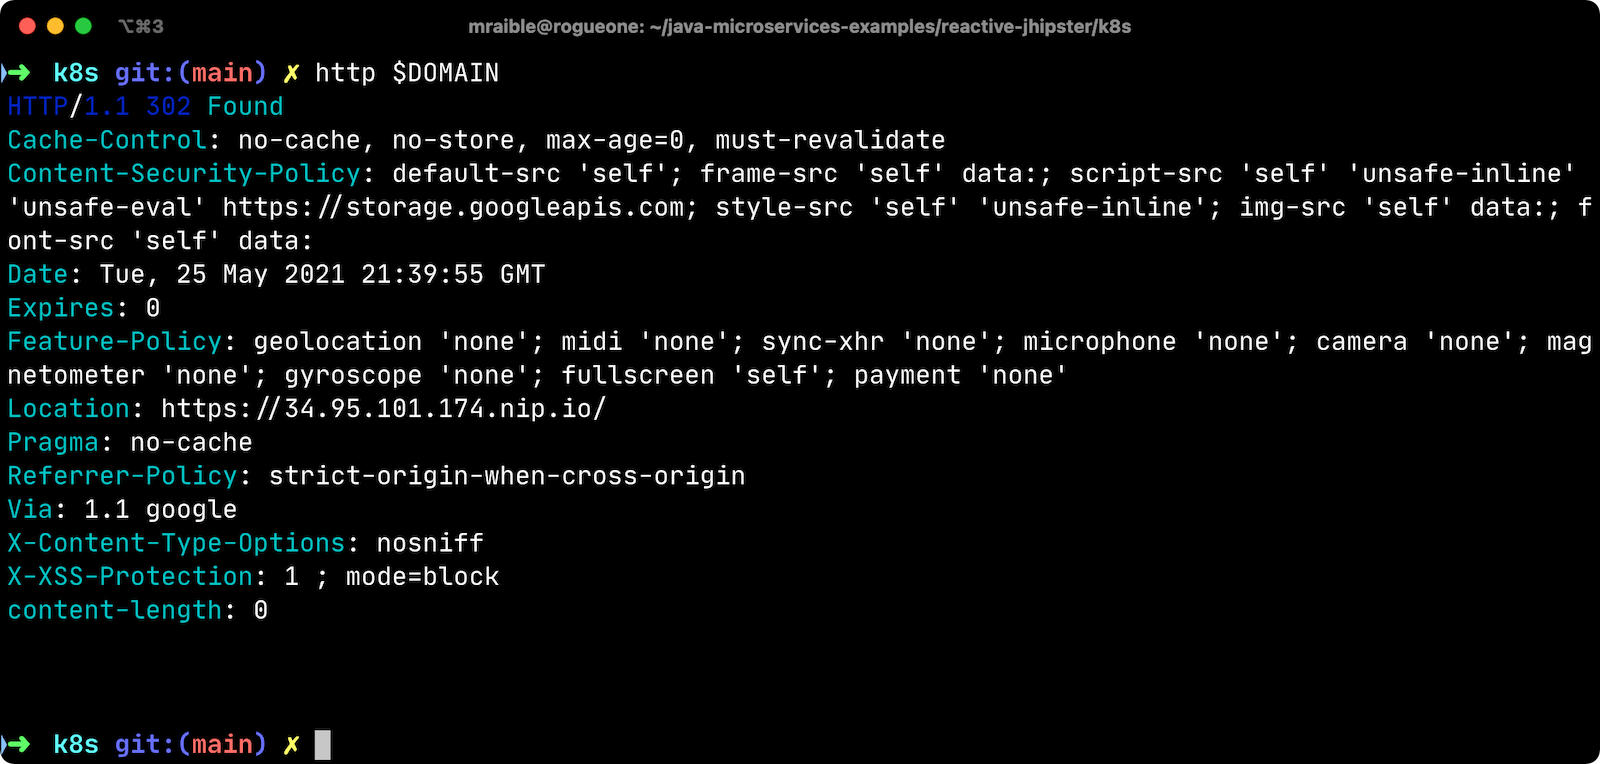
Update your Okta OIDC app to have https://${DOMAIN}/login/oauth2/code/oidc as a valid redirect URI. Add https://${DOMAIN} to the sign-out redirect URIs too.
Encrypt Your Kubernetes Secrets
Congratulations! Now you have everything running on GKE, using HTTPS! However, you have a lot of plain-text secrets in your K8s YAML files.
"But, wait!" you might say. Doesn’t Kubernetes Secrets solve everything?
In my opinion, no. They’re just unencrypted base64-encoded strings stored in YAML files. There’s a good chance you’ll want to check in the k8s directory you created.
Having secrets in your source code is a bad idea! The good news is most people (where most people = my followers) manage secrets externally.
What's your favorite way to protect secrets in your @kubernetesio YAML files?
— Matt Raible (@mraible) April 28, 2021
| Watch Kubernetes Secrets in 5 Minutes if you want to learn more about Kubernetes Secrets. |
The Current State of Secret Management in Kubernetes
I recently noticed a tweet from Daniel Jacob Bilar that links to a talk from FOSDEM 2021 on the current state of secret management within Kubernetes. It’s an excellent overview of the various options.
Store Secrets in Git with Sealed Secrets and Kubeseal
Bitnami has a Sealed Secrets Apache-licensed open source project. Its README explains how it works.
Problem: "I can manage all my K8s config in git, except Secrets."
Solution: Encrypt your Secret into a SealedSecret, which is safe to store - even to a public repository. The SealedSecret can be decrypted only by the controller running in the target cluster, and nobody else (not even the original author) is able to obtain the original Secret from the SealedSecret.
Store your Kubernetes Secrets in Git thanks to Kubeseal. Hello SealedSecret! by Aurélie Vache provides an excellent overview of how to use it.
First, you’ll need to install the Sealed Secrets CRD (Custom Resource Definition).
kubectl apply -f https://github.com/bitnami-labs/sealed-secrets/releases/download/v0.16.0/controller.yamlRetrieve the certificate keypair that this controller generates.
kubectl get secret -n kube-system -l sealedsecrets.bitnami.com/sealed-secrets-key -o yamlCopy the raw value of tls.crt and decode it. You can use the command line, or learn more about base64 encoding/decoding in our documentation.
echo -n <paste-value-here> | base64 --decodePut the raw value in a tls.crt file.
Next, install Kubeseal. On macOS, you can use Homebrew. For other platforms, see the release notes.
brew install kubesealThe major item you need to encrypt in this example is the ENCRYPT_KEY you used to encrypt the OIDC client secret. Run the following command to do this, where the value comes from your k8s/registry-k8s/jhipster-registry.yml file.
kubectl create secret generic encrypt-key \
  --from-literal=ENCRYPT_KEY='your-value-here' \
  --dry-run=client -o yaml > secrets.yml
Next, use kubeseal to convert the secrets to encrypted secrets.
kubeseal --cert tls.crt --format=yaml -n demo < secrets.yml > sealed-secrets.ymlRemove the original secrets file and deploy your sealed secrets.
rm secrets.yml
kubectl apply -n demo -f sealed-secrets.yml && kubectl get -n demo sealedsecret encrypt-key
Configure JHipster Registry to use the Sealed Secret
In k8s/registry-k8s/jhipster-registry.yml, change the ENCRYPT_KEY to use your new secret.
...
- name: ENCRYPT_KEY
  valueFrom:
    secretKeyRef:
      name: encrypt-key
key: ENCRYPT_KEY| You should be able to encrypt other secrets, like your database passwords, using a similar technique. |
Now, redeploy JHipster Registry and restart all your deployments.
./kubectl-apply.sh -f
kubectl rollout restart deployment -n demo
You can use port-forwarding to see the JHipster Registry locally.
kubectl port-forward svc/jhipster-registry -n demo 8761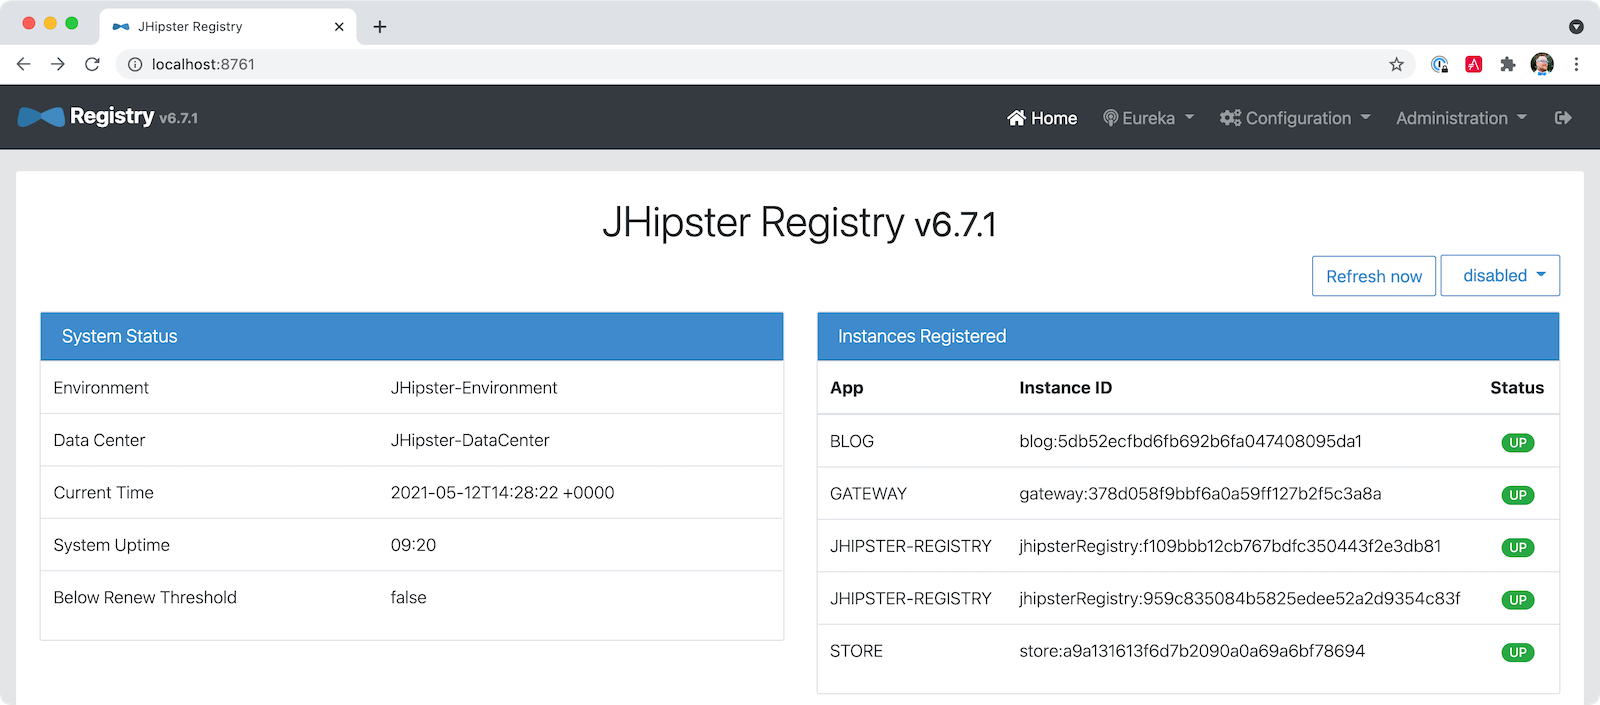
Google Cloud Secret Manager
Google Cloud has a Secret Manager you can use to store your secrets. There’s even a Spring Boot starter to make it convenient to retrieve these values in your app.
For example, you could store your database password in a properties file.
spring.datasource.password=${sm://my-db-password}This is pretty slick, but I like to remain cloud-agnostic. Also, I like how the JHipster Registry allows me to store encrypted secrets in Git.
Use Spring Vault for External Secrets
Using an external key management solution like HashiCorp Vault is also recommended. The JHipster Registry will have Vault support in its next release.
In the meantime, I recommend reading Secure Secrets With Spring Cloud Config and Vault.
Scale Your Reactive Java Microservices
You can scale your instances using the kubectl scale command.
kubectl scale deployments/store --replicas=2 -n demoScaling will work just fine for the microservice apps because they’re set up as OAuth 2.0 resource servers and are therefore stateless.
However, the gateway uses Spring Security’s OIDC login feature and stores the access tokens in the session. So if you scale it, sessions won’t be shared. Single sign-on should still work; you’ll just have to do the OAuth dance to get tokens if you hit a different instance.
To synchronize sessions, you can use Spring Session and Redis with JHipster.
|
If you leave everything running on Google Cloud, you will be charged for usage. Therefore, I recommend removing your cluster or deleting your namespace ( gcloud container clusters delete <cluster-name> --zone=us-central1-a You can delete your Ingress IP address too: gcloud compute addresses delete gateway-ingress-ip --global |
Monitor Your Kubernetes Cluster with K9s

Using kubectl to monitor your Kubernetes cluster can get tiresome. That’s where K9s can be helpful. It provides a terminal UI to interact with your Kubernetes clusters. K9s was created by my good friend Fernand Galiana. He’s also created a commercial version called K9sAlpha.
To install it on macOS, run brew install k9s. Then run k9s -n demo to start it. You can navigate to your pods, select them with Return, and navigate back up with Esc.
There’s also KDash, from JHipster co-lead, Deepu K Sasidharan. It’s a simple K8s terminal dashboard built with Rust. Deepu recently released an MVP of the project.
If for some reason you don’t like CLI’s, you can try Kubernetic.
Continuous Integration and Delivery of JHipster Microservices
This tutorial doesn’t mention continuous integration and delivery of your reactive microservice architecture. To learn how to automate testing and publishing, see CI/CD Java Microservices with CircleCI and Spinnaker.
Spring on Google Cloud Platform
JHipster uses Docker containers to run all its databases in this example. However, there are a number of Google Cloud services you can use as alternatives. See the Spring Cloud GCP project on GitHub for more information.
I didn’t mention Testcontainers in this post. However, JHipster does support using them. Testcontainers also has a GCloud Module.
Why Not Istio?
I didn’t use Istio in this example because I didn’t want to complicate things. Learning Kubernetes is hard enough without learning another system on top of it. Istio acts as a network between your containers that can do networky things like authentication, authorization, monitoring, and retries. I like to think of it as AOP for containers.
If you’d like to see how to use JHipster with Istio, see How to set up Java microservices with Istio service mesh on Kubernetes by JHipster co-lead Deepu K Sasidharan.
Fernand Galiana recommends checking out BPF (Berkeley Packet Filter) and Cilium. Cilium is open source software for transparently providing and securing the network and API connectivity between application services deployed using Linux container management platforms such as Kubernetes.
Learn More About Kubernetes, Spring Boot, and JHipster
This blog post showed you how to deploy your reactive Java microservices to production using Kubernetes. JHipster did much of the heavy lifting for you since it generated all the YAML-based deployment descriptors. Since no one really likes writing YAML, I’m calling that a win!
You learned how to use JHipster Registry to encrypt your secrets and configure Git as a configuration source for Spring Cloud Config. Bitnami’s Sealed Secrets is a nice companion to encrypt the secrets in your Kubernetes deployment descriptors.
For more information about storing your secrets externally, these additional resources might help.
You can find the source code for this example on GitHub in our Java microservices examples repository.
git clone https://github.com/oktadeveloper/java-microservices-examples.git
cd java-microservices-examples/jhipster-k8s
See JHipster’s documentation on Kubernetes and GCP if you’d like more concise instructions.
If you enjoyed this post, I think you’ll like these others as well:
If you have any questions, please ask them in the comments below.
To be notified when we publish new blog posts, follow us on Twitter or LinkedIn. We frequently publish videos to our YouTube channel too. Subscribe today!
A huge thanks goes to Fernand Galiana for his review and detailed feedback.
Changelog:
- Aug 12, 2022: Added link to CI/CD Java Microservices with CircleCI and Spinnaker as a downstream blog post. Changes can be viewed in okta-blog#1241.
- Aug 11, 2021: Fixed missing namespace parameters and Ingress definition. See the code changes in the example on GitHub. Changes to this post can be viewed in okta-blog#857.
Matt Raible is a well-known figure in the Java community and has been building web applications for most of his adult life. For over 20 years, he has helped developers learn and adopt open source frameworks and use them effectively. He's a web developer, Java Champion, and Developer Advocate at Okta. Matt has been a speaker at many conferences worldwide, including Devnexus, Devoxx Belgium, Devoxx France, Jfokus, and JavaOne. He is the author of The Angular Mini-Book, The JHipster Mini-Book, Spring Live, and contributed to Pro JSP. He is a frequent contributor to open source and a member of the JHipster development team. You can find him online @mraible and raibledesigns.com.
Okta Developer Blog Comment Policy
We welcome relevant and respectful comments. Off-topic comments may be removed.