Build an Android App with RxJava and Kotlin
Modern-day mobile apps do so much. They communicate with different back-ends via network APIs. They store and retrieve data from the local database, do heavy media processing, and communicate with web sockets. It’s hard to keep track of all the information from different asynchronous data sources, especially knowing that the users are accustomed to constantly having a fluid experience with the apps they use.
In the early days of Android, developers used the class AsyncTask from the Android framework for doing all the work outside of the main UI thread. Even though async tasks did what they’re supposed to, using them wasn’t the most pleasant experience because of all the boilerplate code you would ultimately end up writing and due to scalability issues. If you had a more advanced use case (i.e., presenting data from a local database on the UI while making an API request to fetch the latest data from the backend, updating the local database, and presenting the latest data on the UI), things would quickly get out of hand. You would end up with code that is hard to understand and maintain.
Many of those problems were solved by releasing the Java version of the ReactiveX API, called RxJava. It is a library that introduced the concept of data streams and functional programming to the Android platform. It became quite popular with the developer community because of the advanced features and boilerplate reduction it introduced. Chaining tasks from different threads into one logical sequence became easier to write and understand.
In this post, you’ll learn the basics of RxJava on Android by building a real-world example of server-client communication. Then, you’ll create a production-ready back-end app that will provide an API to authorized users from the Android app. The OIDC authorization will be implemented with the help of Okta OIDC SDKs on both apps.
Fasten your seatbelt; your reactive journey starts here!
Note: In May 2025, the Okta Integrator Free Plan replaced Okta Developer Edition Accounts, and the Okta CLI was deprecated.
We preserved this post for reference, but the instructions no longer work exactly as written. Replace the Okta CLI commands by manually configuring Okta following the instructions in our Developer Documentation.
Create Android RxJava and Reactive Java Apps
As mentioned, you will create both back-end and Android apps. The good news is that you won’t need to do it from scratch; cloning them from GitHub will suffice.
Clone the Backend Reactive Spring Boot App
The back-end app is based on the Build Reactive APIs with Spring WebFlux blog post. The app is a Java API that uses the Spring Boot framework and the WebFlux library for reactive streams, and it relies on a MongoDB database for storage.
You can find the finished app on GitHub. Run the following command to clone the project:
git clone https://github.com/oktadev/okta-spring-webflux-react-example.git reactive-spring-boot
cd reactive-spring-boot/reactive-web
Before you begin, you’ll need a free Okta developer account. Install the Okta CLI and run okta register to sign up for a new account. If you already have an account, run okta login.
Then, run okta apps create. Select the default app name, or change it as you see fit.
Choose Web and press Enter.
Select Other.
Then, change the Redirect URI to http://localhost:8080/login/oauth2/code/okta and use http://localhost:8080 for the Logout Redirect URI.
What does the Okta CLI do?
The Okta CLI will create an OIDC Web App in your Okta Org. It will add the redirect URIs you specified and grant access to the Everyone group. You will see output like the following when it’s finished:
Okta application configuration has been written to: /path/to/app/.okta.env
Run cat .okta.env (or type .okta.env on Windows) to see the issuer and credentials for your app.
export OKTA_OAUTH2_ISSUER="https://dev-133337.okta.com/oauth2/default"
export OKTA_OAUTH2_CLIENT_ID="0oab8eb55Kb9jdMIr5d6"
export OKTA_OAUTH2_CLIENT_SECRET="NEVER-SHOW-SECRETS"
Your Okta domain is the first part of your issuer, before /oauth2/default.
NOTE: You can also use the Okta Admin Console to create your app. See Create a Web App for more information.
Copy your Okta values from .okta.env into the reactive-spring-boot/reactive-web/src/main/resources/application.yml file.
You can also use the instructions in the repo’s getting started section.
| Please ignore the set-up of the React native app since it’s not needed for this example. But if you’re interested in it, feel free to set it up and see how it works! |
The next step is to remove the scope on the MongoDB dependency so it runs along with our web app. Do that by removing the string <scope>test</scope> from line 49 of the file reactive-spring-boot/reactive-web/pom.xml. This will make it so an embedded MongoDB server starts when you start your app.
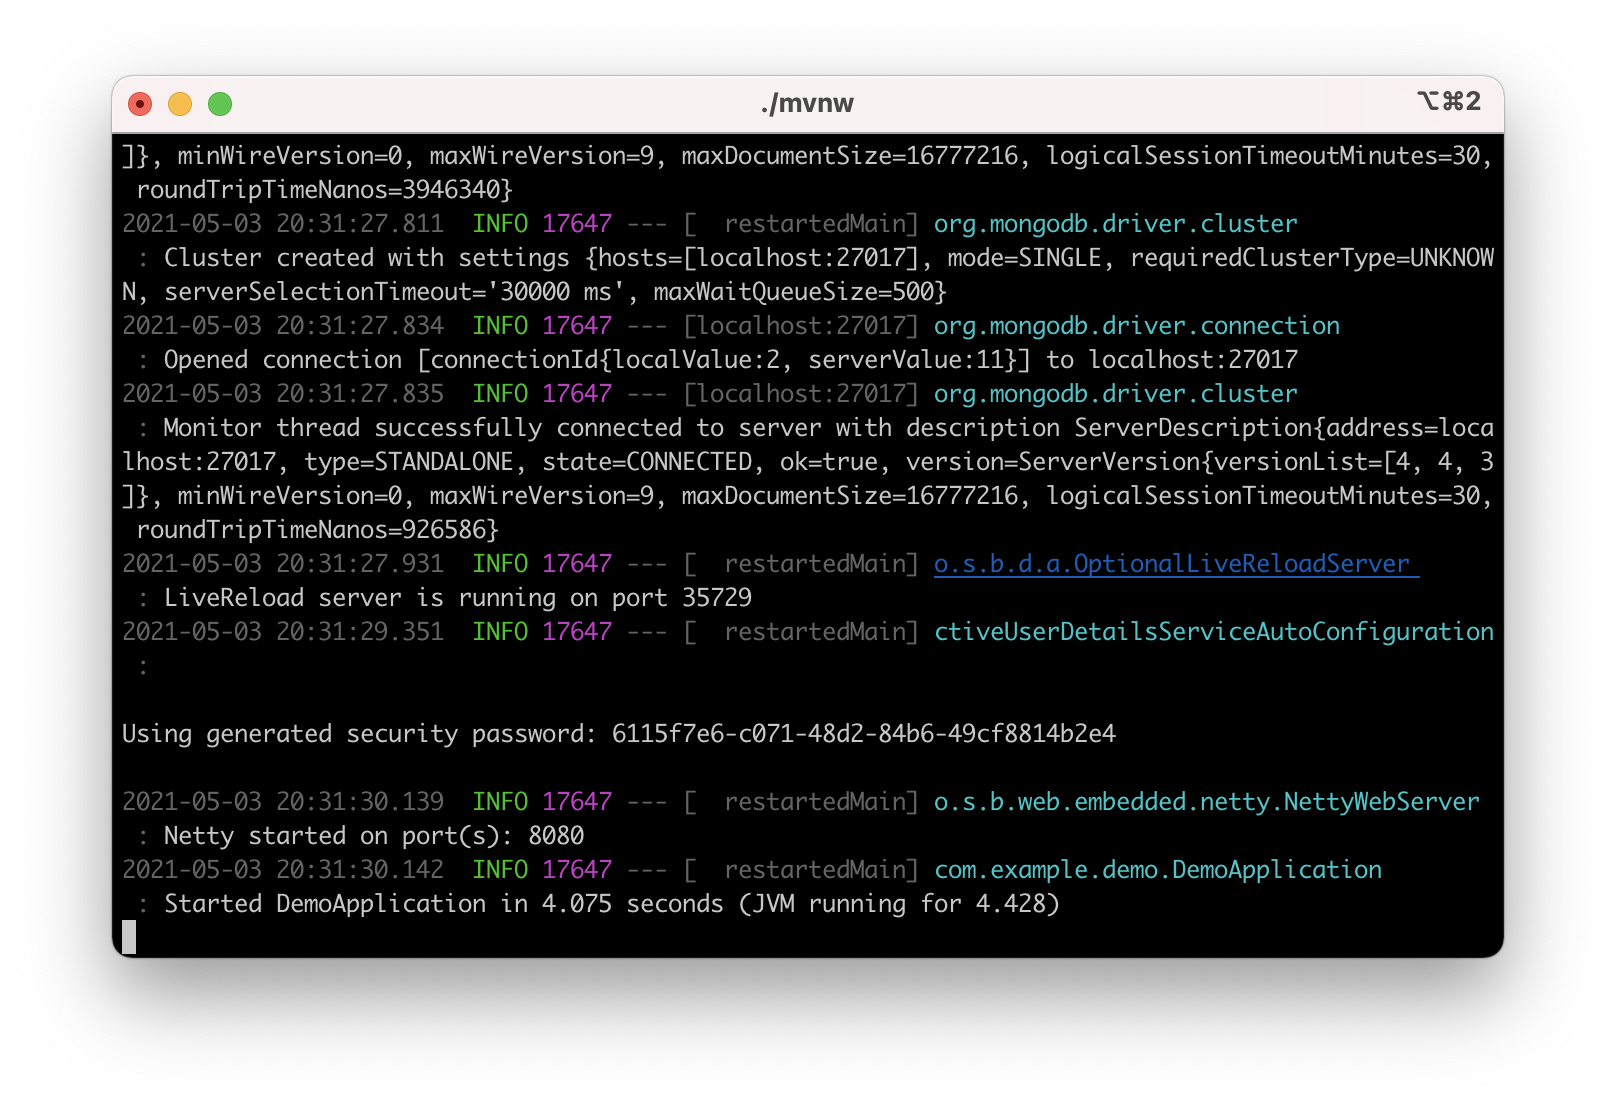
Now you can run the server by running the command:
./mvnwYou should see something like this in your terminal:
To test this, open a new terminal window and run the following command:
curl http://localhost:8080/profiles -vThis API call should fail because you need to be authenticated to access that resource, and it should look like this:
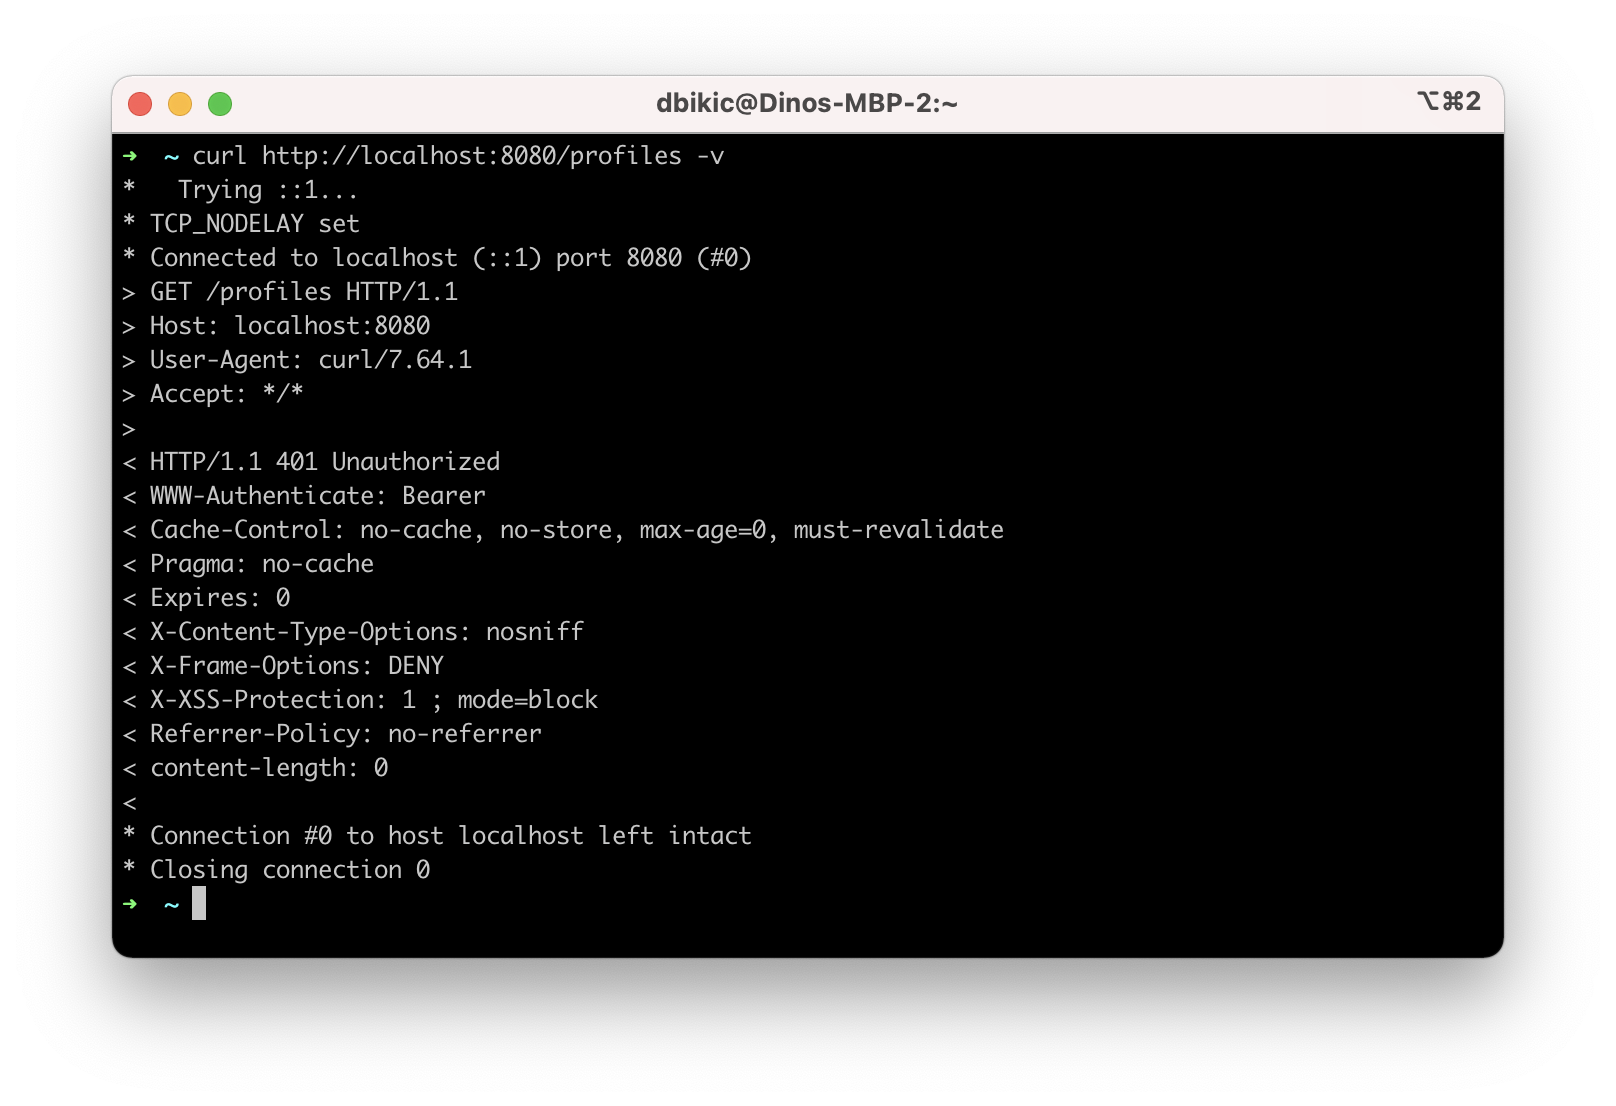
That’s all from the web app. The rest of this tutorial will focus on building a reactive Android app that will communicate with the web app. Leave the server running in the terminal and proceed to the next step.
Clone the Android App
The Android app you’ll use for this guide is based on the Android Login Made Easy with OIDC blog post. Please go ahead and clone the result of the blog post by running this command:
git clone https://github.com/oktadeveloper/okta-android-login-example.gitBefore you begin, you’ll need a free Okta developer account. Install the Okta CLI and run okta register to sign up for a new account. If you already have an account, run okta login.
Then, run okta apps create. Select the default app name, or change it as you see fit.
Choose Native and press Enter.
Use com.okta.dev-133337:/callback for the Redirect URI and set the Logout Redirect URI to com.okta.dev-133337:/
(where dev-133337.okta.com is your Okta domain name). Your domain name is reversed to provide a unique scheme to open your app on a device.
What does the Okta CLI do?
The Okta CLI will create an OIDC Native App in your Okta Org. It will add the redirect URIs you specified and grant access to the Everyone group. You will see output like the following when it’s finished:
Okta application configuration:
Issuer:    https://dev-133337.okta.com/oauth2/default
Client ID: 0oab8eb55Kb9jdMIr5d6
NOTE: You can also use the Okta Admin Console to create your app. See Create a Native App for more information.
Once you have the credentials for your new app, don’t forget to update both your build.gradle file and the OktaManager’s class with the credentials from your newly created Okta mobile app.
Once you have the credentials for your new app, update app/build.gradle to use your reversed Okta domain name.
manifestPlaceholders = [
    "appAuthRedirectScheme": "com.okta.dev-133337"
]
Then, update src/main/java/dev/dbikic/oktaloginexample/OktaManager.kt to have your client ID, issuer, and other Okta settings.
val config = OIDCConfig.Builder()
    .clientId("{yourClientID}")
    .discoveryUri("https://{yourOktaDomain}/oauth2/default")
    .redirectUri("{yourReversedOktaDomain}:/callback")
    .endSessionRedirectUri("{yourReversedOktaDomain}:/")
And voilà, the setup is done! Now you just have to start the server by running the following command in the root folder of the Spring Boot app:
./mvnwBuild a Reactive Android App
Now it’s time to modify the existing Android app, set up the networking, and add the RxJava library. You’re going to use the Retrofit library for networking, which is the de-facto standard for Android. The plan is that you connect to your Spring Boot web app API and reactively do a few API calls. Let’s get started!
Add RxJava and Retrofit Dependencies
To add the needed library dependencies, paste the following lines into the dependencies block of the app/build.gradle file:
dependencies {
    ...
    // RxJava
    implementation 'io.reactivex.rxjava3:rxjava:3.0.0' (1)
    implementation 'io.reactivex.rxjava3:rxandroid:3.0.0' (2)

    // Retrofit
    implementation 'com.squareup.retrofit2:retrofit:2.9.0' (3)
    implementation 'com.squareup.retrofit2:converter-gson:2.9.0' (4)
    implementation 'com.squareup.retrofit2:adapter-rxjava3:2.9.0' (5)
}| 1 | The main RxJava library |
| 2 | The RxJava bindings for Android, needed for thread management |
| 3 | The main Retrofit dependency that includes the HTTP client you’ll use |
| 4 | The converter for Gson, used to deserialize data from the API automatically |
| 5 | The RxJava version of CallAdapter.Factory from Retrofit, used to make the API calls reactive functions |
Please don’t paste the … into Android Studio; it’s just an indicator that some other code exists either above or below the code to paste.
|
Set Up Networking
This part consists of a few parts, the most important being the Retrofit client. Once you instantiate it, you’ll use it for making all the API calls. Create a new package called network (just for the sake of code organization), and create the RetrofitClientInstance Kotlin file:
package dev.dbikic.oktaloginexample.network

import okhttp3.Interceptor
import okhttp3.OkHttpClient
import retrofit2.Retrofit
import retrofit2.adapter.rxjava3.RxJava3CallAdapterFactory
import retrofit2.converter.gson.GsonConverterFactory

object RetrofitClientInstance {

    lateinit var retrofit: Retrofit

    private const val BASE_URL = "http://10.0.2.2:8080/" (1)

    private var token = ""

    val retrofitInstance: Retrofit
        get() {
            if (!this::retrofit.isInitialized) {
                val headersInterceptor = Interceptor { chain ->
                    val requestBuilder = chain.request().newBuilder()
                    requestBuilder.header("Authorization", "Bearer $token") (2)
                    chain.proceed(requestBuilder.build())
                }
                val okHttpClient = OkHttpClient() (3)
                    .newBuilder()
                    .followRedirects(true)
                    .addInterceptor(headersInterceptor) (4)
                    .build()
                retrofit = Retrofit.Builder() (5)
                    .baseUrl(BASE_URL) (6)
                    .addConverterFactory(GsonConverterFactory.create()) (7)
                    .addCallAdapterFactory(RxJava3CallAdapterFactory.create()) (8)
                    .client(okHttpClient) (9)
                    .build()
            }
            return retrofit
        }

    fun setToken(token: String) { (10)
        RetrofitClientInstance.token = token
    }
}| 1 | http://10.0.2.2:8080/ is the URL representing your computer’s localhost address. More info about it can be found here. |
| 2 | Adds the JWT token as a header of all the API calls you make. Without it, our server would fail all the requests to it with 401 Unauthorized. |
| 3 | OkHttp is an HTTP client that comes bundled with Retrofit. |
| 4 | Add the headersInterceptor to okHttpClient. The interceptor code block will execute on every API call you make, allowing us to always send our JWT token. |
| 5 | Creates an instance of Retrofit. |
| 6 | Defines the base URL for convenience purposes. Now when you define the endpoints, you can omit the base URL part. |
| 7 | Creates the converter factory for Gson, which allows automatic deserialization of values received from the API. |
| 8 | This line adds RxJava support to Retrofit, allowing you to define the API calls as reactive functions. |
| 9 | Sets the okHttpClient as the HTTP client. |
| 10 | Setter to the JWT token field. Once you log in to the app, you’ll receive the JWT token from the Okta OIDC SDK and use it for every API call. |
In order for you to connect to the Spring Boot app, which is running at the localhost of your machine, from the Android emulator, you need to add the following line in the application tag of your app/src/main/AndroidManifest.xml file:
<?xml version="1.0" encoding="utf-8"?>
<manifest xmlns:android="http://schemas.android.com/apk/res/android"
  package="dev.dbikic.oktaloginexample">
  ...
  <application
    ...
    android:usesCleartextTraffic="true">
    ...
  </application>
</manifest>
Let’s talk a bit about the API you’ll connect to. The idea of connecting the API from the Spring Boot app is to provide you with endpoints to create, read, update and delete user profiles. A user profile is a relatively simple model, consisting only of a unique id and an email. Create a new package model (just for organizational purposes, the same as the network package), and create two Kotlin files, Profile:
package dev.dbikic.oktaloginexample.model

import com.google.gson.annotations.SerializedName

data class Profile(
    @SerializedName("id") (1)
    val id: String,
    @SerializedName("email")
    val email: String
)| 1 | The SerializedName annotation from Gson allows you to define the name of a field when it’s serialized/deserialized into/from JSON. |
And ProfileRequest:
package dev.dbikic.oktaloginexample.model

import com.google.gson.annotations.SerializedName

data class ProfileRequest(
    @SerializedName("email")
    val email: String
)
The next step is defining the API of the Spring Boot app. It’s pretty simple to do it with the help of Retrofit; you define endpoints as a function of an interface and configure them using annotations. Create the ProfileService interface in your network package:
package dev.dbikic.oktaloginexample.network

import dev.dbikic.oktaloginexample.model.Profile
import dev.dbikic.oktaloginexample.model.ProfileRequest
import io.reactivex.rxjava3.core.Completable
import io.reactivex.rxjava3.core.Observable
import retrofit2.http.*

interface ProfileService {

    @GET("/profiles") (1)
    fun getProfiles(): Observable<List<Profile>> (2)

    @POST("/profiles") (3)
    fun createProfile(
        @Body profile: ProfileRequest (4)
    ): Completable (5)

    @DELETE("/profiles/{profile_id}") (6)
    fun deleteProfile(
        @Path("profile_id") profileId: String (7)
    ): Completable

    @PUT("/profiles/{profile_id}") (8)
    fun updateProfile(
        @Path("profile_id") profileId: String,
        @Body profile: ProfileRequest
    ): Observable<List<Profile>>
}| 1 | GET annotation defines that this is a GET HTTP request. |
| 2 | The return type is an Observable of a list of profiles. Please ignore what Observable is for now; the next section will explain it. |
| 3 | POST annotation defines that this is a POST HTTP request. |
| 4 | Body annotation defines the body of the POST request. |
| 5 | The return type is a Completable. Please ignore what Completable is for now; it will be explained in the next section. |
| 6 | DELETE annotation defines that this is a DELETE HTTP request. |
| 7 | Path annotation defines the path to a specific profile via its profileId. |
| 8 | PUT annotation defines that this is a PUT HTTP request. |
That’s it! You’re now ready to start using reactive networking in your app!
Use RxJava to Access the Profile API
Now that the API is defined, you are ready to consume its endpoints.
The reason why RxJava is so useful and popular on Android is that it brings the concepts of the Observer pattern, the Iterator pattern, and functional programming to the platform. But, it has a steep learning curve, and it’s a bit harder for people used to writing procedural code to understand at first.
RxJava introduces the concept of data streams, where different sources of data (like a network API or the local database) are evaluated as data streams that can be observed, combined, or modified, all depending on the use case. This manipulation of data streams is performed by different operators that you get out of the box, which hides the complexity of the logic they do in the background. Once you learn how to use the operators (and how to explore the library to find more of them), complex manipulation of different data sources, which would be super hard and complex to implement on Android using the platform provided async tasks, can be as simple as a few lines of code.
Operators won’t be used or explained in-depth in this post, but if you want to learn more about them, please check the official docs.
As part of this tutorial, you’ll learn about data streams and how to observe them. There are two basic parts of every data stream: (1) the data source and (2) the data consumer. In RxJava, the basic data source is called Observable. All that an Observable does is emit data in some time interval. If you want to listen to the emitted items, you need to create an Observer and subscribe to the Observable updates.
That’s exactly what you’ll do in this example. You’ve already defined that the Spring Boot API is returning an Observable<List<Profile>> when you fetch the profiles from the API. When you call the getProfiles() function, an Observable<List<Profile>> object type is created and returned.
You will subscribe for the updates, but there won’t be any updates the moment you do the API call. Sometime in the future (or maybe never, as Retrofit has a mechanism to fail an API call if a specified timeout has passed), the API will respond. That response can either be a success or a failure - it doesn’t matter. What matters is that a callback will notify the subscriber, and you can handle either response gracefully.
Let’s see how you’ll add this functionality to the codebase!
Fetch Profiles
As described above, the purpose of our API is to provide access to profiles, but only for authenticated users. In the Android app, the user login is handled by the Okta OIDC SDK. Once the user is authorized, he/she is navigated to the HomeActivity. The sign-in process will generate a new JWT token for the user, and he/she can use it to access the API.
First, add a method to expose the JWT token to the OktaManager class:
...
fun getJwtToken(): String {
    return sessionClient.tokens.accessToken.orEmpty()
}
Modify the HomeActivity class (in app/src/main/java/dev/dbikic/oktaloginexample/ui):
import dev.dbikic.oktaloginexample.network.ProfileService
import dev.dbikic.oktaloginexample.network.RetrofitClientInstance
import dev.dbikic.oktaloginexample.network.RetrofitClientInstance.retrofitInstance
import io.reactivex.rxjava3.disposables.CompositeDisposable
...
class HomeActivity : AppCompatActivity() {

    ...
    private val profileService: ProfileService = retrofitInstance.create( (1)
        ProfileService::class.java
    )
    private var compositeDisposable = CompositeDisposable() (2)

    ...

    override fun onStop() {
        compositeDisposable.clear() (3)
        super.onStop()
    }

    ...

    private fun getUserProfileCallback(): RequestCallback<UserInfo, AuthorizationException> {
        return object : RequestCallback<UserInfo, AuthorizationException> {
            override fun onSuccess(result: UserInfo) {
                binding.userLabel.text = "Hello, ${result["preferred_username"]}!"
                RetrofitClientInstance.setToken(oktaManager.getJwtToken()) (4)
                fetchProfiles()
            }

            override fun onError(msg: String?, exception: AuthorizationException?) {
                Log.d("HomeActivity", "Error: $msg")
            }
        }
    }

    fun fetchProfiles() { (5)

    }
}| 1 | Create an instance of the ProfileService. Interacting with it will allow you to access the API. |
| 2 | CompositeDisposable is a class that provides you a simple way of canceling your reactive data streams. |
| 3 | You want to stop listening for the data stream updates once this activity is destroyed. |
| 4 | Here, you’re setting the JWT token from the logged-in user in your RetrofitClientInstance, with the help of the Okta OIDC SDK and the OktaManager class. |
| 5 | Once the user is logged in, you want to fetch all the profiles from the API. You’ll implement this method in the next step. |
Fetching profiles is done by creating a new Observer, which will observe all the changes from the getProfiles() data stream. Add the fetchProfiles() method to the end of HomeActivity:
...
private fun fetchProfiles() {
    compositeDisposable.add( (1)
        profileService.getProfiles() (2)
            .subscribeOn(Schedulers.io()) (3)
            .observeOn(AndroidSchedulers.mainThread()) (4)
            .subscribe( (5)
                { profiles -> (6)
                    displayProfiles(profiles) (7)
                },
                { throwable -> (8)
                    Log.e("HomeActivity", throwable.message ?: "onError")
                }
            )
    )
}| 1 | You are adding the result of the subscription, which is a class that implements the interface Disposable to our list of subscriptions, so you can cancel it once the current activity gets destroyed. |
| 2 | Fetch the profiles from the API; this returns Observable<List<Profile>>. |
| 3 | This defines that the actual subscription is done on the I/O thread, which is the one used for networking. |
| 4 | Observe the result of the subscription on the main thread. This is also called the UI thread because that’s the only thread that can modify the UI. More info about this can be found here. |
| 5 | The Observer object is created here. It consists of two consumers, which are just callbacks, for the onNext and onError events. |
| 6 | The onNext consumers. Here you’ll receive the list of profiles in the UI thread, ready to be displayed to the user. |
| 7 | Update the UI with the received profiles. This will be implemented in the next section. |
| 8 | The onError consumer. This will be invoked when you receive an error from the API, or you mess things up with the deserialization. |
You will have to add imports manually by clicking the red text and pressing the key combination Option + Enter on MacOS or Alt + Enter on Windows. This step may be required when pasting the code. You can also enable the "Add unambiguous imports on the fly" option (Preferences | Editor | Auto Import) to add imports automatically in Android Studio.
|
Create Profiles
Let’s move on to creating a profile. The idea here is to create a new profile with a button click. For simplicity, you won’t implement email validation; you’ll just send the current timestamp as the profile’s email. Add the createProfile() method to the bottom of HomeActivity:
...
private fun createProfile() {
    val profile = ProfileRequest(email = System.currentTimeMillis().toString()) (1)
    compositeDisposable.add(
        profileService.createProfile(profile) (2)
            .andThen(profileService.getProfiles()) (3)
            .subscribeOn(Schedulers.io())
            .observeOn(AndroidSchedulers.mainThread())
            .subscribe(
                { profiles ->
                    displayProfiles(profiles) (4)
                },
                { throwable ->
                    Log.e("HomeActivity", throwable.message ?: "onError")
                }
            )
    )
}| 1 | Create a new profile. |
| 2 | Send the new profile to the API. This method doesn’t return an Observable, but it returns a Completable. The difference between the two is explained below this code snippet. |
| 3 | Once the profile is created on the API, request all the profiles from the API. |
| 4 | Display the new list of profiles, including the one you just created. You will implement this method in the next section of this blog post. |
In the example above, you used Completable. It’s a type of observable that has only two consumers, onComplete and onError, as opposed to Observable which has three consumers (onNext, onError and onComplete).
You can look at Completable as a data stream for which you don’t care about the possible events that can be emitted. You don’t even care if multiple events are being emitted in a time interval. You only care if at least one item has been emitted or if the data stream has failed. This is different from Observable; in Observable, you do care about all the events that have been emitted in a time interval, hence the naming of the method in which you receive the result, onNext. This indicates that the transmission of the data isn’t over, but rather that a new item has been emitted.
With Completable, you simply want to know when an operation is done. Here is a simple example. You created a profile and you submitted it to the API. You already know what that profile is, and you just want to know when it’s created on the API, so you can fetch the most recent profiles list and display it on the UI.
Delete a Profile
Code for deleting is practically the same as the one for creating the profile. The only difference is the API call that is being made. The rest of the logic is the same, once the deleteProfile() completes, fetch the profiles and display them on the UI. Add the deleteProfiles() method:
...
private fun deleteProfile(profile: Profile) {
    compositeDisposable.add(
        profileService.deleteProfile(profile.id) (1)
            .andThen(profileService.getProfiles())
            .subscribeOn(Schedulers.io())
            .observeOn(AndroidSchedulers.mainThread())
            .subscribe(
                { profiles ->
                    displayProfiles(profiles)
                },
                { throwable ->
                    Log.e("HomeActivity", throwable.message ?: "onError")
                }
            )
    )
}| 1 | Send the id of the profile you want to delete to the method that does the delete API call. |
Update a Profile
Updating profiles is similar to creating a profile; you’ll create a new profile and do the update API call with the id of the profile you want to update. Add the updateProfile() method like this:
...
private fun updateProfile(oldProfile: Profile) {
    val profile = ProfileRequest(email = System.currentTimeMillis().toString())
    compositeDisposable.add(
        profileService.updateProfile(oldProfile.id, profile) (1)
            .subscribeOn(Schedulers.io())
            .observeOn(AndroidSchedulers.mainThread())
            .subscribe(
                { newProfiles ->
                    displayUpdatedProfile(oldProfile, newProfiles.first()) (2)
                },
                { throwable ->
                    Log.e("HomeActivity", throwable.message ?: "onError")
                }
            )
    )
}| 1 | Sends the newly created profile to the method that updates the profile on the API, along with the old profile’s id. |
| 2 | Don’t worry about this method, you’ll implement it in the next section. |
And that’s it! You’ve implemented all the logic and now it’s time to add a simple UI.
Set Up the Android UI
In order for you to display the list of profiles, the UI of the HomeActivity will be changed a bit. Please replace the contents of the activity_home file (found in app/src/main/res/layout) with the following code:
<?xml version="1.0" encoding="utf-8"?>
<LinearLayout xmlns:android="http://schemas.android.com/apk/res/android"
  xmlns:app="http://schemas.android.com/apk/res-auto"
  xmlns:tools="http://schemas.android.com/tools"
  android:layout_width="match_parent"
  android:layout_height="match_parent"
  android:orientation="vertical"
  tools:context=".HomeActivity">

  <TextView
    android:id="@+id/userLabel"
    android:layout_width="match_parent"
    android:layout_height="54dp"
    android:layout_weight="0"
    android:layout_marginTop="16dp"
    android:gravity="center"
    android:textSize="22sp"
    tools:ignore="HardcodedText"
    tools:text="Hello, user!" />

  <androidx.recyclerview.widget.RecyclerView
    android:id="@+id/profilesRecyclerView" (1)
    android:layout_width="match_parent"
    android:layout_height="0dp"
    android:layout_weight="1"
    app:layoutManager="androidx.recyclerview.widget.LinearLayoutManager"
    tools:itemCount="4"
    tools:listitem="@layout/item_profile" />

  <LinearLayout
    android:layout_width="match_parent"
    android:layout_height="wrap_content"
    android:paddingBottom="16dp"
    android:paddingTop="16dp"
    android:orientation="horizontal">

    <com.google.android.material.button.MaterialButton
      android:id="@+id/createProfileButton" (2)
      android:layout_width="0dp"
      android:layout_height="wrap_content"
      android:layout_weight="1"
      android:layout_marginStart="32dp"
      android:layout_marginEnd="16dp"
      android:text="Create profile"
      tools:ignore="HardcodedText" />

    <com.google.android.material.button.MaterialButton
      android:id="@+id/signOutButton" (3)
      android:layout_width="0dp"
      android:layout_height="wrap_content"
      android:layout_weight="1"
      android:layout_marginStart="16dp"
      android:layout_marginEnd="32dp"
      android:text="Log out"
      tools:ignore="HardcodedText" />

  </LinearLayout>
</LinearLayout>| 1 | This is the recycler view, which will display the profiles. |
| 2 | This is the create profile button. |
| 3 | This is the sign-out button that ends the user’s session. |
Next, create a new layout file that represents a single profile in the list. Call it item_profile.xml:
<?xml version="1.0" encoding="utf-8"?>
<LinearLayout xmlns:android="http://schemas.android.com/apk/res/android"
  xmlns:tools="http://schemas.android.com/tools"
  android:layout_width="match_parent"
  android:layout_height="72dp"
  android:orientation="horizontal"
  tools:context=".HomeActivity">

  <TextView
    android:id="@+id/profileNameLabel"
    android:layout_width="0dp"
    android:layout_height="wrap_content"
    android:layout_weight="1"
    android:layout_marginStart="16dp"
    android:layout_gravity="center"
    android:textSize="18sp"
    tools:ignore="HardcodedText"
    tools:text="Test username" />

  <com.google.android.material.button.MaterialButton
    android:id="@+id/updateProfileButton" (1)
    android:layout_width="wrap_content"
    android:layout_height="wrap_content"
    android:layout_marginEnd="8dp"
    android:layout_gravity="center"
    android:text="Update"
    tools:ignore="HardcodedText" />

  <com.google.android.material.button.MaterialButton
    android:id="@+id/deleteProfileButton" (2)
    android:layout_width="wrap_content"
    android:layout_height="wrap_content"
    android:layout_marginEnd="8dp"
    android:layout_gravity="center"
    android:text="Delete"
    tools:ignore="HardcodedText" />
</LinearLayout>| 1 | Button that updates the email of the profile. |
| 2 | Button that deletes the profile. |
Now you need to create an adapter that will display the list of profiles on the UI. Call it ProfilesAdapter:
package dev.dbikic.oktaloginexample

import android.view.LayoutInflater
import android.view.View
import android.view.ViewGroup
import android.widget.TextView
import androidx.recyclerview.widget.RecyclerView
import dev.dbikic.oktaloginexample.model.Profile

class ProfilesAdapter(
    private val onDeleteClickListener: (Profile) -> Unit,
    private val onUpdateClickListener: (Profile) -> Unit
) : RecyclerView.Adapter<ProfilesAdapter.ViewHolder>() {

    val items = mutableListOf<Profile>()

    class ViewHolder(view: View) : RecyclerView.ViewHolder(view) {
        val name: TextView = view.findViewById(R.id.profileNameLabel)
        val updateButton: TextView = view.findViewById(R.id.updateProfileButton)
        val deleteButton: TextView = view.findViewById(R.id.deleteProfileButton)
    }

    override fun onCreateViewHolder(viewGroup: ViewGroup, viewType: Int): ViewHolder {
        val view = LayoutInflater.from(viewGroup.context).inflate(R.layout.item_profile, viewGroup, false)
        return ViewHolder(view)
    }

    override fun onBindViewHolder(viewHolder: ViewHolder, position: Int) {
        with(viewHolder) {
            name.text = items[position].email
            deleteButton.setOnClickListener {
                onDeleteClickListener.invoke(items[position])
            }
            updateButton.setOnClickListener {
                onUpdateClickListener.invoke(items[position])
            }
        }
    }

    override fun getItemCount() = items.size
}
Now it’s time to connect everything together in the HomeActivity. Add the following code snippets:
...
class HomeActivity : AppCompatActivity() {

    private var adapter = ProfilesAdapter(
        onDeleteClickListener = { profile -> deleteProfile(profile) },
        onUpdateClickListener = { profile -> updateProfile(profile) }
    )

    ...

    override fun onCreate(savedInstanceState: Bundle?) {
        ...
        binding.createProfileButton.setOnClickListener { createProfile() }
        binding.profilesRecyclerView.adapter = adapter
    }

    ...

    private fun displayProfiles(profiles: List<Profile>) {
        adapter.items.clear()
        adapter.items.addAll(profiles)
        adapter.notifyDataSetChanged()
    }

    private fun displayUpdatedProfile(oldProfile: Profile, newProfile: Profile) {
        val index = adapter.items.indexOfFirst { profileToReplace ->
            profileToReplace.email == oldProfile.email
        }
        adapter.items[index] = newProfile
        adapter.notifyItemChanged(index)
    }
}
And that’s it! The result is a reactive Android app that connects to your local API. Now, run the app, click on the sign-in button, enter the credential of your user, and log in.
| If you have issues launching your app on macOS Big Sur, see this solution on Stack Overflow. |
Once you’re logged in, you’ll be able to add, update and delete profiles, as can be seen in the animated GIF below:
Learn More About RxJava and Android
RxJava is one of the most popular libraries on Android, and there is good reason for it. The concepts it introduces go way beyond Android development, but its application fits perfectly for it, and mobile development in general. If you look at it that way, all the work that a phone does is a data stream. From communication with network APIs and caching data in the local database, to handling user inputs and processing huge amounts of data, almost everything can be looked at as a data stream.
The tricky part is how to combine and manipulate those data streams, in a way that is clean, easy to maintain, and understand. RxJava gives us all that and more. It’s proven as a robust, scalable, and production-ready framework. It has its disadvantages, the most obvious being its steep learning curve and its size and complexity, which isn’t always needed for many apps. But once you grasp its concepts and set it up properly in your codebase, it will become a quite powerful tool for writing complex logic.
The complete source code of this tutorial can be found on GitHub.
If you want to learn more about RxJava, here are few great resources:
We also have some Android-related posts on this blog:
If you enjoyed this blog post and want to see more like it, follow @oktadev on Twitter, subscribe to our YouTube channel, or follow us on LinkedIn.
Okta Developer Blog Comment Policy
We welcome relevant and respectful comments. Off-topic comments may be removed.