Build an Android Application with Authentication

With mobile apps becoming ever-present in users' lives, following best security practices has become essential in protecting your users and your apps. Implementing security alone and from the ground up can be costly for your development team, create a less-than-ideal user experience, and be susceptible to design/implementation errors. The easiest path to strong security, and a positive user experience, is to turn to the experts.
The Okta OIDC SDK can help with this in many ways: - Our security experts take the development effort of creating a secure authentication method off your plate - OAuth 2.0 and OpenID Connect allows your users to easily authenticate on your app with social login, using industry-standard secure protocols
This post will show you a simple example of how you can use Okta OIDC SDK to create a (Kotlin) Android app with authentication.
Note: In May 2025, the Okta Integrator Free Plan replaced Okta Developer Edition Accounts, and the Okta CLI was deprecated.
We preserved this post for reference, but the instructions no longer work exactly as written. Replace the Okta CLI commands by manually configuring Okta following the instructions in our Developer Documentation.
- (TLDR) Download the Finished App with Android Authentication
- Create Your First Android App
- Get Your Okta OIDC Configuration Settings
- Add a Sign-in Button to Your Android App
- Give Your Android App Permission to Use the Internet
- Add Okta OIDC SDK to Your Android App
- Configure Okta OIDC in Your Android App
- Log in Using Okta OIDC
- (Optional) Add Social login
- (Optional) Biometric Login
- Learn More About Android Auth and OIDC
(TLDR) Download the Finished App with Android Authentication
If you want to follow along using a completed version of the app, clone this repository from GitHub:
git clone https://github.com/oktadeveloper/okta-oidc-android-example.git
cd okta-oidc-android-example
Create Your First Android App
First, you’ll need to download and install Android Studio. Next, launch the app and navigate to File → New… → New Project…. Then, create an "Empty Activity" for "Phone and Tablet". You should now see a screen similar to this:
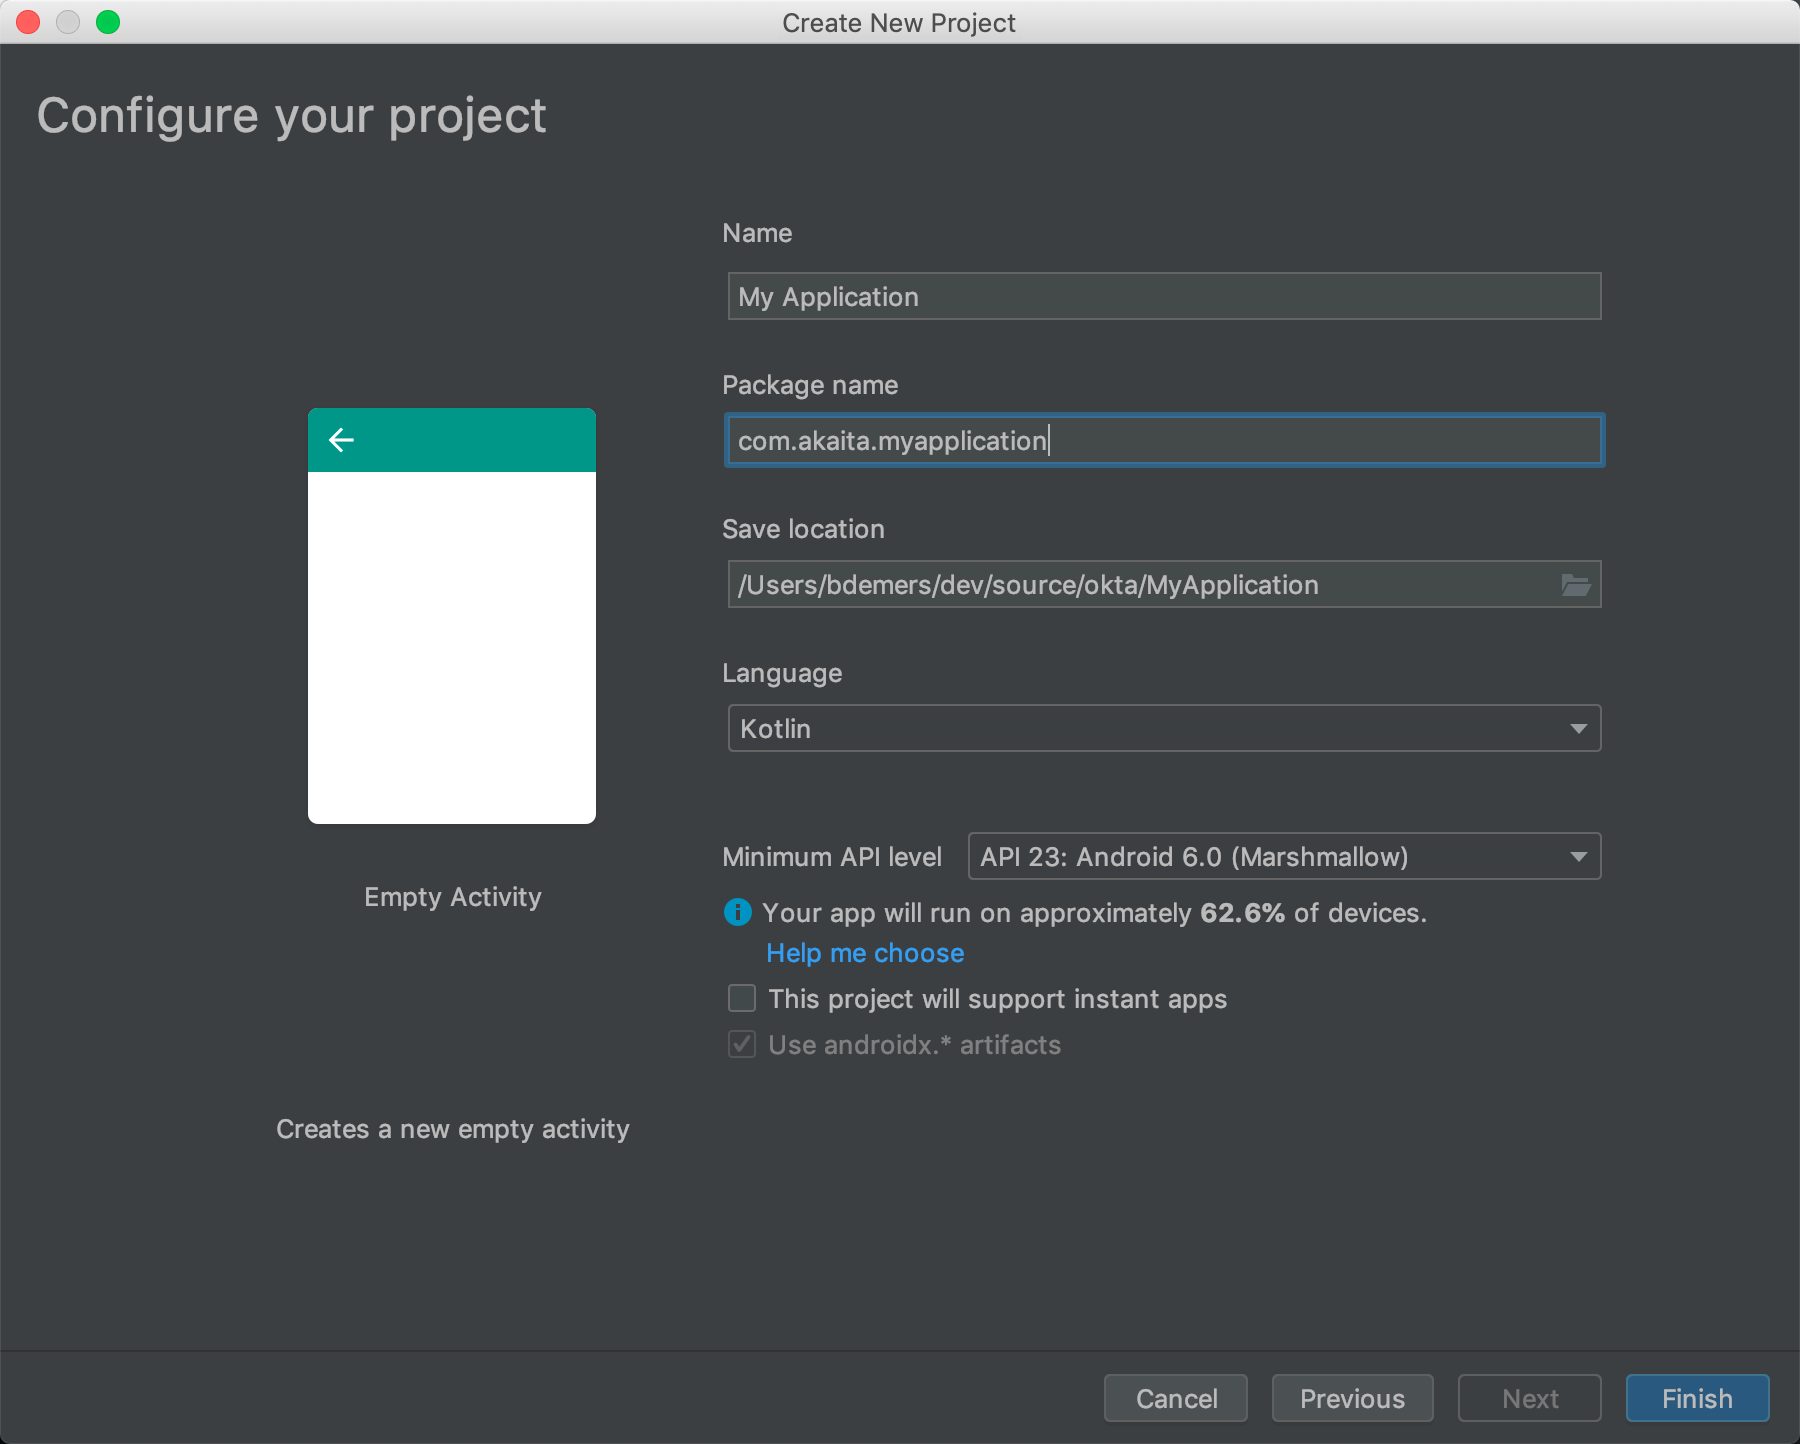
Choose a "Package name" related to a domain you own (I own akaita.com, therefore I used com.akaita.myapplication in the example), a Save location you can remember, "Kotlin", and a "Minimum API level" of 23. Finally, click Finish.
Get Your Okta OIDC Configuration Settings
Before you begin, you’ll need a free Okta developer account. Install the Okta CLI and run okta register to sign up for a new account. If you already have an account, run okta login.
Then, run okta apps create. Select the default app name, or change it as you see fit.
Choose Native and press Enter.
Use com.okta.dev-133337:/callback for the Redirect URI and set the Logout Redirect URI to com.okta.dev-133337:/logout
(where dev-133337.okta.com is your Okta domain name). Your domain name is reversed to provide a unique scheme to open your app on a device.
What does the Okta CLI do?
The Okta CLI will create an OIDC Native App in your Okta Org. It will add the redirect URIs you specified and grant access to the Everyone group. You will see output like the following when it’s finished:
Okta application configuration:
Issuer:    https://dev-133337.okta.com/oauth2/default
Client ID: 0oab8eb55Kb9jdMIr5d6
NOTE: You can also use the Okta Admin Console to create your app. See Create a Native App for more information.
Add a Sign-in Button to Your Android App
Now that you’ve finished up in Okta’s Admin Panel, head back to Android Studio and add a button to your res/layout/activity_main.xml. Replace the contents of this file with the XML below.
<?xml version="1.0" encoding="utf-8"?>
<ScrollView xmlns:android="http://schemas.android.com/apk/res/android"
    xmlns:tools="http://schemas.android.com/tools"
    android:layout_width="match_parent"
    android:layout_height="match_parent"
    android:fitsSystemWindows="true"
    tools:context=".MainActivity">

    <LinearLayout
        android:layout_width="match_parent"
        android:layout_height="wrap_content"
        android:gravity="center"
        android:orientation="vertical">

    <Button
        android:id="@+id/signIn"
        android:layout_width="match_parent"
        android:layout_height="wrap_content"
        android:text="Sign in" />

    </LinearLayout>

</ScrollView>
This button will be used to authenticate using OAuth 2.0 + OpenID Connect, thanks to the Okta OIDC SDK.
Give Your Android App Permission to Use the Internet
In your app/src/main/AndroidManifest.xml add the following XML just before the opening <application> tag:
<uses-permission android:name="android.permission.INTERNET" />Add Okta OIDC SDK to Your Android App
Modify your app/build.gradle to add the Kotlin Android Plugins to make it easy to bind XML views to your code.
You’ll also need to add a manifestPlaceholder for appAuthRedirectScheme in app/build.gradle. Make sure it is consistent with your Redirect URIs. For instance, my redirect URIs look like com.okta.dev-123456:/callback, therefore my appAuthRedirectScheme is com.okta.dev-123456
Then, add Okta OIDC for Android.
plugins {
    id 'com.android.application'
    id 'kotlin-android'
    id 'kotlin-android-extensions' (1)
}

android {
    compileSdkVersion 29
    buildToolsVersion "30.0.2"

    defaultConfig {
        applicationId "com.akaita.myapplication"  (2)
        minSdkVersion 23
        targetSdkVersion 29
        versionCode 1
        versionName "1.0"

        testInstrumentationRunner "androidx.test.runner.AndroidJUnitRunner"

        manifestPlaceholders = [
            "appAuthRedirectScheme": "com.okta.dev-123456" (3)
        ]
    }

    buildTypes {
        release {
            minifyEnabled false
            proguardFiles getDefaultProguardFile('proguard-android-optimize.txt'), 'proguard-rules.pro'
        }
    }
    compileOptions {
        sourceCompatibility JavaVersion.VERSION_1_8
        targetCompatibility JavaVersion.VERSION_1_8
    }
    kotlinOptions { (4)
        jvmTarget = '1.8'
    }
}

dependencies {
    implementation "org.jetbrains.kotlin:kotlin-stdlib:$kotlin_version"
    implementation 'androidx.core:core-ktx:1.3.2'
    implementation 'androidx.appcompat:appcompat:1.2.0'
    implementation 'com.google.android.material:material:1.2.1'
    implementation 'androidx.constraintlayout:constraintlayout:2.0.4'
    testImplementation 'junit:junit:4.+'
    androidTestImplementation 'androidx.test.ext:junit:1.1.2'
    androidTestImplementation 'androidx.test.espresso:espresso-core:3.3.0'

    implementation 'com.okta.android:oidc-androidx:1.0.17' (5)

    // Dependency required for Biometric-Authentication (which we will detail how to implement later on in this same article)
    implementation 'androidx.biometric:biometric:1.0.1'
}| 1 | Add the Kotlin Android Extension plugin |
| 2 | Keep you applicationId here. |
| 3 | The redirect URI for the application you created in your Okta Developer Console. |
| 4 | Okta OIDC libraries require Java 1.8 compatibility. |
| 5 | Add the dependency required for the Okta OIDC library. |
Configure Okta OIDC in Your Android App
In your MainActivity class, add a couple of class properties and a couple of new methods, calling them from onCreate():
package com.akaita.myapplication

import android.os.Bundle
import android.util.Log
import android.widget.Toast
import androidx.appcompat.app.AppCompatActivity
import com.okta.oidc.*
import com.okta.oidc.clients.sessions.SessionClient
import com.okta.oidc.clients.web.WebAuthClient
import com.okta.oidc.storage.security.DefaultEncryptionManager
import com.okta.oidc.util.AuthorizationException
import kotlinx.android.synthetic.main.activity_main.*

class MainActivity : AppCompatActivity() {
    /**
     * Authorization client using chrome custom tab as a user agent.
     */
    private lateinit var webAuth: WebAuthClient (1)

    /**
     * The authorized client to interact with Okta's endpoints.
     */
    private lateinit var sessionClient: SessionClient (2)

    override fun onCreate(savedInstanceState: Bundle?) {
        super.onCreate(savedInstanceState)
        setContentView(R.layout.activity_main)

        setupWebAuth()
        setupWebAuthCallback(webAuth)
    }

    private fun setupWebAuth() {
        val oidcConfig = OIDCConfig.Builder()
                .clientId("20-character-long Client ID")
                .redirectUri("com.okta.dev-123456:/callback")
                .endSessionRedirectUri("com.okta.dev-123456:/logout")
                .scopes("openid", "profile", "offline_access")
                .discoveryUri("https://dev-123456.okta.com")
                .create()

        webAuth = Okta.WebAuthBuilder()
                .withConfig(oidcConfig)
                .withContext(applicationContext)
                .withStorage(SharedPreferenceStorage(this))
                .setRequireHardwareBackedKeyStore(false) (3)
                .create()
        sessionClient = webAuth.sessionClient
    }

    private fun setupWebAuthCallback(webAuth: WebAuthClient) { (4)
        val callback: ResultCallback<AuthorizationStatus, AuthorizationException> =
                object : ResultCallback<AuthorizationStatus, AuthorizationException> {
                    override fun onSuccess(status: AuthorizationStatus) {
                        if (status == AuthorizationStatus.AUTHORIZED) {
                            Log.d("MainActivity", "AUTHORIZED")
                            Toast.makeText(this@MainActivity, "Authorized", Toast.LENGTH_SHORT).show()
                        } else if (status == AuthorizationStatus.SIGNED_OUT) {
                            Log.d("MainActivity", "SIGNED_OUT")
                            Toast.makeText(this@MainActivity, "Signed out", Toast.LENGTH_SHORT).show()
                        }
                    }

                    override fun onCancel() {
                        Log.d("MainActivity", "CANCELED")
                        Toast.makeText(this@MainActivity, "Cancelled", Toast.LENGTH_SHORT).show()
                    }

                    override fun onError(msg: String?, error: AuthorizationException?) {
                        Log.d("MainActivity", "${error?.error} onError", error)
                        Toast.makeText(this@MainActivity, error?.toJsonString(), Toast.LENGTH_SHORT).show()
                    }
                }
        webAuth.registerCallback(callback, this)
    }
}| 1 | private lateinit var webAuth: WebAuthClient is a reference to the web client you will invoke to log in |
| 2 | private lateinit var sessionClient: SessionClient is a reference to the session you can use to conduct multiple operations after logging in, such as getting the user’s profile, revoking the authentication token, refreshing the authentication token, etc… |
| 3 | setRequireHardwareBackedKeyStore(true) forces the app to require a device with encryption capabilities. This is the default configuration for Okta OIDC and it’s considered the best practice. Since you might to run this code in a emulator, you can temporarily set it to false. |
| 4 | private fun setupWebAuthCallback() is the place where you can define the action to take when authentication succeeds, fails or is canceled… |
| You can create a utility method to automatically detect if your application is running in an emulator. |
Make sure to use the values you wrote down during the Get your Okta OIDC configuration settings step to create val oidcConfig in private fun setupWebAuth().
Log in Using Okta OIDC
Now that you have a minimal configuration of Okta OIDC, it’s time to add a listener for the signIn button you added previously.
Create a payload using AuthenticationPayload and call webAuth.signIn() in MainActivity.kt.
import kotlinx.android.synthetic.main.main_activity.*

override fun onCreate(savedInstanceState: Bundle?) {
    super.onCreate(savedInstanceState)
    setContentView(R.layout.activity_main)

    setupWebAuth()
    setupWebAuthCallback(webAuth)

    signIn.setOnClickListener {
        val payload = AuthenticationPayload.Builder()
            .build()
        webAuth.signIn(this, payload)
    }
}
This will instruct Okta OIDC SDK to launch a web browser in which your users can authenticate using their Okta credentials.
Once they successfully authenticate, you will be able to use sessionClient to do things like check their authentication status:
if (sessionClient.isAuthenticated) {
    // Do something specific to authenticated users
} else {
    // Do something to non-authenticated users
}
You can even download their profile:
private fun downloadProfile() {
    sessionClient.getUserProfile(object : RequestCallback<UserInfo, AuthorizationException> {
        override fun onSuccess(result: UserInfo) {
            Log.d("Profile", result.toString())
        }

        override fun onError(error: String?, exception: AuthorizationException?) {
            Log.d("Profile", error, exception.cause)
        }
    })
}
That’s it! You now have an Android app with robust OIDC authentication!
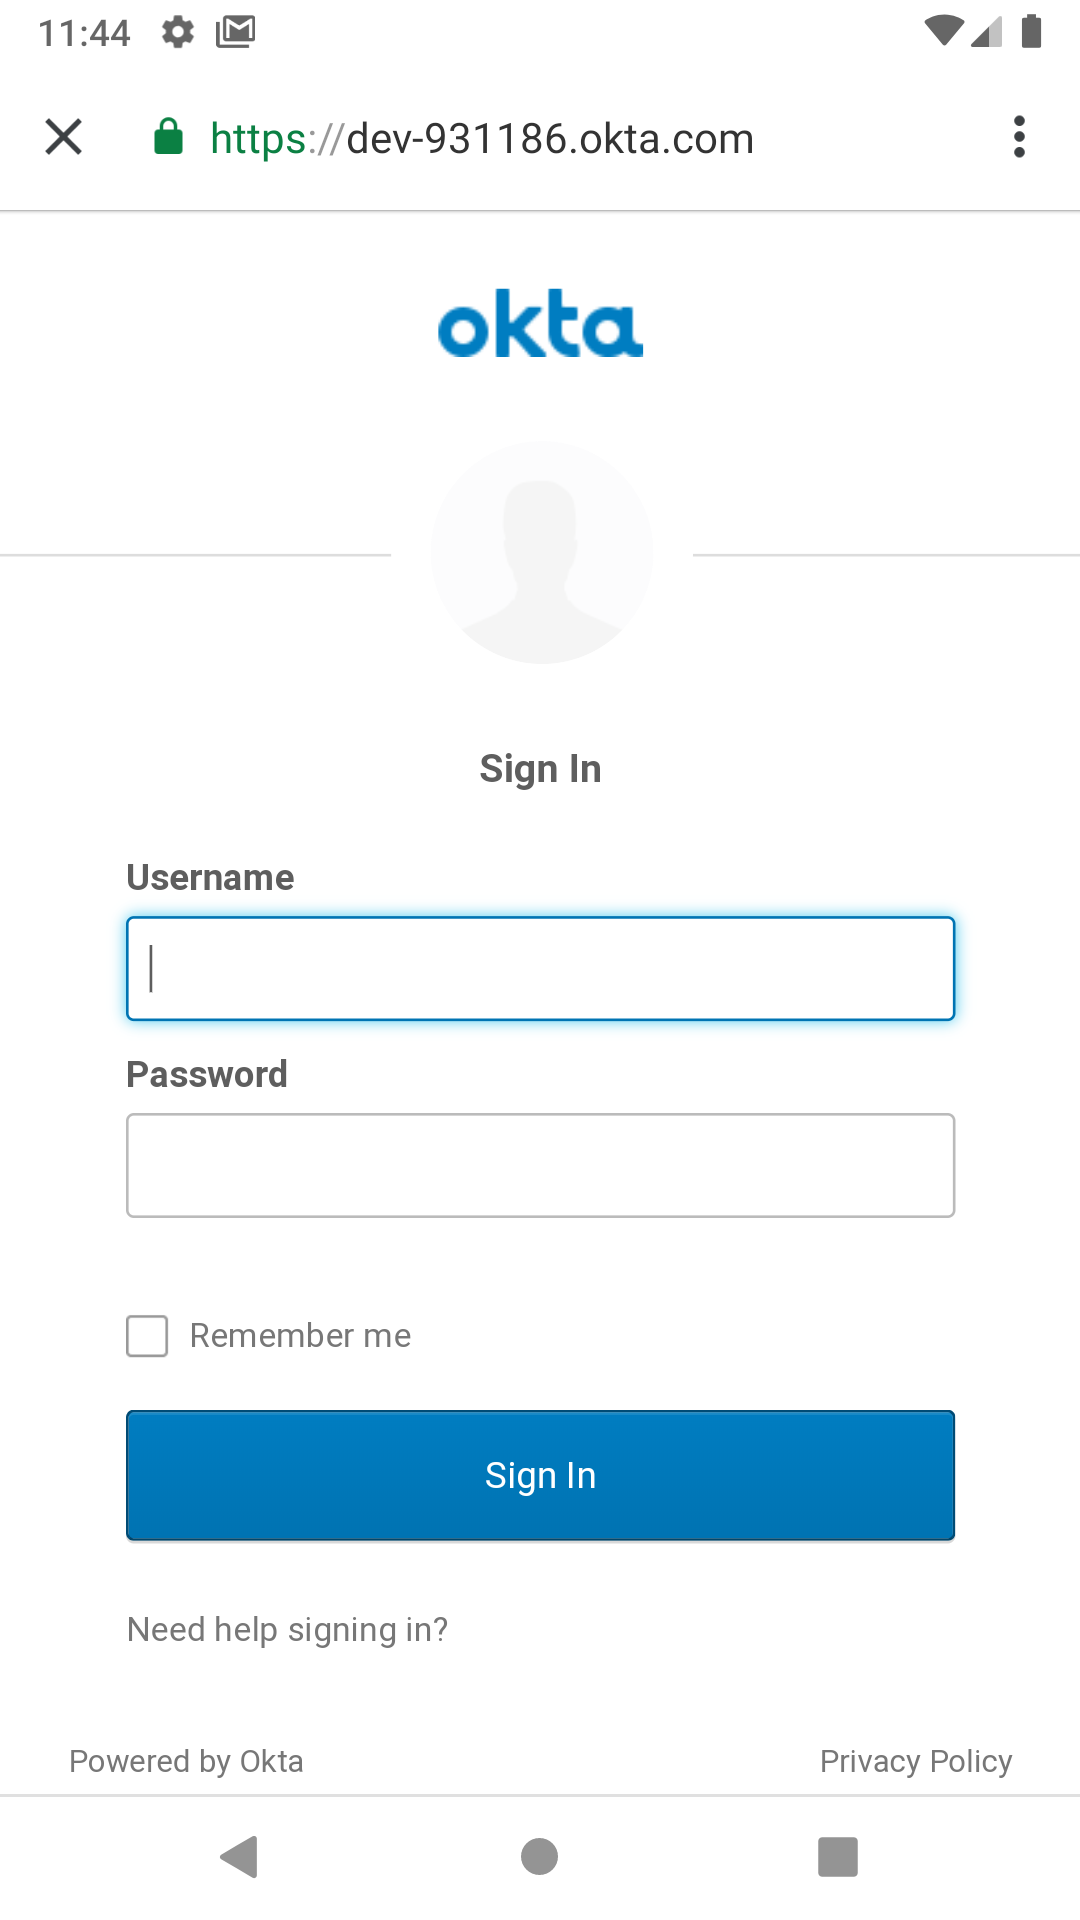
When you launch your app and click on the SIGN IN button, you will be greeted with Okta’s authentication portal, which you can use to authenticate users into your app:
(Optional) Add Social login
It should be easy for users to authenticate into your app. Okta OIDC SDK helps you accomplish this by allowing users to use their social accounts to validate their identity.
With Okta, you can add an external Identity Provider—such as Google, Facebook, LinkedIn or Microsoft. To achieve this, connect to the external identity providers and ask them to trust Okta for your application. This is done in three simple steps:
Lastly, use the identity providers in your app:
signIn.setOnClickListener {
    val payload = AuthenticationPayload.Builder()
        .setIdp("{IdP-id}") // From your "Okta" admin console
        .setIdpScope("clientScope1", "clientScope2", "clientScope3") // Optional, in case the IDP requires it
        .build()
    webAuth.signIn(this, payload)
}
Now, when a user clicks your SIGN IN button, they’ll be greeted with the login page of the IDP of your choice, which will be used to authenticate users into your app.
(Optional) Biometric Login
Additionally, biometrics can be used to access sessions created by Okta OIDC.
The BiometricPrompt recently published by the Android team makes it a very feasible option, taking a lot of the complexity off your hands and offering a unified familiar & native experience for users on all variants of Android (Google devices, Samsung devices, …).
BiometricPrompt uses the available resources in each device to offer whichever options are possible. Those include Iris authentication, fingerprint authentication, PIN authentication, Pattern authentication, etc.
|
In essence, there are two components to be taken into account:
-
BiometricPromptcan be used to only allow biometrically authenticated users into your app, or into specific sections of your app -
You can (and should) instruct Okta OIDC SDK to store all data in a biometrically protected encryption system
I created an easy-to-launch Kotlin wrapper of BiometricPrompt for you:
import androidx.biometric.BiometricConstants.ERROR_NEGATIVE_BUTTON
import androidx.biometric.BiometricPrompt
import androidx.biometric.BiometricPrompt.PromptInfo
import androidx.fragment.app.FragmentActivity
import java.util.concurrent.Executors

class Biometric(
    fragmentActivity: FragmentActivity,
    onSuccessListener: () -> Unit,
    onCancelListener: () -> Unit,
    onErrorListener: (Int, String) -> Unit) {

    private val mCallback: BiometricPrompt.AuthenticationCallback =
        object : BiometricPrompt.AuthenticationCallback() {
            override fun onAuthenticationError(errorCode: Int, errString: CharSequence) {
                if (errorCode == ERROR_NEGATIVE_BUTTON) {
                    onCancelListener()
                } else {
                    onErrorListener(errorCode, errString.toString())
                }
                prompt.cancelAuthentication()
            }

            override fun onAuthenticationSucceeded(result: BiometricPrompt.AuthenticationResult) {
                onSuccessListener()
            }
         }

    private val prompt: BiometricPrompt
    private val promptInfo: PromptInfo

    init {
        prompt = BiometricPrompt(fragmentActivity, Executors.newSingleThreadExecutor(), mCallback)
        promptInfo = PromptInfo.Builder()
            .setTitle("Biometric authentication succeeded")
            .setDeviceCredentialAllowed(true)
            .setConfirmationRequired(true)
            .build()
    }

    fun show() {
        prompt.authenticate(promptInfo)
    }
}
Simply trigger this so that when a user who is not biometrically authenticated tries to launch MainActivity, they are only allowed through if they biometrically authenticate in their device.
Also, remember to use GuardedEncryptionManager to store Okta OIDC data:
import com.okta.oidc.storage.security.DefaultEncryptionManager
import com.okta.oidc.storage.security.EncryptionManager
import com.okta.oidc.storage.security.GuardedEncryptionManager
private var currentEncryptionManager: EncryptionManager? = null
private var keyguardEncryptionManager: GuardedEncryptionManager? = null
override fun onResume() {
super.onResume()
// Check whether the user has already authenticated using the device's authentication method. If it hasn't, ask them to do it
if (currentEncryptionManager?.isUserAuthenticatedOnDevice?.not() == true) {
showKeyguard()
}
}
private fun showKeyguard() {
Biometric(
fragmentActivity = this,
onSuccessListener = {
Log.d("MainActivity", "Biometric authentication succeeded")
Toast.makeText(this, "Biometric authentication succeeded", Toast.LENGTH_SHORT).show()
},
onCancelListener = {
runOnUiThread {
Log.d("MainActivity", "Biometric authentication cancelled")
Toast.makeText(this, "Biometric authentication cancelled", Toast.LENGTH_SHORT).show()
finish()
}
},
onErrorListener = { code, message ->
runOnUiThread {
Log.d("MainActivity", "Biometric authentication failed")
Toast.makeText(this, "Biometric authentication failed", Toast.LENGTH_SHORT).show()
finish()
}
}).show()
}
private fun setupWebAuth() {
keyguardEncryptionManager = GuardedEncryptionManager(this, Int.MAX_VALUE)
webAuth = WebAuthBuilder()
.withConfig(oidcConfig)
.withContext(applicationContext)
.withCallbackExecutor(null)
.withEncryptionManager(keyguardEncryptionManager)
.create()
sessionClient = webAuth.sessionClient
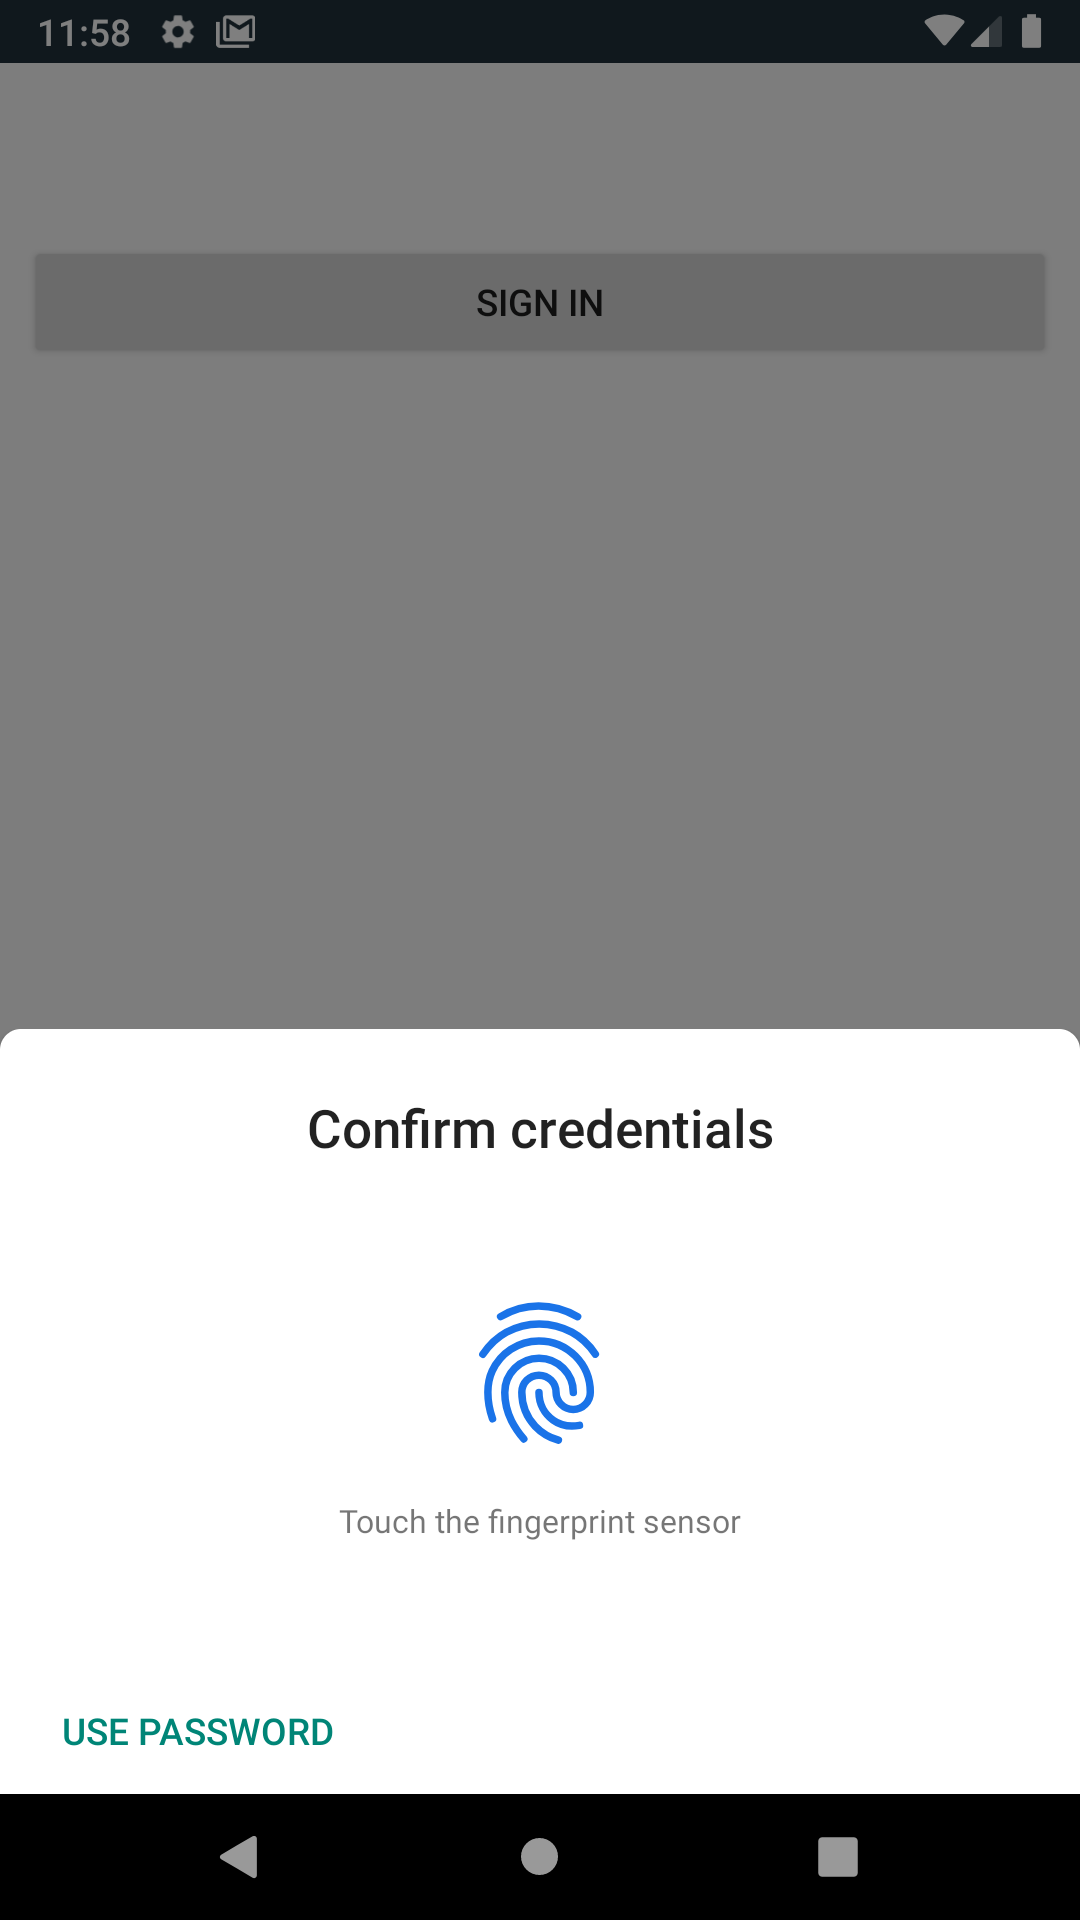
}Now, whenever a user opens a new instance of your app, they will be able to access it using their biometric information. In the below example, a Google Pixel phone, the authentication is a fingerprint:
Learn More About Android Auth and OIDC
It’s now easier than ever to implement OAuth 2.0 and OpenID authorization thanks to Okta OIDC SDK. A high effort, high maintenance chore just became a very straightforward task.
By taking advantage of BiometricPrompt and Kotlin, we can make our apps even safer, while still creating a seamless user experience that feels native to each manufacturer’s UI style.
Although the example we’ve created here does enough to satisfy the needs of the majority of apps, Okta OIDC SDK doesn’t stop there. The Okta OIDC Android repository contains a variety of ideas and suggestions to improve user experience like:
-
Using your own OkHttp client
-
Using a custom UI to log in
-
Having fine-grained control over session tokens' expiration, refresh, etc…
-
Settings to handle preference of browser client for the authentication process (Chrome, Samsung browser, Firefox, etc…)
As a reminder, you can find the source code for this example on GitHub.
This post has given you the foundations to set up a successful OIDC client. If you want to deepen your knowledge around modern authentication systems, check these additional resources on Android, OAuth 2.0 and OpenID Connect:
If you enjoyed this blog post and want to see more like it, follow @oktadev on Twitter, subscribe to our YouTube channel, or follow us on LinkedIn. As always, please leave your questions and comments below—we love to hear from you!
Changelog:
- Dec 24, 2020: Updated to Okta OIDC for Android v1.0.17. See the code changes in the example app on GitHub. Changes to this article can be viewed in oktadeveloper/okta-blog#510.
Okta Developer Blog Comment Policy
We welcome relevant and respectful comments. Off-topic comments may be removed.