Build Easy User Sync Webhooks with Okta

Okta is an identity platform focused on making authentication easy to build with minimal code, and you’ll often hear us say that by using Okta you’ll never have to build authentication again.
A lot of companies benefit from using our platform, which allows them to easily prompt for multi-factor authentication (MFA) based on contextual policies, offer self-service password resets and registration, and of course authentication, including federation to enterprise identity providers and social media accounts. (If you’re interested in learning more, we have a ton of resources, including quick start guides in several languages on our developer site.)
When it comes to authentication flows, you may want to trigger secondary steps after particular events in Okta, including generating tickers, sending an email, or initating some process in a user lifecycle flow.
Syncing Okta user updates to additional user stores is a common requirement. The good news is, this is easy to do with Okta Event Hooks. Whether the system requiring an update is a third-party CRM tool or a company-maintained database, Okta Event Hooks give you the option to push user information updates every time an account or profile is created, updated, or deleted.
The following guide will show you in less than 15 minutes how to create and use an event hook to add a user to a database after they’re created in Okta.
But first let’s address a few key questions you may be wondering.
What Are Event Hooks?
If you’re familiar with webhooks, then you’ll recognize event hooks as similar in functionality, but with a specific tie to events that occur in Okta. Essentially, Okta Event Hooks are outbound calls from Okta that extend the steps and/or functionality of selected Okta events.
The calls take the form of HTTPS REST calls that pass a JSON object containing event information to a URL that you specify, kicking off a process flow in a codebase you maintain and host.
Event hooks require a web service with an internet-accessible endpoint.In this example we’ll use Glitch, a simple to use app-hosting platform to both host and run our custom process flow. If you’re interested in learning more, review our Event Hooks Page, which also includes a list of eligible event hook triggers.
OK,let’s get started.
All the code is already written for you, all you have to do is copy the application I created, create an event hook and API token, and you’re ready for testing. I’m using Node.js, but if a different language is preferred you can simply convert the steps I’m using to the language of your choice.
Using Event Hooks in Okta
Remix This Glitch App: https://okta-eventhook-usertransfer.glitch.me/
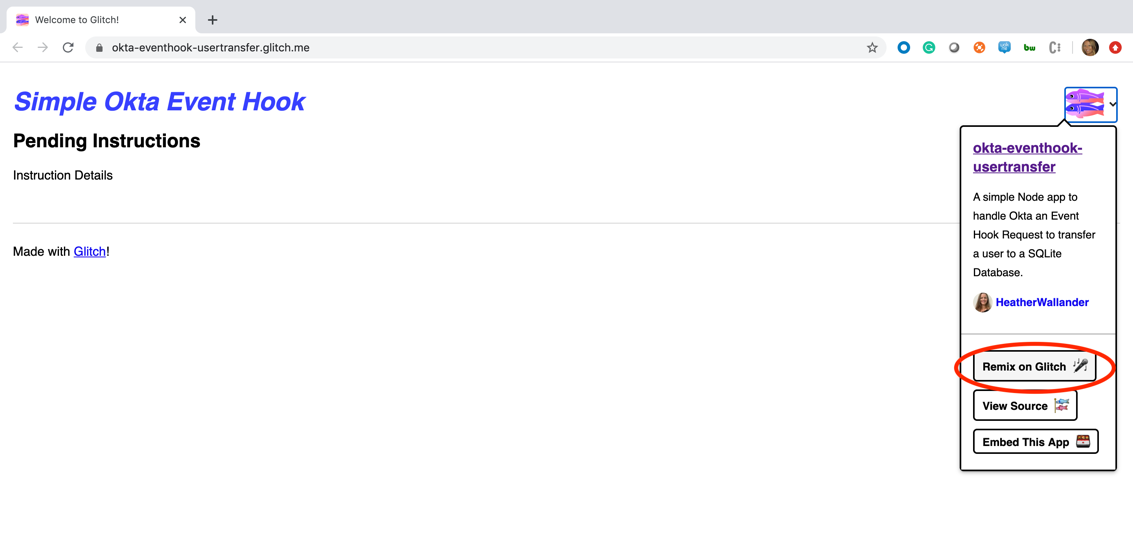
Remixing will create a name and URL that you’ll be able to use for testing. For example:
- Glitch app name:
exclusive-peppermint-neighborhood - Glitch app URL:
https://exclusive-peppermint-neighborhood.glitch.me/getUsers
The code is written to automatically initialize a SQLite database and insert the first row of data. To confirm this, click Show (next to Glitch App Name) and select In a New Window.
Add /getUsers to your URL and you should see the following JSON output for Test User.

Create Event Hook in Okta
We will point the event hook to the /userTransfer endpoint, as I’ve created a POST Request to receive the data from Okta, send a response, and initiate the database insert process.
app.post("/userTransfer", (request, response) => {
  var newUser = request.body.data.events[0]['target'][0];
  response.sendStatus(200);
  dbInsert(newUser);
  console.log('New User Inserted');
});
In your Okta tenant, navigate to Workflow > Event Hooks in the Admin Portal and select Create Event Hook.
Give the hook a name and enter your Glitch base url + /userTransfer as the URL. For Subscribe to events, select User created from the dropdown as that’s what we’ll be using for this example and select Save & continue. If you require a hook for a different event, you can review available options in our Event Hooks Catalog.
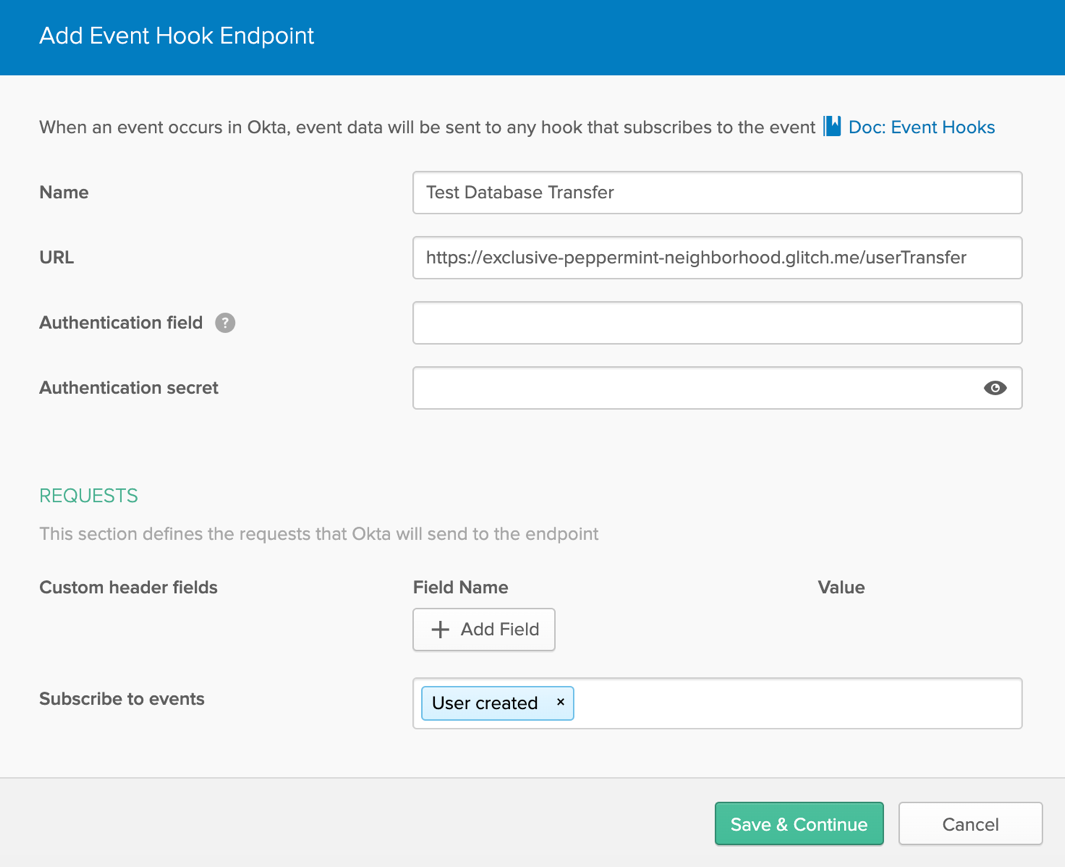
Note: For this test, authentication context has not been added but would be recommended in a production environment.
Verify Event Hook
For each event hook, Okta requires a one-time verification request. The code to handle the GET Request from Okta has already been written for you inside a /userTransfer GET Request.
app.get("/userTransfer", (request, response) => {
  var returnValue = {
    "verification": request.headers['x-okta-verification-challenge'],
  };
  response.json(returnValue);
});
Okta will automatically prompt you for verification upon saving. Since the code is available to complete this requirement, select Verify. You should see the Event Hook saved with a Verification status of Verified.
Create API Key and Add to Application
For event hooks, Okta will send the Log Event Object, which includes transactional information, including base information (first name, last name, email) about the user being created (the event log target).
If more additional information is needed about the user, we’ll need to request it from Okta. In this example, we’re going to use an API key for simplicity; however, in a production environment, you may want to consider setting up a Client Credential Flow Application with the okta.users.read grant enabled.
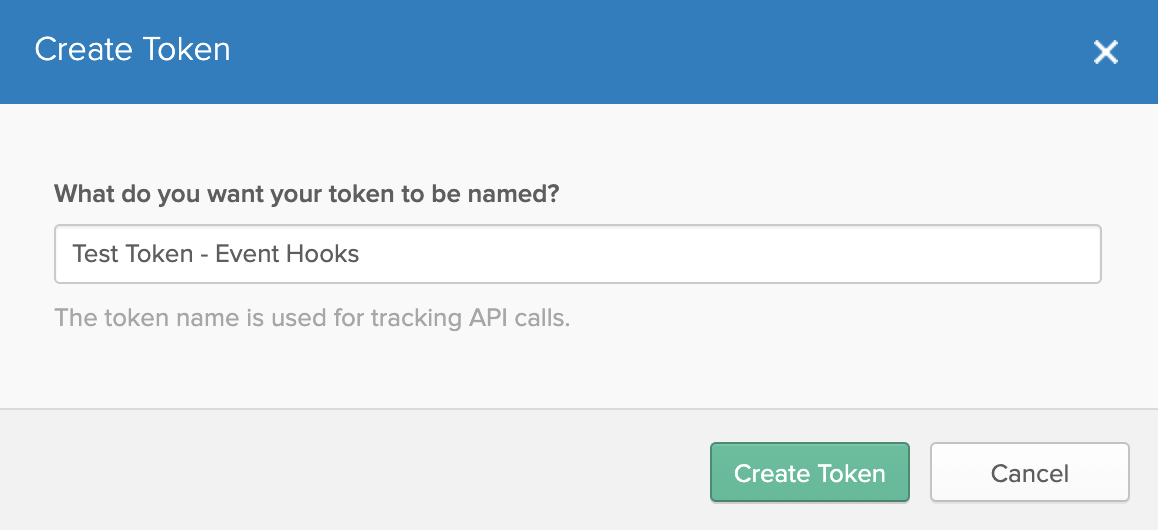
To create the API token, navigate to Security > API > Tokens, and select Create Token.
Give the token a name and click Create Token. A randomized token value will be displayed. Be sure to copy this value before closing the window. Once the window is closed, you will not be able to retrieve the value again.
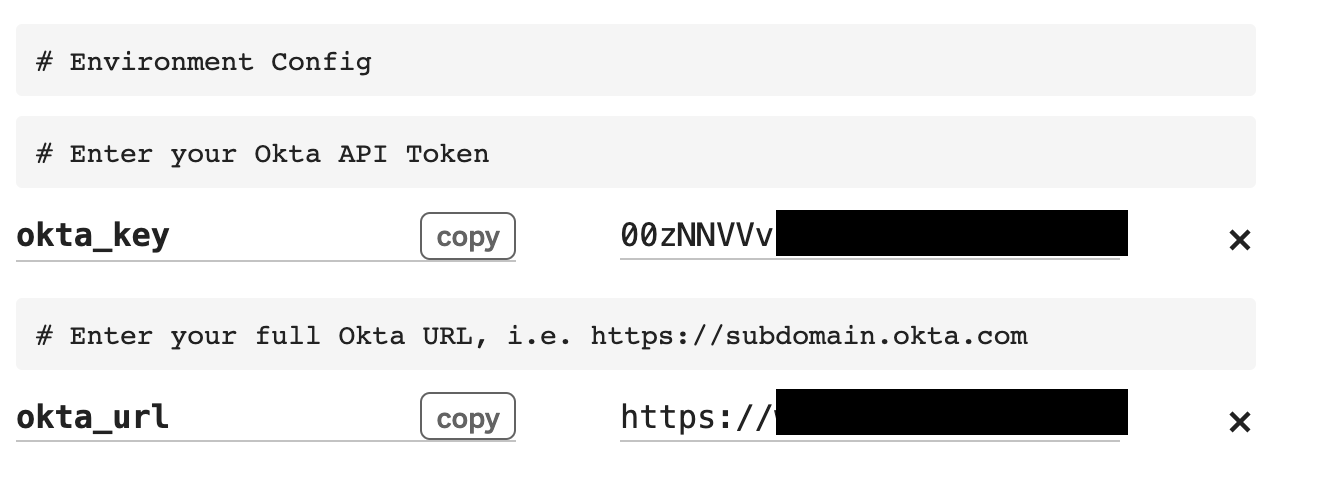
Return to your Glitch app and select the .env file. You will see two variable fields with empty values for okta_key and okta_url. Enter the copied API token value as the empty okta_key value and enter your Okta url (i.e. https://subdomain.okta.com) as okta_url.
Test Your Event Hook
Now everything should be enabled for testing. You can create a user manually in the admin portal, using Self-Service Registration (if enabled on your tenant) or by using the Create User API Requests.
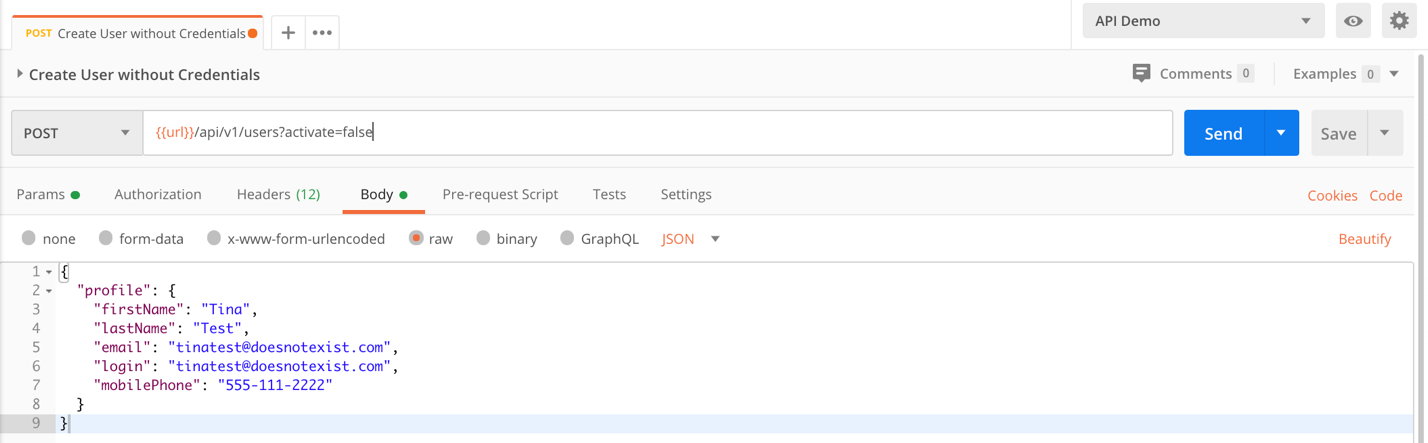
In this example, we’ll create a user using the Create User Without Credentials Request from our Okta Postman Environment. My user will have the following values, but you may create yours with whatever values you prefer.
If the API request is successful (indicated by a 200 response), return to your Glitch application and navigate to or refresh the /getUsers endpoint. You should see the new user added to the results.

That’s it! You’ve successfully used Okta Event Hooks and synced your user’s Okta cloud profile to a SQLite database.
Continue Developing with Okta and Event Hooks
This post walked you through using Okta Event Hooks to automatically push user profiles to a third party user store (like a database) at the time of user creation. However, following this step-by-step guide of creating, verifying and testing Okta Event Hooks you could build out extended capabilities for any of the eligible event hook triggers to include additional processes required for your application.
With Event Hooks, calls are asynchronous, so you can add them without disrupting the process flow of the triggering event. However, if you would prefer a synchronous hook, that will pause a process until a response is received, I’d recommend reviewing Okta’s Inline Hooks capabilities.
If you’d like to learn more about Okta Hooks or you’re interested in learning how you can add Okta authentication to your Node.js application, these posts are helpful:
- Use Okta Token Hooks to Supercharge OpenID Connect
- Node.js Login with Express and OIDC
- Painless Node.js Authentication
If you like this content, be sure to follow us on Twitter and subscribe to our YouTube Channel for updates on new posts and videos.
Heather Wallander is a Solution Engineer at Okta, specializing in Customer Identity Use Cases. After beginning her career in sales and marketing, she moved into software development, before finding the best of both worlds in Solutions Engineering. Heather has a bachelor's in Marketing and master's in Information Systems. She joined Okta in February 2019.
Okta Developer Blog Comment Policy
We welcome relevant and respectful comments. Off-topic comments may be removed.