Serverless Java with Amazon Web Services

Serverless is the next iteration in cloud management. First, we let go of having physical hardware servers and moved all of our servers into the cloud because, hey, why bother managing all that hardware? This created cloud infrastructure providers that resulted in behemoths like Amazon and Google. Now, they’re saying, why bother managing a server at all? What you really want to do is run code, right? Serverless is an architecture where code is run in a managed service container that is totally isolated from server-level concerns like operating systems, web servers, and updates.
In truth, this creates a whole host of trade-offs. The promised benefits are simplicity, automatic scaling, and low cost. The idea is that to create an application, all you have to do is upload your code and you’re off! Because the service provider is managing provisioning for you automatically, scaling is fast and transparent. And because you’re only paying for time you actually use - instead of paying a fixed cost - you save money. Sounds perfect. Indeed, it sounds like a great sell to managers and corporate executives. But while in some use cases, serverless is fantastic, it’s not that simple.
For example, Amazon AWS is a fantastic platform in some ways, but I doubt too many people have accused it of being “simple.” It’s an expert platform made for technical specialists and engineered to provide maximum control. This results in a bewildering array of options and documentation that sometimes leaves me aching for a simple command prompt and a few “sudo apt-get install” commands. More than a few startups have simply traded their Linux gurus for AWS gurus.
The benefit of simplicity can be offset by the cost of learning how to interact with the service provider’s system. Instead of interacting with well known and proven technologies like Linux and Apache or Nginx, you’re working with a new system like Amazon or Google’s cloud infrastructure. Serverless functions run as private functions that have to go through Gateway APIs to make them public, adding another level of complexity. As the complexity of the serverless application grows, the complexity of these proprietary interactions grows. This has two effects: 1) your team is having to become an expert in a totally new system, often every bit as complex as the system they already knew; and 2) you’re becoming increasingly locked into whatever cloud provider you chose just as the benefits of even using a serverless environment diminish (a bit like one of those finger-trap toys).
What are the ideal use-cases for serverless? My thought is: discrete units of code that are not likely to grow greatly in complexity but that have unpredictable or intermittent usage (thus maximizing the benefit from the pay-as-you-go model) or have the potential to vary greatly in demand (thus benefiting from the great scaling capacity of serverless technologies).
Serverless functions should also be stateless (there’s no disk to write to) and have relatively short running times. If you need to write to disk, serverless is out - although, with databases, cloud logging, and cloud file repositories, it’s hard to imagine too many places where this is a huge problem. Further, serverless systems are optimized for short-running code. You start to lose the cost-benefit if your code runs for long and most of the providers have maximum execution times between 300 and 900 seconds.
Table of Contents
- Choose Between Java Serverless Options
- Sign Up for AWS Account with Billing
- Create AWS Access Keys
- Install and Configure AWS CLI
- Create AWS Role
- Download the Project from GitHub
- Configure Okta JWT Auth
- Create the Lambda
- Create an AWS API Gateway
- Test Your API Gateway URL
- Generate a JWT Token
- Test the Protected Serverless Function
- Learn More about AWS and Java
Note: In May 2025, the Okta Integrator Free Plan replaced Okta Developer Edition Accounts, and the Okta CLI was deprecated.
We preserved this post for reference, but the instructions no longer work exactly as written. Replace the Okta CLI commands by manually configuring Okta following the instructions in our Developer Documentation.
Choose Between Java Serverless Options
Broadly speaking, two main options for running a serverless code base are: 1) to use a commercial function-as-service (FaaS) provider, or 2) use an open-source serverless platform and deploy it in one of the many options for deploying containerized code. The example application you’re going to write in this tutorial uses the first option, specifically Amazon AWS Lambda. But before you get started, I’m going to quickly look at a few of the other options.
One of the major differences between FaaS providers is their Java support. Some commercial FaaS providers and the flavors of Java they currently support are:
- Amazon AWS Lambda - Java 8 and Java 11
- Google Cloud Functions - Java 8 in alpha and Java 11 on App Engine public beta
- Microsoft Azure - Java 7, Java 8, and Java 11 (Java 13 in technical preview)
- IBM Cloud Functions - Java 8
The pricing on all of these services is very similar. I looked up the various pricing pages and used their calculators before finding this helpful page: the Serverless Cost Calculator. Assuming 3 million executions per month, 512 MB of memory, and 1 second execution time, the estimated cost for the providers would be:
- Amazon AWS Lambda - $18.74
- Google Cloud Functions - $25.15
- Microsoft Azure - $18.00
- IBM Cloud Functions - $18.70
Because cloud functions often work in a whole ecosystem of online services, probably more significant than cost is going to be what other services you’d like to use and which company you trust to be tied to as your project grows.
Another option, which neatly avoids the problem of vendor-lock-in, but does so at the cost of some increased operational complexity, is to use a cloud container provider combined with one of the great open-source, serverless platforms. These tools allow you to essentially roll your own serverless service packaged in a Docker container (for which there is a cornucopia of hosting solutions).
I’ll just mention a few possible solutions here. We’ll take a look at some of these in future articles.
- Apache OpenWhisk
- Oracle Fn
- Micronaut
Finally, I’ll just point out that there are hybrid/meta solutions like Serverless.com that bridge open-source and pay-for-service models with managing deployment to multiple systems.
In this project, you’re going to create a simple Amazon AWS Lambda function. You’re going to create an API Gateway for the function to make it publicly accessible via HTTP requests. Finally, you’re going to secure the function using Okta and JSON Web Token authentication.
AWS is a good introduction to these kinds of services because it highlights some of the trade-offs in anything-as-service. Often when you offload complexity to a vendor, you either lose flexibility or you simply shift complexity from a system you know to a system you don’t. In this case, AWS is incredibly powerful, and once you get to know it, it can be great. But it’s definitely an expert system in its own right and sometimes daunting if you’re not familiar with it. Fortunately, it’s very well documented and there’s a huge user base, so answers are generally easy to find.
Prerequisites:
- Java 11: This tutorial uses Java 11. OpenJDK 11 works well. You can find instructions on the OpenJDK website. You can install OpenJDK using Homebrew. Alternatively, SDKMAN is another great option for installing and managing Java versions.
- Okta Developer Account: You’ll be using Okta as an OAuth/OIDC provider to add JWT authentication and authorization to the application. You can go to our developer site and sign up for a free developer account.
- HTTPie: This is a powerful command-line HTTP request utility that you’ll use to test the server. Install it according to the docs on their site.
- Amazon Web Services account with billing activated. The costs for this account should be minimal, if not free, but AWS required you to have billing activated to use the Lambda service. Instructions on how to set up an AWS account are below.
Sign Up for AWS Account with Billing
The first thing you need to do is create an Amazon AWS account and activate billing. There are detailed instructions on the Amazon Web Services website. The steps are outlined briefly below:
- Go to the Amazon Web Services home page
- Click Create an AWS Account
- Enter your account information and click Continue
- Choose Personal or Professional and enter the necessary information (either way works)
- Read and accept the AWS Customer Agreement
- Click Create Account and Continue
You’ll get an email confirming your new account. Now you need to sign in to the account and add a payment method. You also need to verify your account using either a text message or an automated phone call.
Account activation usually only takes a few minutes but can take up to 24 hours. Until your account is activated, you won’t be able to use AWS services.
Create AWS Access Keys
For part of this tutorial, you will use the AWS Command Line Interface (CLI). For this to work, you need to generate access keys.
- From the AWS dashboard, go to Your account (your name) and select My Security Credentials
- Expand Access keys (access key ID and secret access key) tab
- Click on Create New Access Key
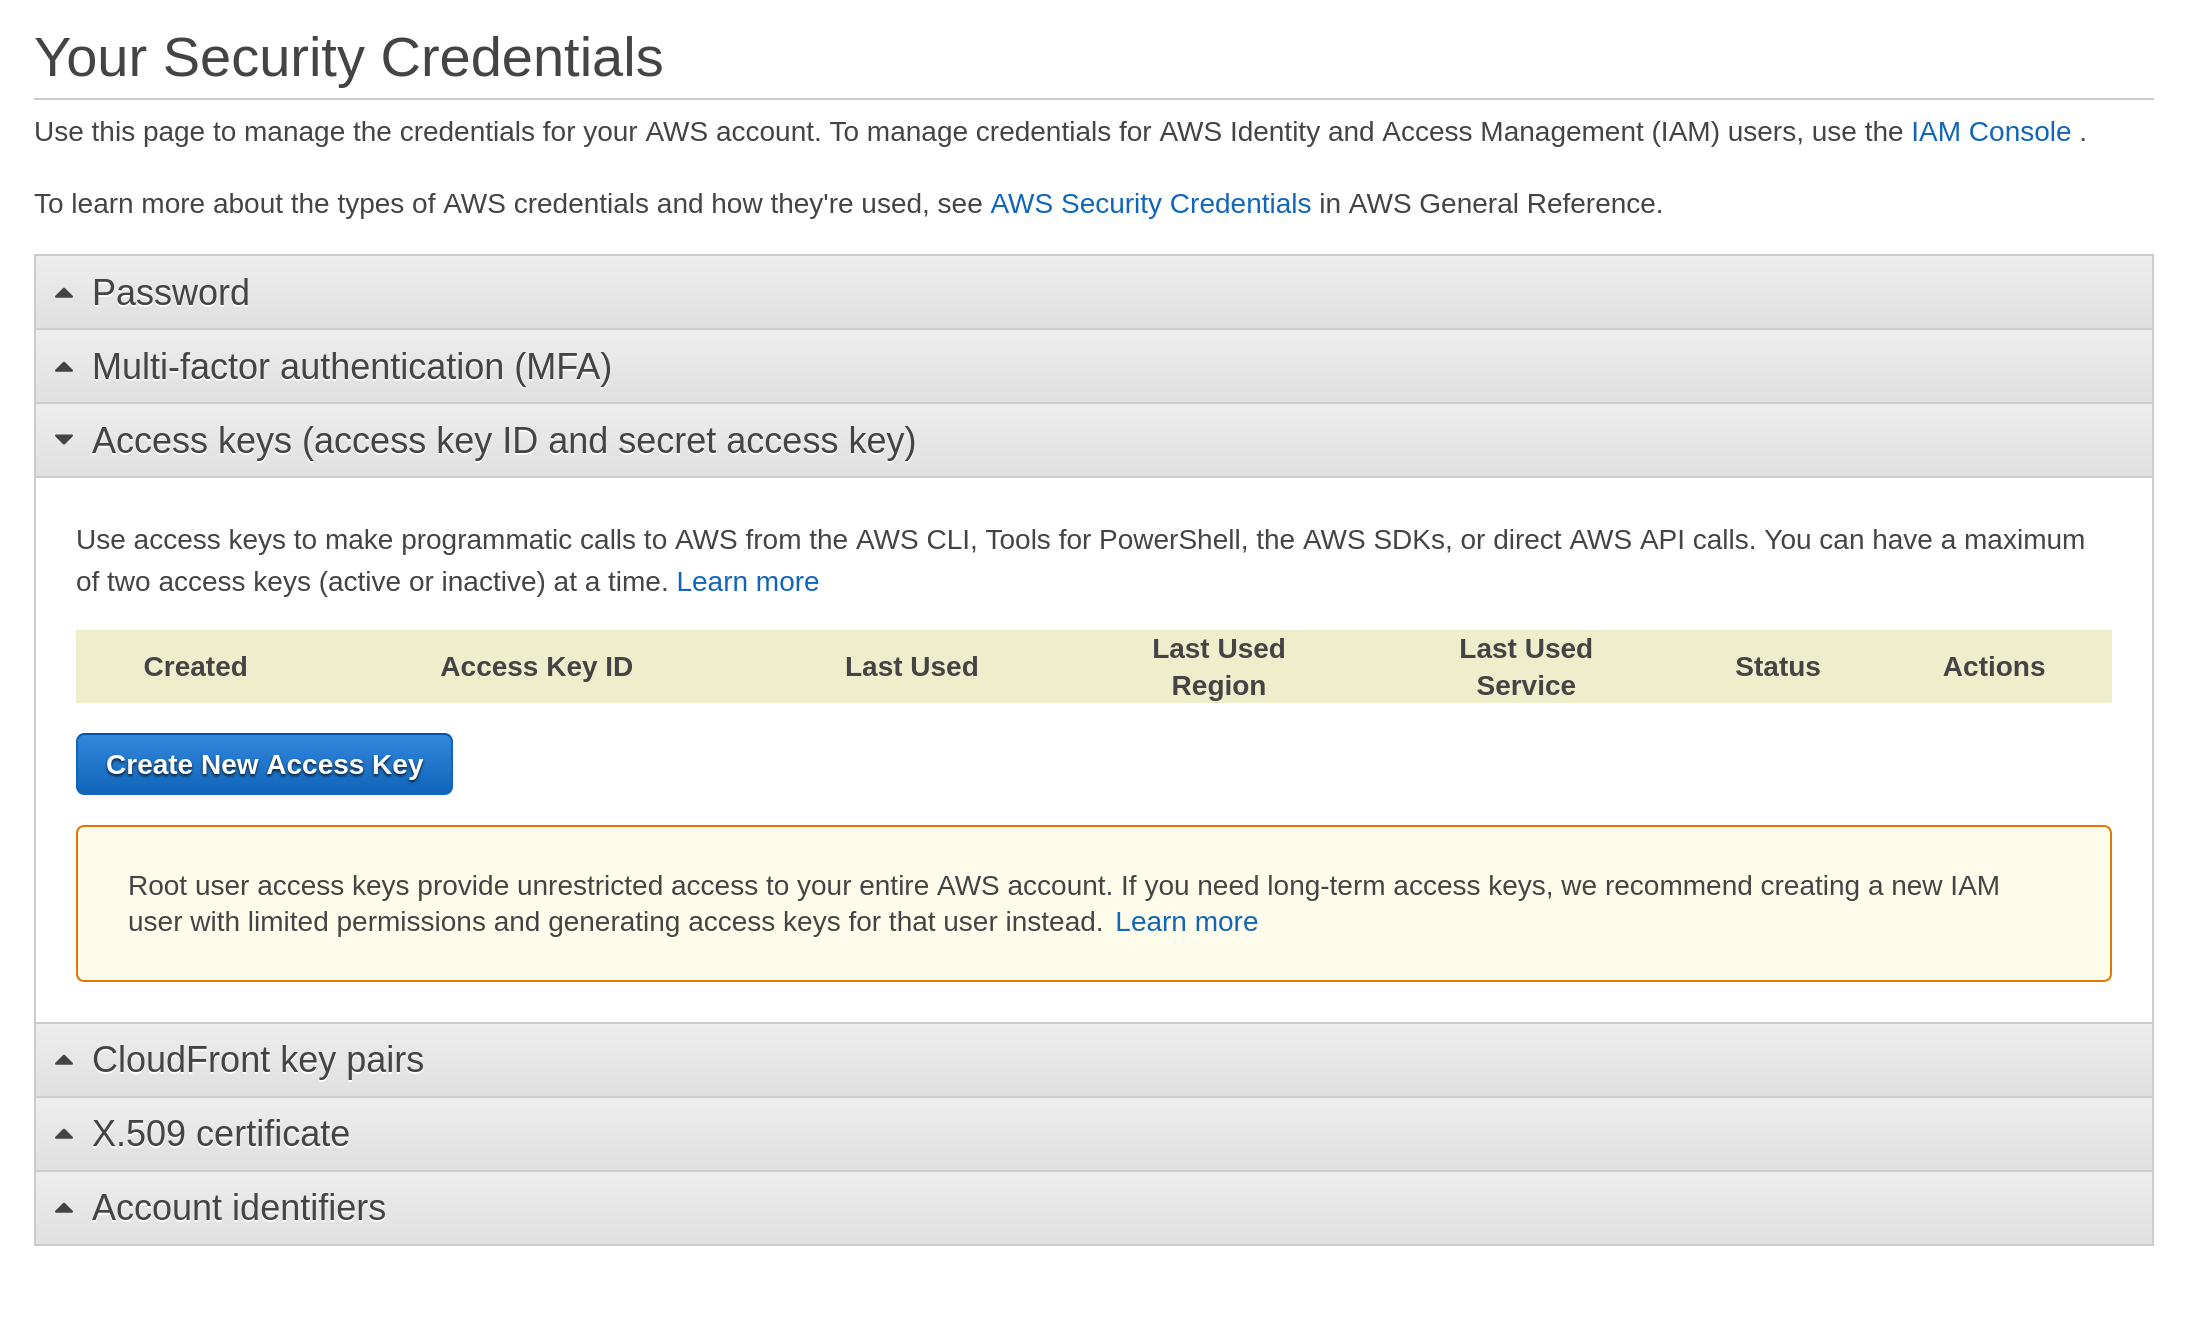
Save your access key ID and access key somewhere (you’ll need them in just a moment).
Install and Configure AWS CLI
The AWS CLI is incredibly full featured. You can do nearly everything from the CLI that you can do from the dashboard. You could probably spend an entire career learning how to use all the features. You’re going to install AWS CLI version 2 (version 1 is still supported, but outdated). To install the CLI, follow the instructions for your operating system from the AWS documentation, or use the commands below.
On a Mac, you should be able to run the following commands from a shell to install the AWS CLI:
$ curl "https://awscli.amazonaws.com/AWSCLIV2.pkg" -o "AWSCLIV2.pkg"
$ sudo installer -pkg AWSCLIV2.pkg -target /
And on Linux:
curl "https://awscli.amazonaws.com/awscli-exe-linux-x86_64.zip" -o "awscliv2.zip"
unzip awscliv2.zip
sudo ./aws/install
Windows users should just download the graphical installer here. No command-line for you!
Once the CLI has been properly installed, you need to configure it. This is where you need the access keys you generated above.
Run aws configure to enter your credentials into the AWS CLI. In this tutorial, I’m going to use region us-west-2. Feel free to use whatever region you like, but just remember that you’ll have to change it at various places throughout the tutorial.
$ aws configure
AWS Access Key ID [****************7D7A]: {yourAwsAccessKeyId}
AWS Secret Access Key [****************I2nP]:  {yourAwsSecretAccessKey}
Default region name [us-west-2]: us-west-2
Default output format [None]:
You can test your configuration by running:
aws sts get-caller-identity
You should see something like:
{
    "UserId": "12345123451",
    "Account": "12345123451",
    "Arn": "arn:aws:iam::12345123451:root"
}
Create AWS Role
The lambda must be executed with a role that defines its permissions. Execute the commands below to create a role named lambda-ex and attach the predefined AWSLambdaBasicExecutionRole role policy.
Create the role:
aws iam create-role --role-name lambda-ex \
--assume-role-policy-document \
'{"Version": "2012-10-17","Statement": [{ "Effect": "Allow", "Principal": {"Service": "lambda.amazonaws.com"}, "Action": "sts:AssumeRole"}]}'
It should output something like this:
{
    "Role": {
        "Path": "/",
        "RoleName": "lambda-ex",
        "RoleId": "AROAT7HGYFHI2ERFCZJ3H",
        "Arn": "arn:aws:iam::273214351825:role/lambda-ex",
        "CreateDate": "2020-04-09T19:54:33+00:00",
        "AssumeRolePolicyDocument": {
            "Version": "2012-10-17",
            "Statement": [
                {
                    "Effect": "Allow",
                    "Principal": {
                        "Service": "lambda.amazonaws.com"
                    },
                    "Action": "sts:AssumeRole"
                }
            ]
        }
    }
}
Notice the field Role.Arn (something like this arn:aws:iam::273214351825:role/lambda-ex). Save this value somewhere. You’re going to need it a little later.
Attach the role policy:
aws iam attach-role-policy --role-name lambda-ex --policy-arn arn:aws:iam::aws:policy/service-role/AWSLambdaBasicExecutionRole
Download the Project from GitHub
Download the code from this tutorials’s GitHub repository.
The build.gradle file has a few notable features I want to point out. First, notice the buildZip task:
task buildZip(type: Zip) {
    from compileJava
    from processResources
    into('lib') {
        from configurations.runtimeClasspath
    }
}
build.dependsOn buildZip
This task creates the Zip file that AWS lambda requires for deployment. The output of this task is what you’ll upload to the AWS servers. There’s also a line that defines the buildZip task as a dependency on the build task. This insures that the Zip file for deployment is built when the build task is run.
There also a deploy task that uses the Gradle AWS plugin to allow us to upload the zipped project using Gradle.
task deploy(type: AWSLambdaUpdateFunctionCodeTask) {
    functionName = lambdaName
    zipFile =  file(buildZip.archiveFile)
}
You won’t necessarily need the deploy task for this tutorial, but it was super handy for me while writing this tutorial and I thought I’d leave it in there to show you how to integrate deploying the lambda into Gradle.
Finally, looking at the dependencies, you’ll notice two dependencies for the Okta JWT Verifier, which is what you’ll use to validate JSON Web Tokens. To learn more, take a look at the Okta JWT Verifier for Java GitHub page.
dependencies {
    ....
    implementation 'com.okta.jwt:okta-jwt-verifier:0.4.0'
    implementation 'com.okta.jwt:okta-jwt-verifier-impl:0.4.0'
    ...
}
The code in src/main/java/com/okta/serverless/awslambda includes three classes:
Config.java: loads our OAuth configuration fromsrc/main/resources/config.propertiesLambdaInput: JSON-mapped model class for function inputHandler.java: the handler function itself, run by AWS Lambda
Config.java is pretty simple. It loads config.properties from the classpath and loads our four OAuth properties from the file into the instance of the Config object.
src/main/java/com/okta/serverless/awslambda/Config.java
package com.okta.serverless.awslambda;

...

public class Config {

    public final String issuer;
    public final String audience;
    public final Long connectionTimeoutSeconds;
    public final Long readTimeoutSeconds;

    Config() throws IOException {

        // Create input stream to read config.properties from classpath (src/main/resources)
        InputStream input = Config.class.getClassLoader().getResourceAsStream("config.properties");

        // Make sure we found it on the classpath
        if (input == null) {
            throw new IOException("Unable to load config properties.");
        }

        // Load the file into our properties object
        Properties prop = new Properties();
        prop.load(input);

        // Save our props into our class properties
        this.issuer = prop.getProperty("okta.oauth.issuer");
        this.audience = prop.getProperty("okta.oauth.audience");
        this.connectionTimeoutSeconds = Long.parseLong(prop.getProperty("okta.oauth.connectionTimeoutSeconds"));
        this.readTimeoutSeconds = Long.parseLong(prop.getProperty("okta.oauth.readTimeoutSeconds"));
    }
}
LambdaInput.java is even simpler. It has one string property named input. We are using this because AWS Lambda requires input and output to be JSON (unless you use the RequestStreamHandler, which allows you to deal with the input and output streams directly) and because Gson, our JSON parser, parses input JSON directly into Java object instances.
The file below really only needs the public String input property, the toString() is just handy for debugging but totally unnecessary.
src/main/java/com/okta/serverless/awslambda/LambdaInput.java
package com.okta.serverless.awslambda;

public class LambdaInput {

    public String input = "";

    @Override
    public String toString() {
        return "LambdaInput{input='" + input + "'}";
    }
}
The last class, where all the action is, is Handler.java. It contains one method, handleRequest(), which is the method executed by the AWS Lambda service. Notice that the class uses two AWS-specific classes for input and output: APIGatewayProxyRequestEvent and APIGatewayProxyResponseEvent. The AWS API Gateway, which is what you’ll use to expose the lambda to the world, is very picky about the format of the event objects it sends and receives. Using these predefined classes saves a lot of headaches.
The flow of the code if pretty simple. In the constructor, the Config class and the JWT verifier are initialized. Notice the line showing you how to get the logger from the context.
LambdaLogger logger = context.getLogger();
These log events show up in the CloudWatch logs and can be helpful debugging.
The general flow of the code is:
- Get the request body
- Use Gson to parse the request body to the
LambdaInputobject - Get the
Authorizationheader and remove theBearer :part of the header to extract the token - Verify the JWT using the Okta JWT Verifier
- Strip all whitespace from the input string
- Populate the
APIGatewayProxyResponseEventobject - Return the response
The code handles two exceptions: a JSON parsing exception and a JWT verification exception.
package com.okta.serverless.awslambda;

...

public class Handler implements RequestHandler<APIGatewayProxyRequestEvent, APIGatewayProxyResponseEvent> {

    // Parse and create JSON
    Gson gson = new GsonBuilder().create();
    // OAuth configuration properties
    Config config;
    // Okta token verifier
    AccessTokenVerifier jwtVerifier;

    public Handler() throws IOException {
        // Get our config properties
        this.config = new Config();
        // Initialize the Okta JWT verifier
        this.jwtVerifier = JwtVerifiers.accessTokenVerifierBuilder()
                .setIssuer(this.config.issuer)
                .setAudience(this.config.audience) // defaults to 'api://default'
                .setConnectionTimeout(Duration.ofSeconds(this.config.connectionTimeoutSeconds)) // defaults to 1s
                .setReadTimeout(Duration.ofSeconds(this.config.readTimeoutSeconds)) // defaults to 1s
                .build();
    }

    // Request method called by AWS Lambda service
    public APIGatewayProxyResponseEvent handleRequest(APIGatewayProxyRequestEvent request, Context context)
    {

        // Create the response object (AWS is picky about the response format, so using their event
        // objects is helfpul)
        APIGatewayProxyResponseEvent apiGatewayProxyResponseEvent = new APIGatewayProxyResponseEvent();

        try {

            // Get the logger from the context
            LambdaLogger logger = context.getLogger();

            // Get the response body
            String body = request.getBody();

            // Log the body--'cause, hey, we went through the trouble of getting the logger
            logger.log("BODY: " + body);

            // Use Gson to pare the response body to our LambdaInput class
            LambdaInput inputObj = gson.fromJson(body, LambdaInput.class);

            // Get the headers so we can check the auth header
            Map<String, String> headers = request.getHeaders();

            if (headers == null) {
                throw new JwtVerificationException("Authorization header empty");
            }

            // Get the auth header
            String authHeader = headers.get("Authorization");

            if (authHeader == null) {
                throw new JwtVerificationException("Authorization header empty");
            }

            String token = authHeader.replaceAll("\\s*Bearer\\s*", "");

            logger.log("TOKEN: " + token);

            // This verifies the token in the auth header and throws an
            // exception if it does't validate
            Jwt jwt = jwtVerifier.decode(token);

            // Strip the spaces!
            String stripped = inputObj.input.replaceAll("\\s", "");

            // Set the status code and response
            apiGatewayProxyResponseEvent.setStatusCode(200);
            apiGatewayProxyResponseEvent.setBody(stripped);

            // Log the full response object, just for fun
            logger.log(gson.toJson(apiGatewayProxyResponseEvent));

            // Return the result
            return apiGatewayProxyResponseEvent;
        } catch (JsonParseException ex) {
            apiGatewayProxyResponseEvent.setStatusCode(400);
            apiGatewayProxyResponseEvent.setBody("Failed to parse JSON: " + ex.getMessage());
            return apiGatewayProxyResponseEvent;
        } catch (JwtVerificationException ex) {
            apiGatewayProxyResponseEvent.setStatusCode(403);
            // In production, you probably just want to return a 403 and not return the error
            apiGatewayProxyResponseEvent.setBody("Invalid Auth: " + ex.getMessage());
            return apiGatewayProxyResponseEvent;
        }
    }
}
Build the application using the following command:
./gradlew build
Remember that because of the buildZip task and the dependency defined on the build task, the build command will also build the Zip file required for deployment to AWS.
Configure Okta JWT Auth
You’re going to use Okta as your OAuth 2.0 & OpenID Connect (OIDC) provider. OAuth 2.0 and OIDC are open standards that together provide a complete authentication and authorization system. Okta provides an implementation of these standards that you’ll use to add JSON Web Token (JWT) authentication to the serverless function.
Before you begin, you’ll need a free Okta developer account. Install the Okta CLI and run okta register to sign up for a new account. If you already have an account, run okta login.
Then, run okta apps create. Select the default app name, or change it as you see fit.
Choose Web and press Enter.
Select Other.
Then, change the Redirect URI to https://oidcdebugger.com/debug and use http://localhost:8080 for the Logout Redirect URI.
What does the Okta CLI do?
The Okta CLI will create an OIDC Web App in your Okta Org. It will add the redirect URIs you specified and grant access to the Everyone group. You will see output like the following when it’s finished:
Okta application configuration has been written to: /path/to/app/.okta.env
Run cat .okta.env (or type .okta.env on Windows) to see the issuer and credentials for your app.
export OKTA_OAUTH2_ISSUER="https://dev-133337.okta.com/oauth2/default"
export OKTA_OAUTH2_CLIENT_ID="0oab8eb55Kb9jdMIr5d6"
export OKTA_OAUTH2_CLIENT_SECRET="NEVER-SHOW-SECRETS"
Your Okta domain is the first part of your issuer, before /oauth2/default.
NOTE: You can also use the Okta Admin Console to create your app. See Create a Web App for more information.
Open src/main/resources/config.properties and fill in the correct value for okta.oauth.issuer using your Okta developer URI. It will look something like dev-123456.okta.com.
okta.oauth.issuer=https://{yourOktaUrl}/oauth2/default
okta.oauth.audience=api://default
okta.oauth.connectionTimeoutSeconds=10
okta.oauth.readTimeoutSeconds=10
You might notice that you don’t need any of the OIDC application values within lambda function itself, only the issuer URI. That’s because you don’t need an OIDC application to verify tokens, but you do need one to create tokens. The JWT validator retrieves the public key used to sign the JWT using a well-known endpoint with your issue value as a base.
Create the Lambda
Now you can use the AWS CLI to create the lambda function and upload the code to the AWS servers. This command must be run from the root directory of your Java project (or you can change the relative path to the zip file).
You’ll notice that you’re defining a lot of important properties here.
- You define the function name as
stripSpaces. - You tell AWS what the handler function by specifying a class and method.
- You specify the role the lambda should execute under (thus defining what the lambda is allowed to do).
- You define a timeout of 30 seconds. The default is 3 seconds. You’re specifying a longer time because when the JWT verifier runs initially, it needs to download public keys and may take longer than 3 seconds.
- Finally, you increase the memory from the default of 128 to 512 because the JWT verifier needs more than 128 MB to run.
You also need to fill in the Role ARN from the step above (where you created the Lambda Role) in the command below, replacing {yourRoleArn} with something like arn:aws:iam::8324982798:role/lambda-ex.
aws lambda create-function --function-name stripSpaces \
--zip-file fileb://build/distributions/okta-serverless-lambda-1.0-SNAPSHOT.zip \
--handler com.okta.serverless.awslambda.Handler::handleRequest \
--runtime java11 \
--role arn:aws:iam::273214351825:role/lambda-ex \
--timeout 30 \
--memory-size 512
You should get some output that looks like this:
{
    "FunctionName": "stripSpaces",
    "FunctionArn": "arn:aws:lambda:us-west-2:273214351825:function:stripSpaces",
    "Runtime": "java11",
    "Role": "arn:aws:iam::273214351825:role/lambda-ex",
    "Handler": "com.okta.serverless.awslambda.Handler::handleRequest",
    "CodeSize": 4854453,
    "Description": "",
    "Timeout": 30,
    "MemorySize": 128,
    "LastModified": "2020-04-09T19:59:57.882+0000",
    "CodeSha256": "Tnik93nDAd2+AXfYAgK2WA8BCznsIuxiBRLimlfY/6w=",
    "Version": "$LATEST",
    "TracingConfig": {
        "Mode": "PassThrough"
    },
    "RevisionId": "88fa30d0-4b60-4ac1-a48a-c1c7629f6983",
    "State": "Active",
    "LastUpdateStatus": "Successful"
}
Create an AWS API Gateway
Currently, your lambda has no way of talking with the outside world. Further, it’s written using some custom input and output objects that are specific to the AWS API Gateway. The next step is to create an AWS API Gateway REST API and assign it to proxy the lambda. This next step is much simpler to perform on the AWS console.
The API Gateway allows you to define publicly visible input paths to your lambda function. Of course, there are a bazillion various options and configurations, including complex mapping, versioning, staging, etc… That’s all well beyond the scope of this tutorial, but there is a (sometimes bewildering) cornucopia of documentation on the AWS website about it. In truth, AWS can be a little daunting if you don’t use it regularly. However, it’s super well documented, has a very active community, and generally, the quality of online resources for using it are high.
Open your AWS console and navigate to your lambda’s page. Make sure you’re in the right region, us-west-2, if you followed the tutorial.. From the top menu, select Services and enter Lambda. Click on the stripSpaces lambda listed in the Functions table.
Click Add Trigger.
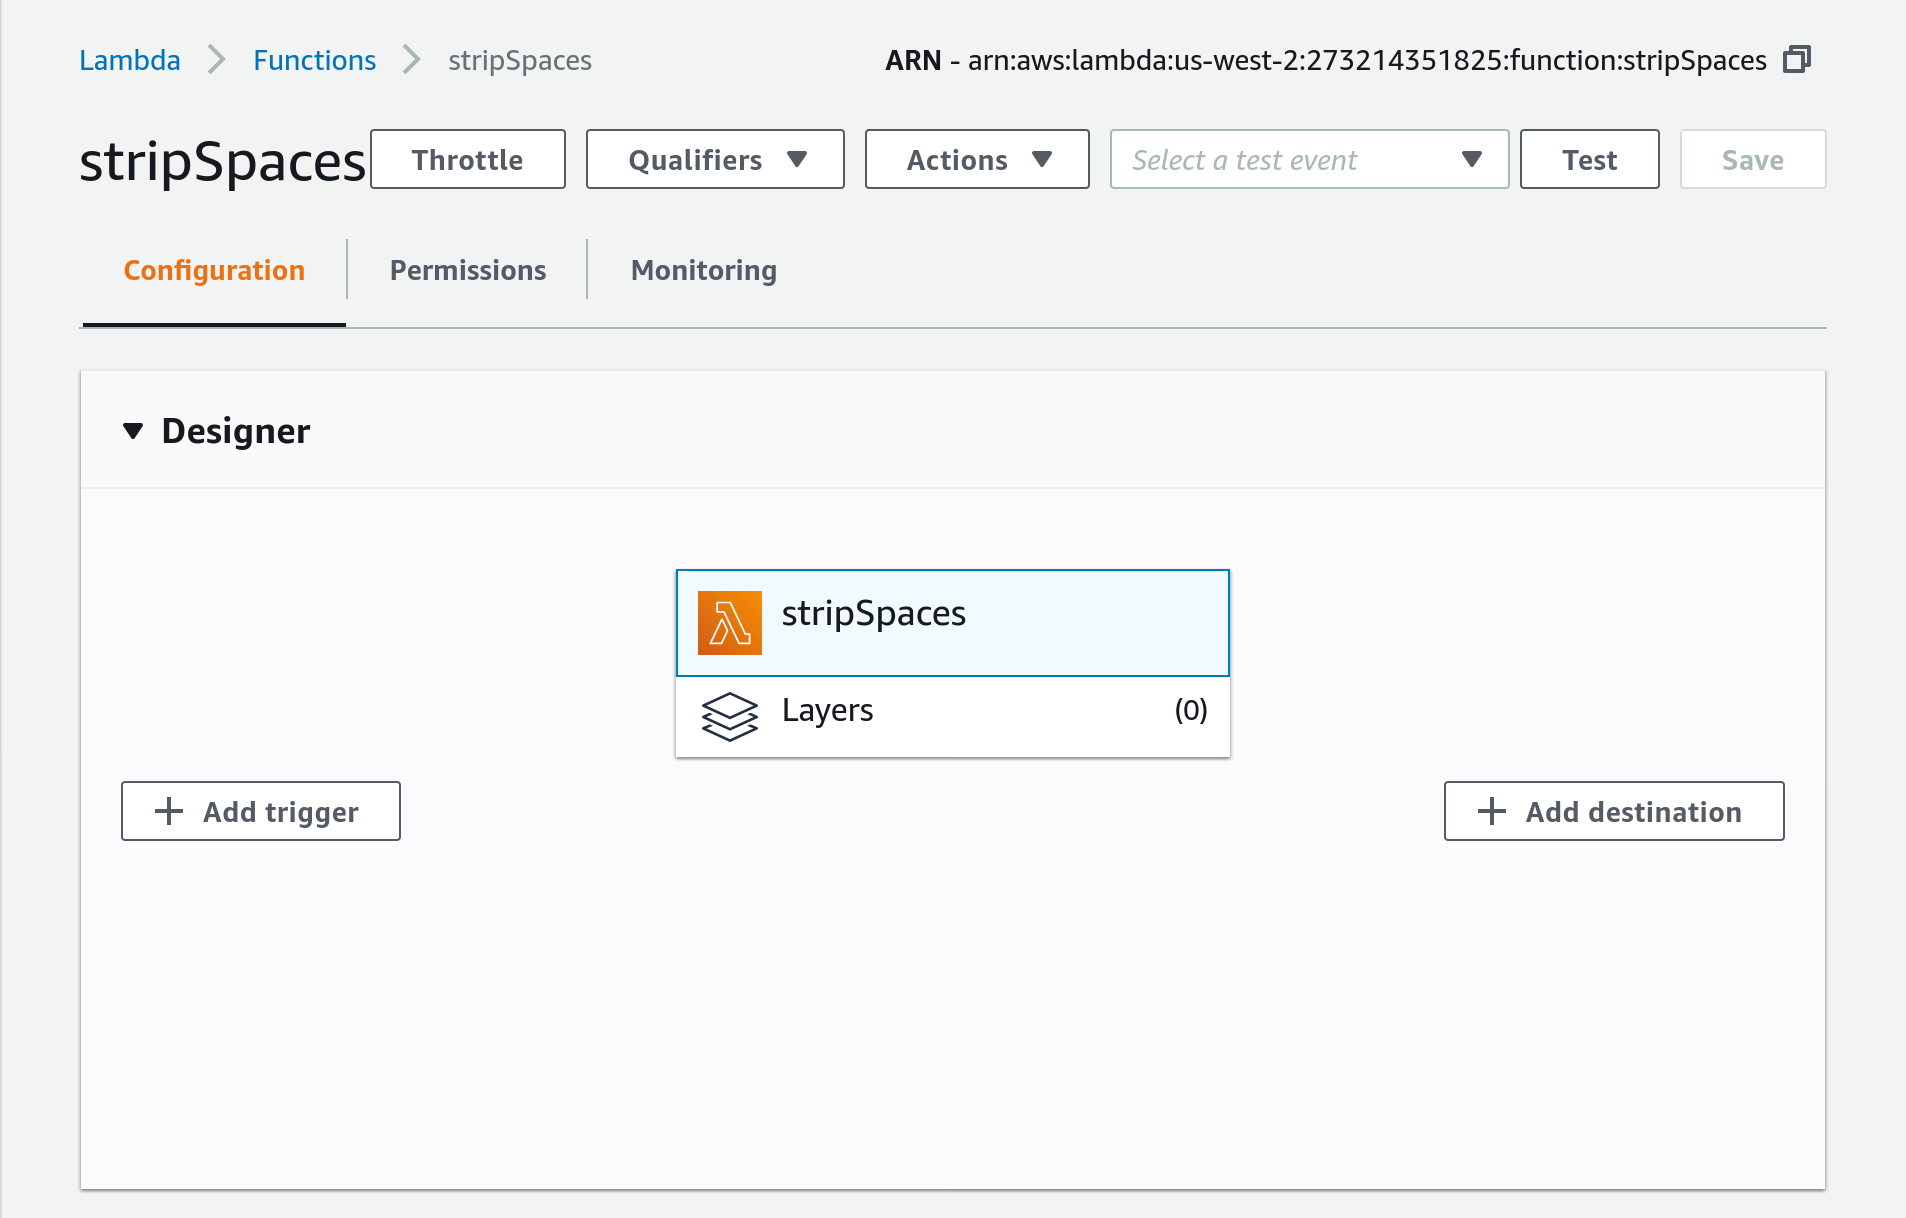
Select API Gateway from the drop-down.
Update the following fields:
- API:
Create an API - API type:
REST API - Security:
Open

Click Add. You should see a page that looks like this:
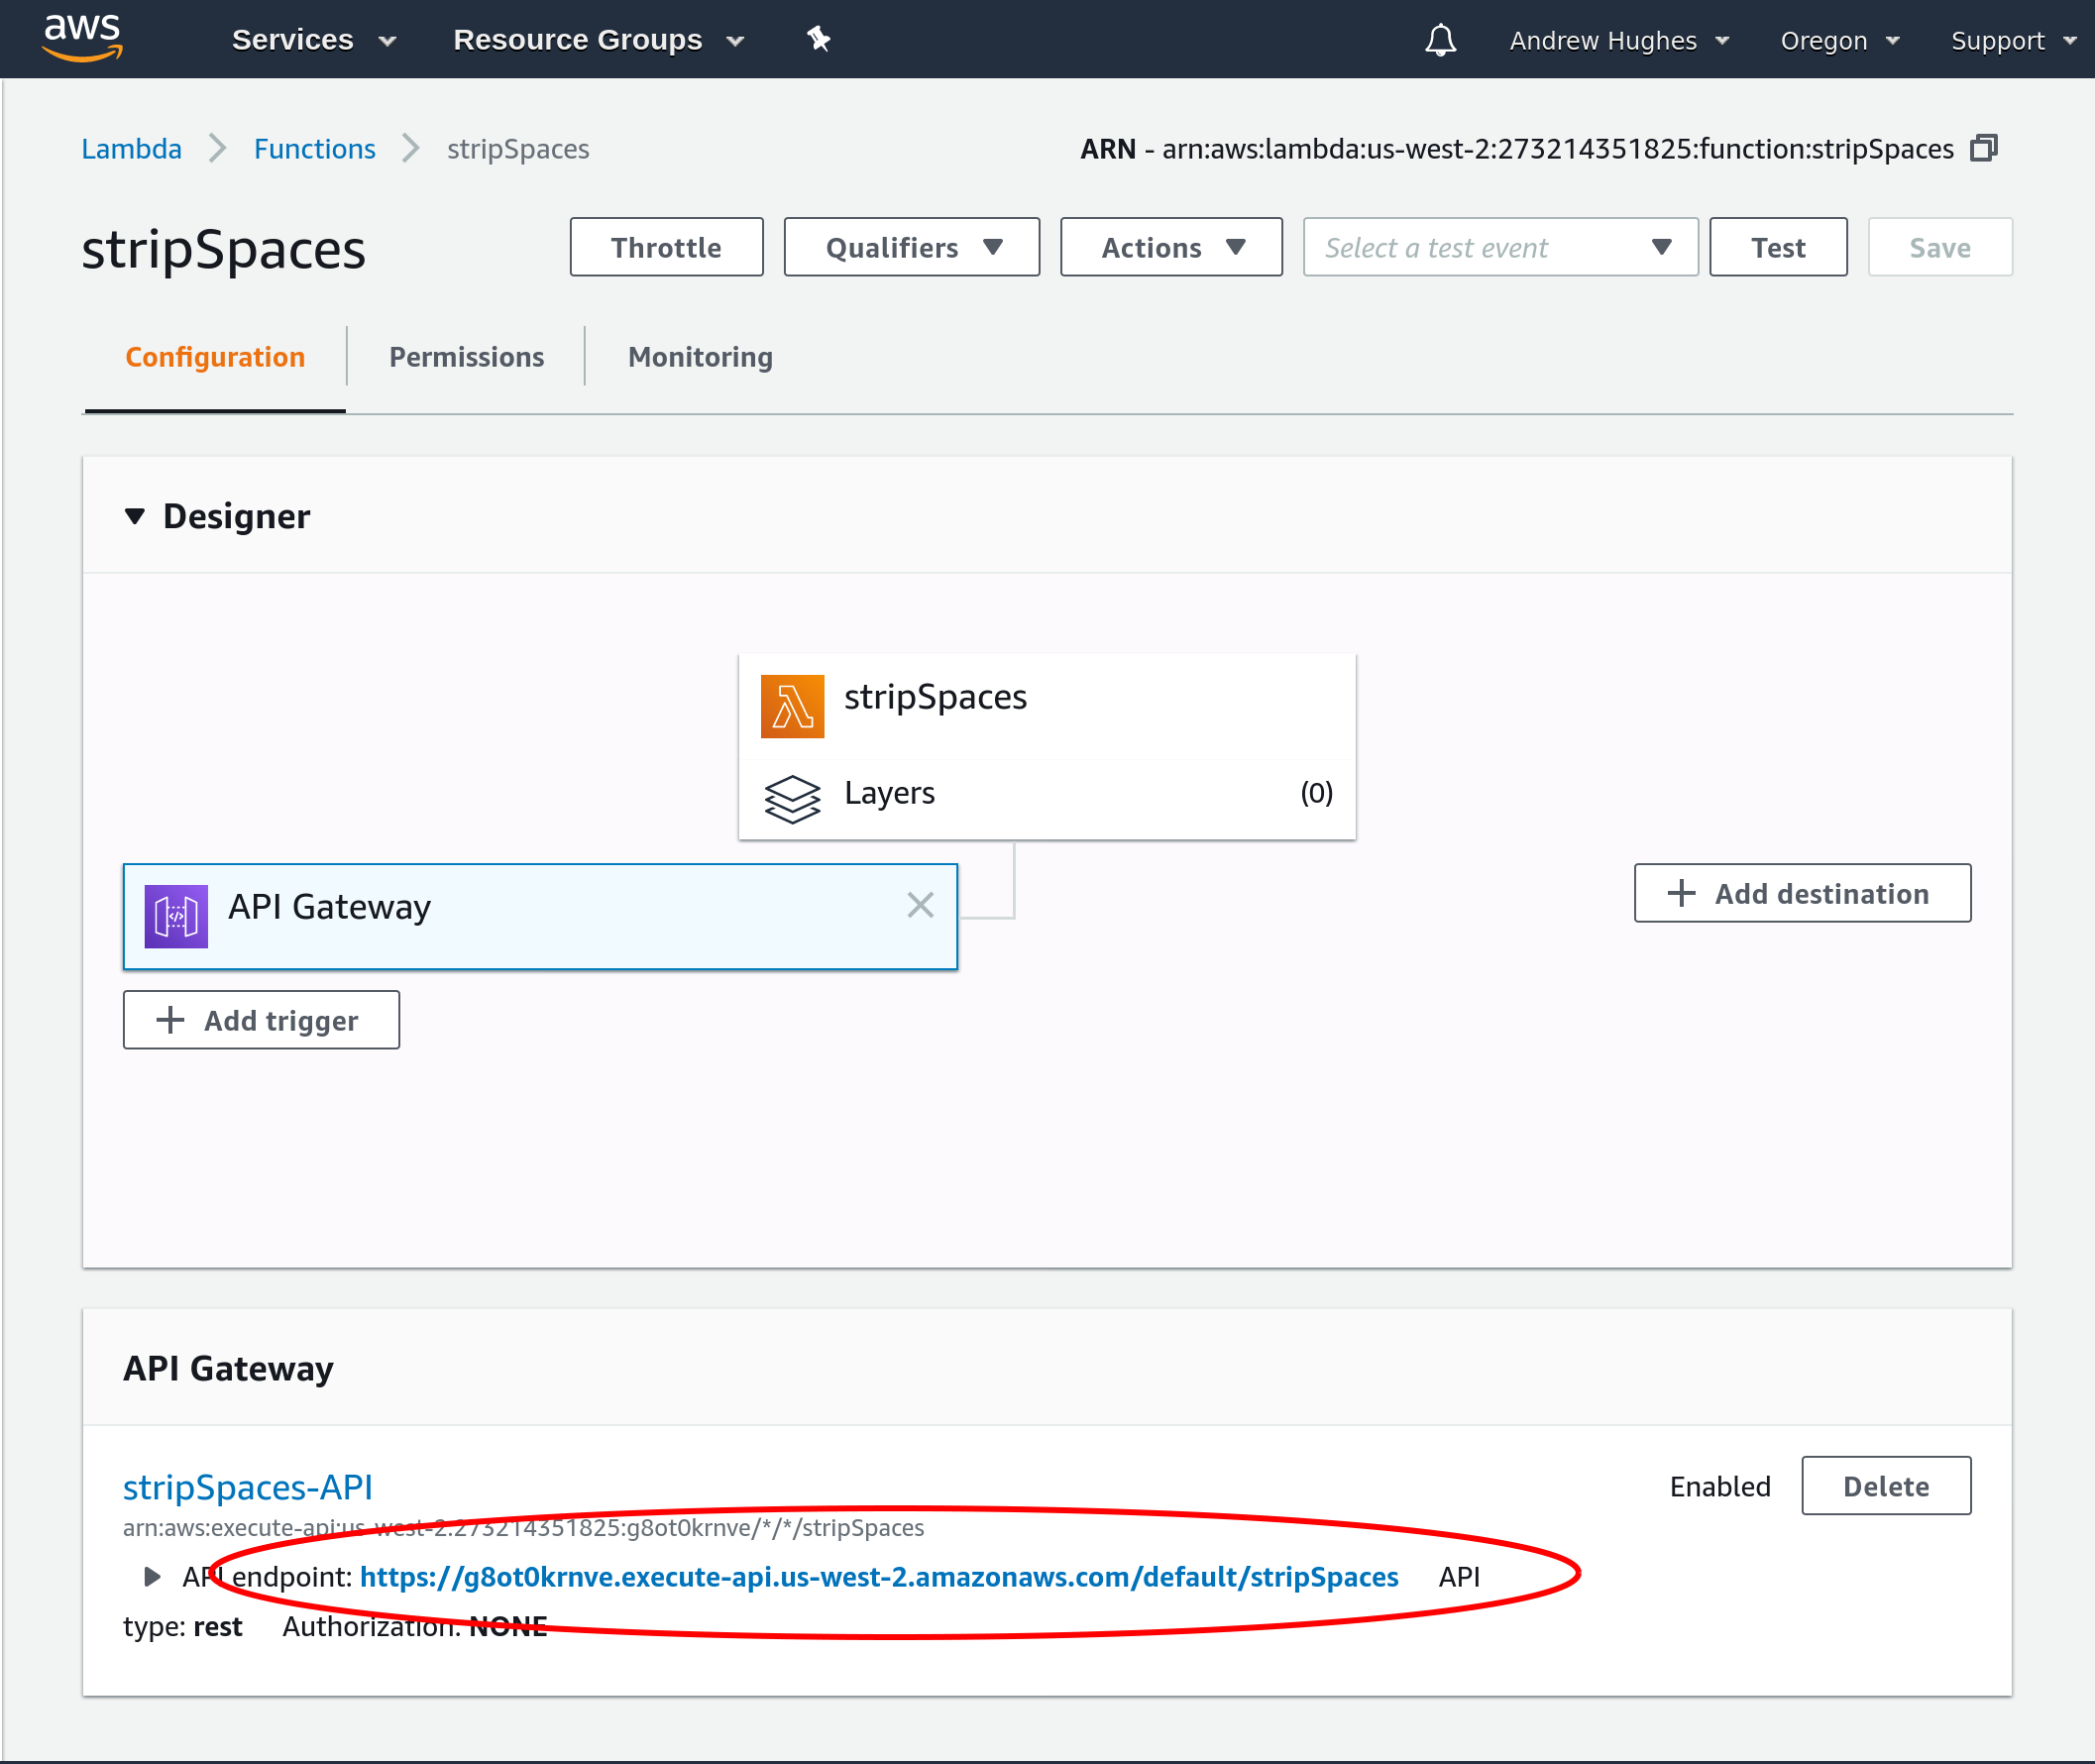
Notice at the bottom is the public URI for your API endpoint.
The general format for the API URIs is: https://{restapi_id}.execute-api.{region}.amazonaws.com/{stage_name}/.
Test Your API Gateway URL
You can test the endpoint by making a request using HTTPie. In the command below, replace {yourGatewayApi} with the URI for the API Gateway you just created. It should look something like this: abcd342x2.execute-api.us-west-2.amazonaws.com/default
Run the request:
http POST https://{yourGatewayUri}/stripSpaces input="test input"
This should fail with:
HTTP/1.1 403 Forbidden
...
Your request requires a valid JSON Web Token issued by your Okta authorization server.
Generate a JWT Token
Now you’re going to use the OpenID Connect Debugger to generate a valid JWT that you can use to make a request against your serverless function.
An easy way to get an access token is to generate one using OpenID Connect Debugger. Open the site in a new window or tab. Fill in your client ID, and use https://{yourOktaDomain}/oauth2/default/v1/authorize for the Authorize URI. Select code for the response type and Use PKCE.
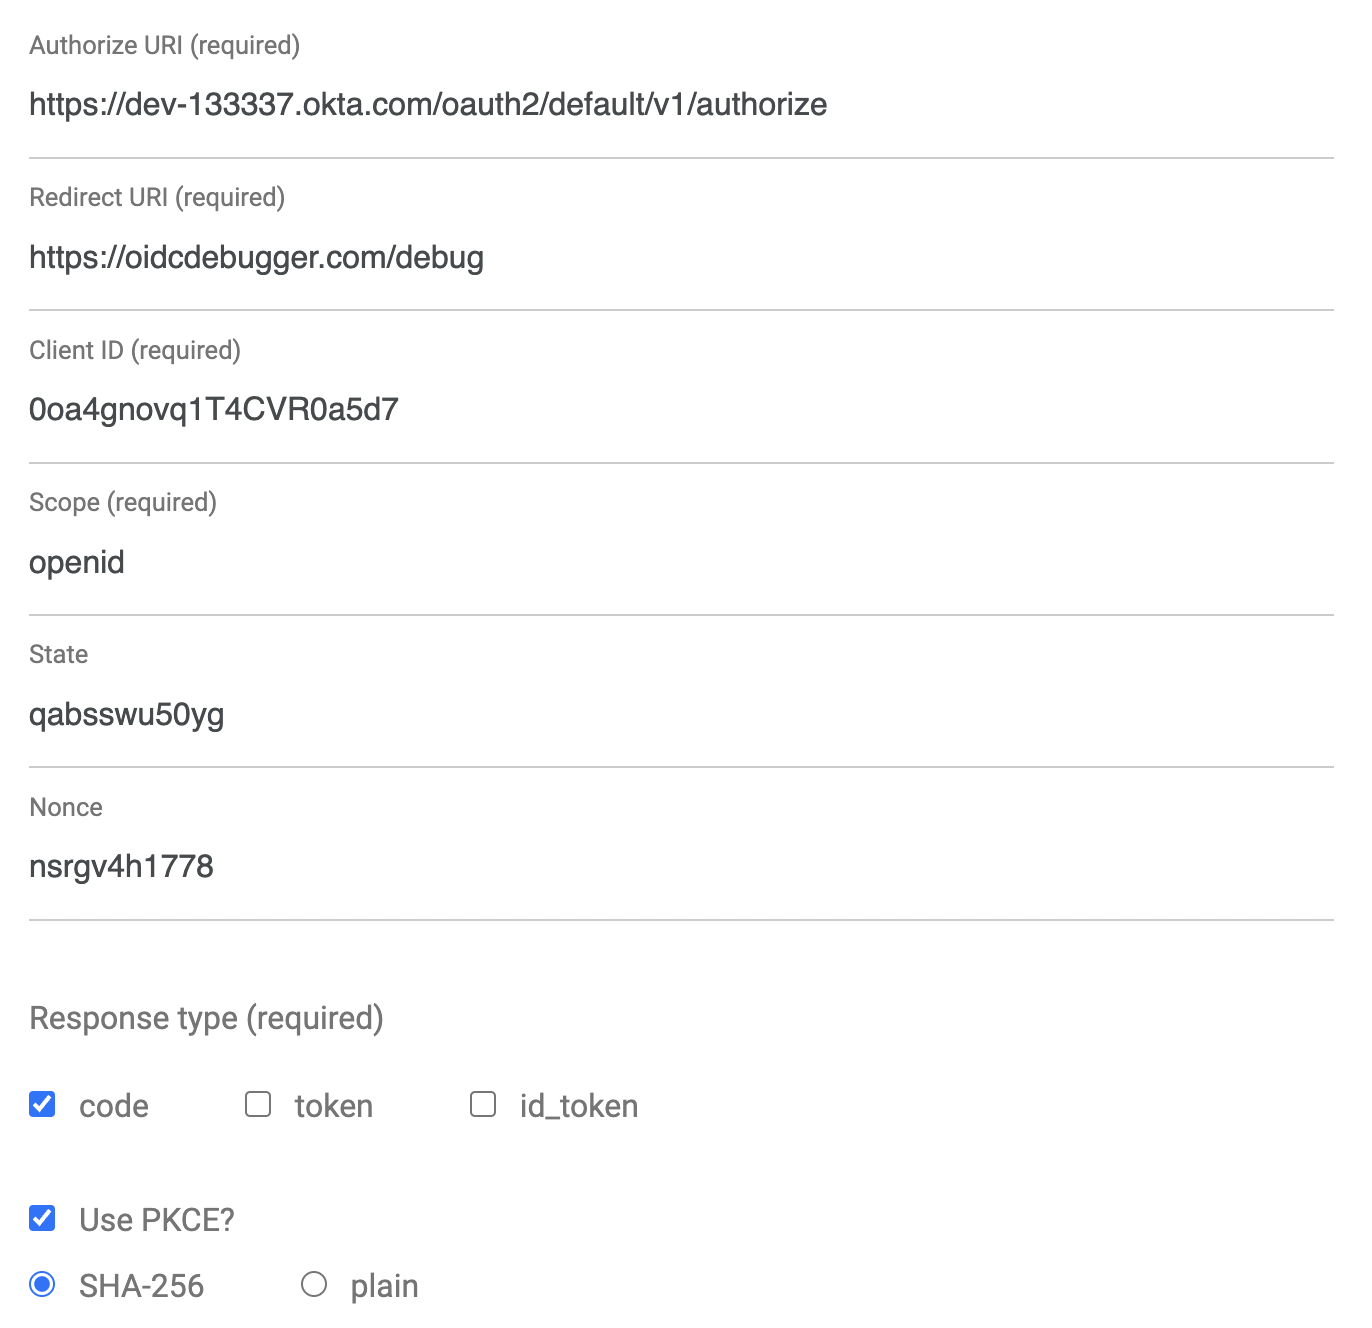
Scroll down and click Send Request. After you authenticate to your Okta org, Okta will redirect back and you’ll see the Authorization code shown in the browser:
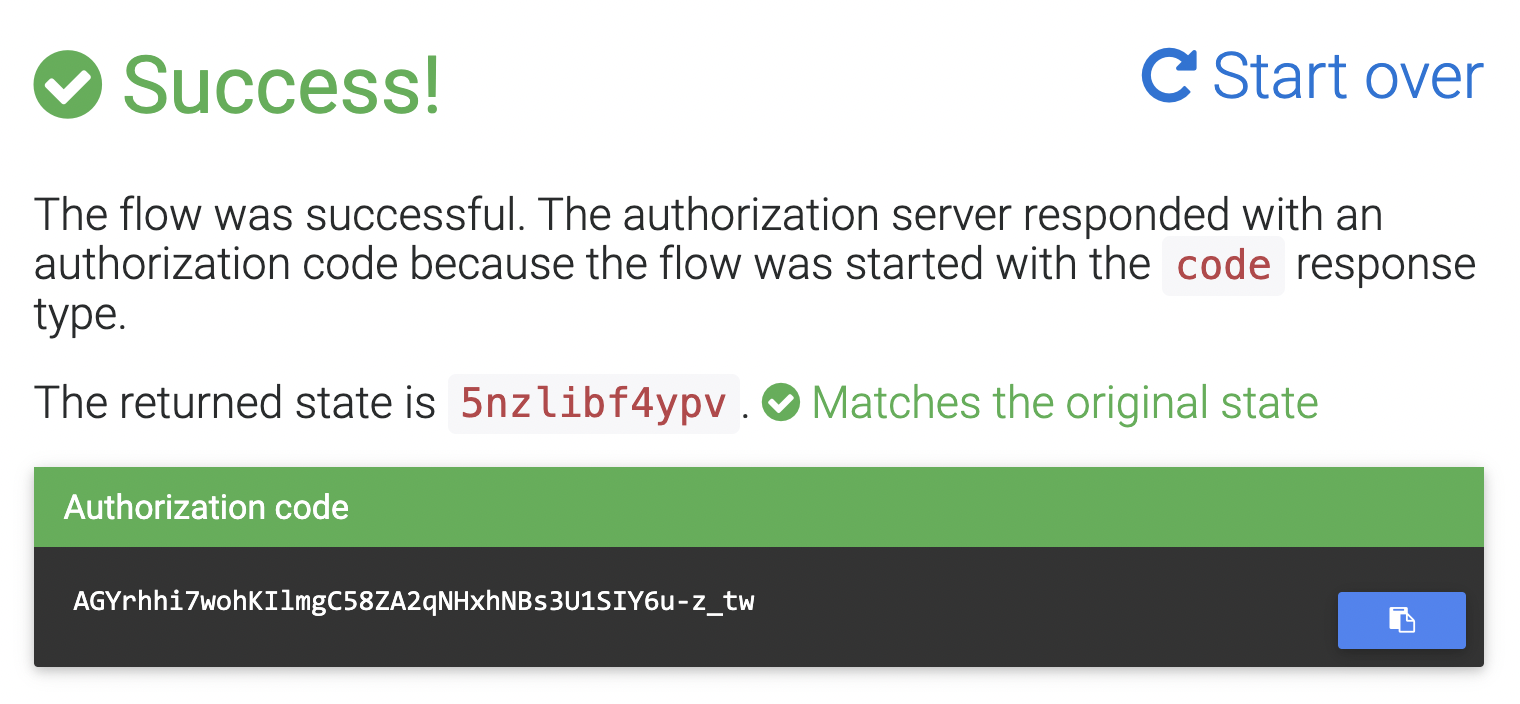
You’ll also see instructions for how to exchange the code for tokens. You’ll can use HTTPie for this. See the command below. Don’t forget to fill in the values in brackets: the authorization code, your Okta domain, your OIDC app client ID, and your OIDC app client secret.
http -f https://{yourOktaDomain}/oauth2/default/v1/token \
grant_type=authorization_code \
code=p48uzYGwqG19EeqvagWU \
client_id={clientId} \
client_secret={clientSecret} \
redirect_uri=https://oidcdebugger.com/debug
You should get JSON response that includes an access token and an ID token.
HTTP/1.1 200 OK
Cache-Control: no-cache, no-store
Connection: keep-alive
...

{
	"access_token": "eyJraWQiOiJycGZWTzd4R2hDWmlvUXdrWWha...",
	"expires_in": 3600,
	"id_token": "eyJraWQiOiJycGZWTzd4R2hDWmlvUXdrWWhaSkph...",
	"scope": "openid",
	"token_type": "Bearer"
}
Copy the resulting JWT Access Token to the clipboard, and in the terminal where you are running your HTTPie commands, save the token value to a shell variable, like so:
TOKEN=eyJraWQiOiJxMm5rZmtwUDRhMlJLV2REU2JfQ...
Test the Protected Serverless Function
Now, with a valid JWT, you can use it to make a request to the Lambda.
http POST https://g8ot0krnve.execute-api.us-west-2.amazonaws.com/default/stripSpaces input="test input" "Authorization: Bearer $TOKEN"
You should see a successful reply:
HTTP/1.1 200 OK
...

testinput
Learn More about AWS and Java
All done. In this tutorial you created a simple serverless function using Amazon Web Services, Java, and Gradle. You saw how to simply integrate AWS deployment with a Gradle script. You also saw how to use Okta to secure the serverless function with JSON Web Tokens, OAuth, and OpenID Connect.
You can find the source code for this tutorial on GitHub at oktadeveloper/okta-java-serverless-aws-example.
If you liked this tutorial, chances are you’ll like some of our other ones:
- How to Build a Secure AWS Lambda API with Node.js and React
- Easy Spring Boot Deployment with AWS Elastic Beanstalk
- Secure Secrets With Spring Cloud Config and Vault
- A Quick Guide to Spring Cloud Stream
- Five Tools to Improve Your Java Code
If you have any questions, please leave a comment below. You can also follow us @oktadev on Twitter. We have a popular YouTube channel too—check it out!
Okta Developer Blog Comment Policy
We welcome relevant and respectful comments. Off-topic comments may be removed.