Build a CRUD API with Java and MongoDB
This tutorial leverages two technologies that are commonly used to build web services: MongoDB and Java (we’ll actually use Spring Boot). MongoDB is a NoSQL database, which is a generic term for any non-relational databases and differentiates them from relational databases. Relational databases, such as SQL, MySQL, Postgres, etc…, store data in large tables with well-defined structures. These structures are strong and tight and not easily changed or customized on a per-record basis (this structure can also be a strength, depending on the use case, but we won’t get too deep into that here). Further, because relational databases grew up pre-internet, they were designed to run on monolithic servers. This makes them hard to scale and sync across multiple machines.
NoSQL databases like MongoDB were developed, to a large degree, to fit the needs of internet scaling where server loads can balloon dramatically and the preferred growth pattern is the replication of servers, not scaling a single monolithic server. MongoDB is a document-based database that natively stores JSON and was built for distributed scaling. Mongo documents are JSON objects and have no predetermined structure on the side of the database. The structure of the documents is determined by the application and can be changed dynamically, adding or removing fields as needed. This means that Mongo documents are very flexible (possibly a blessing and a curse, FYI). Also, because MongoDB produces JSON documents, it has become very popular with many of the JS-based front-ends where Javascript is king and JSON is easily handled.
Spring Boot is an easy to use web application framework from Spring that can be used to create enterprise web services and web applications. They’ve done an admirable job simplifying the underlying complexity of the Spring framework, while still exposing all of its power. And no XML required! Spring Boot can be deployed in a traditional WAR format or can be run stand-alone using embedded Tomcat (the default), Jetty, or Undertow. With Spring you get the benefit of literally decades of proven enterprise Java expertise - Spring has run thousands of productions applications - combined with the simplicity of a modern, “just work” web framework, incredible depth of features, and great community support.
Table of Contents
- Install Java, Spring Boot, MongoDB, and Other Project Dependencies
- Create a Hypermedia-based RESTful Front End
- Create a Domain Class with Java
- Create a Spring Data Repository
- Test the Mongo Repository and Add Some Data
- Create an OIDC Application for Your Java + MongoDB App
- Configure Spring Boot for OAuth 2.0
- Generate a Token Using the OpenID Connect Debugger
- Learn More about Java, Spring Boot, and MongoDB
In this tutorial, you will create a simple Java class file to model your data, you will store this data in a MongoDB database, and you will expose the data with a REST API. To do this, you will use Spring Boot and Spring Data.
Once you have created an unsecured REST API, you are going to use Okta and Spring Security (along with Okta’s Spring Boot Starter) to quickly and easily at JSON Web Token (JWT) authentication to your web service.
Note: In May 2025, the Okta Integrator Free Plan replaced Okta Developer Edition Accounts, and the Okta CLI was deprecated.
We preserved this post for reference, but the instructions no longer work exactly as written. Replace the Okta CLI commands by manually configuring Okta following the instructions in our Developer Documentation.
Install Java, Spring Boot, MongoDB, and Other Project Dependencies
You’ll need to install a few things before you get started.
Java 11: This project uses Java 11. If you don’t have Java 11, you can install OpenJDK. Instructions are found on the OpenJDK website. OpenJDK can also be installed using Homebrew. SDKMAN is another great option for installing and managing Java versions.
HTTPie: This is a simple command-line utility for making HTTP requests. You’ll use this to test the REST application. Check out the installation instructions on their website.
Okta Developer Account: You’ll be using Okta as an OAuth/OIDC provider to add JWT authentication and authorization to the application. Go to developer.okta.com/signup and sign up for a free developer account, if you haven’t already.
Download a Skeleton Project From Spring Initializr
To create a skeleton project, you can use Spring Initializr. It’s a great way to quickly configure a starter for a Spring Boot project.
Open this link to view and download your pre-configured starter project on Spring Initializr. In case this link stops working, select these options on start.spring.io:
- Build tool: Gradle
- Language: Java
- Spring Boot Version: 2.4.5
- Group:
com.okta.mongodb - Artifact:
MongoDbOAuth - Package:
com.okta.mongodb.mongodbouth
Take a look at the settings if you like. You can even preview the project by clicking the Explore button at the bottom of the page.
Once you’re ready, click the green Generate button at the bottom of the page to download the starter project to your computer.
The starter for this project is a Spring Boot 2.4.5 project that uses Java as the application language and Gradle as the build system (there are other options for both). We’ve covered Gradle in-depth in a few other posts (see below), so we won’t go into too much detail here, except to say that you won’t need to install anything for Gradle to work because of the Gradle wrapper, which includes a version of Gradle with the project.
The included dependencies in this project are:
- Spring Web (
spring-boot-starter-web): web application functionality - Spring Data MongoDB (
spring-boot-starter-data-mongodb): MongoDB functionality - Embedded MongoDB Database (
de.flapdoodle.embed.mongo): embed an in-memory MongoDB database, great for testing and tutorials like this - Rest Repositories (
spring-boot-starter-data-rest): needed for the@RepositoryRestResourceannotation, which allows us to quickly generate a REST api from our domain classes - Okta (
okta-spring-boot-starter): starter that simplifies integrating OAuth 2.0 and OIDC authentication and authorization - Lombok (
lombok): a getter, constructor, and setter helper generator via annotations
Before you do anything else, you need to make two changes to the build.gradle file.
- Temporarily comment out the dependency
okta-spring-boot-starter - Change
de.flapdoodle.embed.mongofromtestImplementationtoimplementation
You’re doing number one because you won’t be configuring the JWT OAuth until later in the tutorial, and the application won’t run with this dependency in it unless it is configured. You’re changing the de.flapdoodle.embed.mongo dependency because typically this embedded database is only used in testing, but for the purposes of this tutorial, you’re using it in the actual implementation. In a production situation, you’d use a real MongoDB instance.
The dependencies {} block should look like this:
dependencies {
    implementation 'org.springframework.boot:spring-boot-starter-data-mongodb'
    implementation 'org.springframework.boot:spring-boot-starter-data-rest'
    implementation 'org.springframework.boot:spring-boot-starter-web'
    //implementation 'com.okta.spring:okta-spring-boot-starter:2.0.1'
    compileOnly 'org.projectlombok:lombok'
    annotationProcessor 'org.projectlombok:lombok'
    testImplementation 'org.springframework.boot:spring-boot-starter-test'
    implementation 'de.flapdoodle.embed:de.flapdoodle.embed.mongo'
}
With that done, you can run the application using:
./gradlew bootRun
If all goes well, you’ll see a bunch of output that ends with something like:
...
2019-12-16 20:19:16.430  INFO 69710 --- [           main] o.s.b.w.embedded.tomcat.TomcatWebServer  : Tomcat started on port(s): 8080 (http) with context path ''
2019-12-16 20:19:16.447  INFO 69710 --- [           main] c.o.m.m.MongodboauthApplication          : Started MongodboauthApplication in 16.557 seconds (JVM running for 18.032)
Open a second shell and use HTTPie to make a request:
$ http :8080

HTTP/1.1 200
Content-Type: application/hal+json;charset=UTF-8
Date: Mon, 16 Dec 2019 03:21:21 GMT
Transfer-Encoding: chunked

{
    "_links": {
        "self": {
            "href": "http://localhost:8080/profile"
        }
    }
}
The astute out there might be wondering why this request returned a 200 instead of a 404 (since you haven’t actually defined a controller endpoint).
When you included the spring-boot-starter-data-rest dependency, it included the functionality to automatically generate a “hypermedia-based RESTful front end” (as Spring describes it in their docs).
Create a Hypermedia-based RESTful Front End
What is a “hypermedia-based RESTful front end”? It is a REST API that uses Hypertext Application Language (HAL) format to output descriptive JSON. From the HAL Specification GitHub page:
HAL is a simple format that gives a consistent and easy way to hyperlink between resources in your API. Adopting HAL will make your API explorable, and its documentation easily discoverable from within the API itself. In short, it will make your API easier to work with and therefore more attractive to client developers.
Thus it’s a systematic way for a REST API to describe itself to client applications and for the client applications to easily navigate between the various endpoints.
Currently, there’s not much going on with the application, so there isn’t much to see in the response. It’ll make more sense a little later as we add endpoints and data.
Create a Domain Class with Java
To get the ball rolling, you need to create a domain class. Your application is going to be a simple refrigerator inventory application. You’ll be able to add, update, delete, and list all the items in a refrigerator. Each item will have 4 properties: 1) a unique ID assigned by the database, 2) a name, 3) an owner, and 4) and expiration date.
Create a RefrigeratorItem Java class and copy and paste the code below into it.
src/main/java/com/okta/mongodb/mongodboauth/RefrigeratorItem.java
package com.okta.mongodb.mongodboauth;

import lombok.AllArgsConstructor;
import lombok.Data;
import lombok.NoArgsConstructor;
import org.springframework.data.annotation.Id;
import org.springframework.data.mongodb.core.mapping.Document;

import java.util.Date;

@Document
@Data
@AllArgsConstructor
@NoArgsConstructor
public class RefrigeratorItem {

    @Id
    private String id;
    private String name;
    private String owner;
    private Date expiration;
}
The @Document annotation is the Spring Data annotation that marks this class as defining a MongoDB document data model. The other annotations are Lombok helpers that save us from the drudgery of creating various getters, setters, and constructors. See more about Lombok at the project’s website.
NOTE: If you’re using an IDE for this tutorial, you may need to install and enable the Lombok plugin.
Create a Spring Data Repository
The next step is to define a Spring Data repository. This is where some pretty incredible auto-magicking happens. You’re going to create a base class that extends the Spring Data class MongoRepository. This superclass includes all the necessary code for reading and writing our domain class to and from the database. Further, you will use the @RepositoryRestResource annotation to tell Spring Boot to automatically generate a REST endpoint for the data using the HAL JSON spec. mentioned above.
Create the repository class shown below.
src/main/java/com/okta/mongodb/mongodboauth/RefrigeratorRepository.java
package com.okta.mongodb.mongodboauth;

import org.springframework.data.mongodb.repository.MongoRepository;
import org.springframework.data.rest.core.annotation.RepositoryRestResource;

@RepositoryRestResource(collectionResourceRel = "fridge", path = "fridge")
public interface RefrigeratorRepository extends MongoRepository<RefrigeratorItem, String> {
}
You might notice that in the @RepositoryRestResource annotation you are specifying the /fridge URL context for the generated endpoints.
Test the Mongo Repository and Add Some Data
Stop the app (Control-C, if it’s still running) and re-run it.
./gradlew bootRun
Test the home endpoint again.
$ http :8080

HTTP/1.1 200
Content-Type: application/hal+json;charset=UTF-8
Date: Mon, 16 Dec 2019 03:41:05 GMT
Transfer-Encoding: chunked

{
    "_links": {
        "fridge": {
            "href": "http://localhost:8080/fridge{?page,size,sort}",
            "templated": true
        },
        "profile": {
            "href": "http://localhost:8080/profile"
        }
    }
}
This time you’ll see the /fridge endpoint is listed.
Test it out with http :8080/fridge. You should see a response like the one below:
{
    "_embedded": {
        "fridge": []
    },
    "_links": {
        "profile": {
            "href": "http://localhost:8080/profile/fridge"
        },
        "self": {
            "href": "http://localhost:8080/fridge{?page,size,sort}",
            "templated": true
        }
    },
    "page": {
        "number": 0,
        "size": 20,
        "totalElements": 0,
        "totalPages": 0
    }
}
Not a whole lot going on yet, but that’s easily changed. You’re going to use POST requests to add some data to the embedded MongoDB database. But first, you need to configure an application property.
Add the following line to your src/main/resources/application.properties file.
spring.jackson.date-format=MM-dd-yyyy
This tells Spring the expected date format for the expiration property, which will allow it to properly parse the JSON string into a Java date.
Stop (Control-C) and restart the application.
./gradlew bootRun
Now add some data using the following requests.
http POST :8080/fridge name=milk owner=Andrew expiration=01-01-2020
http POST :8080/fridge name=cheese owner=Andrew expiration=02-10-2020
http POST :8080/fridge name=pizza owner=Andrew expiration=03-30-2020
Check out the inventory now and you should see these new items.
$ http :8080/fridge

HTTP/1.1 200
Content-Type: application/hal+json;charset=UTF-8
Date: Mon, 16 Dec 2019 03:45:23 GMT
Transfer-Encoding: chunked

{
    "_embedded": {
        "fridge": [
            {
                "_links": {
                    "refrigeratorItem": {
                        "href": "http://localhost:8080/fridge/5dae7b4c6a99f01364de916c"
                    },
                    "self": {
                        "href": "http://localhost:8080/fridge/5dae7b4c6a99f01364de916c"
                    }
                },
                "expiration": "01-01-2020",
                "name": "milk",
                "owner": "Andrew"
            },
            {
                "_links": {
                    "refrigeratorItem": {
                        "href": "http://localhost:8080/fridge/5dae7b4d6a99f01364de916d"
                    },
                    "self": {
                        "href": "http://localhost:8080/fridge/5dae7b4d6a99f01364de916d"
                    }
                },
                "expiration": "02-10-2020",
                "name": "cheese",
                "owner": "Andrew"
            },
            {
                "_links": {
                    "refrigeratorItem": {
                        "href": "http://localhost:8080/fridge/5dae7b4f6a99f01364de916e"
                    },
                    "self": {
                        "href": "http://localhost:8080/fridge/5dae7b4f6a99f01364de916e"
                    }
                },
                "expiration": "03-30-2020",
                "name": "pizza",
                "owner": "Andrew"
            }
        ]
    },
    "_links": {
        "profile": {
            "href": "http://localhost:8080/profile/fridge"
        },
        "self": {
            "href": "http://localhost:8080/fridge{?page,size,sort}",
            "templated": true
        }
    },
    "page": {
        "number": 0,
        "size": 20,
        "totalElements": 3,
        "totalPages": 1
    }
}
Notice that the returns JSON gives you the URL for each individual item. If you wanted to delete the first item in the list above, you could run the following request.
http DELETE :8080/fridge/5dae7b4c6a99f01364de916c
The long string,5dae7b4c6a99f01364de916c, is the unique ID for that item. MongoDB doesn’t use sequential integer ID numbers like SQL databases often do. It uses randomly generated UUIDs instead.
If you wanted to update an item, you could use a PUT, as shown below.
http PUT :8080/fridge/5dae7b4f6a99f01364de916e name="old pizza" expiration="03-30-2020" owner="Erin"
Note that with a PUT you have to send data for all the fields, not just the field you want to update, otherwise the omitted fields are set to null. If you just want to update select fields, use a PATCH.
http PATCH :8080/fridge/5dae7b4f6a99f01364de916e owner="Andrew"
With that rather paltry amount of work, you’ve created a MongoDB database model and exposed it to the world using a REST API. Pretty sweet!
The next step is to secure it. The last thing you need is hackers breaking into your house and stealing your pizza and cheese.
Create an OIDC Application for Your Java + MongoDB App
Okta is a software-as-service identity management provider. We provide solutions that make adding authentication and authorization to web applications easy. In this tutorial, you are going to use Okta to add JSON Web Token authentication and authorization to your application using OAuth 2.0 and OpenID Connect (OIDC).
OAuth 2.0 is an authorization protocol (verifying what the client or user is allowed to do) and OIDC is an authentication protocol (verifying the identity of the user) built on top of OAuth 2.0. They are a set of open standards that help ensure your web application’s security is handled safely and effectively. Together they provide a complete authentication and authorization protocol.
They are not, however, implementations. That’s where Okta comes in. Okta will be the identity provider and your Spring Boot app will be the client.
To configure JSON Web Token (JWT) authentication and authorization, you need to create an OIDC application.
Before you begin, you’ll need a free Okta developer account. Install the Okta CLI and run okta register to sign up for a new account. If you already have an account, run okta login.
Then, run okta apps create. Select the default app name, or change it as you see fit.
Choose Web and press Enter.
Select Okta Spring Boot Starter.
Accept the default Redirect URI values provided for you. That is, a Login Redirect of http://localhost:8080/login/oauth2/code/okta and a Logout Redirect of http://localhost:8080.
What does the Okta CLI do?
The Okta CLI will create an OIDC Web App in your Okta Org. It will add the redirect URIs you specified and grant access to the Everyone group. You will see output like the following when it’s finished:
Okta application configuration has been written to:
  /path/to/app/src/main/resources/application.properties
Open src/main/resources/application.properties to see the issuer and credentials for your app.
okta.oauth2.issuer=https://dev-133337.okta.com/oauth2/default
okta.oauth2.client-id=0oab8eb55Kb9jdMIr5d6
okta.oauth2.client-secret=NEVER-SHOW-SECRETS
NOTE: You can also use the Okta Admin Console to create your app. See Create a Spring Boot App for more information.
Configure Spring Boot for OAuth 2.0
Now you need to update the Spring Boot application to use JWT authentication. First, open your src/main/resources/build.gradle file and uncomment the okta-spring-boot-starter dependency.
dependencies {
    ...
    implementation 'com.okta.spring:okta-spring-boot-starter:2.0.1'  <-- UNCOMMENT ME
    ...
}
Make sure your src/main/resources/application.properties file has your Okta Issuer URI in it. You can delete the client ID and secret to tighten up security.
spring.jackson.date-format=MM-dd-yyyy
okta.oauth2.issuer=https://{yourOktaUrl}/oauth2/default
The last update is to add a new class called SecurityConfiguration.
src/main/java/com/okta/mongodb/mongodboauth/SecurityConfiguration.java
package com.okta.mongodb.mongodboauth;

import org.springframework.context.annotation.Configuration;
import org.springframework.security.config.annotation.web.builders.HttpSecurity;
import org.springframework.security.config.annotation.web.configuration.WebSecurityConfigurerAdapter;

@Configuration
public class SecurityConfiguration extends WebSecurityConfigurerAdapter {

    @Override
    public void configure (HttpSecurity http) throws Exception {
        http.authorizeRequests()
            .anyRequest().authenticated()
            .and()
            .oauth2ResourceServer()
            .jwt();
    }
}
This simple class configures Spring Boot to authenticate all requests and to use an OAuth 2.0 resource server with JWT authentication and authorization.
Now if you restart the application and try a request, you’ll get a 401.
$ http :8080

HTTP/1.1 401
Cache-Control: no-cache, no-store, max-age=0, must-revalidate
Content-Length: 0
...
This is the expected response. You’re REST API is now protected and requires a valid token.
Generate a Token Using the OpenID Connect Debugger
To access your now-protected server, you need a valid access token. An easy way to get an access token is to generate one using OpenID Connect Debugger. Open the site in a new window or tab. Fill in your client ID, and use https://{yourOktaDomain}/oauth2/default/v1/authorize for the Authorize URI. Select code for the response type and Use PKCE.
Scroll down to the bottom and click Send Request.
If all went well, you will see your brand-new access token.
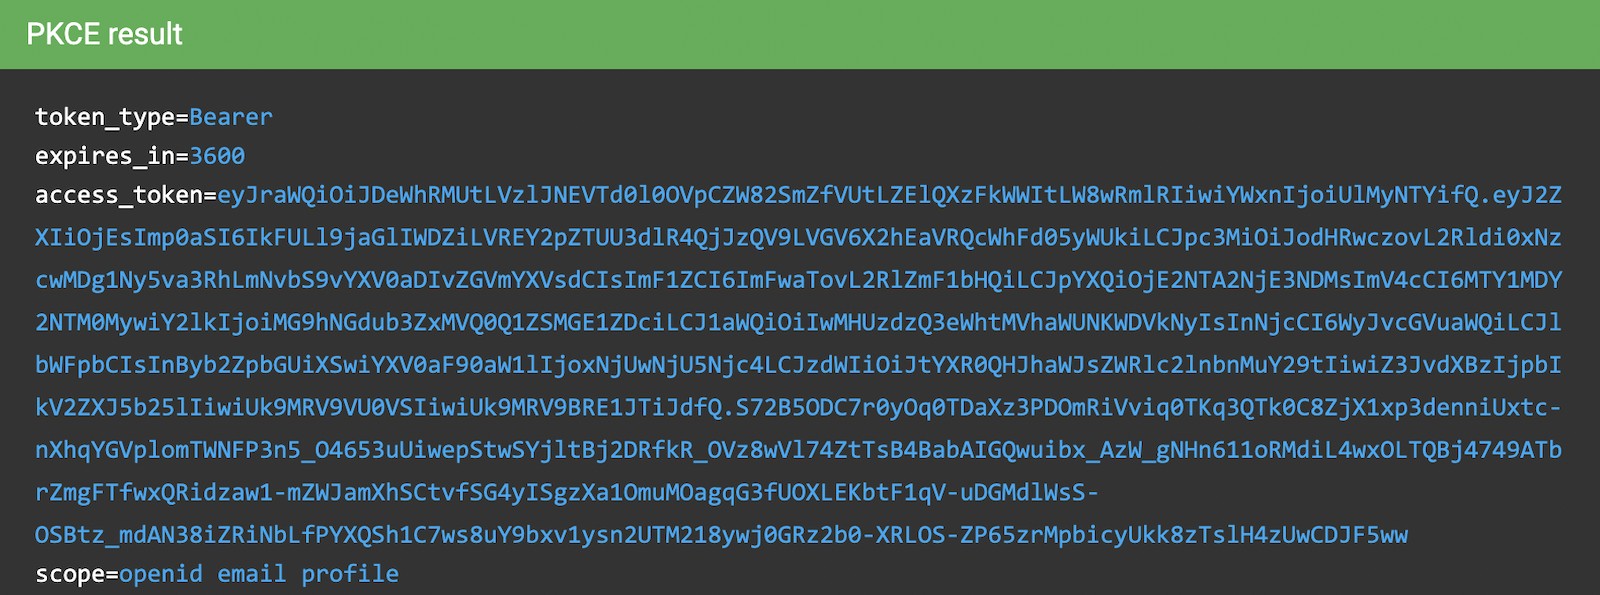
Copy the access token to your clipboard and store it in a shell variable like so:
TOKEN=eyJraWQiOiJrQkNxZ3o1MmQtOUhVSl94c0x4aGtzYlJxUDVD...
Now you can make authenticated and authorized requests.
$ http :8080 "Authorization: Bearer $TOKEN"

HTTP/1.1 200
Cache-Control: no-cache, no-store, max-age=0, must-revalidate
...

{
    "_links": {
        "fridge": {
            "href": "http://localhost:8080/fridge{?page,size,sort}",
            "templated": true
        },
        "profile": {
            "href": "http://localhost:8080/profile"
        }
    }
}
Learn More about Java, Spring Boot, and MongoDB
In this tutorial, you created a Java data model class and mapped it to a MongoDB domain document using Spring Data annotations. You used a simple embedded MongoDB database as the datastore. You used Spring Boot to quickly and easily expose your data model via a REST API. Finally, you secured the REST API using Okta and Okta’s Spring Boot Starter.
The source code for this tutorial is available on GitHub at oktadeveloper/okta-java-mongodb-example.
If you’d like to keep learning, take a look at these related blog posts.
- Build a Reactive App with Spring Boot and MongoDB
- Simple Token Authentication for Java Apps
- Build a Web App with Spring Boot and Spring Security in 15 Minutes
- Create a Secure Spring REST API
- Build a Simple CRUD App with Spring Boot and Vue.js
If you have any questions about this post, please add a comment below. For more awesome content, follow @oktadev on Twitter, like us on Facebook, or subscribe to our YouTube channel.
Changelog:
- Apr 16, 2021: Updated to use Spring Boot 2.4.5 and the Okta CLI for setup. See the example app’s changes in okta-java-mongodb-example#1; changes to this post can be viewed in okta-blog#713;
Okta Developer Blog Comment Policy
We welcome relevant and respectful comments. Off-topic comments may be removed.