Build a Simple CRUD App with Java and JSF

JavaServer Faces (JSF) is a Java framework for building Web applications, centered on components as the building blocks for the user interface. JSF benefits from a rich ecosystem of tools and vendors, as well as out of the box components and libraries that add even more power.
Why use JSF instead of JavaServer Pages (JSP)? There are two primary reasons: First, JSF has more templating capabilities, since it doesn’t write your view directly as it encounters the tag. Instead, you build a view as XML that can be preprocessed before output to HTML. This means you can reuse and better organize your code as your app grows. Second, JSF provides an entire MVC architecture for you, while JSP is just a scripting language that abstracts writing a Servlet by hand.
With that background, let’s create a simple application that shows the power of JSF. In this tutorial, we will build a simple web app to manage a list of your favorite books backed by a database and secure access to your app with Okta.
Table of Contents
- Create a CRUD Application With JSF
- Create A Book In Your JSF Application
- Read the books in your JSF Application
- Update A Record
- Delete A Record
- Improve The User Interface
- Run the Application with PrimeFaces Enabled
- Secure Your Application With Okta
- Learn More About Java, JSF and User Auth!
Note: In May 2025, the Okta Integrator Free Plan replaced Okta Developer Edition Accounts, and the Okta CLI was deprecated.
We preserved this post for reference, but the instructions no longer work exactly as written. Replace the Okta CLI commands by manually configuring Okta following the instructions in our Developer Documentation.
Create a CRUD Application With JSF
To begin, we will use the TomEE Maven archetype to generate the project:
$ mvn archetype:generate \
    -DarchetypeGroupId=org.apache.openejb.maven \
    -DarchetypeArtifactId=tomee-webapp-archetype \
    -DarchetypeVersion=1.7.1
Follow the interactive generation process, using these parameters to generate the app:
Define value for property 'groupId': com.okta.developer
Define value for property 'artifactId': jsf-crud
Define value for property 'version' 1.0-SNAPSHOT: : 1.0-SNAPSHOT
Define value for property 'package' com.okta.developer: : com.okta.developer
Confirm properties configuration:
groupId: com.okta.developer
artifactId: jsf-crud
version: 1.0-SNAPSHOT
package: com.okta.developer
Y: : Y
Then cd into the project, build and run to see it in action:
$ cd jsf-crud # or the artifactId you used to generate the project
$ mvn package
$ mvn tomee:run
Create A Book In Your JSF Application
Now point your preferred browser to http://localhost:8080/. You should see a form to create a book.
To add a book, just type the title and hit Add. You will land on a success page, and will be able to see a list of the books in the database. This form page is generated by src/main/webapp/book.xhtml, and the results page is generated by src/main/webapp/result.xhtml.
The book.xhtml is a simple form that connects its fields to the com.okta.developer.presentation.BookBean class. For example:
<h:inputText value='#{bookBean.bookTitle}'/>
For actions, like submitting the form, we bind directly to methods in the “bean” class. That specific form will trigger the add() method in the class:
<h:commandButton action="#{bookBean.add}" value="Add"/>
The BookBean.add() method creates a new Book instance and sets its title to what we have stored in bookTitle field (remember it was bound to the form’s input field):
public String add() {
    Book book = new Book();
    book.setBookTitle(bookTitle);
    bookService.addBook(book);
    return "success";
}
Then, it asks bookService to persist the book to the database as we can see in the com.okta.developer.application.BookService class:
public void addBook(Book book) {
  entityManager.persist(book);
}
But what about that "success" string being returned? It’s defined in the file src/main/webapp/WEB-INF/faces-config.xml:
<navigation-rule>
  <from-view-id>/book.xhtml</from-view-id>
  <navigation-case>
    <from-outcome>success</from-outcome>
    <to-view-id>/result.xhtml</to-view-id>
  </navigation-case>
</navigation-rule>
This means when a success happens on /book.xhtml file, JSF will send the user to the view /result.xhtml. In the result.xhtml file, we also see a button that binds to a method in the bean:
<h:commandButton action="#{bookBean.fetchBooks}" value="View books present"/>
This executes the method fetchBooks() in the class. In the src/main/java/com/okta/developer/presentation/BookBean.java file, we see fetchBooks() delegates to a method in bookService, which stores the results into the booksAvailable field, and then returns the string “success”.
public String fetchBooks() {
    booksAvailable=bookService.getAllBooks();
    return "success";
}
Read the books in your JSF Application
In the getAllBooks() method, the com.okta.developer.application.BookService class queries the database fetching all Book instances with no filters:
public List<Book> getAllBooks() {
    CriteriaQuery<Book> cq = entityManager.getCriteriaBuilder().createQuery(Book.class);
    cq.select(cq.from(Book.class));
    return entityManager.createQuery(cq).getResultList();
}
Cool. But how does the page actually display the book information? In the result.xhtml file, find the ui:repeat tag:
<ui:repeat value="#{bookBean.booksAvailable}" var="book">
    #{book.bookTitle} <br/>
</ui:repeat>
The <ui:repeat> tag iterates over each value, in this case #{bookBean.booksAvailable} is the field we just assigned from the fetchBooks() method. Each element of the collection can be referenced by the name in the var attribute of the tag (in this case book).
Whatever is inside the <ui:repeat> tag will be repeated for each of the elements in the collection. Here, it simply outputs the book title by using the interpolation notation #{book.bookTitle} followed by a line break tag (<br/>).
We just covered both the Create and Read methods of our CRUD application. Awesome! Now let’s try to Update a book.
Update A Record
Create an edit.xhtml file in src/main/webapp folder to contain the form to update a Book in the database. It looks very similar to the Create form:
<?xml version="1.0" encoding="UTF-8"?>
<!DOCTYPE html PUBLIC "-//W3C//DTD XHTML 1.0 Transitional//EN"
        "http://www.w3.org/TR/xhtml1/DTD/xhtml1-transitional.dtd">
<html xmlns="http://www.w3.org/1999/xhtml"
      xmlns:f="http://java.sun.com/jsf/core"
      xmlns:h="http://java.sun.com/jsf/html">

<h:body bgcolor="white">
    <f:view>
        <h1>Update book</h1>
        <h:form>
            <h:panelGrid columns="2">
                <h:outputText value='Enter book title'/>
                <h:inputText value='#{bookBean.bookTitle}'/>
                <h:outputText value='Update'/>
                <h:commandButton action="#{bookBean.update}" value="Update"/>
            </h:panelGrid>
            <input type="hidden" name="bookId" value='#{param.bookId}'/>
        </h:form>
    </f:view>
</h:body>
</html>
Now add a link to this page from the book list in file src/main/webapp/result.xhtml by changing the content of <ui:repeat> tag:
<ui:repeat value="#{bookBean.booksAvailable}" var="book">
    <h:link value="#{book.bookTitle}" outcome="edit">
        <f:param name="bookId" value="#{book.bookId}"/>
    </h:link>
    <br/>
</ui:repeat>
Now each book in the list is a link to that book’s edit page.
However, if you try to click on that link, you’ll see that the form shows empty on page load. Let’s fix that and load the book’s title before the form renders. To fetch the bookId from the URL in our bean, include the following dependency in the pom.xml file:
<dependencies>
  ...
  <dependency>
    <groupId>javax</groupId>
    <artifactId>javaee-web-api</artifactId>
    <version>6.0</version>
    <scope>provided</scope>
  </dependency>
  ...
</dependencies>
Edit the src/main/java/com/okta/developer/application/BookService.java file and add the following method to BookService class to load the book from the database:
import javax.persistence.criteria.CriteriaBuilder;
import javax.persistence.criteria.Root;

...

public Book getBook(Integer bookId) {
    CriteriaBuilder cb = entityManager.getCriteriaBuilder();
    CriteriaQuery<Book> cq = cb.createQuery(Book.class);
    Root<Book> book = cq.from(Book.class);
    cq.select(book);
    cq.where(cb.equal(book.get("bookId"), bookId));
    return entityManager.createQuery(cq).getSingleResult();
}
And add the following logic to BookBean to load the book before page render:
import javax.annotation.PostConstruct;
import javax.faces.context.FacesContext;

...

private Integer bookId;
private Book book;

@PostConstruct
public void postConstruct() {
    String bookIdParam = FacesContext.getCurrentInstance()
        .getExternalContext().getRequestParameterMap().get("bookId");
    if (bookIdParam != null) {
        bookId = Integer.parseInt(bookIdParam);
        book = bookService.getBook(bookId);
        bookTitle = book.getBookTitle();
    }
}
Now let’s create a method that will persist the changes to the database, with the following method in the BookService class:
public void update(Book book) {
    entityManager.merge(book);
}
Also, add the update method to BookBean class:
public String update() {
    book.setBookTitle(bookTitle);
    bookService.update(book);
    return "success";
}
And to properly redirect the user to the list page, add the following navigation rule to the file src/main/webapp/faces-config.xml:
<navigation-rule>
  <from-view-id>/edit.xhtml</from-view-id>
  <navigation-case>
    <from-outcome>success</from-outcome>
    <to-view-id>/result.xhtml</to-view-id>
  </navigation-case>
</navigation-rule>
Now that we are done updating the book, let’s move on to the Delete part.
Delete A Record
The previous section covers the hard part - loading a book inside the bean. Adding the delete button will be easier.
Add a delete link for each entry in the list to the edit page in file src/main/webapp/result.xhtml:
<ui:repeat value="#{bookBean.booksAvailable}" var="book">
    <h:link value="#{book.bookTitle}" outcome="edit">
        <f:param name="bookId" value="#{book.bookId}"/>
    </h:link>

    <!-- Delete link: -->
    <h:outputText value=" ("/>
    <h:link value="Delete" outcome="delete">
        <f:param name="bookId" value="#{book.bookId}"/>
    </h:link>
    <h:outputText value=")"/>
    <br/>
</ui:repeat>
Now,create the delete confirmation page at src/main/webapp/delete.xhtml:
<?xml version="1.0" encoding="UTF-8"?>

<!DOCTYPE html PUBLIC "-//W3C//DTD XHTML 1.0 Transitional//EN"
        "http://www.w3.org/TR/xhtml1/DTD/xhtml1-transitional.dtd">
<html xmlns="http://www.w3.org/1999/xhtml"
      xmlns:f="http://java.sun.com/jsf/core"
      xmlns:h="http://java.sun.com/jsf/html">

<h:body bgcolor="white">
    <f:view>
        <h1>Delete book?</h1>
        <h:form>
            <h:panelGrid columns="2">
                <h:outputText value='Book title'/>
                <h:inputText value='#{bookBean.bookTitle}' readonly="true"/>
                <h:outputText value='Delete'/>
                <h:commandButton action="#{bookBean.delete}" value="Confirm Delete"/>
            </h:panelGrid>
            <input type="hidden" name="bookId" value='#{param.bookId}'/>
        </h:form>
    </f:view>
</h:body>
</html>
And add the proper delete handler in the BookBean class:
public String delete() {
    bookService.delete(book);
    return "success";
}
Next, handle the delete in the BookService class:
import javax.persistence.Query;

...

public void delete(Book book) {
    Query query = entityManager.createQuery("DELETE FROM Book b WHERE b.bookId = :bookId");
    query.setParameter("bookId", book.getBookId());
    query.executeUpdate();
}
And don’t forget to redirect your user back to the list after deletion by adding the following to src/main/webapp/faces-config.xml:
<navigation-rule>
    <from-view-id>/delete.xhtml</from-view-id>
    <navigation-case>
        <from-outcome>success</from-outcome>
        <to-view-id>/result.xhtml</to-view-id>
    </navigation-case>
</navigation-rule>
Done! I told you delete would be easier.
So now we can Create, Update, Read and Delete our Books CRUD application.
Improve The User Interface
The CRUD app works fine, but the app doesn’t look nice. Let’s improve our app user interface a bit with PrimeFaces.
First, add it as a dependency in our pom.xml:
<dependencies>
    ...
    <dependency>
        <groupId>org.primefaces</groupId>
        <artifactId>primefaces</artifactId>
        <version>7.0</version>
    </dependency>
    ...
</dependencies>
Now we can use any PrimeFaces component in our views by declaring its namespace to our html tag, like so:
<html xmlns="http://www.w3.org/1999/xhtml"
      xmlns:f="http://java.sun.com/jsf/core"
      xmlns:h="http://java.sun.com/jsf/html"
      xmlns:p="http://primefaces.org/ui">
For a deeper overview, read about each PrimeFaces component in their site.
First, let’s remove the book list from our BookBean class and create a BookList class instead. This will load the book list as soon as the page loads. Create the file src/main/java/com/okta/developer/presentation/BookList.java with the following content:
package com.okta.developer.presentation;

import com.okta.developer.application.BookService;
import com.okta.developer.entities.Book;

import javax.annotation.PostConstruct;
import javax.inject.Inject;
import javax.inject.Named;
import java.util.List;

@Named
public class BookList {

    @Inject
    private BookService bookService;
    private List<Book> booksAvailable;

    @PostConstruct
    public void postConstruct() {
        booksAvailable = bookService.getAllBooks();
    }

    public List<Book> getBooksAvailable() {
        return booksAvailable;
    }
}
Remove the following blocks of code related to the booksAvailable field from BookBean class:
private List<Book> booksAvailable;

public List<Book> getBooksAvailable() {
    return booksAvailable;
}

public void setBooksAvailable(List<Book> booksAvailable) {
    this.booksAvailable = booksAvailable;
}

public String fetchBooks() {
    booksAvailable=bookService.getAllBooks();
    return "success";
}
Let’s also change our landing page. Instead of adding a Book through the form, let’s present the book list. For that, edit index.jsp to change the redirect to result.jsf:
<%@ page session="false" %>
<%
    response.sendRedirect("result.jsf");
%>
Here is what my files now look like. Feel free to adapt yours as you browse the PrimeFaces component library.
File: src/main/webapp/book.xhtml using a p:panel and p:panelGrid:
<?xml version="1.0" encoding="UTF-8"?>
<!-- File: book.xhtml -->
<!DOCTYPE html PUBLIC "-//W3C//DTD XHTML 1.0 Transitional//EN"
        "http://www.w3.org/TR/xhtml1/DTD/xhtml1-transitional.dtd">
<html xmlns="http://www.w3.org/1999/xhtml"
      xmlns:h="http://java.sun.com/jsf/html"
      xmlns:p="http://primefaces.org/ui">
<h:head></h:head>
<h:body>
    <h:form>
        <p:panel header="Create Book">
            <p:panelGrid columns="1" layout="grid">
                <p:outputLabel for="book-title" value="Enter book title"/>
                <p:inputText id="book-title" value='#{bookBean.bookTitle}'/>
                <p:commandButton value="Create" action="#{bookBean.add}" ajax="false"/>
            </p:panelGrid>
            <!-- We will use this later
            <input type="hidden" value="${_csrf.token}" name="${_csrf.parameterName}"/>
            -->
        </p:panel>
    </h:form>
</h:body>
</html>
File: src/main/webapp/delete.xhtml using a p:panel and p:panelGrid:
<?xml version="1.0" encoding="UTF-8"?>
<!-- File: delete.xhtml -->
<!DOCTYPE html PUBLIC "-//W3C//DTD XHTML 1.0 Transitional//EN"
        "http://www.w3.org/TR/xhtml1/DTD/xhtml1-transitional.dtd">
<html xmlns="http://www.w3.org/1999/xhtml"
      xmlns:h="http://java.sun.com/jsf/html"
      xmlns:p="http://primefaces.org/ui">
<h:head></h:head>
<h:body>
    <h:form>
        <p:panel header="Delete Book?">
            <p:panelGrid columns="1" layout="grid">
                <p:outputLabel for="book-title" value="Book title"/>
                <p:inputText id="book-title" value='#{bookBean.bookTitle}' readonly="true"/>
                <p:commandButton value="Confirm Delete" action="#{bookBean.delete}" ajax="false"/>
            </p:panelGrid>
            <input type="hidden" name="bookId" value='#{param.bookId}'/>
            <!-- We will use this later
            <input type="hidden" value="${_csrf.token}" name="${_csrf.parameterName}"/>
            -->
        </p:panel>
    </h:form>
</h:body>
</html>
File: src/main/webapp/edit.xhtml using a p:panel and p:panelGrid:
<?xml version="1.0" encoding="UTF-8"?>
<!-- File: edit.xhtml -->
<!DOCTYPE html PUBLIC "-//W3C//DTD XHTML 1.0 Transitional//EN"
        "http://www.w3.org/TR/xhtml1/DTD/xhtml1-transitional.dtd">
<html xmlns="http://www.w3.org/1999/xhtml"
      xmlns:h="http://java.sun.com/jsf/html"
      xmlns:p="http://primefaces.org/ui">
<h:head></h:head>
<h:body>
    <h:form>
        <p:panel header="Update Book">
            <p:panelGrid columns="1" layout="grid">
                <p:outputLabel for="book-title" value="Enter new book title"/>
                <p:inputText id="book-title" value='#{bookBean.bookTitle}'/>
                <p:commandButton value="Update" action="#{bookBean.update}" ajax="false"/>
            </p:panelGrid>
            <input type="hidden" name="bookId" value='#{param.bookId}'/>
            <!-- We will use this later
            <input type="hidden" value="${_csrf.token}" name="${_csrf.parameterName}"/>
            -->
        </p:panel>
    </h:form>
</h:body>
</html>
File: src/main/webapp/result.xhtml using a p:dataList instead of ui:repeat:
<?xml version="1.0" encoding="UTF-8"?>
<!-- File: result.xhtml -->
<!DOCTYPE html PUBLIC "-//W3C//DTD XHTML 1.0 Transitional//EN"
        "http://www.w3.org/TR/xhtml1/DTD/xhtml1-transitional.dtd">
<html xmlns="http://www.w3.org/1999/xhtml"
      xmlns:f="http://java.sun.com/jsf/core"
      xmlns:h="http://java.sun.com/jsf/html"
      xmlns:p="http://primefaces.org/ui">
<h:head></h:head>
<h:body>
    <h:link outcome="book" value="Create Book"/>
    <p:dataList value="#{bookList.booksAvailable}" var="book" type="ordered">
        <f:facet name="header">
            Book List
        </f:facet>
        #{book.bookTitle}
        <h:outputText value=" ("/>
        <p:link value="Edit" outcome="edit">
            <f:param name="bookId" value="#{book.bookId}"/>
        </p:link>
        <h:outputText value=" | "/>
        <p:link value="Delete" outcome="delete">
            <f:param name="bookId" value="#{book.bookId}"/>
        </p:link>
        <h:outputText value=")"/>
    </p:dataList>
</h:body>
</html>
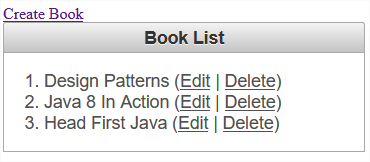
Run the Application with PrimeFaces Enabled
Restart the app with mvn package tomee:run. The app will look a bit better now! Check out the book list:
Secure Your Application With Okta
At the moment, anyone can access our awesome Book application and change the database. To prevent that, let’s add a security layer to our application with the Spring Security library and authenticate users through Okta.
Before you begin, you’ll need a free Okta developer account. Install the Okta CLI and run okta register to sign up for a new account. If you already have an account, run okta login.
Then, run okta apps create. Select the default app name, or change it as you see fit.
Choose Web and press Enter.
Select Okta Spring Boot Starter.
Accept the default Redirect URI values provided for you. That is, a Login Redirect of http://localhost:8080/login/oauth2/code/okta and a Logout Redirect of http://localhost:8080.
What does the Okta CLI do?
The Okta CLI will create an OIDC Web App in your Okta Org. It will add the redirect URIs you specified and grant access to the Everyone group. You will see output like the following when it’s finished:
Okta application configuration has been written to:
  /path/to/app/src/main/resources/application.properties
Open src/main/resources/application.properties to see the issuer and credentials for your app.
okta.oauth2.issuer=https://dev-133337.okta.com/oauth2/default
okta.oauth2.client-id=0oab8eb55Kb9jdMIr5d6
okta.oauth2.client-secret=NEVER-SHOW-SECRETS
NOTE: You can also use the Okta Admin Console to create your app. See Create a Spring Boot App for more information.
In src/main/resources/application.properties, adjust the property names to match those below.
okta.client-id={clientId}
okta.client-secret={clientSecret}
okta.issuer-uri=https://{yourOktaDomain}/oauth2/default
Add Spring Security as a dependency in your pom.xml file:
<properties>
    ...
    <spring-security.version>5.1.6.RELEASE</spring-security.version>
    <spring.version>5.1.6.RELEASE</spring.version>
</properties>

<dependencyManagement>
    <dependencies>
        <dependency>
            <groupId>org.springframework</groupId>
            <artifactId>spring-framework-bom</artifactId>
            <version>${spring.version}</version>
            <scope>import</scope>
            <type>pom</type>
        </dependency>
        <dependency>
            <groupId>org.springframework.security</groupId>
            <artifactId>spring-security-bom</artifactId>
            <version>${spring-security.version}</version>
            <scope>import</scope>
            <type>pom</type>
        </dependency>
    </dependencies>
</dependencyManagement>

<dependencies>
    ...
    <dependency>
        <groupId>org.springframework</groupId>
        <artifactId>spring-webmvc</artifactId>
    </dependency>
    <dependency>
        <groupId>org.springframework.security</groupId>
        <artifactId>spring-security-web</artifactId>
    </dependency>
    <dependency>
        <groupId>org.springframework.security</groupId>
        <artifactId>spring-security-config</artifactId>
    </dependency>
    <dependency>
        <groupId>org.springframework.security</groupId>
        <artifactId>spring-security-oauth2-client</artifactId>
    </dependency>
    <dependency>
        <groupId>org.springframework.security</groupId>
        <artifactId>spring-security-oauth2-resource-server</artifactId>
    </dependency>
    <dependency>
        <groupId>org.springframework.security</groupId>
        <artifactId>spring-security-oauth2-jose</artifactId>
    </dependency>
    <dependency>
        <groupId>com.fasterxml.jackson.core</groupId>
        <artifactId>jackson-core</artifactId>
        <version>2.9.9</version>
    </dependency>
    <dependency>
        <groupId>com.fasterxml.jackson.core</groupId>
        <artifactId>jackson-databind</artifactId>
        <version>2.9.9.3</version>
    </dependency>
</dependencies>
For Spring Security to correctly control your app security, it needs to know which requests need authentication. For that, we will create the file src/main/java/com/okta/developer/SecurityConfiguration.java to tell Spring Security to secure all URLs and to use a CSRF token to secure forms:
package com.okta.developer;

import org.springframework.beans.factory.annotation.Autowired;
import org.springframework.beans.factory.annotation.Value;
import org.springframework.context.annotation.Bean;
import org.springframework.context.annotation.Configuration;
import org.springframework.context.annotation.PropertySource;
import org.springframework.security.config.annotation.web.builders.HttpSecurity;
import org.springframework.security.config.annotation.web.configuration.EnableWebSecurity;
import org.springframework.security.config.annotation.web.configuration.WebSecurityConfigurerAdapter;
import org.springframework.security.config.http.SessionCreationPolicy;
import org.springframework.security.oauth2.client.InMemoryOAuth2AuthorizedClientService;
import org.springframework.security.oauth2.client.OAuth2AuthorizedClientService;
import org.springframework.security.oauth2.client.registration.ClientRegistration;
import org.springframework.security.oauth2.client.registration.ClientRegistrationRepository;
import org.springframework.security.oauth2.client.registration.ClientRegistrations;
import org.springframework.security.oauth2.client.registration.InMemoryClientRegistrationRepository;
import org.springframework.security.web.csrf.CookieCsrfTokenRepository;

@Configuration
@EnableWebSecurity
@PropertySource("classpath:application.properties")
public class SecurityConfiguration extends WebSecurityConfigurerAdapter {
    private final String clientSecret;
    private final String clientId;
    private final String issuerUri;

    @Autowired
    public SecurityConfiguration(@Value("${okta.issuer-uri}") String issuerUri,
                                 @Value("${okta.client-id}") String clientId,
                                 @Value("${okta.client-secret}") String clientSecret) {
        this.issuerUri = issuerUri;
        this.clientId = clientId;
        this.clientSecret = clientSecret;
    }

    @Override
    protected void configure(HttpSecurity http) throws Exception {
        http
            .sessionManagement() // Always create a session
                .sessionCreationPolicy(SessionCreationPolicy.ALWAYS)
                .and()
            .csrf() // Use CSRF token
                .csrfTokenRepository(new CookieCsrfTokenRepository())
                .and()
            .authorizeRequests() // Require all requests to be authenticated
                .anyRequest().authenticated()
                .and()
            .oauth2Login();
    }

    /* Following methods instruct Spring Security to use
       Okta as user/authentication provider
    */

    @Bean
    public OAuth2AuthorizedClientService authorizedClientService() {
        return new InMemoryOAuth2AuthorizedClientService(clientRegistrationRepository());
    }

    @Bean
    public ClientRegistrationRepository clientRegistrationRepository() {
        ClientRegistration okta = getRegistration();
        return new InMemoryClientRegistrationRepository(okta);
    }

    private ClientRegistration getRegistration() {
        return ClientRegistrations.fromOidcIssuerLocation(this.issuerUri)
                .registrationId("okta")
                .clientId(this.clientId)
                .clientSecret(this.clientSecret)
                .build();
    }
}
Next, create the file src/main/java/com/okta/developer/SecurityWebApplicationInitializer.java class to enable Spring Security in the app:
package com.okta.developer;

import org.springframework.security.web.context.*;

public class SecurityWebApplicationInitializer
   extends AbstractSecurityWebApplicationInitializer {

   public SecurityWebApplicationInitializer() {
       super(SecurityConfiguration.class);
   }
}
Since we have enabled CSRF protection, we need to add the token to each <h:form> tag. Just add that line within the forms (I left those commented out on my files that use PrimeFaces):
<input type="hidden" value="${_csrf.token}" name="${_csrf.parameterName}"/>
Done! Go to http://localhost:8080 and you will be redirected to an Okta login form and will only be able to use the application after you are successfully authenticated.
Want to share the app with a friend? Cool, go to the Okta developer console page, go to Users and create an account for them. You now have a fully functional security administration tool as well, where you can enable/disable users, check when they are logging to your app, reset their passwords, etc.
Enjoy your new, secure Book app!
Learn More About Java, JSF and User Auth!
If you want to learn more about Java, JSF and User Auth using Okta, we have other awesome articles for you to keep reading:
- Build a Java REST API with Java EE and OIDC
- Which Java SDK Should You Use?
- Tutorial: Create and Verify JWTs in Java
- Learning Java as a First Language
Questions? Requests for a future post? Drop them in the comments! And don’t forget to follow @oktadev on Twitter and subscribe on Youtube.
The entire source code of this app is available at GitHub: oktadeveloper/okta-java-jsf-crud-example.
Okta Developer Blog Comment Policy
We welcome relevant and respectful comments. Off-topic comments may be removed.