Tutorial: How to Build a JavaFX Desktop App with OIDC Authentication

JavaFX, a library of user interaction controls, allows Java developers to build cross-platform desktop applications and internet application. It was intended as a replacement for Swing (if you’re old like me and remember that).
Implementing an authorization flow with OAuth 2.0 can be tricky with a desktop framework like JavaFX. Typically, OAuth flows require a browser and redirecting to specific URLs. Detecting a redirect in JavaFX’s default browser is impossible. The default Java browser (java.awt.Desktop.browse(URI)) has no way to communicate with external processes.
In this tutorial, we’ll be using the Microsoft OAuth 2.0 User Agent library. This library’s InterceptingBrowser class detects the redirect and intercepts the request to complete the OAuth flow. You can take a look at the project page to read a little more about it. Besides JavaFX, there’s also a Standard Widget Toolkit driver that we won’t be using here.
OAuth 2.0 authorization requires an OAuth provider. Fun fact: OAuth stands for Open Authorization. OpenID Connect is an authentication layer built on top of OAuth, which was only designed for authorization. Both are open standards and not implementations, so to actually use OAuth 2.0 and OIDC, you need an implementation. The OAuth server implementation you’ll be using in this tutorial is provided by Okta, a software-as-service identity management provider.
Note: In May 2025, the Okta Integrator Free Plan replaced Okta Developer Edition Accounts, and the Okta CLI was deprecated.
We preserved this post for reference, but the instructions no longer work exactly as written. Replace the Okta CLI commands by manually configuring Okta following the instructions in our Developer Documentation.
Requirements for Your JavaFX Application
There are two requirements for this tutorial. First, you have to use Oracle Java 8, not a Java version greater than 8 and not OpenJDK. The Microsoft OAuth 2.0 User Agent library actually has a hard-coded requirement check in its code for this. Why? OpenJDK does not include JavaFX, which the Microsoft User Agent requires, and Oracle JDK only includes JavaFX up to Java 8. (Technically, you could use an earlier version. Don’t.)
You can download Oracle Java 8 from the Oracle website.
TIP: On a Mac, you can set your JAVA_HOME using export JAVA_HOME=`/usr/libexec/java_home -v 1.8.0_221`. You can find the versions installed on your system using /usr/libexec/java_home -V.
If you have a couple of free days, the relevant parts of the JavaFX code could almost certainly be extracted from the Microsoft OAuth 2.0 User Agent library and updated to use the OpenJFX project. But that’s out of the scope of this tutorial.
The second requirement is a free Okta developer account. If you do not already have an account, please head over to the Okta sign-up page and create one. When you first log into your new account, you will need to click the Admin button to get to the developer console, where we’ll do most of our work.
This project will also use the Gradle build system. You won’t have to install anything since you can use the Gradle wrapper. But if you’d like to learn more about this awesome build tool, take a look at the Gradle docs.
Download the JavaFX Example Code
Download or clone the project code from the GitHub repository.
git clone https://github.com/oktadeveloper/javafx-oauth2-oidc-example.git
The sole Java file in the project is src/main/java/com/okta/javafx/DemoApp.java. A simplified version (imports, package, and some helper functions removed) is reproduced below. I’m going to walk you through it briefly.
// lots of imports here

public class DemoApp extends Application {

    /*
     * This is where the magic happens...
     */
    public static void main(String[] args) throws AuthorizationException, URISyntaxException  {
        launch(args);
    }

    ...

    /**
     * Entry point for the JavaFX application.
     * 1) Loads the system properties
     * 2) Requests the authorization code
     * 3) Exchanges the code for the token
     * 4) Displays the token
     * @param primaryStage
     */
    @Override
    public void start(Stage primaryStage) {

        try {

            // 1. Load auth info from the app.properties
            loadProperties();

            // 2. Request the authorization code from the identity provider
            String code = requestAuthCode();

            // 3. Exchange the auth code for the access token
            String token = getTokenForCode(code);

            // 4. Configure stage and scene to display token results
            primaryStage.setTitle("JavaFX Okta OAuth");

            Text tokenText = new Text();
            tokenText.setText("Your token: \n" + prettyPrintJson(token));
            tokenText.setWrappingWidth(600);
            tokenText.setX(100);
            tokenText.setY(100);
            StackPane root = new StackPane();
            root.getChildren().add(tokenText);
            primaryStage.setScene(new Scene(root, 800, 800));
            primaryStage.show();
        }
        catch (IOException | AuthorizationException | URISyntaxException e) {
            e.printStackTrace();
        }

    }

    /**
     * Requests an authorization code from the auth server
     *
     * @return
     * @throws MalformedURLException
     * @throws URISyntaxException
     * @throws AuthorizationException
     */
    public String requestAuthCode() throws MalformedURLException, URISyntaxException, AuthorizationException {

        // Generate the auth endpoint URI to request the auth code

        URI authorizationEndpoint = getAuthorizationEndpointUri();

        System.out.print("Authorization Endpoint URI: " + authorizationEndpoint.toString());

        final URI redirectUri = new URI(this.redirectUri);

        // Create the user agent and make the call to the auth endpoint
        final UserAgent userAgent = new UserAgentImpl();

        final AuthorizationResponse authorizationResponse = userAgent.requestAuthorizationCode(authorizationEndpoint, redirectUri);

        // You should have the code here, which you can trade for the token

        final String code = authorizationResponse.getCode();

        System.out.print("Authorization Code: ");
        System.out.println(code);

        return code;

    }

    ...

    /**
     * Given an authorization code, calls the auth server to request a token
     *
     * @param code
     * @return
     * @throws URISyntaxException
     * @throws IOException
     */
    public String getTokenForCode(String code) throws URISyntaxException, IOException {

        // The token request URL

        final String tokenUrl = "https://"+ oktaDomain +"/oauth2/default/v1/token";

        // The original redirect URL

        final URI redirectUri = new URI(this.redirectUri);

        // Using HttpClient to make the POST to exchange the auth code for the token

        HttpClient client = HttpClientBuilder.create().build();
        HttpPost post = new HttpPost(tokenUrl);

        // Adding the POST params to the request

        List<NameValuePair> urlParameters = new ArrayList<NameValuePair>();
        urlParameters.add(new BasicNameValuePair("grant_type", grantType));
        urlParameters.add(new BasicNameValuePair("code", code));
        urlParameters.add(new BasicNameValuePair("redirect_uri", redirectUri.toString()));
        urlParameters.add(new BasicNameValuePair("client_id", clientId));
        urlParameters.add(new BasicNameValuePair("client_secret", clientSecret));
        urlParameters.add(new BasicNameValuePair("scope", scope));

        post.setEntity(new UrlEncodedFormEntity(urlParameters));

        // Execute the request

        HttpResponse response = client.execute(post);

        // Print the status code

        System.out.println("Response Code : " + response.getStatusLine().getStatusCode());

        // Get the content as a String

        String content = EntityUtils.toString(response.getEntity());

        System.out.println("Result : " + content.toString());

        return content.toString();
    }

}
The main() function here serves to call the JavaFX launch() method. Notice that this class extends the javafx.application.Application class, the entry point into the JavaFX system.
JavaFX calls the start(Stage primaryStage) method, where our application logic resides. This method does roughly four things. First, it loads our OAuth config values from the app.properties file. Second, it requests the authentication code from the Okta server. Third, it trades this code for an actual auth token. Finally, it displays the token value in a JavaFX window.
This app uses the authorization code grant type. Okta has a nice tutorial on it. Briefly, authorization happens in two steps.
First, the application presents its credentials to the authorization server. If successful, the auth server then sends a redirect back with an authorization code. The application receives the code and can use this code to make a POST request to the auth server’s token endpoint to retrieve an auth token. Why the extra step of the redirect? Because the redirect URIs must be whitelisted on the auth server, this step provides an extra level of security.
If you look at the requestAuthCode() method, this is where the Microsoft OAuth User Agent library greatly simplifies the handling of the redirect. Basically, two lines here open a JavaFX browser window, allow the user to log in, and capture the response:
final AuthorizationResponse authorizationResponse = userAgent.requestAuthorizationCode(authorizationEndpoint, redirectUri);
final String code = authorizationResponse.getCode();
Once you have the code, you need to exchange it for a token. That happens in the cunningly named getTokenForCode() method. This method uses HttpClient to make a POST request to the auth server, the end result of which is, hopefully, your auth token.
The auth token is, in this case, a JSON Web Token, or JWT. JWTs are typically not encrypted, just Base64 encoded. They include a hash value, however, to allow for the detection of tampering.
Create an OIDC Application on Okta
Before you can run the code, you need to create an OIDC application on Okta. If you don’t have an Okta developer account, create one at developer.okta.com/signup.
From the developer.okta.com dashboard, in the top menu, click on Applications.
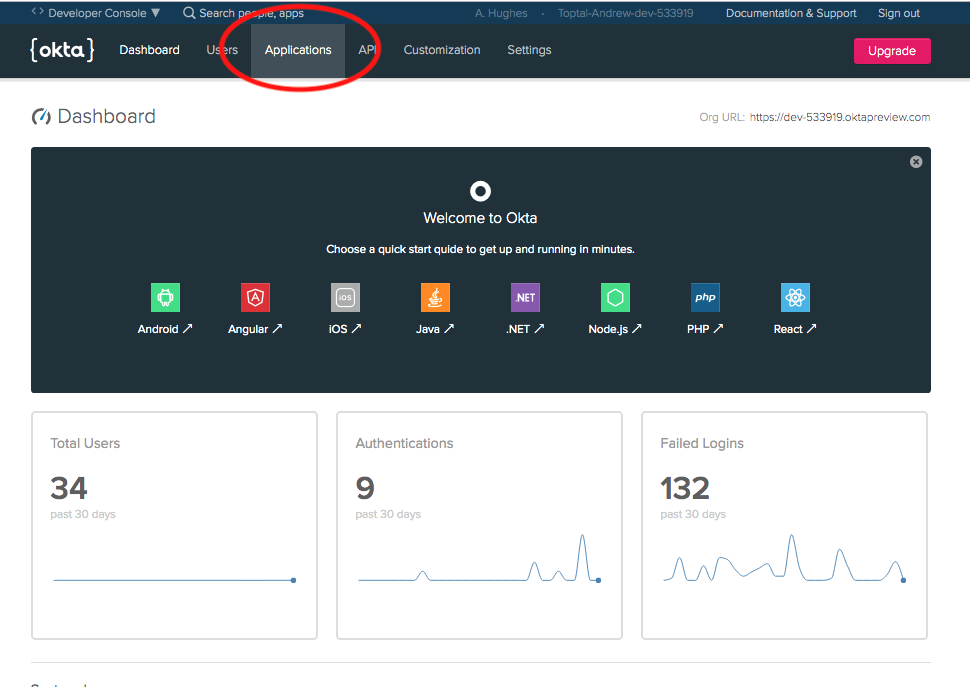
If you’ve never logged into your account before, you may need to click the Admin button to get to the developer dashboard.
- Click the green Add Application button
- Select Web application, and click Next
- Give the app a Name. Any name. I used
JavaFX. - Click Done
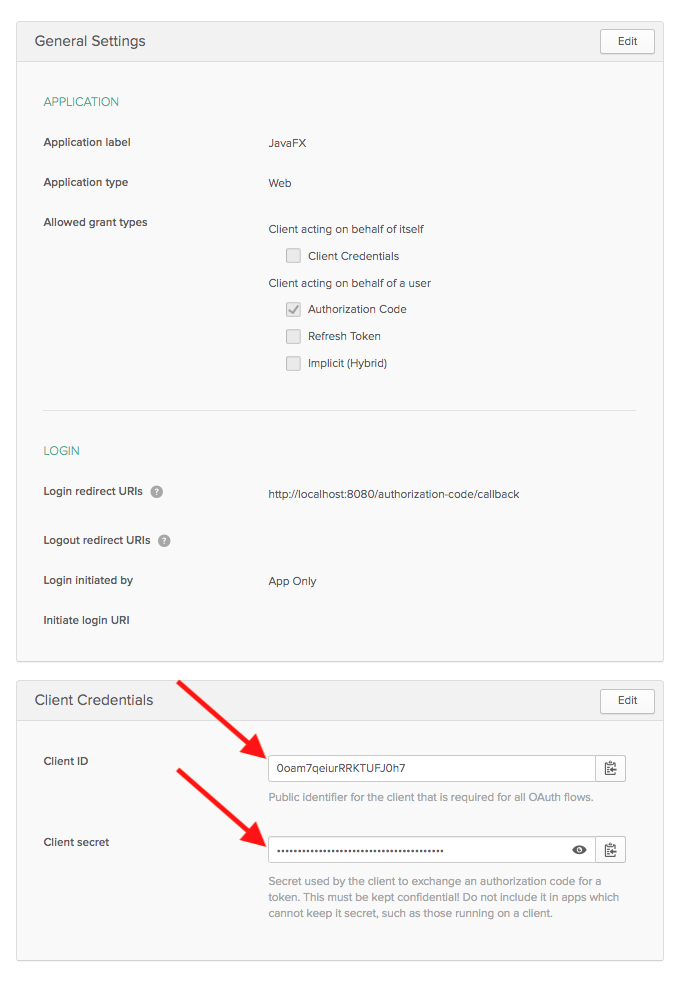
Take note of the Client ID and Client Secret at the bottom of the page. You’ll need these in the next section.
That’s it on the Okta side. You just configured an OAuth 2.0 + OIDC identity provider. Congrats!
Run the JavaFX App
Open the src/main/resources/app.properties file. You need to fill in three values: your Okta domain, the client ID, and the client secret from the OIDC app you just created.
To find your Okta domain, from the Okta developer dashboard, go to API > Authorization Servers. Look at the Issuer URI for the “default” auth server. Your Okta domain will be the base domain listed there. It’s a domain that looks like dev-123456.okta.com, replacing the numbers.
## You'll need to update these
oktaDomain={yourOktaDomain}
oktaClientId={yourClientId}
oktaClientSecret={yourClientSecret}

## You should not have to change these
redirectUri=http://localhost:8080/authorization-code/callback
scope=profile email openid
grantType=authorization_code
Once you’ve updated the app.properties file, you’re ready to run the program!
Open a shell in the project direction. Use Gradle to build and run the app.
./gradlew build run
NOTE: This will fail if you’re not using Oracle JDK 8!
After building, the app will run, opening a JavaFX window with the Okta sign-in page.
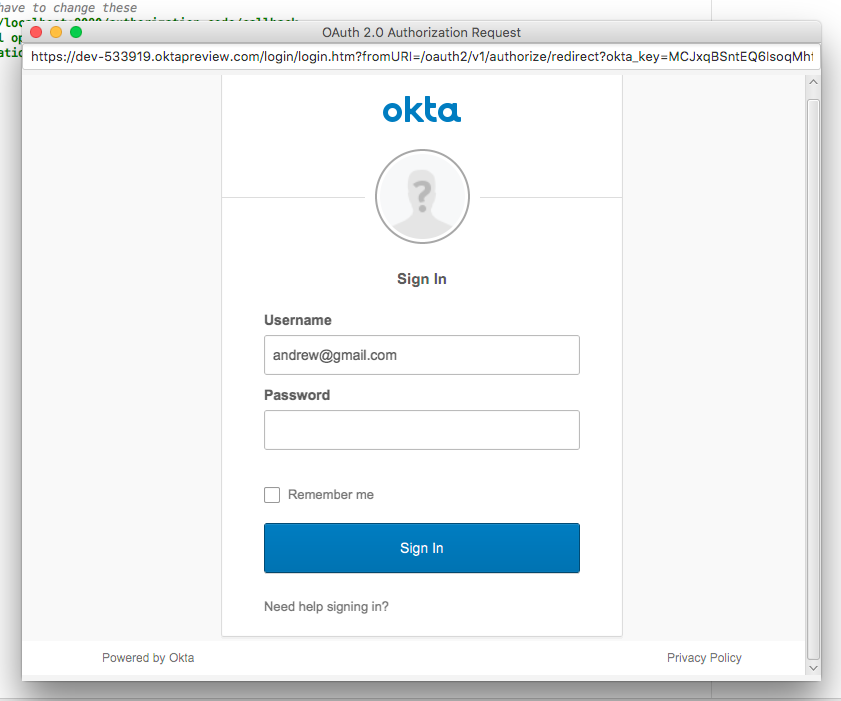
Sign in with your Okta credentials.
After that, a new JavaFX window opens to display your token.
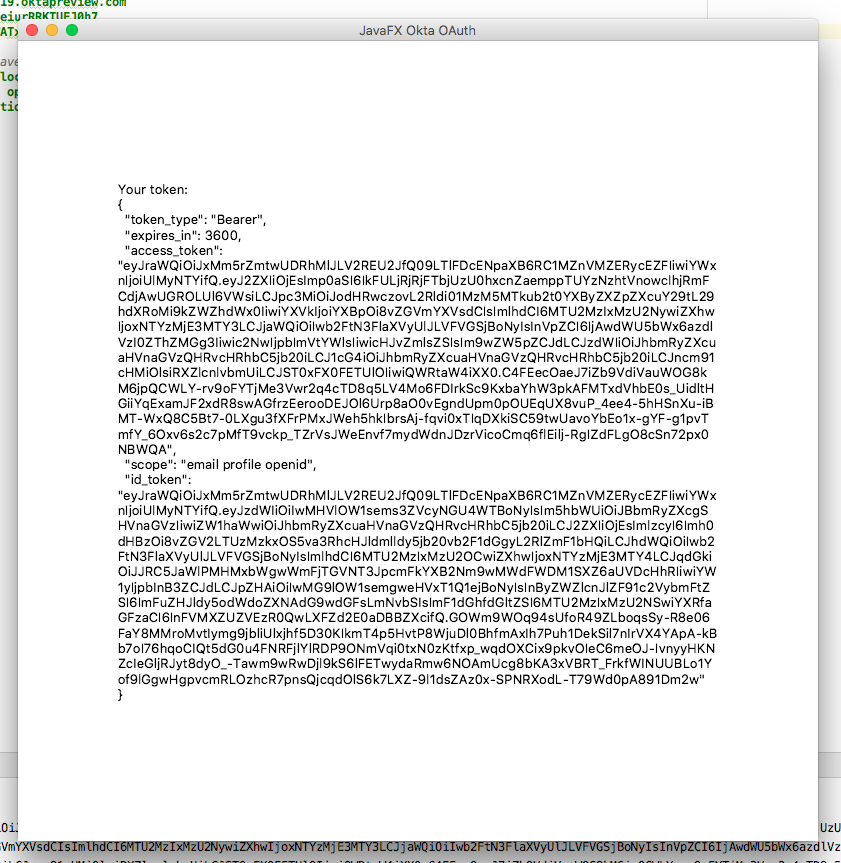
That’s it! Pretty sweet.
As a side note, I want to point out this example actually runs two separate JavaFX applications. The JavaFX UserAgent implementation is itself a JavaFX application. Thus the OAuth 2.0 OIDC sign-in and initial redirect occur in the first JavaFX application, and the token is displayed in the second (the one that is created and visible in the project code). The only noticeable effect for the user is that the sign-in cannot happen in the same window as the rest of the application. To fix this, you would have to dig into the Microsoft OAuth User Agent code and extract the relevant code and rebuild it into your app directly.
Decode the Returned JSON Web Token
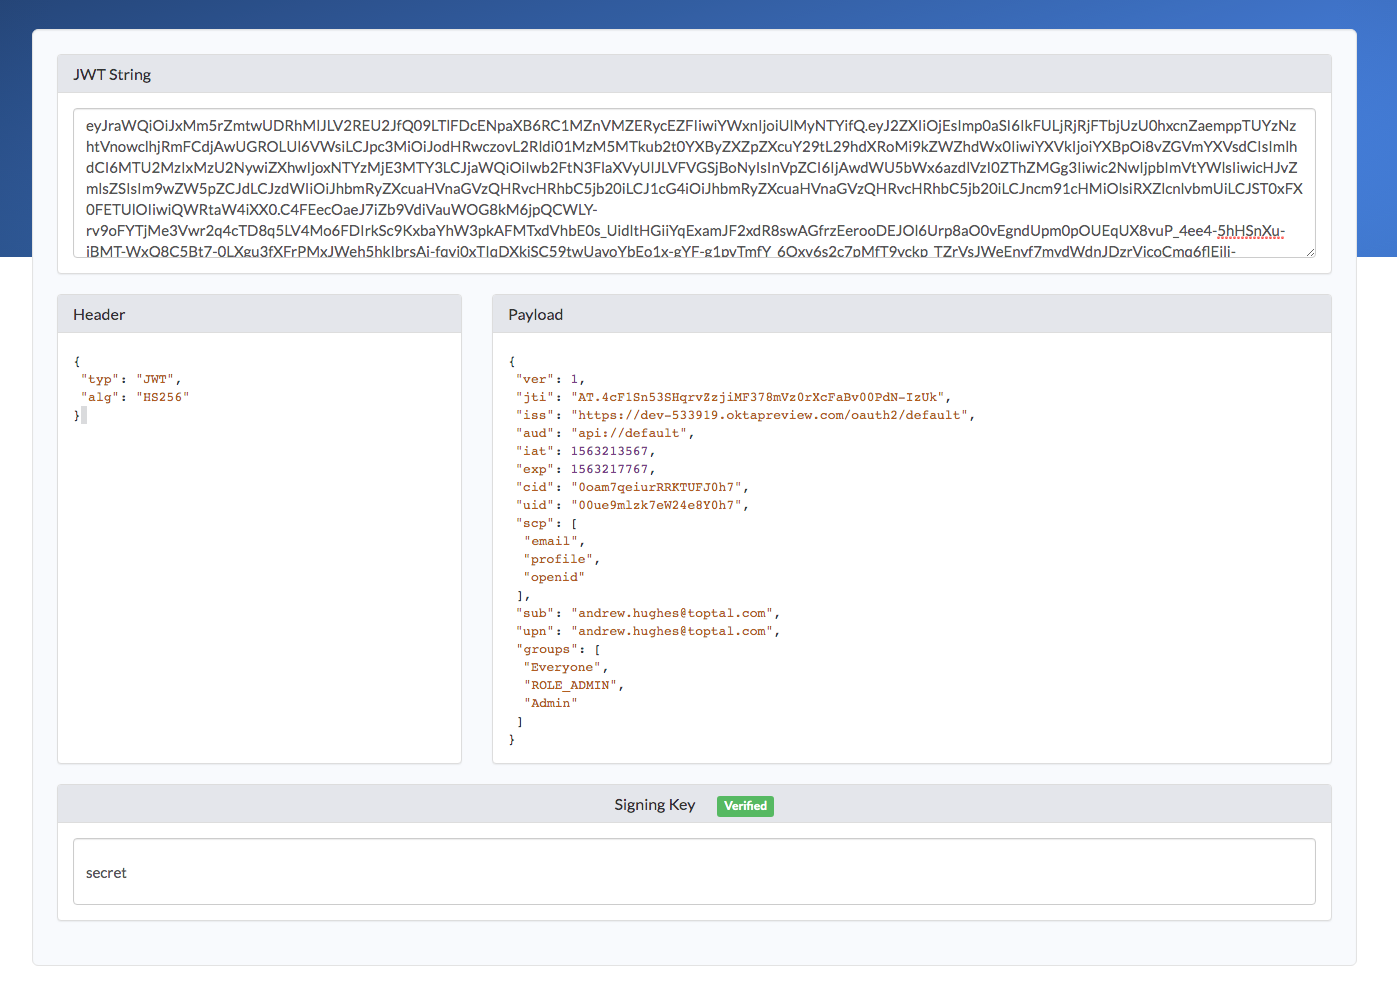
For extra credit, you can decode your JWT. Look in the console output and find the text for the access token in JSON. Copy it. Open a browser and go to https://www.jsonwebtoken.io. Past the text there, and it will decode the token for you and show you the token info.
Moving Forward with JavaFX, OAuth 2.0, and OIDC
In this tutorial, you created a very simple JavaFX desktop application. You also used Okta as a provider and the Microsoft OAuth 2.0 User Agent library to add authentication to your application. This is a great start.
You can find the source code for this example on GitHub at oktadeveloper/javafx-oauth2-oidc-example.
Moving forward, it would be great to update the user agent to support OpenJFX and Java 11 or 12. The Microsoft User Agent library is under the MIT license, so no problem there. Any takers? If I have time, I might update it in the future and write a new tutorial.
If you want to keep learning, here are some more links from the Okta blog to keep you going:
- Tutorial: Create and Verify JWTs in Java
- Encode or Decode JWTs online
- Simple Token Authentication for Java Apps
- Build a REST API Using Java, MicroProfile, and JWT Authentication
- 10 Myths About Java in 2019
- Simple Authentication with Spring Security
If you have any questions about this post, please add a comment below. For more awesome content, follow @oktadev on Twitter, like us on Facebook, or subscribe to our YouTube channel.
Okta Developer Blog Comment Policy
We welcome relevant and respectful comments. Off-topic comments may be removed.