Build Server Side Authentication in Grails with OAuth 2.0 and Okta
What is Grails, what is Groovy, and why would we choose them over Spring Boot? In this post I’ll walk you through implementing server-side authentication in Grails using OAuth 2.0 and Okta. Before we dive in, however, I want to talk a little bit about why you’d be using Grails + Groovy in the first place, and how it can make your life easier in specific situations.
Grails is an open source “convention over configuration” web application framework built on Groovy. It’s essentially a JVM version of Ruby on Rails. It’s opinionated and full-featured and has a strong emphasis on ORM, templating, and plugins. Grails is built on Spring Boot.
Groovy is a superset of Java that compiles down to JVM bytecode and interoperable with pure Java, but adds tons of great meta-programming and functional programming features, while also slashing the ceremony code that can plague pure java.
Update: See part two of this series which flushes which adds additional controllers and authorization.
Note: In May 2025, the Okta Integrator Free Plan replaced Okta Developer Edition Accounts, and the Okta CLI was deprecated.
We preserved this post for reference, but the instructions no longer work exactly as written. Replace the Okta CLI commands by manually configuring Okta following the instructions in our Developer Documentation.
Why Use Grails Over Spring Boot?
If Grails is built on Spring Boot, why not just use that? Good question! The answer depends on your goals and your background (ie, do you already know and love Spring?).
Let’s look at Grails + Groovy:
- Grails and Groovy may be easier to dive into if you’re not already familiar with Spring
- Grails has a great templating system and full-featured ORM
- Grails is built on Spring Boot, so (theoretically, at least) you can get the best of both worlds. In practice this might be easier said than done.
- Grails has super easy JSON conversion and test-driven development
- Groovy is a super awesome language that’s a pleasure to develop in
- Grails may be waning in popularity. The upgrade from 2.x to 3.x was bumpy and caused a lot of grumbling in the community.
Let’s look at Spring:
- Spring Boot is great for simple REST API services
- Spring Data is super powerful but correspondingly complicated
- Templating in Spring is pretty old-fashioned these days
- Spring has a HUGE community and massive enterprise support.
- Spring also has easy JSON conversion and TDD
- The larger Spring architecture is incredibly powerful once you wrap your head around it
So what’s the verdict? My suggestions are:
- If you’re not already into Spring, and you want to develop a web application quickly, go with Grails. It’s easy and developer friendly by design.
- For simple REST services, Spring Boot or Apache Jersey + Shiro might be good alternatives. There’s really no point in using Grails if you’re not going to use the ORM and/or templating capabilities.
- If you’re building a large enterprise app or API system and require a guarantee of long term support (many years), or are already deep into Spring, then Spring Boot may be your best bet.
Get Started with Grails
Let’s start by installing Grails. Groovy and Grails use an install/update manager called SDKMAN. The install is super easy, and we’ll walk you through it below, but if you’d like to see the complete instructions, look here.
Install SDKMAN:
# follow instructions to install SDKMAN!
curl -s get.sdkman.io | bash
Load SDKMAN into your shell:
source "$HOME/.sdkman/bin/sdkman-init.sh"
Install the latest stable version of Grails:
sdk install grails
Test the install (should look something like this):
grails -version
| Grails Version: 3.3.3
| Groovy Version: 2.4.14
| JVM Version: 1.8.0_102
Create Your New Grails Application
Grails uses a command-line shell similar to Ruby or React. We will be creating a simple app called “OktaCameraKit” that we uses can use to organize their camera lenses.
In the shell, move to a directory in which you would like the new project generated and enter the following.
grails create-app OktaCameraKit
| Application created at /okta/grails/OktaCameraKit
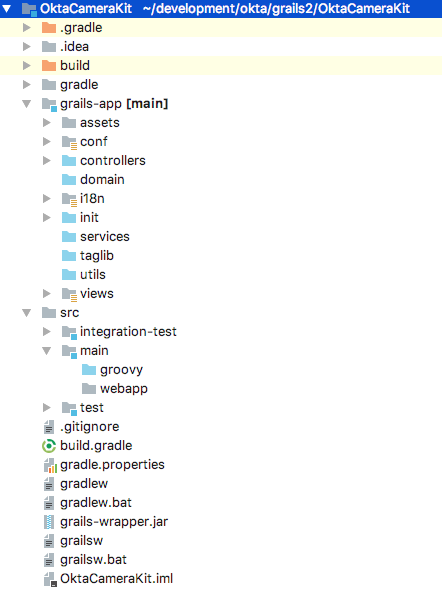
This should have created your application in the “OktaCameraKit” subdirectory with the following directory structure:
Test Your New Grails App
“cd” into the “OktaCameraKit” directory and run:
grails run-app
You should see something like this:
| Running application...
:compileJava NO-SOURCE
:compileGroovy UP-TO-DATE
:buildProperties UP-TO-DATE
:processResources
:classes
:findMainClass
:bootRun
Grails application running at http://localhost:8080 in environment: development
<===========--> 85% EXECUTING
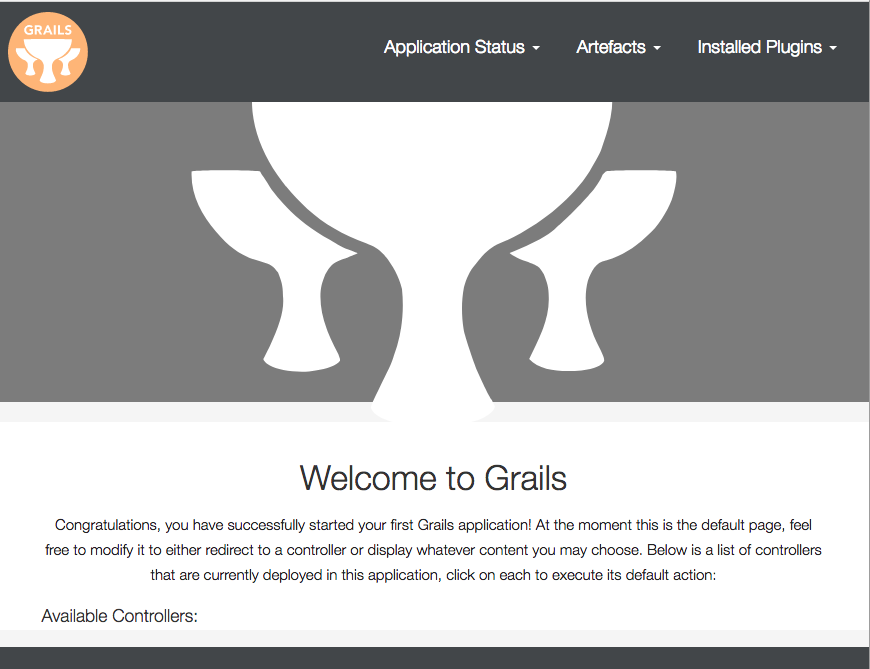
Open your browser to http://localhost:8080 and you should see the Grails welcome screen.
NOTE: I heartily suggest downloading and trying out the Community Edition of IntelliJ IDEA. JetBrains products are fantastic, and the free Community Edition of their premier Java development IDE is a godsend. Check it out!
Some Basics on Grails
The basic idea in Grails is that Controller classes have Action methods that load data from Models and map the data that is presented in Views.
Grails is opinionated and expects controllers to be in the “controllers” directory and “views” to be in the views directory. DO NOT, UNDER ANY CIRCUMSTANCES, PUT FILES IN THE WRONG PLACE. You will hurt Grails’ feelings and it may not work for you. But seriously, if you’re used to more contemporary Javascript frameworks, you may not be used to the well-defined structure that Grails expects. If you surrender to it, you may learn to love it! A good structure can free you to worry about more important things, like writing your app! You certainly end up with fewer lines of code like this:
import ../../../../../../app/module/resources/blah.js
Don’t Forget About Gradle
What’s with all the “G”s? Yep. There’s a lot of them: Groovy, Grails, Gradle. It’s been scientifically proven that alliteration increases the performance of programming toolkits at developer conferences.
Gradle is a super powerful build system that “eclipsed” Maven as the build tool of choice in the JVM world. It’s built on Groovy and uses a Domain Specific Language that makes it infinitely powerful. If the universe had been built with Maven, the earth would not be revolving around the sun because we’d still be resolving dependencies. Fortunately, Gradle was invented, and all is well.
Add Authentication with Spring Security and Okta
We are going to use the Spring Security Core Plugin and the Spring Security OAuth 2.0 plugin to connect with Okta OAuth. There are, however, a few other options. Apache Shiro has a plugin that integrates nicely with Grails. Shiro is a fine alternative that is worth examining. If you are building an API service that will have client-side authentication, then you might want to look at the Okta Spring Boot Starter, which makes authentication super simple, and Zachary Klein’s Grails + React + Okta demo.
Because we will be using a purely server-side authentication flow, we can’t use the authentication filter method implemented in the Spring Boot Starter.
Now, you may be tempted to think: “Hey! Grails is just Spring Boot with some bells and whistles. Why can’t I just use Spring authentication, like in this great Okta tutorial?” I know I did. That was what I tried first. Let me save you some time, it doesn’t work.
Spring Security does a funny thing and uses thrown exceptions to handle the OAuth redirects. These are supposed to propagate up to the Spring servlet context, where they are caught and handled. Unfortunately, Grails has it’s own custom GrailsDispatcherServlet that overrides this behavior, catching the exceptions before they can be handled by the Spring filters. You could potentially create a subclass of the GrailsDispatcherServlet that checks for the OAuth exceptions and re-throws them, but Grails 3.0 made this more complicated – and anyway the whole scheme starts to feel pretty “hacky” fighting the framework instead of doing it the “right” way.
Okta Provider Plugin for Grails Spring Security OAuth 2.0
What’s the “right” way? Writing a provider plugin for the Grails spring-security-oauth2 plugin that tells Grails how to “talk” to Okta as an OAuth 2.0 provider.
Fortunately for you, I’ve already done this.
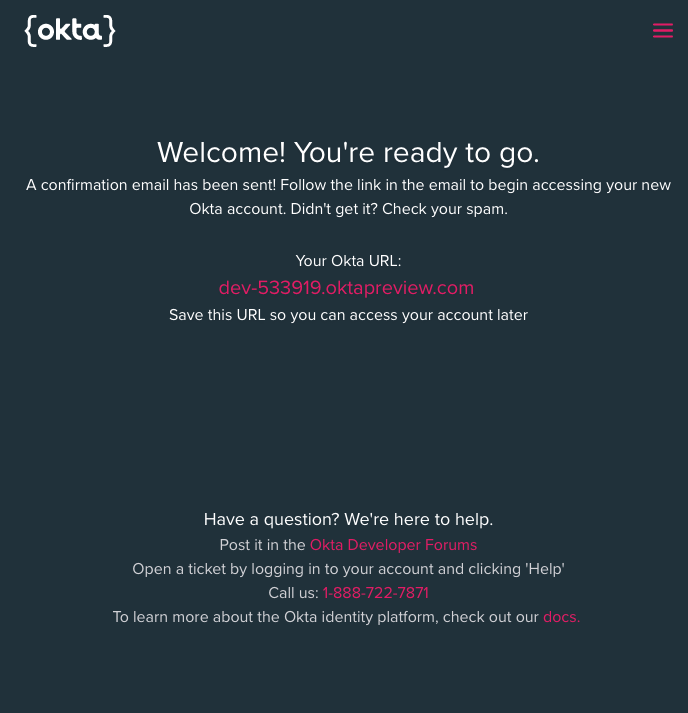
If you don’t already have an account with Okta, now would be a great time to sign up for a free developer account.
Don’t forget to note your Okta URL as we’ll need it in a minute.
Create Your Okta Application
Once you’ve logged into your Okta dashboard, you need to create an Application. You also need an Authorization Server, but fortunately for the purposes of this tutorial we can just use the default one.
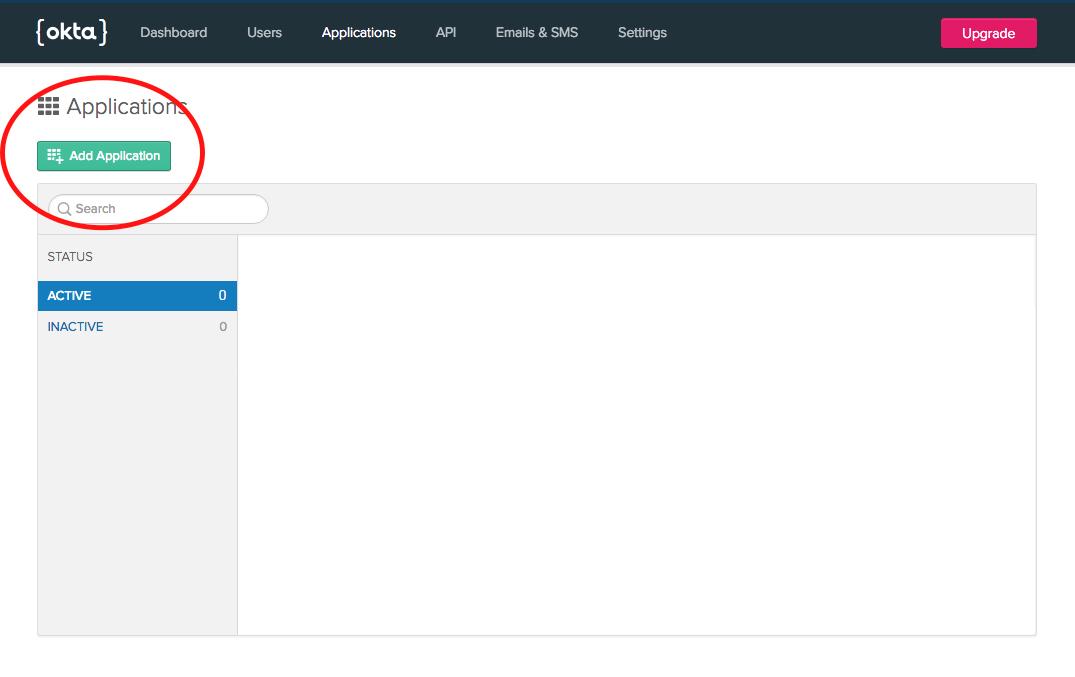
From your Okta admin panel, click on Applications in the top menu and then click “Add Application”
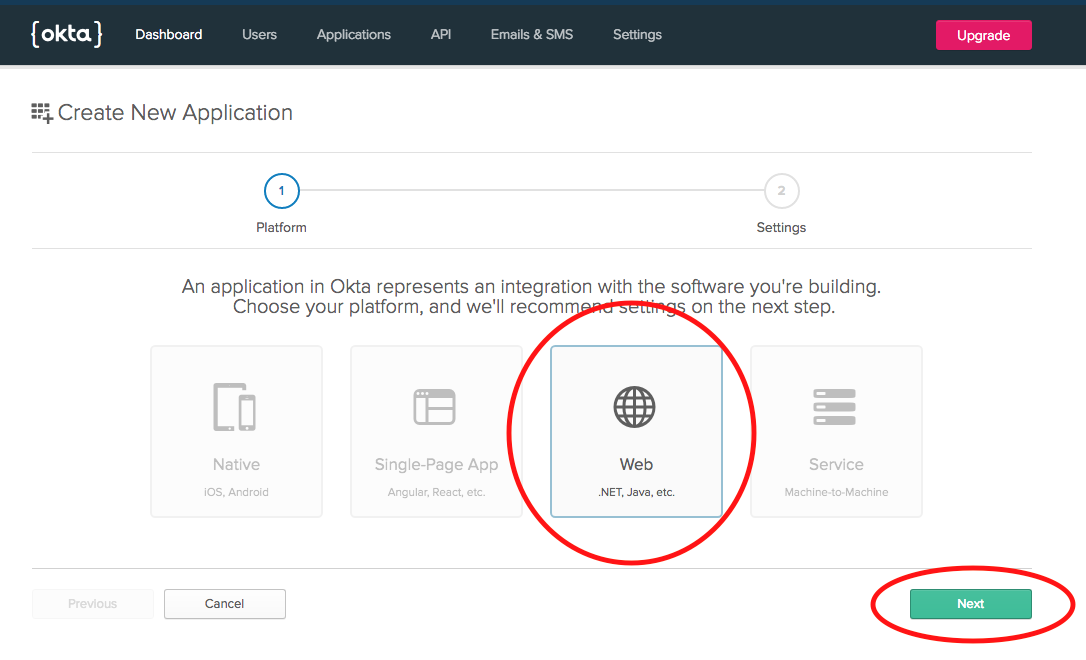
Select the web application icon and then click Next.
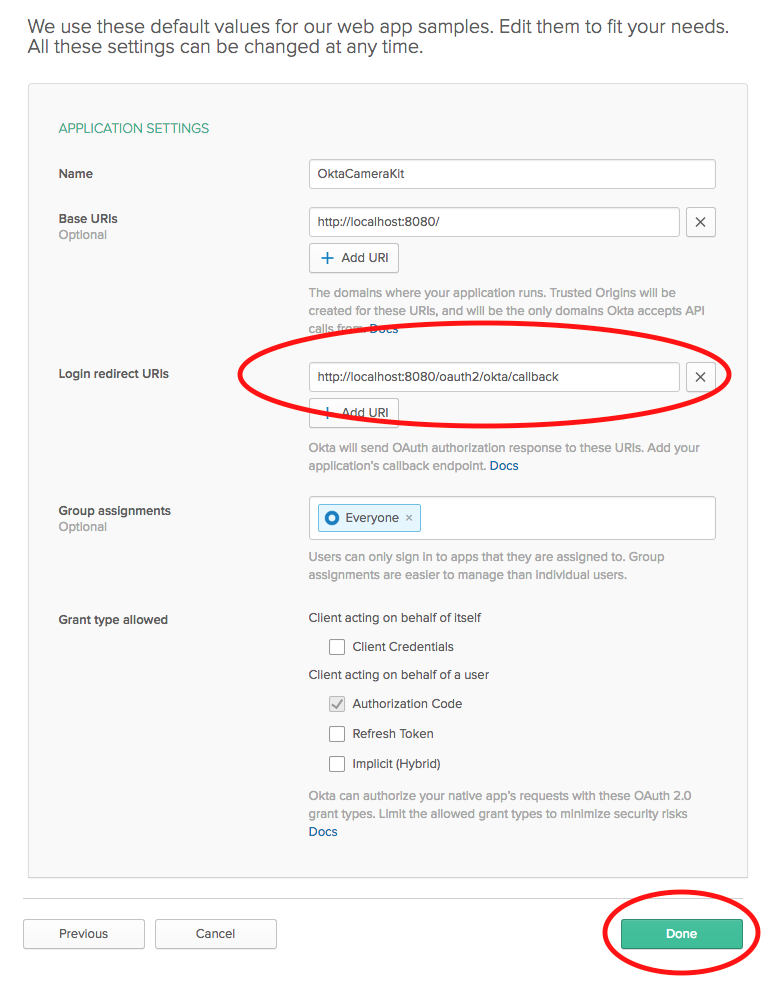
Next, we need to update the “Login redirect URIs”. OAuth 2.0 requires a whitelisted redirect URI that the OAuth server can direct the app to after successful login. The URL we’ll be using is: http://localhost:8080/oauth2/okta/callback. Enter that into the field and then hit “Done!”
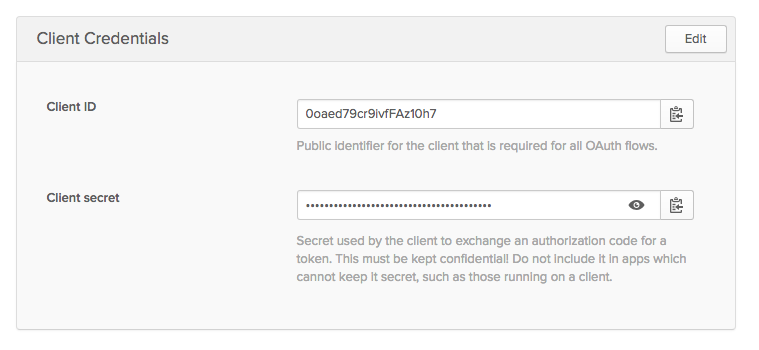
You’ll need to copy your Client ID and Client Secret to a safe place for later.
That’s it for Okta setup for our purposes. You can certainly dig MUCH deeper into the OAuth rabbit hole with tons of configuration options. Take a look here to get started.
Dive Back Into Grails!
We need to install three dependencies:
- Grails Spring Security Core Plugin (adds core Spring Security features)
- Grails Spring Security OAuth2 plugin (adds OAuth 2.0 features)
- Okta OAuth 2.0 Provider Plugin (tells the OAuth plugin how to talk to Okta)
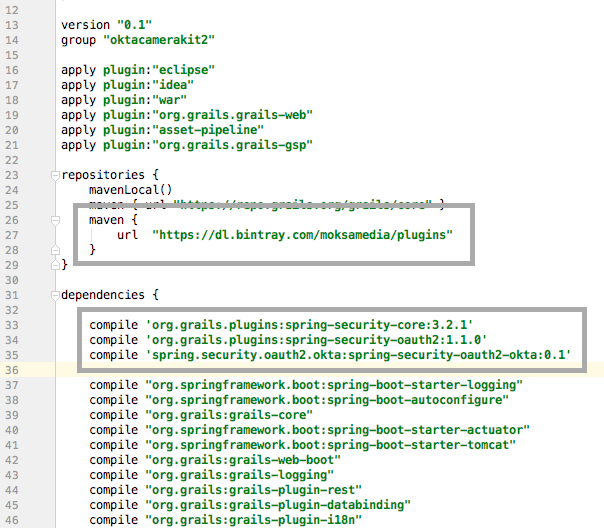
Edit your build.gradle file, adding the new Maven repository and the three compile dependencies, as seen below.
repositories {
   ...
    maven {
        url  "https://dl.bintray.com/moksamedia/plugins"
    }
}

dependencies {
    compile 'org.grails.plugins:spring-security-core:3.2.1'
    compile 'org.grails.plugins:spring-security-oauth2:1.1.0'
    compile 'spring.security.oauth2.okta:spring-security-oauth2-okta:0.1'
    ...
}
The plugins come with a quickstart script that we need to run to generate some domain files and set up some configurations.
From your main project directory, run the following command:
grails s2-quickstart com.oktacamerakit User Role
This creates your User and Role domain classes and adds some authentication configuration entries in the “grails-app/conf/application.groovy” file.
Now run the OAuth 2.0 quickstart script:
grails init-oauth2 com.oktacamerakit User OAuthID
The starter script creates an OAuthID domain class that links the OAuth 2.0 authenticated identities to your local User domain classes, and adds a configuration line to your application.groovy file.
These install scripts did a pretty good job of setting things up, be we still need to make some changes.
You need to add the following line to you User.groovy domain class. It doesn’t matter where you put it as long as it’s within the class definition.
static hasMany = [oAuthIDs: OAuthID]
We also need to edit the UserRole.groovy class slightly. Find the create method and change the default value for the flush param to true. (This particular tip cost me about three hours of my life. You get it for free.)
static UserRole create(User user, Role role, boolean flush = true)
{
    def instance = new UserRole(user: user, role: role)
    instance.save(flush: flush)
    instance
}
Finally, we need to add some configuration to the application.yml file. You need to fill in your Client ID for the api_key and your Client Secret for the api_secret, as well as your Okta URL in the three URLs.
grails:
    ### other grails config settings ###
    plugin:
        springsecurity:
            oauth2:
                active: true
                registration:
                    roleNames: ['ROLE_USER']
                providers:
                    okta:
                        api_key: '<Okta Client ID>'
                        api_secret: '<Okta Client Secret>'
                        userInfoUrl: 'https://{yourOktaDomain}/oauth2/default/v1/userinfo'
                        authorizeUrl: 'https://{yourOktaDomain}/oauth2/default/v1/authorize'
                        tokenUrl: 'https://{yourOktaDomain}/oauth2/default/v1/token'
                        scopes: 'email profile openid'
Run the App Again
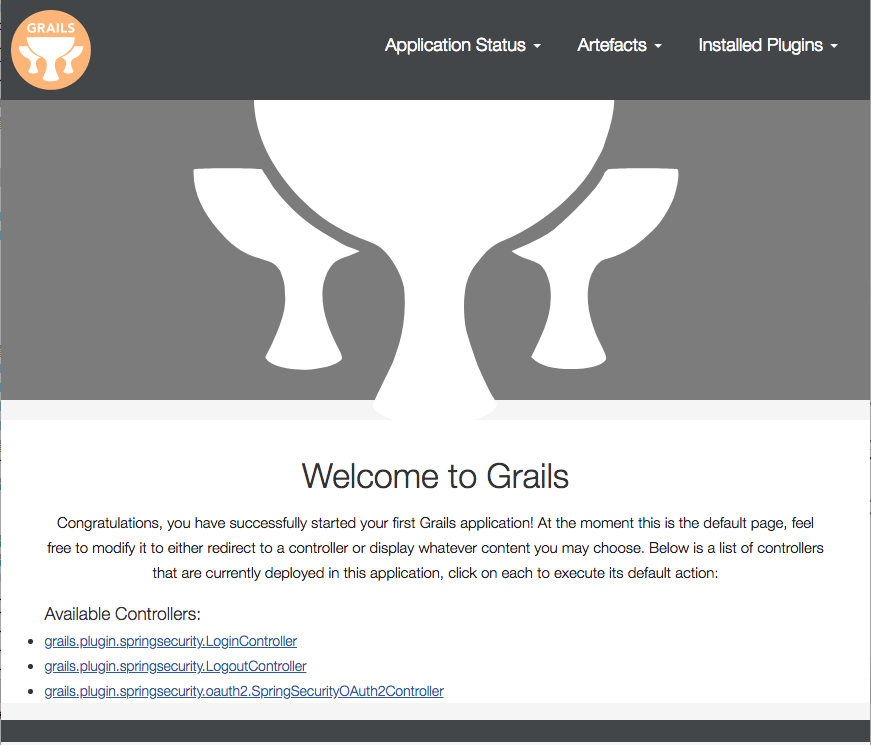
Whew! Lets test all that. Run the app again using grails run-app. You should see the following. Notice particularly the three new controllers listed below the “Available Controllers” heading.
Add A Grails Home Controller
Let’s add a Home controller for the app. Use the Grails CLI to add the controller.
grails create-controller Home
Open the HomeController.groovy file and edit it to match the following. We need to do two things: 1) define our authentication requirement using the @Secured annotation, and 2) add some output text.
import grails.plugin.springsecurity.annotation.Secured

class HomeController {
    @Secured('ROLE_USER')
    def index() {
        render "Success!!!"
    }
}
If you re-start the app and navigate to http://localhost:8080 now you should see the Home controller listed below the authentication related controllers.

If you click on the oktacamerakit.HomeController link at the bottom of the screen, you’ll be taken to a login page. Currently this is a “local” login based on the User domain objects. Since there are no local users, there’s no way to authenticate.
To fix this, one option would be to add a “Login with Okta” link to the bottom of the login page. This is pretty simple and would require creating a custom login page template and adding the link. We might get back to this in Part II of this tutorial.
For the moment, we’re going to configure Okta to always redirect to the Okta login page when a user needs to log in. Add the following to you application.groovy file:
grails.plugin.springsecurity.auth.loginFormUrl = '/springSecurityOAuth2/authenticate?provider=okta'
Give Your New App a Whirl!
That’s it! You should be all set.
Go ahead and log into your developer.okta.com admin panel and sign out. This will force you to log in again through the Grails app instead of automatically being authenticated via OAuth.
Re-start the app, using grails run-app, and this time navigate to http://localhost:8080/home/index.
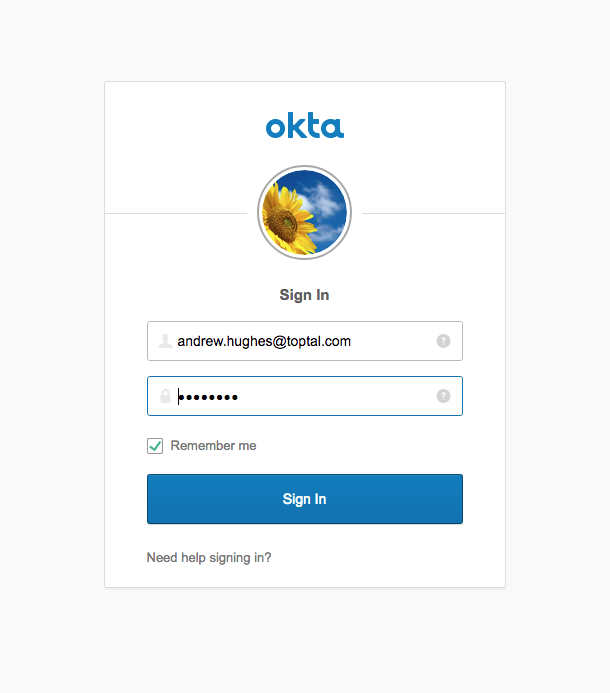
The first screen you’ll see (if you signed out) is the Okta login screen:
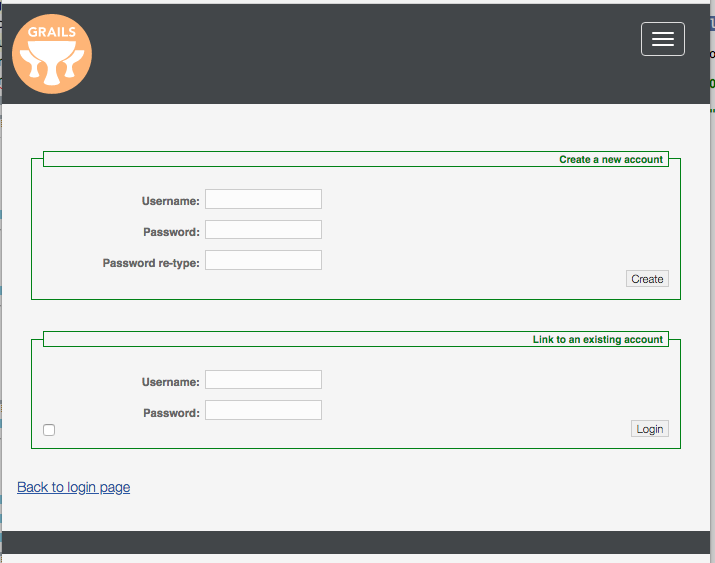
After logging in, you’ll be redirected back to your Grails app, where you’ll see the screen that allows you to either register a new account or link your OAuth account to an existing user account.
Fill in the top form to register a new user account.
Congrats! You Built a Grails App with Okta for Authentication
Success! We did it! Pretty simple.
Obviously there’s a lot we can do from here. We’ll look at building out the app more completely in Part 2 of this tutorial. We need to create some domain and controller classes to model our data, set up some views, and hook our authenticated users into a authorization system. I’ll also show you how to run the remote debugger in IntelliJ, configure logging, and set up the database so development data is persisted between sessions (right now it’s recreated every time the app is run, which is why the app will never remember who you are if you restart).
Learn More about Grails, Gradle, Groovy, and Okta
If you’d like to learn more about Grails to get ready for Part 2 check out the documentation and Groovy Language Documentation.
While you’re in the Grails docs, make sure to familiarize yourself with the basic folder structure of the Grails application. As we saw, it can be touchy.
You may also want to take a look at Understanding Controllers and Actions.
And finally, you can check out the Gradle docs.
If you’d like to learn more about Okta, you should definitely be following our team on Twitter @oktadev. You can also check out these other cool Java posts:
Okta Developer Blog Comment Policy
We welcome relevant and respectful comments. Off-topic comments may be removed.