How to Secure User Data in Azure Cosmos DB
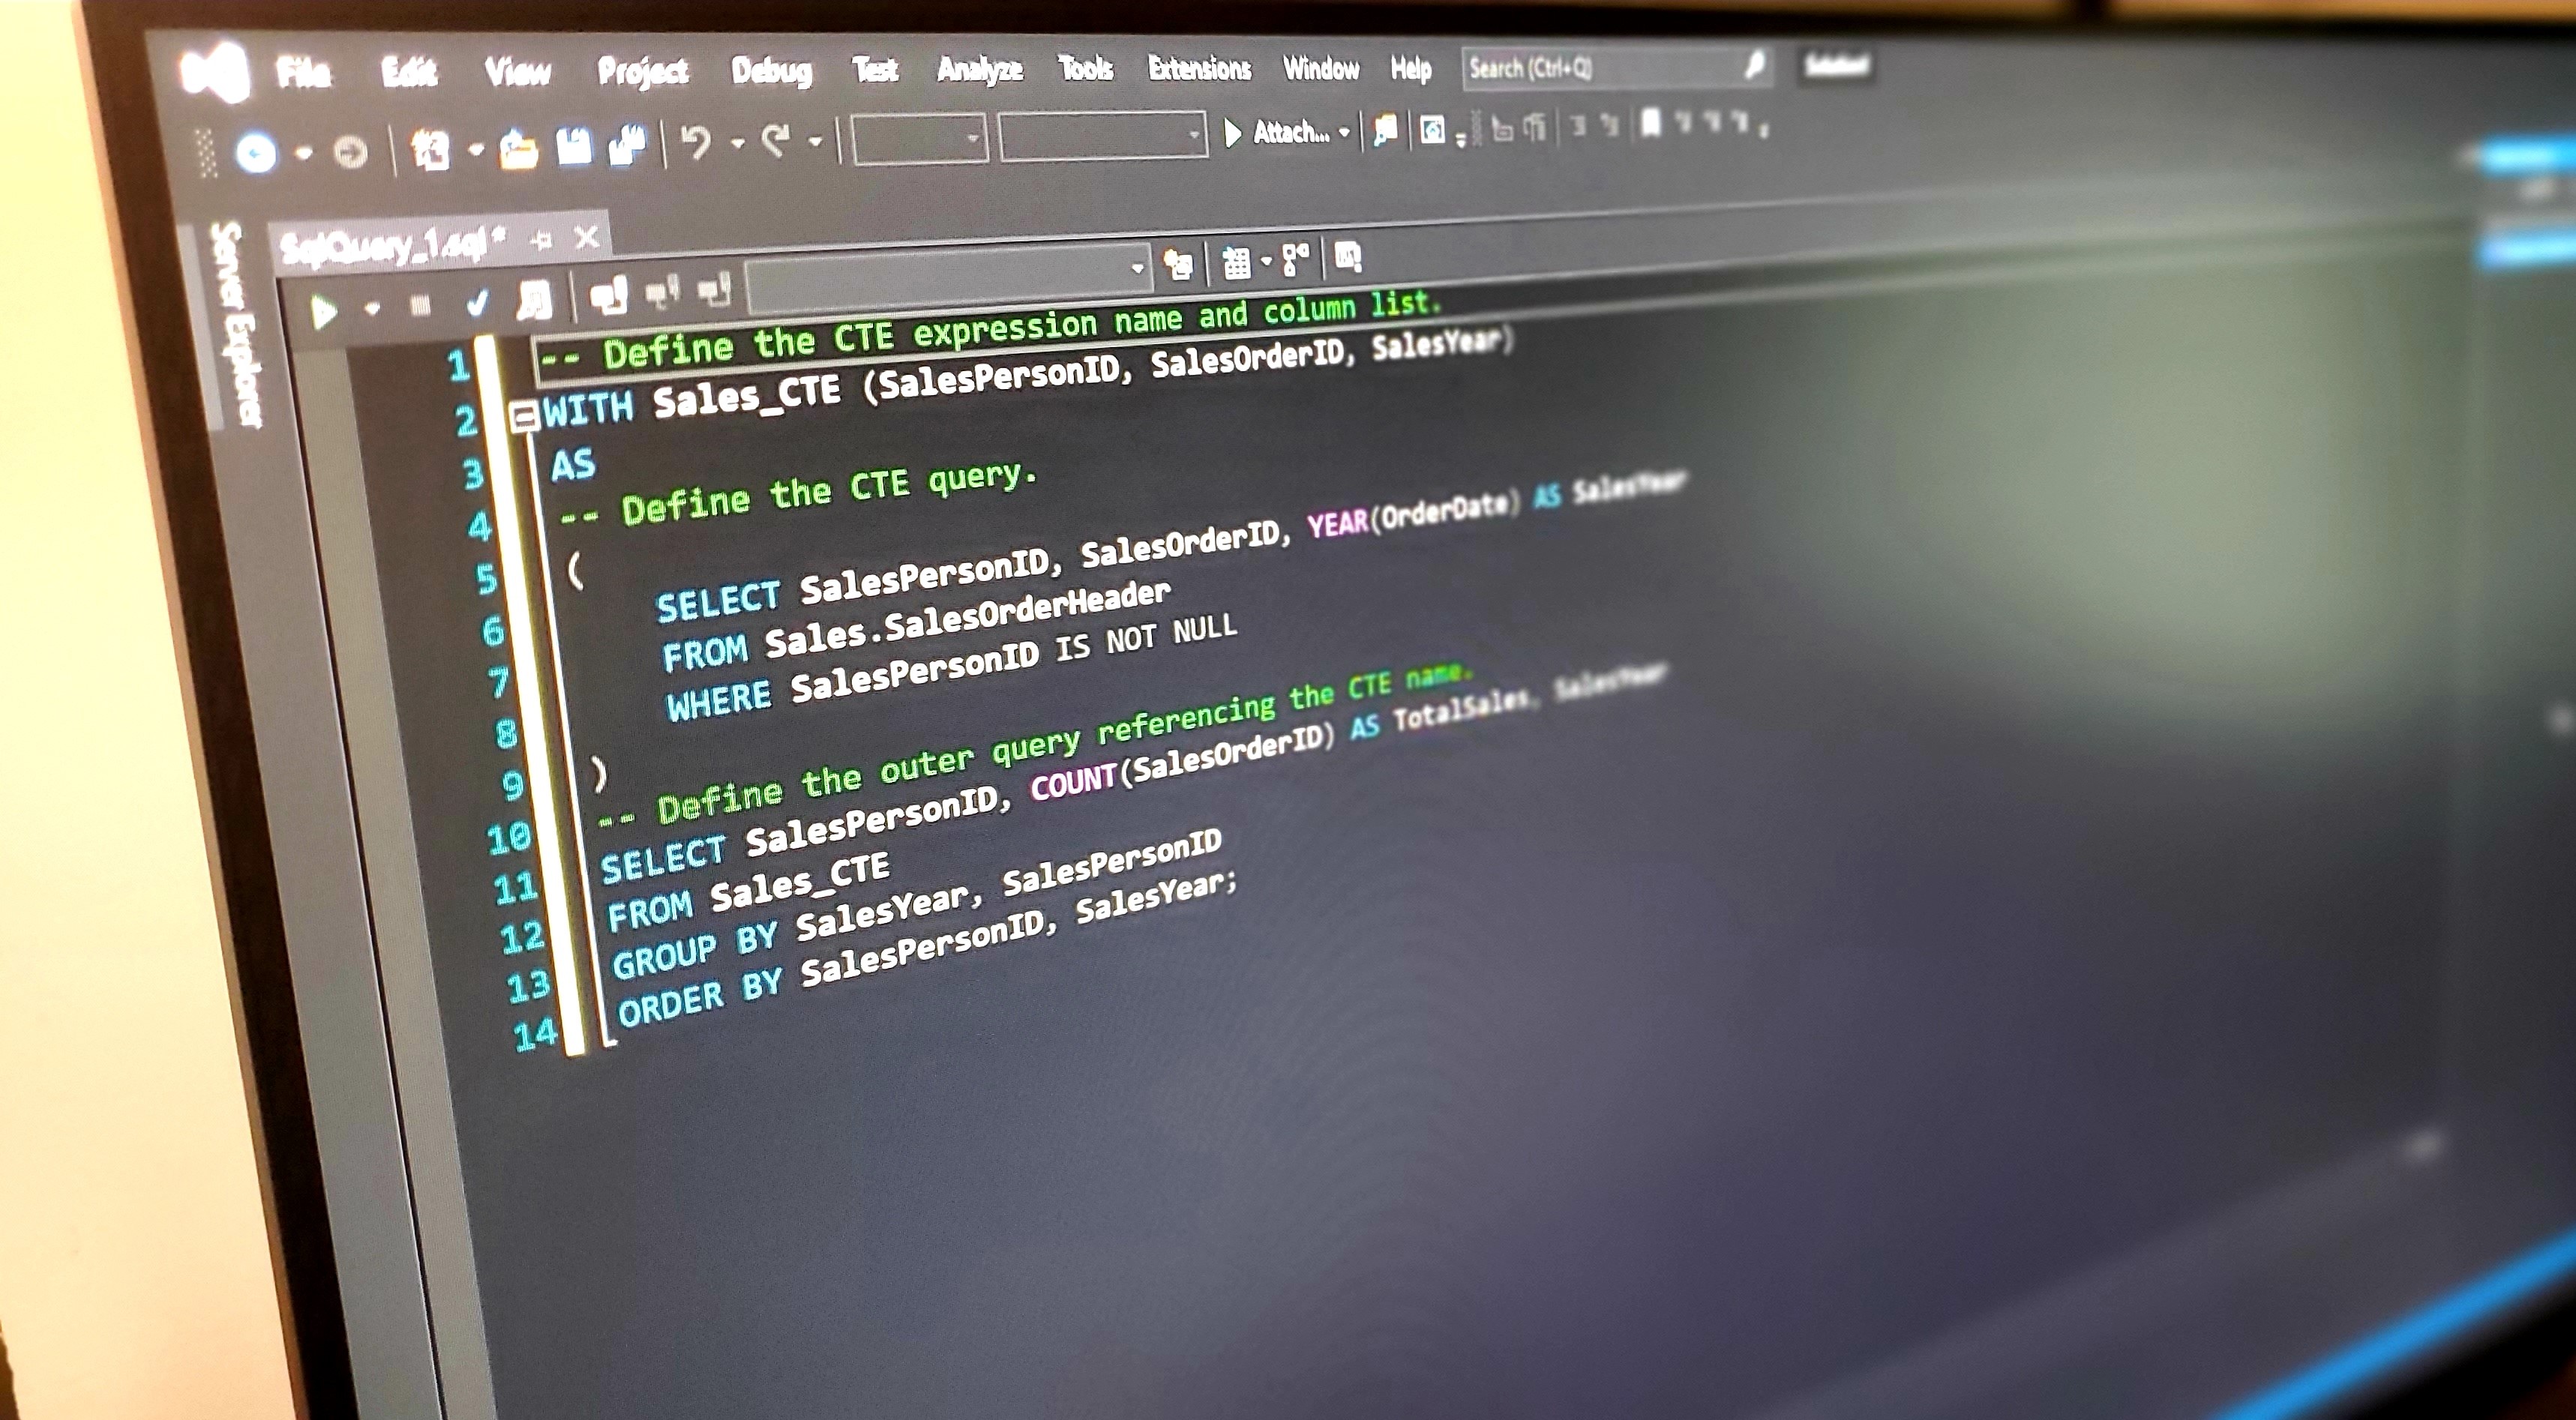
Cosmos DB is a cloud database product from Microsoft that offers scalable and high-performance services. The core product runs on a proprietary NoSQL database that should look familiar to experienced MongoDB developers. Microsoft offers several APIs in addition to the core Cosmos DB API. These include APIs for:
- SQL
- MongoDB
- Gremlin
- Cassandra
The shift to serverless database operations is one of the most obvious advantages of migrating. Cosmos DB can automatically scale your throughput based on load, rather than the traditional provisioning of throughput in advance.
As developers, we need to be mindful of how we can protect data at rest. In this article, you will learn how Cosmos DB helps to protect data at rest and what you can do to remove sensitive data like personally identifiable information (PII) from data that you intend to store in Cosmos DB.
Note: In May 2025, the Okta Integrator Free Plan replaced Okta Developer Edition Accounts, and the Okta CLI was deprecated.
We preserved this post for reference, but the instructions no longer work exactly as written. Replace the Okta CLI commands by manually configuring Okta following the instructions in our Developer Documentation.
A secure application for PII
One of my first jobs in development was writing applications that would perform a scrubbing process on personal data coming from clients. Effectively we would receive data that included the person’s name, social security number, and address. This data would then be sent out for verification to a consumer reporting corporation, and that company would return a result letting us know if the address was current and if the information we’d received was correct. Once the data returned we could import the result into our software and if the scrub came back successful then the account was a valid contact.
In this tutorial, you will do the same process. You will build an ASP.NET Core web application on .NET 6 that accepts a CSV file with a person’s name and social security number. You will send that to a dummy scrub service. Then you will record the results in a Cosmos DB account. But the word has come from your boss that you cannot store the social security number. So you will learn how to remove that information from your data model before storing it in Cosmos DB.
To continue you will need:
- Visual Studio 2022
- .NET 6
- An free Okta Developer Account (to handle your OAuth needs)
- Okta CLI
- An Azure account with a subscription
Of course, if you just want to see the code feel free to view it on Github.
Cosmos DB overview
Like most Platform as a Service (PaaS) offerings, Cosmos DB provides many features for security and performance. There are too many to list here. Finding the documentation on Microsoft’s endless labyrinth of docs is challenging enough. But I do want to touch on a few highlights.
First, as a PaaS, Microsoft takes responsibility for network controls, host infrastructure, and physical security. They share application-level controls and identity access with you as well as the data classification. Endpoint protection is your responsibility.
It is important to note though that Azure is HIPPA compliant. Ultimately, the data that you choose to store is your responsibility and subject to laws and regulations that are out of scope for this article.
You should also take a moment to familiarize yourself with the Cosmos DB resource model. I won’t go into it too deeply here, but the short version is that a database account owns a database. The database contains containers. Containers can contain items, stored procedures, triggers, and other objects. In this tutorial, you will create the database account on the Azure portal, but you will create the database, container, and items from your web application.
The last thing I want to mention is that different Cosmos DB APIs have different methods for removing or encrypting data. In this tutorial, you will work with the core Cosmos DB API, but I encourage you to explore the other APIs.
Create your Okta application
Before you begin, you’ll need a free Okta developer account. Install the Okta CLI and run okta register to sign up for a new account. If you already have an account, run okta login.
Then, run okta apps create. Select the default app name, or change it as you see fit.
Choose Web and press Enter.
Select ASP.NET Core.
Then, change the Redirect URI to http://localhost:5001/authorization-code/callback and use http://localhost:5001/signout/callback for the Logout Redirect URI.
Note that the TCP port 5001 must be the same used by the application. You can see it in the messages displayed in the terminal when you start the application with
dotnet run.
What does the Okta CLI do?
The Okta CLI will create an OIDC Web App in your Okta Org. It will add the redirect URIs you specified and grant access to the Everyone group. You will see output like the following when it’s finished:
Okta application configuration has been written to: /path/to/app/.okta.env
Run cat .okta.env (or type .okta.env on Windows) to see the issuer and credentials for your app.
export OKTA_OAUTH2_ISSUER="https://dev-133337.okta.com/oauth2/default"
export OKTA_OAUTH2_CLIENT_ID="0oab8eb55Kb9jdMIr5d6"
export OKTA_OAUTH2_CLIENT_SECRET="NEVER-SHOW-SECRETS"
Your Okta domain is the first part of your issuer, before /oauth2/default.
NOTE: You can also use the Okta Admin Console to create your app. See Create a ASP.NET Core App for more information.
Create a Cosmos DB account
As I mentioned before, the logic for creating your database, container, and items will be in your application. However, you do need to create a database account to connect to.
Navigate to the Azure portal and select Create a resource. Search for Azure Cosmos DB and select the option. Follow the prompt and select Create on the Azure Cosmos DB marketing page.
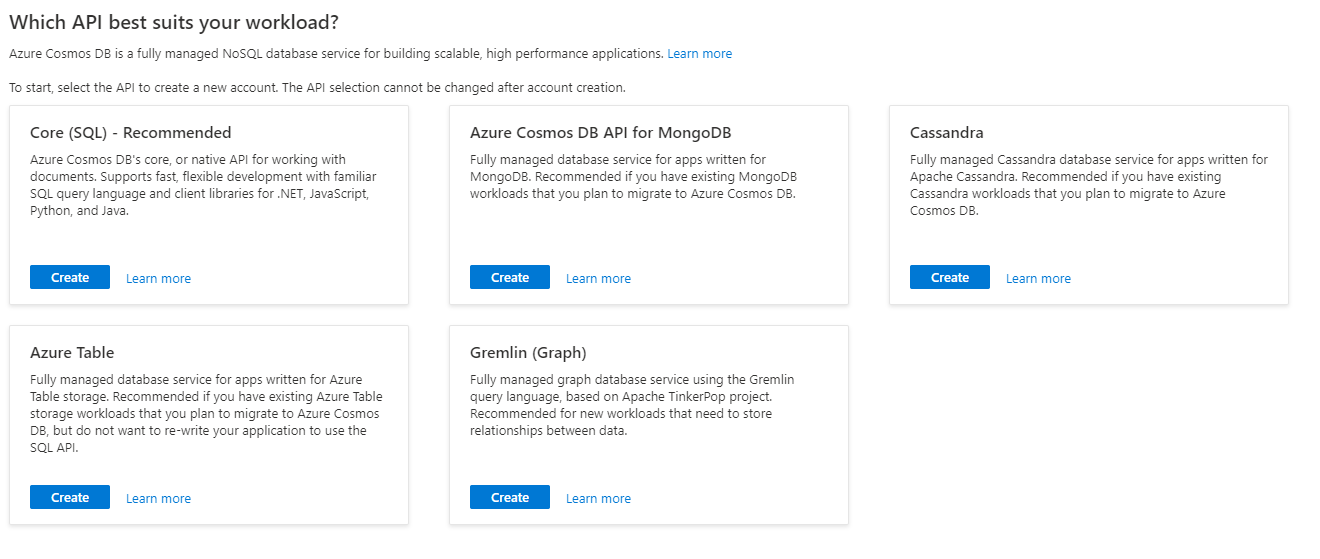
Next, you will see a page asking which API best suits your workload. Find Core (SQL) - Recommended and press Create.
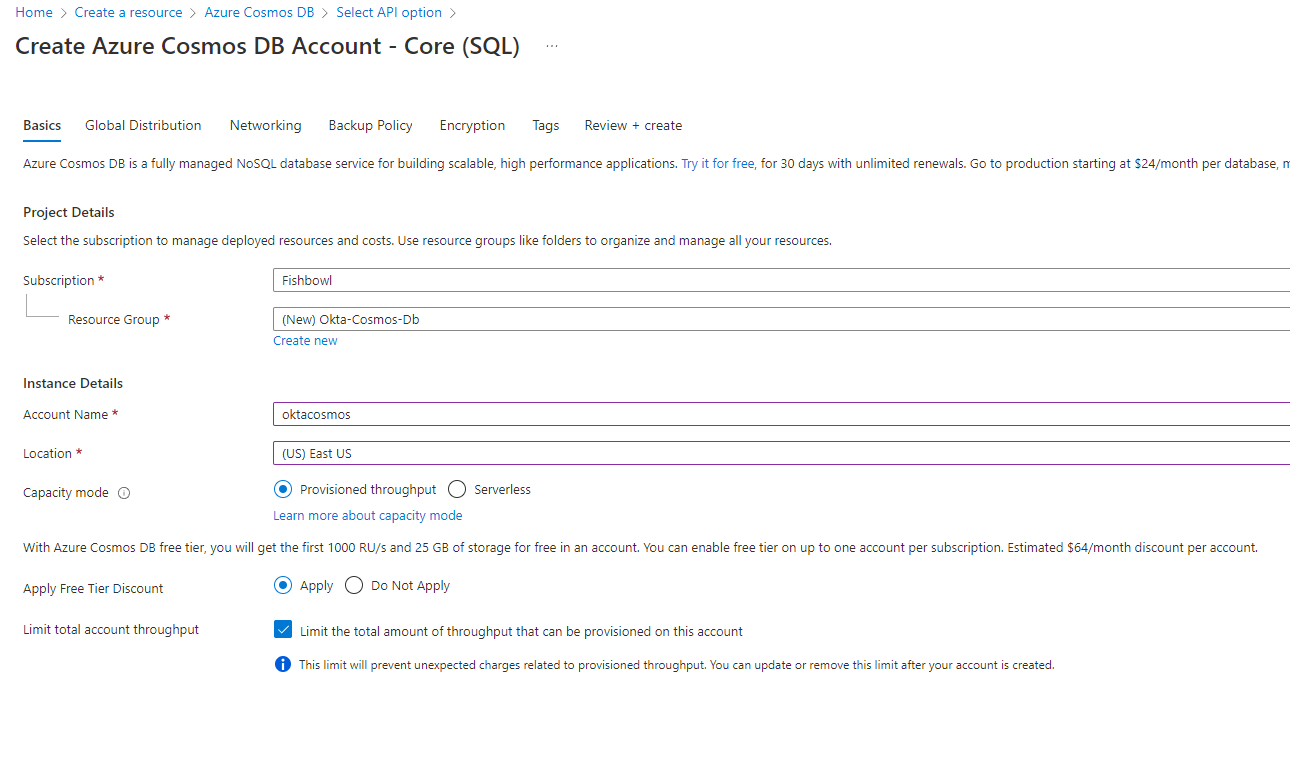
The Create Azure Cosmos DB Account - Core (SQL) page provides the details about your subscription and resource group. Make sure you select Apply under the Apply Free Tier Discount then press Review + create.
Create your web application
Now you can turn your attention toward creating your web application. Open Visual Studio and press Create a new project. Find the template for ASP.NET Core Web App (Model-View-Controller) and press Next. Name your application Okta_CosmosDb and press Next. Finally, select .NET 6.0 (Long-term support) from your framework and press Create. Allow Visual Studio a moment to scaffold the project.
Next, you can install the two packages you will need in your project.
Install-Package Okta.AspNetCore -Version 4.1.0
Install-Package Microsoft.Azure.Cosmos -Version 3.26.1
Okta.AspNetCore will do all the heavy lifting of connecting your web application to Okta using middleware provided by Okta. This package will just require a quick configuration using the values output to .okta.env from your application set up earlier.
Microsoft.Azure.Cosmos provides the core libraries for accessing the Cosmos DB API. You will use this package to create your database, add a container to it, and insert items into the container.
Next, open appsettings.Development.json and replace the code there with the following.
{
  "Logging": {
    "LogLevel": {
      "Default": "Information",
      "Microsoft.AspNetCore": "Warning"
    }
  },
  "AllowedHosts": "*",
  "Okta": {
    "ClientId": "{yourClientId}",
    "Domain": "{yourOktaDomain}",
    "ClientSecret": "{yourClientSecret}"
  },
  "CosmosDb": {
    "Account": "{yourCosmosDbUri}",
    "Key": "{yourCosmosDbPrimaryKey}",
    "DatabaseName": "oktacosmos",
    "ContainerName": "Results"
  }
}
You can find the Okta values in .okta.env produced by the CLI when you initialized your Okta application. To find your Cosmos values, navigate to your Cosmos DB account page and open the Settings > Keys tab. Here you will find the URI, PRIMARY KEY, and other values you may need down the line.
Next, replace the code in Program.cs with the following.
using Microsoft.AspNetCore.Authentication.Cookies;
using Microsoft.AspNetCore.Authentication.OpenIdConnect;
using Okta.AspNetCore;

var builder = WebApplication.CreateBuilder(args);

// Add services to the container.
builder.Services.AddControllersWithViews();

builder.Services.ConfigureApplicationCookie(options =>
{
    options.Cookie.HttpOnly = true;
    options.Cookie.SecurePolicy = Microsoft.AspNetCore.Http.CookieSecurePolicy.Always;
})
.AddAuthentication(options =>
{
    options.DefaultScheme = CookieAuthenticationDefaults.AuthenticationScheme;
    options.DefaultChallengeScheme = OpenIdConnectDefaults.AuthenticationScheme;
})
.AddCookie()
.AddOktaMvc(new OktaMvcOptions
{
    // Replace these values with your Okta configuration
    OktaDomain = builder.Configuration.GetValue<string>("Okta:Domain"),
    ClientId = builder.Configuration.GetValue<string>("Okta:ClientId"),
    ClientSecret = builder.Configuration.GetValue<string>("Okta:ClientSecret"),
    Scope = new List<string> { "openid", "profile", "email" },
    PostLogoutRedirectUri = "/"
});

builder.Services.AddScoped<Okta_CosmosDb.Services.IScrubService, Okta_CosmosDb.Services.ScrubService>();
builder.Services.AddSingleton<Okta_CosmosDb.Services.ICosmosService>(Okta_CosmosDb.Services.CosmosService.InitializeCosmosClientInstanceAsync(builder.Configuration.GetSection("CosmosDb")).GetAwaiter().GetResult());

var app = builder.Build();

// Configure the HTTP request pipeline.
if (!app.Environment.IsDevelopment())
{
    app.UseExceptionHandler("/Home/Error");
    // The default HSTS value is 30 days. You may want to change this for production scenarios, see https://aka.ms/aspnetcore-hsts.
    app.UseHsts();
}

app.UseHttpsRedirection();
app.UseStaticFiles();

app.UseRouting();

app.UseAuthentication();
app.UseAuthorization();

app.MapControllerRoute(
    name: "default",
    pattern: "{controller=Home}/{action=Index}/{id?}");

app.Run();
Much of this code is boilerplate from the Visual Studio scaffolding process but you are adding a few extra items.
First, you need to configure your authentication to use AddOktaMvc and provide the configuration values from your appsettings file.
Next, you are setting up the dependency injection for a couple of custom services that you will write soon. These are the IScrubService, which will handle your scrubbing process, and the ICosmosService, which will handle communication to your Cosmos DB account.
Finally, you are calling InitializeCosmosClientInstanceAsync, which will set up your database and container if they do not exist. Then it will return the CosmosService as a singleton.
Create your application services
Create a new folder in the project root and name it Services. You will add the following four files to this directory.
ICosmosService.csCosmosService.csIScrubService.csScrubService.cs
Start by replacing the code in the two interfaces. First, replace the code in ICosmosService.cs with the following.
namespace Okta_CosmosDb.Services
{
    public interface ICosmosService
    {
        Task SaveResultAsync(Models.ScrubResult result);
    }
}
Next, replace the code in IScrubService.cs with the code below.
namespace Okta_CosmosDb.Services
{
    public interface IScrubService
    {
        Task<Models.ScrubResult> ScrubAsync(Models.Person person);
    }
}
Now you can implement these interfaces in their respective classes. First, open CosmosService.cs and update the code there with the code below.
using Okta_CosmosDb.Models;
using Microsoft.Azure.Cosmos;

namespace Okta_CosmosDb.Services
{
    public class CosmosService : ICosmosService
    {
        private Container _container;

        public CosmosService(
            CosmosClient dbClient,
            string databaseName,
            string containerName)
        {
            this._container = dbClient.GetContainer(databaseName, containerName);
        }

        /// <summary>
        /// Creates a Cosmos DB database and a container with the specified partition key.
        /// </summary>
        /// <returns></returns>
        public static async Task<CosmosService> InitializeCosmosClientInstanceAsync(IConfigurationSection configurationSection)
        {
            string databaseName = configurationSection.GetSection("DatabaseName").Value;
            string containerName = configurationSection.GetSection("ContainerName").Value;
            string account = configurationSection.GetSection("Account").Value;
            string key = configurationSection.GetSection("Key").Value;

            CosmosClient client = new CosmosClient(account, key);
            CosmosService cosmosDbService = new CosmosService(client, databaseName, containerName);
            DatabaseResponse database = await client.CreateDatabaseIfNotExistsAsync(databaseName);
            await database.Database.CreateContainerIfNotExistsAsync(containerName, "/id");

            return cosmosDbService;
        }

        public async Task SaveResultAsync(ScrubResult result)
        {
            await this._container.CreateItemAsync<ScrubResult>(result, new PartitionKey(result.Id));
        }
    }
}
This service does two tasks. First, it stores data in Cosmos DB using the SaveResultAsync method. This simply calls the container you are operating on and creates an item in that container.
This class also contains the static InitializeCosmosClientInstanceAsync method, which your Program.cs called to return the service. Anytime you attempt to access an ICosmosService your application will return a singleton using this method. This method will ensure your database and your container are created before passing the instance of the CosmosService to the consumer to be used.
Next open ScrubService.cs and replace the code there with this implementation.
using Okta_CosmosDb.Models;

namespace Okta_CosmosDb.Services
{
    public class ScrubService : IScrubService
    {
        public async Task<ScrubResult> ScrubAsync(Person person)
        {
            var task = Task.Run(() => { return new ScrubResult(person, new Random().Next(2) == 0); });
            return await task;
        }
    }
}
This class serves to mock a true scrub service. The method here is async because in a real-world environment that would be the case, but since you are just mocking the service you can wrap the login in Task.Run to simulate an async method.
Create your models
Next, you will need a couple of data models to facilitate your views and to pass in your application. In your Models folder add a file for ScrubResult.cs and add the following code to it.
using Newtonsoft.Json;

namespace Okta_CosmosDb.Models
{
    public class ScrubResult
    {
        [JsonProperty(PropertyName = "id")]
        public string Id { get; set; }

        [JsonProperty(PropertyName = "person")]
        public Person Person { get; set; }

        [JsonProperty(PropertyName = "success")]
        public bool Success { get; set; }

        public ScrubResult(Person person, bool success)
        {
            Person = person;
            Success = success;
            Id = Guid.NewGuid().ToString();
        }
    }
}
Now add the file and code for Person.cs in your Models folder.
using Newtonsoft.Json;

namespace Okta_CosmosDb.Models
{
    public class Person
    {
        public string Name { get; set; }

        [JsonIgnore]
        public string SSN { get; set; }
    }
}
There are a couple of things going on here that you should understand. First, you are going to store the ScrubResult object in your Cosmos database. Each property is explicitly given a name using the JsonProperty attribute, however you do not need to do this. You do need a field called id. The JsonProperty attribute helps keep your C# code consistently Pascal case while keeping your Cosmos DB property names camel case.
The real kicker here is that the API is using the Newtonsoft.Json package to serialize the objects into JSON strings. This means you can use any of the features that come with the Newtonsoft package to manipulate your data. This is what you did on the Person object where you use the JsonIgnore attribute to hide the SSN.
While JsonIgnore is the simplest way to remove the SSN from this object, there are many other approaches. You could even create a custom attribute using the Newtonsoft.Json.Serialization.DefaultContractResolver, and hash, encrypt, or otherwise translate the field into something less sensitive.
Add the controller logic
Now you can add your controller logic to your application.
Start by adding a class to your Controllers directory named ImportController.cs. Replace the code with the following.
using Microsoft.AspNetCore.Mvc;
using Microsoft.AspNetCore.Authorization;
using Microsoft.AspNetCore.Http;

namespace Okta_CosmosDb.Controllers
{
    [Authorize]
    public class ImportController : Controller
    {
        Services.IScrubService _scrubService;
        Services.ICosmosService _cosmosService;

        public ImportController(
            Services.IScrubService scrubService,
            Services.ICosmosService cosmosService
            )
        {
            _scrubService = scrubService;
            _cosmosService = cosmosService;
        }

        public IActionResult Index()
        {
            return View();
        }

        [HttpPost]
        public IActionResult Upload(IFormFile csvFile)
        {
            List<Models.Person> persons = new List<Models.Person>();

            using (var stream = csvFile.OpenReadStream())
            using (StreamReader sr = new StreamReader(stream))
            {
                while (!sr.EndOfStream)
                {
                    string[] rows = sr.ReadToEnd().Split(Environment.NewLine);

                    for(int i =0; i < rows.Length; i++)
                    {
                       if(i == 0)
                        {
                            //header row
                            continue;
                        }

                        var row = rows[i].Split(',');

                        persons.Add(new Models.Person()
                        {
                            Name = row[0],
                            SSN = row[1]
                        });
                    }
                }
            }

            List<Models.ScrubResult> results = new List<Models.ScrubResult>();

            foreach(var person in persons)
            {
                results.Add(_scrubService.Scrub(person));
            }

            foreach(var result in results)
            {
                _cosmosService.SaveResultAsync(result);
            }

            return View(results);
        }
    }
}
This controller will serve as a view for the import page. It will also accept a CSV file, convert the file into a list of Person objects, and then run the scrub process against each person. Once the scrub process is complete it will save the results to your Cosmos DB account using the database you set up earlier.
Next, you will want a controller for logging users in and out. Add a controller called AccountController.cs and replace the code with the following.
using Microsoft.AspNetCore.Mvc;
using Microsoft.AspNetCore.Authentication.Cookies;
using Okta.AspNetCore;

namespace Okta_CosmosDb.Controllers
{
    public class AccountController : Controller
    {
        public IActionResult SignIn()
        {
            if (!(HttpContext.User?.Identity?.IsAuthenticated ?? false))
            {
                return Challenge(OktaDefaults.MvcAuthenticationScheme);
            }

            return RedirectToAction("Index", "Import");
        }

        [HttpPost]
        public IActionResult SignOut()
        {
            return new SignOutResult(new[] { OktaDefaults.MvcAuthenticationScheme,
                                         CookieAuthenticationDefaults.AuthenticationScheme });
        }
    }
}
This controller contains methods for SignIn and SignOut implemented per Okta’s recommendation.
Finally, replace the code in HomeController.cs with the code below.
using Microsoft.AspNetCore.Mvc;
using Okta_CosmosDb.Models;
using System.Diagnostics;

namespace Okta_CosmosDb.Controllers
{
    public class HomeController : Controller
    {
        private readonly ILogger<HomeController> _logger;

        public HomeController(ILogger<HomeController> logger)
        {
            _logger = logger;
        }

        public IActionResult Index()
        {
            if ((User?.Identity?.IsAuthenticated ?? false))
                return RedirectToAction("Index", "Import");

            return View();
        }

        [ResponseCache(Duration = 0, Location = ResponseCacheLocation.None, NoStore = true)]
        public IActionResult Error()
        {
            return View(new ErrorViewModel { RequestId = Activity.Current?.Id ?? HttpContext.TraceIdentifier });
        }
    }
}
Here you have the Index method but the logic is replaced to redirect authenticated users to the Import screen.
Add and edit your views
The first view to edit is the _Layout.cshtml in your Views/Shared folder.
<!DOCTYPE html>
<html lang="en">
<head>
<meta charset="utf-8" />
<meta name="viewport" content="width=device-width, initial-scale=1.0" />
<title>@ViewData["Title"] - Okta With Cosmos DB</title>
<link rel="stylesheet" href="~/lib/bootstrap/dist/css/bootstrap.min.css" />
<link rel="stylesheet" href="~/css/site.css" />
</head>
<body>
<header>
<nav class="navbar navbar-expand-sm navbar-toggleable-sm navbar-light bg-white border-bottom box-shadow mb-3">
<div class="container">
<a class="navbar-brand" asp-area="" asp-controller="Home" asp-action="Index">Okta - Cosmos DB</a>
<button class="navbar-toggler" type="button" data-toggle="collapse" data-target=".navbar-collapse" aria-controls="navbarSupportedContent"
aria-expanded="false" aria-label="Toggle navigation">
<span class="navbar-toggler-icon"></span>
</button>
<div class="navbar-collapse collapse d-sm-inline-flex justify-content-between">
<ul class="navbar-nav flex-grow-1">
<li class="nav-item">
<a class="nav-link text-dark" asp-area="" asp-controller="Home" asp-action="Index">Home</a>
</li>
</ul>
@if ((User?.Identity?.IsAuthenticated ?? false))
{
<form asp-action="SignOut" asp-controller="Account" method="post">
<button type="submit" href="Account/Logout" class="btn btn-primary my-2 my-sm-0">Logout</button>
</form>
}
else
{
<a href="Account/SignIn" class="btn btn-primary my-2 my-sm-0">Login</a>
}
</div>
</div>
</nav>
</header>
<div class="container">
<main role="main" class="pb-3">
@RenderBody()
</main>
</div>
<footer class="border-top footer text-muted">
<div class="container">
© 2022 - <a href="https://profile.fishbowlllc.com" target="_blank" rel="noreferrer">Nik Fisher</a>
</div>
</footer>
<script src="~/lib/jquery/dist/jquery.min.js"></script>
<script src="~/lib/bootstrap/dist/js/bootstrap.bundle.min.js"></script>
<script src="~/js/site.js" asp-append-version="true"></script>
@await RenderSectionAsync("Scripts", required: false)
</body>
</html>
Most of the boilerplate layout is fine but it doesn’t include Login or Logout buttons. You added these to the navbar and displayed the appropriate one based on the user’s authentication status.
Next, replace the Home\Index.cshtml code with the following.
@{
    ViewData["Title"] = "Home Page";
}

<div class="text-center">
    A small tutorial on protecting PII in Microsoft's <a href="https://azure.microsoft.com/en-us/services/cosmos-db/"> Azure Cosmos DB</a>.
    <br />Secured by <a href="https://www.okta.com/free-trial/">Okta.</a> <br />
    Written by <a href="https://github.com/nickolasfisher"> Nik Fisher.</a>
</div>
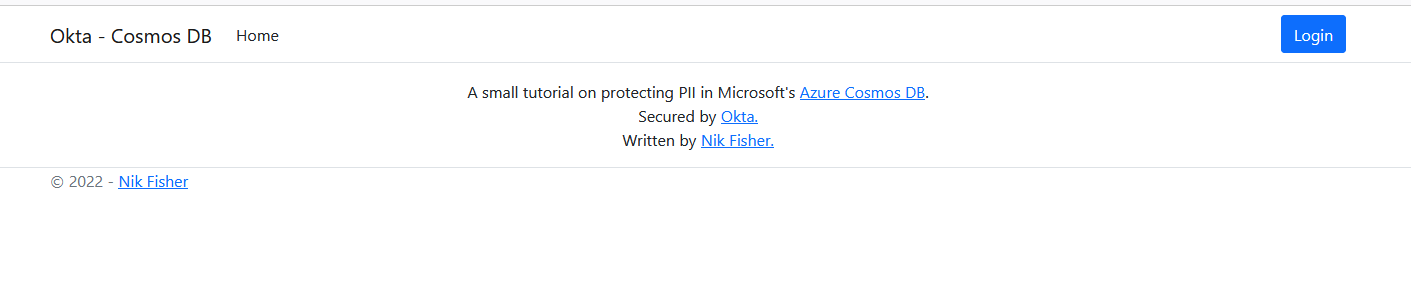
This is just a little home page with some information about the tutorial.
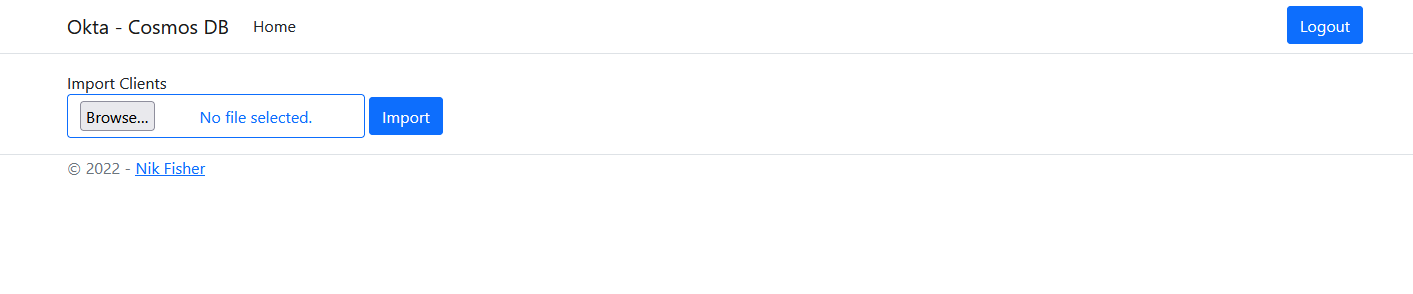
Finally, create a new folder (if one wasn’t created already) for Import in your Views folder. Add a file called Index.cshtml with the following code.
@(ViewData["Title"] = "Import Clients")

<form method="POST" asp-controller="Import" asp-action="Upload" enctype="multipart/form-data">
    <input type="file" name="csvFile" class="btn-outline-primary btn" />
    <input type="submit" class="btn btn-primary" value="Import" />
</form>
This simple page provides an opportunity for the user to import a CSV file and submit it to the server.
Next, add a file for Upload.cshtml that will display the results as they come back.
@model List<Okta_CosmosDb.Models.ScrubResult>
@(ViewData["Title"] = "Scrub Results")

<table class="table table-bordered">
    <thead>
        <tr>
            <th>Name</th>
            <th>Result</th>
        </tr>
    </thead>
    <tbody>
        @foreach (var result in Model)
        {
            <tr>
                <td>@result.Person.Name</td>
                <td>@result.Success</td>
            </tr>
        }
    </tbody>
</table>
Test your application locally
With your application complete you can now start debugging. You should be greeted with the home screen.
Click on Login and follow the login page to Okta and then back to your import page. Download the CSV File found here and upload this to your server using the application page.
Your application will then process this file and save the results to Cosmos DB. You can navigate to your Cosmos DB portal using the Data Explorer.
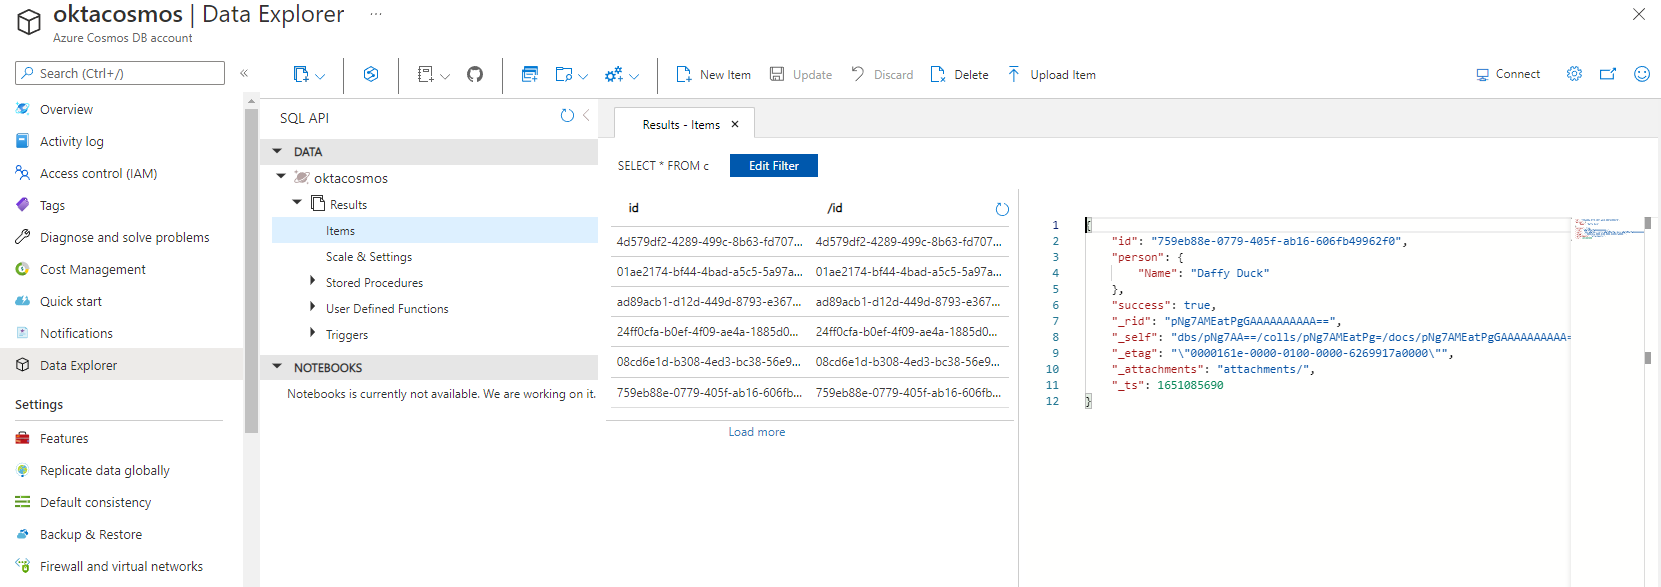
You will note that the social security number does not appear in the data you sent to Cosmos DB.
Conclusions
As developers, we always need to be thinking about protecting users’ data. The rise of PaaS and SaaS platforms has decreased risk when used properly. But along with these new platforms, we must make sure we use best practices and keep an attentive eye on the data we choose to retain.
In this tutorial, you learned how to store data in Cosmos DB from an ASP.NET Core application. You learned how to set up your Cosmos DB account and how to set up your application to create databases and containers to store your items. Finally, you used the JSON functionality to remove sensitive data from your data model before storing it.
Learn more about Azure and ASP.NET Core
Build a Simple Microservice with C# Azure Functions
Deploy a .NET Container with Azure DevOps
Make sure you follow us on Twitter and subscribe to our YouTube channel. If you have any questions or want to share what tutorial you’d like to see next, please comment below.
Okta Developer Blog Comment Policy
We welcome relevant and respectful comments. Off-topic comments may be removed.