Build and Deploy a Node.js App to Heroku

Heroku is a platform as a service (PaaS) that supports many languages. Initially, it supported only Ruby sites but now supports various languages, including JavaScript with Node.js. Heroku also has Docker support so that you can deploy just about anything to it.
This tutorial will teach you how to build a small application using the Express framework for Node.js. You will then secure that application using Okta by integrating the Okta OIDC middleware with your application. Finally, you will learn how to deploy the application to Heroku, update your Okta application for your Heroku site, and set the environment variables for your app in Heroku.
This tutorial uses the following technologies but doesn’t require any prior experience:
- Visual Studio Code
- Node.js
- A free Okta Developer Account (to handle your OAuth needs)
- Heroku Account
- A repository on GitHub
Of course, if you want to just see the code feel free to view it on GitHub.
Note: In May 2025, the Okta Integrator Free Plan replaced Okta Developer Edition Accounts, and the Okta CLI was deprecated.
We preserved this post for reference, but the instructions no longer work exactly as written. Replace the Okta CLI commands by manually configuring Okta following the instructions in our Developer Documentation.
Create your Okta application
Install the Okta CLI and run okta login.
Then, run okta apps create. Select the default app name, or change it as you see fit.
Choose Web and press Enter.
Select node.
Then, change the Redirect URI to http://localhost:3000/authorization-code/callback and accept the default Logout Redirect URI of http://localhost:3000.
What does the Okta CLI do?
The Okta CLI will create an OIDC Web App in your Okta Org. It will add the redirect URIs you specified and grant access to the Everyone group. You will see output like the following when it’s finished:
Okta application configuration has been written to: /path/to/app/.okta.env
Run cat .okta.env (or type .okta.env on Windows) to see the issuer and credentials for your app.
export OKTA_OAUTH2_ISSUER="https://dev-133337.okta.com/oauth2/default"
export OKTA_OAUTH2_CLIENT_ID="0oab8eb55Kb9jdMIr5d6"
export OKTA_OAUTH2_CLIENT_SECRET="NEVER-SHOW-SECRETS"
Your Okta domain is the first part of your issuer, before /oauth2/default.
NOTE: You can also use the Okta Admin Console to create your app. See Create a node App for more information.
Create your Express application
Now it’s time to turn your attention to writing your application. You will scaffold it using express application generator. Open the folder where your application will live and run the following command:
npx express-generator
Install your dependencies
Run the following command to install the default dependencies from express-generator:
npm install
You will need to install some additional dependencies for your application.
First, you will add dotenv to house your sensitive and environment-specific information.
npm i dotenv@16.0.0
Next, you will add Bootstrap. You will use the Bootstrap libraries in your jade templates for writing the front end. Bootstrap is a simple UI framework with many samples to help you develop HTML pages quickly.
npm i bootstrap@5.1.3
You will need oidc-middleware from Okta to help secure your application. This package makes integrating with Okta painless, quick, and secure. You will be able to configure the middleware with your Okta application details and start securing your routes with only a few lines of code. express-session is required when using the oidc-middleware so you will need to install that as well.
npm i express-session@1.17.2
npm i @okta/oidc-middleware@4.3.0
Write your server code
The express-generator package does a great job of scaffolding a simple Node.js application. For this tutorial, you can leave most of the application the way it is. You will need to make a few changes, though.
Open .okta.env and add the following to the end of your file after your Okta configuration values:
export APP_BASEURL="http://localhost:3000"
NOTE: Make sure that you add the .okta.env to your .gitignore file.
Next, open app.js and replace the contents of the file with the following code:
require('dotenv').config({ path: '.okta.env' })

var createError = require("http-errors");
var express = require("express");
var path = require("path");
var cookieParser = require("cookie-parser");
var logger = require("morgan");

var indexRouter = require("./routes/index");
var usersRouter = require("./routes/users");

const session = require("express-session");
const { ExpressOIDC } = require("@okta/oidc-middleware");

var app = express();

// session support is required to use ExpressOIDC
app.use(
  session({
    secret: "this should be secure",
    resave: true,
    saveUninitialized: false,
  })
);

const { OKTA_OAUTH2_ISSUER, OKTA_OAUTH2_CLIENT_ID, OKTA_OAUTH2_CLIENT_SECRET, APP_BASEURL } = process.env;

const oidc = new ExpressOIDC({
  issuer: OKTA_OAUTH2_ISSUER,
  client_id: OKTA_OAUTH2_CLIENT_ID,
  client_secret: OKTA_OAUTH2_CLIENT_SECRET,
  appBaseUrl: APP_BASEURL,
  redirect_uri: `${APP_BASEURL}/authorization-code/callback`,
  scope: "openid profile",
});

// ExpressOIDC attaches handlers for the /login and /authorization-code/callback routes
app.use(oidc.router);

// view engine setup
app.set("views", path.join(__dirname, "views"));
app.set("view engine", "jade");

app.use(logger("dev"));
app.use(express.json());
app.use(express.urlencoded({ extended: false }));
app.use(cookieParser());
app.use(express.static(path.join(__dirname, "public")));

app.use(express.static(__dirname + "/node_modules/bootstrap/dist"));

app.use("/", indexRouter);
app.use("/users", usersRouter.userRoutes({ oidc: oidc }));

// catch 404 and forward to error handler
app.use(function (req, res, next) {
  next(createError(404));
});

// error handler
app.use(function (err, req, res, next) {
  // set locals, only providing error in development
  res.locals.message = err.message;
  res.locals.error = req.app.get("env") === "development" ? err : {};

  // render the error page
  res.status(err.status || 500);
  res.render("error");
});

module.exports = app;
Most of this code is boilerplate from the express-generator—the notable addition is the configuration for the Okta OIDC. First, you need to enable dotenv at the top of this file. Next, configure the express-session and add it to your application. Finally, you can configure your Okta OIDC middleware using the variables from .env.
Open your routes/index.js file and replace the contents of the file with the following code:
var express = require("express");
var router = express.Router();

/* GET home page. */
router.get("/", function (req, res, next) {
  res.render("index", { loggedIn: req.isAuthenticated() });
});

module.exports = router;
Here you added a property called loggedIn for the index.jade template to use. This property will help the view decide if it should display a login or logout button. The rest of the home page will be static.
Open your routes/users.js file and replace the contents of the file with the following code:
var express = require("express");
var router = express.Router();

function userRoutes(options) {
  const oidc = options.oidc;

  router.get("/", oidc.ensureAuthenticated(), function (req, res, next) {
    res.render("users/index", {
      loggedIn: true,
      title: "Express",
      user: req.userContext.userinfo,
    });
  });

  return router;
}

module.exports.userRoutes = userRoutes;
This file is where the magic from the Okta OIDC middleware shines. You are passing in the oidc.ensureAuthenticated middleware in your route definition. This function will reroute unauthenticated users to the login route you defined in your app.js file. Because you didn’t explicitly set this parameter, it will direct the user to /login and trigger the authentication flow. The model that is passed to the view here also contains some information about the user, which you’ll display when the user lands on this page.
Write your frontend code
Now you can write some client code. By default, the express-generator sets up some views using jade. Jade is a templating engine for Node.js. The language incorporates some conditionals and flow controls to make templating HTML from your model easier. The syntax is pretty simple to learn, and there are many HTML to jade converters out there.
Open the layout.jade file that was generated with your project and replace that code with the following:
doctype html
html
  head
    title= title
    link(rel='stylesheet' href='/stylesheets/style.css')
    link(rel='stylesheet' href='css/bootstrap.min.css')
    script(language='javascript' src='js/bootstrap.min.js')

  body
    .container
      header.d-flex.flex-wrap.justify-content-center.py-3.mb-4.border-bottom
        h5.d-flex.align-items-center.mb-3.mb-md-0.me-md-auto.text-dark.text-decoration-none
          a(href="/") Home
        ul.nav.nav-pills
          if loggedIn
            li.nav-item
              a(href="users").nav-link Profile
          li.nav-item
            if loggedIn
              form(action="logout" method="post")
                button(type="submit").nav-link.active Logout
            else
              a(href="Users").nav-link.active Login

      block content
We have used the HTML elements; the classes are chained with a . between them. The attributes are bounded by parentheses. This simple layout takes the loggedIn value from the server and determines if it should display a login or logout button. It also conditionally shows a tab for the Profile page if the user is logged in.
You can add the profile page by creating a new folder called users in your views folder and adding a new file called index.jade. Add the following code to it:
extends ../layout

block content
  h1 Welcome #{user.name}
  P locale: #{user.locale}
  p UserName: #{user.preferred_username}
This page displays the user information that was retrieved from Okta when the user logged in.
Replace the code in views/index.jade with the following:
extends layout
block content
.container-fluid.py-5.bg-dark.text-white-50
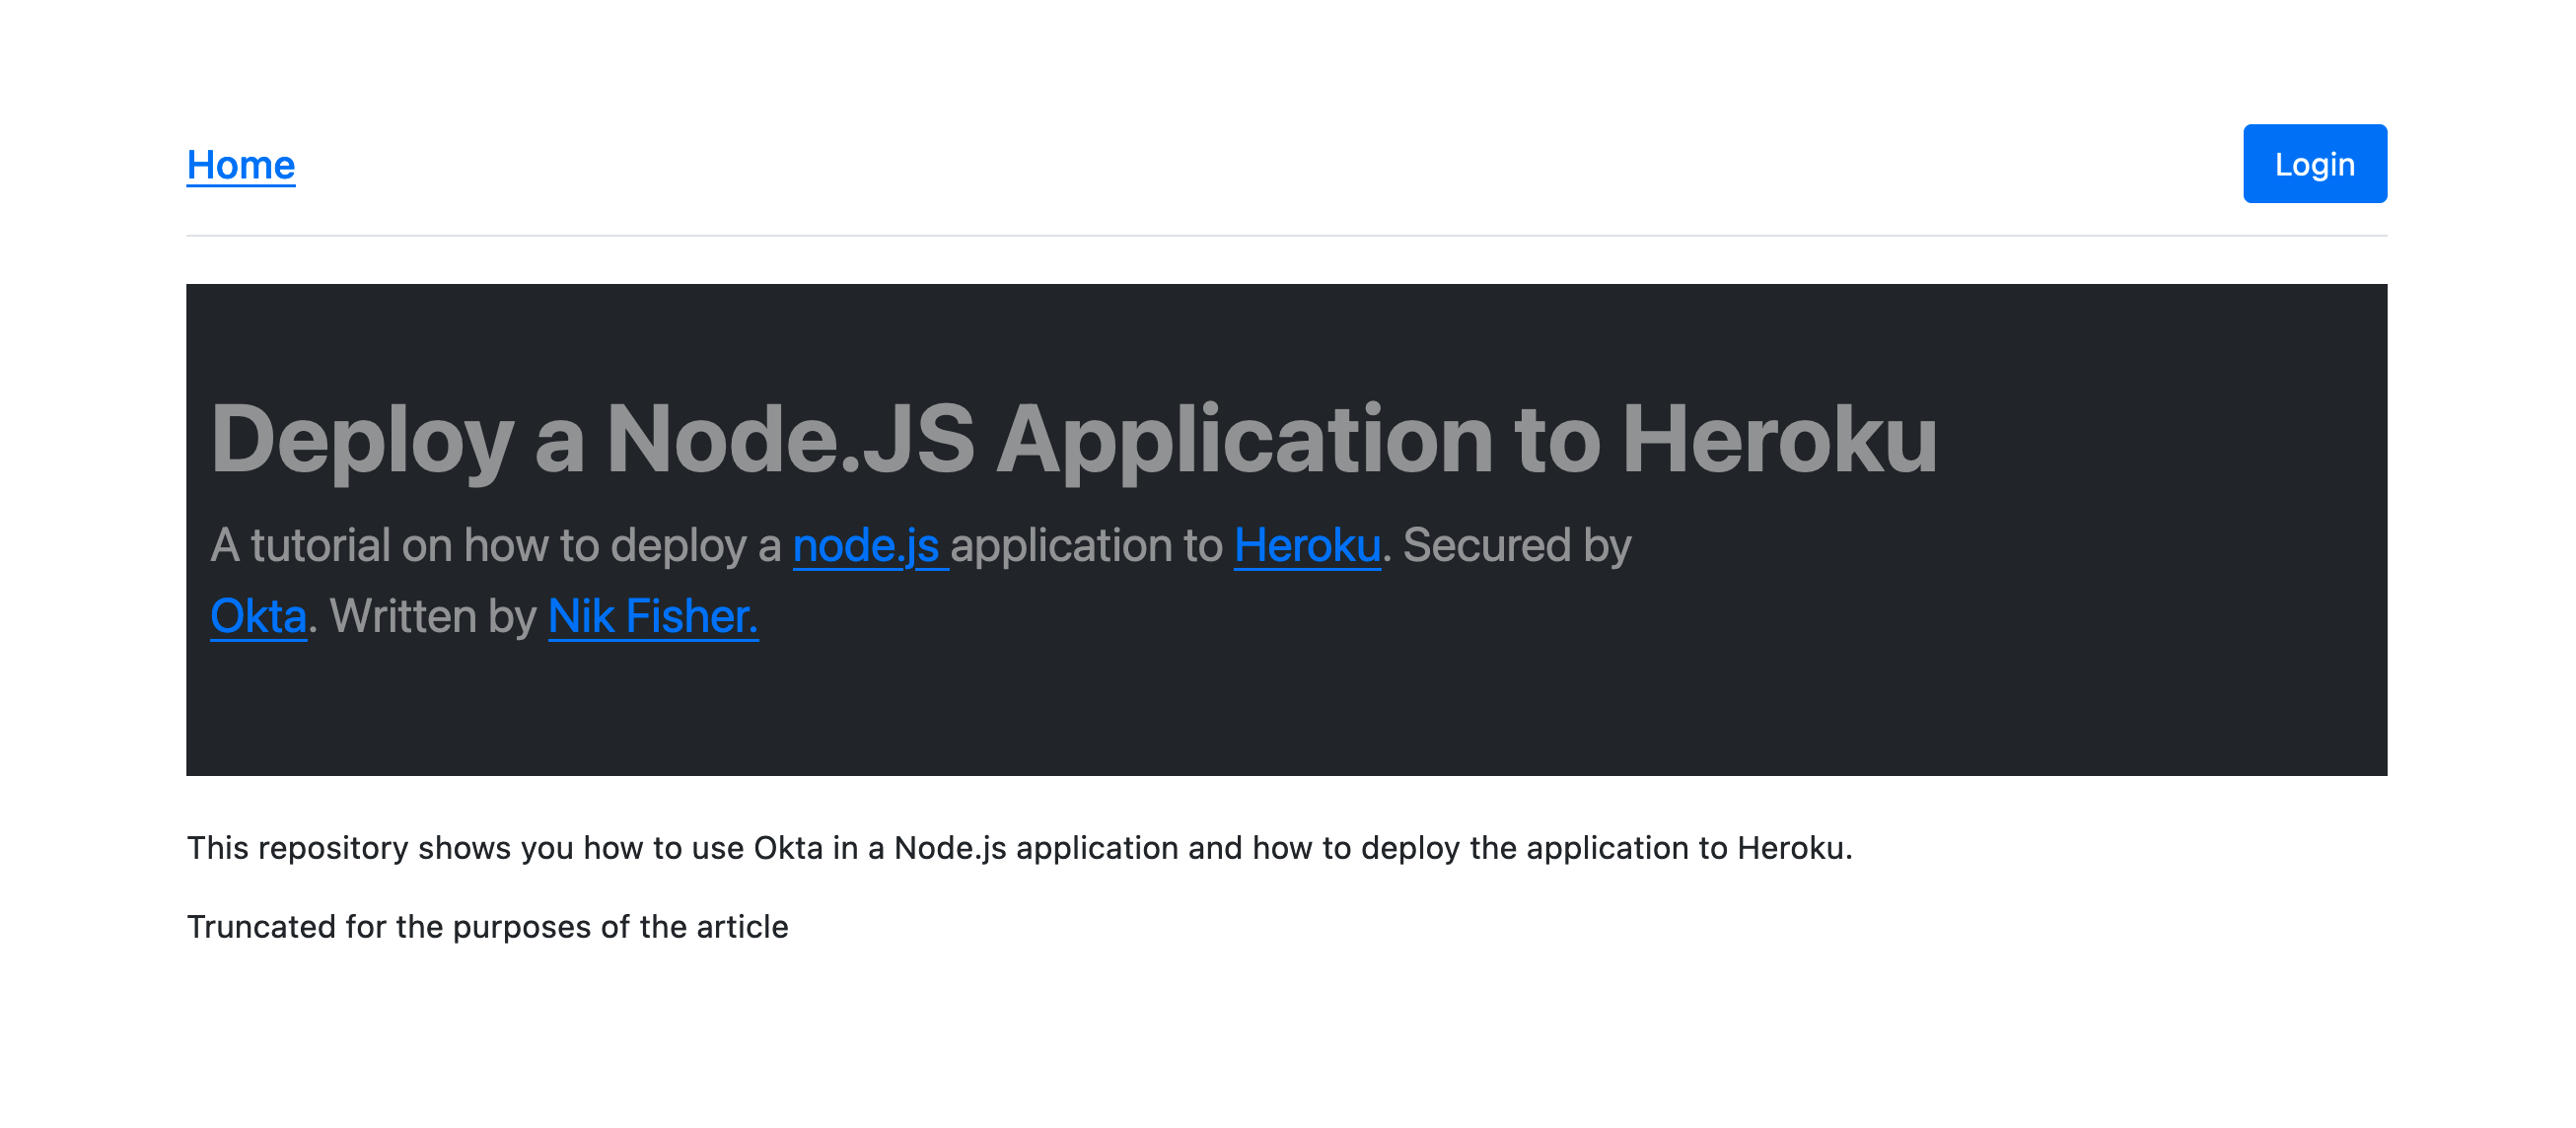
h1.display-5.fw-bold Deploy a Node.JS Application to Heroku
p.col-md-8.fs-4
| A tutorial on how to deploy a
a(href="https://nodejs.org/en/" target="_blank") node.js
| application to
a(href="https://dashboard.heroku.com/apps" target="_blank") Heroku
| . Secured by
a(href="https://www.okta.com/" target="_blank") Okta
| . Written by
a(href="https://profile.fishbowlllc.com/" target="_blank") Nik Fisher.
br
p
| This repository shows you how to use Okta in a Node.js application and how to deploy the application to Heroku.
p Truncated for the purposes of the article.
As mentioned earlier, this is a static page. Your next step is deploying the application. But before you move on to that, run the command npm run start and navigate to http://localhost:3000 to view your application and ensure it is working locally.
Deploy to Heroku
Make sure all your code is running and checked into your GitHub repository. Navigate to your Heroku Dashboard. If this is your first time using Heroku you shouldn’t have any apps configured yet. Click on New and then Create New App. Name your app okta-heroku-webapp-{yourUserName} or another unique name you feel is appropriate. Press Create App.
On the application page for your newly created app, find the Deployment Method section on the Deploy tab. Click on GitHub and connect your Heroku account to your GitHub account.
Next, in the Connect to GitHub section, find the repository you created for this tutorial and press Connect.
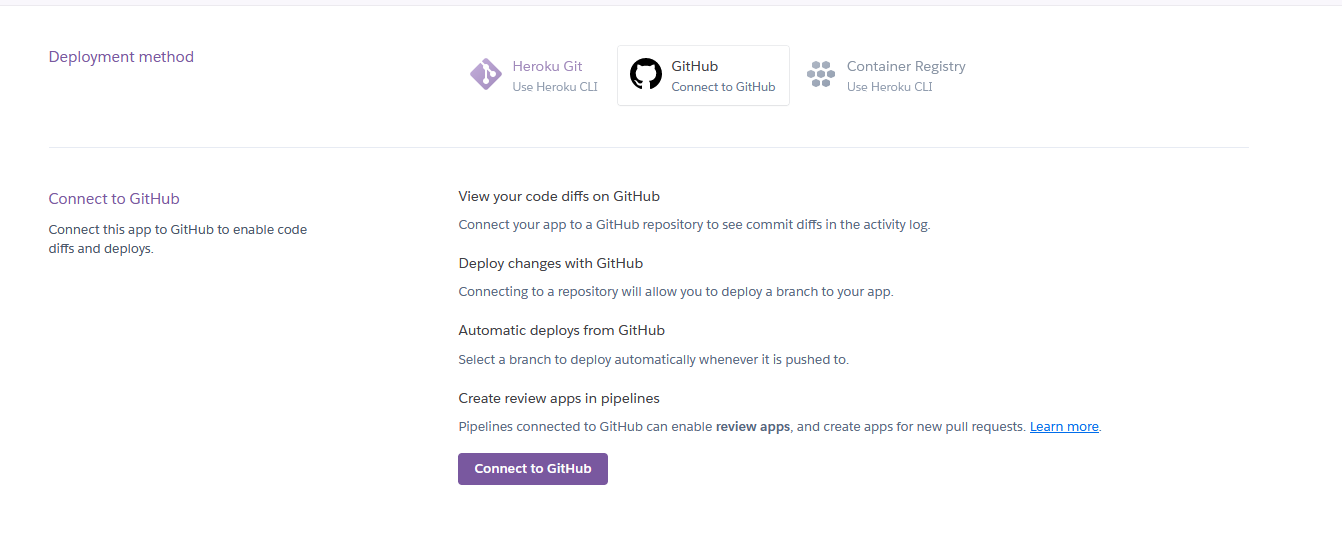
You can enable automatic deploys under Automatic deploys. In addition, you can configure it to wait for CI to pass before deploying the application. CI can be configured from your GitHub account. This step isn’t strictly necessary for this tutorial, but it’s nice to see how this fits into the CI pipeline.

Finally, under Manual Deploy choose the branch you wish to deploy and click Deploy Branch. Wait a moment and you should receive a message from Heroku saying that your app was successfully deployed.
Click the view button to be taken to your application. At this point, your application won’t be running because it isn’t configured correctly yet. Make note of the URL of your site and then you’ll make a few changes.
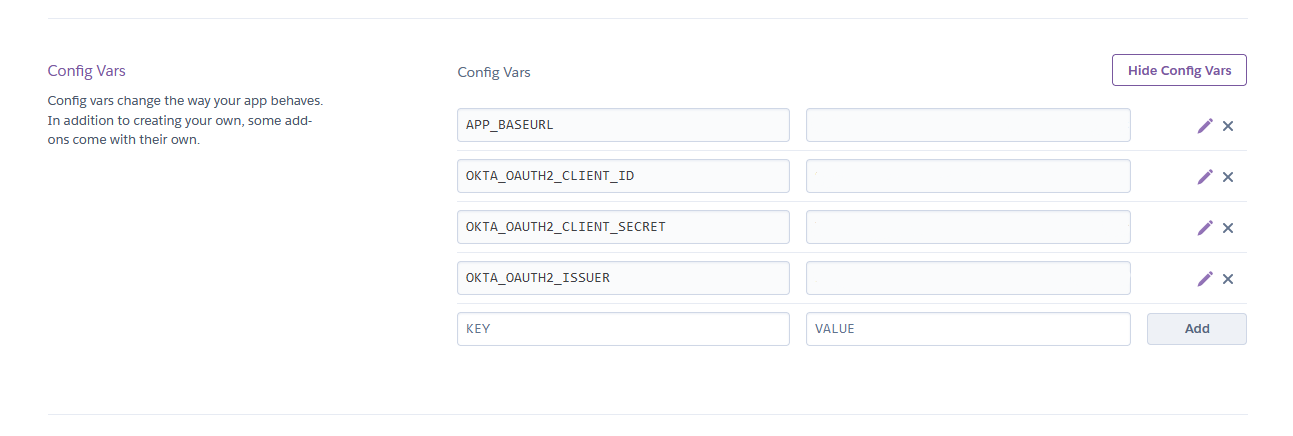
Configure your environment variables
In your Heroku application click on Settings. Find the section named Config Vars and click on Reveal Config Vars. Here you will add the same key and value pairs from the .okta.env file you used locally. You can see mine below with the values blurred out.
Configure your Okta application
Next, you will need to configure your Okta application to accept the new URL from Heroku. Navigate to your application in the Okta admin dashboard and find the General Settings tab. Click Edit. Under the Login section add a value for Sign-in redirect URIs that matches your URI from your development settings, but replace http://localhost:3000 with the URL from your Heroku application. For example, my URI would be https://okta-heroku-webapp-nfisher.herokuapp.com.
Add a similar value for your Sign-out redirects URIs, which should just be your application’s home page from Heroku.
Now return to your application. You should be able to log in and see your app running as expected.
Do more with Node and Heroku
Heroku is a great way to quickly and easily deploy a lightweight application that slides into your existing CI process. Plus, it’s free to get started. Together with Express and Okta, you can quickly build secure web apps and deploy them to a modern platform.
In this tutorial, you learned how to build an express application with the express-generator toolchain. You then secured it with Okta. Next, you learned how to create an application on Heroku, connect it to your GitHub repository and deploy your app from GitHub to Heroku. Finally, you learned how to configure Heroku and Okta to work with each other.
If you’d like to learn more about building web apps with Node.js or Heroku, you might want to check out these other great posts:
Okta Developer Blog Comment Policy
We welcome relevant and respectful comments. Off-topic comments may be removed.