Kubernetes To The Cloud With AWS: Deploying a Node.js App to EKS
Since 2013 when it was released to the public, Docker has become an industry-standard tool for development teams to package applications into small executable containers. A year later, Kubernetes was released by Google to manage large amounts of containers, and provide features for high availability (HA) and auto-scaling.
While Kubernetes adds many benefits to your container management, you might find the process of setting up Kubernetes within your on-premise infrastructure quite challenging, especially on the first try. To overcome this challenge, managed Kubernetes is offered as a service by several cloud service providers.
In this article, you will learn about the services offered by Amazon Web Services (AWS) for using Kubernetes.
Table of Contents
- Introducing Kubernetes offerings on Amazon
- Understanding the EKS architecture on AWS
- Creating a Docker container
- Pushing the docker image to the Elastic Container Registry (ECR)
- Creating an EKS cluster
- Creating Kubernetes resources
- Modifying Okta client credentials
- More resources for Kubernetes on AWS
Prerequisites
This article will walk through the hands-on creation of a Kubernetes cluster to deploy a containerized Node.js application secured with Okta.
To follow along with the cluster creation steps, you will need the following:
- An AWS account. Sign up for an account to receive free AWS credits.
- The AWS CLI installed and configured on a local computer.
- The
eksctlcommand line tool installed on your local machine. - Docker, installed on a local computer to build a Docker image of the cloned Express.js application.
Introducing Kubernetes offerings on Amazon
While Kubernetes is open-source and can be used within your on-premise infrastructure, Kubernetes is also cloud-agnostic. Major cloud service vendors provide Kubernetes as a Platform as a Service (PaaS) offering to deploy and scale containerized applications across virtual machines. The Elastic Kubernetes Service (EKS) from Amazon Web Services is one example of such an offering.
The Amazon Elastic Kubernetes Service (EKS) lets you deploy, run, and scale your containerized application within a Kubernetes cluster consisting of EC2 instances acting as worker nodes. For customers using a hybrid cloud model, the Amazon EKS Anywhere deployment option allows you to use Kubernetes clusters within a supported on-premise infrastructure.
The Fargate service on AWS also provides cloud customers with the ability to use Kubernetes, but in a serverless manner. When using Fargate, you get to run a pod within a Kubernetes cluster on demand. Fargate helps to reduce the operating cost (OpEx) of your infrastructure as you will only be billed for the pods and not the EC2 instance nodes.
Related: The article Deploy a .NET application using AWS Fargate shows a practical use of AWS Fargate.
In the following sections, we will focus on using Kubernetes through the Elastic Kubernetes Service.
Understanding the EKS architecture on AWS
The EKS architecture comprises three main components – clusters, nodes, and the Virtual Private Cloud (VPC), which forms the networking aspect. Let’s proceed to consider the clusters, and VPC.
EKS Clusters
An EKS cluster is composed of a control plane and worker nodes residing within a VPC created for the cluster. A cluster’s control plane is placed in an AWS-managed account and runs the Kubernetes software. The worker nodes, on the other hand, run in a user’s AWS account, and are EC2 instances that connect to the control plane through the API Server from the Kubernetes software.
An EKS cluster can be created through several tools such as the AWS console, AWS CLI, Cloud Formation, eksctl, or even Terraform, as well as other infrastructure as code tools. When using terminal-based tools such as the AWS CLI or eksctl, you provide the properties of the cluster to be created by EKS, either by using a configuration file or through command line arguments. Within the demo section of this article, you will use the eksctl command line tool to create a cluster.
With regard to the cluster’s security, the internal connection between the control plane and worker nodes uses a certificate file generated on setup. The cluster’s data stored within etcd is also encrypted by default using the Key Management Service on AWS.
The EKS Virtual Private Cloud (VPC)
An AWS virtual private cloud (VPC) is an isolated virtual network made up of smaller network components such as subnets and internet gateways, amongst others.
A VPC is required for creating a cluster. The VPC is also required to contain subnets within at least two availability zones. These subnets can either be public or private; however, it is recommended to have a combination of public and private subnets so that ingress traffic can be load balanced.
EKS has an uptime Service Level Agreement of 99.95%. As one of the strategies to ensure high availability (HA), an Auto Scaling Group can be used within each Availability Zone to monitor the nodes within a cluster, scaling them to meet your application’s demands or even restarting them when health probes fail repeatedly.
Creating a Docker container
With the knowledge you now have about EKS, let’s create a cluster having a deployment to run the Docker image of a Node.js application secured with Okta. We will reuse the Node.js application that was built for an earlier blog post, Building a Simple Authentication in Express in 15 minutes. You need only focus on creating a Docker image of the application.
The steps outlined below will guide you through building the Docker image of a Node.js app secured with Okta.
1. Open your terminal to execute the git-clone command below to clone the Okta-secured Node.js application from the OktaDev repository to your local computer.
git clone https://github.com/oktadev/okta-node-express-15-minute-auth-example.git
2. Using your preferred code editor, open the okta-node-express-15-minute-auth-example folder cloned above and create a file named Dockerfile. This file will store the steps for building a docker image out of the cloned application.
Next, paste the code within the code block below into the Dockerfile.
FROM node:alpine

WORKDIR /okta-k8-app

COPY . .

RUN npm install

EXPOSE 3000

CMD exec npm start
When the docker build command is executed, Docker will perform the following steps to build an image of the application.
- Use
node:alpineas the base image of the docker image about to be built. - Set the current working directory to
okta-k8-app. - Copy all the files from the root directory (
okta-node-express-15-minute-auth-example) into the root directory of the docker image being built. - Run
npm installcommand to install the node.js dependencies specified in thepackage.jsonfile for the application. - Expose port 3000 to allow external HTTP requests to reach the Node.js application running on port 3000.
- Lastly, execute
npm startcommand to start the application
3. Create another file within the project directory and name it .dockerignore. This file will specify other files that should not be copied into the Docker image such as a .env file containing sensitive credentials.
Next, add the content of the code block below into the .dockerignore file;
.git
.env
4. Execute the docker build command below to build a docker image of the application using the steps in the Dockerfile you created above.
The tag -t flag specified in the command below will attach a tag of okta-k8-app to the docker image about to be built. This tag will come in handy when you run the docker image.
docker build . -t okta-k8-app
5. Optionally, create a .env file within the project directory to securely store the Okta client credentials.
Please refer to the article, Build Simple Authentication in Express in 15 Minutes, to create an Okta application, and retrieve the client credentials for the application through the Okta developer console before proceeding further.
Add the client credentials retrieved to the .env file in the format below. (Make sure there is no whitespace before values.)
HOST_URL=<OKTA_APP_HOST_URL>
OKTA_ORG_URL=<OKTA_ORG_URL>
OKTA_CLIENT_ID=<OKTA_APP CLIENT_ID>
OKTA_CLIENT_SECRET=<OKTA APP CLIENT_SECRET>
OKTA_TOKEN=<OKTA_APP_TOKEN>
APP_SECRET=<OKTA_APP_SECRET>
6. Optionally, execute the docker run command below from your terminal to run the docker image built above. This command will allow you to test the running docker image from your web browser.
docker run --env-file .env -p 3000:3000 okta-k8-app
From your terminal’s output, you can see the logs, indicating that the application is running on port 3000.

With the Node.js application now running in the terminal, you can view the Node.js application within the web browser at http://localhost:3000.

Pushing the docker image to the Elastic Container Registry (ECR)
In the last section, you built the docker image for your application. Now you can proceed to create a registry within the Elastic Container Registry, and push the newly created docker image into it.
Execute the ecr-public command below to create a public repository within the Elastic Container Registry. The tag flag --tags will also attach a tag with a key of environment and value of development to the repository. This command works for the us-east-1 region, but does not work in all AWS regions.
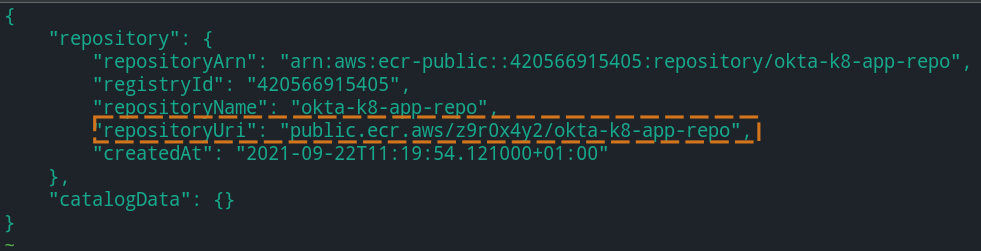
aws ecr-public create-repository --repository-name okta-k8-ecr-repo --tags Key=environment,Value=development --region us-east-1
The command executed above will return a JSON response by default to describe the created repository. Take note of the repositoryUri contained in the JSON response, as you will attach a tag containing the repositoryUri to the docker image.
Next, execute the docker tag command below to tag the docker image built previously.
Note: Replace the <REPOSITORY_URI> placeholder within the template section in the code block below with the REPOSITORY_URI of the docker image you pushed to the ECR in the format of <REPOSITORY_URI>:latest .
docker tag okta-k8-app:latest <REPOSITORY_URI>:latest
Execute the command below to authenticate your computer’s docker client with your ECR repo through an authentication token.
aws ecr-public get-login-password --region us-east-1 | docker login --username AWS --password-stdin public.ecr.aws
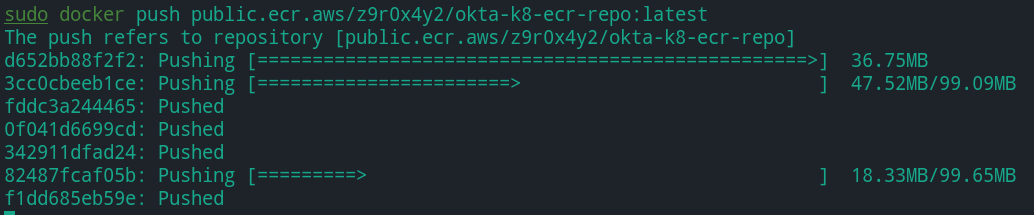
Next, execute the command below to push the tagged docker image to the ECR repository you created.
docker push <REPOSITORY_URI>
Creating an EKS cluster
So far, you have pushed a docker image to the Elastic Container Registry. Let’s create a cluster in EKS that will use the docker image you previously pushed.
Use the eksctl CLI tool to create a cluster within EKS. eksctl is a third-party CLI tool written in Go that simplifies the management of EKS clusters by leveraging AWS CloudFormation to manage your cluster and other dependent objects such as VPCs, and subnets.
When creating a cluster, eksctl requires a very minimal configuration. It will attempt to create a cluster using its default values. However, you can specify the cluster configurations as command line arguments to the eksctl command, or more conveniently, specify a YAML file containing your cluster configurations.
When the create cluster command is executed without a configuration file, eksctl will create the following AWS resources, which the cluster depends on:
- A VPC with two subnets. One is public, the other is a private subnet across three availability zones within the VPC.
- A node group containing two virtual machines as the worker nodes for the cluster.
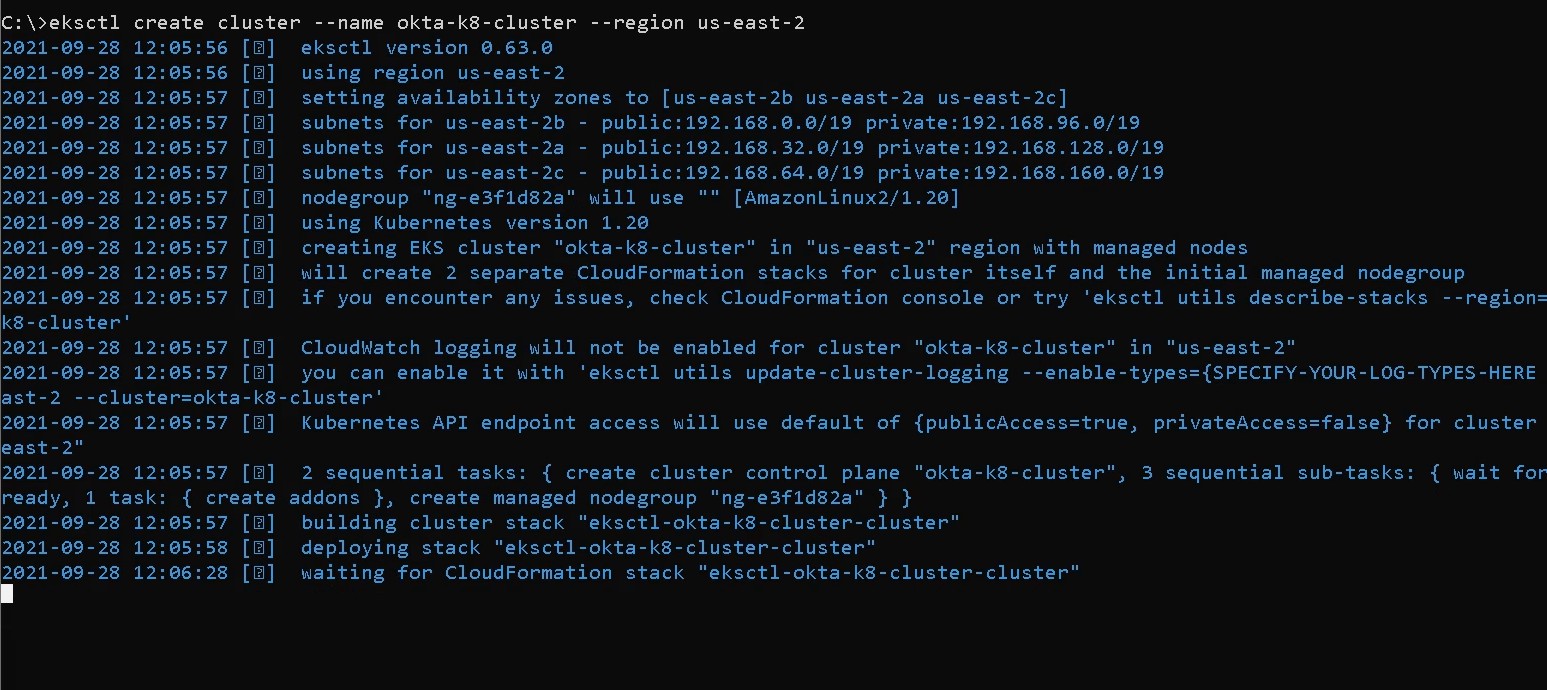
Execute the create cluster command below to create a new cluster named okta-k8-cluster within the AWS region specified. This can take a considerable amount of time, so wait until the command is executed successfully.
Note: Replace the <AWS_REGION> placeholder with the region attached to your AWS account. For this tutorial, we are using the us-east-2 region.
eksctl create cluster --name okta-k8-cluster --region <AWS_REGION>
After the okta-k8-cluster has been created, execute the command to switch your kubectl context to that of the okta-k8-cluster. Executing the command will enable kubectl to connect to your EKS clusters.
aws eks --region us-east-2 update-kubeconfig --name okta-k8-cluster
Creating Kubernetes resources
At this point, you have an empty Kubernetes cluster running on EKS. Let’s proceed to create three resources within the cluster.
Using the three steps below, you will create three YAML files within the application directory to store the configurations for the following resources that will be created within the cluster: Secret, deployment, and service..
1. Create a file named loadbalancer.yaml. This YAML file will contain the configurations for creating a load balancer for the okta-k8-cluster, enabling you to access the application that will run within the cluster.
Add the content of the code block below into the loadbalancer.yaml file.
apiVersion: v1
kind: Service
metadata:
  name: okta-express-k8-loadbalancer
spec:
  type: LoadBalancer
  selector:
    app: okta-express-k8
  ports:
    - protocol: TCP
      port: 3000
      targetPort: 3000
Execute the command below to create a load balancer using the configuration in the loadbalancer.yaml file above. This command creates a load balancer within the Elastic Load Balancing (ELB) service on AWS, which you can access through an endpoint.
kubectl apply -f loadbalancer.yaml
Next, execute the command below to get details about the load balancer we just created.
kubectl get service/okta-express-k8-loadbalancer

Note: Take note of the External IP returned among the details of the load balancer above. You will use the External IP in the following steps as an endpoint to access the application.
2. Create a file named secret.yaml. It will contain the fields for a Kubernetes Secret, storing the Okta credentials. A Secret within Kubernetes is a resource used to store sensitive data such as passwords and API keys that have been excluded from your application code for security reasons.
Replace the <LOAD_BALANCER_EXTERNAL_IP> placeholder in the code block below with the External IP value derived from the load balancer details in step 1.
apiVersion: v1
kind: Secret
metadata:
  name: okta-node-app-secrets
type: Opaque
stringData:
  HOST_URL: http://<LOAD_BALANCER_EXTERNAL_IP>:3000
  OKTA_ORG_URL: <OKTA_ORG_URL>
  OKTA_CLIENT_ID: <OKTA_APP CLIENT_ID>
  OKTA_CLIENT_SECRET: <OKTA APP CLIENT_SECRET>
  OKTA_TOKEN: <OKTA_APP_TOKEN>
  APP_SECRET: <OKTA_APP_SECRET>
Execute the kubectl create command below, from the directory where the files are located, to create a Kubernetes Secret using the secret.yaml file above. Make sure to replace the placeholders with their actual values.
kubectl create -f secret.yaml
3. Create a deployment.yaml file and add the content of the code block below to define the properties of a deployment resource type.
The configuration file contains three parts that define a deployment. The metadata defines the resource information; the spec defines the number of pods to be created, the docker image to run within the pods, and a network port within the container to expose. The deployment will also mount the volume for the Kubernetes Secrets.
Note: Replace the <DOCKER-IMAGE-URI> placeholder within the template section in the code block below with the URI of the docker image that you pushed to the ECR.
apiVersion: apps/v1
kind: Deployment
metadata:
  name: okta-express-k8-deployment
  namespace: default
  labels:
    app: okta-express-k8
spec:
  replicas: 2
  selector:
    matchLabels:
      app: okta-express-k8
  template:
    metadata:
      labels:
        app: okta-express-k8
    spec:
      containers:
        - name: okta-express-k8
          image: <DOCKER-IMAGE-URI>:latest
          ports:
            - containerPort: 3000
          env:
            - name: HOST_URL
              valueFrom:
                secretKeyRef:
                  name: okta-node-app-secrets
                  key: HOST_URL
            - name: OKTA_ORG_URL
              valueFrom:
                secretKeyRef:
                  name: okta-node-app-secrets
                  key: OKTA_ORG_URL
            - name: OKTA_CLIENT_ID
              valueFrom:
                secretKeyRef:
                  name: okta-node-app-secrets
                  key: OKTA_CLIENT_ID
            - name: OKTA_CLIENT_SECRET
              valueFrom:
                secretKeyRef:
                  name: okta-node-app-secrets
                  key: OKTA_CLIENT_SECRET
            - name: OKTA_TOKEN
              valueFrom:
                secretKeyRef:
                  name: okta-node-app-secrets
                  key: OKTA_TOKEN
            - name: APP_SECRET
              valueFrom:
                secretKeyRef:
                  name: okta-node-app-secrets
                  key: APP_SECRET
Execute the kubectl create command below to create the deployment resource using the content of the configuration file above.
kubectl create -f deployment.yaml
Modifying Okta client credentials
At this point, the okta-k8-cluster is almost ready for use. You’ve created a load balancer and a deployment resource. However, before a user can be fully authenticated through the Node.js application running within the cluster, you have to update the redirect_uri within the Okta credentials to point to the load balancer for the okta-k8-cluster.
Navigate to your Okta Developer Console and click on the application we’re using for this tutorial.
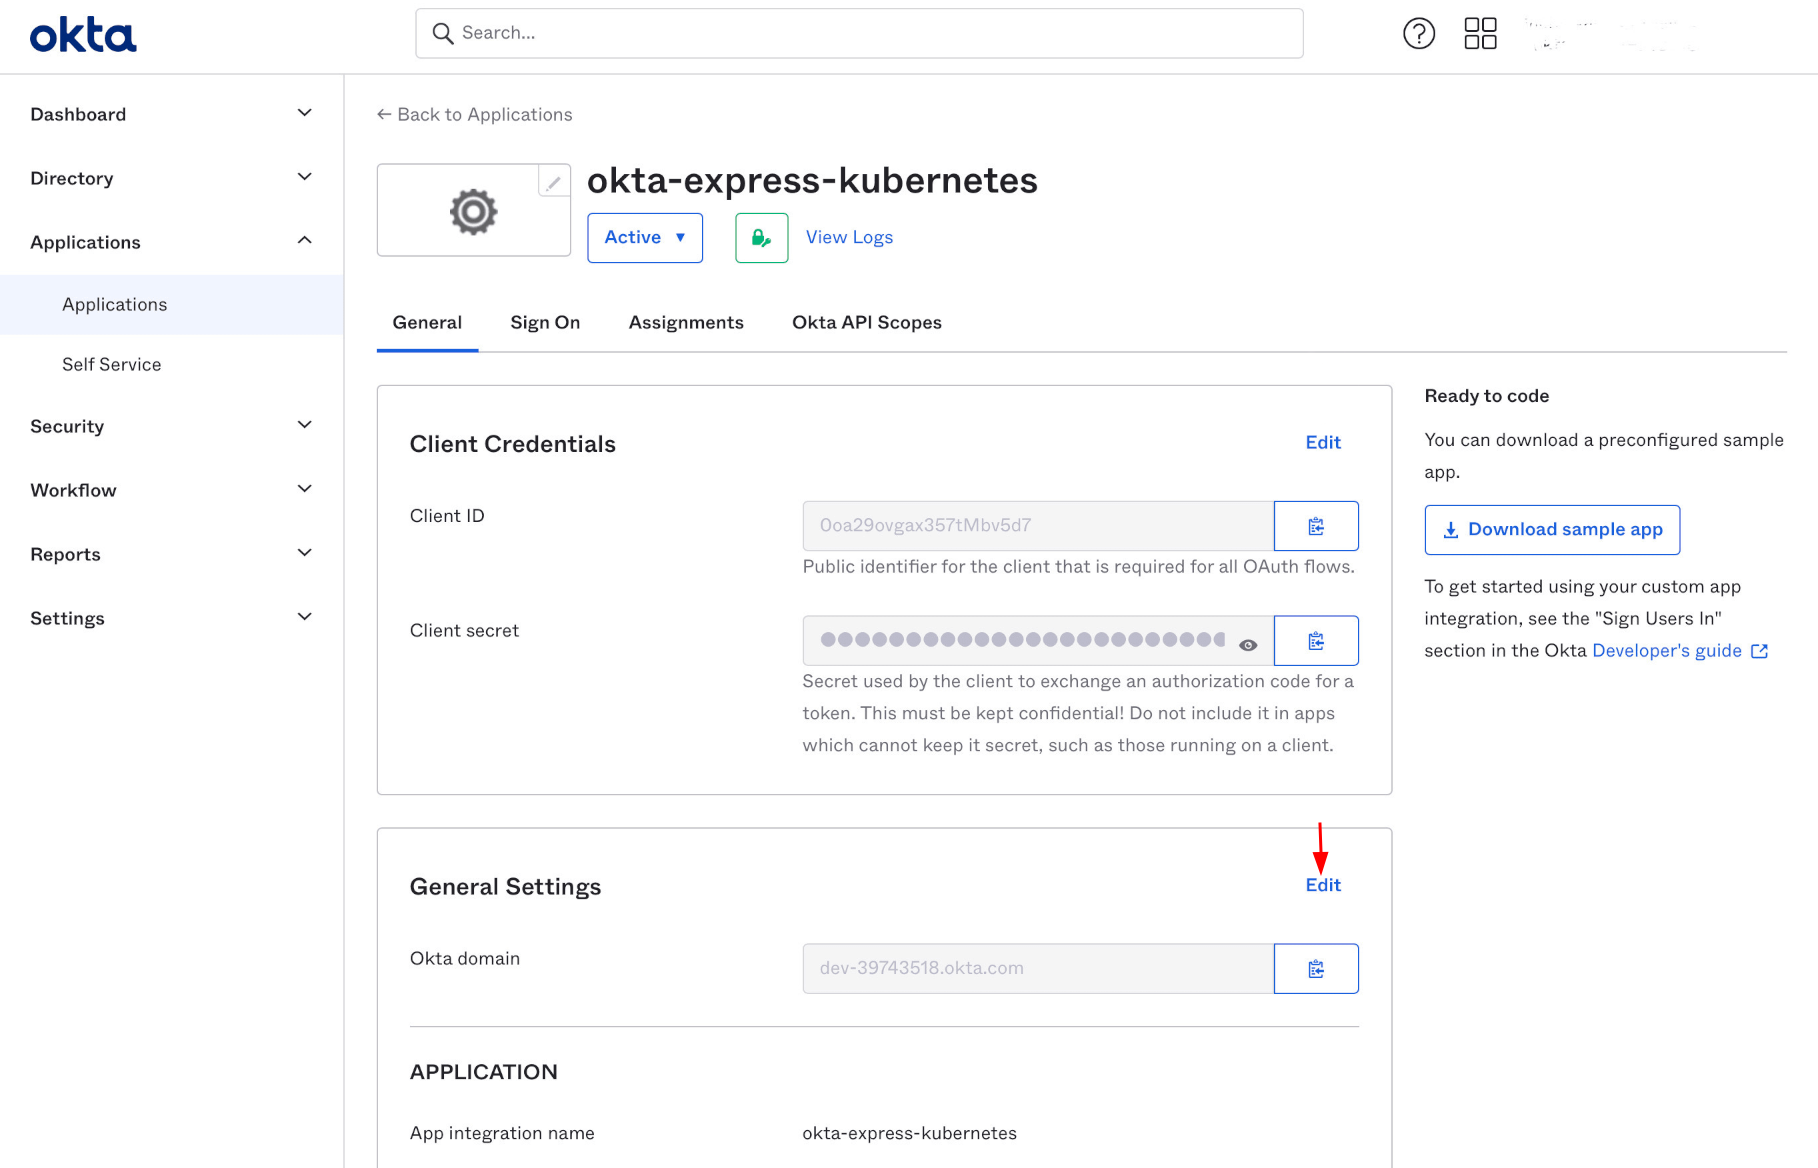
In the LOGIN, section, click the Add URI button within the Sign-in redirect URIs subsection to add a new URI that will be used when initiating an authentication process. Add the load balancer external IP into the input field in the format below, replacing the LOAD_BALANCER_EXTERNAL_IP with your cluster load balancer’s external IP.
http://LOAD_BALANCER_EXTERNAL_IP:3000/callback
Next click the Add URI button within the Sign-out redirect URIs subsection to add a new URI that will be used when signing out of the application. Add the load balancer external IP in the input field in the format below:
http://LOAD_BALANCER_EXTERNAL_IP:3000
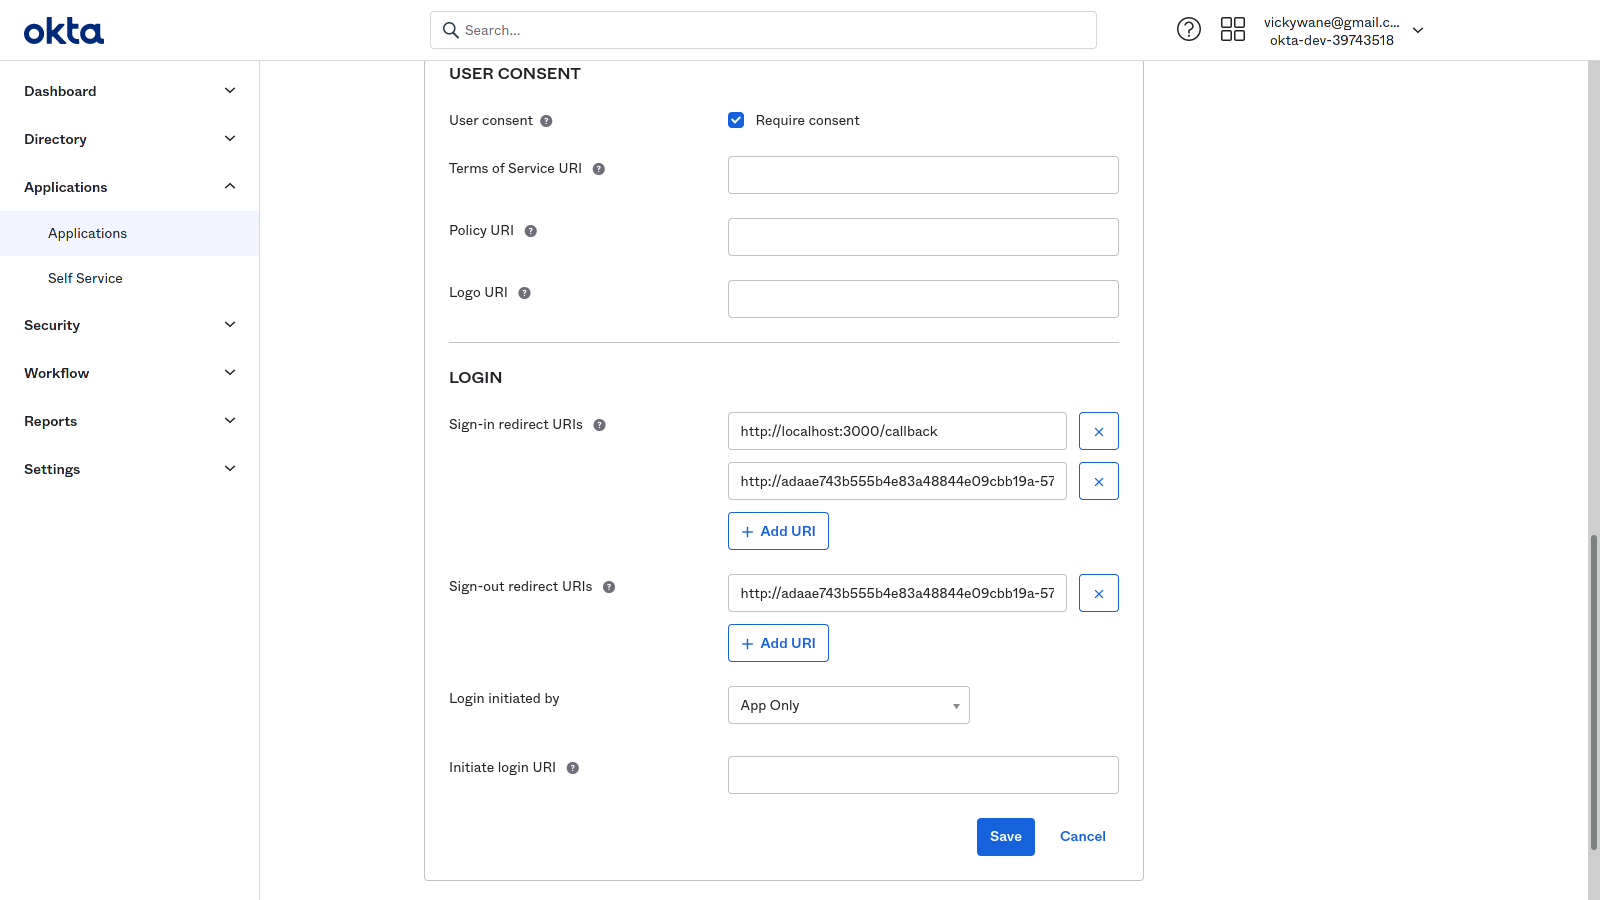
Click the Save button to save the two added URIs.
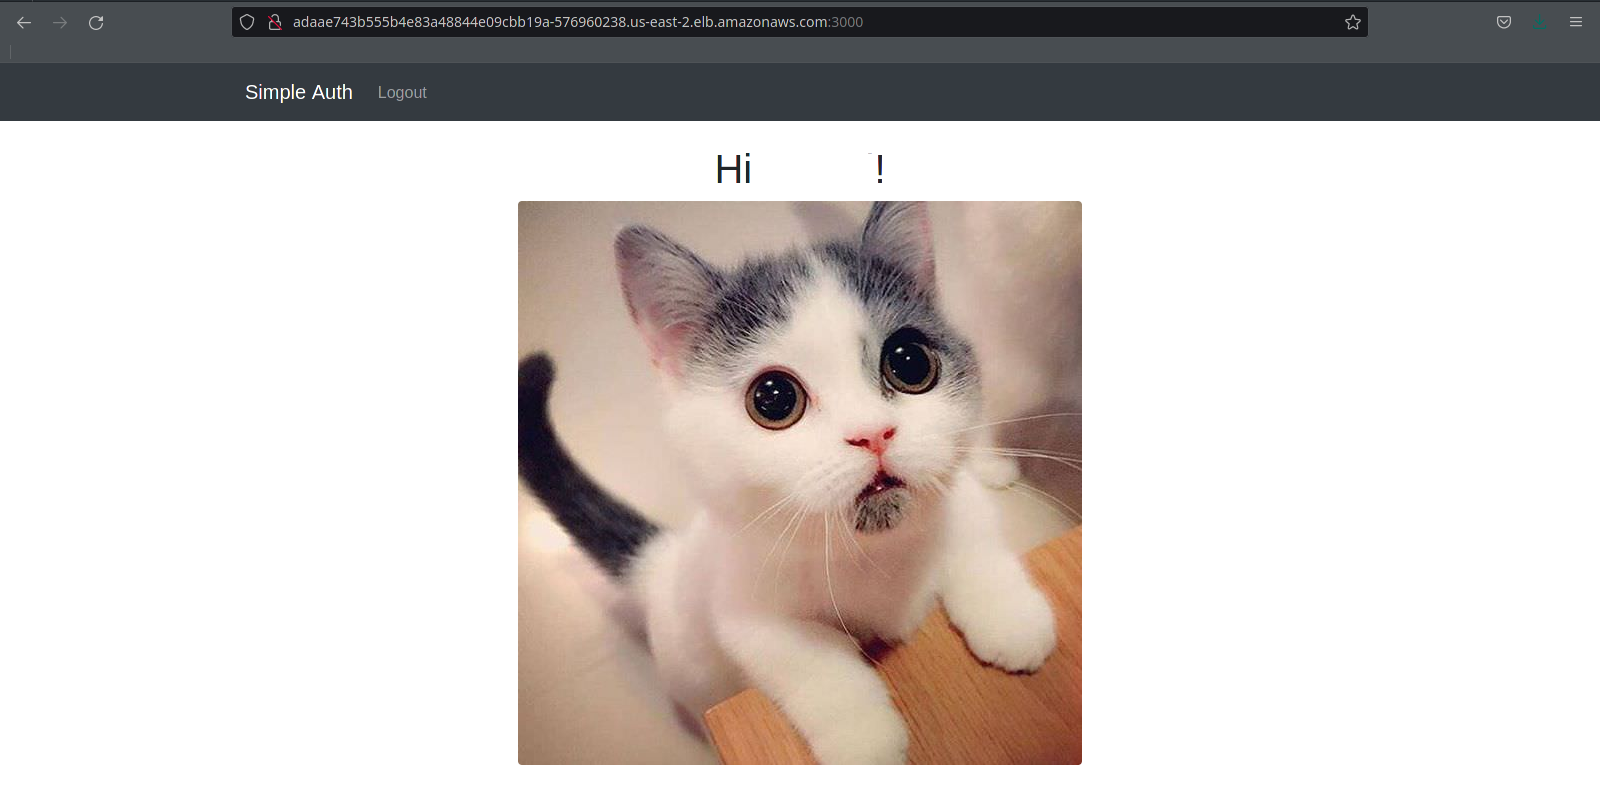
At this point the application is fully set up and ready for use. With your web browser, you can access the Node.js application through the load balancer’s External IP in the format of http://LOAD_BALANCER_EXTERNAL_IP:3000.
More resources for Kubernetes on AWS
In this article, we covered basic aspects of the Elastic Kubernetes Service on AWS. You created an EKS cluster with a deployment and a service that uses the Docker image of a Node.js application.
Although this article did not focus on testing the scalability of the EKS cluster, you also created a load balancer within the ELB service to handle incoming traffic to the nodes within the cluster. Congratulations!
Want to continue learning about Kubernetes, infrastructure, security, auth, identity, and related topics? Here are some resources from the Okta Developer blog you might be interested in:
- Secure Access to AWS EKS Clusters for Admins
- The Top 5 DevOps Automation Tools .NET Developers Should Know
- An Overview of Best Practices for Security Headers
You can find the code for this tutorial on GitHub at: https://github.com/oktadev/okta-node-express-15-minute-auth-example. If you liked this tutorial, you might like to explore others we publish. Please follow @oktadev on Twitter and subscribe to our YouTube channel to get notified when we publish new developer tutorials.
Okta Developer Blog Comment Policy
We welcome relevant and respectful comments. Off-topic comments may be removed.