Using AWS Toolkit for Visual Studio

Amazon Web Services is one of the most popular cloud computing platforms on the planet. There’s a good chance you will need to work in an AWS environment, which means publishing to one of their web server services like Elastic Beanstalk. The AWS platform is enormous, and this can be an intimidating task for a developer. Luckily, Amazon has released their AWS Toolkit for Visual Studio 2013-2015 and AWS Toolkit for Visual Studio 2017-2019, which make publishing your web applications to Elastic Beanstalk a snap.
In this article, you will build an ASP.Net MVC web application on .Net 5 using Visual Studio 2019. You will secure this application using Okta. Okta makes it easy to create a secure application with their SSO provider. Once your application is complete you will publish it to a production Elastic Beanstalk instance using the AWS Toolkit.
Table of Contents
- What You’ll Need
- Write Your MVC Application
- Create your Okta Development Application
- Set up the Amazon Tool Kit
- Publish to AWS Elastic Beanstalk
- Create Your Okta Production Application
- Conclusion
- Learn More About C# and AWS
Note: In May 2025, the Okta Integrator Free Plan replaced Okta Developer Edition Accounts, and the Okta CLI was deprecated.
We preserved this post for reference, but the instructions no longer work exactly as written. Replace the Okta CLI commands by manually configuring Okta following the instructions in our Developer Documentation.
What You’ll Need
Write Your MVC Application
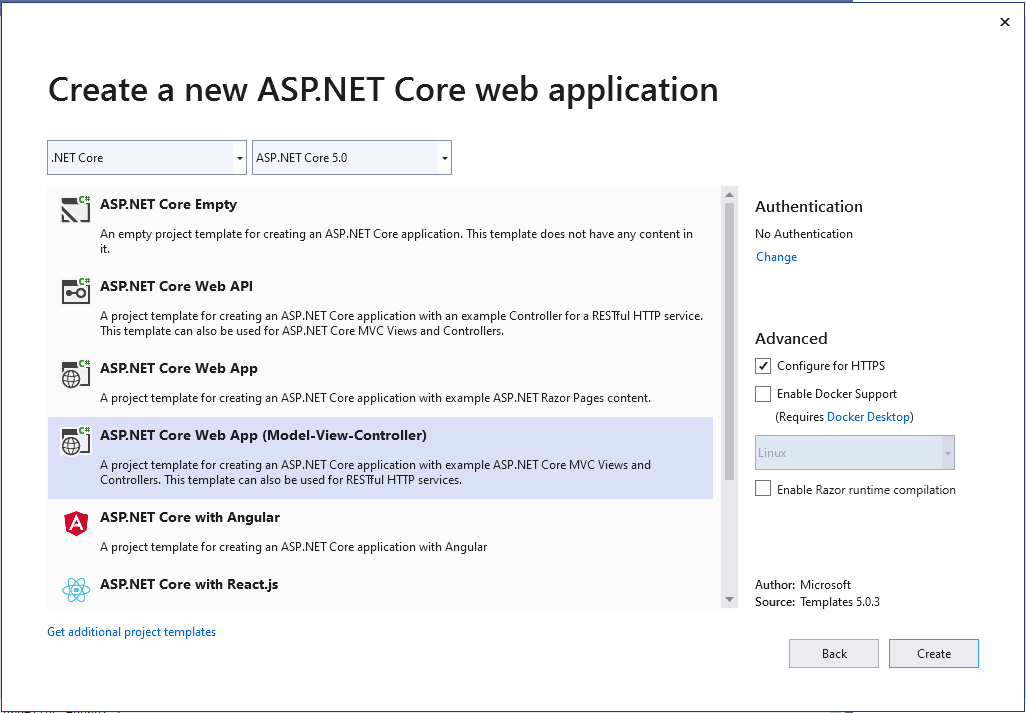
Open Visual Studio 2019 and select Create a new project. Under Templates select ASP.Net Core Web Application and give your application a meaningful name. I named mine Okta_AWSToolkit, and my namespaces in code will reflect that.
Next, press Create then under Create a new ASP.NET Core web application select ASP.NET Core Web App (Model-View-Controller) and ensure that ASP.NET Core 5.0 is selected.
Wait a few moments for Visual Studio to scaffold the project.
Next, you will install the necessary dependencies for the application. In this instance, you will only need the Okta AspNetCore package from NuGet. You can install this with the package command Install-Package Okta.AspNetCore -Version 3.5.0 or by using the package manager interface.
Your application should have a file called appsettings.json. You will use this as a template for your appsettings files for development and production. Add the following JSON to it.
{
  "Logging": {
    "LogLevel": {
      "Default": "Information",
      "Microsoft": "Warning",
      "Microsoft.Hosting.Lifetime": "Information"
    }
  },
  "Okta": {
    "Domain": "",
    "ClientId": "",
    "ClientSecret": "",
    "CallbackPath": "/okta/callback"
  }
}
This file lacks any sensitive information, so you can check this into your source control. You will populate two files shortly: appsettings.Development.json and appsettings.Production.json. For now, you can add those files and add the same template as appsettings.json.
Next, open your HomeController.cs file and add the following code.
using Microsoft.AspNetCore.Mvc;
using Microsoft.Extensions.Logging;
using Okta_AWSTookit.Models;
using System.Diagnostics;

namespace Okta_AWSTookit.Controllers
{
    public class HomeController : Controller
    {
        private readonly ILogger<HomeController> _logger;

        public HomeController(ILogger<HomeController> logger)
        {
            _logger = logger;
        }

        public IActionResult Index()
        {
            if (User.Identity.IsAuthenticated)
            {
                return RedirectToAction("Index", "Profile");
            }

            return View();
        }

        [ResponseCache(Duration = 0, Location = ResponseCacheLocation.None, NoStore = true)]
        public IActionResult Error()
        {
            return View(new ErrorViewModel { RequestId = Activity.Current?.Id ?? HttpContext.TraceIdentifier });
        }
    }
}
This controller has an Index action that will be your home page. Under the Index action you are checking if the user is authenticated. If they are, then you will redirect them to the Profile page, otherwise, they can continue to the Home page.
Next, create a controller called AccountController.cs and add the following code.
using Microsoft.AspNetCore.Mvc;

using Microsoft.AspNetCore.Authentication.Cookies;
using Okta.AspNetCore;
using Microsoft.AspNetCore.Authentication;

namespace Okta_AWSTookit.Controllers
{
    public class AccountController : Controller
    {
        public IActionResult Login()
        {
            if (!HttpContext.User.Identity.IsAuthenticated)
            {
                return Challenge(OktaDefaults.MvcAuthenticationScheme);
            }

            return RedirectToAction("Index", "Home");
        }

        [HttpPost]
        public IActionResult Logout()
        {
            return new SignOutResult(
            new[]
            {
                OktaDefaults.MvcAuthenticationScheme,
                CookieAuthenticationDefaults.AuthenticationScheme
            },
            new AuthenticationProperties()
            {
                RedirectUri = "/Home/Index"
            });
        }
    }
}
This controller contains Login and Logout actions. There are no views here since Okta will deliver the login page for you. The Login action should check that the user is not authenticated before returning the ChallengeResult. The Logout action redirects the user to the Home page.
The last controller you need is the Profile controller. Add a new controller called ProfileController.cs. The code follows.
using Microsoft.AspNetCore.Mvc;
using Microsoft.Extensions.Logging;
using Microsoft.AspNetCore.Authorization;

namespace Okta_AWSTookit.Controllers
{
    public class ProfileController : Controller
    {
        private readonly ILogger<ProfileController> _logger;

        public ProfileController(ILogger<ProfileController> logger)
        {
            _logger = logger;
        }

        [Authorize]
        public IActionResult Index()
        {
            return View();
        }
    }
}
The only purpose of this controller is to serve the Profile/Index page. The Index action is decorated with the Authorize attribute, which will automatically send unauthenticated users to the Okta login page.
Next, you can begin to work on your views. The first thing to edit is Layout.cshtml. Replace the boilerplate code with the following:
<!DOCTYPE html>
<html lang="en">
<head>
<meta charset="utf-8" />
<meta name="viewport" content="width=device-width, initial-scale=1.0" />
<title>@ViewData["Title"] - Okta with Jenkins</title>
<link rel="stylesheet" href="~/lib/bootstrap/dist/css/bootstrap.min.css" />
<link rel="stylesheet" href="~/css/site.css" />
</head>
<body>
<header>
<nav class="navbar navbar-expand-sm navbar-toggleable-sm navbar-light bg-white border-bottom box-shadow mb-3">
<div class="container">
<a class="navbar-brand" asp-area="" asp-controller="Home" asp-action="Index">Home</a>
<button class="navbar-toggler" type="button" data-toggle="collapse" data-target=".navbar-collapse" aria-controls="navbarSupportedContent"
aria-expanded="false" aria-label="Toggle navigation">
<span class="navbar-toggler-icon"></span>
</button>
<div class="navbar-collapse collapse d-sm-inline-flex justify-content-between">
<ul class="navbar-nav justify-content-end flex-grow-1">
<li class="nav-item">
@if (User.Identity.IsAuthenticated)
{
<form asp-action="Logout" asp-controller="Account" asp-method="POST">
<input type="submit" value="Logout" class="btn btn-secondary" />
</form>
}
else
{
<a class="btn btn-primary" asp-action="Login" asp-controller="Account">Login</a>
}
</li>
</ul>
</div>
</div>
</nav>
</header>
<div class="container">
<main role="main" class="pb-3">
@RenderBody()
</main>
</div>
<footer class="border-top footer text-muted">
<div class="container">
© 2021 - Okta_AWSToolkit - <a asp-area="" asp-controller="Home" asp-action="Privacy">Privacy</a>
</div>
</footer>
<script src="~/lib/jquery/dist/jquery.min.js"></script>
<script src="~/lib/bootstrap/dist/js/bootstrap.bundle.min.js"></script>
<script src="~/js/site.js" asp-append-version="true"></script>
@await RenderSectionAsync("Scripts", required: false)
</body>
</html>
Much of this code is the same as the boilerplate, with one major exception. You’ve added a Login button to the navbar that turns into a Logout button if the user is authenticated.
Next, open Home/Index.cshtml and replace the code with the following.
@{
    ViewData["Title"] = "Home Page";
}

<div class="text-center">
    <h1 class="display-4">Welcome</h1>
    <p>This is a brief tutorial on using <a href="https://aws.amazon.com/visualstudio/" target="_blank" rel="nofollow">the AWS Toolkit for Visual Studio 2019</a> with <a href="https://dotnet.microsoft.com/download/dotnet/5.0" target="_blank" rel="nofollow">.Net 5</a>, Secured with <a href="https://www.okta.com/" target="_blank" rel="nofollow">Okta</a></p>
    <p>Written by <a href="https://profile.fishbowlllc.com/" target="_blank" rel="nofollow">Nik Fisher</a></p>
</div>
This page provides some additional information about the project and replaces the standard ASP.NET introduction.
Finally, add a new view for Profile/Index.cshtml and add the following code.
@*
    For more information on enabling MVC for empty projects, visit https://go.microsoft.com/fwlink/?LinkID=397860
*@

@{
    ViewData["Title"] = "Profile";
}

<div class="jumbotron">
    Welcome to your Profile
</div>
There’s not much going on here, we just present a page for users to understand that they are authenticated and have made it to the profile page. You can edit this page with whatever code you feel fits here.
Finally, you need to edit your Startup.cs code to enable and configure authentication with Okta. Replace the code in this file with the following.
using Microsoft.AspNetCore.Builder;
using Microsoft.AspNetCore.Hosting;
using Microsoft.Extensions.Configuration;
using Microsoft.Extensions.DependencyInjection;
using Microsoft.Extensions.Hosting;

using Microsoft.AspNetCore.Authentication.Cookies;
using Okta.AspNetCore;

namespace Okta_AWSTookit
{
    public class Startup
    {
        public Startup(IConfiguration configuration)
        {
            Configuration = configuration;
        }

        public IConfiguration Configuration { get; }

        // This method gets called by the runtime. Use this method to add services to the container.
        public void ConfigureServices(IServiceCollection services)
        {
            services.AddAuthentication(options =>
            {
                options.DefaultAuthenticateScheme = CookieAuthenticationDefaults.AuthenticationScheme;
                options.DefaultSignInScheme = CookieAuthenticationDefaults.AuthenticationScheme;
                options.DefaultChallengeScheme = OktaDefaults.MvcAuthenticationScheme;
            })
           .AddCookie()
           .AddOktaMvc(new OktaMvcOptions
           {
                // Replace these values with your Okta configuration
               OktaDomain = Configuration.GetValue<string>("Okta:Domain"),
               ClientId = Configuration.GetValue<string>("Okta:ClientId"),
               ClientSecret = Configuration.GetValue<string>("Okta:ClientSecret"),
               CallbackPath = Configuration.GetValue<string>("Okta:CallbackPath")
           });

            services.AddControllersWithViews();
        }

        // This method gets called by the runtime. Use this method to configure the HTTP request pipeline.
        public void Configure(IApplicationBuilder app, IWebHostEnvironment env)
        {
            if (env.IsDevelopment())
            {
                app.UseDeveloperExceptionPage();
            }
            else
            {
                app.UseExceptionHandler("/Home/Error");
                // The default HSTS value is 30 days. You may want to change this for production scenarios, see https://aka.ms/aspnetcore-hsts.
                app.UseHsts();
            }
            app.UseHttpsRedirection();
            app.UseStaticFiles();

            app.UseRouting();

            app.UseAuthentication();
            app.UseAuthorization();

            app.UseEndpoints(endpoints =>
            {
                endpoints.MapControllerRoute(
                    name: "default",
                    pattern: "{controller=Home}/{action=Index}/{id?}");
            });
        }
    }
}
This file brings it all together. You have registered the Okta component using the appsettings file that matches your ASPNETCORE_ENVIRONMENT variable. Now you can easily change your Okta application depending on your environment.
Create your Okta Development Application
You’ll need to create an Okta application for your development environment. You can use the Okta CLI tool. Download the CLI tool and run okta login. This will walk you through the login process. Once that is completed run okta apps create and follow the prompts on the screen. Select web as your application type. For your Redirect URI, use the web address provided from your application and append /okta/callback to it. For your Post Logout RedirectURI, use the same domain. This time, append /signout/callback to it. If you have multiple authorization servers you can select default for this application. After a moment, the CLI will write your Client Id, Client Secret, and Issuer to a file called .okta.env in the same directory you were working in. Take these values and add them to your appsettings.Development.json file.
NOTE: you will only need the Domain portion of your Issuer, not the full URL. You can then delete the contents of
.okta.env.
At this time you can begin your project and ensure everything is working as you expect in development mode.
Set up the Amazon Tool Kit
Now it’s time to publish your application to your Elastic Beanstalk. You should have already installed the AWS Toolkit extension, but go ahead and install it now if you haven’t. The first time it opens, you’ll see a screen with instructions on how to set up the extension.
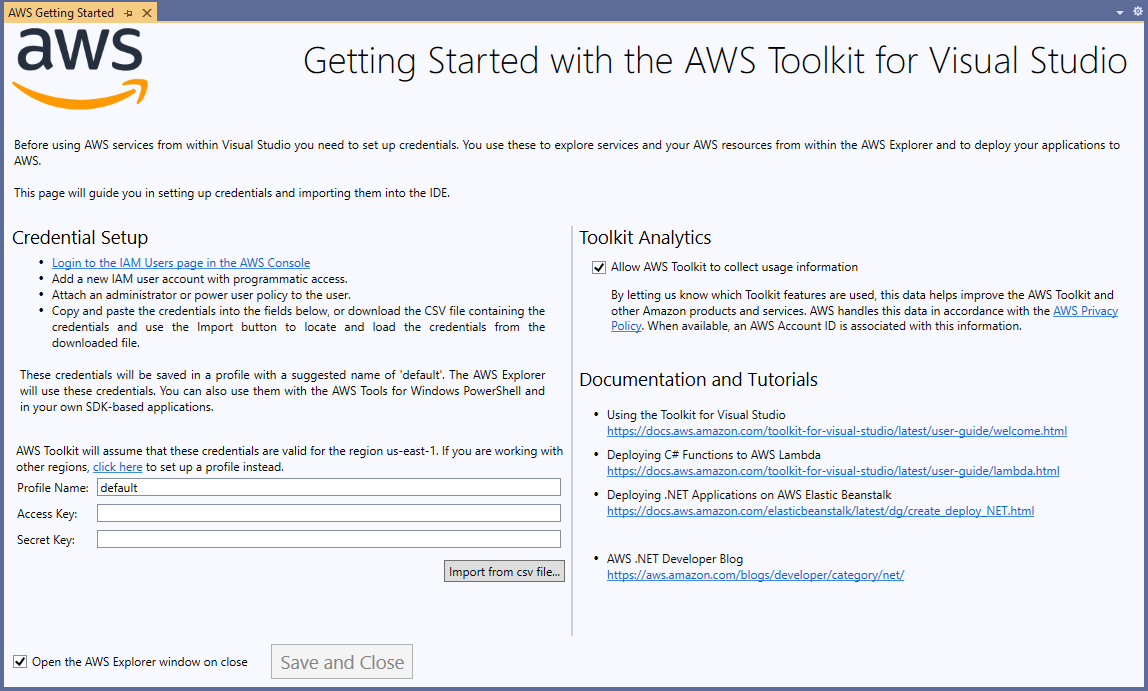
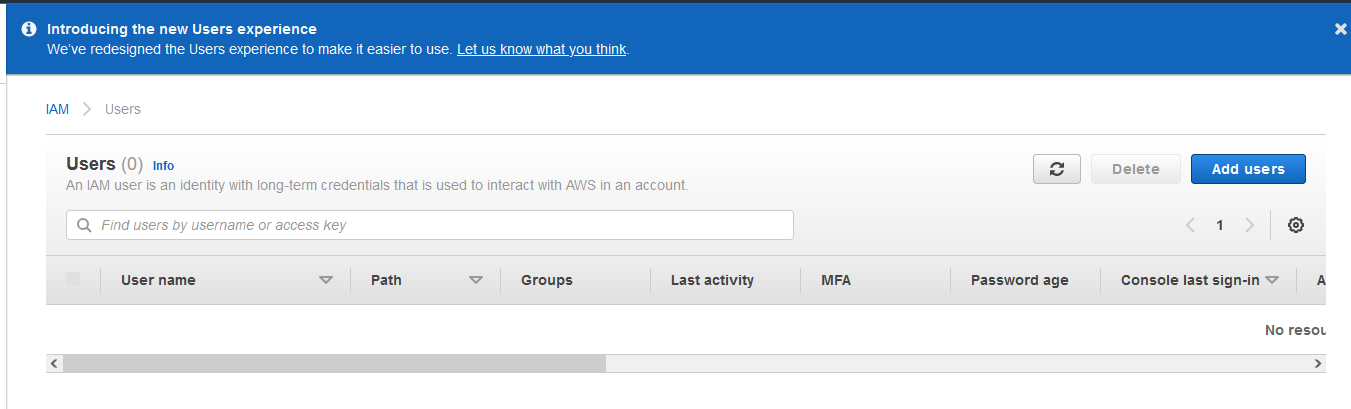
The screen will instruct you to log into the IAM Users page in the AWS console and create a user. Click on that link and set up a new user.
Create the new user, then attach an administrator or power user policy to the user. Next, you will be presented with the Access Key and Secret Key. Copy and paste those into the AWS Toolkit, then press save, and close.
Publish to AWS Elastic Beanstalk
Next, right-click on your project and click Publish to AWS Elastic Beanstalk. This will open a new wizard to guide you through the publish process.
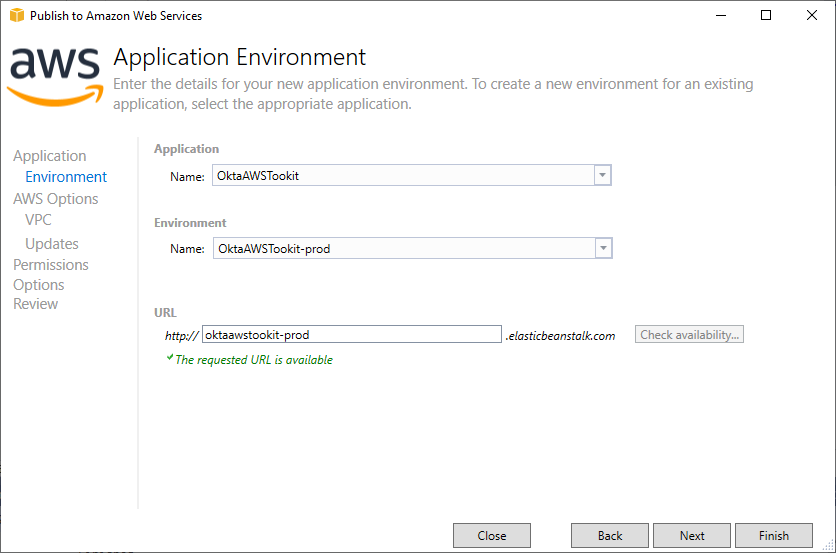
First is the application tab. Select Create a new application environment and then select Next.
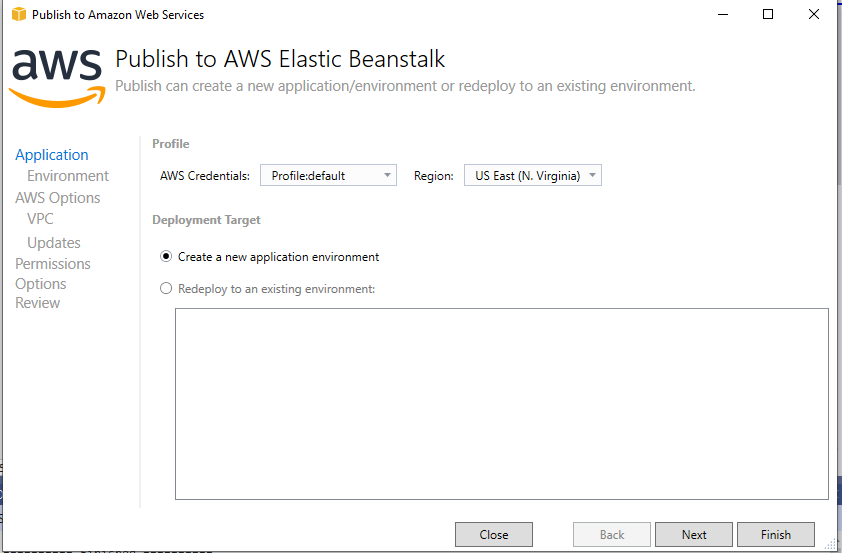
Under the Application Environment screen select the production version of your environment. This action will automatically populate the URL for your Elastic Beanstalk instance. You’ll want to check to make sure the URL is available before moving forward.
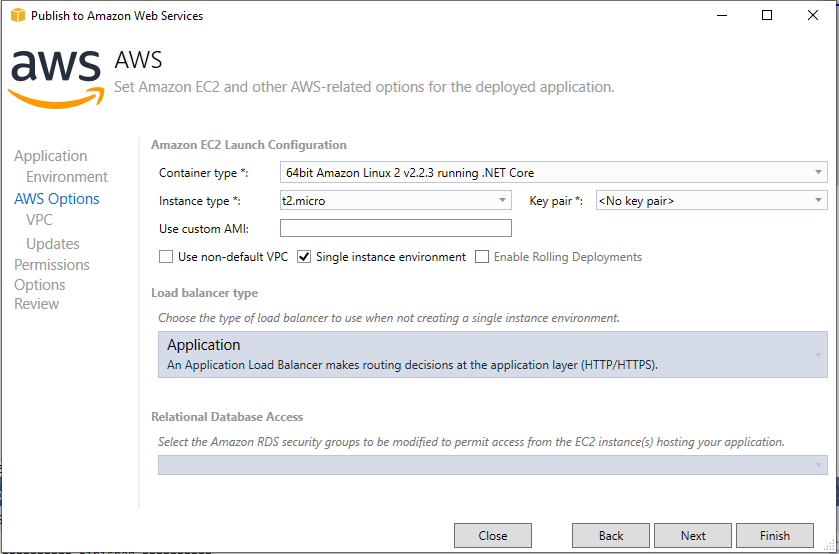
Under the Options tab, the only change you need to make is to use a t2.micro instance to maintain your free tier status. If you need to scale up later Amazon makes that easy through the AWS Toolkit.
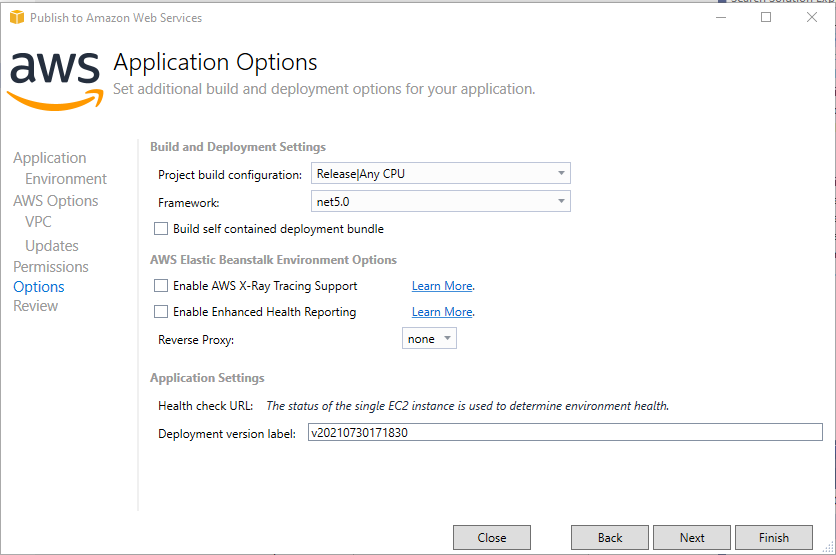
Under the options tab you will want to select the Release configuration.
Finally, on the view tab, click Deploy and wait a few minutes for the site to be published and the server to be live. You will receive a notification when it is ready. From there, you can click the link to your site to see the published version. However, at this time, you will notice your login screen doesn’t work as expected. This is because you still need to populate your production Okta credentials.
Create Your Okta Production Application
Open your CLI again and go through the okta apps create wizard. However this time, instead of using the localhost domain provided by Visual Studio, replace the domain in your Redirect URI and Post Logout RedirectURI with the domain at which AWS published your application. After a moment, the CLI will again write your details to .okta.env and you can replace your appsettings.Production.json values with these new ones. Again, only use the domain of your Issuer in the domain field of your appsettings file.
You will need to publish your application to AWS one last time to ensure that the updated appsettings.Production.json reaches the server. Once that is complete you should be able to log in to your application again.
Conclusion
The AWS Toolkit is a powerful tool that helps you integrate with AWS Cloud services easily from Visual Studio. This article is a brief introduction to the capabilities of the tool. If you use AWS for development, I recommend exploring all the features of the AWS Toolkit for Visual Studio.
Check out the code from this tutorial in this GitHub repo.
Learn More About C# and AWS
- How to Toggle Functionality in C# with Feature Flags
- Update App Secrets with Jenkins CI and .NET Core
- AWS Lambda vs Azure Functions for C# Serverless
Make sure you follow us on Twitter and subscribe to our YouTube channel. If you have any questions, or you want to share what tutorial you’d like to see next, please comment below.
Okta Developer Blog Comment Policy
We welcome relevant and respectful comments. Off-topic comments may be removed.