Easy Xamarin Essentials with Web Authenticator

Authentication is an important part of today’s mobile applications, but securely implementing authentication in a mobile app can be a daunting task. In this article, you will learn how to create a basic cross-platform application with Xamarin.Forms and use the WebAuthenticator class from Xamarin.Essentials together with Okta to quickly and easily add user login to your mobile app.
To continue you will need:
- A basic knowledge of C#
- Visual Studio 2019
- An Okta Developer Account (free forever, to handle your OAuth needs)
- An Android or iPhone device or an emulator for testing (For the article, we show Android as an example but this will work for either platform)
Note: In May 2025, the Okta Integrator Free Plan replaced Okta Developer Edition Accounts, and the Okta CLI was deprecated.
We preserved this post for reference, but the instructions no longer work exactly as written. Replace the Okta CLI commands by manually configuring Okta following the instructions in our Developer Documentation.
Create a Xamarin.Forms App with Xamarin.Essentials
Xamarin is a framework from Microsoft for building cross-platform mobile apps from one shared source code, written in C#, and compiled to each platform’s runtime. Xamarin.Forms is an abstraction on that, enabling developers to share the UI code as well. Xamarin.Essentials is a NuGet package providing cross-platform APIs for accessing and using native platform capabilities. In this article I will show you how to build a simple Xamarin.Forms app and add authentication to it.
Xamarin.Forms is now included in Visual Studio! Create a new project by clicking File>New Project in Visual Studio, select Mobile App (Xamarin.Forms), and click Next. Name the app OktaAuth and click Create. On the next window, select Blank and click OK.
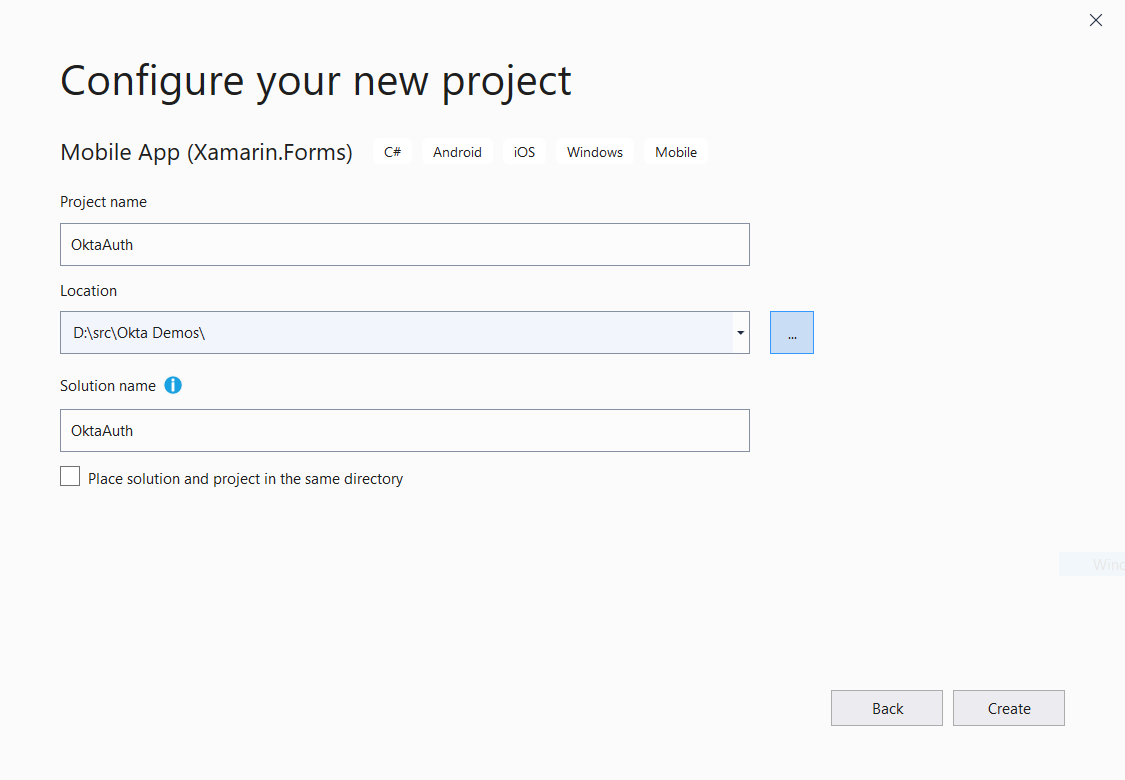
Visual Studio will automatically create a solution with three projects: OktaAuth.Android for Android, OktaAuth.iOS for iOS, and OktaAuth for shared code and user interface. The projects already include Xamarin.Essentials out of the box - however, the included version doesn’t have the WebAuthenticator class, so you will need to update it to the latest available version which, as of the publish date of this post, is 1.5.3.2
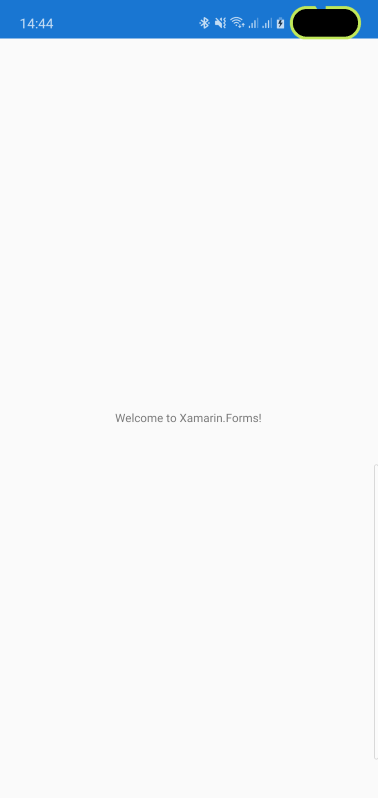
Now, run the app on your attached mobile device (or in the simulator) and you should see a screen like this:
Next, it’s time to secure your users login!
Xamarin.Essentials Auth Flow with an External Identity Provider
I will use Okta to easily and securely implement user authentication so that I don’t have to implement it from scratch or roll my own identity management. Okta supports user authentication, multi-factor authentication, social authentication as well as all OpenID connect flows out of the box—so it can take care of all the scenarios you might ever need.
In the sample app, I will use Okta’s browser-based OpenID Connect flow to securely authenticate the user via the native browser installed on the device. Using an external browser is the most secure way to authenticate and allows you to log in automatically if you are already signed in the browser. Also, you won’t need to store the ‘client secret’` in your mobile app. When you log in, the browser will redirect you back to your Xamarin app using the redirect URI and pass the requested token as a parameter.
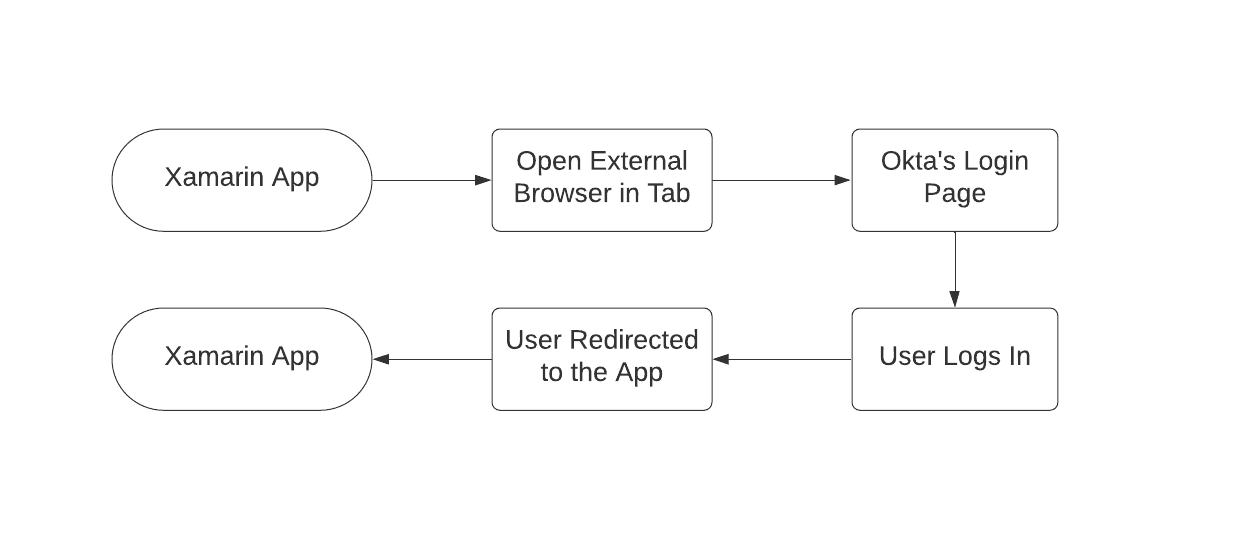
The WebAuthenticator class from Xamarin.Essentials library simplifies implementing this flow and takes care of launching the browser, handling redirect, and parsing received parameters for you.
Add Authentication with Xamarin.Essentials and Okta
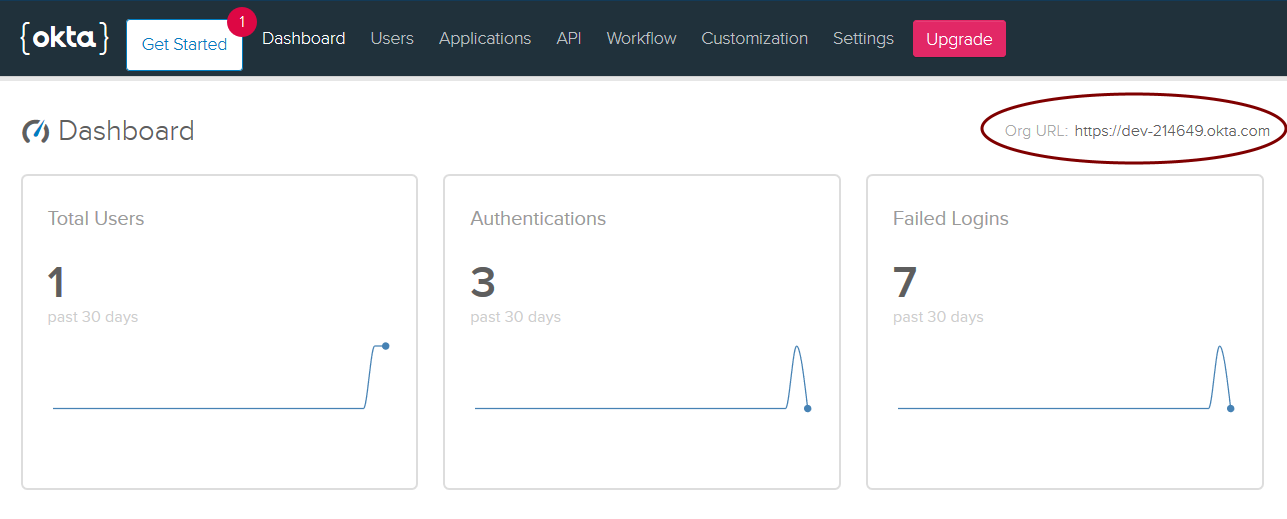
To get started, log in to your Okta Developer Account via the URL you are emailed after signing up, to access your org’s portal dashboard. Once you log in, make sure to note your Org URL from the upper right corner of the screen:
Now create a new application. Click Applications in the top menu and then Add Application. Select Native and click Next.
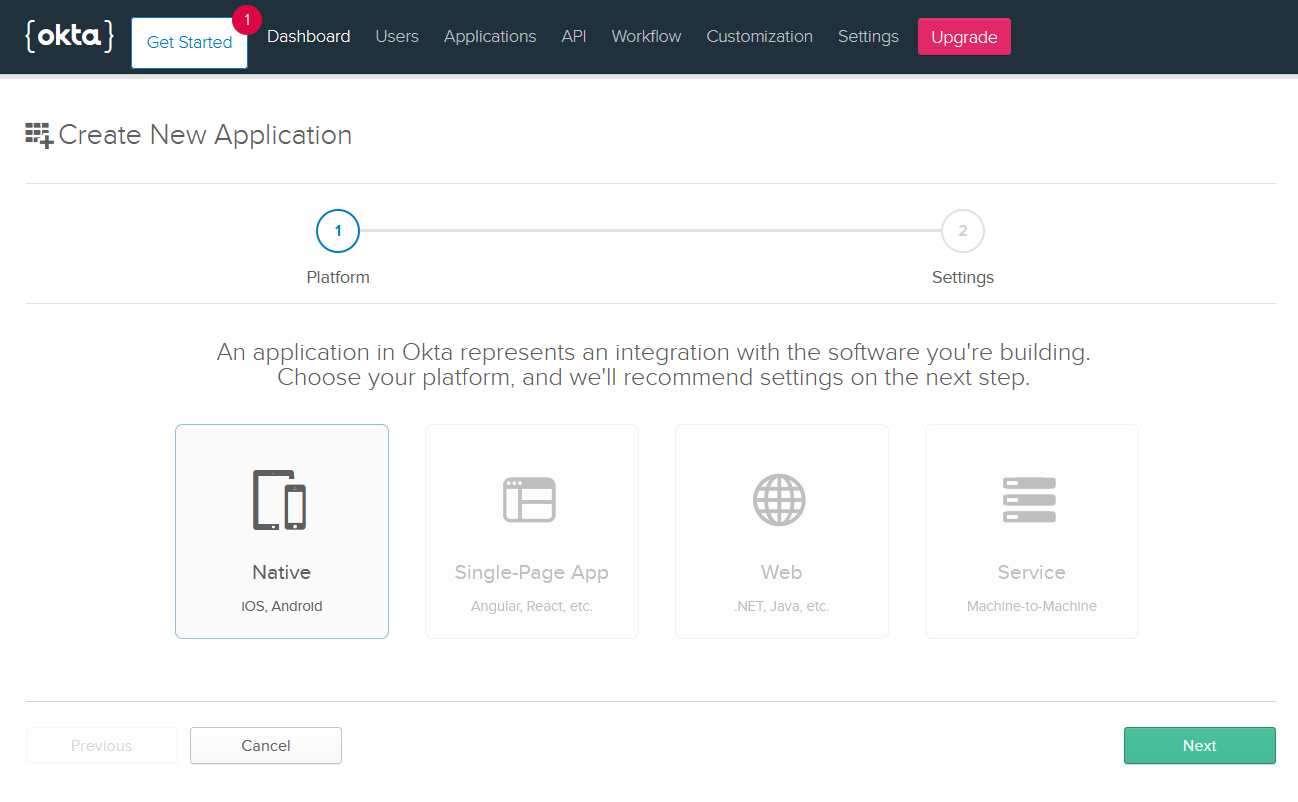
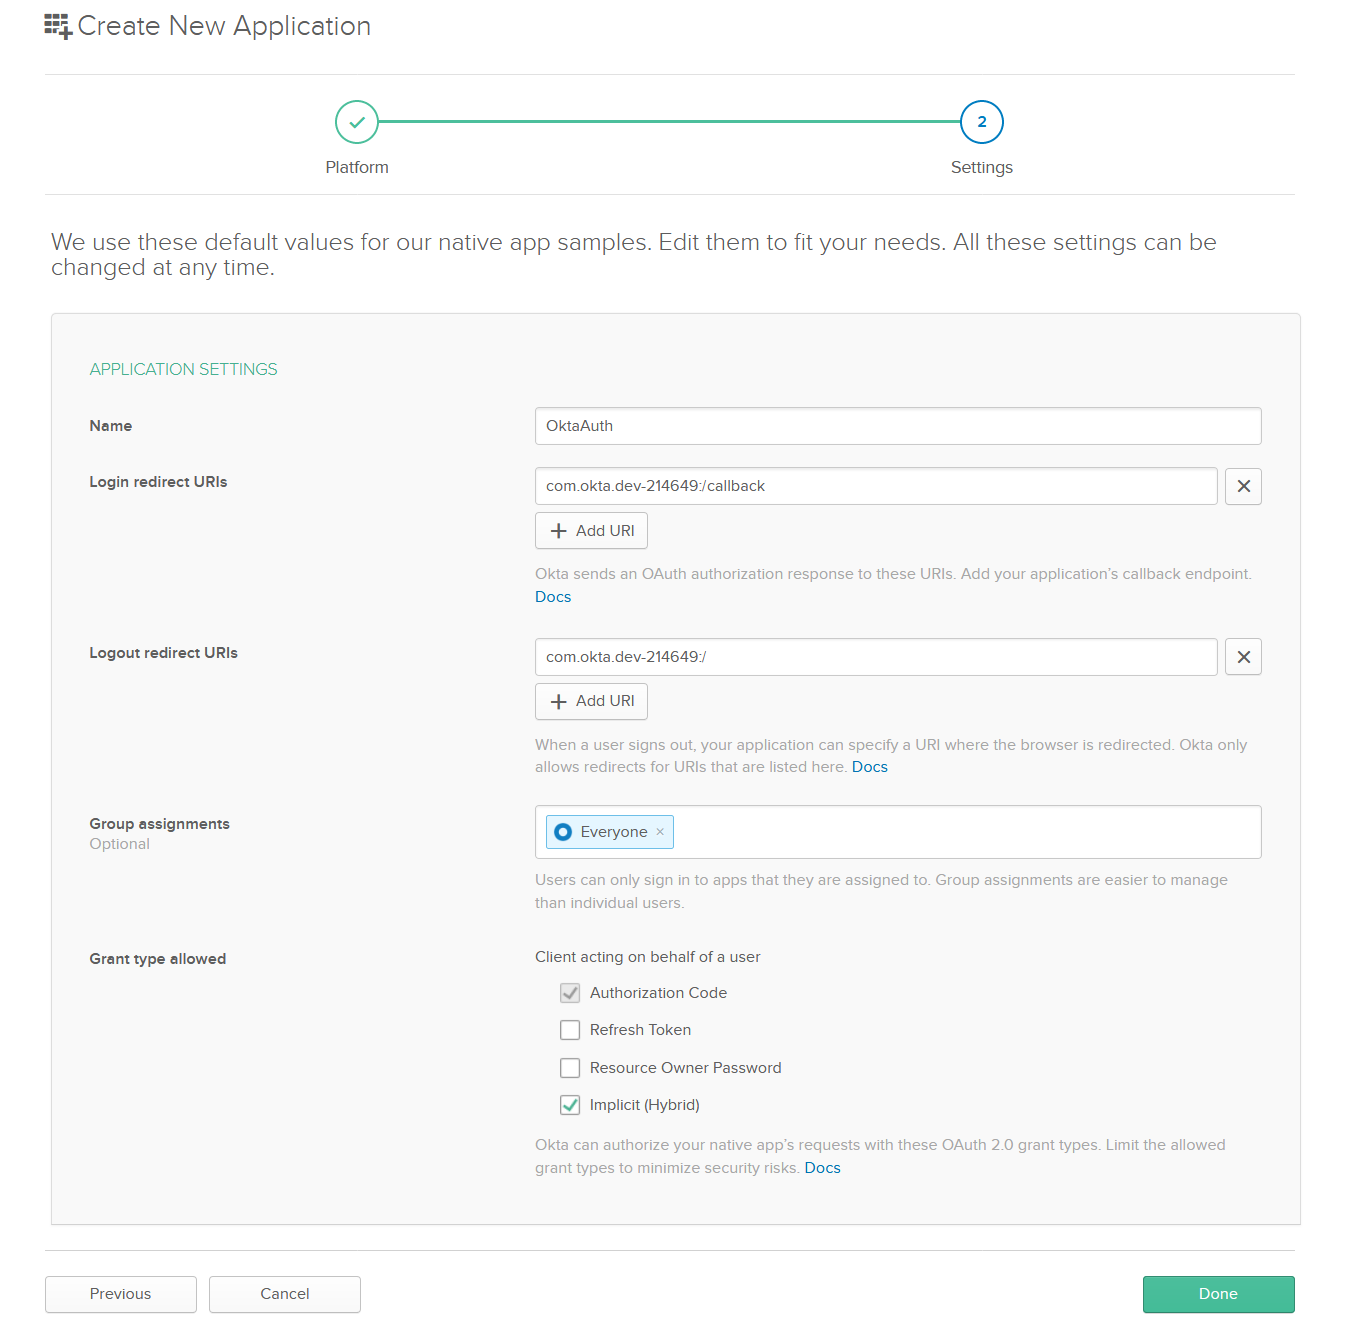
Enter a name (I will use OktaAuth again), check Implicit (Hybrid) at the bottom of the screen, and click Done.
Switch back to Visual Studio and add a login and logout button to the app. In the shared OktaAuth project, double-click the MainPage.xaml file and replace its content with this:
<?xml version="1.0" encoding="utf-8" ?>

<ContentPage xmlns="http://xamarin.com/schemas/2014/forms" xmlns:x="http://schemas.microsoft.com/winfx/2009/xaml"
xmlns:d="http://xamarin.com/schemas/2014/forms/design" xmlns:mc="http://schemas.openxmlformats.org/markup-compatibility/2006" mc:Ignorable="d" x:Class="OktaAuth.MainPage">
  <StackLayout VerticalOptions="Center">
    <Label Text="Welcome to Xamarin.Forms!" x:Name="WelcomeLabel"
      HorizontalOptions="Center" VerticalOptions="CenterAndExpand" />
    <Button x:Name="LoginButton" Text="Log in with Okta"
      HorizontalOptions="Center" Clicked="LoginButtonClicked"/>
    <Button x:Name="LogoutButton" Text="Log out"  IsVisible="False"
      HorizontalOptions="Center" Clicked="LogoutButtonClicked"/>
  </StackLayout>
</ContentPage>
In the MainPage.xaml.cs file add empty event handlers for the login and logout buttons:
private async void LoginButtonClicked(object sender, EventArgs e)
{
}

private void LogoutButtonClicked(object sender, EventArgs e)
{
}
Next, add a class to the project and name it OktaConfiguration. This class will hold configuration data that you need to pass to Okta and should look like this:
public class OktaConfiguration
{
  public const string ClientId = "{clientId}";

  public const string OrganizationUrl = "https://{yourOktaDomain}";

  public const string Callback = "com.okta.{yourOktaAccountNameOnly i.e. 'dev-12345'}:/callback";

  public const string CallbackScheme = "com.okta.{yourOktaAccountNameOnly i.e. 'dev-12345'}";
}
Copy the Login redirect URI from your app configuration to the Callback field and paste it into the CallbackScheme (excluding the :/callback part). Copy ClientId value to the ClientId field too.
IOS and Android Setup for Xamarin WebAuthenticator
Before you use the WebAuthenticator class, you need to perform each platform-specific setup. For Android, add the following class to the OktaAuth.Android project:
[Activity(NoHistory = true, LaunchMode = LaunchMode.SingleTop)]
    [IntentFilter(new[] { Android.Content.Intent.ActionView },
        Categories = new[] { Android.Content.Intent.CategoryDefault, Android.Content.Intent.CategoryBrowsable },
        DataScheme = OktaConfiguration.CallbackScheme)]
public class WebAuthenticationCallbackActivity : XamarinEssentials.WebAuthenticatorCallbackActivity
{
  protected override void OnResume()
  {
    base.OnResume();
    Xamarin.Essentials.Platform.OnResume();
  }
}
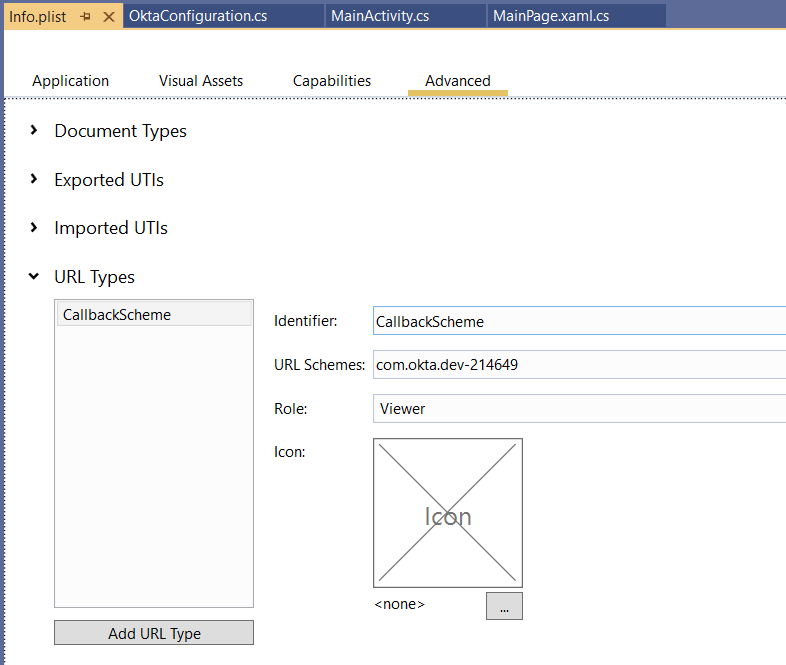
For iOS, open the Info.plist file, go to the Advanced tab, click Add Url Type, and enter CallbackScheme value in the URL Schemes field.
You also need to override the OpenUrl method in the AppDelegate class:
public override bool OpenUrl(UIApplication app, NSUrl url, NSDictionary options)
{
  if (Xamarin.Essentials.Platform.OpenUrl(app, url, options))
  {
    return true;
  }
  return base.OpenUrl(app, url, options);
}
Next, add a LoginService class that will build the url with required parameters and also parse the ID token returned by Okta. Paste this code in the LoginService class:
class LoginService
{
  private string codeVerifier;
  private const string IDToken = "id_token";
  private const string CodeChallengeMethod = "S256";

  public string BuildAuthenticationUrl()
  {
    var state = CreateCryptoGuid();
    var nonce = CreateCryptoGuid();
    var codeChallenge = CreateCodeChallenge();

    return $"{OktaConfiguration.OrganizationUrl}/oauth2/default/v1/authorizeresponse_type={IDToken}ope=openid%20profile&redirect_uri={OktaConfigurationCallback}&client_id={OktaConfiguration.ClientId}state=tate}&code_challenge{codeChallenge}&code_challenge_method={CodeChallengeMethod}&nonce={nonce}";
  }

  private string CreateCryptoGuid()
  {
    using (var generator = RandomNumberGenerator.Create())
    {
      var bytes = new byte[16];
      generator.GetBytes(bytes);
      return new Guid(bytes).ToString("N");
    }
  }

  private string CreateCodeChallenge()
  {
    codeVerifier = CreateCryptoGuid();
    using (var sha256 = SHA256.Create())
    {
      var codeChallengeBytes = sha256.ComputeHash(Encoding.UTF8.GetByte(codeVerifier));
      return Convert.ToBase64String(codeChallengeBytes);
    }
  }

  public JwtSecurityToken ParseAuthenticationResult(WebAuthenticatorResultauthenticationResult)
  {
    var handler = new JwtSecurityTokenHandler();
    var token = handler.ReadJwtToken(authenticationResult.IdToken);
    return token;
  }
}
The code in the BuildAuthenticationUrl method builds the URL required by the auth code grant flow with PKCE. The base URL, when using Okta as the authorization server, is https://${yourOktaDomain}/oauth2/default/v1/authorize. The method then appends client_Id, response_type and scope parameters, sets the redirect_uri to the login redirect URI from the app configuration, and sets other parameters as required by the PKCE flow.
The ParseAuthenticationResult method parses the jwt IdToken returned by Okta into a JwtSecurityToken object that contains all the claims from the token.
You are now ready to use the WebAuthenticator class to start the login flow.
Go to the MainPage.Xaml.cs file and add and initialize LoginService field:
private readonly LoginService loginService = new LoginService();
Next, replace the LoginButtonClicked method with this:
private async void LoginButtonClicked(object sender, EventArgs e)
{
  try
  {
    var callbackUrl = new Uri(OktaConfiguration.Callback);
    var loginUrl = new Uri(loginService.BuildAuthenticationUrl());

    var authenticationResult = await WebAuthenticator.AuthenticateAsync(loginUrl, callbackUrl)
    var token = loginService.ParseAuthenticationResult(authenticationResult);

    var nameClaim = token.Claims.FirstOrDefault(claim => claim.Type == "given_name")
    if (nameClaim != null)
    {
      WelcomeLabel.Text = $"Welcome to Xamarin.Forms {nameClaim.Value}!";
      LogoutButton.IsVisible = !(LoginButton.IsVisible = false);
    }
  }
  catch (TaskCanceledException)
  {
      //User closed browser
  }
}
When the login button is clicked, it builds the authentication url and passes it and the callback url to the WebAuthenticator.AuthenticateAsync() method. The WebAuthenticator.AuthenticateAsync() method will launch an external browser and, when I log in, redirects me back to the app passing the token returned by Okta. It then extracts the given_name claim from the parsed claims and displays its value in the WelcomeLabel.
The logout button will simply reset the app to its initial state:
private void LogoutButtonClicked(object sender, EventArgs e)
{
  WelcomeLabel.Text = "Welcome to Xamarin.Forms!";
  LogoutButton.IsVisible = !(LoginButton.IsVisible = true);
}
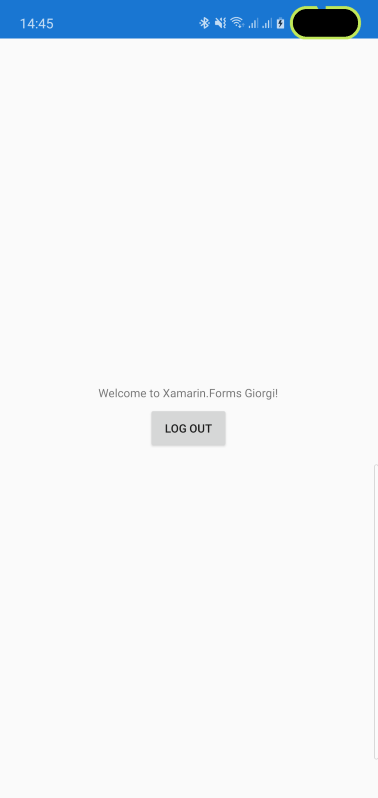
Now run the app, click the Login with Okta button, log in to your Okta account and you will see a screen similar to this:
That’s it!
Learn More About Xamarin, OpenID Connect, and Okta
I hope the tutorial was interesting to you and that you enjoyed it. You can get the full source code of the project from GitHub. For more Xamarin and Okta articles check out these posts:
- OAuth 2.0 for Native and Mobile Apps
- Build Login in Xamarin with Xamarin.Forms
- Add Authentication to Your Xamarin App with OpenID Connect
- Okta Xamarin SDK
Okta’s OpenID Connect Primer in three parts:
Make sure to follow us on Twitter and subscribe to our YouTube Channel so that you never miss any awesome content!
Okta Developer Blog Comment Policy
We welcome relevant and respectful comments. Off-topic comments may be removed.