Build an Application with Spring Boot and Kotlin

In 2011, JetBrains, the company behind IntelliJ, decided to create a modern language that would run inside the Java Virtual Machine and address common concerns with Java at the time like its verbosity. This project became Kotlin, a quickly growing and popular language.
Google then announced official support for Kotlin on Android, further accelerating its adoption. Many companies started to replace Java with Kotlin as their main language to take advantage of the new features it provides. Kotlin is now an increasingly important language for developers inside the JVM ecosystem to know and understand.
In this tutorial, you will build a Spring Boot application from scratch, using Kotlin as the main language. You will learn how Kotlin works with Spring and how to integrate the code with other Java libraries. By the end, you will have a secure Spring application running in Kotlin that authenticates users via OAuth 2.0.
Table of Contents
- Create the Kotlin Application with Spring Initializr
- Make the Kotlin Application Endpoint Dynamic
- Extensions: Say Farewell to Utility Classes
- When: An Enhanced Switch Operator
- Leverage Java Libraries In Your Kotlin App
Note: In May 2025, the Okta Integrator Free Plan replaced Okta Developer Edition Accounts, and the Okta CLI was deprecated.
We preserved this post for reference, but the instructions no longer work exactly as written. Replace the Okta CLI commands by manually configuring Okta following the instructions in our Developer Documentation.
Create the Kotlin Application with Spring Initializr
Let’s start by creating the project using Spring Initializr.
Go to the Spring Initializr website and type in the following information:
- Project: Gradle Project
- Language: Kotlin
- Group: com.okta
- Artifact: spring-kotlin
- Options:
- Package Name: com.okta
- Dependencies: Spring Web
You can also use the command line to get the same result:
curl https://start.spring.io/starter.zip \
        -d language=kotlin \
        -d dependencies=web \
        -d packageName=com.okta \
        -d name=spring-kotlin \
        -d type=gradle-project \
        -o spring-kotlin.zip
You can choose to use either Maven or Gradle. Since Gradle is the most common build tool to go along with Kotlin, this tutorial will go for it.
Import the project into your favorite IDE. Although you can choose your favorite, I strongly recommend IntelliJ, from the creators of Kotlin.
If you use IntelliJ, you don’t need to download Kotlin since it ships included with the IDE. Otherwise download the latest release.
Once you’ve imported the project, it will have a single file named SpringKotlinApplication.kt. Inside the file, you will find the following code:
@SpringBootApplication
class SpringKotlinApplication

fun main(args: Array<String>) {
    runApplication<SpringKotlinApplication>(*args)
}
This file contains the main function, which bootstraps the application. To declare a function in Kotlin you use the keyword fun, followed by its name, the parameters, and the return type. When there is no return type, you don’t specify anything, which is the case with this function.
Here you also have a class annotated with SpringBootApplication that will behave the same way as in Java. You may also notice that SpringKotlinApplication is not declared as public. The reason is pretty simple: all classes are public in Kotlin by default!
Next, create a REST endpoint. As with Java, you need to create a class and annotate it with RestController.
Inside src/com/okta/controller/, create the class GreetController with the following code:
package com.okta.controller

import org.springframework.web.bind.annotation.GetMapping
import org.springframework.web.bind.annotation.RestController

@RestController
class GreetController {

    @GetMapping("/greet")
    fun greet(): String {
        return "Hello, World"
    }
}
As with classes, all functions are public by default so there is no need to add an explicit modifier. The other big difference is the function declaration: the return type goes after the name of the method, separated by a colon.
That’s it! You have created your first application in Spring using Kotlin.
Run the application by executing the class SpringKotlinApplication in your IDE (or with ./gradlew bootRun). After that, go to http://localhost:8080/greet and you should see the following greeting message in your browser:
Hello, World!
Make the Kotlin Application Endpoint Dynamic
You can make the message in your endpoint available to greet any person. Let’s update it to receive a name as the input and display a personalized greeting message:
Inside the GreetController file, make the following changes:
@GetMapping("/greet")
fun greet(@RequestParam("name") name: String): String {
    return "Hello, $name!"
}
The greet function now receives a parameter called name. In Kotlin, you declare parameters by specifying the name first, followed by a colon and its type. This is the same convention used to declare a function. The RequestParam annotation is placed in the same position as you would in Java code.
You might also have noticed that you didn’t have to concatenate Strings to display the input value. Kotlin has a built-in feature called String templates, which allows you to reference a variable by putting the $ sign, followed by the variable name itself.
Run the application again and open http://localhost:8080/greet?name=john. You should see the message below:
Hello, john!
Great! With very little effort, your application can greet any user by name from now on.
Extensions: Say Farewell to Utility Classes
Your endpoint is working, but there is little problem with the current version: the user might input their name in all lowercase characters.
To fix this, you can capitalize the first character of the name before returning it. In Java, you usually achieve this by creating or importing a utility class that you then call to do the action. For instance, you could import StringUtils from Apache Commons to your project and add the following code:
String capitalizedName = StringUtils.capitalize(name);
return "Hello, " + capitalizedName + "!";
In Kotlin, you don’t need to use a utility class. Instead, use a feature called extension functions. This feature allows you to add functions to existing classes, even when they are final or outside your project scope. All you have to do is inform the class you want to extend with the method to make it available:
fun String.capitalize(): String {
    if (this.isEmpty()) {
        return this
    } else if (this.length == 1) {
        return this.toUpperCase()
    } else {
        return this[0].toTitleCase() + this.substring(1).toLowerCase()
    }
}
The function above ensures the first letter of the word is in uppercase and all others are in lowercase.
The extension function is declared in the same way as a regular function. The only difference is you have to specify the class you want to extend before the name of the method. In our case, you want to add a capitalize function in the String class, which means you need to declare the function as String.capitalize.
Go to the greet function and make the following changes:
@GetMapping("/")
fun greet(@RequestParam("name") name: String): String {
    val capitalizedName = name.capitalize()
    return "Hello $capitalizedName!"
}
Although you declared the function in your project, you make the call as it was defined inside the String class! This eliminates the need to create utility classes and concentrates the methods in one place, making it easier to find the function you want to use.
Restart the application and reload http://localhost:8080/greet?name=john you should see the following message:
Hello, John!
There you go! Now your application displays the name with a capitalized first letter :-)
When: An Enhanced Switch Operator
Take a closer look at the capitalize method you created earlier and note that all three if statements are related. This is a common programming pattern the creators of Kotlin decided to handle with a new keyword: when.
You can think of the when as an enhanced switch statement. In Java, you can verify if an enum is of a particular type by using switch:
switch(myEnum) {
    case ENUM_A:
        // code here
    case ENUM_B:
        // code here
    default:
    // code here
}
This is very useful to make cleaner code, but it’s also limited because it can only verify the type of the variable. In Kotlin, when lets you verify any condition. That way you get cleaner code while performing more advanced operations.
Let’s rewrite the previous capitalize method using when.
fun String.capitalize(): String {
    when (this.length) {
        0 -> return this
        1 -> return this.toUpperCase()
        else -> return this[0].toTitleCase() + this.substring(1).toLowerCase()
    }
}
In this new version, you verify the length of the current String and return the result based on its length.
But the power of when doesn’t end there. You can even mix up different types of conditionals in the same clause. For instance, you could write the above method like this:
fun String.capitalize(): String {
    when {
        this.isEmpty() -> return this
        this.length == 1 -> return this.toUpperCase()
        else -> return this[0].toTitleCase() + this.substring(1).toLowerCase()
    }
}
As you can see, one of the conditionals calls isEmpty(), while the other one verifies the length of the String. As long as your expression can be evaluated as a boolean value, you can use it inside of a when expression.
Leverage Java Libraries In Your Kotlin App
Although your application is still very simple, you can make it look like a professional app with just a few small tweaks. For instance, greet the logged-in user by name instead of asking for it as a parameter every time.To make that work of course, you need to implement user authentication first.
Authentication is a vital part of any modern app, but can you incorporate auth into your project without layers of configuration and code? The answer is yes! We’ll use OAuth 2.0 to authenticate users and display a greeting message based on the user’s name with no headache.
Recall how Kotlin can use libraries from the Java ecosystem? Add Okta’s Java library written to handle the OAuth 2.0 flow inside your application.
To start, open the build.gradle.kts file. Inside the dependencies tag, add the following line:
implementation("com.okta.spring:okta-spring-boot-starter:2.0.1")
Your dependencies object should look like this:
dependencies {
    implementation("org.springframework.boot:spring-boot-starter-web")
    implementation("com.fasterxml.jackson.module:jackson-module-kotlin")
    implementation("org.jetbrains.kotlin:kotlin-reflect")
    implementation("org.jetbrains.kotlin:kotlin-stdlib-jdk8")
    implementation("com.okta.spring:okta-spring-boot-starter:2.0.1")
    testImplementation("org.springframework.boot:spring-boot-starter-test")
}
This dependency adds both Okta and Spring Security to your project. They make it simple to ensure only authenticated users can access protected areas of your application.
Before you begin, you’ll need a free Okta developer account. Install the Okta CLI and run okta register to sign up for a new account. If you already have an account, run okta login.
Then, run okta apps create. Select the default app name, or change it as you see fit.
Choose Web and press Enter.
Select Okta Spring Boot Starter.
Accept the default Redirect URI values provided for you. That is, a Login Redirect of http://localhost:8080/login/oauth2/code/okta and a Logout Redirect of http://localhost:8080.
What does the Okta CLI do?
The Okta CLI will create an OIDC Web App in your Okta Org. It will add the redirect URIs you specified and grant access to the Everyone group. You will see output like the following when it’s finished:
Okta application configuration has been written to:
  /path/to/app/src/main/resources/application.properties
Open src/main/resources/application.properties to see the issuer and credentials for your app.
okta.oauth2.issuer=https://dev-133337.okta.com/oauth2/default
okta.oauth2.client-id=0oab8eb55Kb9jdMIr5d6
okta.oauth2.client-secret=NEVER-SHOW-SECRETS
NOTE: You can also use the Okta Admin Console to create your app. See Create a Spring Boot App for more information.
Now that you have your Okta OIDC application, you can use it to authenticate users in your Kotlin app.
The last step is to modify your greet endpoint to pull the name from the authenticated user. Go to the GreetController class and apply the following changes:
package com.okta.controller

import org.springframework.web.bind.annotation.GetMapping
import org.springframework.web.bind.annotation.RestController
import org.springframework.security.web.bind.annotation.AuthenticationPrincipal
import org.springframework.security.oauth2.core.oidc.user.OidcUser

@RestController
class GreetController {

    @GetMapping("/greet")
    fun greet(@AuthenticationPrincipal user: OidcUser): String {
        val capitalizedName = user.givenName.capitalize()
        return "Hello, $capitalizedName!"
    }

    fun String.capitalize(): String {
        when {
            this.isEmpty() -> return this
            this.length == 1 -> return this.toUpperCase()
            else -> return this[0].toTitleCase() + this.substring(1).toLowerCase()
        }
    }
}
The main difference here is that you are not receiving the user as a parameter anymore. Since you annotated the function with AuthenticationPrincipal, Spring knows that you want to retrieve the current user and will do it automatically.
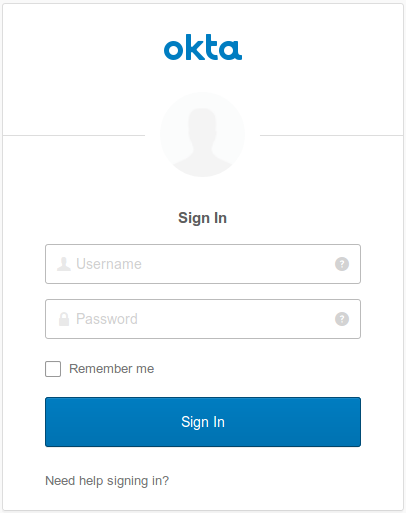
That’s it! You now have an application with secure authentication out of the box. Go to http://localhost:8080/greet and you should be redirected to the Okta’s login page:
Once the user enters their username and password they’ll be redirected to your greeting page again. In my case, I see the following:
Hello, Daniel!
Congratulations! You just finished your first app written in Kotlin. You also took advantage of the JVM ecosystem by adding authentication in a simple, secure way. Take a look at the final code on GitHub.
Want to learn more about Kotlin, Spring and Security, and OAuth 2.0 overall? here are a few links you might be interested in:
- How to Docker with Spring Boot
- Build a Secure Notes Application with Kotlin, TypeScript
- Build a Basic CRUD App in Android with Kotlin
- A Quick Guide to Spring Boot Login Options
I hope you enjoyed this article! Follow up in the comments below and give @oktadev a follow on Twitter to keep up with the latest.
Changelog:
- Apr 16, 2021: Updated to use Spring Boot 2.4 and Okta CLI. See blog changes in okta-blog#727. Example app changes can be viewed in this PR.
Okta Developer Blog Comment Policy
We welcome relevant and respectful comments. Off-topic comments may be removed.