How to Build a Secure React and Fastify API App
The National Aeronautics and Space Administration (NASA) is an independent agency of the US federal government, responsible for space exploration and research, with field facilities across the United States. In this tutorial, we’ll set up an app to keep track of what NASA facilities we’ve visited and which ones we still want to check out.
Our app will be a monorepo with Okta authentication, using React for the frontend and Fastify for the backend. Fastify is a highly performant web framework with low overhead that we’ll connect to a PostgreSQL database. We’ll also use Lerna to manage the frontend and backend apps in a monorepo.
Prerequisites
Create React App currently requires Node >= 14.0.0 and npm >= 5.6. The latest required versions can be found at https://reactjs.org/docs/create-a-new-react-app.html. This tutorial was created using Node v18.8.1 and npm v8.11.0.
A Docker installation is required as well.
Table of Contents
- Set up OAuth2 and OpenID Connect (OIDC)
- Setup Lerna for monorepo management
- Add needed Fastify backend and React frontend dependencies with TypeScript
- Set up the PostgreSQL Docker instance
- Create the API backend app using Fastify
- Configure the React app
- Running the app
- Further learning
Note: In May 2025, the Okta Integrator Free Plan replaced Okta Developer Edition Accounts, and the Okta CLI was deprecated.
We preserved this post for reference, but the instructions no longer work exactly as written. Replace the Okta CLI commands by manually configuring Okta following the instructions in our Developer Documentation.
Set up OAuth2 and OpenID Connect (OIDC)
We’ll be using Okta’s SPA redirect model to authenticate.
Before you begin, you’ll need a free Okta developer account. Install the Okta CLI and run okta register to sign up for a new account. If you already have an account, run okta login.
Then, run okta apps create. Select the default app name, or change it as you see fit.
Choose Single-Page App and press Enter.
Use http://localhost:3001/callback for the Redirect URI and accept the default Logout Redirect URI of http://localhost:3001.
What does the Okta CLI do?
The Okta CLI will create an OIDC Single-Page App in your Okta Org. It will add the redirect URIs you specified and grant access to the Everyone group. It will also add a trusted origin for http://localhost:3001. You will see output like the following when it’s finished:
Okta application configuration:
Issuer:    https://dev-133337.okta.com/oauth2/default
Client ID: 0oab8eb55Kb9jdMIr5d6
NOTE: You can also use the Okta Admin Console to create your app. See Create a React App for more information.
NOTE: Take note of your client ID and issuer as this will be used in a subsequent step.
Setup Lerna for monorepo management
Lerna is a tool used to manage multi-package repositories. In this project, it’ll allow us to have a single repository where both our frontend and API packages live.
-
If you don’t already have
npxinstalled, you can runnpm i npxto do so. -
Create a project root directory named
okta-react-fastify. - Add Lerna to your project by running the following in your project root directory:
npx lerna@latest init - Create the
frontendandapipackages:cd packages mkdir frontend api
NOTE: The team behind Nx now manages Lerna, so if you’d like to integrate Nx’s additional robust, scalable, and faster tooling for managing monorepos, check out their documentation on integrating Nx and Lerna.
Add needed Fastify backend and React frontend dependencies with TypeScript
- In
packages/api, run:npm init fastify - Add the required backend packages:
npx lerna add @fastify/postgres@5.1.0 packages/api npx lerna add dotenv@16.0.2 packages/api npx lerna add @okta/jwt-verifier@2.6.0 packages/api npx lerna add pg@8.8.0 packages/api - Add TypeScript and needed types to the backend repository:
npx lerna add @types/pg@8.6.5 packages/api --dev npx lerna add typescript@4.8.3 packages/api --dev - Next, let’s create a basic React application using Create React App. We’ll use the template for TypeScript with it as well. In the created
packages/frontenddirectory, run:npx create-react-app . --template typescript - Add the frontend Okta dependencies:
npx lerna add @okta/okta-auth-js@7.0.1 packages/frontend npx lerna add @okta/okta-react@6.7.0 packages/frontend - You can now run
npx lerna bootstrapto install your package dependencies.
NOTE: Our demo repository uses React ^18.2.0 and React Scripts 5.0.1.
Set up the PostgreSQL Docker instance
- In your project’s root directory, create a file
docker-compose.yml:
services:
  postgres:
    container_name: "nasa-facilities"
    image: "postgres:latest"
    ports:
      - "5432:5432"
    environment:
      POSTGRES_USERNAME: "${POSTGRES_USERNAME}"
      POSTGRES_PASSWORD: "${POSTGRES_PASSWORD}"
      POSTGRES_DB: "${POSTGRES_DB}"
- Create a
.envfile in the same project root directory and add the following:POSTGRES_USERNAME=postgres POSTGRES_PASSWORD=postgres POSTGRES_DB=nasa-facilities -
To use the Docker configuration we created, run
docker compose up. - There is a provided PostgrSQL data dump
./nasa-facilities_20200910.sqlin the example repo. You can import it by running the following from the project root directory:docker exec -i nasa-facilities psql -U postgres nasa-facilities < ./nasa-facilities_20200910.sql
Your newly created Docker instance is now running a PostgreSQL database with the restored data.
NOTE: The PostgreSQL dump included in the demo repo uses data from https://www.kaggle.com/datasets/nasa/nasa-facilities.
Create the API backend app using Fastify
-
In the command line, go to your backend repository root directory at
packages/api. - Update
package.jsonby adding the following to allow the backend application to compile using TypeScript:{ "main": "build/index.js", "scripts": { "start": "tsc && node build/index.js" } } - Initialize a Typescript config file by running:
npx tsc --init - Add the following to
tsconfig.jsonto output the build files to the proper directory:"outDir": "build" - Create a
.envfile with the following and replace the Okta values with the prior output from the CLI:CONNECTION_STRING=PostgreSQL://postgres:postgres@localhost:5432/nasa-facilities OKTA_ISSUER=https://{yourOktaDomain}/oauth2/default OKTA_CLIENT_ID={yourOktaClientId} OKTA_AUDIENCE="api://default" - Create an
index.tsfile and add the backend application Fastify server code:
import fastifyPostgres from "@fastify/postgres";
import Fastify, { FastifyInstance, FastifyRequest } from "fastify";
import * as dotenv from "dotenv";

dotenv.config();

const fastify: FastifyInstance = Fastify({
  logger: {
    serializers: {
      res(reply) {
        return {
          statusCode: reply.statusCode,
        };
      },
      req(request) {
        return {
          method: request.method,
          url: request.url,
        };
      },
    },
  },
});

fastify.register(fastifyPostgres, {
  connectionString: process.env.CONNECTION_STRING,
});

const start = async () => {
  try {
    await fastify.listen({ port: 3000 });
  } catch (err) {
    fastify.log.error(err);
    process.exit(1);
  }
};
start();
- Next, let’s create our Fastify API routes along with their appropriate CRUD operations in a new file
routes/facilities.ts:
import { FastifyInstance } from "fastify";
import { FastifyReply, FastifyRequest } from "fastify";

interface IFacility {
  Center: string;
  Facility: string;
  Status: string;
  City: string;
  State: string;
  Visited: boolean;
  id: bigint;
}

async function facilitiesRoutes(fastify: FastifyInstance) {
  const client = await fastify.pg.connect();

  fastify.get(
    "/facilities",
    async (request: FastifyRequest, reply: FastifyReply) => {
      let facilities: IFacility[] = [];

      try {
        const { rows } = await client.query("SELECT * FROM facilities");
        if (rows.length == 0) throw new Error("No facilities found");

        facilities = rows;
        reply
          .code(200)
          .header("Content-Type", "application/json; charset=utf-8")
          .send([...facilities]);
      } catch (error) {
        const errorMessage = (error as Error).message;
        throw new Error(errorMessage);
      }
    }
  );

  fastify.patch(
    "/facilities/:id",
    async (request: FastifyRequest, reply: FastifyReply) => {
      const { id } = request.params as { id: bigint };
      const { visited } = request.body as { visited: boolean };

      const query = {
        text: `UPDATE public.facilities SET
                "Visited" = COALESCE($1, "Visited")
                WHERE id = $2`,
        values: [visited, id],
      };

      try {
        await client.query(query);
        reply.code(204);
      } catch (error) {
        const errorMessage = (error as Error).message;
        throw new Error(errorMessage);
      }
    }
  );

  fastify.delete(
    "/facilities/:id",
    async (request: FastifyRequest, reply: FastifyReply) => {
      const { id } = request.params as { id: bigint };

      const query = {
        text: `DELETE FROM public.facilities
                  WHERE id = $1 RETURNING *`,
        values: [id],
      };

      try {
        await client.query(query);
        reply.code(204);
      } catch (error) {
        const errorMessage = (error as Error).message;
        throw new Error(errorMessage);
      }
    }
  );
}

export default facilitiesRoutes;
- To register these routes with our Fastify instance, add the following to
index.ts:fastify.register(facilitiesRoutes);
NOTE: Don’t forget to also import the facilitiesRoutes after adding the above line.
- Then we’ll create a
utils/jwt-verifier.tsfile that will include logic to verify the access token included in API calls from the frontend:
import OktaJwtVerifier from "@okta/jwt-verifier";
import dotenv from "dotenv";
import { FastifyReply, FastifyRequest } from "fastify";

dotenv.config();

const oktaJwtVerifier = new OktaJwtVerifier({
  issuer: process.env.OKTA_ISSUER || "",
  clientId: process.env.OKTA_CLIENT_ID
});

const audience = process.env.OKTA_AUDIENCE;

export const jwtVerifier = async (
  request: FastifyRequest,
  reply: FastifyReply
) => {
  const { authorization } = request.headers;

  request.log.info({ authorization });

  const match = authorization?.match(/Bearer (.+)/);

  if (!match) {
    return reply.status(401).send();
  }

  if (!authorization || !match) {
    reply.code(401).send();
  }

  try {
    const accessToken = match[1];
    const { claims } = await oktaJwtVerifier.verifyAccessToken(
      accessToken,
      audience || ""
    );

    request.log.info({ claims });

    if (!claims) {
      reply.code(401).send();
    }
  } catch (err) {
    console.log(err);
    reply.code(401).send();
  }
};
- We’ll then add a Fastify Prehandler Hook to
index.tsthat will run thejwtVerifierlogic with each Fastify route:
fastify.decorate("jwtVerify", (request: FastifyRequest) => {
  fastify.log.info(`The incoming request is: ${JSON.stringify(request)}`);
});

fastify.addHook("preHandler", async (request, reply, done) => {
  return jwtVerifier(request, reply);
});
NOTE: An import will also need to be added for jwtVerifier.
Your final packages/api/index.ts file should look like this:
import fastifyPostgres from "@fastify/postgres";
import Fastify, { FastifyInstance, FastifyRequest } from "fastify";
import * as dotenv from "dotenv";
import facilitiesRoutes from "./routes/facilities";
import { jwtVerifier } from "./utils/jwt-verifier";

dotenv.config();

const fastify: FastifyInstance = Fastify({
  logger: {
    serializers: {
      res(reply) {
        return {
          statusCode: reply.statusCode,
        };
      },
      req(request) {
        return {
          method: request.method,
          url: request.url,
        };
      },
    },
  },
});

fastify.register(fastifyPostgres, {
  connectionString: process.env.CONNECTION_STRING,
});

fastify.decorate("jwtVerify", (request: FastifyRequest) => {
  fastify.log.info(`The incoming request is: ${JSON.stringify(request)}`);
});

fastify.addHook("preHandler", async (request, reply, done) => {
  return jwtVerifier(request, reply);
});

fastify.register(facilitiesRoutes);

const start = async () => {
  try {
    await fastify.listen({ port: 3000 });
  } catch (err) {
    fastify.log.error(err);
    process.exit(1);
  }
};
start();
Configure the React app
-
Add
"proxy": "http://localhost:3000"topackages/frontend/package.jsonso that React knows what base URL our API calls will need to make. -
In a
.envfile in thepackages/frontenddirectory, add the needed environment variables:PORT=3001 REACT_APP_OKTA_ISSUER=https://{yourOktaDomain}/oauth2/default REACT_APP_OKTA_CLIENT_ID={yourOktaClientId} REACT_APP_OKTA_BASE_REDIRECT_URI=http://localhost:3001
NOTE: Make sure to replace {yourOktaDomain} and {yourOktaClientId} with your own Okta domain and client ID.
NOTE: We are switching the default port React will run on because the backend API app will use port 3000 by default as well.
Create React components
Let’s create our React components for render on the frontend.
- In a newly created
src/componentsdirectory, add the following files:
login.tsx
import { useOktaAuth } from "@okta/okta-react";
import { Navigate, useNavigate } from "react-router-dom";
import "../App.css";

export function Login() {
  const navigate = useNavigate();
  const { authState } = useOktaAuth();

  const handleLoginClick = () => {
    navigate("/facilities");
  };

  return authState?.isAuthenticated ? (
    <Navigate to="/facilities" replace />
  ) : (
    <div className="form-wrapper">
      <form onSubmit={handleLoginClick}>
        <h2>Welcome Back!</h2>
        <input type="submit" value="Login" />
      </form>
    </div>
  );
}
NOTE: Our app uses React Router v6, which utilizes the new useNavigate to replace useHistory to programmatically navigate.
facilities.tsx
import { useOktaAuth } from "@okta/okta-react";
import { useEffect, useState } from "react";

interface IFacility {
  Center: string;
  Facility: string;
  Status: string;
  City: string;
  State: string;
  Visited: boolean;
  id: bigint;
}

function getErrorMessage(error: unknown) {
  if (error instanceof Error) return error.message;
  return String(error);
}

function Facilities() {
  const [data, setData] = useState<IFacility[]>();
  const [errors, setErrors] = useState<string>();
  const { authState, oktaAuth } = useOktaAuth();

  const logout = async () => {
    try {
      await oktaAuth.signOut();
    } catch (err) {
      throw err;
    }
  };

  useEffect(() => {
    const apiCall = async () => {
      if (authState?.isAuthenticated && authState.accessToken?.accessToken) {
        try {
          const response = await fetch("/facilities", {
            headers: {
              Authorization: `Bearer ${authState.accessToken.accessToken}`,
            },
          });
          const data = await response.json();
          setData(data);
        } catch (error: unknown) {
          setErrors(getErrorMessage(error));
        }
      }
    };
    apiCall();
  }, [authState]);

  const handleVisitedClick = (
    e: React.ChangeEvent<HTMLInputElement>,
    facilityId: bigint
  ) => {
    const url = `/facilities/${facilityId}`;

    const apiCall = async () => {
      if (authState?.isAuthenticated && authState.accessToken?.accessToken) {
        try {
          await fetch(url, {
            method: "PATCH",
            headers: {
              Authorization: `Bearer ${authState.accessToken.accessToken}`,
              "Content-Type": "application/json",
            },
            body: JSON.stringify({ visited: e.target.checked }),
          });
        } catch (error: unknown) {
          setErrors(getErrorMessage(error));
        }
      }
    };
    apiCall();
  };

  const handleDeleteClick = (facilityId: bigint) => {
    const url = `/facilities/${facilityId}`;

    const apiCall = async () => {
      if (authState?.isAuthenticated && authState.accessToken?.accessToken) {
        try {
          await fetch(url, {
            method: "DELETE",
            headers: {
              Authorization: `Bearer ${authState.accessToken.accessToken}`,
            },
          });

          setData(data?.filter((row) => row.id !== facilityId));
        } catch (error: unknown) {
          setErrors(getErrorMessage(error));
        }
      }
    };
    apiCall();
  };

  if (data && !errors && authState?.isAuthenticated) {
    return (
      <div className="facilities-wrapper">
        <button onClick={logout} className="logout-button">
          Logout
        </button>
        <h1>NASA Facilities</h1>
        {data ? (
          <table className="facilities-table">
            <thead>
              <tr>
                <th>Center</th>
                <th>Facility</th>
                <th>Status</th>
                <th>City</th>
                <th>State</th>
                <th>Visited</th>
              </tr>
            </thead>
            <tbody>
              {data
                .sort((a, b) => (a.id < b.id ? -1 : a.id > b.id ? 1 : 0))
                .map((facility) => {
                  return (
                    <tr key={facility.Facility}>
                      <td>{facility.Center}</td>
                      <td>{facility.Facility}</td>
                      <td>{facility.Status}</td>
                      <td>{facility.City}</td>
                      <td>{facility.State}</td>
                      <td>
                        <input
                          type="checkbox"
                          defaultChecked={facility.Visited}
                          onChange={(e) => handleVisitedClick(e, facility.id)}
                        />
                      </td>
                      <td>
                        <button
                          className="button-delete"
                          onClick={() => handleDeleteClick(facility.id)}
                        >
                          DELETE
                        </button>
                      </td>
                    </tr>
                  );
                })}
            </tbody>
          </table>
        ) : (
          <p>No facilities found</p>
        )}
      </div>
    );
  } else if (errors) {
    return <p>An error occurred: {errors}</p>;
  } else return <p className="loading">Loading...</p>;
}

export default Facilities;
secureRoute.tsx
In this file we’ll create a custom SecureRoute component to work with React Router v6.
import React, { useEffect } from "react";
import { useOktaAuth } from "@okta/okta-react";
import { toRelativeUrl } from "@okta/okta-auth-js";
import { Outlet } from "react-router-dom";

export const RequiredAuth: React.FC = () => {
  const { oktaAuth, authState } = useOktaAuth();

  useEffect(() => {
    if (!authState) {
      return;
    }

    if (!authState?.isAuthenticated) {
      const originalUri = toRelativeUrl(
        window.location.href,
        window.location.origin
      );
      oktaAuth.setOriginalUri(originalUri);
      oktaAuth.signInWithRedirect();
    }
  }, [oktaAuth, authState?.isAuthenticated, authState]);

  if (!authState || !authState?.isAuthenticated) {
    return <p className="loading">Loading...</p>;
  }

  return <Outlet />;
};
NOTE: The okta/okta-react package includes a SecureRoute component, but it does not support React Router v6 to stay router version agnostic. For more information, please see the issue comment at https://github.com/okta/okta-react/issues/178#issuecomment-1150407182.
- We’ll also need to add the
SecureRoutecomponent and the following toApp.tsx.
import { useCallback } from "react";
import "./App.css";
import { OktaAuth, toRelativeUrl } from "@okta/okta-auth-js";
import { BrowserRouter as Router, Route, Routes } from "react-router-dom";
import { LoginCallback, Security } from "@okta/okta-react";
import { Login } from "./components/login";
import Facilities from "./components/facilities";
import { RequiredAuth } from "./components/secureRoute";

function App() {
  const oktaAuth = new OktaAuth({
    issuer: process.env.REACT_APP_OKTA_ISSUER,
    clientId: process.env.REACT_APP_OKTA_CLIENT_ID,
    redirectUri:
      process.env.REACT_APP_OKTA_BASE_REDIRECT_URI + "/callback",
  });

  const restoreOriginalUri = useCallback(
    async (_oktaAuth: OktaAuth, originalUri: string) => {
      window.location.replace(
        toRelativeUrl(originalUri || "/", window.location.origin)
      );
    },
    []
  );

  return (
    <Router>
      <Security oktaAuth={oktaAuth} restoreOriginalUri={restoreOriginalUri}>
        <Routes>
          <Route path="/callback" element={<LoginCallback />} />
          <Route path="/" element={<Login />} />
          <Route path="/facilities" element={<RequiredAuth />}>
            <Route path="" element={<Facilities />} />
          </Route>
        </Routes>
      </Security>
    </Router>
  );
}

export default App;
The following CSS has been added to App.css in the demo application with inspiration from https://codepen.io/anthonymarkreynolds/pen/qJBazW.
@import url("https://fonts.googleapis.com/css?family=Jura:400");

* {
  font-family: Jura, Arial;
  font-weight: 500;
}

h2 {
  font-weight: 600;
}

.facilities-wrapper {
  display: inline-flex;
  width: 100%;
  justify-content: center;
  flex-direction: column;
  align-items: center;
}

.loading {
  font-size: 40px;
  text-align: center;
  margin-top: 25%;
}

.facilities-table {
  border: 1px solid #ddd;
  border-collapse: collapse;
  margin: 32px;
}

th,
td {
  padding: 8px;
  border-right: 1px solid #ddd;
}

tr {
  border-bottom: 1px solid #ddd;
}

.form-wrapper {
  display: grid;
  grid-template-columns: 1fr minmax(200px, 400px) 1fr;
  grid-template-rows: 1fr minmax(auto, 1fr) 1fr;
  grid-gap: 10px;
  width: 100%;
  height: 100vh;
  background: linear-gradient(-45deg, #ee7752, #e73c7e, #23a6d5, #23d5ab);
  background-size: 400% 400%;
  animation: Gradient 15s ease infinite;
  box-sizing: border-box;
}

form {
  grid-column: 2;
  grid-row: 2;
  display: grid;
  grid-gap: 10px;
  margin: auto 0;
  padding: 16px 32px;
  background-color: rgba(255, 255, 255, 0.9);
  border-radius: 10px;
  box-shadow: 0 32px 64px rgba(0, 0, 0, 0.2);
  margin-bottom: 33%;
}

form fieldset {
  margin: 0;
  background-color: #fff;
  border: none;
  border-radius: 5px;
  box-shadow: 0 1px 3px rgba(0, 0, 0, 0.2);
}

legend {
  padding: 4px;
  background-color: #fff;
  border-radius: 5px;
}

form > input,
button {
  padding: 10px;
  border: 1px solid rgba(0, 0, 0, 0);
  border-radius: 5px;
  background: #fff;
  box-shadow: 0 1px 3px rgba(0, 0, 0, 0.2);
  cursor: pointer;
  margin-bottom: 24px;
  min-width: 100px;
}

form > input:hover,
button:hover {
  background-color: #eef;
}

.logout-button {
  align-self: end;
  margin: 32px 32px 0px;
}

input[type="checkbox"] {
  width: 48px;
  height: 20px;
  cursor: pointer;
}

@keyframes Gradient {
  0% {
    background-position: 0% 50%;
  }
  50% {
    background-position: 100% 50%;
  }
  100% {
    background-position: 0% 50%;
  }
}

button.button-delete {
  background-color: #fe2c54;
  color: white;
  font-weight: 700;
  margin-bottom: 0;
  min-width: unset;
}
Running the app
You can start the demo app by running npx lerna run start.
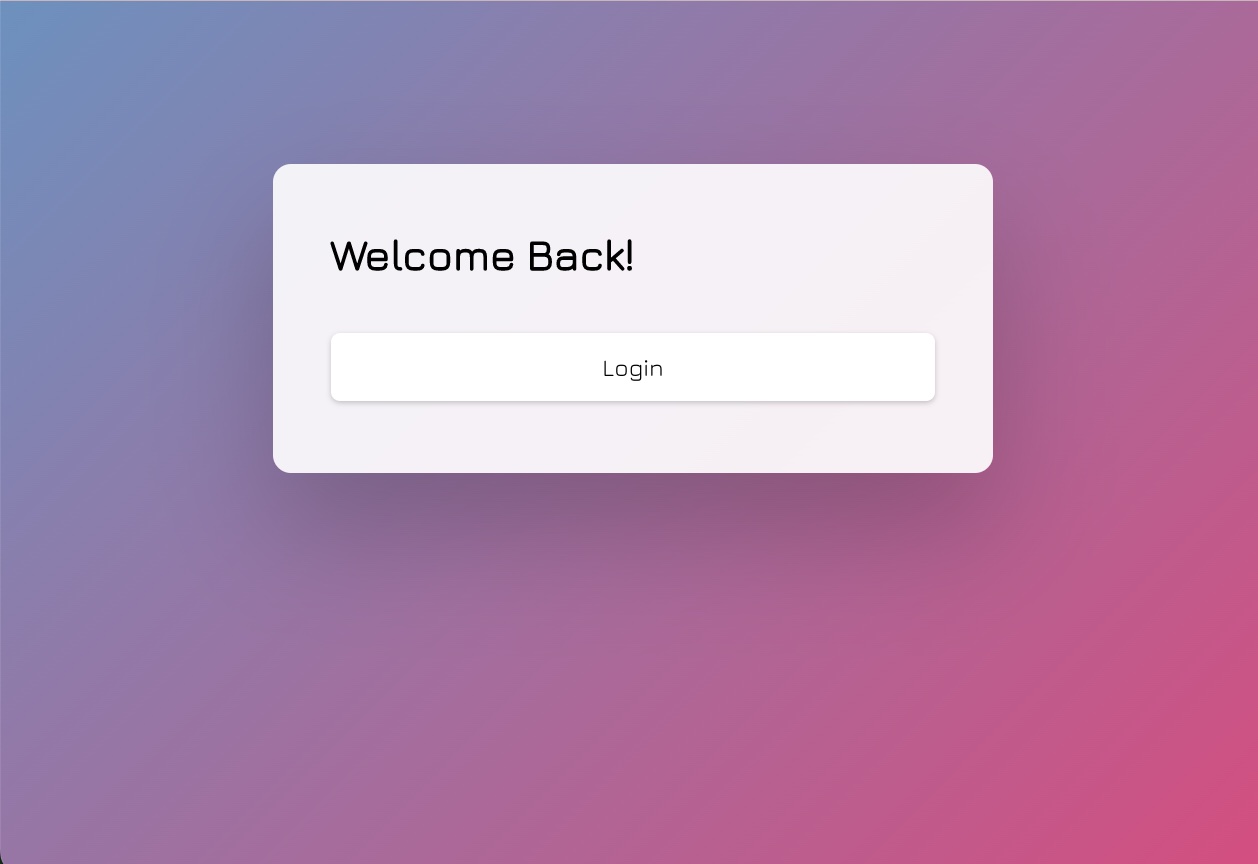
If we’re not authenticated, our app will land us at the login page. Here, we click login to go through the Okta login process. Once authenticated, we’re redirected to /facilities. If we’re already authenticated when we land on the root URL, our app will automatically navigate us to /facilities. Once our table loads, we’ll see the following:
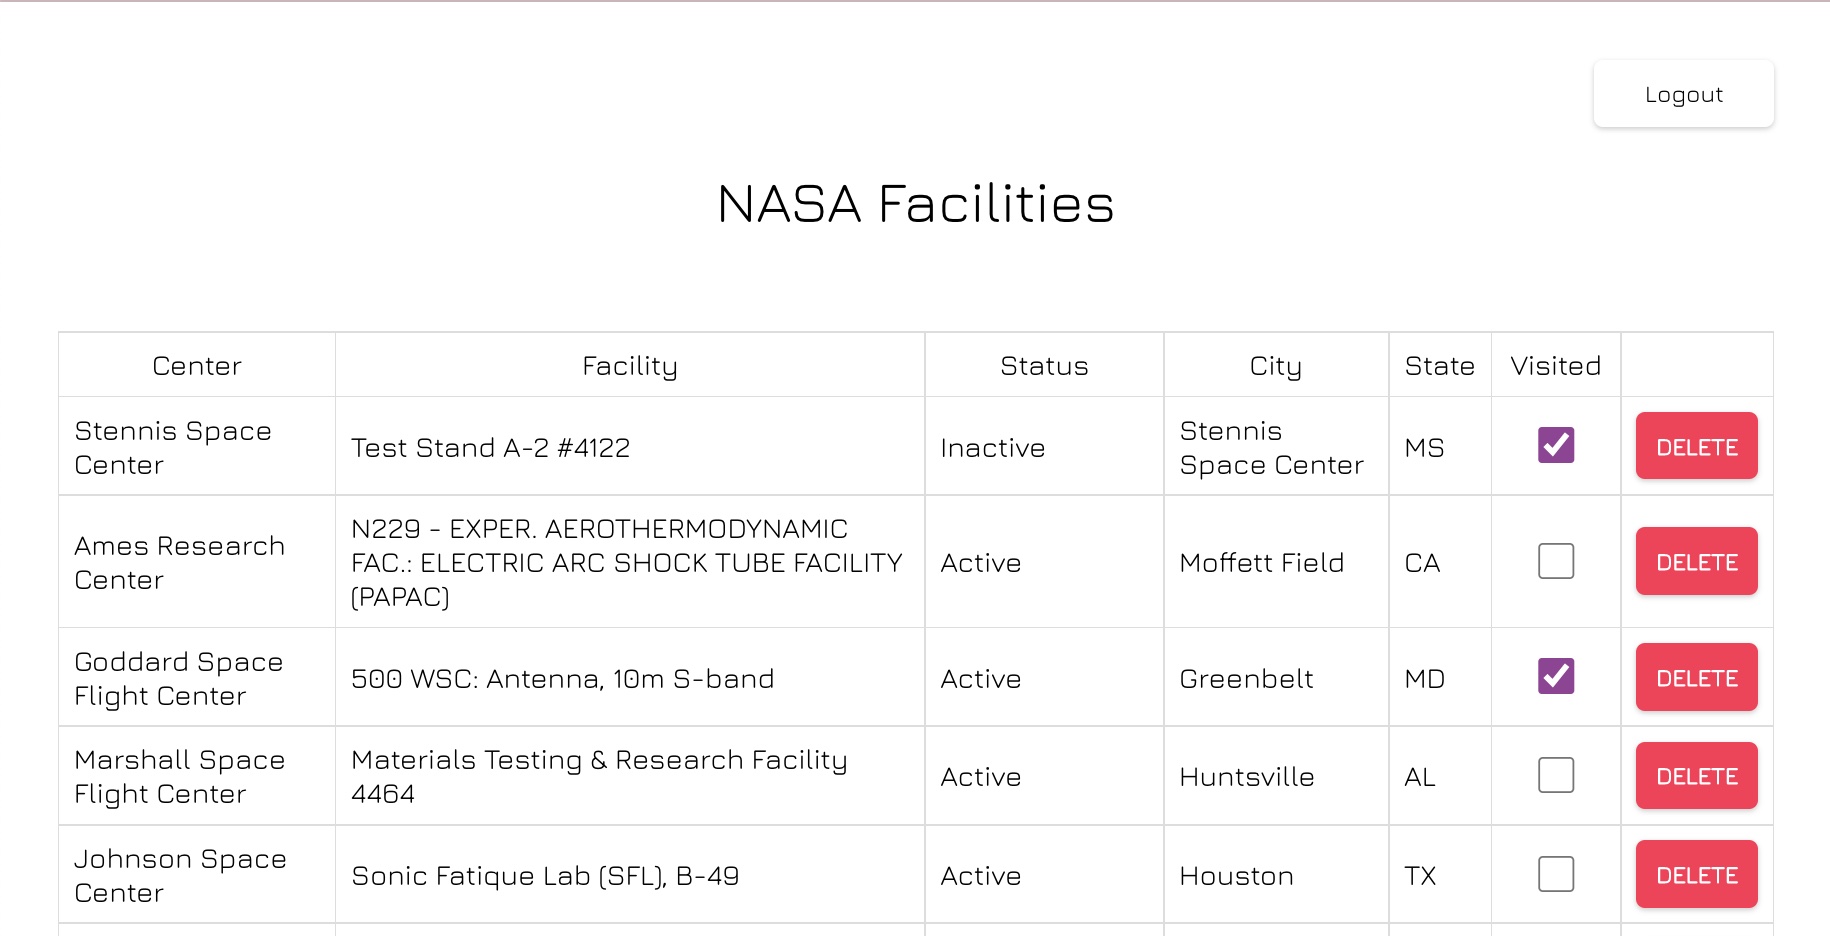
To render the facilities table, our app has made a call to our API which includes the access token to fetch the data from the backend /facilities API endpoint.
In packages/frontend/facilities.tsx:
  useEffect(() => {
    const apiCall = async () => {
      if (authState?.isAuthenticated && authState.accessToken?.accessToken) {
        try {
          const response = await fetch("/facilities", {
            headers: {
              Authorization: authState.accessToken.accessToken,
            },
          });
          const data = await response.json();
          setData(data);
        } catch (error: unknown) {
          setErrors(getErrorMessage(error));
        }
      }
    };
    apiCall();
  }, [authState]);
The backend verified the access token using the jwtVerifier utility we created.
The backend connects to our PostgreSQL instance and has used the query we specified to fetch the needed data at the /facilities route.
In packages/api/routes/facilities.ts:
fastify.get(
    "/facilities",
    async (request: FastifyRequest, reply: FastifyReply) => {
      let facilities: IFacility[] = [];

      try {
        const { rows } = await client.query("SELECT * FROM facilities");
        if (rows.length == 0) throw new Error("No facilities found");

        facilities = rows;
        reply
          .code(200)
          .header("Content-Type", "application/json; charset=utf-8")
          .send([...facilities]);
      } catch (error) {
        const errorMessage = (error as Error).message;
        throw new Error(errorMessage);
      }
    }
  );
The same process repeats when a user clicks on the Visited checkbox or Delete button for the appropriate API endpoints and PostgreSQL queries.
Further learning
Handling CORS Errors in Fastify
Secure Your PostgreSQL Instance
Use Redux to Manage Authenticated State in a React App
A Developer’s Guide to Session Management in React
Be sure you follow us on Twitter and subscribe to our YouTube channel. Please comment below if you have any questions or want to share what tutorial you’d like to see next.
Gabi spent her youth immersed in MS-DOS, server rooms, and Geocities fan page HTML. She transitioned to a development career in 2016 after life as a Systems Administrator and is active in her local tech community as a volunteer and as Mentor Director for a monthly coding session to help women break into the industry. Her other interests include ashtanga yoga, learning languages, and curating stellar playlists.
Okta Developer Blog Comment Policy
We welcome relevant and respectful comments. Off-topic comments may be removed.