How to Build a Website With Eleventy

11ty is a fantastic tool for quickly creating static sites using a variety of templating languages. 11ty makes designing and developing static sites simple. It supports HTML, Markdown, JavaScript, Nunjucks, Handlebars, and many other template styles, along with built-in support for layouts, pagination, and slugify. 11ty aims to compete against other frameworks such as Jekyll, Hugo, Hexo, Gatsby, and Nuxt. The framework is indeed as simple and powerful as its creators claim.
This tutorial will teach how to secure your 11ty site using Okta. 11ty will produce static pages, which means you won’t have the luxury of servers and states to help manage your authentication. But Okta still has a solution for this. To authenticate users, you will use the Okta Sign-In Widget. Then you will store the id token returned from the Okta authentication server. You can then use that id token to query Okta’s servers for many operations, including verifying if the token is valid or obtaining user information.
Table of Contents
- Create your Okta application
- Create your 11ty site
- Add a couple of static pages
- Add layout pages
- Start your 11ty website
- Learn more about working with 11ty
Prerequisites:
Note: In May 2025, the Okta Integrator Free Plan replaced Okta Developer Edition Accounts, and the Okta CLI was deprecated.
We preserved this post for reference, but the instructions no longer work exactly as written. Replace the Okta CLI commands by manually configuring Okta following the instructions in our Developer Documentation.
Create your Okta application
Install the Okta CLI and run okta login.
Then, run okta apps create. Select the default app name, or change it as you see fit.
Choose Single-Page App and press Enter.
Use http://localhost:8080/callback for the Redirect URI and accept the default Logout Redirect URI of http://localhost:8080.
What does the Okta CLI do?
The Okta CLI will create an OIDC Single-Page App in your Okta Org. It will add the redirect URIs you specified and grant access to the Everyone group. It will also add a trusted origin for http://localhost:8080. You will see output like the following when it’s finished:
Okta application configuration:
Issuer:    https://dev-133337.okta.com/oauth2/default
Client ID: 0oab8eb55Kb9jdMIr5d6
NOTE: You can also use the Okta Admin Console to create your app. See Create a Vue App for more information.
Create your 11ty site
If you wish to follow along using the completed project you can check out the GitHub repository here.
The first step is to create your 11ty site. Create your project directory.
mkdir okta-website-eleventy-example
cd okta-website-eleventy-example
Next, create your node application and install 11ty.
npm init -y
npm install --save-dev @11ty/eleventy@1.0.0
At this point, your 11ty site is ready to run. You can test it out by adding a new page.
echo '<!doctype html><html><head><title>Page title</title></head><body><p>Hello World</p></body></html>' > index.html
Enter the following command to start 11ty:
npx @11ty/eleventy --serve
By default, 11ty will attempt to use port 8080 on localhost, so navigate to http://localhost:8080, and you can see your Hello World page.
NOTE: If you are using Windows, you will need to open the index file you just created and resave it with UTF-8 encoding, as 11ty uses UTF-16 LE by default.
Add a couple of static pages
Now you can add some content to your site. Your site will consist of the following pages:
- An index page to greet users (
index.html) - A login page (
login.html) - A readme to demonstrate the usage of markdown (
README.md) - A page that is under authentication (
protected.html)
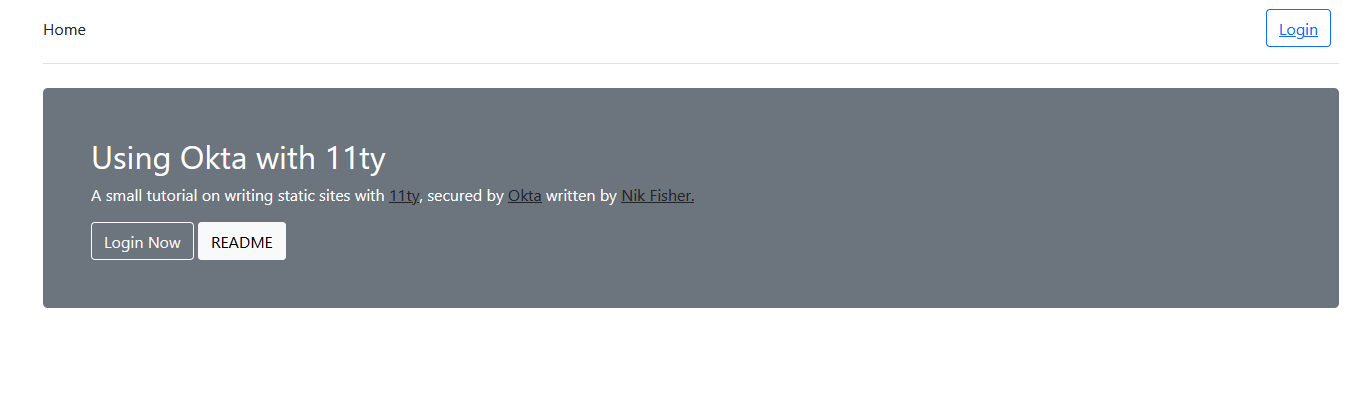
First, open the index.html file you just created and replace the code with the following.
---
layout: _layout_unauthenticated.11ty.js
---

<div class="row align-items-md-stretch">
    <div class="col-md-12">
        <div class="h-100 p-5 text-white bg-secondary rounded-3">
            <h2>Using Okta with 11ty</h2>
            <p>A small tutorial on writing static sites with
                <a class="text-dark" href="https://www.11ty.dev/" target="_blank">11ty</a>,
                secured by <a class="text-dark" href="https://www.okta.com/" target="_blank">Okta</a>
                written by <a class="text-dark" href="https://profile.fishbowlllc.com/" target="_blank">Nik Fisher.</a>
            </p>
            <a class="btn btn-outline-light" role="button" href="Login">Login Now</a>
            <a class="btn btn-light" role="button" href="README">README</a>
        </div>
    </div>
</div>
You will notice the layout variable at the top of the file. You have not added this file to your project yet and will need to do that. But you can assign the layout page to this file, so you don’t have to add it later.
Next, create a file for login.html and add the following code.
---
layout: _layout_unauthenticated.11ty.js
---

<div id="okta-login-container"></div>
<script>
  oktaSignIn.authClient.token.getUserInfo().then(function(user) {
    window.location='/protected';
  },function(error) {
    oktaSignIn.showSignInToGetTokens({
      el: '#okta-login-container'
    }).then(function(tokens) {
      oktaSignIn.authClient.tokenManager.setTokens(tokens);
      oktaSignIn.remove();
      window.location='/protected';
    }).catch(function(err) {
      console.error(err);
    });
  });
</script>
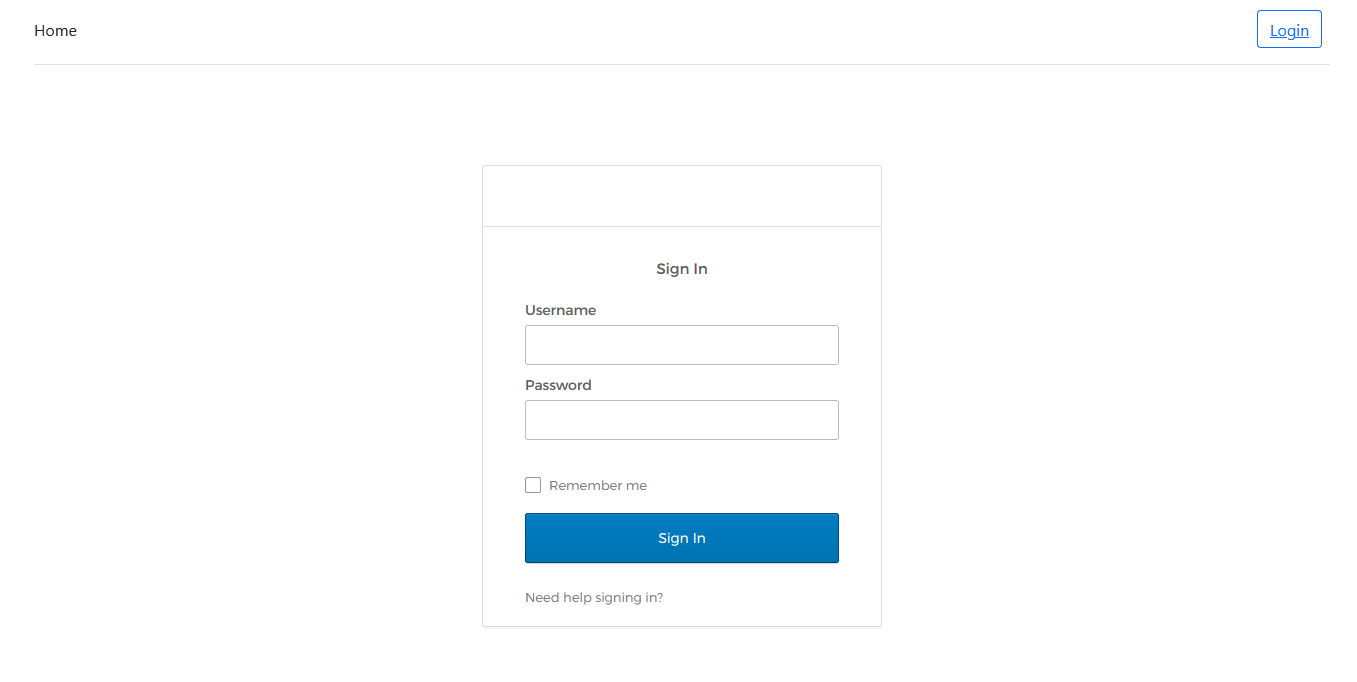
The only HTML in this page here is a div with id="okta-login-container". You call the OktaSignIn features and display the login screen to the user with the JavaScript code on this page. Okta will create the login form and handle the actual authentication. All you need to do is call the showSignInToGetTokens method and handle the promise to set the token using the tokenManager. Once you have done that, you will redirect the user to the protected page.
You can add the protected.html page now. Add the following code to it.
---
layout: _layout_authenticated.11ty.js
---
<div id="content"></div>
<script>
function loadPage(){
//replace with API call
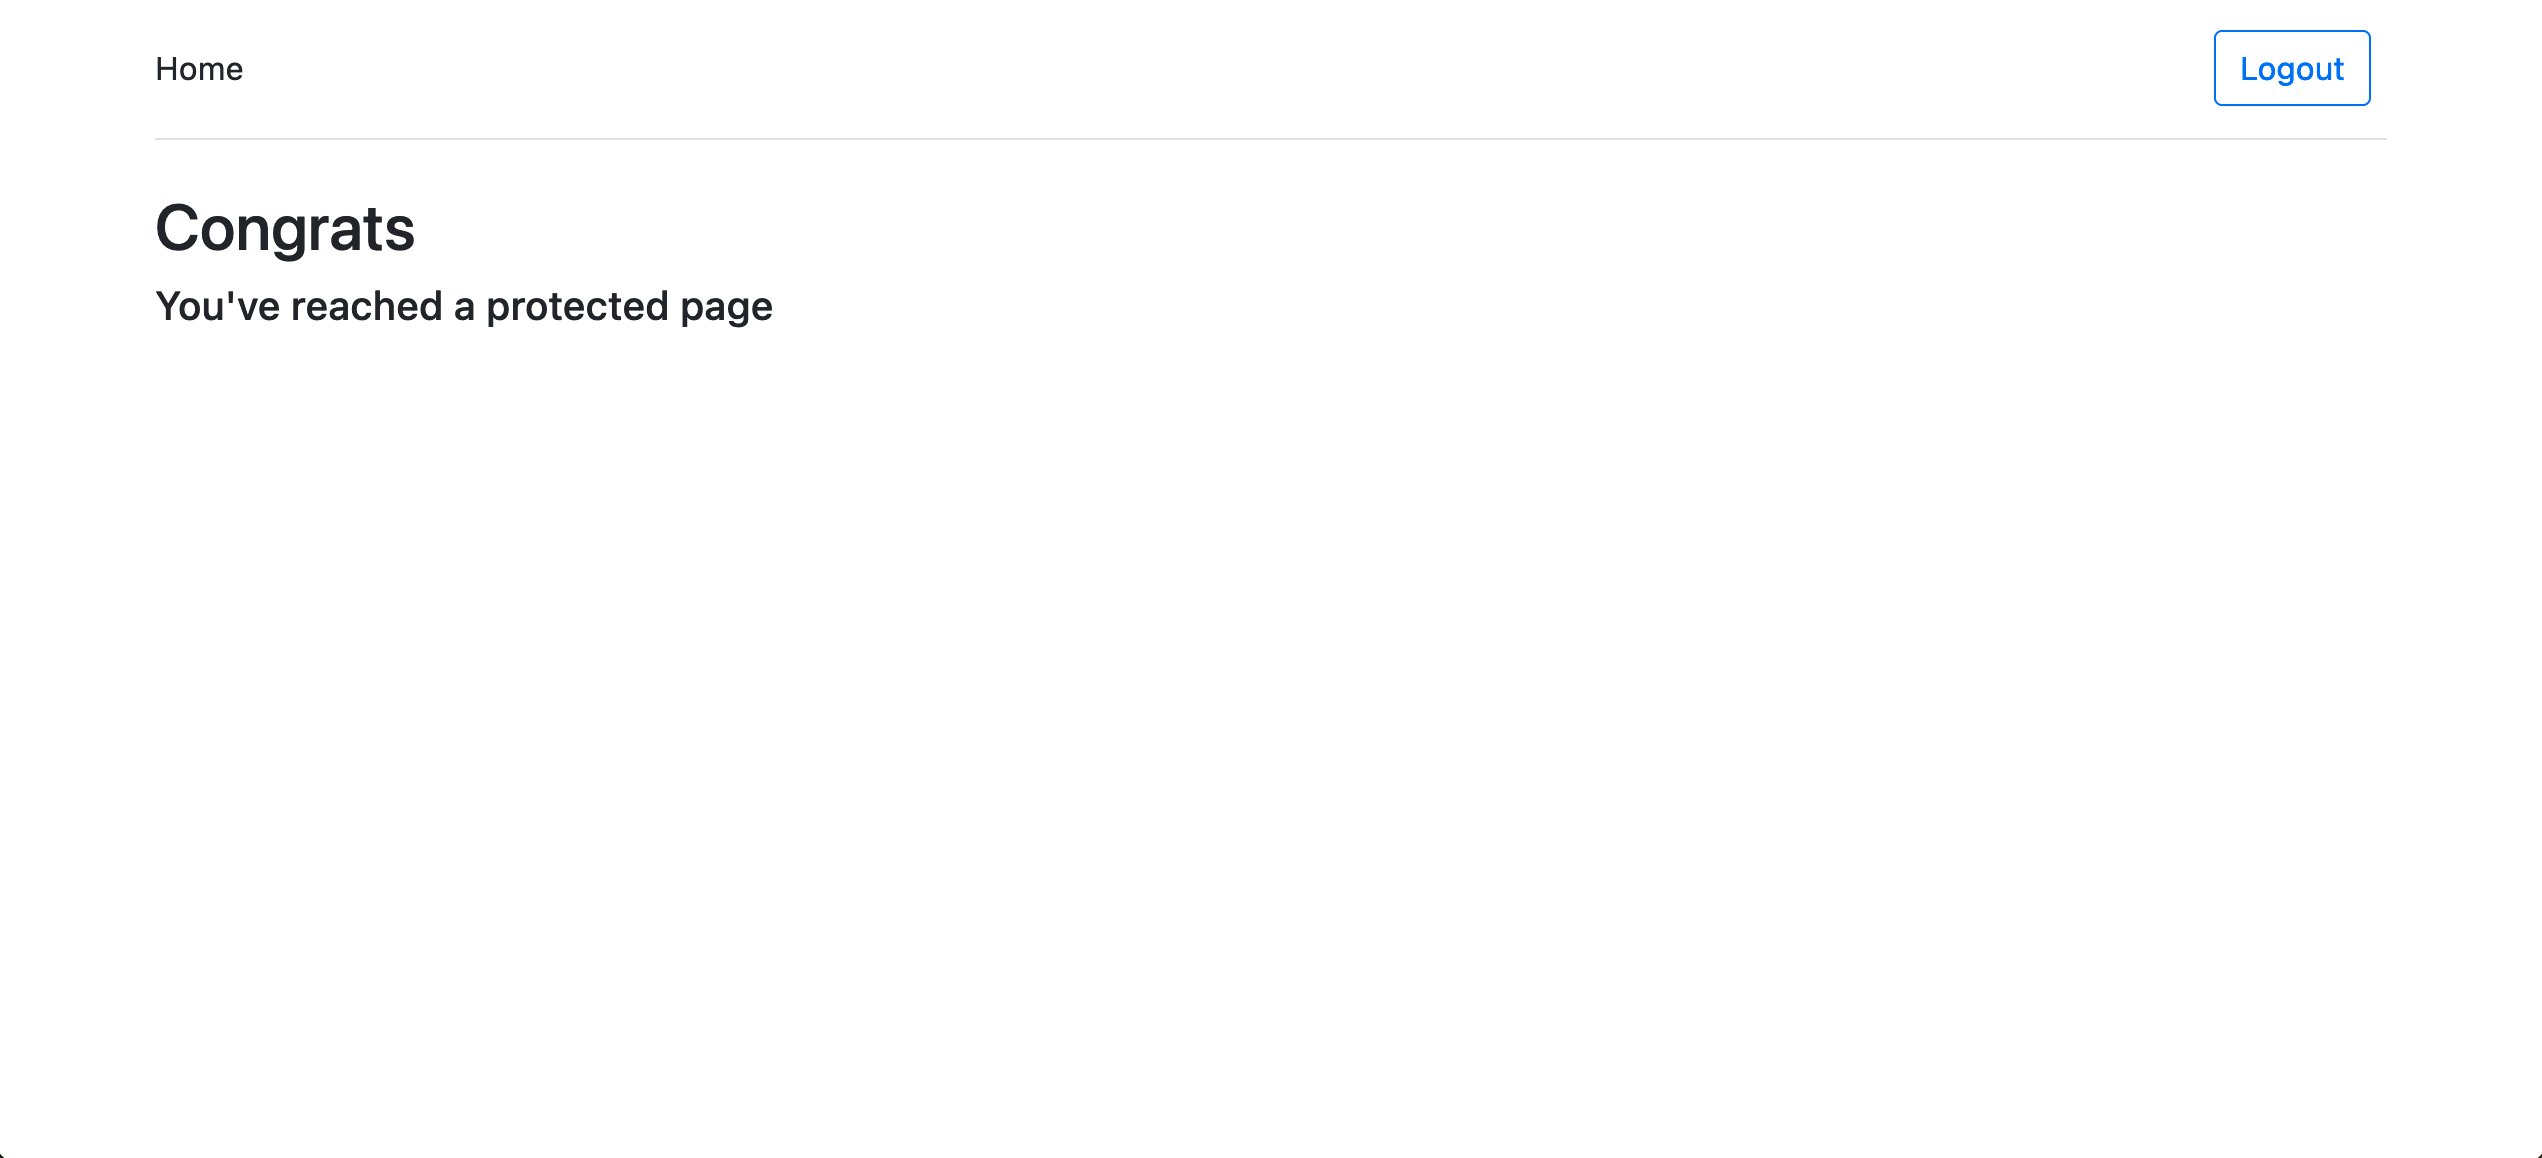
document.getElementById('content').innerHTML = "<h2>Congrats</h2><h5>You've reached a protected page</h5>"
}
</script>
Since you haven’t seen the _layout_authenticated.11ty.js page yet, this will need some explanation. After verifying that the user has authenticated, the loadPage function is called by the layout.
There’s a comment to replace the code here with an API call. You can add an API call to verify the ID token on the server-side before displaying any content to the user.
Finally, add a page for README.md and add the following markdown to it.
---
layout: _layout_unauthenticated.11ty.js
---

# Okta Eleventy website example

This repository shows you how to use Okta on a static site built with 11ty.

**Prerequisites:**

- [Node.js 10 or newer](https://nodejs.org/en/download/)
- [Okta CLI](https://cli.okta.com)
The README.mdyou’ve just added is a truncated version of the README file that you can see in the GitHub repository for this project.
Add layout pages
It’s now time to add the layout pages for your static files. 11ty enables you to write layouts in several templating languages. For this project, you will use the stock 11ty.js format. Create a new folder called _includes using the command mkdir _includes.
Add a file called _layout_base.11ty.js and add the following code to it.
exports.data = {

};

exports.render = function (data) {
  return `<!doctype html>
<html lang="en">

<head>
    <link rel="stylesheet" href="https://cdn.jsdelivr.net/npm/bootstrap@5.1.3/dist/css/bootstrap.min.css"
        integrity="sha384-1BmE4kWBq78iYhFldvKuhfTAU6auU8tT94WrHftjDbrCEXSU1oBoqyl2QvZ6jIW3" crossorigin="anonymous">
    <script src="https://cdn.jsdelivr.net/npm/bootstrap@5.1.3/dist/js/bootstrap.bundle.min.js"
        integrity="sha384-ka7Sk0Gln4gmtz2MlQnikT1wXgYsOg+OMhuP+IlRH9sENBO0LRn5q+8nbTov4+1p"
        crossorigin="anonymous"></script>
    <script src="https://global.oktacdn.com/okta-signin-widget/5.14.1/js/okta-sign-in.min.js"
        type="text/javascript"></script>
    <link href="https://global.oktacdn.com/okta-signin-widget/5.14.1/css/okta-sign-in.min.css" type="text/css"
        rel="stylesheet" />
    <meta charset="utf-8">
    <meta name="viewport" content="width=device-width, initial-scale=1.0">
    <title>${data.title}</title>
</head>

<body>

    <script type="text/javascript">
        const oktaSignIn=new OktaSignIn({
            baseUrl: "https://{{yourOktaDomain}}",
            redirectUri: 'http://localhost:8080/callback',
            clientId: "{{yourClientId}}",
            authParams: {
                issuer: "https://{{yourOktaDomain}}/oauth2/default"
            }
        });
    </script>
    <div class="container">
        ${data.content}
    </div>

</body>

</html>`;
};
Be sure to replace the placeholder variables with your actual Okta information.
This file will be the base layout for all of your pages. It loads bootstrap into all of your pages and also initializes the OktaSignIn widget on each page. In this way, you can access it in the JavaScript of your file no matter where you are.
Next, add a file for _layout_unauthenticated.11ty.js and then add the following code.
exports.data = {
  title: "11ty And Okta",
  layout:  "_layout_base.11ty.js"
};

exports.render = function (data) {
  return `
     <header class="d-flex flex-wrap align-items-center justify-content-center justify-content-md-between py-3 mb-4 border-bottom">
      <a href="/" class="d-flex align-items-center col-md-3 mb-2 mb-md-0 text-dark text-decoration-none">
       Home
      </a>

      <div class="col-md-3 text-end">
        <button type="button" class="btn btn-outline-primary me-2"><a href="Login">Login</a></button>
      </div>
    </header>

    ${data.content}

        `;
};
This file extends the base layout you created by creating a header with a Home button and a Login button that will direct the user to the Login page with your Okta sign-in widget.
Finally, add a new file called _layout_authenticated.11ty.js. Then, add the following code.
exports.data = {
title: "11ty And Okta",
layout: "_layout_base.11ty.js",
};

exports.render = function (data) {
return `

<header
    class="d-flex flex-wrap align-items-center justify-content-center justify-content-md-between py-3 mb-4 border-bottom">
    <a href="/" class="d-flex align-items-center col-md-3 mb-2 mb-md-0 text-dark text-decoration-none">
        Home
    </a>

    <div class="col-md-3 text-end">
        <button type="button" class="btn btn-outline-primary me-2" onclick='logout()'>Logout</button>
    </div>
</header>

${data.content}

<script type="text/javascript">
    function logout() {
        oktaSignIn.authClient.signOut();
        location.reload();
    }

    if(!oktaSignIn?.authClient?.token) {
        window.location='/Login';
    }

    oktaSignIn.authClient.token.getUserInfo().then(function(user) {
        if(loadPage) {
            loadPage();
        }
    }).catch(function(e) {
        console.log(e);
        window.location='/Login'
    });
</script>
`;
};
Again, this file will extend the base layout, while adding some additional functionality to each page that uses this layout. When the page loads, it will attempt to contact the Okta authorization server for information about the user with the ID token stored in the browser. If the contact request is successful, it will call the loadPage function implemented in those pages. Otherwise, the code redirects the user to the Login page. This page also contains a header with a Logout button and a method for logout that uses the sign-in widget to log the user out.
Start your 11ty website
If you are still running the site, then 11ty will have hot reloaded the site, and you should see the home page. If not, run the following command:
npx @11ty/eleventy --serve
The command will build your templates into static pages and then serve the site on localhost:8080. Navigate to http://localhost:8080 to see the home page.
Next, click the login button to see the Okta Sign-In Widget in action. You can log in with your Okta credentials.
If everything goes well, you should see the protected page.
Learn more about working with 11ty
11ty is an excellent tool for building static websites using several different templating languages. Together with Okta, you can create secure static sites easily and quickly.
In this article, you learned how to write static pages with HTML and Markdown and use 11ty to convert pages into a static site. Then you saw how to create a page under authentication and protect it using Okta’s Sign-In Widget. Finally, I showed how you can use 11ty’s layout feature to streamline your coding experience.
If you liked this tutorial, you might like these others:
- Static Sites vs CMS
- Add Secure Authentication to your WordPress Site in 15 Minutes
- Add Authentication to Any Web Page in 10 Minutes
Make sure you follow us on Twitter and subscribe to our YouTube channel. If you have any questions, or you want to share what tutorial you’d like to see next, please comment below.
Okta Developer Blog Comment Policy
We welcome relevant and respectful comments. Off-topic comments may be removed.