Build an Electron App with JavaScript and Authentication
Electron is one of the most popular desktop frameworks today. Electron uses HTML, JavaScript, and CSS for its front end and Node.js for its backend. This design enables developers to quickly write and easily maintain cross-platform applications between their desktop and web applications. Since Electron uses Node on the backend, it also has access to the entire npm ecosystem that Node developers have come to rely on.
Even though it is built on Node, Electron is used for desktop applications rather than web applications. This can present a new set of challenges. For example, one of the most common and popular ways to interface with Okta from a Node.js application is to use the Okta NodeJS OIDC Middleware. The middleware takes some configuration and connects with Okta. This process is super simple to set up and use securely.
Matt Raible wrote a blog post about using Electron with Okta in 2018. In his example, he used AppAuth with its PKCE extension to secure his Electron application.
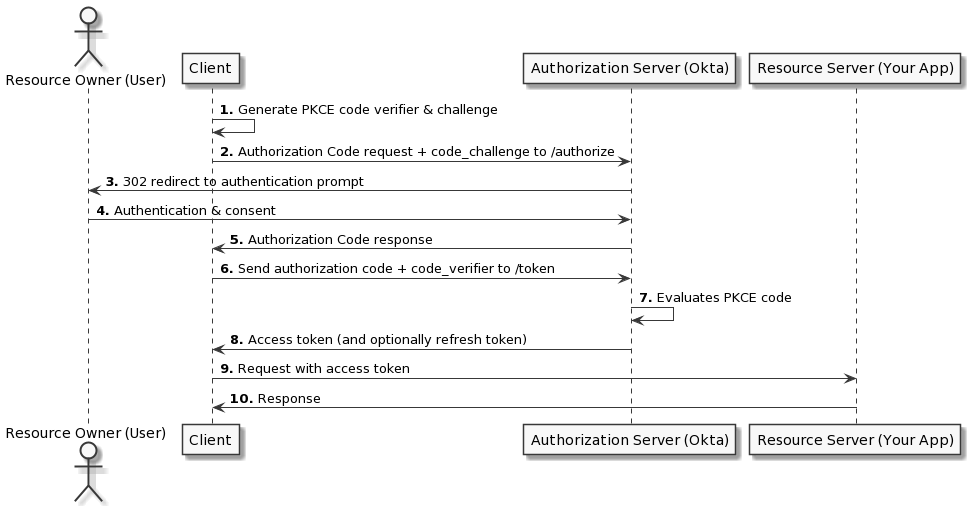
Both of these approaches require a callback path where Okta can send the authentication code to be processed by your application. For some companies, allowing localhost to receive the response from Okta may pose a security concern. There are many ways to handle this, but in this article, you will use Okta’s Auth JS SDK. This SDK exposes a signInWithCredentials() method that you can use to authenticate your users.
Note: In May 2025, the Okta Integrator Free Plan replaced Okta Developer Edition Accounts, and the Okta CLI was deprecated.
We preserved this post for reference, but the instructions no longer work exactly as written. Replace the Okta CLI commands by manually configuring Okta following the instructions in our Developer Documentation.
Create an OpenID Connect application
Before you begin, you’ll need a free Okta developer account. Install the Okta CLI and run okta register to sign up for a new account. If you already have an account, run okta login.
Then, run okta apps create. Select the default app name, or change it as you see fit.
Choose Native and press Enter.
Use com.okta.dev-133337:/callback for the Redirect URI and the Logout Redirect URI
(where dev-133337.okta.com is your Okta domain name). Your domain name is reversed to provide a unique scheme to open your app on a device.
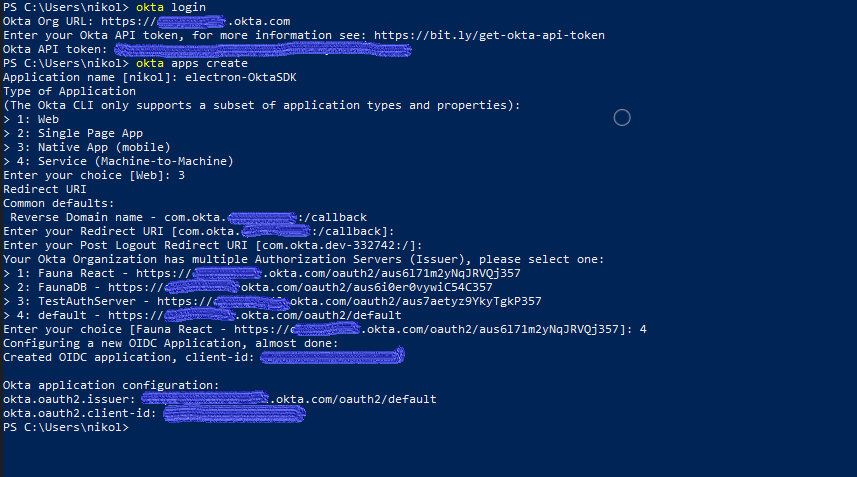
What does the Okta CLI do?
The Okta CLI will create an OIDC Native App in your Okta Org. It will add the redirect URIs you specified and grant access to the Everyone group. You will see output like the following when it’s finished:
Okta application configuration:
Issuer:    https://dev-133337.okta.com/oauth2/default
Client ID: 0oab8eb55Kb9jdMIr5d6
NOTE: You can also use the Okta Admin Console to create your app. See Create a Native App for more information.
You can leave the redirect URI at the default as you won’t be using it for this project. If you have multiple authorization servers you will need to pick one. For this application, the default server is fine.
Once your application is configured, the Okta CLI will return the issuer and client-id. Make note of these as you will need them when you build your application.
Build an Electron app
Now you’re ready to build an Electron application. First, open a new folder using your favorite IDE. In the console, type npm init and complete the setup presented to you. Accepting all the defaults is fine. Once you are done with the setup, install the following dependencies:
npm i -D electron@16.0.3 @okta/okta-auth-js@5.8.0
Next, add a start script to your package.json file.
"scripts": {
  "start": "electron .",
  ...
},
Create a new file called main.js and add the following code to it. Make sure to replace {yourOktaDomain} and {yourClientId} with the settings from the OIDC app you created earlier.
const { app, BrowserWindow } = require("electron");
const path = require("path");
const OktaAuth = require("@okta/okta-auth-js").OktaAuth;

const { ipcMain } = require("electron");

let mainWindow;
let user;

var config = {
  // Required config
  issuer: "https://{yourOktaDomain}/oauth2/default",
  clientId: "{yourClientId}",
};

var authClient = new OktaAuth(config);

ipcMain.on("user:login", (event, data) => {
  authClient
    .signInWithCredentials(data)
    .then(function (res) {
      console.log(res);

      if (res.data.status != "SUCCESS") {
        event.reply("login-failed", err.errorSummary);
        return;
      }

      user = res.user;
      openHome();
    })
    .catch(function (err) {
      console.log(err);
      event.reply("login-failed", err.errorSummary);
    });
});

ipcMain.handle("user:get", (event) => {
  return user;
});

ipcMain.on("user:logout", (event) => {
  user = null;
  openIndex();
});

function createWindow() {
  mainWindow = new BrowserWindow({
    width: 800,
    height: 600,
    webPreferences: {
      preload: path.join(__dirname, "preload.js"),
    },
  });
}

function openIndex() {
  mainWindow.loadFile("index.html");

  // Open the DevTools.
  mainWindow.webContents.openDevTools();
}

function openHome() {
  mainWindow.loadFile("home.html");
}

// This method will be called when Electron has finished
// initialization and is ready to create browser windows.
// Some APIs can only be used after this event occurs.
app.whenReady().then(() => {
  createWindow();
  openIndex();

  app.on("activate", function () {
    // On macOS it's common to re-create a window in the app when the
    // dock icon is clicked and there are no other windows open.
    if (BrowserWindow.getAllWindows().length === 0) createWindow();
  });
});

// Quit when all windows are closed, except on macOS. There, it's common
// for applications and their menu bar to stay active until the user quits
// explicitly with Cmd + Q.
app.on("window-all-closed", function () {
  if (process.platform !== "darwin") app.quit();
});
This file serves a few different functions. First, it is the main entry point for the application. Because of this, it also handles creating the window as well as the close function.
The main.js file also serves to navigate between the unsecured index.html page and the secured home.html page. When the user is authenticated you will direct them to the home.html page. After the user logs out, direct them to the index.html page which contains the login logic.
The file also contains handlers for the main process and communication back to the renderer process. In Electron, these processes are isolated from each other for security. The appropriate way to communicate between the two is to use the contextBridge and the ipcRenderer or ipcMain modules, depending on which way you are trying to communicate. In main.js you are receiving communication from the renderer process when the user attempts to log in or requests to log out. There is also a handler for user:get that will return the user stored by the main process to the renderer process.
Finally, the main.js file will also handle the authentication logic from the Okta SDK. You will need to configure your client first, using your issuer and the client ID obtained during the setup process above. Next, you can create a login() method that makes use of the signInWithCredentials() method provided by the SDK. This method will return a result that you can parse. If the message is a success then you can redirect the user to home.index, otherwise you can return an error message and handle that on your renderer side as you see fit.
Next, add a file called preload.js with the following code.
const { contextBridge, ipcRenderer } = require("electron");

contextBridge.exposeInMainWorld("electron", {
  login: (data) => ipcRenderer.send("user:login", data),
  getUser: async () => {
    const user = await ipcRenderer.invoke("user:get");
    return user;
  },
  logout: () => ipcRenderer.send("user:logout"),
});

ipcRenderer.on("login-failed", (event, message) => {
  document.getElementById("error-message").innerHTML = message;
});
The preload.js file is where you will mediate the communication between the main and the renderer process. contextBridge.exposeInMainWorld allows you to define an API, in this case, called electron, that your renderer can invoke. This file has access to both the renderer and main process and can delegate messages from the renderer to the main process. When the renderer calls electron.login, the ipcRenderer will send the message and payload through the contextBridge to be handled in the main.js page you saw earlier.
Next, add two HTML files. Start by adding index.html.
<!DOCTYPE html>
<html lang="en">

<head>
  <meta charset="UTF-8">
  <title>A Brief Electron demo with Okta</title>
</head>

<body>
<h1>Electron and Okta</h1>

<div class="container">
  <h4>Please Login</h4>

  <div>
    <label>Username</label>
    <input type="text" name="username" id="username"/>

    <label>Password</label>
    <input type="password" name="password" id="password"/>
  </div>

  <div>
    <button id="login-button">Login</button>
  </div>
  <div>
    <label id="error-message"></label>
  </div>

</div>
</body>

<style>
  .container {
    width: 60%;
    margin: 0 auto;
  }
</style>

<script>
  document.querySelector("#login-button").addEventListener("click", () => {
    const username = document.getElementById("username").value;
    const password = document.getElementById("password").value;

    const data = {
      username: username,
      password: password,
    };

    window.electron.login(data);
  });

</script>

</html>
The index.html page is for users who are not authenticated yet. You are presenting the user with a login screen that collects a username and password and calls window.electron.login. As you learned earlier, this function is added in the preload.js file.
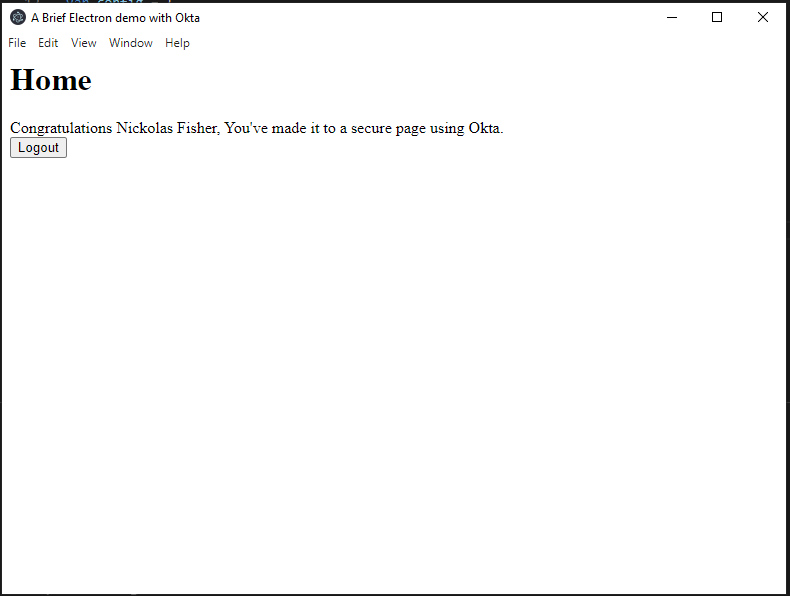
Finally, add a home.html file and provide a landing page for authenticated users.
<h1>Home</h1>

<div>
  Congratulations <span id="username">test</span>, You've made it to a secure page using Okta.
</div>

<div>
  <button id="logout-button">Logout</button>
</div>

<script>
  window.addEventListener('DOMContentLoaded', () => {
    window.electron.getUser().then((user) => {
      document.getElementById("username").innerHTML = `${user.profile.firstName} ${user.profile.lastName}`
    });
  });

  document.getElementById('logout-button').addEventListener('click', () => {
    window.electron.logout();
  });
</script>
The logout button calls your electron API from the preload.js file. You are also displaying the user’s name from Okta. This helps verify that the user is logged in and who they signed in as.
This page has been left intentionally simple for a very good reason. Electron doesn’t care what frontend you use. This could be a full-fledged React application or could have very little JavaScript at all. How you handle managing the application and user state is up to you. But, by using the Okta SDKs you can securely authenticate your users, and push them into the application state you need.
With your application ready, you can use the command npm start or run your debugger to see the application. You will see a warning in your console when starting:
[okta-auth-sdk] WARN: Memory storage can only support simple single user use case on server
side, please provide custom storageProvider or storageKey if advanced scenarios need to be
supported.
For development, this isn’t an issue; in production you may want to consider implementing a custom storage provider for your application. You can find more usage information here.
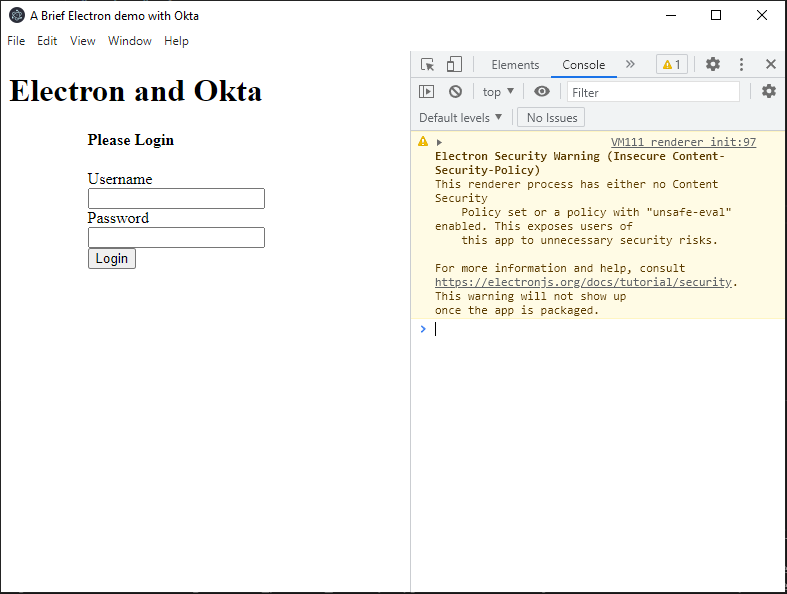
Once the application starts up, you can use your Okta credentials to log in and see the home.html page.
Learn more about Electron and OpenID Connect
Electron is an amazing technology that does more than just bring JavaScript to the desktop–it allows developers to create truly cross-platform applications. With Electron, you can use React, Vue, or Angular to create your UI and deploy it to desktops, mobile devices, and web applications.
You can find the example code from this tutorial in the okta-electron-javascript-example project on GitHub.
If you liked this tutorial, there’s a good chance you’ll enjoy these too:
- Build a Desktop Application with Angular and Electron
- Build a Desktop App with Electron and Authentication
- Implement the OAuth 2.0 Authorization Code with PKCE Flow
- Painless Node.js Authentication
Make sure to follow us on Twitter and subscribe to our YouTube channel. If you have any questions, or want to share what tutorial you’d like to see next, please comment below.
Okta Developer Blog Comment Policy
We welcome relevant and respectful comments. Off-topic comments may be removed.