Rider for C# - The Best Visual Studio Alternative IDE

When it comes to developing .NET apps, Visual Studio has historically been the default choice for .NET developers for two main reasons:
- Visual Studio is the official integrated development environment (IDE) from Microsoft, and
- There was no viable alternative to Visual Studio
This all changed about three years ago when JetBrains, the company behind Resharper, one of the most popular Visual Studio extensions, released a new, cross-platform, and innovative IDE - Rider.
The Rider IDE can be used to build .NET Framework, ASP.NET, .NET Core, Xamarin, or Unity apps and comes with the power of ReSharper. It supports C#, VB.Net, F#, JavaScript, and TypeScript. It also supports ASP.Net’s Razor syntax as well as XAML, HTML, CSS, SCSS, LESS, JSON, and SQL. In this tutorial, you will see how to build a basic ASP.NET Core web application with Rider and how to secure it with Okta.
To continue you will need:
- A basic knowledge of C#
- JetBrains Rider (Free 30-day trial included)
- .NET Core 3.1 SDK
- An Okta Developer Account (free forever, to handle your OAuth needs)
Note: In May 2025, the Okta Integrator Free Plan replaced Okta Developer Edition Accounts, and the Okta CLI was deprecated.
We preserved this post for reference, but the instructions no longer work exactly as written. Replace the Okta CLI commands by manually configuring Okta following the instructions in our Developer Documentation.
Rider Installation and Customization
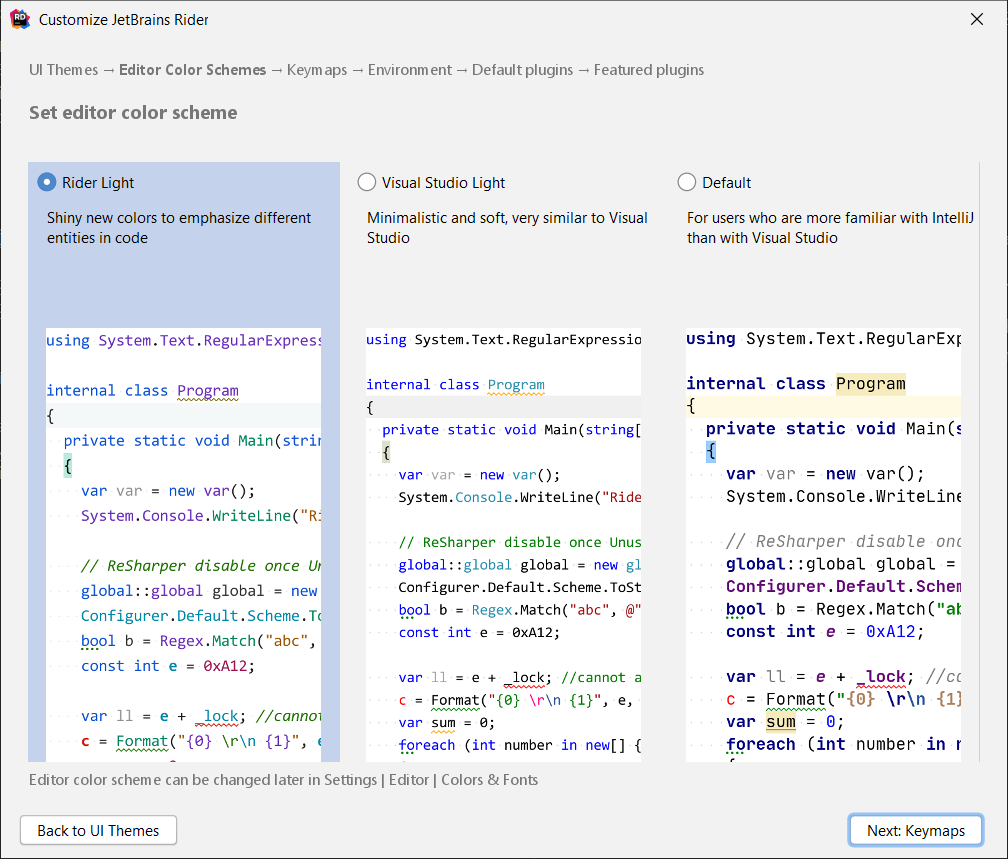
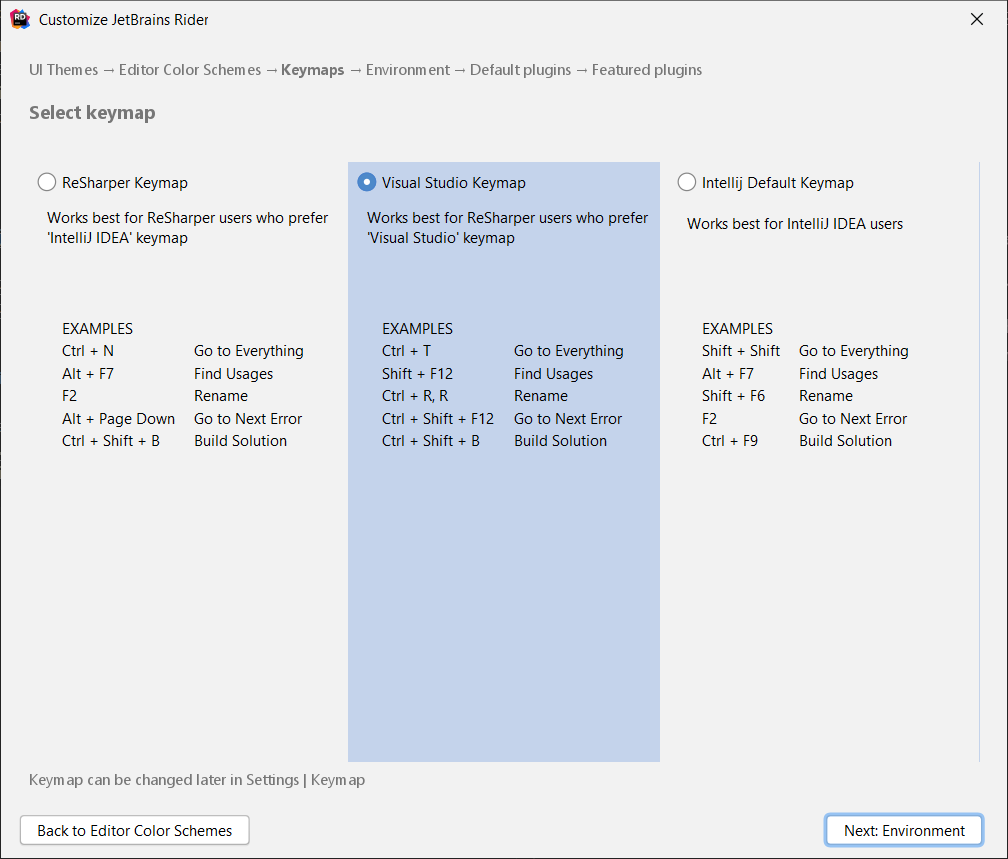
Rider only has a paid version available, but it comes with a 30-day free trial, so download, and install that. When you launch it for the first time, a Customize JetBrains Rider window will appear where you can customize the UI theme, editor color schemes, Keymaps, and setup necessary environments and plugins.
On the last step of the window, click Start using JetBrains Rider to start using Rider.
Create a new ASP.NET Core Web Application with Rider
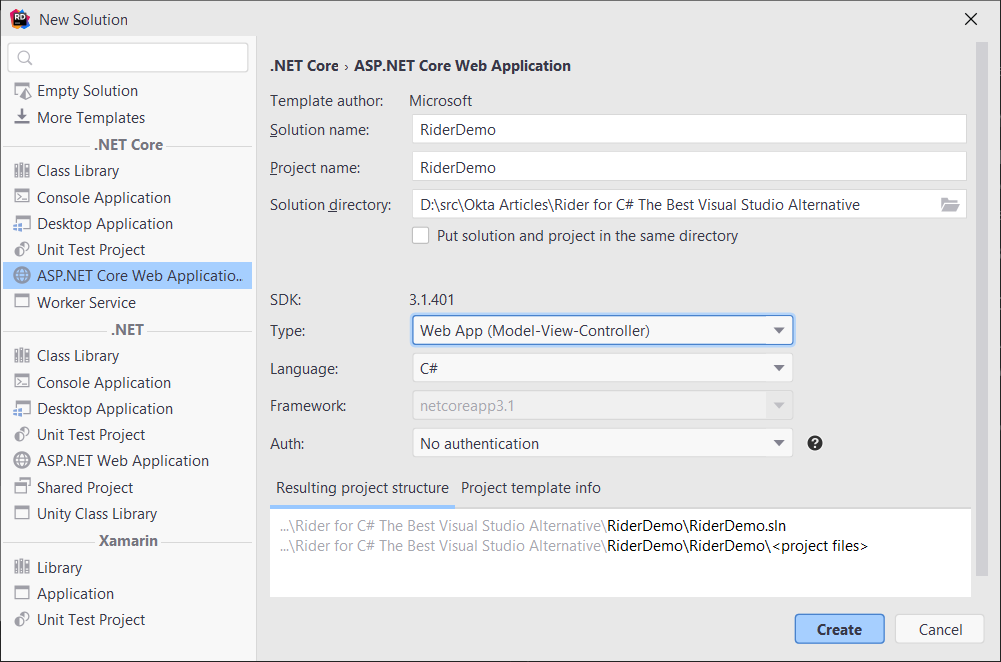
Now that you have finished setting up Rider, you should see a Welcome to JetBrains Rider window. Click on the New Solution button and a new window will appear, showing available project templates. Select ASP.NET Core Web Application from the left panel of the window, enter the name of the solution (I will use RiderDemo), select Web App (Model-View-Controller) for the Type of project, and click Create.
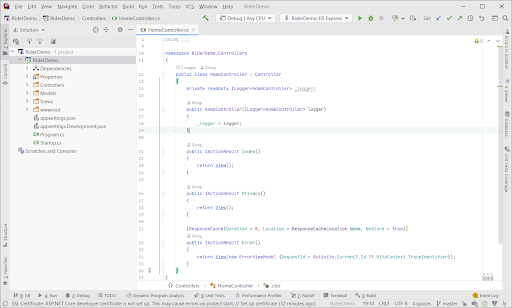
Rider will create a new project which will look like this:
Rider Overview
As you can see, Rider looks quite similar to Visual Studio. It has roughly the same layout and provides many tools and features also found in Visual Studio. One thing you will notice is that Rider includes all the inspections and refactorings that are available in Resharper:

Rider supports navigating ASP.NET Core code so open the HomeController.cs file and hover your cursor over View() in method Index. You will see the full path to the Razor view file and if you Ctrl+click or press F12 on your keyboard, Rider will open the corresponding file in the editor.
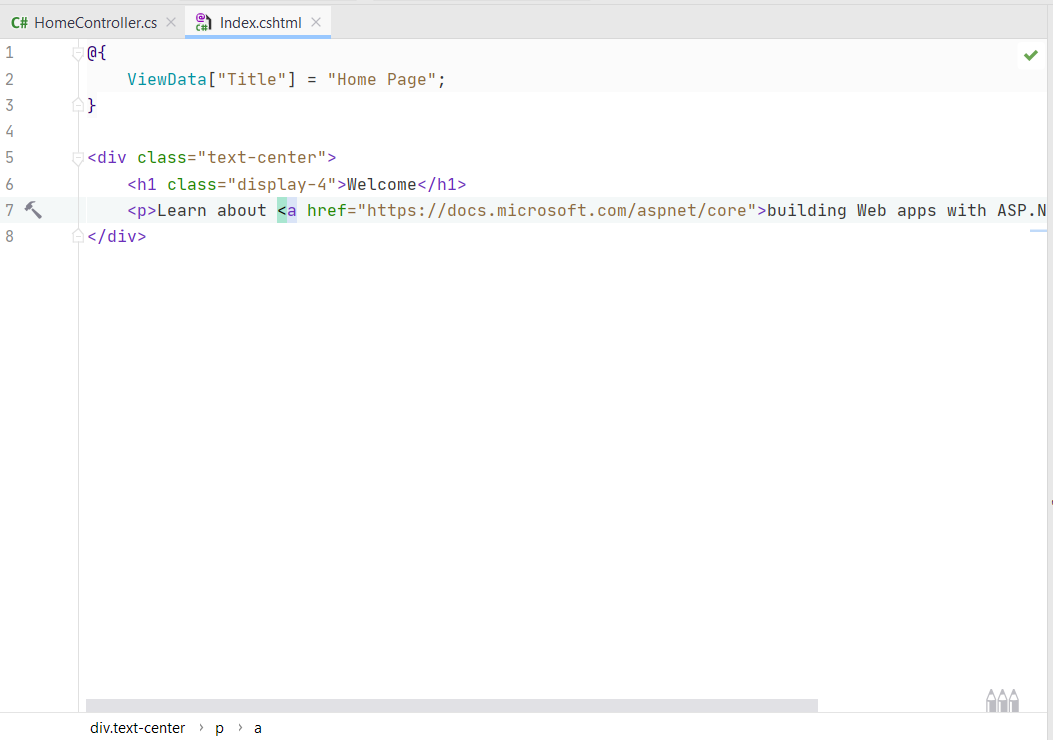
Rider also supports breadcrumbs when navigating inside cshtml files, so you can navigate easily in files with deep HTML structure:
Now let’s run the project. Click Ctrl + F5 or click on the little green play icon (similar to Visual Studio’s) at the top of the window to build and launch the project. You won’t notice any difference for this small project, but on large projects, Rider build can be a lot faster as it only builds projects where build items have actually been changed. This can save a lot of time when working on a solution that contains many projects.
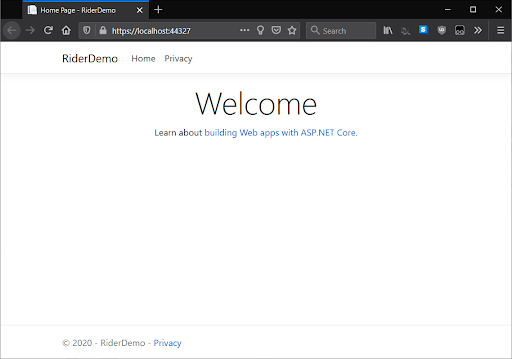
Once the project is built, you will see the web application running in your browser:
Now, let’s move on and add NuGet packages to secure our simple web app with Okta.
Secure ASP.NET Core Web Application with Okta
In this tutorial, I will use Okta to easily secure the API, so that I don’t have to manage the intricacies of rolling over my own identity provider. Okta supports user authentication, multi-factor authentication, and social authentication, as well as all OpenID connect flows out of the box—so it can take care of all the scenarios you would ever need.
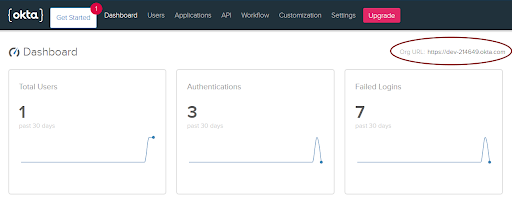
To get started, log in to your Okta Developer Account — via the URL emailed to you after signing up—to access your org’s portal dashboard. Once you log in, make sure to note your Org URL from the upper right corner of the screen:
Now, create a new application. Click Applications in the top menu, and then Add Application. Select Web and click Next.
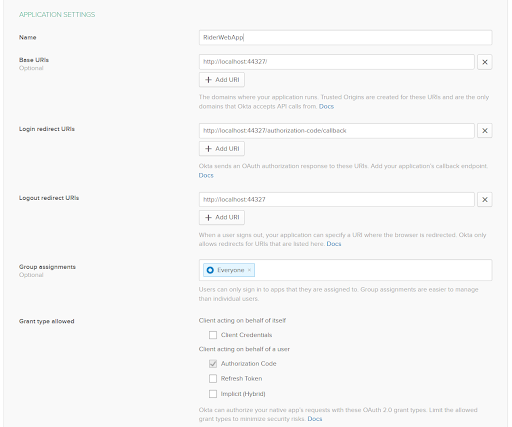
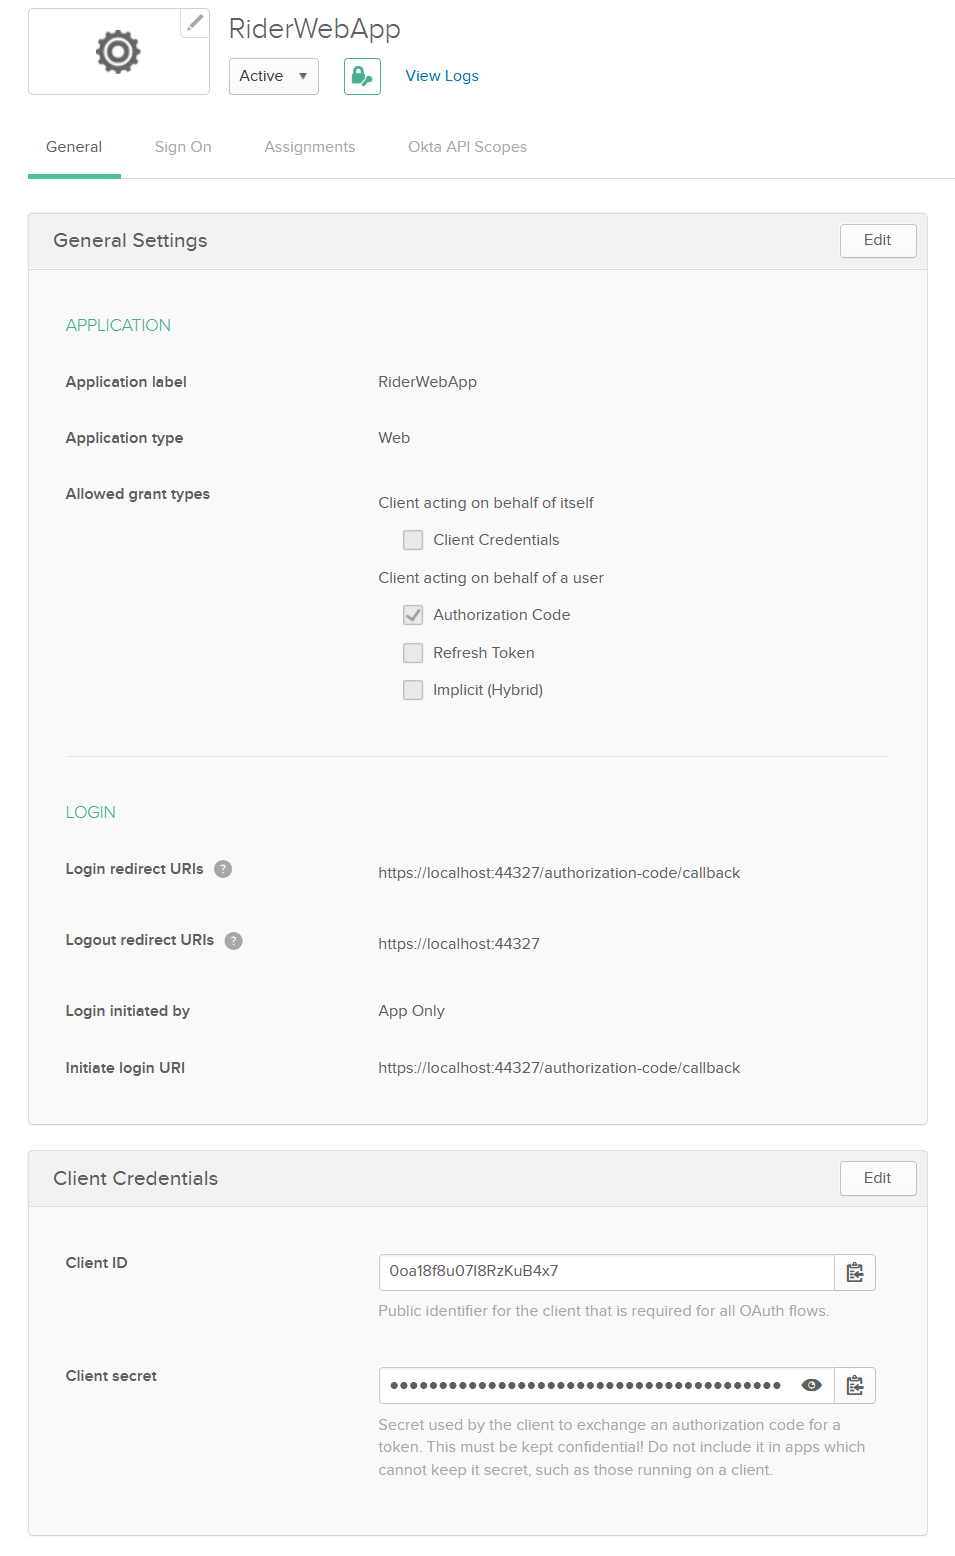
Enter a name for the app (I will use RiderWebApp), replace 8080 with your local port number (in my case it’s 44327) and click Done.
On the next screen, you will see the Client Id and Client Secret of the application. You will need these to configure the Okta middleware, so take note of them:
In Rider, open the appsettings.Development.json file, add a new section Okta below the Logging section, and add the details of your app:
{
  "Logging": {
    "LogLevel": {
      "Default": "Information",
      "Microsoft": "Warning",
      "Microsoft.Hosting.Lifetime": "Information"
    }
  },
  "Okta": {
    "ClientId": "{clientId}",
    "ClientSecret": "{clientSecret}",
    "Domain": "https://{yourOktaDomain}"
  }
}
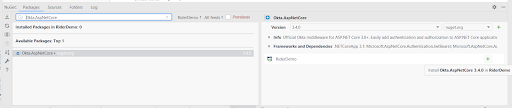
Now, you are ready to add authentication to the project. In Rider, right-click the RiderDemo project and click Manage NuGet Packages. In the NuGet window search for the Okta.AspNetCore package and click on the green plus button to add the package to the project:
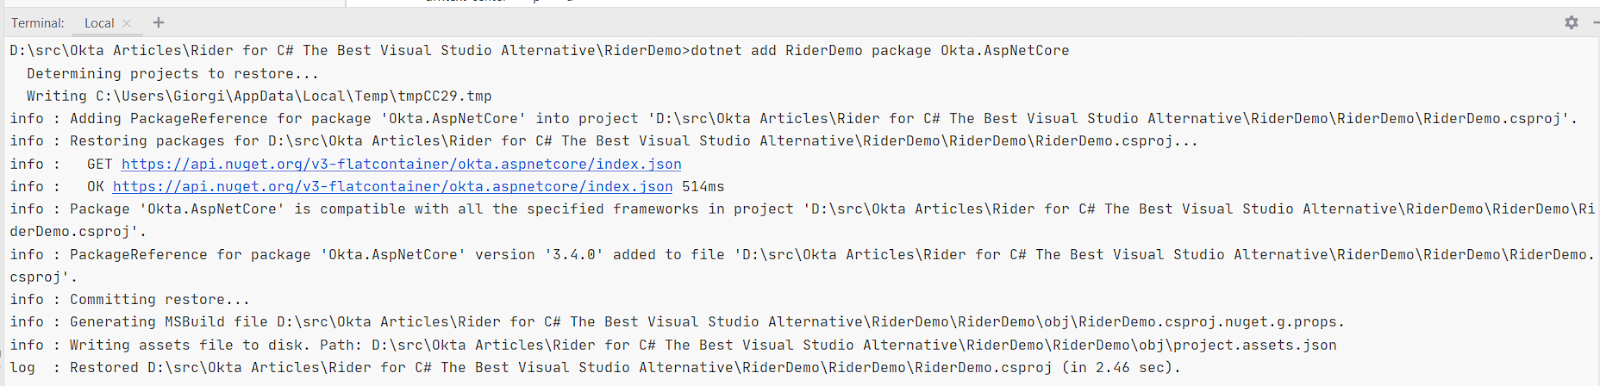
Alternatively, you can open the Terminal window and add the package by running the following command:
dotnet add RiderDemo package Okta.AspNetCore
Now, go to the Startup class and add this code in ConfigureServices before services.AddControllersWithViews():
services.AddAuthentication(options =>
{
  options.DefaultAuthenticateScheme = CookieAuthenticationDefaults.AuthenticationScheme;
  options.DefaultSignInScheme = CookieAuthenticationDefaults.AuthenticationScheme;
  options.DefaultChallengeScheme = OktaDefaults.MvcAuthenticationScheme;
})
.AddCookie()
.AddOktaMvc(new OktaMvcOptions
{
  OktaDomain = Configuration["Okta:Domain"],
  ClientId = Configuration["Okta:ClientId"],
  ClientSecret = Configuration["Okta:ClientSecret"]
});
Next, add the following line to the Configure() method:
app.UseAuthentication();
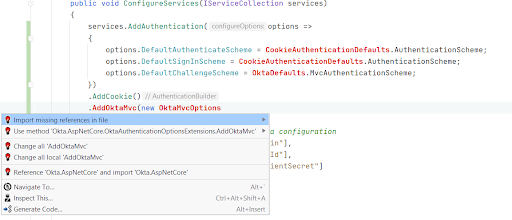
Finally, add the missing using statement below to the Startup.cs file:
using Microsoft.AspNetCore.Authentication.Cookies;
using Okta.AspNetCore;
OR click Alt+Enter on the highlighted errors and select Import missing references in file from the suggested quick fixes:
Now that the Okta middleware is configured, let’s add sign in support to the project.
Open the _Layout.cshtml file and add the following markup above the <ul class="navbar-nav flex-grow-1"> tag:
@if (User.Identity.IsAuthenticated)
{
  <ul class="navbar-nav navbar-right">
    <li class="nav-item">
      <a class="nav-link text-dark" href="#">Hello, @User.Identity.Name</a>
    </li>
    <li>
      <a class="nav-link text-dark" asp-controller="Account" asp-action="Profile" id="profile-button">Profile</a>
    </li>
  </ul>
}
else
{
  <ul class="navbar-nav navbar-right">
    <li>
      <a class="nav-link text-dark" asp-controller="Account" asp-action="SignIn" id="login-button">Sign In</a>
    </li>
  </ul>
}
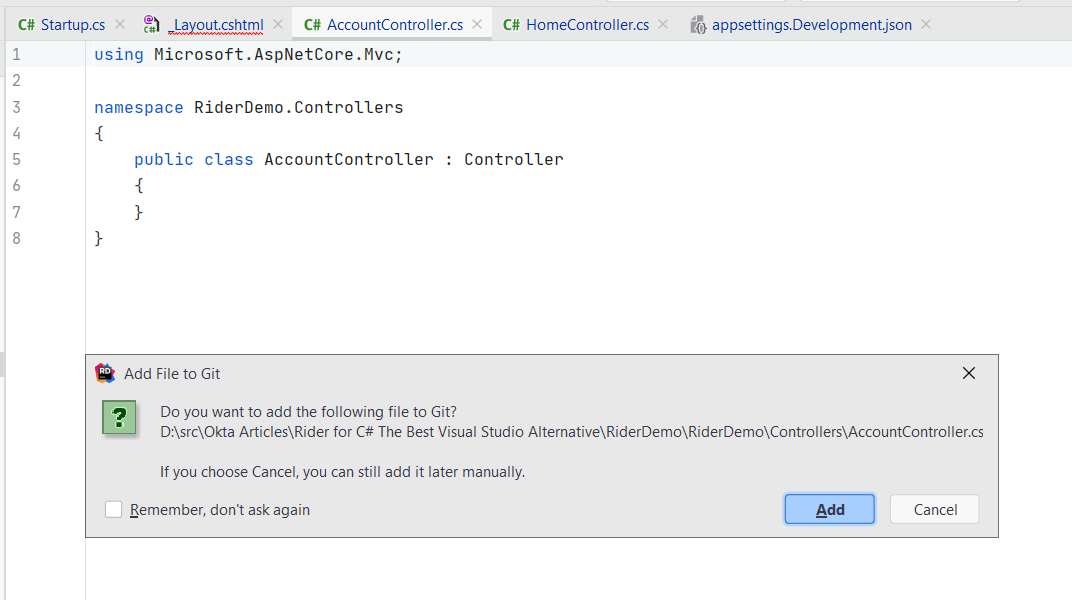
The Sign In and Profile links use ASP.NET Core TagHelpers that generate links to the corresponding ASP.NET Core actions. Rider will detect that there is no AccountController that can handle the links and suggest a quick-fix for adding it. Again, click on the highlighted error and click Create controller ‘Account’ to create AccountController. Do the same for Sign In and Profile actions too.
Rider comes with an integrated git plugin. Because I have the project in a local repo, Rider detects that I added a new file and suggests I add it to Git:
Next, add the following code to the SignIn method:
if (!HttpContext.User.Identity.IsAuthenticated)
{
  return Challenge(OktaDefaults.MvcAuthenticationScheme);
}

return RedirectToAction("Index", "Home");
Finally, run the project and you will see a Sign In link at the top right of the web app. Click the link and you will be redirected to Okta’s Single Sign-On page for authentication. Once you log in, you will be redirected back to the app, and you will be logged in with your Okta account.
Next, I will add a page for displaying and modifying user details.
View and Modify Okta User Details
To get user profile information and make changes to it, I will use the Okta .NET management SDK. Go ahead and install the NuGet package in the RiderDemo package:
dotnet add RiderDemo package Okta.Sdk
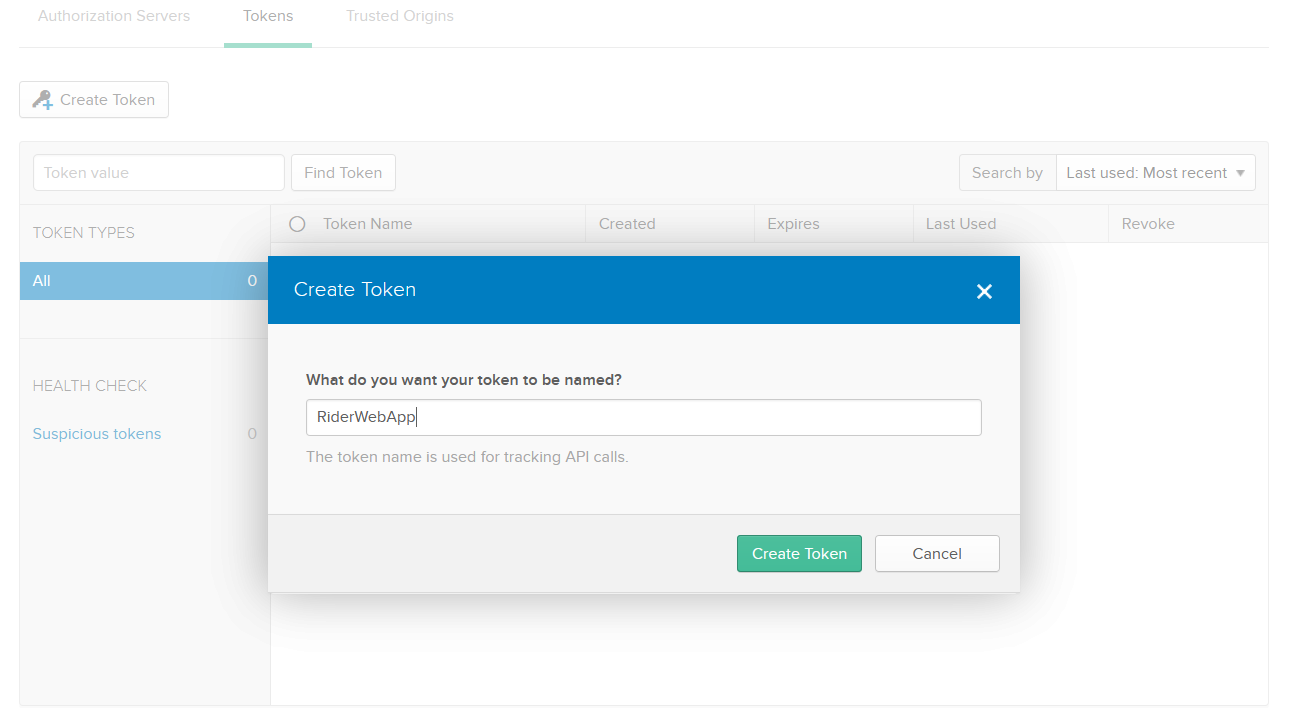
Now open the Okta Developer Console again, go to API in the menu, click Tokens, and click the Create Token button. Enter the name of the token (I will use RiderWebApp again), and click the Create Token button. Make sure you copy the token because you won’t be able to view it again:
In Rider, open the appsettings.Development.json file, and put the value of the token in the Okta section, under the ApiToken key:
"Okta": {
  "ClientId": "{clientId}",
  "ClientSecret": "{clientSecret}",
  "Domain": "https://{yourOktaDomain}",
  "ApiToken": "{ApiToken}"
}
Next, go to the AccountController class, add the field type OktaClient and add a constructor:
private readonly OktaClient oktaClient;

public AccountController(IConfiguration configuration)
{
  oktaClient = new OktaClient(new OktaClientConfiguration
  {
    OktaDomain = configuration["Okta:Domain"],
    Token = configuration["Okta:ApiToken"]
  });
}
ASP.NET Core will inject an instance of the IConfiguration object that you can use to read the values from the settings files we added earlier.
Now, replace the Profile method with the following code:
public async Task<IActionResult> Profile()
{
  var user = await GetOktaUser();

  return View(user);
}
GetOktaUser is a helper method that gets the current user’s details using the Okta .NET Management SDK:
private async Task<IUser> GetOktaUser()
{
  var subject = HttpContext.User.Claims.First(claim => claim.Type == JwtRegisteredClaimNames.Sub).Value;

  return await oktaClient.Users.GetUserAsync(subject);
}
Next, create a Profile.cshtml file in the Views\Account folder that looks like this:
@model Okta.Sdk.IUser

@{
  ViewData["Title"] = "User Profile";
}

<h1>User Profile</h1>

<div>
  <dl class="row">
    <dt class = "col-sm-2">
      @Html.DisplayNameFor(model => model.Profile.FirstName)
    </dt>
    <dd class = "col-sm-10">
      @Html.DisplayFor(model => model.Profile.FirstName)
    </dd>
    <dt class = "col-sm-2">
      @Html.DisplayNameFor(model => model.Profile.LastName)
    </dt>
    <dd class = "col-sm-10">
      @Html.DisplayFor(model => model.Profile.LastName)
    </dd>
    <dt class = "col-sm-2">
      @Html.DisplayNameFor(model => model.Profile.Email)
    </dt>
    <dd class = "col-sm-10">
      @Html.DisplayFor(model => model.Profile.Email)
    </dd>
    <dt class = "col-sm-2">
      @Html.DisplayNameFor(model => model.Profile.City)
    </dt>
    <dd class = "col-sm-10">
      @Html.DisplayFor(model => model.Profile.City)
    </dd>
    <dt class = "col-sm-2">
      @Html.DisplayNameFor(model => model.Profile.CountryCode)
    </dt>
    <dd class = "col-sm-10">
      @Html.DisplayFor(model => model.Profile.CountryCode)
    </dd>
  </dl>
</div>
<div>
  <a asp-action="EditProfile">Edit Profile</a>
</div>
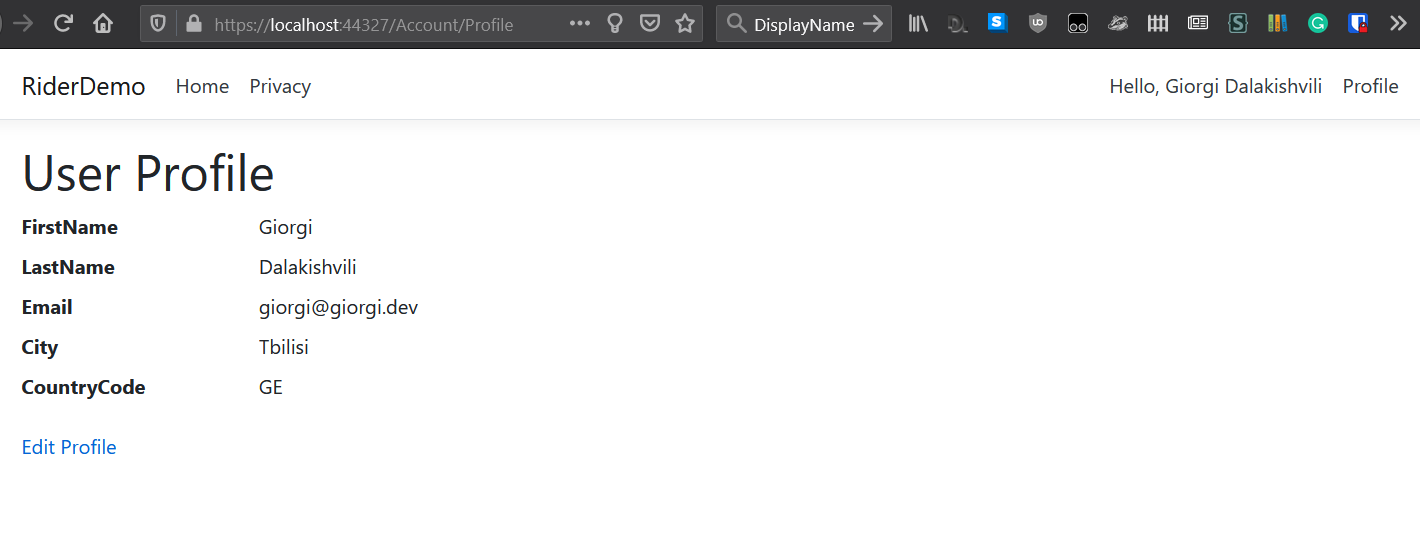
The view simply renders profile details such as the user’s first name and last name, email, city, and country code.
Now, go back to AccountController and add the EditProfile action method and create EditProfile.cshtml view in Views\Account:
public async Task<IActionResult> EditProfile()
{
  var user = await GetOktaUser();

  return View(new UserProfileViewModel
  {
    City = user.Profile.City,
    Email = user.Profile.Email,
    CountryCode = user.Profile.CountryCode,
    FirstName = user.Profile.FirstName,
    LastName = user.Profile.LastName
  });
}
@model UserProfileViewModel

@{
  ViewData["Title"] = "Edit Profile";
}

<h1>Edit Profile</h1>

<div class="row">
  <div class="col-md-4">
    <form asp-action="EditProfile">
      <div asp-validation-summary="ModelOnly" class="text-danger"></div>
      <div class="form-group">
        <label asp-for="FirstName" class="control-label"></label>
        <input asp-for="FirstName" class="form-control" />
        <span asp-validation-for="FirstName" class="text-danger"></span>
      </div>
      <div class="form-group">
        <label asp-for="LastName" class="control-label"></label>
        <input asp-for="LastName" class="form-control" />
        <span asp-validation-for="LastName" class="text-danger"></span>
      </div>
      <div class="form-group">
        <label asp-for="Email" class="control-label"></label>
        <input asp-for="Email" class="form-control" />
        <span asp-validation-for="Email" class="text-danger"></span>
      </div>
      <div class="form-group">
        <label asp-for="City" class="control-label"></label>
        <input asp-for="City" class="form-control" />
        <span asp-validation-for="City" class="text-danger"></span>
      </div>
      <div class="form-group">
        <label asp-for="CountryCode" class="control-label"></label>
        <input asp-for="CountryCode" class="form-control" />
        <span asp-validation-for="CountryCode" class="text-danger"></span>
      </div>
      <div class="form-group">
        <input type="submit" value="Save" class="btn btn-primary" />
      </div>
    </form>
  </div>
</div>

<div>
  <a asp-action="Profile">Back to Profile</a>
</div>

@section Scripts {
  @{await Html.RenderPartialAsync("_ValidationScriptsPartial");}
}
Finally, add an overload of the EditProfile method that will accept the posted values and save changes to the user in Okta:
[HttpPost]
[ValidateAntiForgeryToken]
public async Task<IActionResult> EditProfile(UserProfileViewModel profile)
{
  if (ModelState.IsValid)
  {
    var user = await GetOktaUser();
    user.Profile.FirstName = profile.FirstName;
    user.Profile.LastName = profile.LastName;
    user.Profile.Email = profile.Email;
    user.Profile.City = profile.City;
    user.Profile.CountryCode = profile.CountryCode;

    await oktaClient.Users.UpdateUserAsync(user, user.Id, null);

    return RedirectToAction("Profile");
  }

  return View(profile);
}
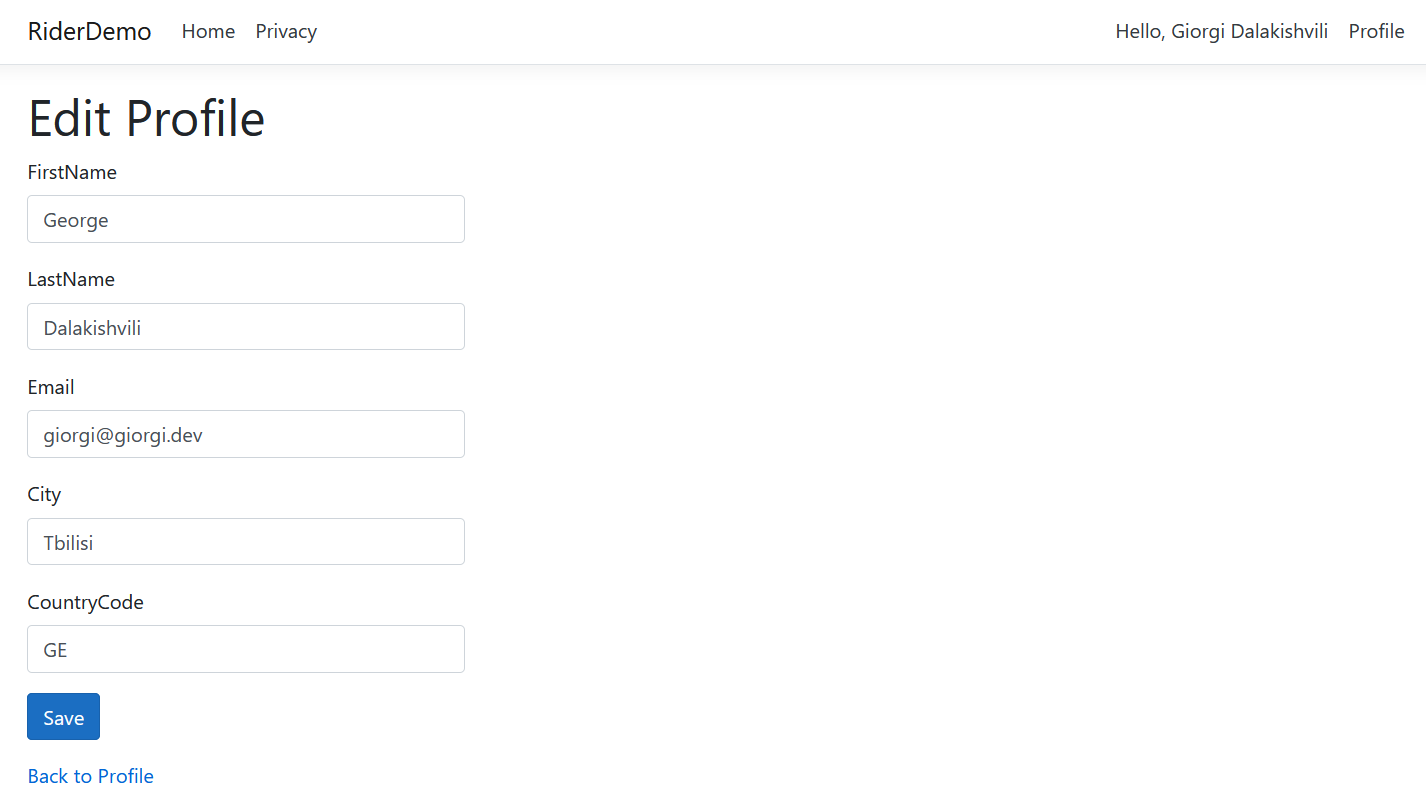
Now, run the project, sign in and you will be able to view and edit your Okta profile information:
That’s it! We saw how to build a simple web app with Rider, secure it with Okta Single Sign On and manage a logged in user’s profile.
What You Learned
In this tutorial, we went through some of the features of Rider. While Rider doesn’t have all the features that Visual Studio has including IntelliCode, it does offer faster build times, built-in quick fixes and refactorings, and better git integration, among other benefits.
Give Rider a try, get the full source code of the project from GitHub, and let us know what you think in the comments below.
Learn More About .NET and Okta
If you are interested in learning more about security and .NET check out these other great articles:
- Build an Authenticated Web App in C# with Blazor + ASP.NET Core 3.0
- How to Adapt Your .NET App for SameSite
- The Most Exciting Promise of .NET 5
- Get Started with Blazor and Web Assembly
- ASP.NET Core 3.0 MVC Secure Authentication
Make sure to follow us on Twitter, subscribe to our YouTube Channel and check out our Twitch stream so that you never miss any awesome content!
Okta Developer Blog Comment Policy
We welcome relevant and respectful comments. Off-topic comments may be removed.