A Quick Guide to Security with Vaadin Fusion and Spring Boot
Building a web application involves a lot of moving pieces. You have a backend server handling API calls, a frontend application running business logic, and you need to somehow make sure both are in sync and secure.
In this blog post, you’ll learn how to use Vaadin Fusion, Spring Boot, and Okta to create a full-stack web application with authentication. Specifically, you’ll learn how to:
-
Create a Spring Boot-based Vaadin Fusion app
-
Secure server endpoints with Okta
-
Use Okta Auth JS for logging in and securing Vaadin routes

I collaborated on this post with Marcus Hellberg, Head of Community at Vaadin. Marcus and I met years ago on the conference circuit, and we’re both from Finland. My great grandparents were Finnish and built the sauna and cabin I grew up in in Montana’s remote woods. Marcus and I share a passion for using Java and web technologies to build fast, efficient applications.
You might notice we keep saying "Vaadin Fusion" instead of "Vaadin." I’ve always thought Vaadin was a web framework based on Google’s GWT (Google Web Toolkit). I asked Marcus about this, and he explained to me there are now two products—Vaadin Flow and Vaadin Fusion.
The classic Vaadin server-side Java API is now called Vaadin Flow. Vaadin Fusion is a new TypeScript frontend framework designed for Java backends. Both offer full-stack type safety and use the same set of UI components. Vaadin is no longer based on GWT. Instead, its components use web component standards.
Note: In May 2025, the Okta Integrator Free Plan replaced Okta Developer Edition Accounts, and the Okta CLI was deprecated.
We preserved this post for reference, but the instructions no longer work exactly as written. Replace the Okta CLI commands by manually configuring Okta following the instructions in our Developer Documentation.
Prerequisites
-
Maven 3.6+
You can find the full completed source code for this tutorial on GitHub, in the oktadeveloper/okta-vaadin-fusion-spring-boot-example repository.
What Is Vaadin Fusion?
Vaadin Fusion is an open-source, front-end framework designed specifically for Java backends. Fusion gives you type-safe access to your backend from your client app by auto-generating TypeScript interfaces for your server Java objects. It wraps REST calls in async TypeScript methods, so you can access your backend as easily as calling any TypeScript function.
End-to-end type checking means you catch any breaking changes at build time, not in production. Oh, and there’s auto-complete everywhere, so you can focus on coding, not reading API docs.
Views are written in TypeScript with LitElement, a lightweight, reactive component library.
Create a Spring Boot-based Vaadin Fusion Application
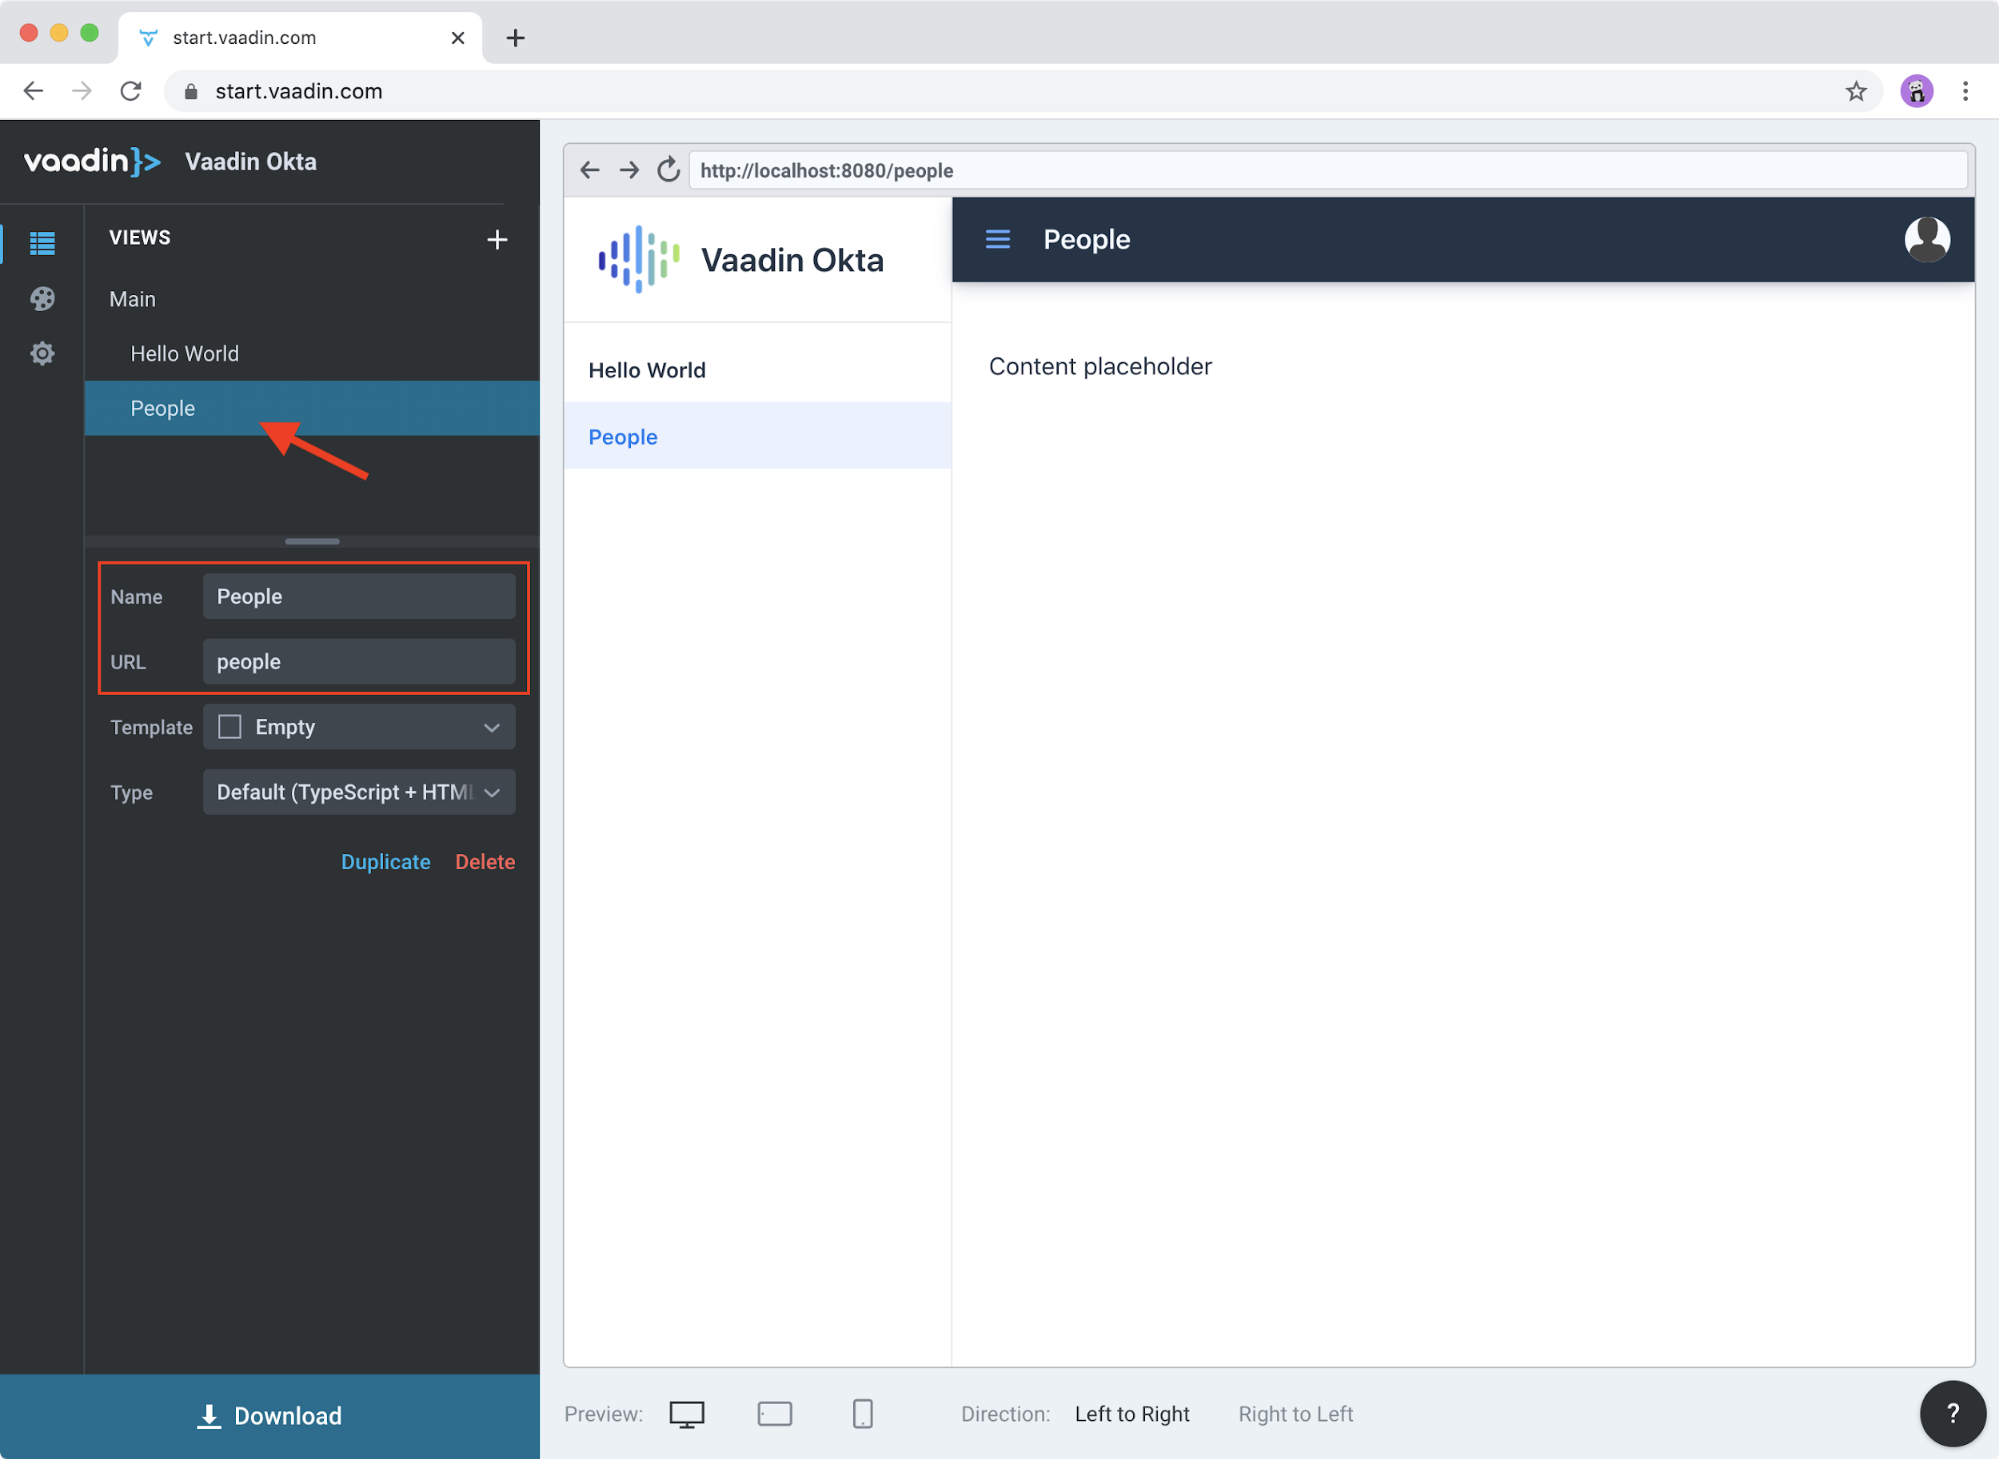
Begin by creating a new Vaadin Fusion app with the Vaadin starter wizard. It allows you to configure views, tech stack, and theme before downloading an app starter.
Rename the About view to "People" and change its URL to "people":
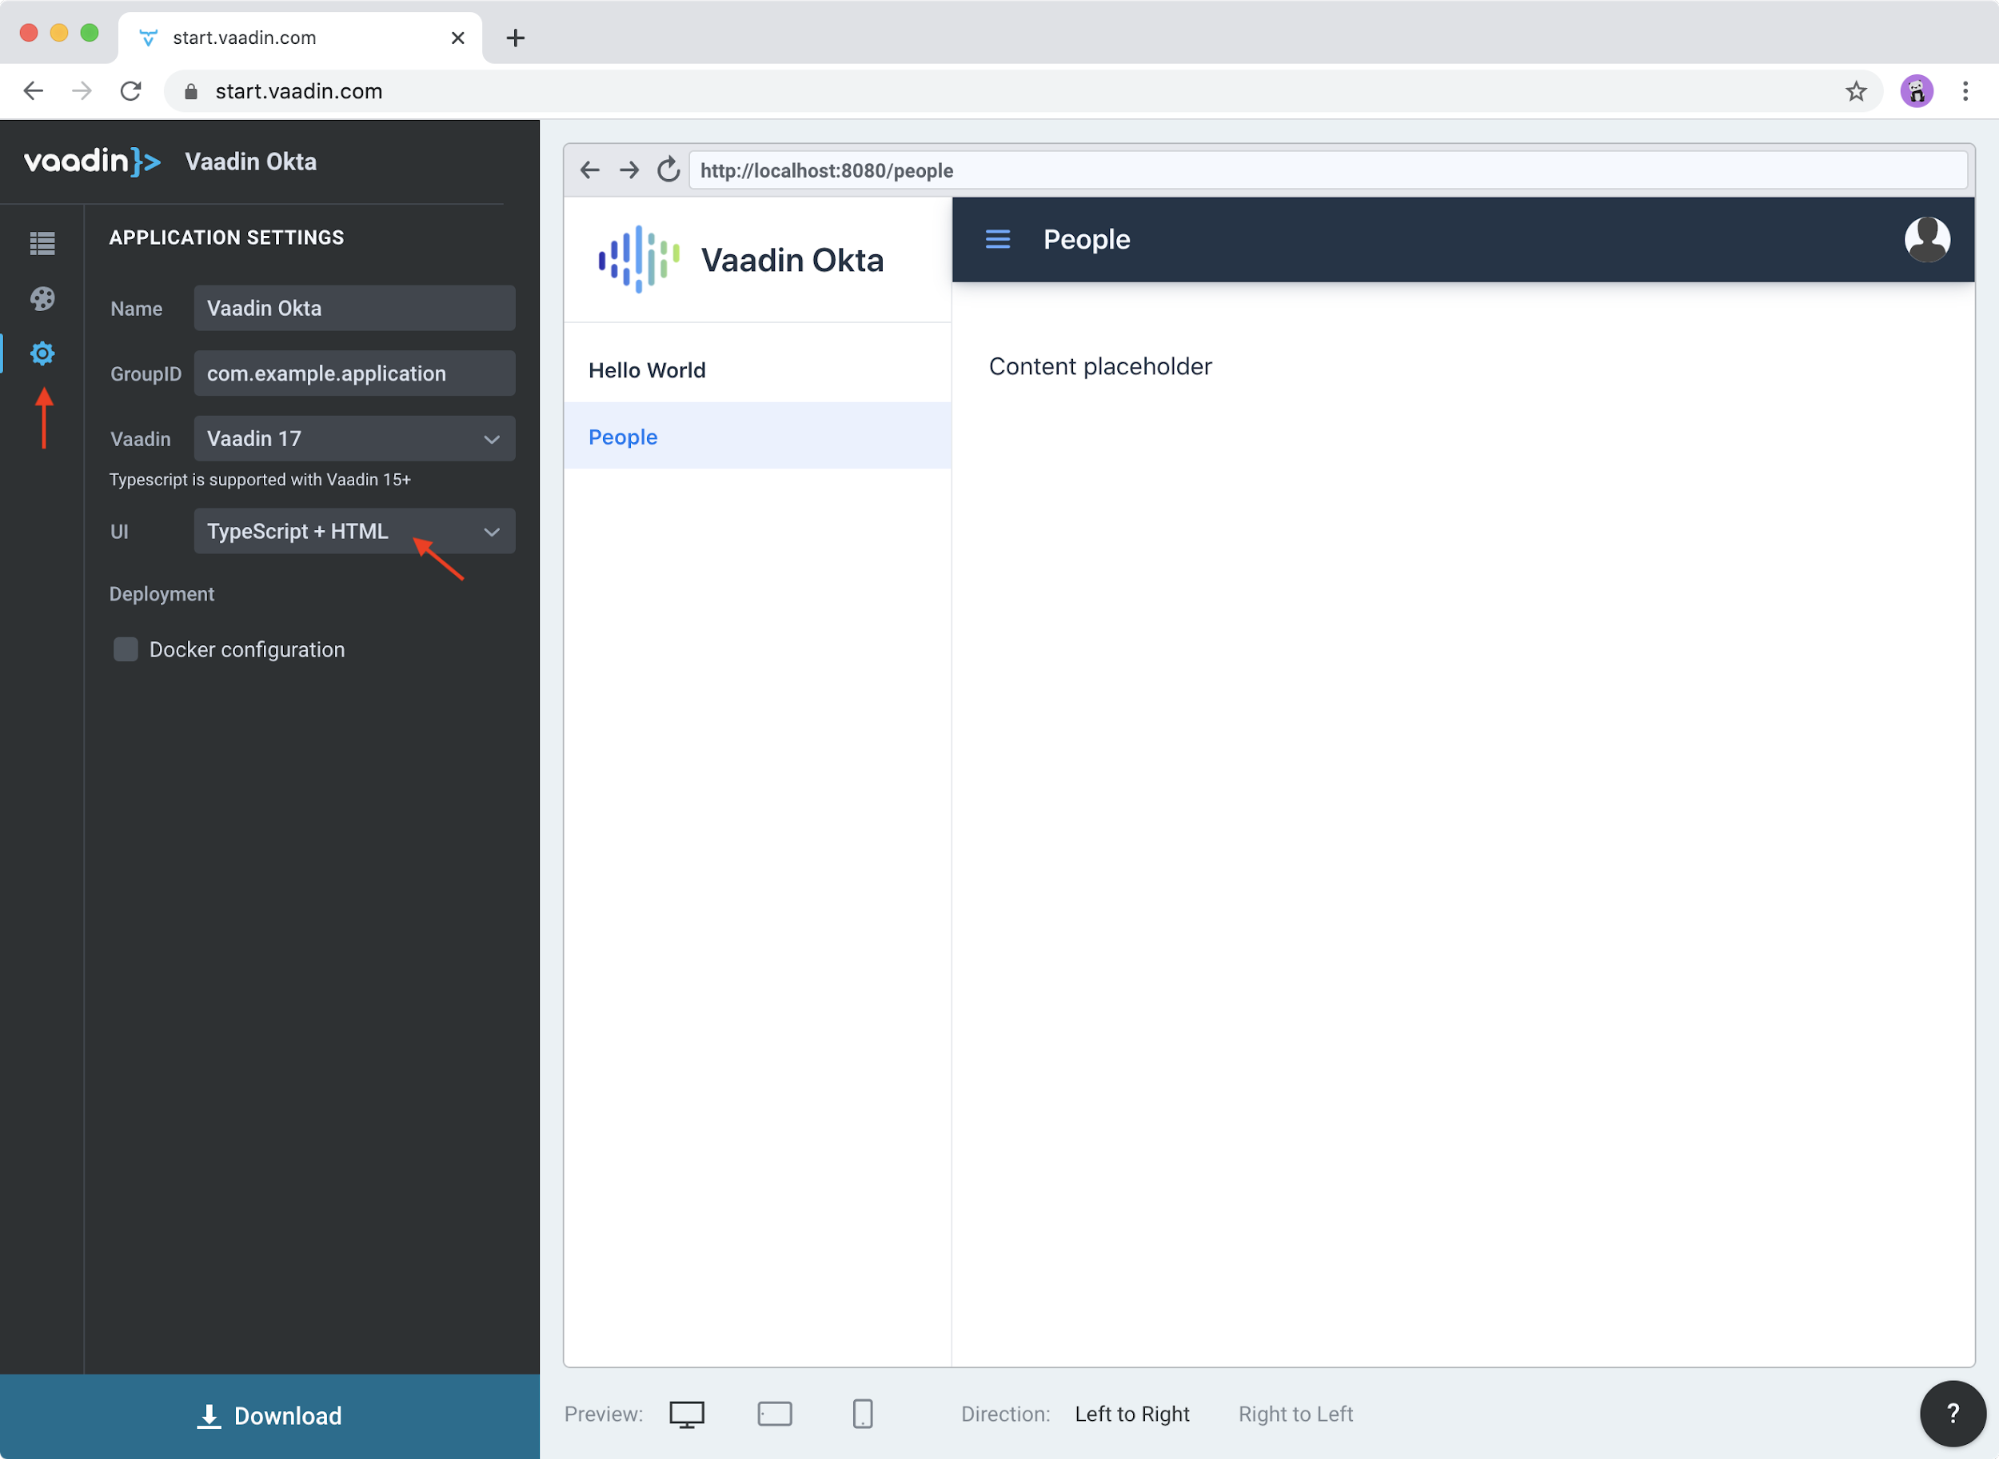
Go into the application settings and change the name to Vaadin Okta. Then, select TypeScript + HTML for the UI stack to get a Fusion project.
-
Click Download, and you’ll get a zip file containing a Maven project.
-
Open the project in your IDE.
The two important folders in the project are:
-
/frontend- This folder contains all the frontend code -
/src/main/java- This folder includes all the backend code, which is a Spring Boot app
Start the application with the following command:
mvnThe launcher should open up the app in your default browser. If not, navigate to http://localhost:8080.
Secure Your Spring Boot Backend Services
Vaadin Fusion uses type-safe endpoints for server access. You create an endpoint by annotating a class with @Endpoint. This will export all the methods in the class and make them callable from TypeScript. Vaadin will also generate TypeScript interfaces for any data types the methods use.
Vaadin endpoints require authentication by default. You can explicitly make an endpoint class or a single method accessible to unauthenticated users by adding an @AnonymousAllowed annotation.
In this app, you want to restrict access to only authenticated users. You’ll use OpenID Connect (OIDC) and Okta to make this possible.
Add the Okta Spring Boot Starter
Add the Okta Spring Boot starter and Lombok dependencies to the <dependencies> section of your pom.xml file.
<dependency>
    <groupId>com.okta.spring</groupId>
    <artifactId>okta-spring-boot-starter</artifactId>
    <version>1.4.0</version>
</dependency>

<!-- Only for convenience, not required for using Vaadin or Okta -->
<dependency>
    <groupId>org.projectlombok</groupId>
    <artifactId>lombok</artifactId>
</dependency>
Make sure your IDE imports the dependencies, or re-run mvn.
Register an OpenID Connect Application
Before you begin, you’ll need a free Okta developer account. Install the Okta CLI and run okta register to sign up for a new account. If you already have an account, run okta login.
Then, run okta apps create. Select the default app name, or change it as you see fit.
Choose Single-Page App and press Enter.
Use http://localhost:8080/callback for the Redirect URI and accept the default Logout Redirect URI of http://localhost:8080.
What does the Okta CLI do?
The Okta CLI will create an OIDC Single-Page App in your Okta Org. It will add the redirect URIs you specified and grant access to the Everyone group. It will also add a trusted origin for http://localhost:8080. You will see output like the following when it’s finished:
Okta application configuration:
Issuer:    https://dev-133337.okta.com/oauth2/default
Client ID: 0oab8eb55Kb9jdMIr5d6
NOTE: You can also use the Okta Admin Console to create your app. See Create a Single-Page App for more information.
You only need the issuer in src/main/resources/application.properties; you can delete the client ID and secret for tighter security.
okta.oauth2.issuer=https://{yourOktaDomain}/oauth2/defaultConfigure Spring Security
Vaadin integrates with Spring Security to handle authorization. Instead of restricting access to specific routes as you would with Spring REST controllers, you need permit all traffic to /** so Vaadin can handle security.
Vaadin is configured to:
-
Serve
index.htmlfor the root path and any unmatched server route -
Serve static assets
-
Handle authorization and cross-site request forgery (CSRF) protection in server endpoints
By default, all server endpoints require an authenticated user. You can allow anonymous access to an endpoint or a method by adding an @AnonymousAllowed annotation. You can further restrict access by adding @RolesAllowed to an endpoint or a method.
The security configuration below assumes you are only serving a Vaadin Fusion application. Suppose you are also serving Spring REST controllers or other non-Vaadin resources. In that case, you need to configure their access control separately, for instance, adding antMatchers("/api/**").authenticated() if you serve REST APIs under /api.
|
Create a new class SecurityConfiguration.java in the same package as Application.java with the following contents:
package com.example.application;

import com.okta.spring.boot.oauth.Okta;

import org.springframework.http.HttpMethod;
import org.springframework.security.config.annotation.web.builders.HttpSecurity;
import org.springframework.security.config.annotation.web.builders.WebSecurity;
import org.springframework.security.config.annotation.web.configuration.EnableWebSecurity;
import org.springframework.security.config.annotation.web.configuration.WebSecurityConfigurerAdapter;

@EnableWebSecurity
public class SecurityConfiguration extends WebSecurityConfigurerAdapter {

    @Override
    public void configure(WebSecurity web) throws Exception {
        // @formatter:off
        web.ignoring()
          .antMatchers(HttpMethod.OPTIONS, "/**")
          .antMatchers("/**/*.{js,html,css,webmanifest}");
        // @formatter:on
    }

    @Override
    protected void configure(HttpSecurity http) throws Exception {
        // @formatter:off
        // Vaadin handles CSRF for its endpoints

        http.csrf().ignoringAntMatchers("/connect/**")
            .and()
            .authorizeRequests()
            // allow access to everything, Vaadin will handle security
            .antMatchers("/**").permitAll()
            .and()
            .oauth2ResourceServer().jwt();
        // @formatter:on

        Okta.configureResourceServer401ResponseBody(http);
    }
}
Create a Vaadin Endpoint for Accessing Data
Now that you have the server set up for authenticating requests add a service you can call from the client app.
First, create a Person.java class to use as the data model in the com.example.application.views.people package.
package com.example.application.views.people;

import lombok.AllArgsConstructor;
import lombok.Data;

@Data
@AllArgsConstructor
public class Person {
    private String firstName;
    private String lastName;
}
If you aren’t using Lombok, omit the annotations and add a constructor that takes in firstName and lastName, and create getters and setters for both.
| If you’re doing this tutorial in an IDE, you may need to enable annotation processing so Lombok can generate code for you. See Lombok’s instructions { Eclipse, IntelliJ IDEA } for more information. |
Open PeopleEndpoint.java and replace the contents with the following:
package com.example.application.views.people;

import com.vaadin.flow.server.connect.Endpoint;

import java.util.ArrayList;
import java.util.List;

@Endpoint
public class PeopleEndpoint {

    // We'll use a simple list to hold data
    private List<Person> people = new ArrayList<>();

    public PeopleEndpoint() {
        // Add one person so we can see that everything works
        people.add(new Person("Jane", "Doe"));
    }

    public List<Person> getPeople() {
        return people;
    }

    public Person adEclipsedPerson(Person person) {
        people.add(person);
        return person;
    }
}
Vaadin will make the getPeople() and addPerson() methods available as asynchronous TypeScript methods. It will also generate a TypeScript interface for Person, so you can access the same type-information of both on the server and in the client.
Call the Spring Boot Endpoint from Vaadin Fusion
Create a view that uses the server API. Open frontend/views/people/people-view.ts and replace its code with the following:
import {
  LitElement,
  html,
  css,
  customElement,
  internalProperty,
} from 'lit-element';
import Person from '../../generated/com/example/application/views/people/Person';

import '@vaadin/vaadin-text-field';
import '@vaadin/vaadin-button';
import { Binder, field } from '@vaadin/form';
import PersonModel from '../../generated/com/example/application/views/people/PersonModel';
import { addPerson, getPeople } from '../../generated/PeopleEndpoint';

@customElement('people-view')
export class PeopleView extends LitElement {
  @internalProperty()
  private people: Person[] = [];
  @internalProperty()
  private message = '';

  // Manages form state, binds inputs to the model
  private binder = new Binder(this, PersonModel);

  render() {
    const { model } = this.binder;

    return html`
     <h1>People</h1>

     <div class="message">${this.message}</div>

     <ul>
       ${this.people.map(
      (person) => html`<li>${person.firstName} ${person.lastName}</li>`
    )}
     </ul>

     <h2>Add new person</h2>
     <div class="form">
       <vaadin-text-field
         label="First Name"
         ...=${field(model.firstName)}
       ></vaadin-text-field>
       <vaadin-text-field
         label="Last Name"
         ...=${field(model.lastName)}
       ></vaadin-text-field>
       <vaadin-button @click=${this.add}>Add</vaadin-button>
     </div>
   `;
  }

  async connectedCallback() {
    super.connectedCallback();
    try {
      this.people = await getPeople();
    } catch (e) {
      this.message = `Failed to get people: ${e.message}.`;
    }
  }

  async add() {
    try {
      const saved = await this.binder.submitTo(addPerson);
      if (saved) {
        this.people = [...this.people, saved];
        this.binder.clear();
      }
    } catch (e) {
      this.message = `Failed to save: ${e.message}.`;
    }
  }

  static styles = css`
   :host {
     display: block;
     padding: var(--lumo-space-m) var(--lumo-space-l);
   }
 `;
}
Here’s what this code does:
-
Defines two internal properties:
peopleandmessageto hold the component’s state. Any time a property changes, the template will get re-rendered efficiently. -
Initialized a
Binderfor handling the new-person form. It keeps track of the model value, handles validations, and submits the value to the endpoint. -
The template:
-
Lists all people in an unordered list (
<ul>) -
Displays a form for adding new people. The form uses two Vaadin components:
vaadin-text-fieldandvaadin-button. The fields are bound to the Binder with the help of a spread operator (…=${field(…)}). You can read more about forms in the Vaadin documentation -
The Add button calls the
add()method, which submits the form to the backend and adds the savedPersonto the people array.
-
-
If any of the server calls fail,
messagegets populated to inform the user.
Start Your Vaadin + Spring Boot App
Start the application with the following command:
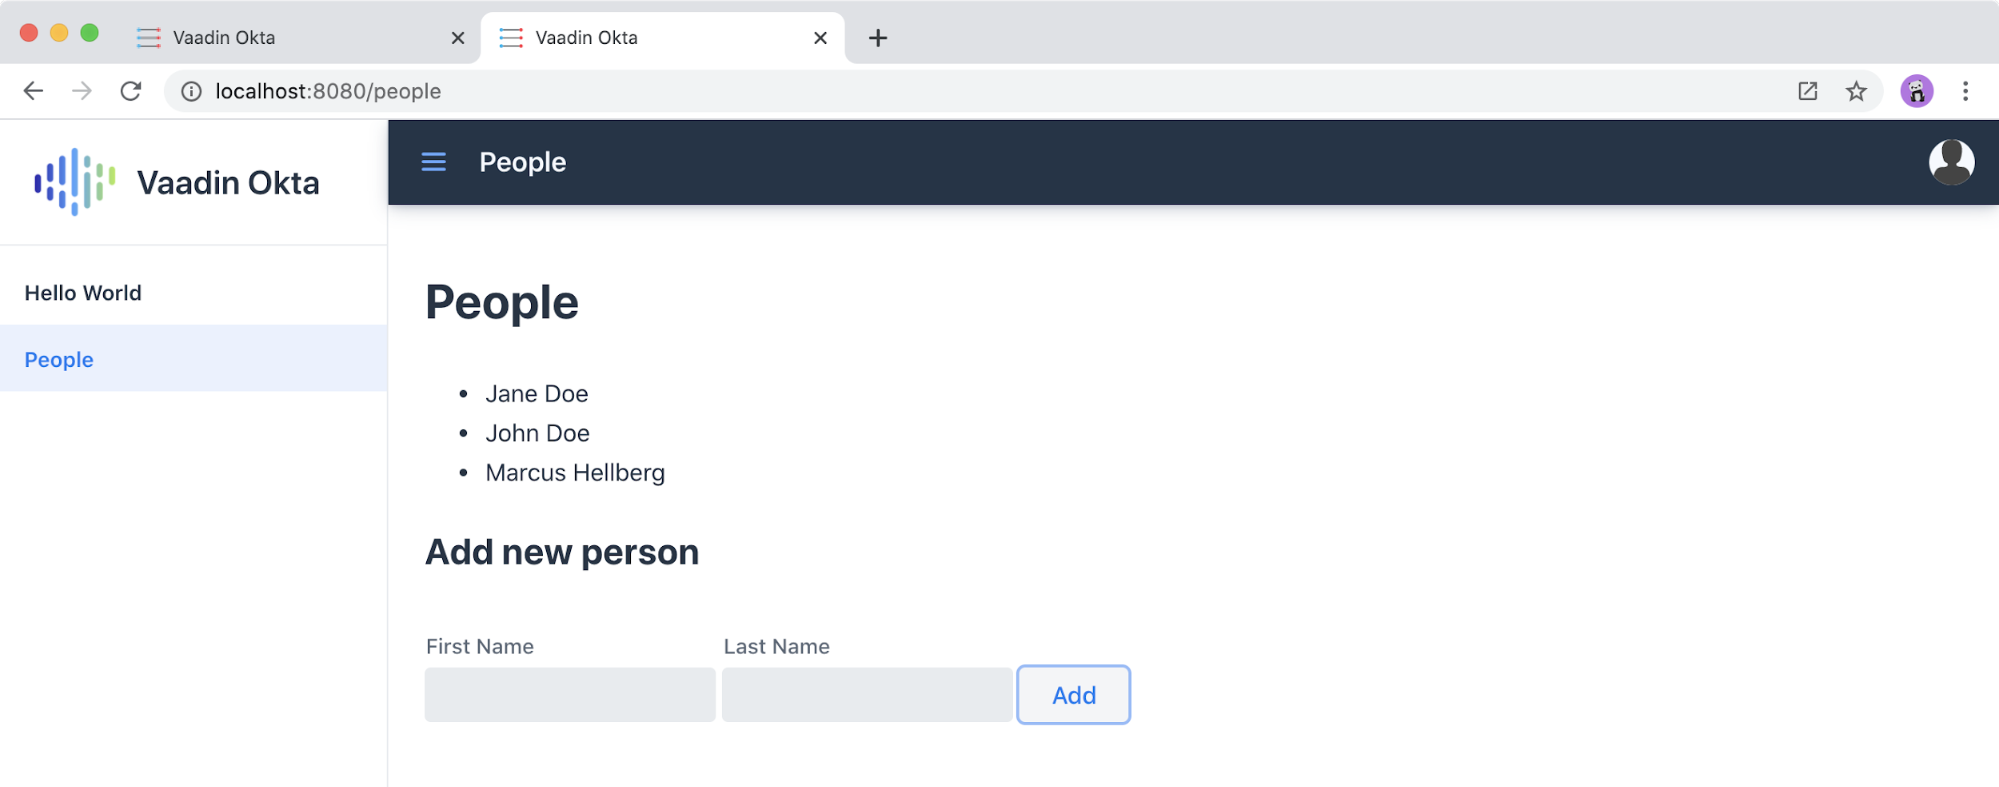
mvnYou should now be able to launch the application and see the views. However, if you try to access the People page, you’ll get an error because you aren’t authenticated.
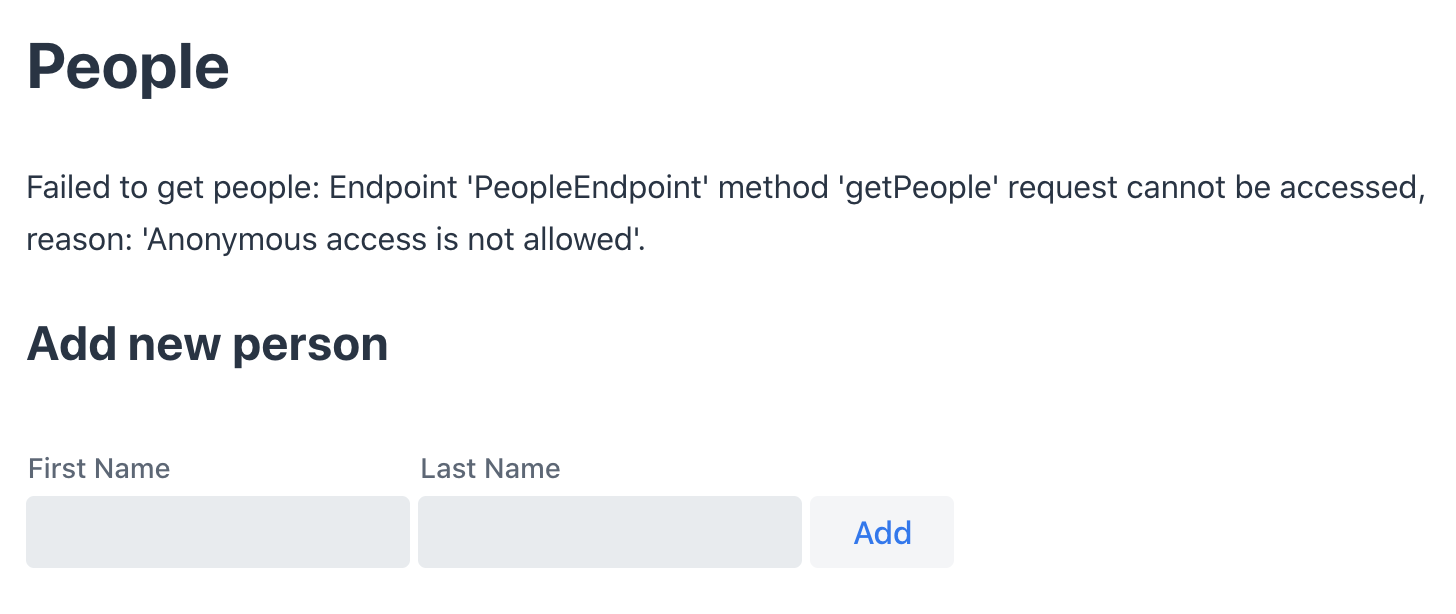
You need to add a login view and authenticate the user before calling any of the secure endpoints.
Add a Vaadin Login Page and Restrict Access to Views
You are going to use a custom login screen and Okta Auth JS to authenticate users. You will do this in three steps:
-
Create a service for handling everything auth related
-
Create a login view
-
Restrict view access to logged-in users and redirect unauthenticated users to the login view
Create an Auth Service for Authentication
Begin by installing the Okta Auth JS library with npm:
npm i @okta/okta-auth-js@4.0.3Then, create a new file, auth.ts, in the frontend folder. This is where all the authentication magic happens.
import { AccessToken, OktaAuth } from '@okta/okta-auth-js';

const authClient = new OktaAuth({
  issuer: 'https://{yourOktadomain}/oauth2/default', // use your own
  clientId: '{frontend app client id}', // use your own
  redirectUri: window.location.origin + '/callback',
  pkce: true
});

const isAuthenticated = async () => {
  // Checks if there is a current accessToken in the TokenManger.
  return !!(await authClient.tokenManager.get('accessToken'));
};

const signIn = async (username: string, password: string) => {
  const authResult = await authClient.signIn({
    username,
    password,
    scopes: ['openid', 'email', 'profile'],
  });

  if (authResult.status === 'SUCCESS') {
    authClient.token.getWithRedirect({
      sessionToken: authResult.sessionToken,
      responseType: 'id_token',
    });
  }
};

const signOut = () => authClient.signOut();

const handleAuthentication = async () => {
  if (authClient.token.isLoginRedirect()) {
    try {
      const tokenResponse = await authClient.token.parseFromUrl();
      const {accessToken, idToken} = tokenResponse.tokens;
      if (!accessToken || !idToken) return false;

      authClient.tokenManager.add('accessToken', accessToken);
      authClient.tokenManager.add('idToken', idToken);
      return true;
    } catch (err) {
      console.warn(`authClient.token.parseFromUrl() errored: ${err}`);
      return false;
    }
  }
  return false;
};

const getAccessToken = async () => {
  const token = (await authClient.tokenManager.get(
    'accessToken'
  )) as AccessToken;

  return token;
};

export {
  isAuthenticated,
  signIn,
  signOut,
  handleAuthentication,
  getAccessToken,
};
Here’s what auth.ts does:
-
It creates an internal instance of
AuthClientconfigured with your info -
It exports the following methods:
-
isAuthenticatedreturns a boolean indicating whether or not the user is authenticated -
signIntakes a username and password and asks the client to authenticate. The client will redirect to the redirect URI -
handleAuthenticationreads the response from the redirect and saves the returned tokens -
getAccessTokenreturns the access token for use with server calls -
signOutsigns out the user
-
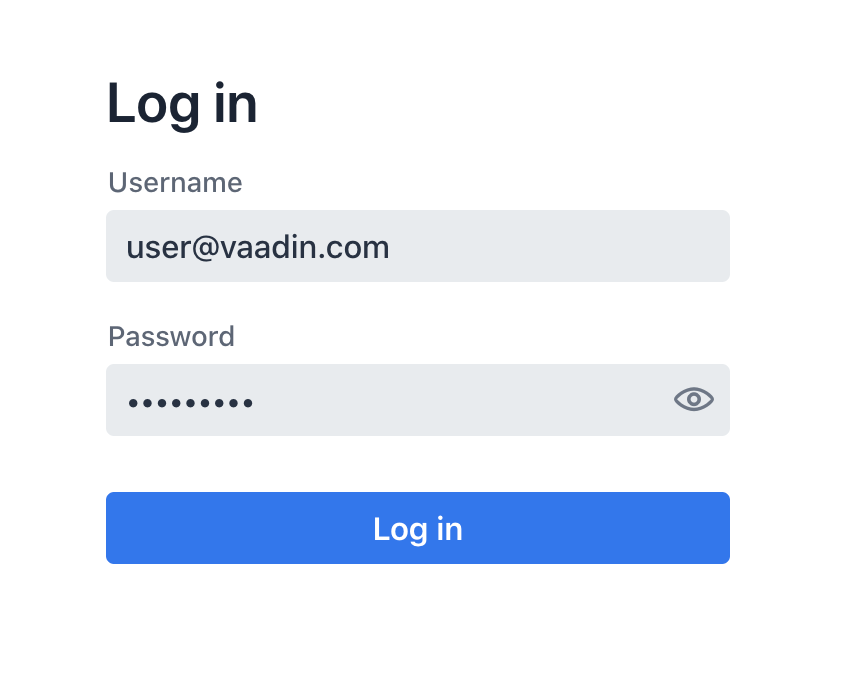
Create a Login View
Next, create a login view so users can enter their credentials and get authenticated.
Create a new folder frontend/views/login. In that folder, create a new file login-view.ts with the following content:
import { customElement, html, internalProperty, LitElement } from 'lit-element';
import { signIn } from '../../auth';
import '@vaadin/vaadin-login/vaadin-login-form';

@customElement('login-view') (1)
export class LoginView extends LitElement {
  @internalProperty()
  private error = !!new URLSearchParams().get('error');

  render() {
    return html`
     <style>
       login-view {
         display: flex;
         flex-direction: column;
         height: 100%;
         align-items: center;
         justify-content: center;
       }
     </style>
     <vaadin-login-form (2)
       @login=${this.login} (3)
       ?error=${this.error}
       no-forgot-password
     ></vaadin-login-form>
   `;
  }

  async login(e: CustomEvent) { (4)
    try {
      await signIn(e.detail.username, e.detail.password);
    } catch (e) {
      this.error = true;
    }
  }

  // Render in light DOM for password managers
  protected createRenderRoot() {
    return this;
  }
}| 1 | The view uses LitElement to define a new component, <login-view>. |
| 2 | Use the <vaadin-login-form> element for capturing login information. |
| 3 | The login-event is bound to the login method with @login=${this.login}. |
| 4 | The login() method calls the signIn() function in the auth service, which in turn will redirect the user to the callback URL. |
Restrict View Access to Authenticated Users
The final piece of the puzzle is to add an authentication guard that only allows logged-in users to access the views. Any unauthenticated users should be redirected to the login page first. You also need to define logic for capturing the callback from Okta and logging out users.
Open frontend/index.ts and replace its contents with the following:
import { Commands, Context, Route, Router } from '@vaadin/router';

import './views/main/main-view';
import './views/login/login-view';
import './views/helloworld/hello-world-view';
import { handleAuthentication, isAuthenticated, signOut } from './auth';

const authGuard = async (context: Context, commands: Commands) => {
  if (!(await isAuthenticated())) {
    // Save requested path
    sessionStorage.setItem('login-redirect-path', context.pathname);
    return commands.redirect('/login');
  }
  return undefined;
};

const routes: Route[] = [
  { path: '/login', component: 'login-view' },
  {
    path: '/callback',
    action: async (_: Context, commands: Commands) => {
      if (await handleAuthentication()) {
        return commands.redirect(
          sessionStorage.getItem('login-redirect-path') || '/'
        );
      } else {
        return commands.redirect('/login?error');
      }
    },
  },
  {
    path: '/logout',
    action: async (_: Context, commands: Commands) => {
      signOut();
      location.reload();
      return commands.prevent();
    },
  },
  {
    path: '',
    component: 'main-view',
    action: authGuard, // Require a logged in user to access
    children: [
      { path: '', component: 'hello-world-view' },
      { path: 'hello', component: 'hello-world-view' },
      {
        path: 'people',
        component: 'people-view',
        action: async () => {
          await import('./views/people/people-view');
        },
      },
    ],
  },
];

export const router = new Router(document.querySelector('#outlet'));
router.setRoutes(routes);
Here’s what this code does:
-
authGuardis a Vaadin Router action that uses the auth service to check if a user is authenticated. If not, it will save the requested path and redirect to the login view -
In the router configuration, you added three routes:
-
loginmaps to the login view component you created in the previous step -
callbackhandles the return value from Okta. If the authentication was successful, it will navigate to the path the user requested before being redirected to the login page -
logoutsigns out the user from the Okta Auth JS client and then destroys the Spring Security context by calling/logouton the server
-
-
Adds the
authGuardtomain-viewwithaction: authGuard
Consume the Secure Endpoint from the Client
One last thing we need to take care of before we can access the backend is to include the access token JWT with server requests. We can do this with a middleware.
Create a Middleware to Add the Access Token JWT to Server Requests
Create a new file, connect-client.ts in the frontend folder with the following content:
import {
  ConnectClient,
  MiddlewareContext,
  MiddlewareNext,
} from '@vaadin/flow-frontend/Connect';
import { getAccessToken } from './auth';

const client = new ConnectClient({
  prefix: 'connect',
  middlewares: [
    async function addAuthHeaderMiddleware(
      context: MiddlewareContext,
      next: MiddlewareNext
    ) {
      const token = await getAccessToken();
      if (token) {
        context.request.headers.set(
          'Authorization',
          `Bearer ${token.accessToken}`
        );
      }
      return next(context);
    },
  ],
});

export default client;
The middleware uses the auth service to get the access token and adds it to the outgoing request headers.
Call the Secure Endpoint Methods
You are now ready to use the application. Run the application with the following command:
mvnOnce the application is up, go to http://localhost:8080, log in with the user you created.
Once you are logged in, you should be able to view and add people through the secure server endpoint.
Add a Logout Link
Finally, add a logout link so users can sign out when they’re done.
Open main-view.ts and add a link at the end of the <header> section of the template, just after the Avatar image:
<header slot="navbar" theme="dark">
  <vaadin-drawer-toggle></vaadin-drawer-toggle>
  <h1>${this.getSelectedTabName(this.menuTabs)}</h1>
  <img src="images/user.svg" alt="Avatar" />
  <a href="logout" class="logout">Log out</a>
</header>
Add a margin to the link so that it doesn’t touch the edge of the screen in the styles section of main-view.ts:
...
header h1 {
  font-size: var(--lumo-font-size-l);
  margin: 0;
}

header .logout {
  margin-right: 12px;
}
...
After making these changes, you should see a Log out link in the top right corner.
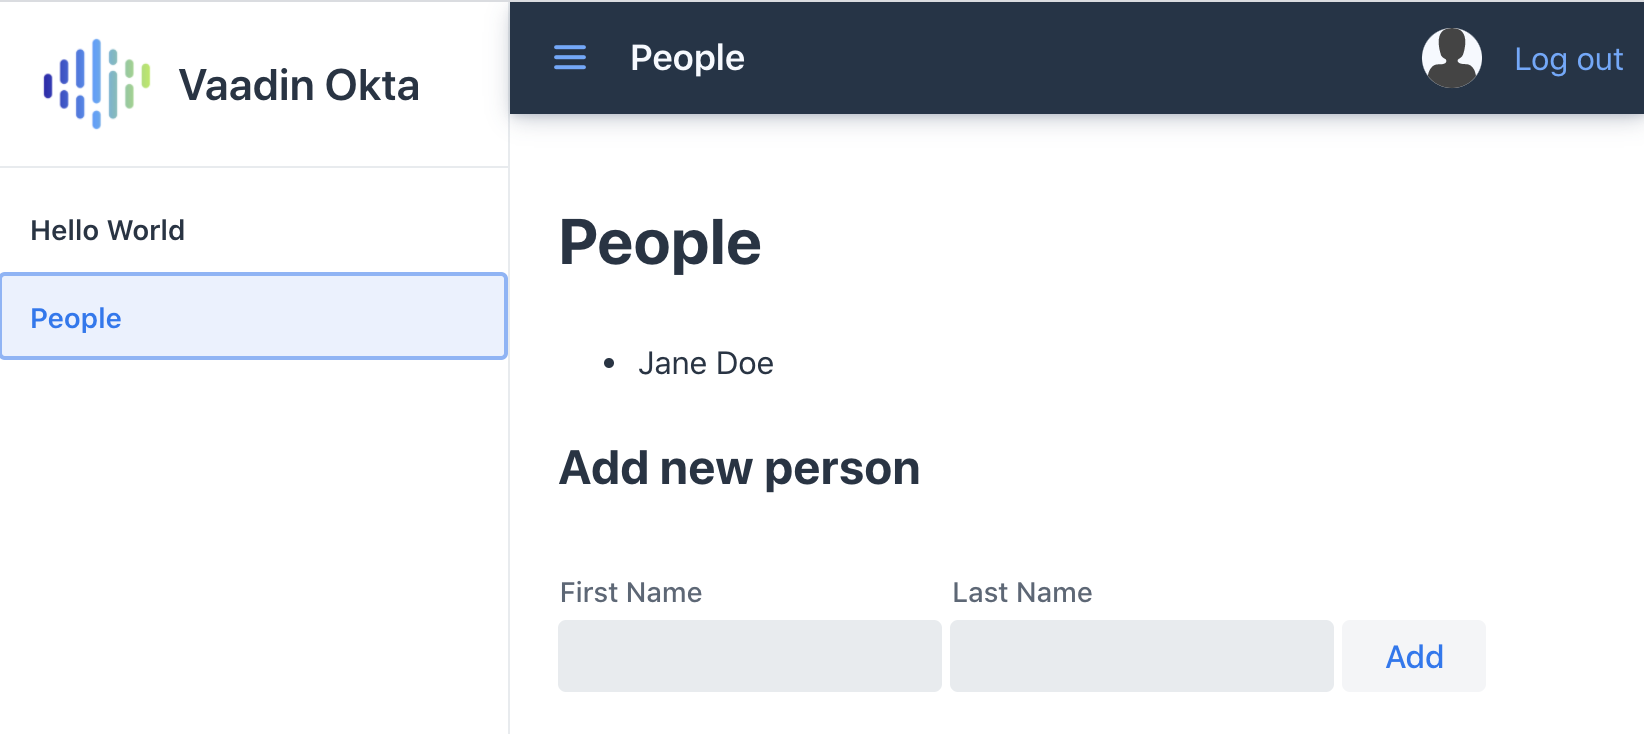
Now you should be able to log in, add people, and log out. Huzzah! 😃
Learn More About Vaadin and Spring Boot
We hope you’ve enjoyed this quick tutorial on how to integrate authentication with Okta into a Vaadin Fusion app.
Now that you have a secure app up and running, you can start exploring other features of Vaadin and Okta. Here are some helpful resources to get started:
You can find the full completed source code for this tutorial on GitHub in our okta-vaadin-fusion-spring-boot-example repository.
If you want to know more about Spring Boot and Okta, you might find these blog posts helpful:
As always, if you have any questions, feel free to leave us a comment below. Don’t forget to follow us on Twitter, like us on Facebook, check us out on LinkedIn, and subscribe to our YouTube channel.
| If you’d like to learn more about Vaadin and Okta, you can watch Web app security made simple with Vaadin and Okta. This is a webinar Marcus and I did on November 17, 2020. |
Matt Raible is a well-known figure in the Java community and has been building web applications for most of his adult life. For over 20 years, he has helped developers learn and adopt open source frameworks and use them effectively. He's a web developer, Java Champion, and Developer Advocate at Okta. Matt has been a speaker at many conferences worldwide, including Devnexus, Devoxx Belgium, Devoxx France, Jfokus, and JavaOne. He is the author of The Angular Mini-Book, The JHipster Mini-Book, Spring Live, and contributed to Pro JSP. He is a frequent contributor to open source and a member of the JHipster development team. You can find him online @mraible and raibledesigns.com.
Okta Developer Blog Comment Policy
We welcome relevant and respectful comments. Off-topic comments may be removed.