Build a CRUD Application with Kotlin and React

In this tutorial, you’re going to build a client and server application using React for the frontend and Kotlin with Spring Boot for the backend. You’ll first build the app unsecured before securing it using Okta. To secure the React frontend, you’ll use OAuth 2.0 login, and for the backend, you’ll use a JSON Web Token and Spring Boot’s resource server OAuth implementation.
This tutorial covers a lot of ground. It also uses a lot of technologies. Because of this, it doesn’t dive too deep into any one of them and assumes a basic familiarity with React, Kotlin, Spring Boot, and REST APIs.
If you’d prefer to watch a video, you can watch this tutorial as a screencast.
Table of Contents
- Install Kotlin and React Project Dependencies
- Download a Kotlin Starter Project With Spring Initializr
- Test the Kotlin Starter App
- Create a Kotlin REST API
- Create the React Frontend
- Build a Full-Featured React UI
- Secure Your Kotlin + React App
- Create an OpenID Connect Application
- Configure the Resource Server for JWT Authentication
- Add OAuth 2.0 Login to the React Application
- Test Your Secured Kotlin + React Application
- Learn More About Kotlin and React
Note: In May 2025, the Okta Integrator Free Plan replaced Okta Developer Edition Accounts, and the Okta CLI was deprecated.
We preserved this post for reference, but the instructions no longer work exactly as written. Replace the Okta CLI commands by manually configuring Okta following the instructions in our Developer Documentation.
Install Kotlin and React Project Dependencies
You’ll need to install a few things before you get started.
Java 11: If you don’t have Java 11, you can install OpenJDK. The OpenJDK website has instructions for installation. OpenJDK can also be installed using Homebrew. SDKMAN is another excellent option for installing and managing Java versions.
Node 12: You’ll need Node to create and run your React application. You can install it with Homebrew or download it from nodejs.org.
Yarn: Yarn is a JavaScript package manager. You’ll use it for the React UI application. To install Yarn, head to their website for instructions.
HTTPie: This is a simple command-line utility for making HTTP requests. You’ll use this to test the REST application. Check out the installation instructions on their website.
Okta Developer Account: You’ll be using Okta as an OAuth/OIDC provider to add JWT authentication and authorization to the application. Go to developer.okta.com/signup and sign up for a free developer account, if you haven’t already.
Download a Kotlin Starter Project With Spring Initializr
To get the party started, you’re going to use the Spring Initializr. It’s a great resource that makes getting started with Spring Boot projects super simple. If you want to dig into the options, take a look at the Spring Initializr GitHub page.
Open this link to a pre-configured project for this tutorial.
Take a moment to peruse the pre-selected options. Note a feature that I really like: you can explore the project online using the Explore button at the bottom of the page.
To highlight some of the important settings:
- Project: Gradle project (vs. Maven, because XML. Ugh. Holy 1999!)
- Language: Kotlin
- Group:
com.okta.kotlin(this defines the package of the app files) - Artifact:
resourceserver(determines the project identifier as well as the name of the generated artifact) - Dependencies:
- Spring Web (Spring Boot’s basic web capabilities)
- Spring Data JPA (Spring Boot’s data model Java persistence)
- Rest Repositories (Spring Boot’s ability to turn JPA repositories directly into REST APIs)
- H2 Database (In-memory SQL database for data model persistence)
Once you’re ready, click the green Generate button at the bottom of the Spring Initializr page. Download the project and move it to a suitable parent directory before unzipping it. You’re also going to create a React frontend, so you might want to make a kotlin-react-app parent directory for both projects.
Test the Kotlin Starter App
You can test the starter project by opening a shell and running the following command from the resource server project’s base directory.
./gradlew bootRun
Give that a few seconds to run. You should see something like this:
2020-01-10 13:54:05.692  INFO 41512 --- [    main] o.s.b.w.embedded.tomcat.TomcatWebServer  : Tomcat started on port(s): 8080 (http) with context path ''
2020-01-10 13:54:05.696  INFO 41512 --- [    main] c.o.k.ResourceServerApplicationKt : Started ResourceServerApplicationKt in 3.276 seconds (JVM running for 3.624)
<==========---> 80% EXECUTING [29s]
> :bootRun
Open a separate shell and use HTTPie to make a simple request.
$ http :8080

HTTP/1.1 200
Connection: keep-alive
Content-Type: application/hal+json
...

{
  "_links": {
    "profile": {
      "href": "http://localhost:8080/profile"
    }
  }
}
You may be wondering why, without even defining a controller, you have any response at all. This is because by including the spring-boot-starter-data-rest starter dependency, you have included Spring’s auto-magic “hypermedia-based RESTful front end” (as Spring describes it in their docs).
A “hypermedia-based RESTful front end” is a REST API that uses Hypertext Application Language (HAL) format to output descriptive JSON. It’s essentially a systematic way for a REST API to describe itself to client applications and for the client applications to easily navigate between the various endpoints.
The /profile endpoint that you see is an endpoint automatically added by the spring-boot-starter-data-rest starter dependency.
Otherwise, there isn’t much going on yet. That’s about to change!
Create a Kotlin REST API
The next step is to create a REST API using Kotlin and Spring Boot. For this example application, you’re going to model a list of coffee shops (‘cause I spend a lot of time in coffee shops, and not all coffee shops are created equal).
One of the nice things about Spring Boot is that if you define a data model and a repository, it can automatically expose that data as a REST API using the aforementioned HAL. In practice, in production, you may find yourself needing to create custom controllers for your REST APIs, since you may need to inject business logic between the data and the client apps. However, this auto-generated REST API is a great start and may be enough for simple applications.
So, step 1. Define the data model.
Create a new Kotlin class called CoffeeShopModel.kt in the src/main/kotlin/com/okta/kotlin directory.
package com.okta.kotlin

import javax.persistence.Entity
import javax.persistence.GeneratedValue
import javax.persistence.GenerationType
import javax.persistence.Id

@Entity
data class CoffeeShopModel(
    @Id
    @GeneratedValue(strategy = GenerationType.AUTO)
    var id: Long = -1,
    var name: String = "",
    var address: String = "",
    var phone: String = "",
    var priceOfCoffee: Double = 0.0,
    var powerAccessible: Boolean = true,
    var internetReliability: Short = 3 // 1-5
) {}
Step 2. Define the repository. Create a Kotlin class called CoffeeShopRepository.kt in the same package.
package com.okta.kotlin

import org.springframework.data.repository.CrudRepository
import org.springframework.data.rest.core.annotation.RepositoryRestResource

@RepositoryRestResource(collectionResourceRel = "coffeeshops", path = "coffeeshops")
interface CoffeeShopRepository : CrudRepository<CoffeeShopModel, Long> {
}
That’s all you have to do to turn a data model into a REST API with full CRUD (Create, Read, Update, and Delete) capabilities. The magic happens primarily with two technologies: Spring Data JPA and the Spring Data @RepositoryRestResource annotation. Spring Data JPA is what turns the data model into a persisted entity, using our H2 database. In our case, the database is in-memory by default, so nothing will be persisted across database restarts. Obviously, in a production app, you’d need to connect the app to an actual SQL database instance.
The @RepositoryRestResource and the CrudRepository are what take the persisted model and turn it into a REST API. You can inspect the CrudRepository to see what methods it exposes to get an idea of its capabilities (see its API docs).
Before you test the REST API, you need to make a change to the ResourceServerApplication class. This is not a functional change. It adds a couple of sample coffees shop to your in-memory database so that you have something to work with.
package com.okta.kotlin

import org.springframework.boot.ApplicationRunner
import org.springframework.boot.autoconfigure.SpringBootApplication
import org.springframework.boot.runApplication
import org.springframework.context.annotation.Bean

@SpringBootApplication
class ResourceServerApplication  {

  @Bean
  fun run(repository: CoffeeShopRepository) = ApplicationRunner {
    repository.save(CoffeeShopModel(
      name = "Oblique",
      address = "3039 SE Stark St, Portland, OR 97214",
      phone = "555-111-4444",
      priceOfCoffee = 1.50,
      powerAccessible = true,
      internetReliability = 5
    ))
    repository.save(CoffeeShopModel(
      name = "Epoch Coffee",
      address = "221 W N Loop Blvd, Austin, TX 78751",
      phone = "555-111-2424",
      priceOfCoffee = 2.50,
      powerAccessible = true,
      internetReliability = 3
    ))
  }

}

fun main(args: Array<String>) {
    runApplication<ResourceServerApplication>(*args)
}
Restart everything and test your new REST API.
$ http :8080/coffeeshops

HTTP/1.1 200
...

{
  "_embedded": {
    "coffeeshops": [
      {
        "_links": {
          "coffeeShopModel": {
            "href": "http://localhost:8080/coffeeshops/1"
          },
          "self": {
            "href": "http://localhost:8080/coffeeshops/1"
          }
        },
        "address": "3039 SE Stark St, Portland, OR 97214",
        "internetReliability": 5,
        "name": "Oblique",
        "phone": "555-111-4444",
        "powerAccessible": true,
        "priceOfCoffee": 1.5
      },
      {
        "_links": {
          "coffeeShopModel": {
            "href": "http://localhost:8080/coffeeshops/2"
          },
          "self": {
            "href": "http://localhost:8080/coffeeshops/2"
          }
        },
        "address": "221 W N Loop Blvd, Austin, TX 78751",
        "internetReliability": 3,
        "name": "Epoch",
        "phone": "555-111-2424",
        "powerAccessible": true,
        "priceOfCoffee": 2.5
      }
    ]
  },
  "_links": {
    "profile": {
      "href": "http://localhost:8080/profile/coffeeshops"
    },
    "self": {
      "href": "http://localhost:8080/coffeeshops"
    }
  }
}
Before you move on to the React UI, make two more changes to the REST API. You’ll notice above that the id field is not being returned as part of the JSON. This is inconvenient. Also, it’d be better if the REST API was set to have a base context path of /api, making the full path /api/coffeeshops.
To make these changes, you need to add a RepositoryRestConfigurer configuration class.
Add RestConfiguration.kt at src/main/kotlin/com/okta/kotlin/RestConfiguration.kt.
package com.okta.kotlin

import org.springframework.context.annotation.Configuration
import org.springframework.data.rest.core.config.RepositoryRestConfiguration
import org.springframework.data.rest.webmvc.config.RepositoryRestConfigurer

@Configuration
open class RestConfiguration : RepositoryRestConfigurer {
  override fun configureRepositoryRestConfiguration(config: RepositoryRestConfiguration?) {
    config?.exposeIdsFor(CoffeeShopModel::class.java)
    config?.setBasePath("/api");
  }
}
If you re-start the resource server and execute an http :8080/api/coffeeshops request, you’ll find that the id field is now included in the JSON response.
Create the React Frontend
You will use Create React App to create the starter React application. The project is well documented on the Create React App homepage. It does a lot of routine work for us, setting up a React application.
From the root directory of the project (the parent directory of the Spring Boot resource server project), run the following command:
yarn create react-app client
If that doesn’t work, as it didn’t for me, failing with a 404 error, you can use npx instead (requires that Node be installed):
npx create-react-app client
Once the client application is created, navigate into the client directory and add a few dependencies:
yarn add bootstrap react-router-dom reactstrap
This installs Bootstrap, React Router, and Reactstrap. It’s unlikely I have to tell you what Bootstrap is, but if you want to dig deeper, take a look at the project page. react-router-dom provides DOM bindings for React Router (their docs). Reactstrap is a library of React components that leverage Bootstrap to provide a set of mobile-friendly UI components (their docs).
Add Bootstrap’s CSS file as an import in client/src/index.js.
import 'bootstrap/dist/css/bootstrap.min.css';
Update the client/src/App.js file:
import React, { Component } from 'react';
import './App.css';
class App extends Component {
state = {
isLoading: true,
coffeeShops: []
};
async componentDidMount() {
const response = await fetch('/api/coffeeshops');
const body = await response.json();
this.setState({coffeeShops: body._embedded.coffeeshops, isLoading: false});
}
render() {
const {coffeeShops, isLoading} = this.state;
if (isLoading) {
return <p>Loading...</p>;
}
return (
<div className="App">
<header className="App-header">
<div className="App-intro">
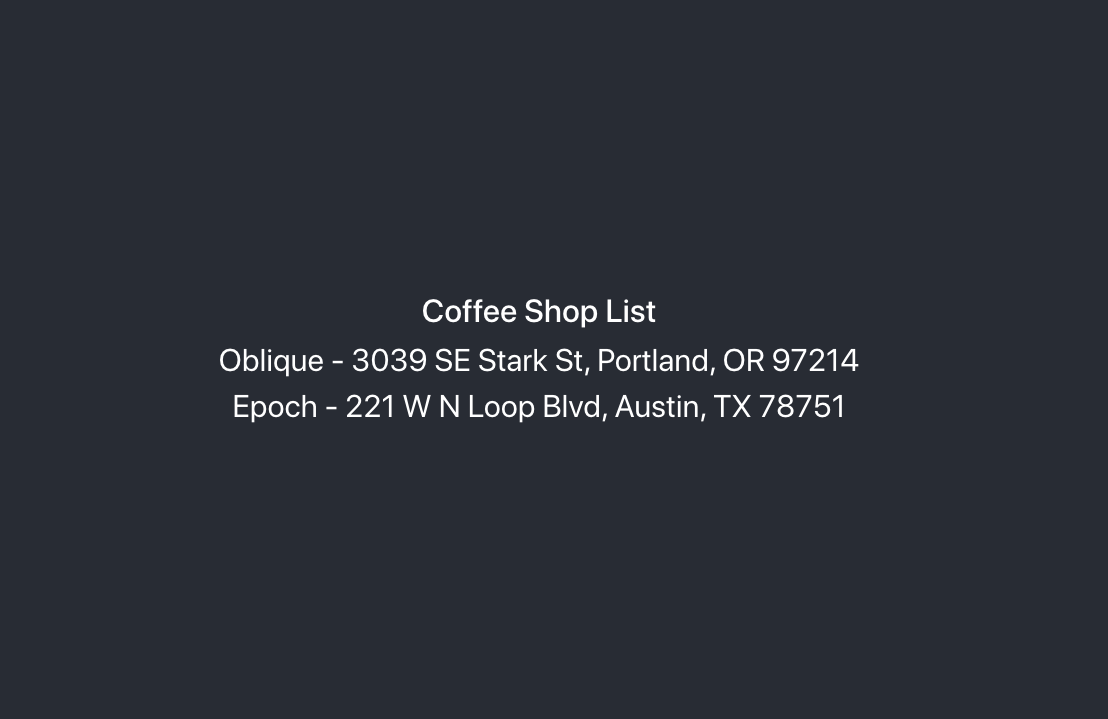
<h2>Coffee Shop List</h2>
{coffeeShops.map(coffeeShop =>
<div key={coffeeShop.id}>
{coffeeShop.name} - {coffeeShop.address}
</div>
)}
</div>
</header>
</div>
);
}
}
export default App;
Instead of using config values to set the resource server’s URL, you can use a proxy. Do this by adding the following to the package.json file.
"proxy": "http://localhost:8080",
Take a look at the Create React App docs on this feature to learn more about proxying requests in development.
Run the React app using yarn start (ensure your Spring Boot resource server is running). You should see a very simple list of the coffee shop names and addresses.
Build a Full-Featured React UI
The UI as it is doesn’t do very much except demonstrate successful communication between the client and the server. The next step is to add some components, such as a navigation bar, a page for editing and adding coffee shops, and a nicer way to display the data. You’re also going to use routing to map URLs to app pages.
Change src/App.js to match the following. This adds three routes: a home route, a coffee shop list route, and a route for editing and creating new coffee shop entries. You’ll notice that the module uses composition (via the render() method) to pass the Api class and the NavBar module to the route components. In our current app state, without authentication and authorization, this is unnecessary. However, once you add in OAuth, you’ll see how this allows you to keep all of the auth logic in one place, avoiding a bunch of repeated code (or having to use something like MobX or Redux to manage a global state).
src/App.s
import React, { Component } from 'react';
import './App.css';
import Home from './Home';
import { BrowserRouter as Router, Route, Switch } from 'react-router-dom';
import CoffeeShopsList from './CoffeeShopsList';
import CoffeeShopEdit from './CoffeeShopEdit';
import Api from './Api';
import NavBar from './NavBar';

const api = new Api();

class App extends Component {

  render() {
    const navbar = <NavBar/>;

    return (
      <Router>
        <Switch>
          <Route
            path='/'
            exact={true}
            render={(props) => <Home {...props} api={api} navbar={navbar}/>}
          />
          <Route
            path='/coffee-shops'
            exact={true}
            render={(props) => <CoffeeShopsList {...props} api={api} navbar={navbar}/>}
          />
          <Route
            path='/coffee-shops/:id'
            render={(props) => <CoffeeShopEdit {...props} api={api} navbar={navbar}/>}
          />
        </Switch>
      </Router>
    )
  }
}

export default App;
Create a new JavaScript file, src/Home.js, with the following contents. This will be a simple home page. All it does is display the navigation bar and a button to open the list of coffee shops.
src/Home.js
import React, { Component } from 'react';
import './App.css';
import { Link } from 'react-router-dom';
import { Button, Container } from 'reactstrap';

class Home extends Component {

  render() {
    return (
      <div className="app">
        {this.props.navbar}
        <Container fluid>
          <div>
            <Button color="secondary">
              <Link className="app-link" to="/coffee-shops">Manage Coffee Shops</Link>
            </Button>
          </div>
        </Container>
      </div>
    );
  }
}

export default Home;
Create the navigation bar JavaScript file, src/NavBar.js. The navbar displays a “Home” link, as well as a link to Okta’s Twitter channel and a link to the project repository.
src/NavBar.js
import React, { Component } from 'react';
import { Collapse, Nav, Navbar, NavbarBrand, NavbarToggler, NavItem, NavLink } from 'reactstrap';
import { Link } from 'react-router-dom';

class NavBar extends Component {

  constructor(props) {
    super(props);
    this.state = {isOpen: false};
    this.toggle = this.toggle.bind(this);
  }

  toggle() {
    this.setState({
      isOpen: !this.state.isOpen
    });
  }

  render() {
    return <Navbar color="light" light expand="md">
      <NavbarBrand tag={Link} to="/">Home</NavbarBrand>
      <NavbarToggler onClick={this.toggle}/>
      <Collapse isOpen={this.state.isOpen} navbar>
        <Nav className="ml-auto" navbar>
          <NavItem>
            <NavLink
              href="https://twitter.com/oktadev">@oktadev</NavLink>
          </NavItem>
          <NavItem>
            <NavLink href="https://github.com/oktadeveloper/okta-kotlin-react-crud-example">GitHub</NavLink>
          </NavItem>
        </Nav>
      </Collapse>
    </Navbar>;
  }
}

export default NavBar;
The next file holds the components that display the coffee shops in a responsive, card-style grid layout. Create a new file, src/CoffeeShopsList.js, and add the following contents. There are two components in this file. CoffeeShop is a simple, functional component that encapsulates the display of each coffee shop item. CoffeeShopsList manages the overall display logic as well as the asynchronous calls to the server for loading and updating data.
src/CoffeeShopsList.js
import React, { Component } from 'react';
import {
  Alert,
  Button
} from 'reactstrap';
import { Link } from 'react-router-dom';

const CoffeeShop = (props) => (
  <div className="coffeeshop-container p-2 m-2 d-flex flex-column">
    <h3>{props.name}</h3>
    <div className="coffeeshop-body">
      <div className="subtitle-container">
        <div>Cost: ${props.priceOfCoffee} / cup</div>
        <div>Internet Reliability: {props.internetReliability} / 5 </div>
        <div>{props.powerAccessible ? 'Power Accessible' : 'Power NOT Accessible'} </div>
      </div>
      <div>{props.address}</div>
      <div>{props.phone}</div>
    </div>
    <div className="coffeeshop-footer">
      <Button color="secondary" tag={Link} to={'/coffee-shops/' + props.id}>Edit</Button>
      <Button color="danger" onClick={() => props.remove(props.id)}>Delete</Button>
    </div>
  </div>
);

class CoffeeShopsList extends Component {

  constructor(props) {
    super(props);
    this.state = {
      coffeeShops: [],
      isLoading: true,
      errorMessage: null
    };
    this.remove = this.remove.bind(this);
  }

  async componentDidMount() {
    this.setState({isLoading: true});
    const response = await this.props.api.getAll();
    if (!response.ok) {
      this.setState({
          errorMessage: `Failed to load coffee shops: ${response.status} ${response.statusText}`,
          isLoading: false
        }
      )
    }
    else {
      const body = await response.json();
      const coffeeShops = body._embedded.coffeeshops;
      this.setState({
        coffeeShops: coffeeShops,
        isLoading: false,
        errorMessage: null
      });
    }
  }

  async remove(id) {
    let response = await this.props.api.delete(id);
    if (!response.ok) {
      this.setState({errorMessage: `Failed to delete coffee shop: ${response.status} ${response.statusText}`})
    }
    else {
      let updatedCoffeeShops = [...this.state.coffeeShops].filter(i => i.id !== id);
      this.setState({coffeeShops: updatedCoffeeShops, errorMessage: null});
    }
  }

  render() {
    const {coffeeShops, isLoading, errorMessage} = this.state;

    if (isLoading) {
      return <p>Loading...</p>;
    }

    return (
      <div>
        {this.props.navbar}
        <div className="d-flex flex-row justify-content-between p-3">
          <h3 className="coffee-shops-title">Coffee Shops</h3>
          <Button color="success" tag={Link} to="/coffee-shops/new">Add New</Button>
        </div>
        {errorMessage ?
          <div className="d-flex flex-row justify-content-center">
            <Alert color="warning" style={{flex:1, maxWidth:'80%'}}>
              {errorMessage}
            </Alert>
          </div> : null
        }
        <div className="d-flex flex-row flex-container flex-wrap justify-content-center">
          {coffeeShops.map( coffeeShop =>
            <CoffeeShop {...coffeeShop} remove={this.remove.bind(this)} key={coffeeShop.id}/>
          )}
          {!coffeeShops || coffeeShops.length === 0 ? <p>No coffee shops!</p> : null}
        </div>
      </div>
    );
  }
}

export default CoffeeShopsList;
Add a React Component to Edit with Reactstrap Form Elements
The next new file, src/CoffeeShopEdit.js, is the component that is responsible for editing existing coffee shop entries and creating new ones. It demonstrates the use of Reactstrap form elements, as well as making some asynchronous calls to the server.
src/CoffeeShopEdit.js
import React, { Component } from 'react';
import { Link, withRouter } from 'react-router-dom';
import { Alert, Button, Container, Form, FormGroup, Input, Label } from 'reactstrap';

class CoffeeShopEdit extends Component {

  emptyItem = {
    name: '',
    address: '',
    phone: '',
    priceOfCoffee: '',
    powerAccessible: '',
    internetReliability: ''
  };

  constructor(props) {
    super(props);
    this.state = {
      item: this.emptyItem,
      errorMessage: null,
      isCreate: false
    };
    this.handleChange = this.handleChange.bind(this);
    this.handleSubmit = this.handleSubmit.bind(this);
  }

  async componentDidMount() {
    this.state.isCreate = this.props.match.params.id === 'new'; // are we editing or creating?
    if (!this.state.isCreate) {
      const response = await this.props.api.getById(this.props.match.params.id);
      const coffeeShop = await response.json();
      this.setState({item: coffeeShop});
    }
  }

  handleChange(event) {
    const target = event.target;
    const value = target.value;
    const name = target.name;
    let item = {...this.state.item};
    item[name] = value;
    this.setState({item});
  }

  async handleSubmit(event) {
    event.preventDefault();
    const {item, isCreate} = this.state;

    let result = isCreate ? await this.props.api.create(item) : await this.props.api.update(item);

    if (!result.ok) {
      this.setState({errorMessage: `Failed to ${isCreate ? 'create' : 'update'} record: ${result.status} ${result.statusText}`})
    } else {
      this.setState({errorMessage: null});
      this.props.history.push('/coffee-shops');
    }

  }

  render() {
    const {item, errorMessage, isCreate} = this.state;
    const title = <h2>{isCreate ? 'Add Coffee Shop' : 'Edit Coffee Shop'}</h2>;

    return (
      <div>
        {this.props.navbar}
        <Container style={{textAlign: 'left'}}>
          {title}
          {errorMessage ?
            <Alert color="warning">
              {errorMessage}
            </Alert> : null
          }
          <Form onSubmit={this.handleSubmit}>
            <div className="row">
              <FormGroup className="col-md-8 mb-3">
                <Label for="name">Name</Label>
                <Input type="text" name="name" id="name" value={item.name || ''}
                       onChange={this.handleChange} autoComplete="name"/>
              </FormGroup>
              <FormGroup className="col-md-4 mb-3">
                <Label for="phone">Phone</Label>
                <Input type="text" name="phone" id="phone" value={item.phone || ''}
                       onChange={this.handleChange} autoComplete="phone"/>
              </FormGroup>
            </div>
            <FormGroup>
              <Label for="address">Address</Label>
              <Input type="text" name="address" id="address" value={item.address || ''}
                     onChange={this.handleChange} autoComplete="address-level1"/>
            </FormGroup>
            <div className="row">
              <FormGroup className="col-md-4 mb-3">
                <Label for="priceOfCoffee">Price of Coffee</Label>
                <Input type="text" name="priceOfCoffee" id="priceOfCoffee" value={item.priceOfCoffee || ''}
                       onChange={this.handleChange}/>
              </FormGroup>
              <FormGroup className="col-md-4 mb-3">
                <Label for="powerAccessible">Power Accessible?</Label>
                <Input type="select" name="powerAccessible" id="powerAccessible"
                       value={item.powerAccessible === 'true' ? 'true' : 'false'}
                       onChange={this.handleChange}>
                  <option value="true">Yes</option>
                  <option value="false">No</option>
                </Input>
              </FormGroup>
              <FormGroup className="col-md-4 mb-3">
                <Label for="internetReliability">Internet Reliability</Label>
                <Input type="select" name="internetReliability" id="internetReliability"
                       value={item.internetReliability || '-'}
                       onChange={this.handleChange}>
                  <option>1</option>
                  <option>2</option>
                  <option>3</option>
                  <option>4</option>
                  <option>5</option>
                  <option value="-">-</option>
                </Input>
              </FormGroup>
            </div>
            <FormGroup>
              <Button color="primary" type="submit">Save</Button>{' '}
              <Button color="secondary" tag={Link} to="/coffee-shops">Cancel</Button>
            </FormGroup>
          </Form>
        </Container>
      </div>
    );
  }
}

export default withRouter(CoffeeShopEdit);
Add an Authentication-Aware Service for Server Requests
Create one more new file, src/Api.js. This module serves to centralize all of the server request logic. It is written so that it allows you to pass an authorization token to its constructor (which you’ll get to in the next section), and it will set the appropriate header. Without an auth token, it makes an unauthenticated request.
src/Api.js
class Api {

  constructor(authToken) {
    this.authToken = authToken;
  }

  headers = {
    'Accept': 'application/json',
    'Content-Type': 'application/json'
  };

  BASE_URL = '/api/coffeeshops';

  createHeaders() {
    return this.authToken ? {
      ...this.headers,
      'Authorization': 'Bearer ' + this.authToken
    } : this.headers;
  }

  async getAll() {
    return await fetch(this.BASE_URL, {
      method: 'GET',
      headers: this.createHeaders()
    });
  }

  async getById(id) {
    return await fetch(`${this.BASE_URL}/${id}`, {
      method: 'GET',
      headers: this.createHeaders()
    });
  }

  async delete(id) {
    return await fetch(`${this.BASE_URL}/${id}`, {
      method: 'DELETE',
      headers: this.createHeaders()
    });
  }

  async update(item) {
    return await fetch(`${this.BASE_URL}/${item.id}`, {
      method: 'PUT',
      headers: this.createHeaders(),
      body: JSON.stringify(item)
    });
  }

  async create(item) {
    return await fetch(this.BASE_URL, {
      method: 'POST',
      headers: this.createHeaders(),
      body: JSON.stringify(item)
    });
  }
}

export default Api;
Make Your React App Look Good
Finally, add some styling to make things look good. Modify src/App.css to have the CSS below.
html, #root {
  background-color: #282c34;
}

.row {
  margin-bottom: 10px;
}

a.app-link {
   color: #d3d8e3;
}

a.app-link:hover {
  color: #a2a9b8;
  text-decoration: none;
}

.container-fluid {
  color: white;
  text-align: center;
  padding-top: 40px;
}

.flex-container {
  color: white;
  text-align: center;
  padding-top: 40px;
}

.container {
  color: white;
  text-align: left;
  padding-top: 40px;
}

.coffee-shops-title {
  color: white;
}

.coffeeshop-container {
  width: 400px;
  min-width: 300px;
  background-color: #e9edf7;
  border-radius: 10px;
  color: #282c34;
  font-size: calc(10px + 1.0vmin);
}

.coffeeshop-container h3 {
  font-size: calc(10px + 2vmin);
}

.subtitle-container {
  font-size: calc(10px + 0.8vmin);
  color: #596273;
  margin-bottom: 10px;
}

.coffeeshop-body {
  flex: 1;
  margin-bottom: 10px;
}

.coffeeshop-footer {
  padding-top: 8px;
  margin-top: 8px;
  border-top: 1px solid #282c34;
}

.coffeeshop-footer .btn {
  margin: 5px 5px;
}

@media only screen and (max-width: 992px) {
  .coffeeshop-container {
    width: 300px;
  }
}

@media only screen and (max-width: 576px) {
  .coffeeshop-container {
    width: 80%;
  }
}
Run yarn start again if you need to (you may not need to; if you left it running, it should update automatically as you make changes). Make sure your resource server is running as well.
Take a look at the updated app at http://localhost:3000/.
You’ll see the new home page with the navbar.
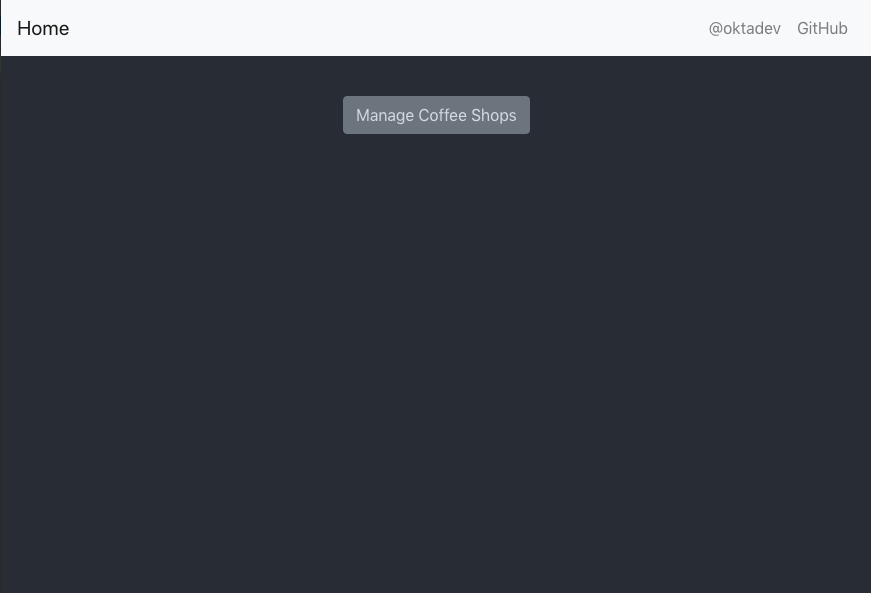
Press the Manage Coffee Shops button.
You can now view, edit, create, and delete coffee shops.
Secure Your Kotlin + React App
You’ve got a nice, functional client and server application going. Don’t rest on your laurels yet! It’s unsecured, and if you leave that thing unattended, hackers will have it spewing spam and twist it into cheating little old ladies out of their retirement funds quicker than you can figure out what the heck a ‘hook’ is.
The next step is to secure it. You’re going to implement OAuth 2.0 login on the frontend. On the back end, you’re going to use a JSON Web Token (JWT) to secure the resource server. To make life much easier, you’re going to use Okta as your OAuth provider. Using Okta means you won’t have to write or maintain any login code or handle user passwords; nor will you have to waste any time mucking around writing code to verify tokens.
Okta has two projects that are going to make this painless: the Okta React SDK and the Okta Spring Boot Starter.
Before you make any code changes, though, you need to log into your Okta developer account and create an OpenID Connect (OIDC) application.
Create an OpenID Connect Application
OpenID Connect (or, OIDC) is an authentication protocol built on top of OAuth 2.0, which is an authorization protocol. Very briefly, OIDC allows you to know who a client is, and OAuth 2.0 allows you to determine what they’re allowed to do. Together they specify a complete authentication and authorization system. You’re going to use Okta’s implementation of these protocols as your OAuth 2.0 / OIDC provider.
To do this, you need to create an OIDC application in your Okta account. This configures and activates the OIDC application that your frontend application and backend resources server will interact with when verifying authentication and authorization.
Install the Okta CLI and run okta login.
Then, run okta apps create. Select the default app name, or change it as you see fit.
Choose Single-Page App and press Enter.
Use http://localhost:3000/callback for the Redirect URI and accept the default Logout Redirect URI of http://localhost:3000.
What does the Okta CLI do?
The Okta CLI will create an OIDC Single-Page App in your Okta Org. It will add the redirect URIs you specified and grant access to the Everyone group. It will also add a trusted origin for http://localhost:3000. You will see output like the following when it’s finished:
Okta application configuration:
Issuer:    https://dev-133337.okta.com/oauth2/default
Client ID: 0oab8eb55Kb9jdMIr5d6
NOTE: You can also use the Okta Admin Console to create your app. See Create a React App for more information.
You’ll need your issuer and client ID in a moment.
Configure the Resource Server for JWT Authentication
Securing the Spring Boot REST API is super easy. First, you need to add the Okta Spring Boot Starter to your Gradle project. This is a library we’ve created that streamlines adding OAuth 2.0/OIDC to your Spring Boot app with Okta.
Add the dependency in build.gradle.kts:
dependencies {
    ...
    implementation("com.okta.spring:okta-spring-boot-starter:1.3.0")
    ...
}
Next, create a SecurityConfiguration class to configure Spring Boot as an OAuth 2.0 resource server.
src/main/kotlin/com/okta/kotlin/SecurityConfiguration.kt
package com.okta.kotlin

import com.okta.spring.boot.oauth.Okta
import org.springframework.context.annotation.Configuration
import org.springframework.security.config.annotation.web.builders.HttpSecurity
import org.springframework.security.config.annotation.web.configuration.WebSecurityConfigurerAdapter

@Configuration
class SecurityConfiguration : WebSecurityConfigurerAdapter() {
  override fun configure(http: HttpSecurity) {
    http
      .csrf().disable()
      .authorizeRequests().anyRequest().authenticated()
      .and()
      .oauth2ResourceServer().jwt();

    // Send a 401 message to the browser (w/o this, you'll see a blank page)
    Okta.configureResourceServer401ResponseBody(http);
  }
}
NOTE: This file also does a couple of other things: 1) it disables CSRF (Cross-site forgery protection), and 2) it configures the resource server to send a 401 instead of a blank page if a request is not authorized. Disabling CSRF in production is definitely NOT recommended, and you’re doing it here to simplify things so you can focus on OAuth 2.0 login and JWT authentication. To see how to implement CSRF protection, take a look at some of the other blog posts at the end of this tutorial.
Finally, add some configuration to src/main/resources/application.properties. Here you need the Okta Issuer URL (from the Okta developer dashboard, go to API > Authorization Servers and look in the table under the default server). You also need the Client ID from the OIDC application you just created.
okta.oauth2.issuer=https://{yourOktaUrl}/oauth2/default
okta.oauth2.clientId={yourClientID}
That’s it. The resource server now requires a valid JWT for all requests.
Stop and restart the resource server: ./gradlew bootRun.
You can test that it requires a JWT by opening a shell and running a simple request using HTTPie:
http :8080/api/coffeeshops
You’ll get a 401 / Unauthorized:
HTTP/1.1 401
...

401 Unauthorized
Add OAuth 2.0 Login to the React Application
The first step to adding Okta OAuth 2.0 login to your frontend React application is to add the Okta React SDK. Take a look at the project’s GitHub page for more info.
Use Yarn to add the project dependency to your React client.
yarn add @okta/okta-react@3.0.4
Now update src/App.js to match the following. Fill in your Client ID and your Issuer URL in the Security component properties.
import React, { Component } from 'react';
import './App.css';
import Home from './Home';
import { BrowserRouter as Router, Route, Switch } from 'react-router-dom';
import { Security, SecureRoute, LoginCallback } from '@okta/okta-react';
import CoffeeShopsList from './CoffeeShopsList';
import CoffeeShopEdit from './CoffeeShopEdit';
import { withOktaAuth } from '@okta/okta-react';
import Api from './Api';
import NavBar from "./NavBar";

const AuthWrapper = withOktaAuth(class WrappedRoutes extends Component {

  constructor(props) {
    super(props);
    this.state = {authenticated: null, user: null, api: new Api()};
    this.checkAuthentication = this.checkAuthentication.bind(this);
  }

  async checkAuthentication() {
    const authenticated = await this.props.authState.isAuthenticated;
    if (authenticated !== this.state.authenticated) {
      if (authenticated) {
        const user = await this.props.authService.getUser();
        let accessToken = await this.props.authService.getAccessToken();
        this.setState({authenticated, user, api: new Api(accessToken)});
      } else {
        this.setState({authenticated, user: null, api: new Api()});
      }
    }
  }

  async componentDidMount() {
    await this.checkAuthentication();
  }

  async componentDidUpdate() {
    await this.checkAuthentication();
  }

  async login() {
    if (this.state.authenticated === null) return; // do nothing if auth isn't loaded yet
    await this.props.authService.login('/');
  }

  async logout() {
    await this.props.authService.logout('/');
  }

  render() {
    let {authenticated, user, api} = this.state;

    if (authenticated === null) {
      return null;
    }

    const navbar = <NavBar
      isAuthenticated={authenticated}
      login={this.login.bind(this)}
      logout={this.logout.bind(this)}
    />;

    return (
      <Switch>
        <Route
          path='/'
          exact={true}
          render={(props) => <Home {...props} authenticated={authenticated} user={user} api={api} navbar={navbar}/>}
        />
        <SecureRoute
          path='/coffee-shops'
          exact={true}
          render={(props) => <CoffeeShopsList {...props} authenticated={authenticated} user={user} api={api}
                                              navbar={navbar}/>}
        />
        <SecureRoute
          path='/coffee-shops/:id'
          render={(props) => <CoffeeShopEdit {...props} authenticated={authenticated} user={user} api={api}
                                             navbar={navbar}/>}
        />
      </Switch>
    )
  }
});

class App extends Component {

  render() {
    return (
      <Router>
        <Security issuer='https://{yourOktaUrl}/oauth2/default'
              clientId='{yourClientId}'
              redirectUri={window.location.origin + '/callback'}
              pkce={true}>
          <Route path='/callback' component={LoginCallback}/>
          <AuthWrapper/>
        </Security>
      </Router>
    )
  }
}

export default App;
The Security component is where the Okta OAuth configuration happens. You need to fill in your clientId and your issuer in the properties there.
You’ll also notice that I chose to centralize all the security logic in a wrapper component called AuthWrapper. This allows you to handle all authentication-related logic in one place and pass down the authentication state as properties. It also allows you to pass down the Api module with the access token to the child components. This keeps a lot of the security logic out of the route/view components and avoids some repeated code, which I like.
However, the withOktaAuth() function supplied by the Okta React SDK can be applied to any React component (that is a child of the Security component). Thus, it’s also possible not to use a wrapper class like this and inject the authState prop into the various routes directly. Ultimately, in an app in production, the authState would likely be moved to a global state using something like MobX or Redux.
Two more files need to be updated, the home page and the navigation bar.
Update src/Home.js:
import React, { Component } from 'react';
import './App.css';
import { Link } from 'react-router-dom';
import { Button, Container } from 'reactstrap';

class Home extends Component {

  render() {
    if (this.props.authenticated === null) {
      return <p>Loading...</p>;
    }

    return (
      <div className="app">
        {this.props.navbar}
        <Container fluid>
          {this.props.authenticated ?
            <div>
              <p>Welcome, {this.props.user.name}</p>
              <Button color="secondary">
                <Link className="app-link" to="/coffee-shops">Manage Coffee Shops</Link>
              </Button>
            </div> :
            <div>
              <p>Please log in to manage coffee shops.</p>
              <Button color="secondary" disabled={true}>
                Manage Coffee Shops
              </Button>
            </div>
          }
        </Container>
      </div>
    );
  }
}

export default Home;
Update src/NavBar.js to add login and logout buttons:
import React, { Component } from 'react';
import { Button, Collapse, Nav, Navbar, NavbarBrand, NavbarToggler, NavItem, NavLink } from 'reactstrap';
import { Link } from 'react-router-dom';

class NavBar extends Component {

  constructor(props) {
    super(props);
    this.state = {isOpen: false};
    this.toggle = this.toggle.bind(this);
  }

  toggle() {
    this.setState({
      isOpen: !this.state.isOpen
    });
  }

  render() {
    const {isAuthenticated, login, logout} = this.props;

    return <Navbar color="light" light expand="md">
      <NavbarBrand tag={Link} to="/">Home</NavbarBrand>
      <NavbarToggler onClick={this.toggle}/>
      <Collapse isOpen={this.state.isOpen} navbar>
        <Nav className="ml-auto" navbar>
          <NavItem>
            <NavLink
              href="https://twitter.com/oktadev">@oktadev</NavLink>
          </NavItem>
          <NavItem>
            <NavLink href="https://github.com/oktadeveloper/okta-kotlin-react-crud-example">GitHub</NavLink>
          </NavItem>
          {!isAuthenticated ?
            <NavItem>
              <Button color="secondary" outline onClick={login}>Login</Button>
            </NavItem> :
            <NavItem>
              <Button color="secondary" outline onClick={logout}>Logout</Button>
            </NavItem>
          }
        </Nav>
      </Collapse>
    </Navbar>;
  }
}

export default NavBar;
Time to test the secured app.
Test Your Secured Kotlin + React Application
Run the resource server (if you need to):
./gradlew bootRun
Start the React client:
yarn start
Open a browser: http://localhost:3000.
Click the Login button in the header. You’ll be redirected to the Okta login page. Log in using your Okta credentials.
When you return to your client app’s homepage, click the Manage Coffee Shops button.
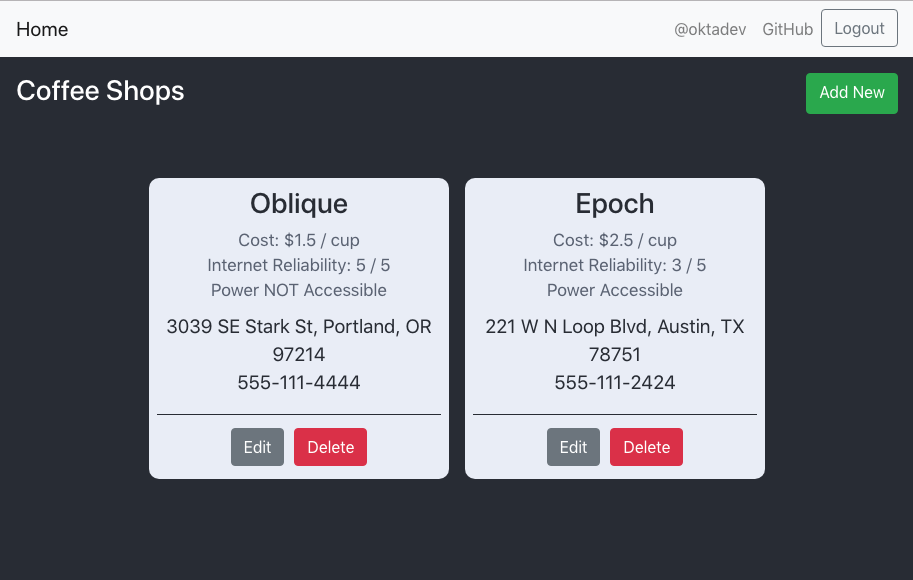
From this page, you can edit, delete, and add new coffee shops.
All done! In this tutorial, you created a web-based application using a React frontend with data being served by a Kotlin Spring Boot resource server. You also saw how to use a free developer account from Okta to add OAuth 2.0 login to your application and to secure your resource server.
You can find the source code for this example on GitHub in the okta-kotlin-react-crud-example repository.
Learn More About Kotlin and React
If you want to keep learning, take a look at these related posts:
- Kotlin: A Beginner’s Guide and Tutorial
- Use React and Spring Boot to Build a Simple CRUD App
- ^^ Shows how to configure CSRF protection with Spring Boot and React
- Build a Basic CRUD App in Android with Kotlin
- Build a Web App with Spring Boot and Spring Security in 15 Minutes
- Create a Secure Spring REST API
- Build a Simple CRUD App with Spring Boot and Vue.js
If you have any questions about this post, please add a comment below. For more awesome content, follow @oktadev on Twitter, like us on Facebook, or subscribe to our YouTube channel.
Changelog:
- Apr 16, 2021: Updated to streamline setup with the Okta CLI. Changes to this article can be viewed in okta-blog#766;
- Sep 3, 2020: Fixed the power accessible attribute to render correctly. Thanks to Katie Levy for the pull request!
- Aug 13, 2020: Upgraded to Spring Boot 2.3.2 and Okta React 3.0.4. See the code changes in the example app on GitHub. Changes to this article can be viewed in oktadeveloper/okta-blog#369.
- May 18, 2020:
Upgraded to Okta React 3.0.1 and removed
/implicitfrom Login redirect URI. See the code changes in the example app on GitHub. Changes to this article can be viewed in oktadeveloper/okta-blog#297.
Okta Developer Blog Comment Policy
We welcome relevant and respectful comments. Off-topic comments may be removed.