Develop Secure Apps with WebSockets and Node.js

WebSockets is a technology for communicating between the client and the server in a web application, where an open socket creates a persistent connection between the client and the server. This method of communication works outside of the HTTP request/response paradigm that has existed since the earliest days of the internet. Since sockets don’t use HTTP they can eliminate the overhead that comes with HTTP for low latency communications.
In this tutorial, you will learn how to create a small chat room web application that will keep track of the users in the room and send messages using WebSockets. For the server, you will use Express on Node.js. Node.js is an event-driven JavaScript runtime that has made JavaScript one of the most popular back end languages. Express is the most popular web framework for Node.js. You will also learn how to set up Okta for authentication. To authenticate the socket communication, you will issue a JSON Web Token (JWT) to the client, and validate it when the client attempts to open the socket.
Note: In May 2025, the Okta Integrator Free Plan replaced Okta Developer Edition Accounts, and the Okta CLI was deprecated.
We preserved this post for reference, but the instructions no longer work exactly as written. Replace the Okta CLI commands by manually configuring Okta following the instructions in our Developer Documentation.
Create Your Okta App
Before you begin, you’ll need a free Okta developer account. Install the Okta CLI and run okta register to sign up for a new account. If you already have an account, run okta login.
Then, run okta apps create. Select the default app name, or change it as you see fit.
Choose Web and press Enter.
Select Other.
Then, change the Redirect URI to http://localhost:8080/authorization-code/callback and accept the default Logout Redirect URI of http://localhost:8080.
What does the Okta CLI do?
The Okta CLI will create an OIDC Web App in your Okta Org. It will add the redirect URIs you specified and grant access to the Everyone group. You will see output like the following when it’s finished:
Okta application configuration has been written to: /path/to/app/.okta.env
Run cat .okta.env (or type .okta.env on Windows) to see the issuer and credentials for your app.
export OKTA_OAUTH2_ISSUER="https://dev-133337.okta.com/oauth2/default"
export OKTA_OAUTH2_CLIENT_ID="0oab8eb55Kb9jdMIr5d6"
export OKTA_OAUTH2_CLIENT_SECRET="NEVER-SHOW-SECRETS"
Your Okta domain is the first part of your issuer, before /oauth2/default.
NOTE: You can also use the Okta Admin Console to create your app. See Create a Web App for more information.
Make note of your Client ID and your Client Secret, since you will need this in your application.
Create Your Node.js Application
Start by opening your favorite IDE and use the command mkdir to create a folder for your project. Navigate to that folder and enter the command npm init. You will need to walk through the instructions that follow. Next, you will want to install your dependencies.
First, you will need Okta’s Node.js SDK and the OIDC middleware. These two packages make integrating Okta’s authentication into your application simple. It’s easy to configure the middleware, but you will do that later. For now, install the packages with the following commands.
npm i @okta/oidc-middleware@4.0.1
npm i @okta/okta-sdk-nodejs@4.1.0
Next, install dotenv, which will store and retrieve sensitive configuration without pushing this information to your source code repository.
npm i dotenv
Next, you will need to install Express.
npm i express@4.17.1
You will also need express-session to help manage your session state.
npm i express-session@1.17.1
Next, install jsonwebtoken to help create JWTs that you will issue to your client.
npm i jsonwebtoken@8.5.1
To manage the sockets, you will use socket.io. For validating the JWT in your socket management, you will use socketio-jwt. You will see later how these two connect to authenticate your socket requests.
npm i socket.io@2.3.0
npm i socketio-jwt@4.6.2
Finally, you will need pug. Pug is a view engine that was previously known as Jade.
npm i pug@3.0.0
Once you are all set up, add a new file to your root directory called .env. Add the following code to it. You can change your JWT_TOKEN_KEY to something more fitting if you wish.
OKTA_BASE_URL={yourOktaUrl}
OKTA_CLIENT_ID={yourClientId}
OKTA_CLIENT_SECRET={yourClientSecret}
APP_BASE_PORT=8080
APP_BASE_URL=http://localhost:8080
JWT_TOKEN_KEY=someverylongandveryrandomandverysecretkey
Write Your Server Code
Now you are ready to begin writing your server-side code. First, add a file to your root called index.js and add the following code.
"use strict";

require( "dotenv" ).config();

const server = require( "./server" );

const port = process.env.APP_BASE_PORT;

server.start( {
  port: port
} ).then( app => {
  console.log( "Application is now running on port " + port );
} );
This file serves as your entry point for the application. It starts the server by listening to the port defined in your .env file. It also calls the config() function on dotenv, which should be called as early as possible in your application.
Next, add a file called rooms.js.
"use strict";

module.exports = function () {
  let rooms = [];

  rooms.push( {
    name: "General",
    users: []
  } );

  rooms.push( {
    name: "Sports",
    users: []
  } );

  rooms.push( {
    name: "Music",
    users: []
  } );

  return rooms;
};
This file is just in-memory storage for your chatrooms. In a production application, you would want to connect this to some sort of persistent storage but this solution works fine for this demo. You start by providing three default rooms—General, Sports, and Music. Each room consists of a name and a list of users. The lists are empty when the application first starts but they will be populated as users visit each room. You could also keep a list of messages here so that new users could view the history.
Next, you can define your routes. Create a new file called routes.js and add the following code to it.
"use strict";

module.exports = function ( app, opts ) {

  function ensureAuthenticated ( request, response, next ) {
    if ( !request.userContext ) {
      return response.status( 401 ).redirect( "/account/login" );
    }

    next();
  }

  app.get( "", ( request, response, next ) => {
    return response.render( "home" );
  } );

  app.get( "/dashboard", ensureAuthenticated, ( request, response, next ) => {
    return response.render( "dashboard", {
      user: request.userContext.userinfo,
      rooms: opts.rooms
    } );
  } );

  app.get( "/chat/:room", ensureAuthenticated, ( request, response, next ) => {
    return response.render( "room", {
      jwt: opts.jwt.sign( { user: request.userContext.userinfo, room: request.params.room }, process.env.JWT_TOKEN_KEY ),
      room: opts.rooms.filter( ( r ) => r.name == request.params.room )[0]
    } );
  } );

  app.get( "/account/logout", ensureAuthenticated, ( request, response, next ) => {
    request.logout();
    response.redirect( "/" );
  } );

  app.get( "/account/login", ( request, response, next ) => {
    return response.render( "home" );
  } );
};
As you can see we are defining a few routes here. First is the home page, second is the Dashboard page which will be the landing page for authenticated users. To ensure a user is authenticated you add the ensureAuthenticated middleware function to the route. This function is defined above and simply returns a 401 for unauthenticated users and redirects them to the login page. The chat route looks for a route parameter called room. This means a user who navigates to ~/chat/General will land in the general chat room. This route also creates a JWT and passes it to the client, using the jsonwebtoken object that was injected into the routes. There is also a logout route for logging out. (The login route will be configured using Okta in the server setup later.)
Next, you need to set up your socket.js file to handle the socket communications. Create the file in your root and add the following code.
"use strict";

const socketioJwt = require( "socketio-jwt" );

module.exports = function ( io, opts ) {

  io.sockets.on( "connection", socketioJwt.authorize( {
    secret: process.env.JWT_TOKEN_KEY,
    timeout: 15000 // 15 seconds to send the authentication message
  } ) ).on( "authenticated", function ( socket ) {
    socket.on( "entered", () => {

      let user = socket.decoded_token.user.name;
      let room = socket.decoded_token.room;

      opts.rooms.filter( ( r ) => r.name === room )[0].users.push( user );
      socket.join( room );

      io.to( room ).emit( "user entered", user );
    } );

    socket.on( "message sent", ( message ) => {
      let user = socket.decoded_token.user.name;
      let room = socket.decoded_token.room;

      io.to( room ).emit( "message received", user, message );
    } );

    socket.on( "disconnect", () => {
      let user = socket.decoded_token.user.name;
      let room = socket.decoded_token.room;

      opts.rooms.filter( ( r ) => r.name === room )[0].users.splice( user, 1 );

      io.to( room ).emit( "user exited", user );
    } );

    let users = [];

    users.push( {
      user: "test"
    } );

    socket.emit( "welcome", users );

  } );

};
Here you are using socketio-jwt to decode the JWT you passed to the client when the user enters the room. A JWT is a token whose payload holds some information representing claims to be sent to the server. The JWT can be signed or encrypted and then validated by the server to ensure their validity. Once established, the server can read the claims from the token and decide the proper course of action. You can send the JWT with the request to the server to ensure the sender of the request is authorized to perform the requested action.
(Note, you can read more about an alternative approach using Okta as an authentication server a, where you authenticate the user when they reach a room.)
The socket.js file also has the logic for receiving and sending messages as well as handling users entering and leaving the room. When a user enters or leaves, you add or remove them from the room’s user list and broadcast to the room that the user has left. The client side is responsible for displaying that information to the user.
Finally, to tie it all together you need to add a server.js file.
"use strict";

const express = require( "express" );
const bodyParser = require( "body-parser" );
const path = require( "path" );

const ExpressOIDC = require( "@okta/oidc-middleware" ).ExpressOIDC;
const session = require( "express-session" );
let jwt = require( "jsonwebtoken" );

const routes = require( "./routes" );
const sockets = require( "./socket" );

const start = function ( options ) {
  return new Promise( function ( resolve, reject ) {
    process.on( "unhandledRejection", ( reason, p ) => {
      console.log( "Unhandled Rejection at: Promise", p, "reason:", reason );
    } );

    if ( !options.port ) {
      reject( new Error( "no port specificed" ) );
    }

    const app = express();
    const http = require( "http" ).createServer( app );
    const io = require( "socket.io" )( http );

    var rooms = [];

    app.use( express.static( "public" ) );
    app.set( "views", path.join( __dirname, "/public/views" ) );
    app.set( "view engine", "pug" );

    app.use( bodyParser.urlencoded( { extended: false } ) );

    app.use( function ( error, request, response, next ) {
      console.log( error );
      reject( new Error( "something went wrong" + error ) );
      response.status( 500 ).send( "something went wrong" );
    } );

    const oidc = new ExpressOIDC( {
      issuer: process.env.OKTA_BASE_URL + "/oauth2/default",
      client_id: process.env.OKTA_CLIENT_ID,
      client_secret: process.env.OKTA_CLIENT_SECRET,
      appBaseUrl: process.env.APP_BASE_URL,
      scope: "openid profile",
      routes: {
        login: {
          path: "/users/login",
        },
        callback: {
          path: "/authorization-code/callback",
        },
        loginCallback: {
          afterCallback: "/dashboard",
        },
      },
    } );

    app.use(
      session( {
        secret:
          "asd;skdvmfebvoswmvlkmes';lvmsdlfbvmsbvoibvms'dplvmdmaspviresmpvmrae';vm'psdemr",
        resave: true,
        saveUninitialized: false,
      } )
    );

    app.use( oidc.router );

    var rooms = require( "./rooms" )();

    routes( app, {
      rooms: rooms,
      jwt: jwt
    } );

    sockets( io, {
      rooms: rooms
    } );

    const server = http.listen( options.port, function () {
      resolve( server );
    } );
  } );
};

module.exports = Object.assign( {}, { start } );
This file does a lot of the legwork getting the application set up. When the server is started, it registers your various middleware and dependencies. This includes the Okta middleware, which uses the variables in your .env file. It will register the route /users/login as the login page. This page is hosted by Okta and will manage the authentication for you.
Create Your Pages and Client-Side JavaScript
With the server code complete, it’s time to turn your attention to the client. You will have three distinct pages and one layout page. First, you can add your layout.pug page to the public/views folder.
block variables

doctype html
html(lang='en')
  head
    meta(charset='utf-8')
    meta(name='viewport' content='width=device-width, initial-scale=1, shrink-to-fit=no')
    script(src="https://code.jquery.com/jquery-3.4.1.min.js" integrity="sha256-CSXorXvZcTkaix6Yvo6HppcZGetbYMGWSFlBw8HfCJo=" crossorigin="anonymous")
    script(src="https://stackpath.bootstrapcdn.com/bootstrap/4.3.1/js/bootstrap.min.js", integrity="sha384-JjSmVgyd0p3pXB1rRibZUAYoIIy6OrQ6VrjIEaFf/nJGzIxFDsf4x0xIM+B07jRM", crossorigin="anonymous")
    script(src="https://stackpath.bootstrapcdn.com/bootstrap/4.3.1/js/bootstrap.bundle.min.js", integrity="sha384-xrRywqdh3PHs8keKZN+8zzc5TX0GRTLCcmivcbNJWm2rs5C8PRhcEn3czEjhAO9o", crossorigin="anonymous")
    link(href="https://stackpath.bootstrapcdn.com/bootstrap/4.3.1/css/bootstrap.min.css", rel="stylesheet", integrity="sha384-ggOyR0iXCbMQv3Xipma34MD+dH/1fQ784/j6cY/iJTQUOhcWr7x9JvoRxT2MZw1T", crossorigin="anonymous")
    title #{title}
  body
    div.d-flex.flex-column.flex-md-row.align-items-center.p-3.px-md-4.mb-3.bg-white.border-bottom.box-shadow
      h5.my-0.mr-md-auto Let's Talk
      nav.my-2.my-md-0.mr-md-3
        if user == undefined
          a.p-2.text-dark(href="/users/login") Log In
        else
          a.p-2.text-dark(href="/Dashboard") Home
          a.p-2.text-dark(href="/users/logout") Logout
    .container
      block content

    footer.pt-4.my-md-5.pt-md-5.border-top
      div.row.text-center
        div.col-8.col-md A Web sockets demo using Socket.IO
      div.row.text-center
        div.col-8.col-md Built with #[a(href='https://expressjs.com/') Express.js], login powered by #[a(href='https://developer.okta.com/') Okta].
      div.row.text-center
        div.col-8.col-md Written by #[a(href='https://profile.fishbowlllc.com') Nik Fisher]
You are importing Bootstrap because it is nice and easy to work with. There’s a login button that checks the view model for a user object. That object is populated on the server and passed to the view. If it doesn’t exist then the user is shown the login button.
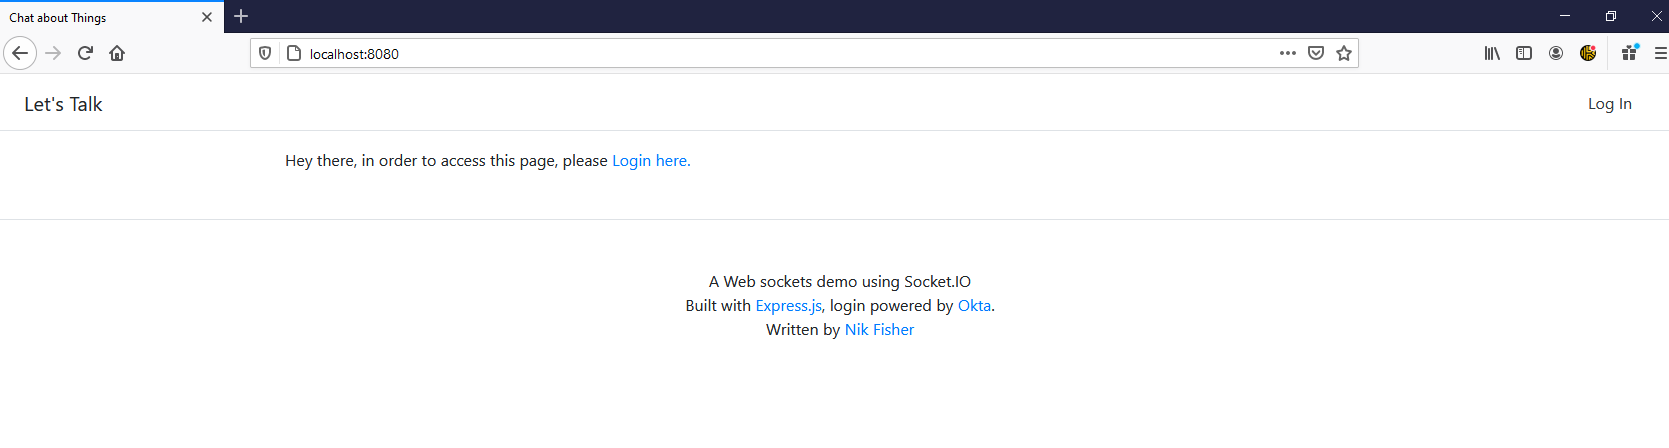
Next, you can provide a landing page for your users. Add a new file to the views folder called home.pug.
extends layout

block variables
  - var title = 'Chat about Things'

block content

    p Hey there, in order to access this page, please
      a(href="/users/login") log in here.
Next, add a page called dashboard.pug to the views folder for authenticated users. This page will display a list of available rooms to the users.
extends layout

block variables
  - var title = "Let's chat about something"

block content
  .row
    .col-lg-3
      h3 Chat Rooms
      ul.list-group
        each room, i in rooms
          li.list-group-item
            a(href="chat/"+room.name ) #{room.name}
    .col-lg-9
      .jumbotron
        h1 Join a chat room
        p.lead You can check out our chat rooms on the left
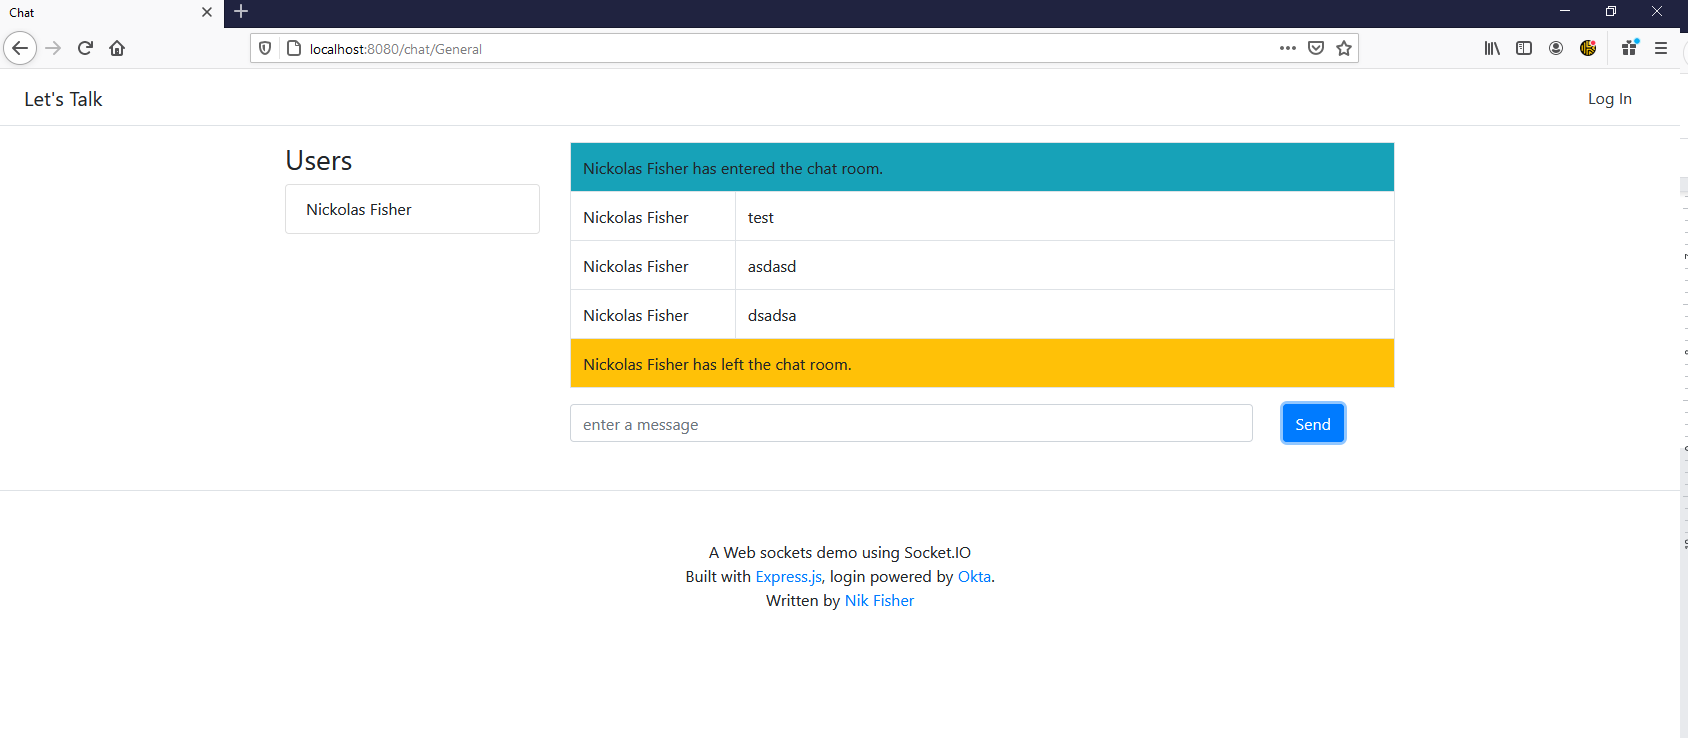
Finally, add your room.pug file to the views folder. This page will have the chat room itself along with any JavaScript you need.
extends layout

block variables
  - var title = 'Chat'

block content
  .row
    .col-lg-3
        h3 Users
        ul#users-list.list-group
          each user, i in room.users
            li.list-group-item #{user}
    .col-lg-9
        .row
            .col-lg-12
                table#chat-table.table.table-bordered
        .row
            .col-lg-10
                input#chat-message(type=text placeholder="enter a message").form-control
            .col-lg-2
                button#chat-button.btn.btn-primary Send


  script(src="https://cdnjs.cloudflare.com/ajax/libs/socket.io/2.3.0/socket.io.js")
  script(src="..\\js\\room.js")
  script.
    start('!{jwt}')
You are using two JavaScript scripts on this page. The first is the socket.io client library. The second is a file named room.js. Add room.js to public/js and insert the following code.
const socket = io.connect( window.location.origin );

function start( jwt ) {

  socket.on( "connect", () => {
    socket
      .emit( "authenticate", { token: jwt } ) //send the jwt
      .on( "authenticated", () => {

        socket.on( "user entered", ( user ) => {
          $( "#chat-table" ).append(
            "<tr class=\"bg-info\"><td colspan=2>" + user + " has entered the chat room. </td></tr>"
          );

          let li = "<li class=\"list-group-item\"> " + user + " </li>";
          $( "#users-list" ).append( li );

        } );

        socket.on( "user exited", ( user ) => {
          $( "#chat-table" ).append(
            "<tr class=\"bg-warning\"><td colspan=2>" + user + " has left the chat room. </td></tr>"
          );

          $( "#users-list > li:contains(\"" + user + "\")" )[0].remove();
        } );

        socket.on( "message received", ( user, message ) => {
          $( "#chat-table" ).append(
            "<tr><td style=\"width:20%\">" + user + "</td><td>" + message + "</td></tr>"
          );
        } );

        $( "#chat-button" ).on( "click", function () {
          let message = $( "#chat-message" ).val();
          socket.emit( "message sent", message );
          $( "#chat-message" ).val( "" );
        } );

        window.onunload = window.onbeforeunload = () => {
          socket.close();
        };

        socket.emit( "entered" );
      } )
      .on( "unauthorized", ( msg ) => {
        console.log( `unauthorized: ${ JSON.stringify( msg.data ) }` );
        throw new Error( msg.data.type );
      } );
  } );
}
This file manages all the user connections and messages between clients. When a remote client performs an action in the room, it’s broadcast to each other client. socket.on will take care of these messages and manipulate the client in whatever way you see fit. When you want the server to be made aware of an action this client took, you use socket.emit to broadcast the message back to the server. Of course, right when the page loads, you are authenticating the user with the JWT you supplied earlier. This ensures the socket communication is secure.
Test Your Application
Your application is complete and ready for the first test. Use the command node index.js to start your server and navigate to localhost:8080 to see your home page.
Log in using Okta and navigate to a room of your choice. You can open another instance of the browser and log in to see your second user enter the chat room. You can send messages back and forth and see how each room will handle them.
Summary
WebSockets provide exciting new opportunities for web applications by bucking the age old request/response paradigm. But with this new technology, developers need to continue practicing secure coding techniques. By combining JWT with Okta’s secure and easy single sign-on ecosystem, you can ensure the safety of your users without inflating your development time.
The source code for this project can be found on GitHub.
You might also like this related content:
- Setup a Mute Indicator Light for Zoom with Hammerspoon
- Build a Video Chat Service with JavaScript, WebRTC, and Okta
- How to Build Securely with Blazor WebAssembly (WASM)
Also, be sure to follow us on Twitter and subscribe to our YouTube Channel for updates on new posts and videos.
Okta Developer Blog Comment Policy
We welcome relevant and respectful comments. Off-topic comments may be removed.