How to Authenticate with SAML in ASP.NET Core and C#

Security Assertion Markup Language, more commonly known as SAML, is an open standard for exchanging authentication and authorization data between parties. Most commonly these parties are an Identity Provider and a Service Provider. The primary use case for SAML has typically been to provide single sign-on (SSO) for users to applications within an enterprise/workforce environment.
Up until the past few years, SAML was considered the industry standard—and proven workhorse—for passing an authenticated user into applications while allowing these applications to defer authentication to a centralized identity solution. However, with the introduction of OpenID Connect, which is an authentication layer built on top of OAuth2, SAML has become outdated. Furthermore, every year seems to bring new issues with SAML – in the form of newly discovered exploits – which is giving it a reputation of not being the most secure option. That being said, SAML is still considered a relevant option for single sign-on and there are still requirements for developers to support it in modern environments. If OpenID Connect is not an option, and SAML is a requirement, this blog will cover a simple approach to add SAML 2.0 support to an ASP .NET Core 3.1 application so that it can accept authenticated users from an Identity Provider and track that users authenticated state within the .NET middleware.
Prerequisites
Install .NET Core 3.1
Install an Editor/IDE such as Visual Studio Code or Visual Studio
Learn about Basic SAML Concepts
Getting Started
First, create an application to function as a SAML Service Provider. Open a command shell, cd to a preferred directory to create the project in and enter the following command:
dotnet new webapp -o Okta_SAML_Example
This command will create a new web app from a template and put it in a directory called Okta_SAML_Example.
If this is your first-time using .NET Core, you may need to trust the development certificate. To do this, use the following command and enter your admin password if prompted:
dotnet dev-certs https –trust
Next, enter the Okta_SAML_Example directory:
cd Okta_SAML_Example
Finally, run the sample application to make sure that it works:
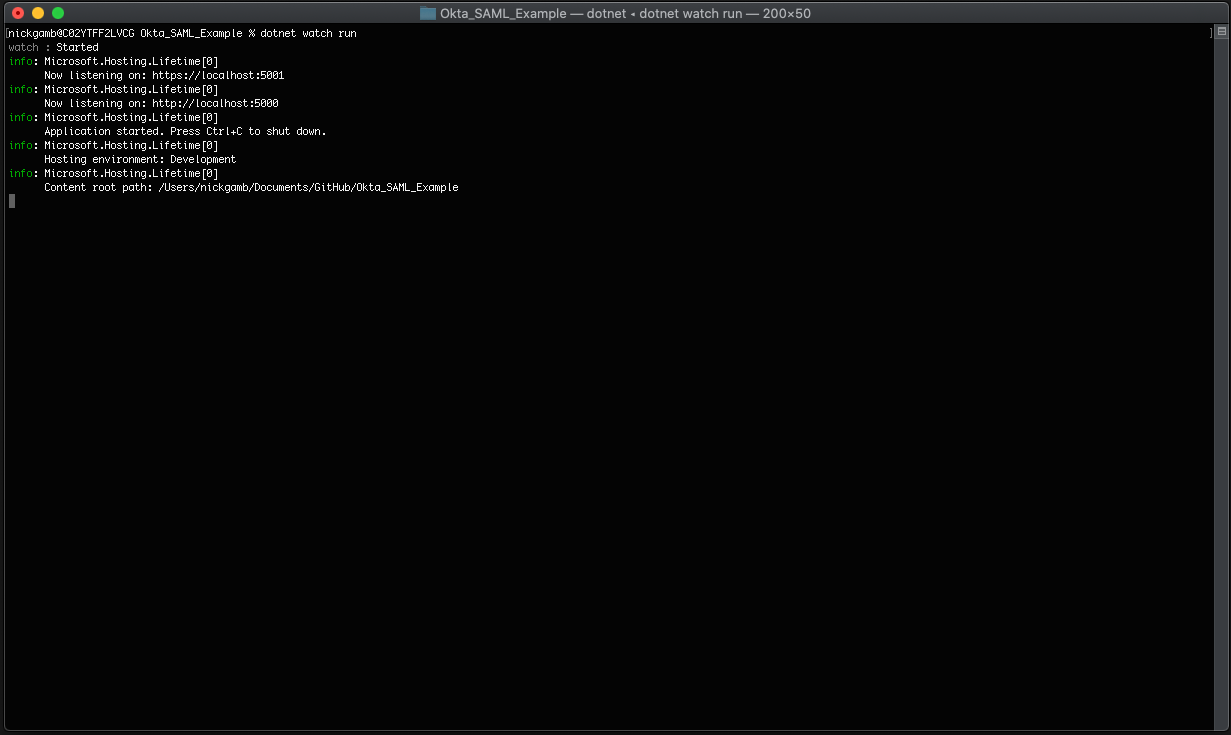
dotnet watch run
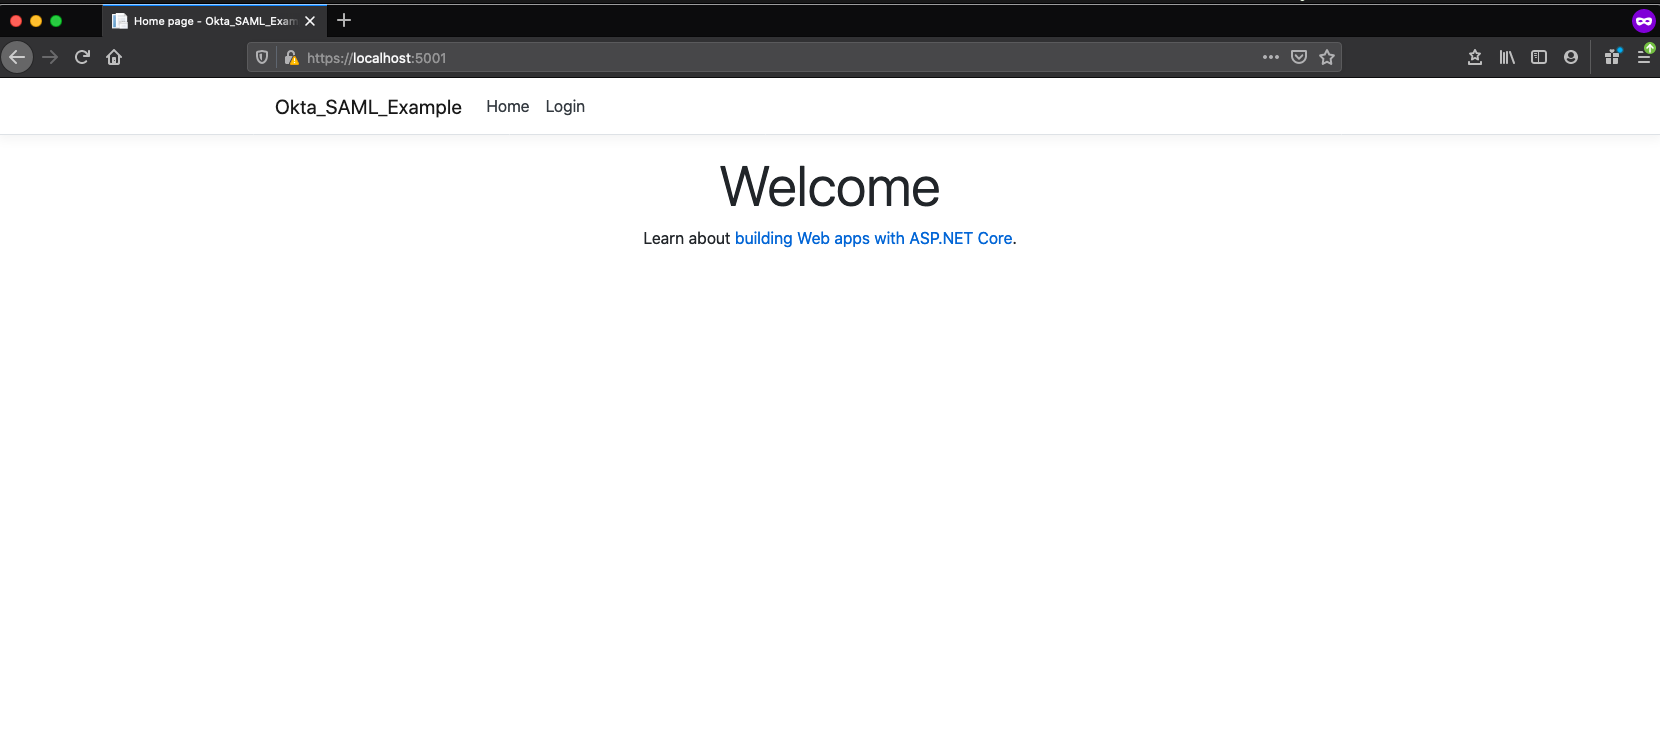
Once the application has started, navigate to https://localhost:5001 in your preferred web browser. Using watch run, instead of run by itself, allows the compiler to detect changes in the code and recompile every time it sees them. This is very helpful when iterating on the code. Type CTRL + C in shell to terminate.
Unlike .NET Framework, .NET Core is missing some XML and cryptology libraries that are very important when implementing SAML. Thankfully, there are some great open source solutions that exist for .NET Core 3.x, which reimplements these concepts and others to make supporting SAML easy. After evaluating multiple such solutions, I have found that working with https://github.com/ITfoxtec/ITfoxtec.Identity.Saml2 was the most enjoyable experience for me.
Add the required packages by running the following commands:
dotnet add package ITfoxtec.Identity.Saml2 --version 4.0.8
dotnet add package ITfoxtec.Identity.Saml2.MvcCore --version 4.0.8
Login With SAML
The first step is to configure the application to use SAML for authentication. Open Startup.cs. Start by adding the following using statements:
using ITfoxtec.Identity.Saml2;
using ITfoxtec.Identity.Saml2.Schemas.Metadata;
using ITfoxtec.Identity.Saml2.MvcCore.Configuration;
Next, find ConfigureServices(), and add the following code below services.AddRazorPages();:
public void ConfigureServices(IServiceCollection services)
{
    services.AddRazorPages();

    services.Configure<Saml2Configuration>(Configuration.GetSection("Saml2"));

    services.Configure<Saml2Configuration>(saml2Configuration =>
    {
        saml2Configuration.AllowedAudienceUris.Add(saml2Configuration.Issuer);

        var entityDescriptor = new EntityDescriptor();
        entityDescriptor.ReadIdPSsoDescriptorFromUrl(new Uri(Configuration["Saml2:IdPMetadata"]));
        if (entityDescriptor.IdPSsoDescriptor != null)
        {
            saml2Configuration.SingleSignOnDestination = entityDescriptor.IdPSsoDescriptor.SingleSignOnServices.First().Location;
            saml2Configuration.SignatureValidationCertificates.AddRange(entityDescriptor.IdPSsoDescriptor.SigningCertificates);
        }
        else
        {
            throw new Exception("IdPSsoDescriptor not loaded from metadata.");
        }
    });

    services.AddSaml2();
}
Find Configure() and add the following after app.UseRouting();
app.UseSaml2();
Still within Configure(), find the app.UseEndpoints() method and add the following new code below endpoints.MapRazorPages();
app.UseEndpoints(endpoints =>
{
    endpoints.MapRazorPages();

    endpoints.MapControllerRoute(
        name: "default",
        pattern: "{controller=Home}/{action=Index}/{id?}");
});
The application will now use SAML for authentication. Next, add a controller to handle the authentication routing. Create a new file in the root project folder called AuthController.cs and start by adding the following:
using ITfoxtec.Identity.Saml2;
using ITfoxtec.Identity.Saml2.Schemas;
using ITfoxtec.Identity.Saml2.MvcCore;
using System.Collections.Generic;
using System.Threading.Tasks;
using Microsoft.AspNetCore.Authorization;
using Microsoft.AspNetCore.Mvc;
using Okta_SAML_Example.Identity;
using Microsoft.Extensions.Options;
using System.Security.Authentication;

namespace Okta_SAML_Example.Controllers
{
    [AllowAnonymous]
    [Route("Auth")]
    public class AuthController : Controller
    {
        const string relayStateReturnUrl = "ReturnUrl";
        private readonly Saml2Configuration config;

        public AuthController(IOptions<Saml2Configuration> configAccessor)
        {
            config = configAccessor.Value;
        }
    }
}
Here you have created the foundation of your authentication controller by referencing the required dependencies, adding the basic controller layout, and bringing in the configuration object for your routes to use.
The next step is to create a route for Login(). Add the following code right after the AuthController() method.
[Route("Login")]
public IActionResult Login(string returnUrl = null)
{
    var binding = new Saml2RedirectBinding();
    binding.SetRelayStateQuery(new Dictionary<string, string> { { relayStateReturnUrl, returnUrl ?? Url.Content("~/") } });

    return binding.Bind(new Saml2AuthnRequest(config)).ToActionResult();
}
This route handles a user initiating login from your application directly. In SAML, this is called SP Initiated because the authentication request is starting from your Service Provider application. You will eventually call this route from a login button in your nav. During this process, a SAML Request Assertion is generated and sent to the Identity Provider via a redirect to an Identity Provider URL. This assertion is just XML with basic information about the request. In SAML there is also a concept called IDP Initiated. This is when the user starts in an Identity Provider and clicks a link to get into your Service Provider application. The IDP Initiated flow simply bypasses the login route, and SAML Request, entirely.
Next, you will need an Assertion Consumer Service. This is the route that your Identity Provider will send the SAML Response Assertion to. Right after the Login() route, add the following:
[Route("AssertionConsumerService")]
public async Task<IActionResult> AssertionConsumerService()
{
    var binding = new Saml2PostBinding();
    var saml2AuthnResponse = new Saml2AuthnResponse(config);

    binding.ReadSamlResponse(Request.ToGenericHttpRequest(), saml2AuthnResponse);
    if (saml2AuthnResponse.Status != Saml2StatusCodes.Success)
    {
        throw new AuthenticationException($"SAML Response status: {saml2AuthnResponse.Status}");
    }
    binding.Unbind(Request.ToGenericHttpRequest(), saml2AuthnResponse);
    await saml2AuthnResponse.CreateSession(HttpContext, claimsTransform: (claimsPrincipal) => ClaimsTransform.Transform(claimsPrincipal));

    var relayStateQuery = binding.GetRelayStateQuery();
    var returnUrl = relayStateQuery.ContainsKey(relayStateReturnUrl) ? relayStateQuery[relayStateReturnUrl] : Url.Content("~/");
    return Redirect(returnUrl);
}
This route is the meat and potatoes of your SAML implementation. This code receives the SAML Response from the Identity Provider, validates its signature via a signing certificate, decodes it, validates claims, creates an authenticated session with the middleware, and parses claims for later use.
Last, you will need a logout route to allow the user to logout from your application and kill the session with the middleware. Add the following below the Assertion Consumer Service route.
[HttpPost("Logout")]
[ValidateAntiForgeryToken]
public async Task<IActionResult> Logout()
{
    if (!User.Identity.IsAuthenticated)
    {
        return Redirect(Url.Content("~/"));
    }

    var binding = new Saml2PostBinding();
    var saml2LogoutRequest = await new Saml2LogoutRequest(config, User).DeleteSession(HttpContext);
    return Redirect("~/");
}
This route will be mapped to a logout button in your nav and it will delete the user’s session, logging them out. This is not a Single Log Out route, which could also be supported, that would also log the user out of the Identity Provider. Often it is not desired to log a user out of the Identity Provider when logging them out of the Service Provider, because the user may be using it for other applications.
In the Assertion Consumer Service route, there is a class called ClaimsTransform. This is a helper class that we need to implement to help parse the claims out of the SAML Response. Create a new file in the root directory of the project called ClaimsTransform.cs. Add the following:
using ITfoxtec.Identity.Saml2.Claims;
using System.Collections.Generic;
using System.Linq;
using System.Security.Claims;

namespace Okta_SAML_Example.Identity
{
    public static class ClaimsTransform
    {
        public static ClaimsPrincipal Transform(ClaimsPrincipal incomingPrincipal)
        {
            if (!incomingPrincipal.Identity.IsAuthenticated)
            {
                return incomingPrincipal;
            }

            return CreateClaimsPrincipal(incomingPrincipal);
        }

        private static ClaimsPrincipal CreateClaimsPrincipal(ClaimsPrincipal incomingPrincipal)
        {
            var claims = new List<Claim>();

            // All claims
            claims.AddRange(incomingPrincipal.Claims);

            // Or custom claims
            //claims.AddRange(GetSaml2LogoutClaims(incomingPrincipal));
            //claims.Add(new Claim(ClaimTypes.NameIdentifier, GetClaimValue(incomingPrincipal, ClaimTypes.NameIdentifier)));

            return new ClaimsPrincipal(new ClaimsIdentity(claims, incomingPrincipal.Identity.AuthenticationType, ClaimTypes.NameIdentifier, ClaimTypes.Role)
            {
                BootstrapContext = ((ClaimsIdentity)incomingPrincipal.Identity).BootstrapContext
            });
        }

        private static IEnumerable<Claim> GetSaml2LogoutClaims(ClaimsPrincipal principal)
        {
            yield return GetClaim(principal, Saml2ClaimTypes.NameId);
            yield return GetClaim(principal, Saml2ClaimTypes.NameIdFormat);
            yield return GetClaim(principal, Saml2ClaimTypes.SessionIndex);
        }

        private static Claim GetClaim(ClaimsPrincipal principal, string claimType)
        {
            return ((ClaimsIdentity)principal.Identity).Claims.Where(c => c.Type == claimType).FirstOrDefault();
        }

        private static string GetClaimValue(ClaimsPrincipal principal, string claimType)
        {
            var claim = GetClaim(principal, claimType);
            return claim != null ? claim.Value : null;
        }
    }
}
Next, you will need to modify your nav to show the login/logout buttons. You also want to add a nav button to take the user to a secured page which will display their SAML claims. Open _layout.cshtml and find the Home button:
<ul class="navbar-nav flex-grow-1">
    <li class="nav-item">
            <a class="nav-link text-dark" asp-area="" asp-page="/Index">Home</a>
     </li>
    ~
</ul>
Remove everything in the <ul> after the Home button. Between the </li> and the </ul>, at the spot above indicated by the ~ in the snippet above, replace the existing code with the following:
@if (((System.Security.Claims.ClaimsIdentity)User.Identity).IsAuthenticated)
{
    <li class="nav-item">
        <a class="nav-link text-dark" asp-area="" asp-page="/Claims">SAML Claims</a>
    </li>
    <li>
        @if (User.Identity.Name != null)
        {
            <span class="navbar-text">Hello, @User.Identity.Name!</span>
        }
        else
        {
            <span class="navbar-text">Hello</span>
        }
    </li>
    <li>
        <form class="form-inline" asp-controller="Auth" asp-action="Logout">
            <button type="submit" class="nav-link btn btn-link text-dark">Logout</button>
        </form>
    </li>
}
else
{
    <li class="nav-item">
        <a class="nav-link text-dark" asp-controller="Auth" asp-action="Login">Login</a>
    </li>
 }
This code shows the login button and hides the logout and claims buttons when the user is not logged in. It shows the logout and claims button, hiding the login button, when the user is logged in.
The next step is to create the Claims page, which is a secure page that can only be accessed once a user has authenticated.
Create two new files in the Pages folder of the project. Claims.cshtml and Claims.cshtml.cs.
Claims.cshtml:
@page
@model ClaimsModel
@{
    ViewData["Title"] = "Home page";
}

<div class="row">
    <div class="col-md-12">
        <h2>The users Claims (Iteration on User.Claims)</h2>
        <p>
            @foreach (var claim in User.Claims)
            {
                <strong>@claim.Type</strong> <br /> <span style="padding-left: 10px">Value: @claim.Value</span> <br />
            }
        </p>
    </div>
</div>
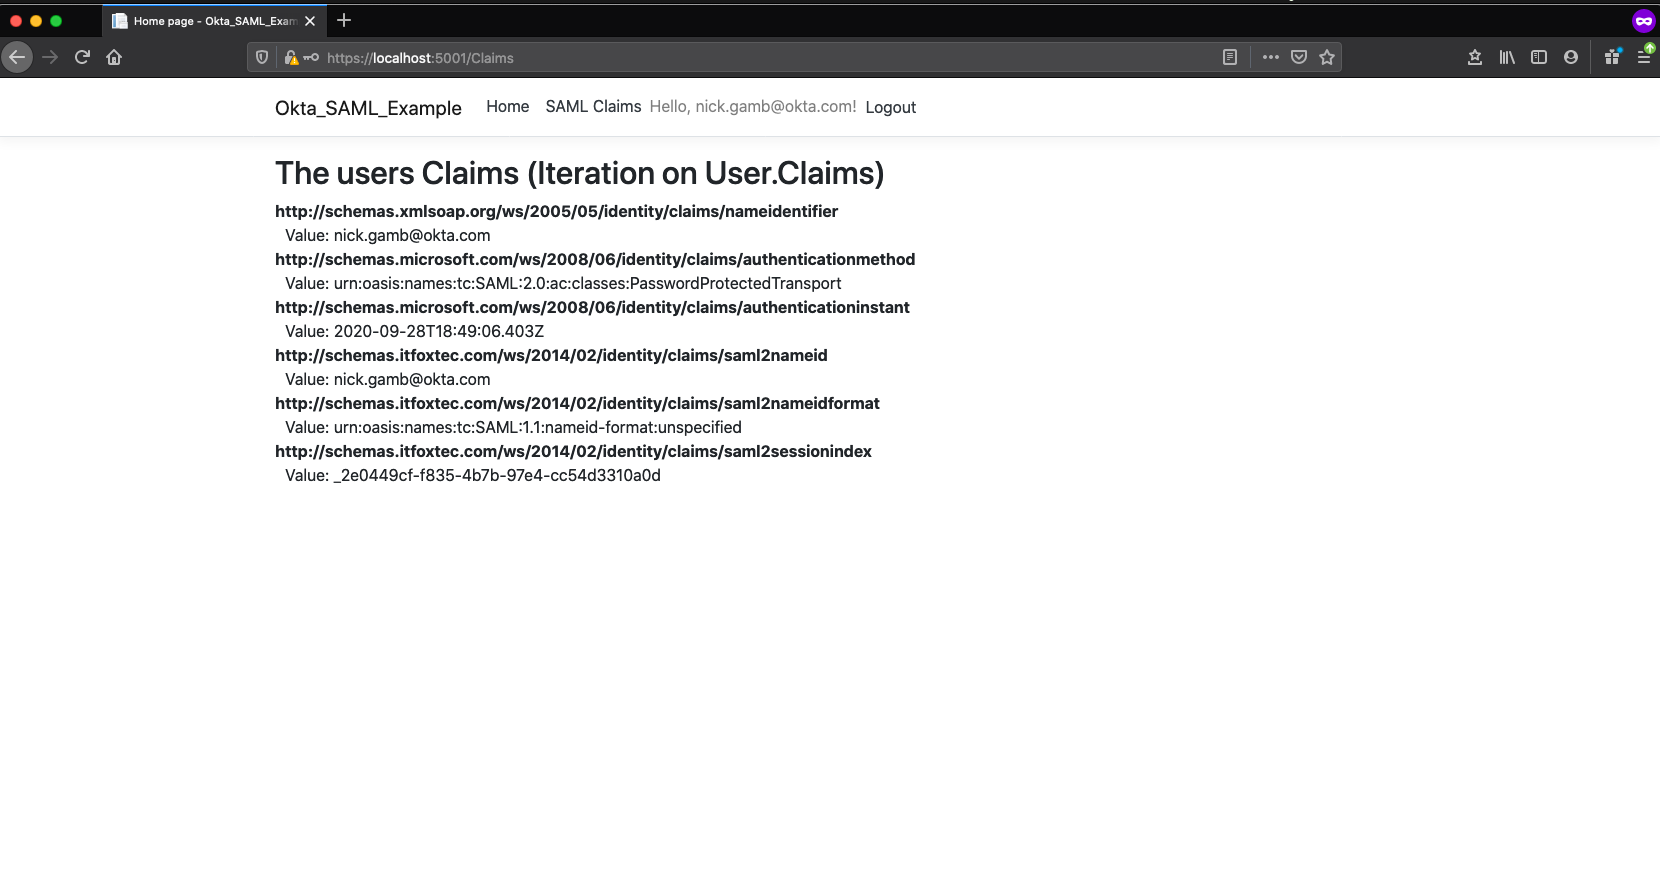
Here you are simply iterating on User.Claims, which will contain all claims from the SAML Response.
Claims.cshtml.cs:
using System;
using System.Collections.Generic;
using System.Linq;
using System.Threading.Tasks;
using Microsoft.AspNetCore.Mvc;
using Microsoft.AspNetCore.Mvc.RazorPages;
using Microsoft.AspNetCore.Authorization;
using Microsoft.Extensions.Logging;

namespace Okta_SAML_Example.Pages
{
    [Authorize]
    public class ClaimsModel : PageModel
    {
        private readonly ILogger<ClaimsModel> _logger;

        public ClaimsModel(ILogger<ClaimsModel> logger)
        {
            _logger = logger;
        }

        public void OnGet()
        {

        }
    }
}
This is the base model for your Claims page. The most important part here is the [Authorize] attribute before the class initialization that indicates that this page will require a user to authenticate. If you navigate to the claims page directly before authenticating, you will be redirected to authenticate first.
Lastly, add your configuration settings to appsettings.json. This is where you are pulling your SAML configuration settings from. Open appsettings.json and add the following code before "AllowedHosts": "*":
"Saml2": {
    "IdPMetadata": "{IDP MetaData URL}",
    "Issuer": "Okta_SAML_Example",
    "SignatureAlgorithm": "http://www.w3.org/2001/04/xmldsig-more#rsa-sha256",
    "CertificateValidationMode": "ChainTrust",
    "RevocationMode": "NoCheck"
  },
In this example, you are pulling your SAML settings from the IDP’s metadata. This is a great feature of SAML that allows you to pull a config from the source rather than having to copy each setting, and the signing certificate, into your code.
Configure An IDP
You have added all of the code that is required to implement SAML support to your Service Provider application. To test, you will need an Identity Provider. Okta is the single best identity platform on the market and supports SAML, as well as OpenID Connect and other standards. If you have not created a free Okta developer tenant, do so at developer.okta.com.
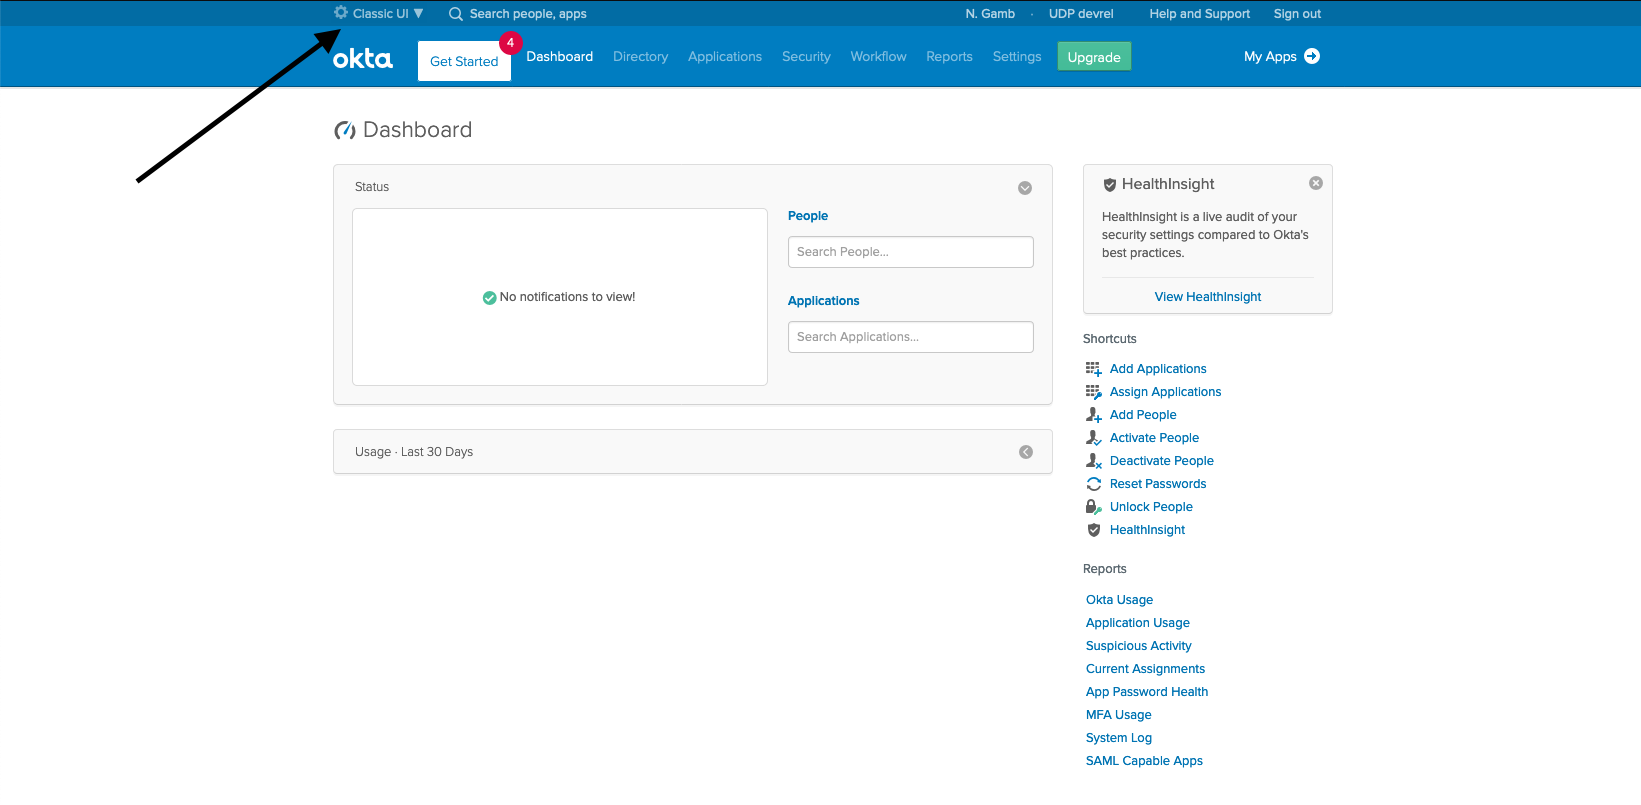
Log in to your Okta tenant, switch to the admin portal, and switch to the classic UI if you are in the developer UI.
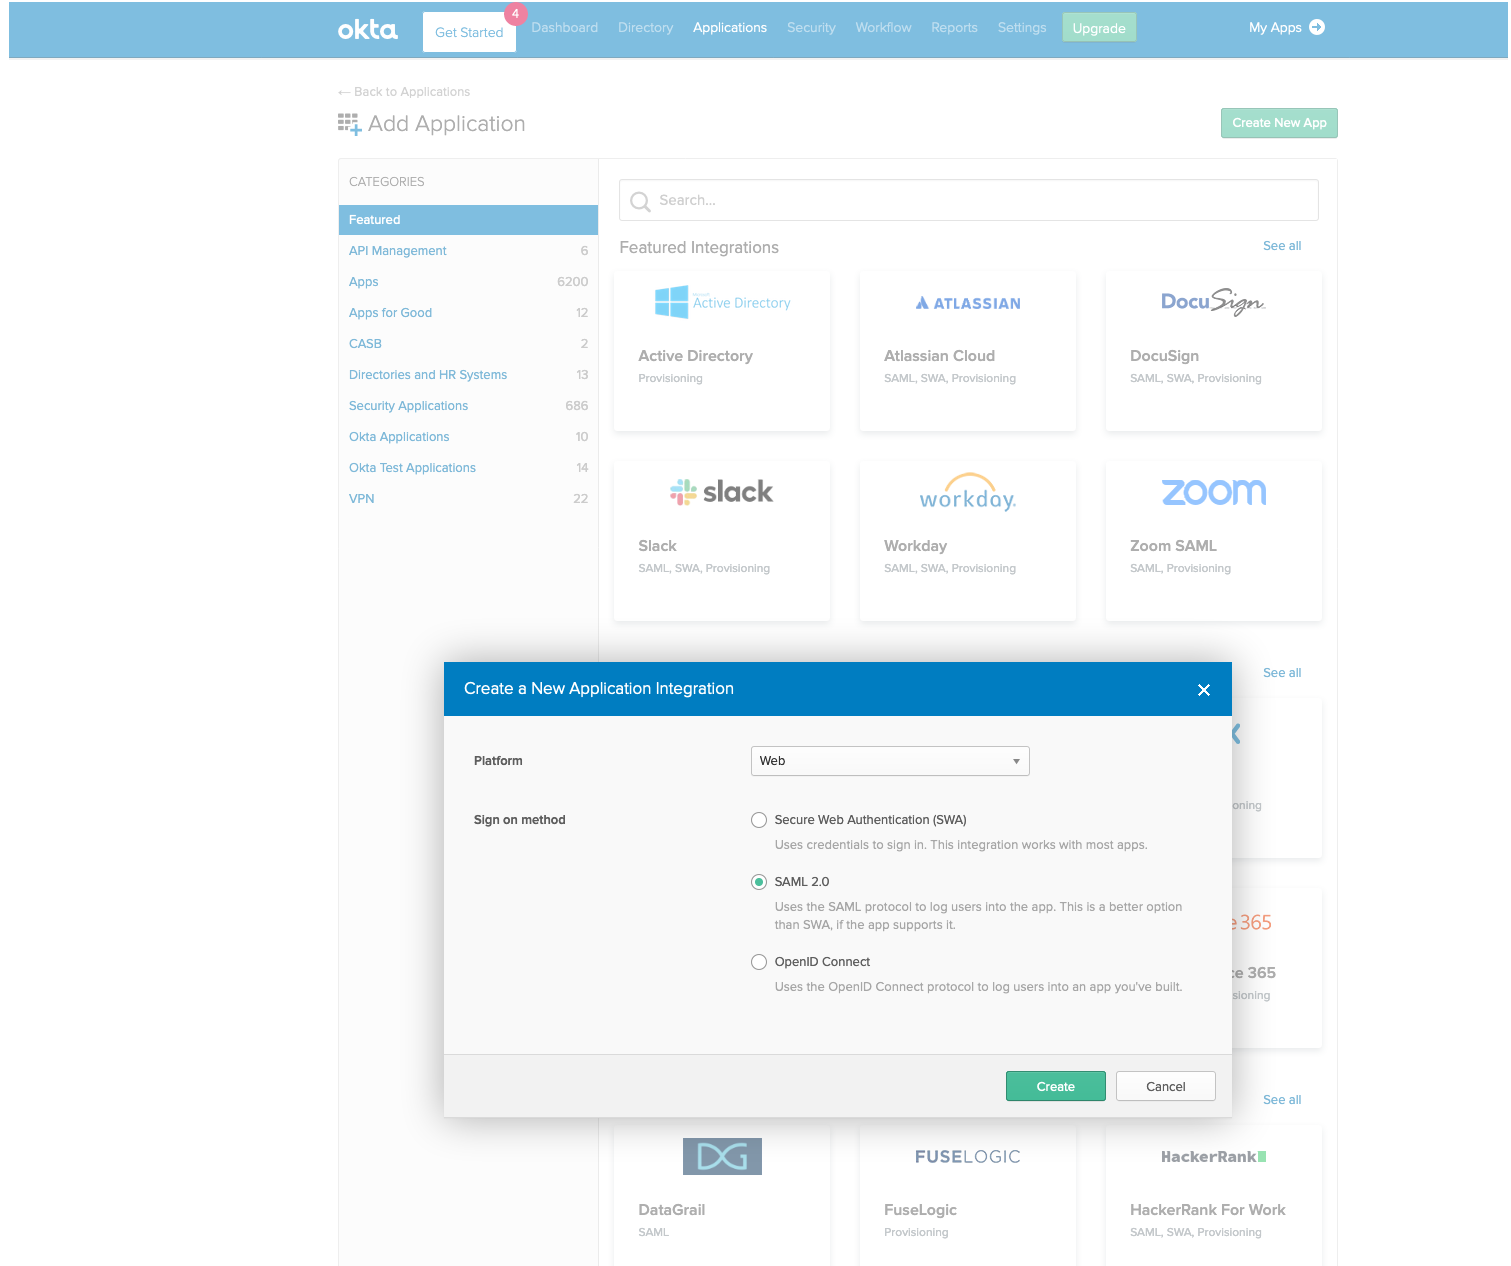
Click Applications, Add Application, Create New App, and select the SAML 2.0 radio button before clicking Create.
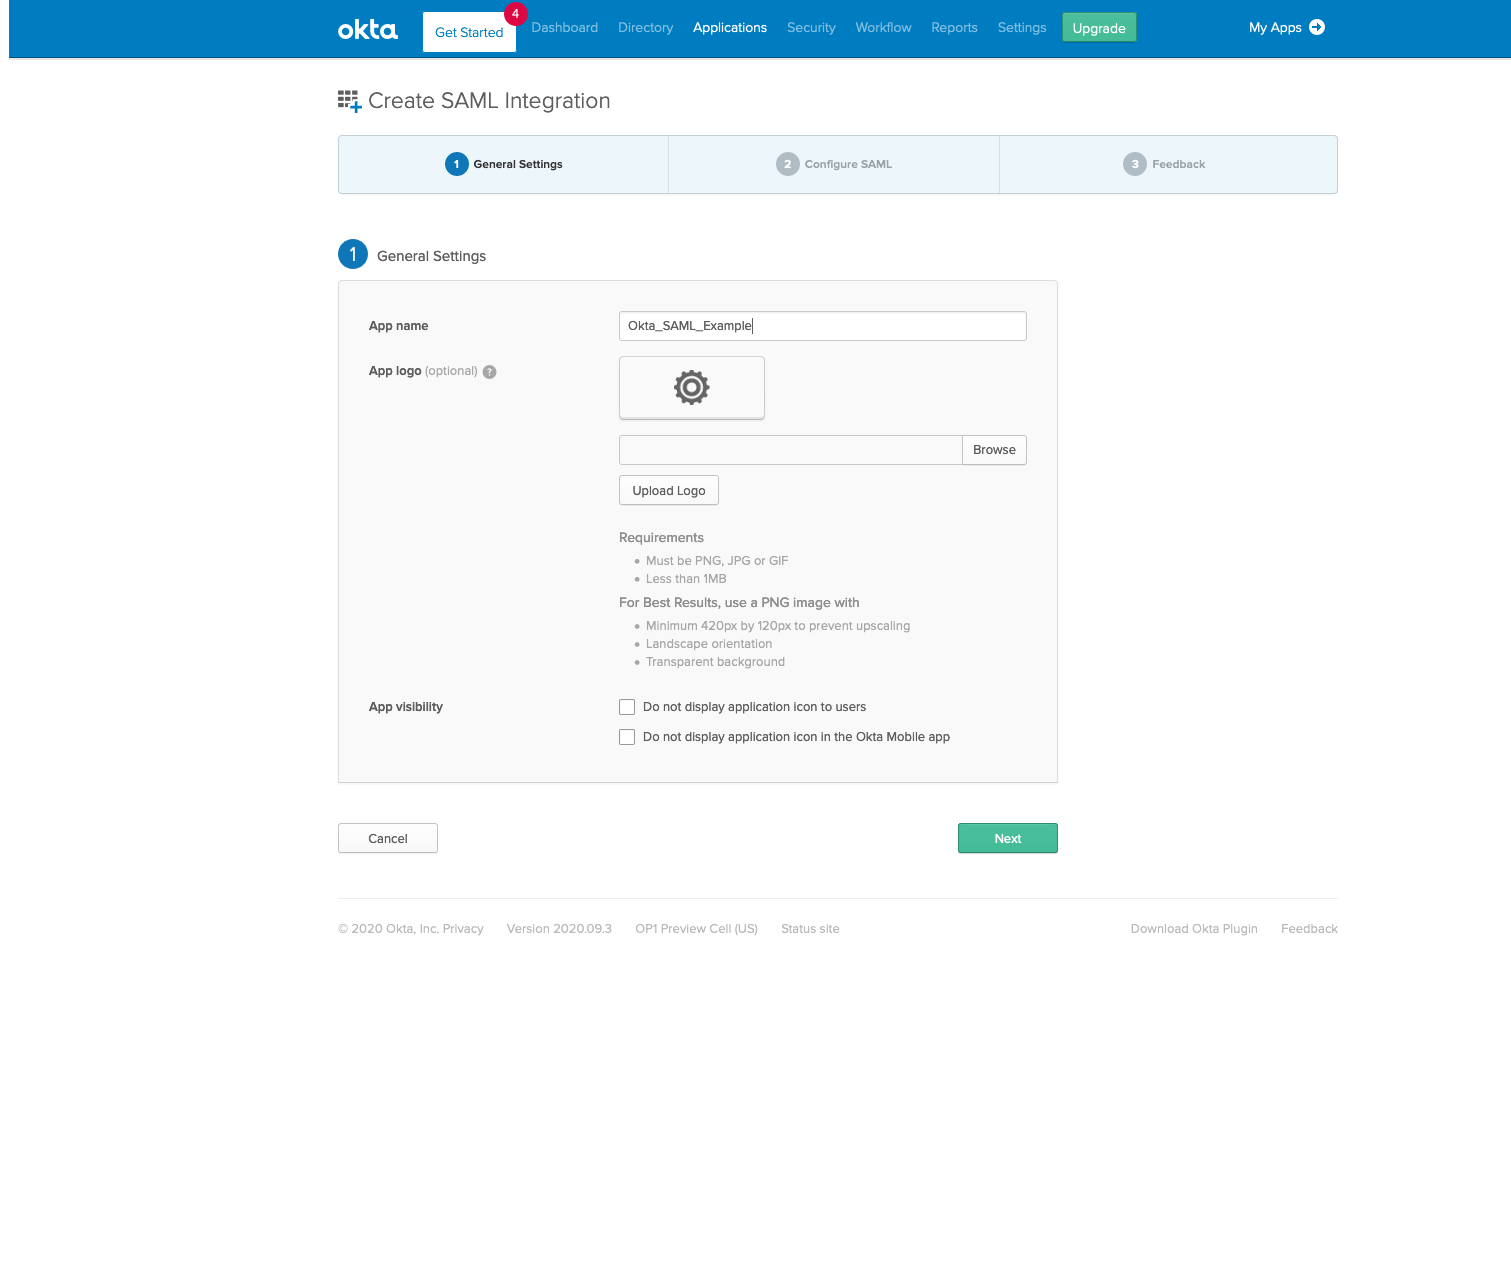
Give your app a name and click Next.
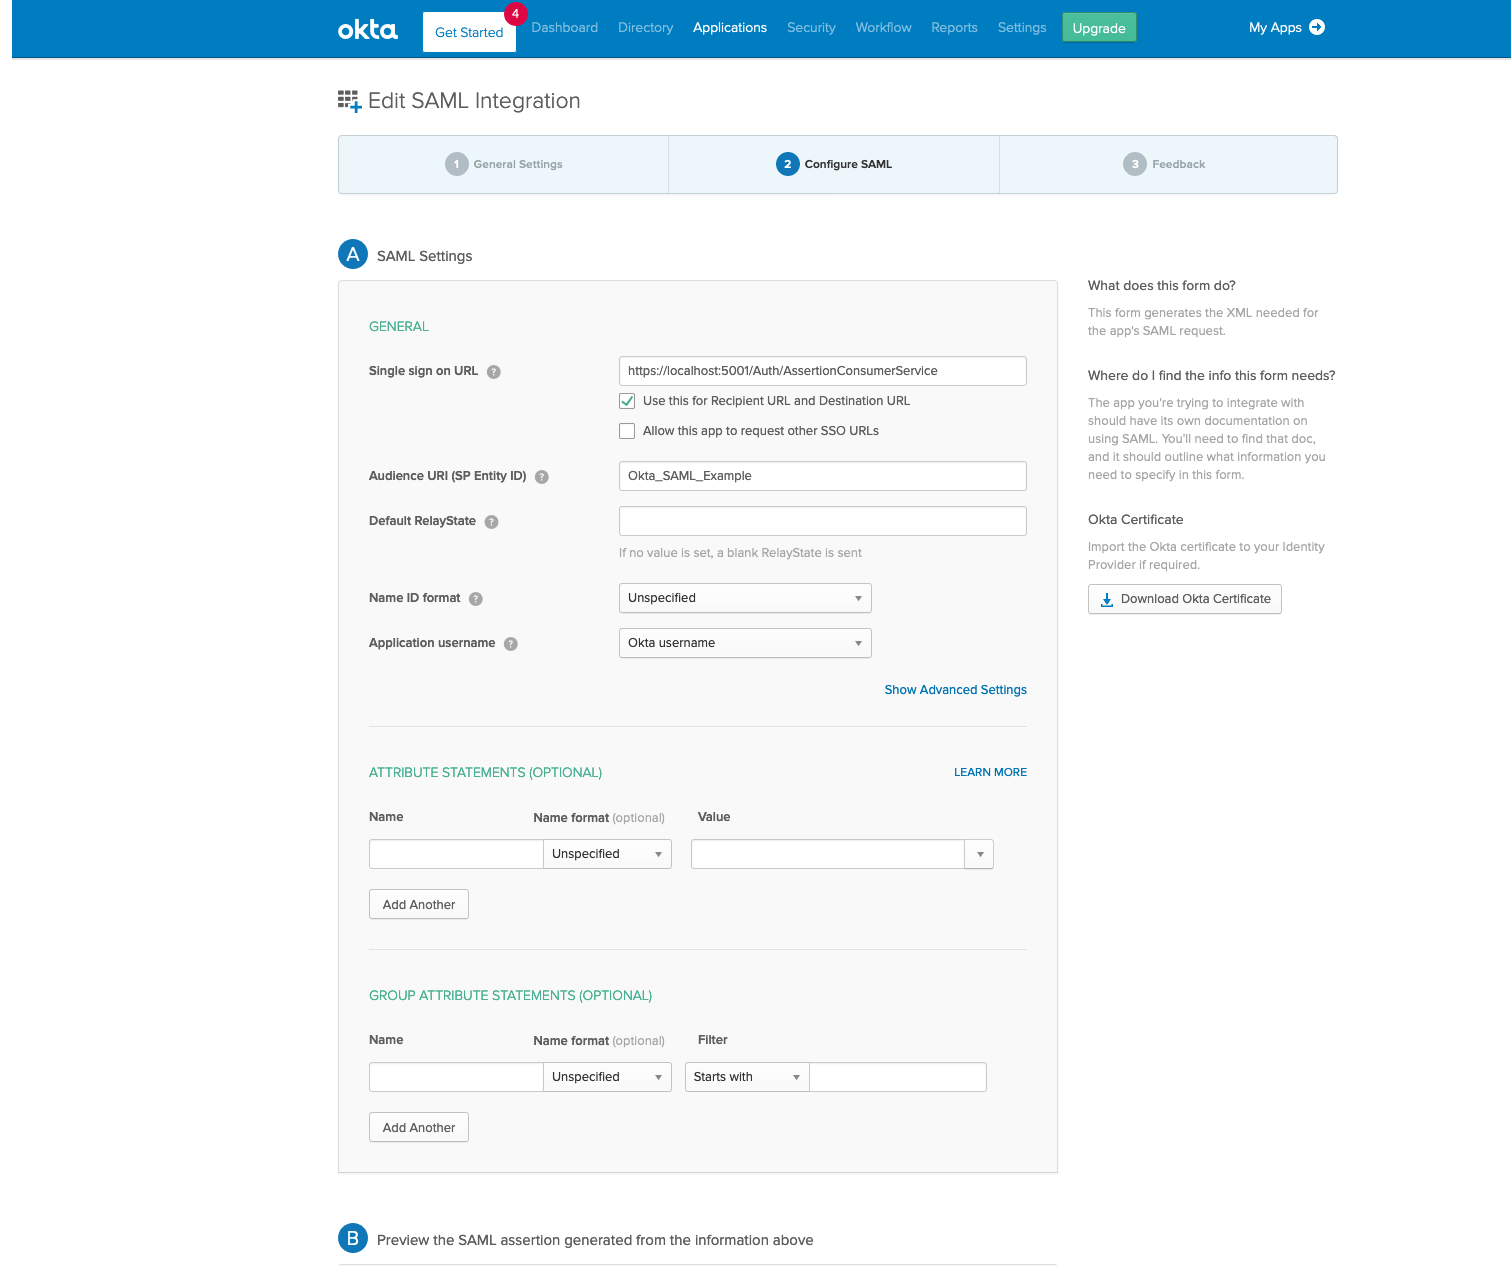
In Single Sign on URL, enter https://localhost:5001/Auth/AssertionConsumerService
In Audience URI, enter Okta_SAML_Example.
Select the I’m an Okta customer adding an internal app radio button and click Finish.
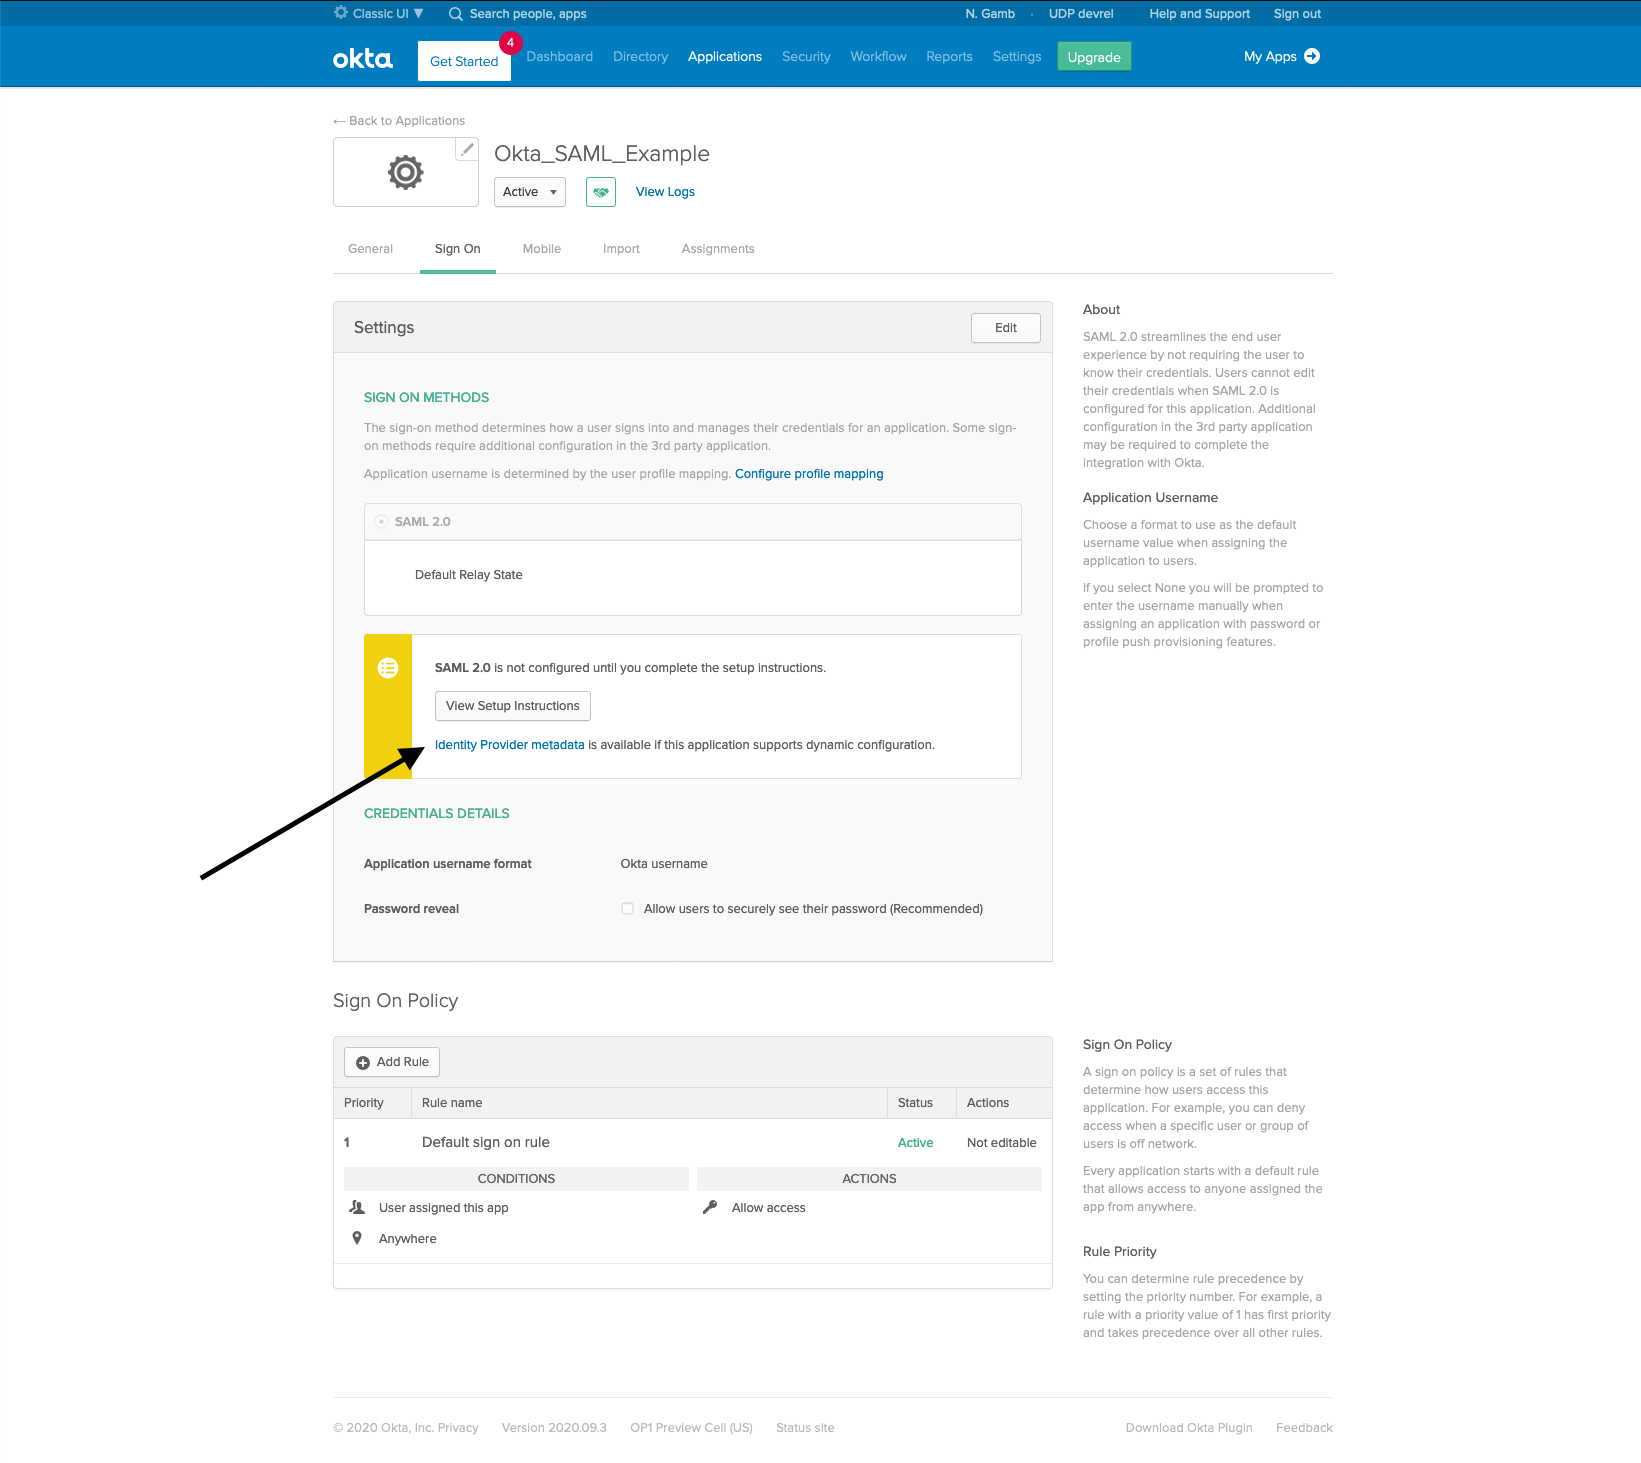
You will be taken to the Sign On tab of the newly created app in Okta. Click the hyperlink under View Setup Instructions that says Identity Provider metadata. This will open a new tab to your metadata. Copy the URL from this hyperlink and add it to your appsettings.json file in the IdpMetadata attribute. This will save you from having to copy all of the settings from Otka into your code.
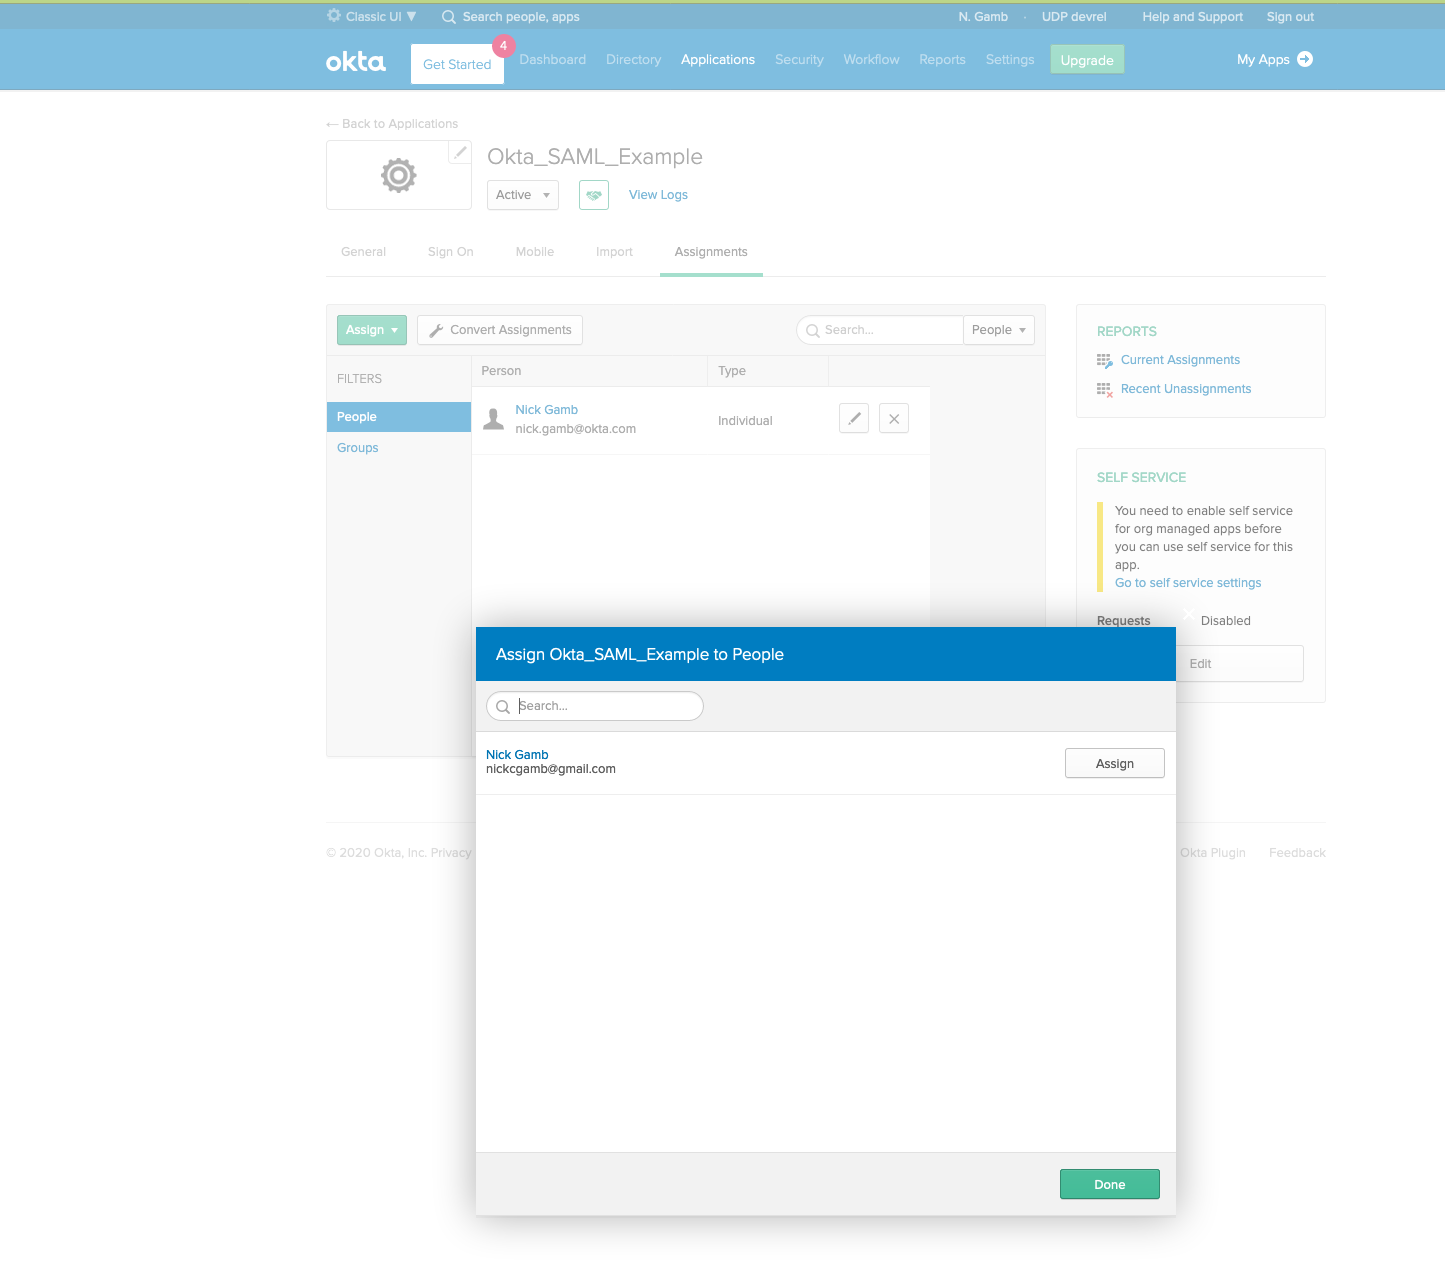
Last, you’ll need to make sure that your user is allowed to use this app in Okta. Click on the Assignments tab, click the Assign button, and click Assign to People.
Click the Assign button next to your user, and then click Save and Go Back.
You are now ready to test your application.
Try It Out
Return to your command shell, type:
dotnet watch run
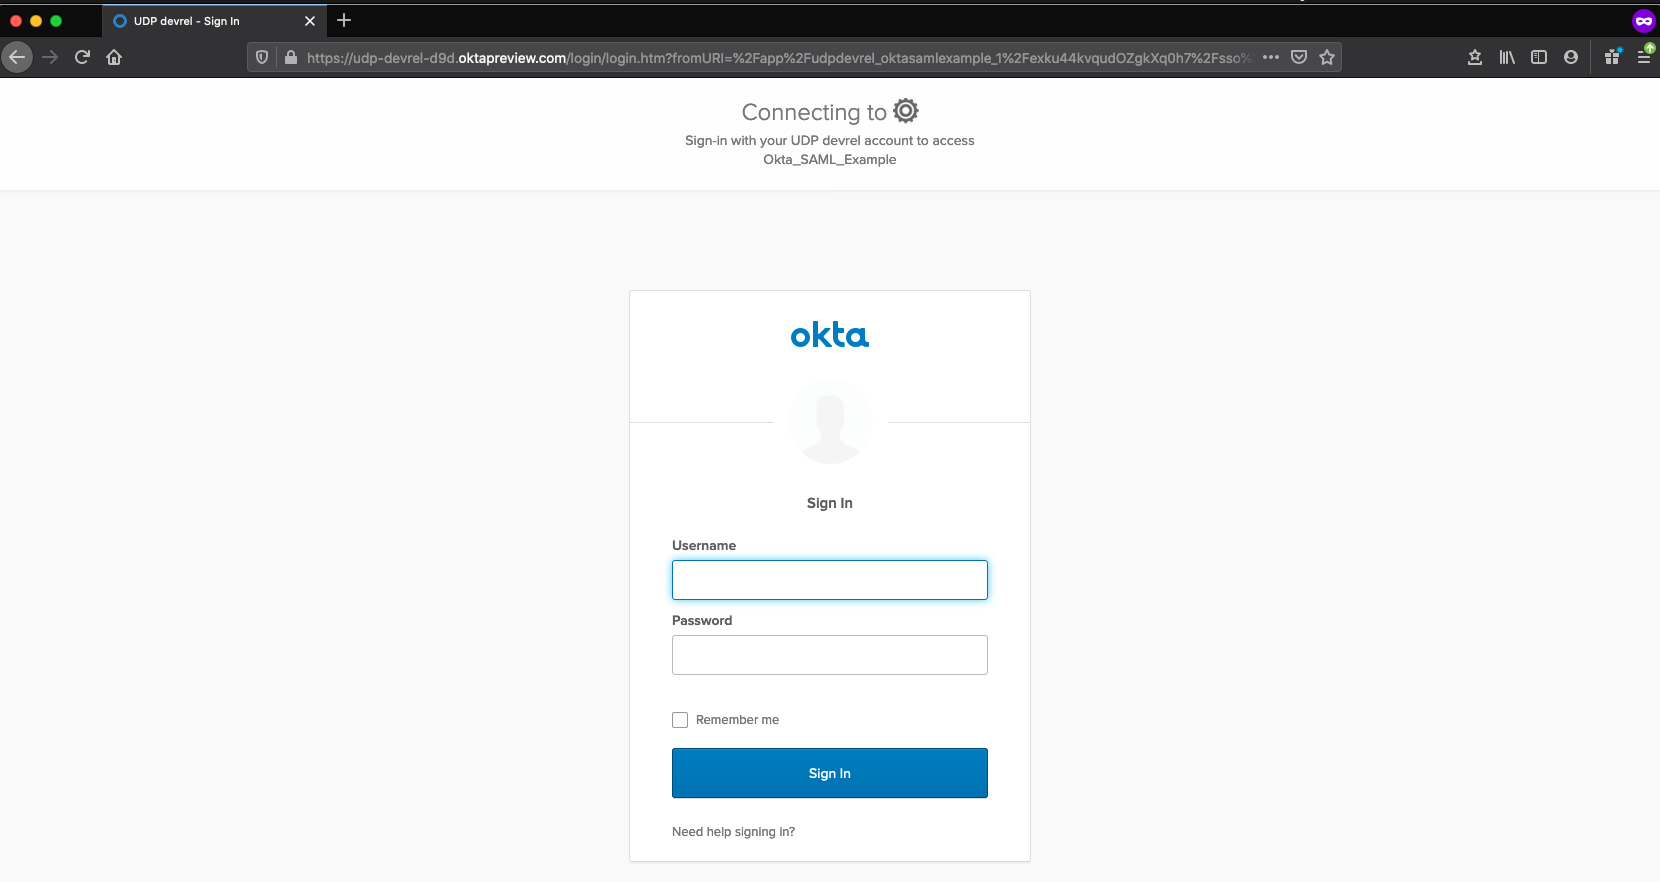
Navigate to https://localhost:5001 in a private browser window once the application is running.
Click Login and login with your user.
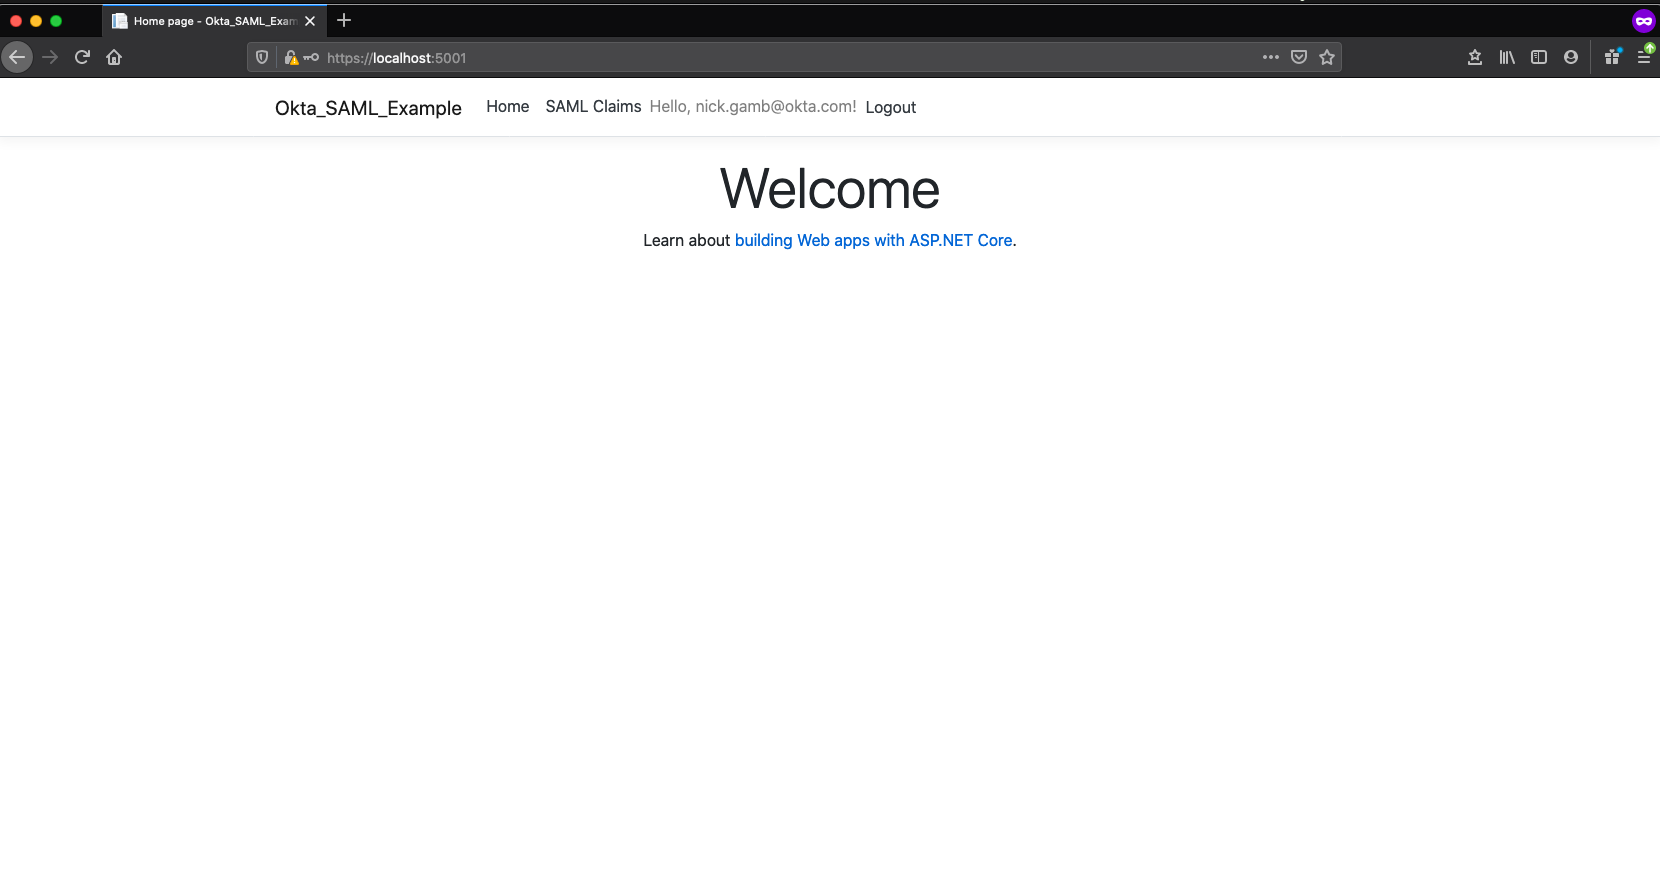
Once redirected back to your application, you will see that your nav shows that you are logged in.
Click Claims to see your claims within the secure page.
Click Logout.
Close the browser and open a new private window.
Attempt to navigate directly to https://localhost:5001/claims to ensure that you are forced to login before being allowed to access the page.
Conclusion
You now have an, ASP .Net Core 3.1 web application functioning as a SAML Service Provider using Okta as the Identity Provider. As new secure pages are created, using the [Authorize] attribute in the page model, or in a controller route, will ensure that only authenticated users are allowed access. The complete project code can be found on GitHub.
Learn More About C# and Okta
If you’d like to learn more about ASP.NET Core, check out some of our other killer content:
- How to Master the Filestream in C#
- How I Learned to Love Default Implementations in C# 8.0
- Decode JWTs in C# for Authorization
- Create a Blockchain Explorer in C#
We are always posting new content. If you like this content, be sure to follow us on Twitter, subscribe to our YouTube Channel, and follow us on Twitch.
Okta Developer Blog Comment Policy
We welcome relevant and respectful comments. Off-topic comments may be removed.