How to Build Securely with Blazor WebAssembly (WASM)
Last month I came out with a video tutorial on Blazor WebAssembly and I thought it would be good to follow up with a written tutorial as well.
Because of the JS Interop, Blazor WASM has some key differences in the world of OAuth. Instead of thinking of this as a normal .NET back end application, you have to think of what Blazor resolves to in the browser - and that’s Javascript. Therefore, all of the security vulnerabilities that come along with browser-based languages apply here. Many have been handled by the team that built Blazor WebAssembly already, but they cannot code for you and make decisions about how to handle your token. We can help with that!
For this tutorial, we will focus on a Blazor WASM Progressive Web App (PWA) because it can be hooked up to a previously-built back end API that can handle the token validation with Okta - this way, we can learn what is required for the Blazor WASM front end website by itself. The ASP.NET Core Hosted option will be addressed in a future post and you can check out the official Okta .NET Blazor samples to see some samples in the meantime.
Requirements:
- Visual Studio 2019, Visual Studio 2019 for Mac (see the comparison here) or Visual Studio Code (we will be using VS Code for the samples in this article since it runs on everything including Linux)
- .NET Core 3.0 SDK
- An Okta Developer Account (free forever, to handle your OAuth needs)
Ready to go blazing fast through hooking up external authentication? Start your engines and don’t blink - here we go!
Note: In May 2025, the Okta Integrator Free Plan replaced Okta Developer Edition Accounts, and the Okta CLI was deprecated.
We preserved this post for reference, but the instructions no longer work exactly as written. Replace the Okta CLI commands by manually configuring Okta following the instructions in our Developer Documentation.
Build a Blazor WASM Progressive Web App Project
Let’s start from the beginning with a fresh application. You can also use the .NET CLI to create your app, but for this tutorial, I will walk you through the IDE and portal steps.
In Visual Studio, select Create a new project. Then, select Blazor App and click Next.
Set the Project name to “Okta Blazor WASM” and click Create.
Select Blazor WebAssembly App and check Progressive Web Application. We are starting with a PWA because this way you can hook it up to your own, previously-built back end API leaving Configure for HTTPS checked as well.
Under the Authentication section, “No Authentication” will be set as the default option. Click Change.
Select Individual User Accounts to store user accounts in-app. Click OK.
Note: This option will automatically add the configurations your Blazor application needs to handle authentication and cuts down on having to add some files manually.
Click Create.
Build and run your new project to ensure there aren’t any updates to the Visual Studio templates needed. You should see the placeholder Blazor site!
Set up Okta to Handle Your Blazor WebAssembly App
You can access your dashboard via the email you received from Okta giving you your org URL. Go there now—unless you need to sign up for an Okta developer account.
Once you are logged in, click on Applications and then Add Application.
Since this is Blazor WebAssembly (specifically a PWA), and not traditional .NET Core MVC, you are going to select Single-Page App and fill out the form with the following values:
- Name: My Blazor WASM App
- Base URL:
https://{yourLocalhostPortURL} - Grant Type: Authorization Code
- Login redirect URIs:
https://{yourLocalhostPortURL}/authentication/login-callback - Logout redirect URIs:
https://{yourLocalhostPortURL}/authentication/logout-callback
Click Done.
Note: The login-callback and logout-callback parts of the URIs are Blazor WebAssembly specific routing for OIDC that has been auto-generated for the project when we opted to add authentication to it during the wizard set-up. This is handled specifically inside of the WebAssembly.Authentication Nuget package installed with the latest SDK.
At the bottom of the screen, your newly registered Okta app will get a Client ID and Client Authentication. Notice that the only option you have is to do this flow with PKCE (instead of a traditional client secret), as this is a more secure way of handling security vulnerabilities in a front end framework like WebAssembly (which resolves to Javascript). You can read more about what Proof-Key for Code Exchange (PKCE) is here.
That’s all there is to set-up for Okta right now!
Add External Authentication to Your Blazor WASM Project
Now it’s time to return to the Visual Studio Blazor project and make some adjustments to allow an external auth provider to handle the user login.
Open the Program.cs file.
You’ll notice, because Individual User Accounts were selected during the wizard, “Local” is set up here but we are going to use Okta, instead. Replace “Local” with “Okta”. The line should now look like this:
builder.Configuration.Bind("Okta", options.ProviderOptions);
This is going to pull from a configuration file. You can find that under the wwwroot folder, inside of your appsettings.json file.
Replace the JSON in the entire file with the code below:
{
  "Okta": {
    "Authority": "https://{yourOktaOrg}.okta.com/oauth2/default",
    "ClientId": "{yourClientId}"
  }
}
It’s important to specify in Program.cs that the kind of flow we are using is the authentication code flow with OIDC. The way you do that is by providing a ProviderOptions response type. Add the code below underneath your Okta configuration line:
options.ProviderOptions.ResponseType = "code";
If you are interested in bringing over more information in the token, besides the user’s ID, you need to include some other scopes. I have added a few that come out of the box with your Okta default authorization server, but you can create and configure your own at any time in the portal. To see what scopes are available, look under API > Authorization Servers > default > Scopes.
Add the following underneath the “code” ProviderOptions line to add more information about your user:
options.ProviderOptions.DefaultScopes.Add("profile");
options.ProviderOptions.DefaultScopes.Add("address");
The AddOidcAuthentication method should now look like this altogether:
builder.Services.AddOidcAuthentication(options =>
{
    // Configure your authentication provider options here.
    // For more information, see https://aka.ms/blazor-standalone-auth
    //builder.Configuration.Bind("Local", options.ProviderOptions);
    builder.Configuration.Bind("Okta", options.ProviderOptions);
    options.ProviderOptions.ResponseType = "code";
    options.ProviderOptions.DefaultScopes.Add("profile");
    options.ProviderOptions.DefaultScopes.Add("address");
});
Using Razor Components AuthorizeView in Your Blazor WASM App
A lot of work has been done on Blazor around templatizing the views to handle toggling what can be seen based on the user’s authenticated state. You don’t have to write a bunch of this from scratch; the wizard set-up generated a sample UI for you that is already observing that state. The built-in Authentication.razor page inside of the Pages folder already handles whatever Actions come through the routing with a RemoteAuthenticatorView.
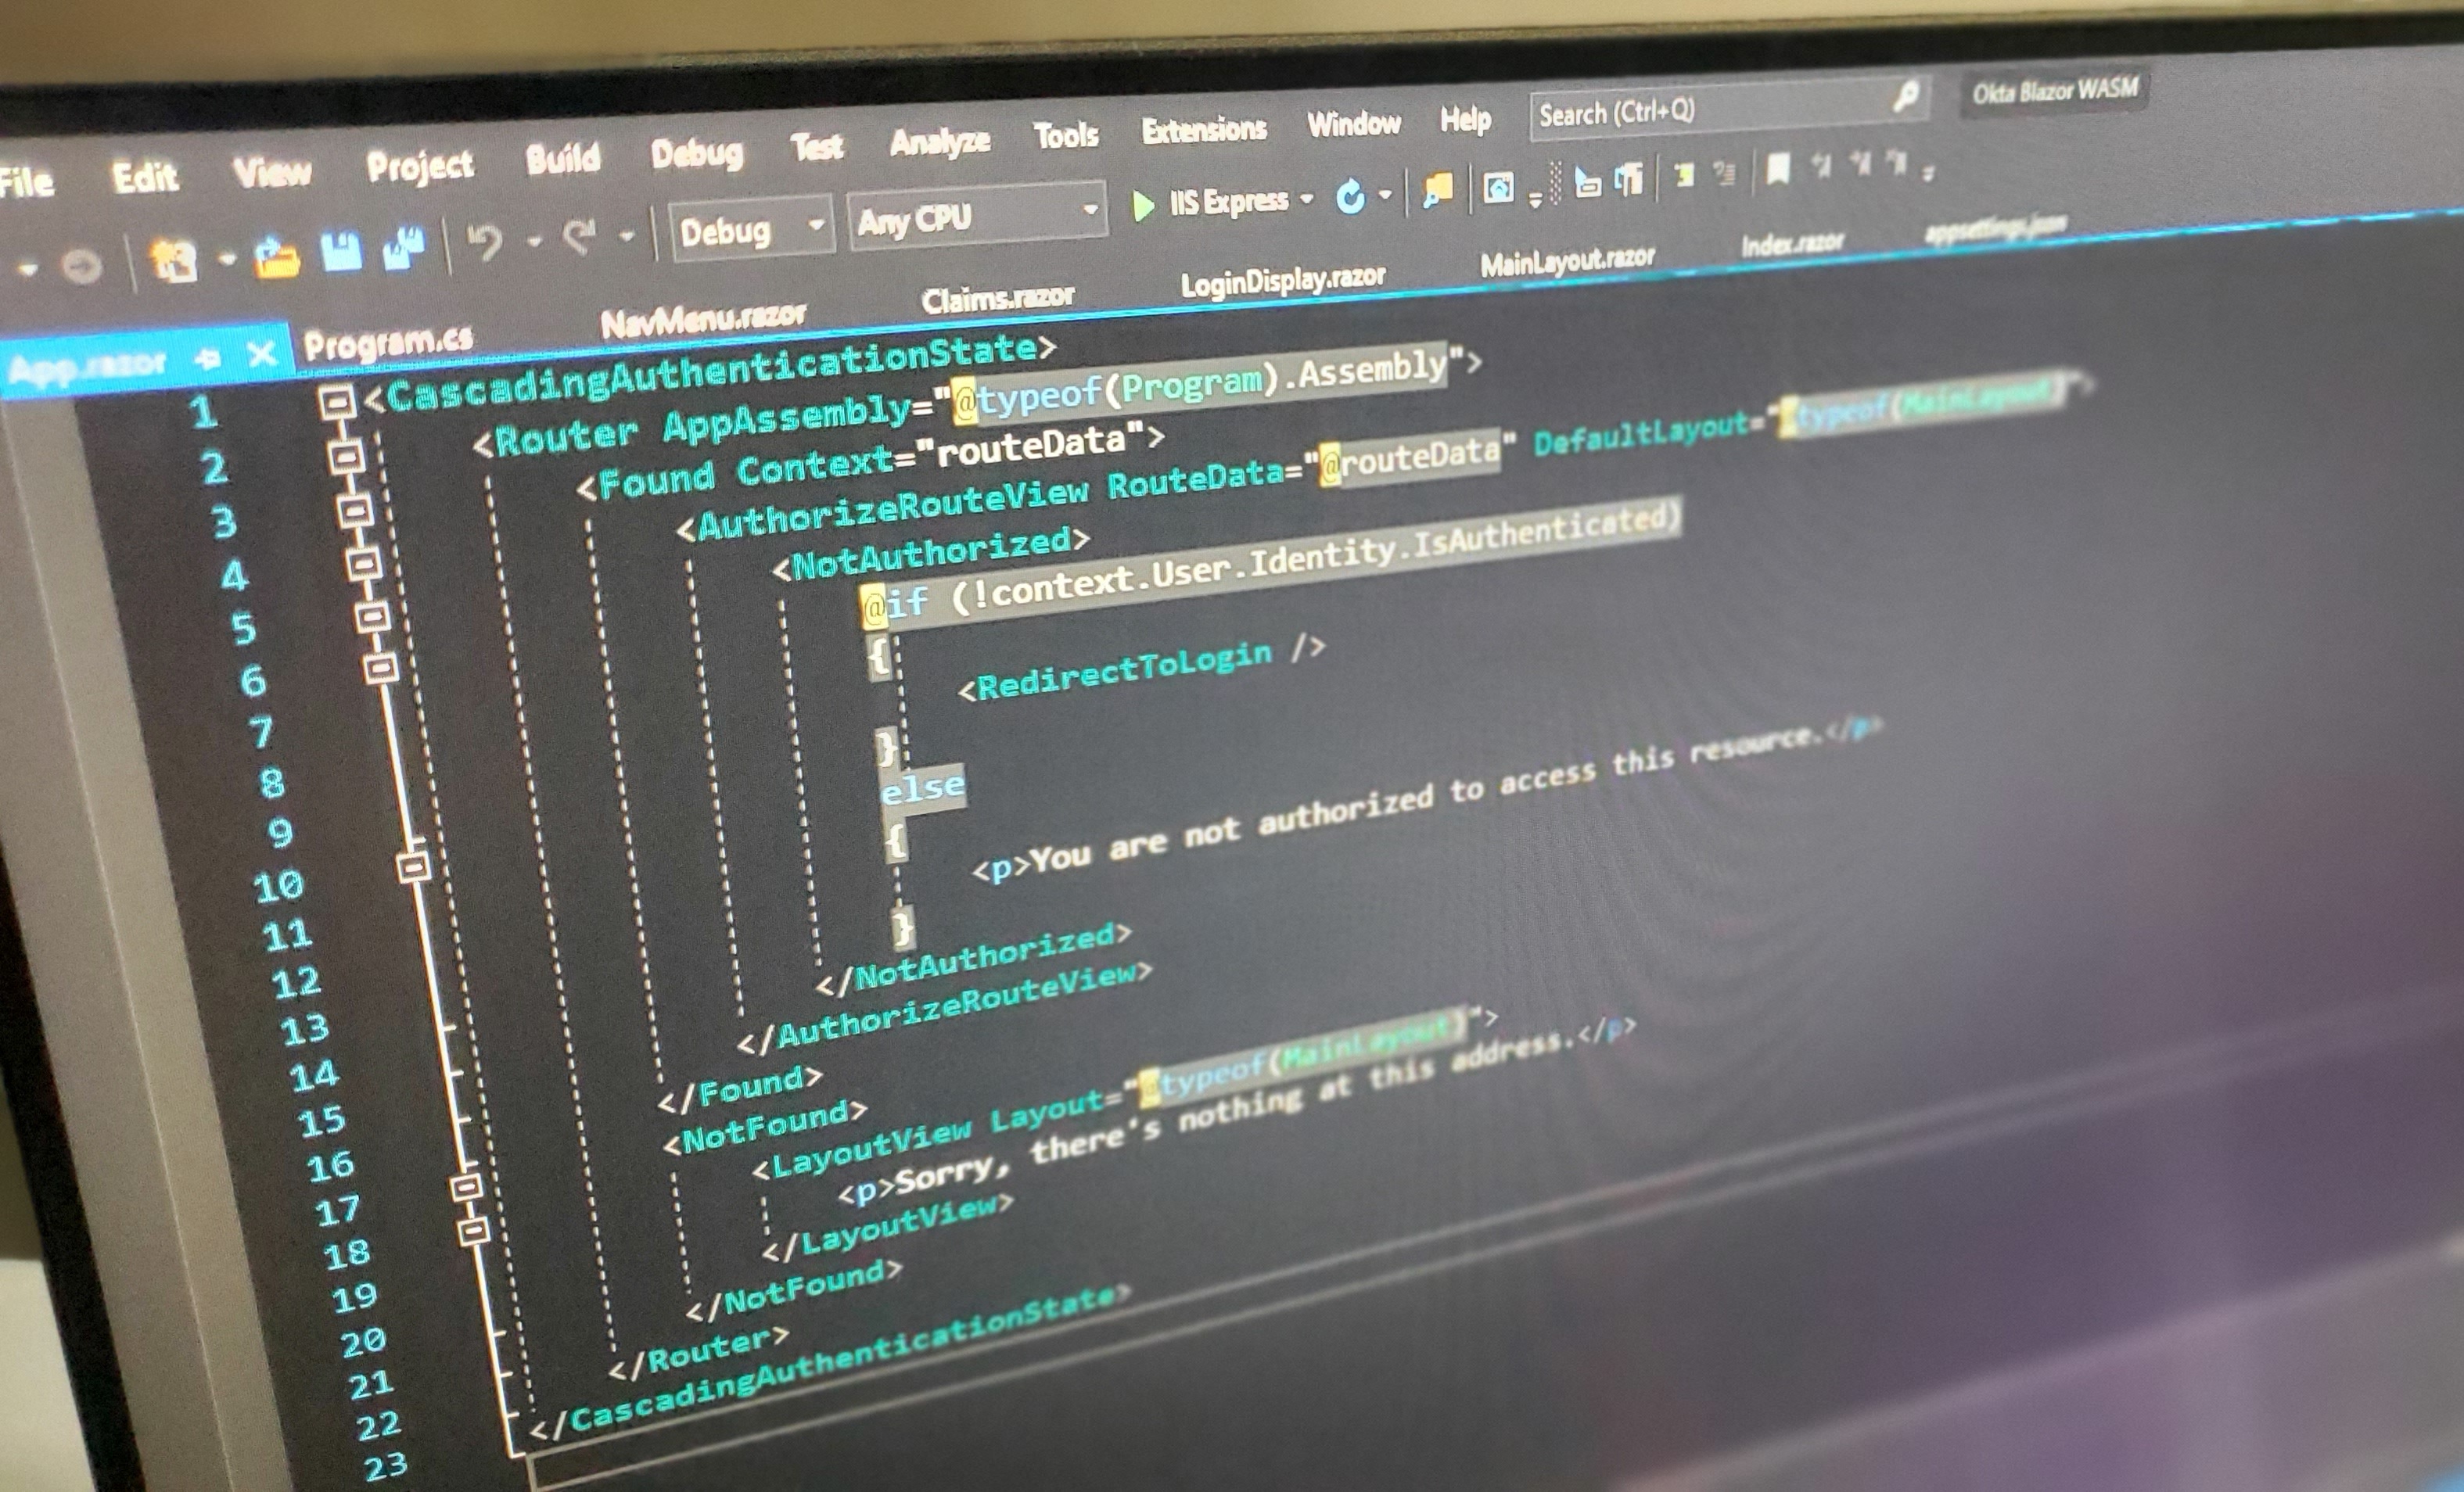
Take a look at App.razor and you will see the entire site UI is wrapped in a CascadingAuthenticationState. You don’t have to write a separate one for each page, as this handles what is displayed to the user globally. However, you can override what the user sees in a logged out or logged in state at the Page-level as well. If you take a look at the Shared folder and open LoginDisplay.razor you can see an example of this inside of an AuthorizeView with Authorized and NotAuthorized HTML views for you to customize.
It’s great that all this works out of the box!
Let’s add a page to see a bit more about our user, which specifically shows the claims that came along with the token—but only if the user is logged in.
Right-click on Pages, add a new Razor Page and name it “Claims.razor”.
Copy the code below into the file:
@page "/claims"
<AuthorizeView>
    <Authorized>
        <h2>
            Hello @context.User.Identity.Name,
            here's the list of your claims:
        </h2>
        <ul>
            @foreach (var claim in context.User.Claims)
            {
                <li><b>@claim.Type</b>: @claim.Value</li>
            }
        </ul>
    </Authorized>
    <NotAuthorized>
        <p>I'm sorry, I can't display anything until you log in</p>
    </NotAuthorized>
</AuthorizeView>
The foreach loop accesses the application context and looks at the OIDC Claims collection. which has been added via token deserialization into the User object, courtesy of the built-in WebAssembly Authentication in Blazor.
Next, we need to add this page to the UI navigation.
Expand the Shared folder and open NavMenu.razor. Go to the NavMenuCssClass div and and another list item below “Fetch data”:
<li class="nav-item px-3">
    <NavLink class="nav-link" href="claims">
        <span class="oi oi-list-rich" aria-hidden="true"></span> User OIDC Claims
    </NavLink>
</li>
Save, build, and run the application in a browser. It may take a minute to load whenever you make changes.
You can view three pages in a logged out state, but the new page you added should display this NotAuthorized message.
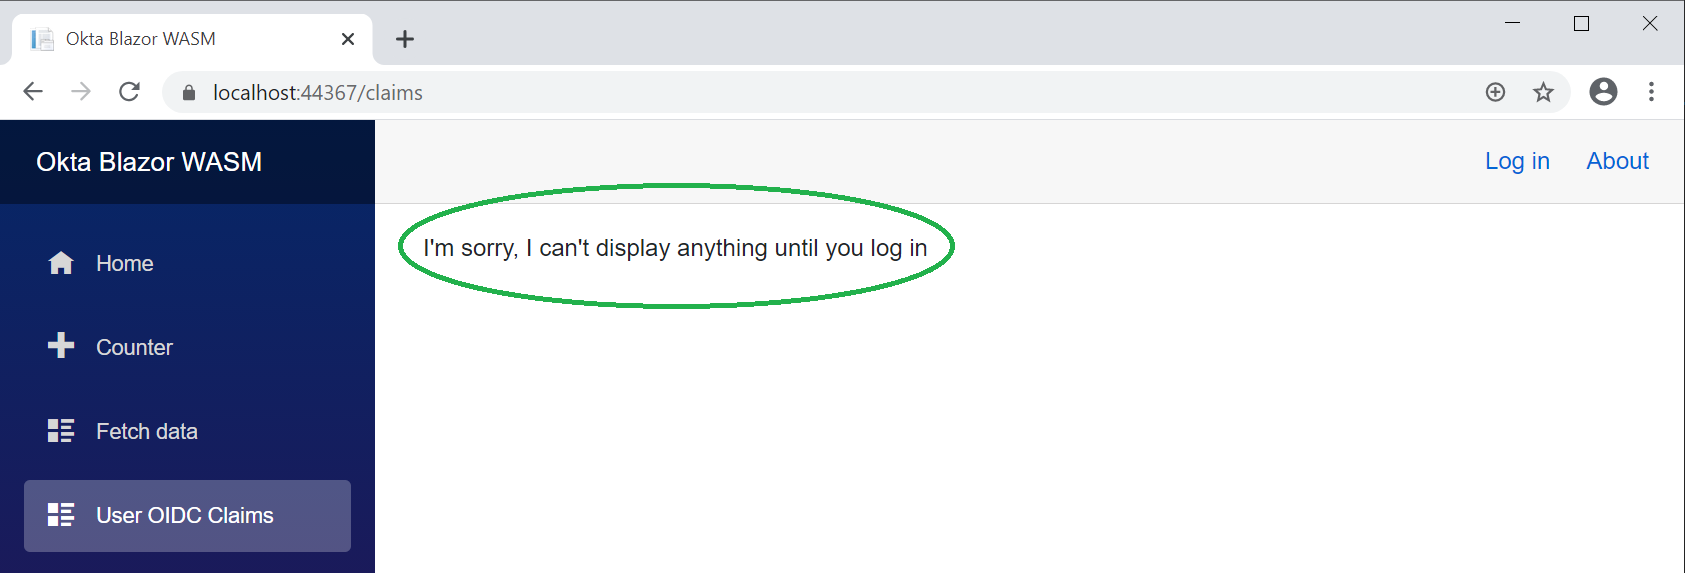
Let’s log in now!
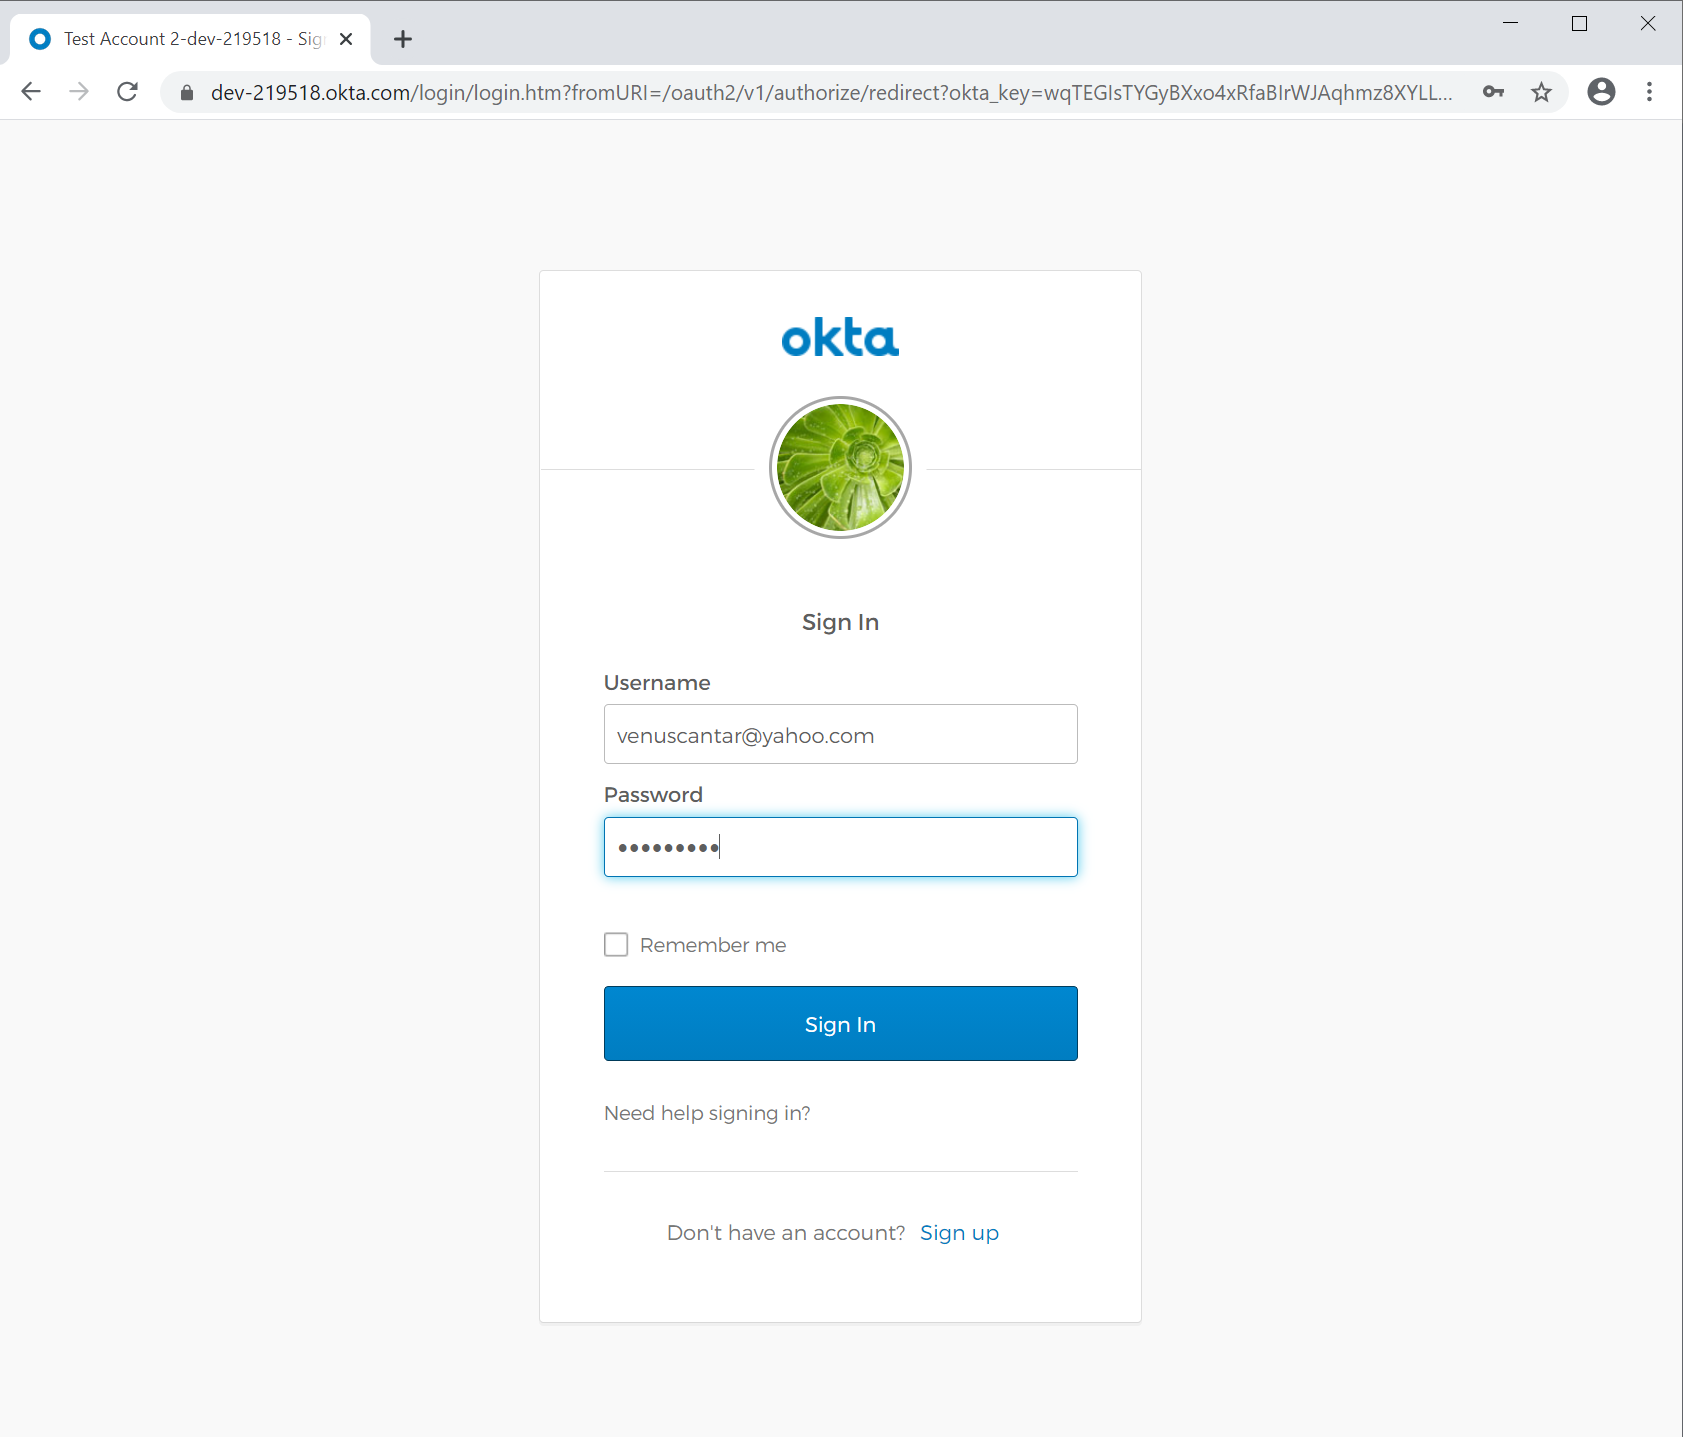
Click Log In at the top right-hand corner of the page. The user will be redirected to your identity provider, which is your Okta org. If you have a test user already added to your account, go ahead and try out those credentials. However, if you are interested in enabling a user to register themselves (highly recommended), go back to your Okta portal and turn that feature on. You can find it by selecting Users > Registration and filling out the information you want to display to a new user. Once you are done there, a Sign up link should appear at the bottom of your Okta login screen. Click that, and fill it out (real email address required).
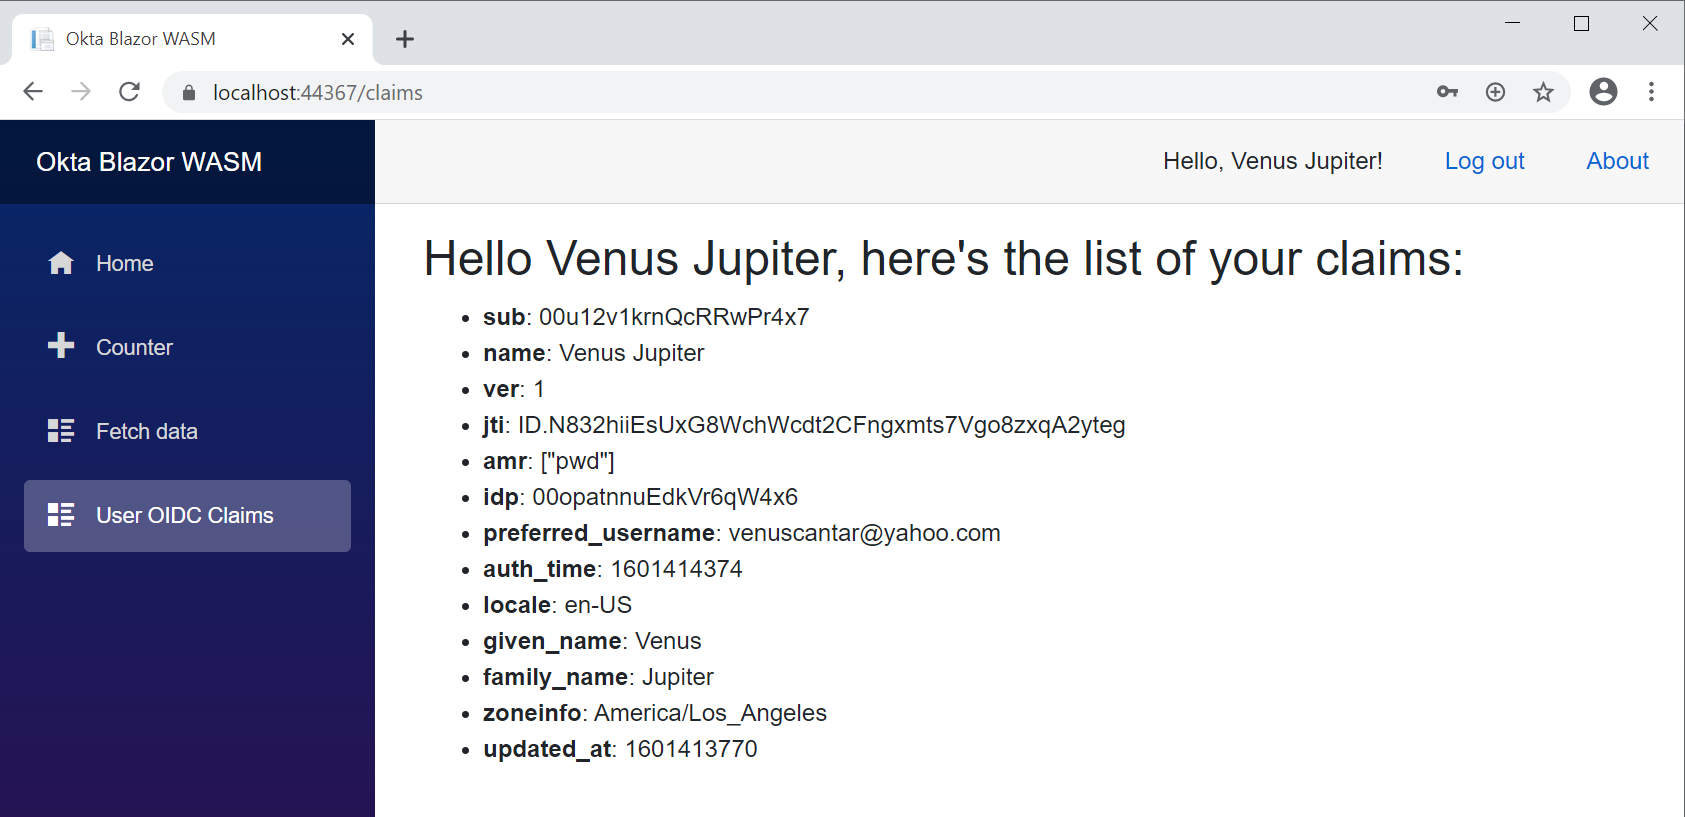
Once you are authenticated, it will redirect you back to your app‚which has grabbed the name of the logged-in user and displays it on the top-right of the screen—with a Log Out URL next to it.

Now if you navigate to your User OIDC Claims page, you should be authorized to see what was brought along with the token.
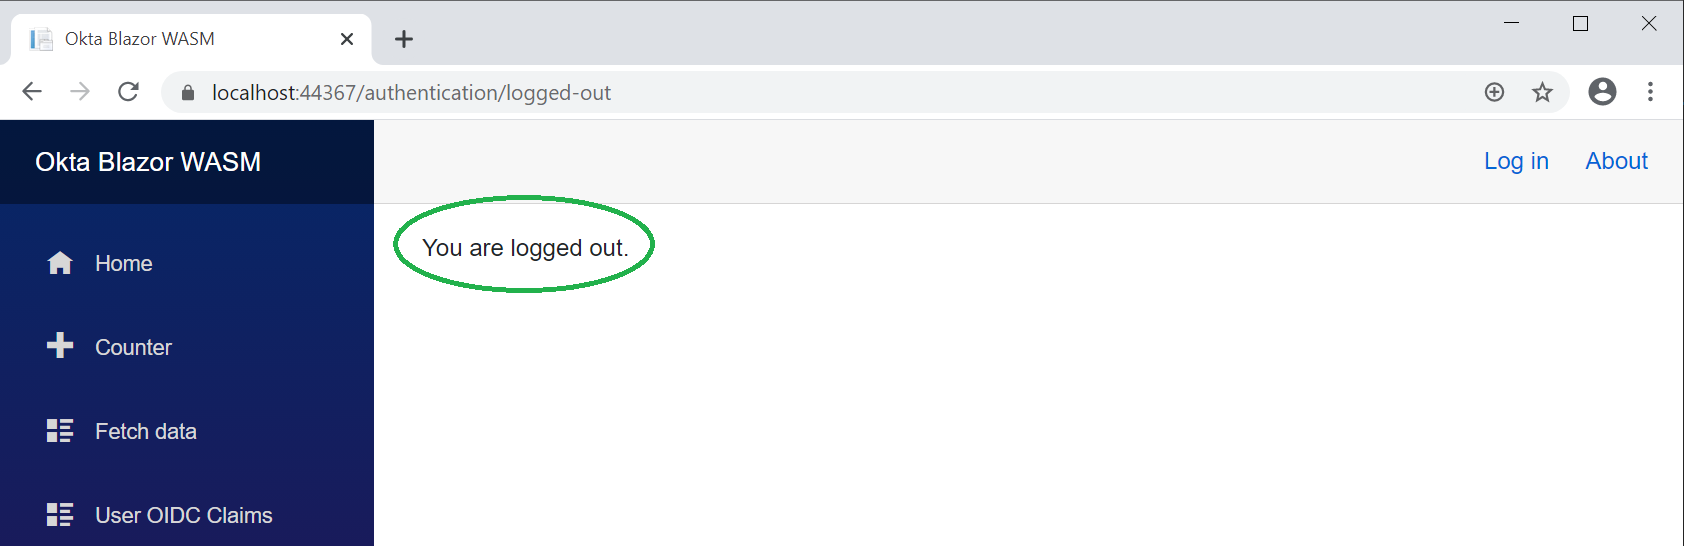
You can also log out to play with the visibility of sections of the app.
Pretty sweet!
You can check out the official project code in our GitHub repo.
Recap
I found the process of plugging in Okta to Blazor WASM to be very quick and easy. The team that worked on WebAssembly for .NET was very thoughtful about the experience of using an external identity provider, and it shows. We’ve got more coming around Blazor, so tell us what you would like to see!
Until next time, fellow Coders.
Learn More about .NET Core, Blazor, and Authentication
Like what you learned today? Here are some other resources that will help learn more about adding secure authentication and user management in your .NET Core projects:
- Build an Authenticated Web App in C# with Blazor + ASP.NET Core 3.0
- How to Adapt Your .NET App for SameSite
- The Most Exciting Promise of .NET 5
- Get Started with Blazor and Web Assembly
- How to Secure PII with Entity Framework Core
- Implement the OAuth 2.0 Authorization Code with PKCE Flow
Make sure to follow us on Twitter, subscribe to our YouTube Channel and check out our Twitch channel so that you never miss any awesome content!
Okta Developer Blog Comment Policy
We welcome relevant and respectful comments. Off-topic comments may be removed.