Identity Security for Games in C# with Unity

Unity is a cross-platform game engine developed by Unity Technologies. The engine is able to create three-dimensional, two-dimensional, virtual reality, and augmented reality games, as well as simulations and other experiences. The engine has been adopted by industries outside video gaming such as film, automotive, architecture, engineering, and construction.
Identity security is a key concept that is mostly missing in Unity. In fact, most engines today do not provide solutions for securing identity, authenticating users, and authorizing users. The industry has instead traditionally relied on custom-built solutions and/or delegated auth from other products, like game stores. As the industry advances beyond anonymous consumption of video games, into massively interconnected online projects, or professional XR use cases such as ArchViz and simulation, new requirements have appeared for authentication and authorization.
In gaming, use cases tend to depend on the project itself. A single-player game really only needs to focus on protecting its own intellectual property from theft. Using a game store’s authorization—as is common today—is more than enough for this use case. Even the introduction of microtransactions can stay secure with just a store if these transactions are being handled by that store. However, once the project gets to a point where a user’s client needs to authenticate a user and authorize that user to one or multiple servers, the solutions provided by stores fall short. It gets even more complicated when users are actually making purchases or entering personal information into your game client directly. Once the game gets to a more complex level of interconnectivity, and once users are trusting you with private information and financial information, proper identity security is paramount.
With XR use cases, the concept is similar to what is described above for gaming—especially if the project is a VR game—however professional XR projects open up a whole new area of interest. Professional projects such as ArchViz, or simulations done for security or scientific application, need to protect the intellectual property within the project itself, and the user identity, just like games. However, more is potentially needed to handle authorization to specific aspects of the project results, as well as professional requirements to integrate or federate with other technologies used by these professionals.
The level of effort to build identity security from scratch is massive. Just to build a secure store for identity, authentication with basic username/password, authorization via OAuth, and basic security policy, it takes a large team months. When you account for keeping the tech up to date with new standards, compliance with standards such as PCI, compliance with GDPR, complex multi-factor authentication, and complex authorization rules, it becomes apparent that the work is not a one-time effort and it is not easy. Rather than spend countless development cycles focusing on identity security—when the team should be focused on the core project itself—it is much easier and more secure to leave it to the experts. Okta is the most advanced identity platform on the market today and represents the best of breed solution for developers, including Game/XR developers creating within Unity.
Note: In May 2025, the Okta Integrator Free Plan replaced Okta Developer Edition Accounts, and the Okta CLI was deprecated.
We preserved this post for reference, but the instructions no longer work exactly as written. Replace the Okta CLI commands by manually configuring Okta following the instructions in our Developer Documentation.
Prerequisites
- Download and install Unity.
- Log in to Okta and step through the initial account creation. No other setup is needed.
- Read about OAuth2.
Downloads
Videos
Follow along with our companion videos.
NATIVE: https://youtu.be/9C5xaaLt7Q4
OAUTH: https://youtu.be/ciDl0-Wtfvo
Core Concepts
Before we jump into Unity, it is important to understand what options exist to handle authentication and authorization of users within your project. The most common designs are in engine with native UI, in engine with OAuth via browser, external with native UI, and external with OAuth via browser. The other option, as previously mentioned, is to trust authorization from another product such as a game store.
The decision that needs to be addressed first is the balancing act that every security team must make between what is most secure and what has the best user experience. If the decision is that the project is not storing sensitive user data, then it is reasonable to focus on user experience. However, if there is even a slight risk that a data breach would negatively affect individual consumers, security must take the front seat.
When a project accepts authorization from another product, one that is not a security product like Okta, there is a huge risk with that trust. Risk that users are not being challenged properly with MFA, risk that standards and technology get out of date from what is standard in the security industry, and risk that user data is not being secured and passed correctly and safely. This is the risk represented by delegating security to a game store.
The most secure option would be to leverage OAuth2/OIDC either in the engine or externally in the project’s launcher. OAuth2/OIDC is the industry standard best practice for authorization/authentication. OAuth specification defines multiple different flows, or grants, but the most recommended for security is Auth Code with PKCE. You can read more about OAuth2 here. The complaint typically with OAuth, especially within a game engine directly, is that it traditionally leverages a browser and a hosted login experience. Okta provides a hosted login experience that is fully customizable via HTML/CSS and Unity is able to pop up a browser and receive tokens from it after authentication. How to do this will be described in this blog. What needs to be considered is if that user experience is acceptable for the project. The browser can also be embedded with different Unity browser plugins, found in the asset store, which might make the experience better because the user will not need to leave the game to interact with an external browser. OAuth is considered more secure because users are putting their credentials into a trusted browser and a trusted, secure, login page. Furthermore, the access token that is returned at the end of the authorization process is retrieved by code not running in a browser which means intercepting it is difficult to impossible.
Okta also supports a native UI experience both in engine or externally. This is a better user experience but considered potentially less secure because the project’s code is now required to accept a password from a user, properly handle it in a secure way from start to finish, and be secure enough that it can’t be exploited by bad actors or rogue software. Essentially you take all of the risk onto yourself to handle the information from the user with care. This concept also requires a bit more work in UI development because the UI will be entirely built in engine and Okta would be interacted with via API only. This option will be reviewed in this blog as well.
In order to help visualize the difference between these concepts, this blog will show you how to build for Native UI and OAuth via browser in engine. These same concepts can also be applied to external solutions, such as a launcher. developer.okta.com contains countless guides and blogs that can assist further with the external use case.
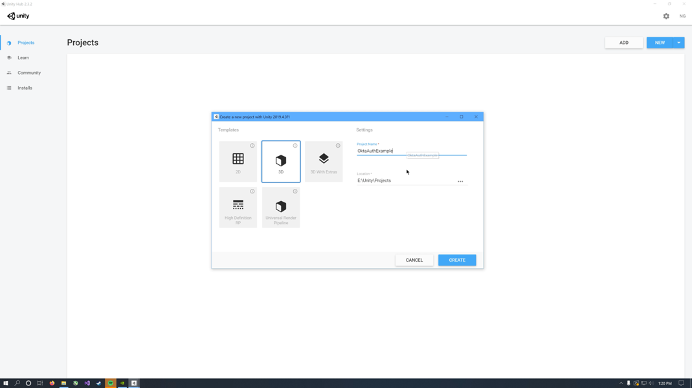
Create the Project
Get started by creating a new project in Unity Hub. Select 3D and give the project a name.
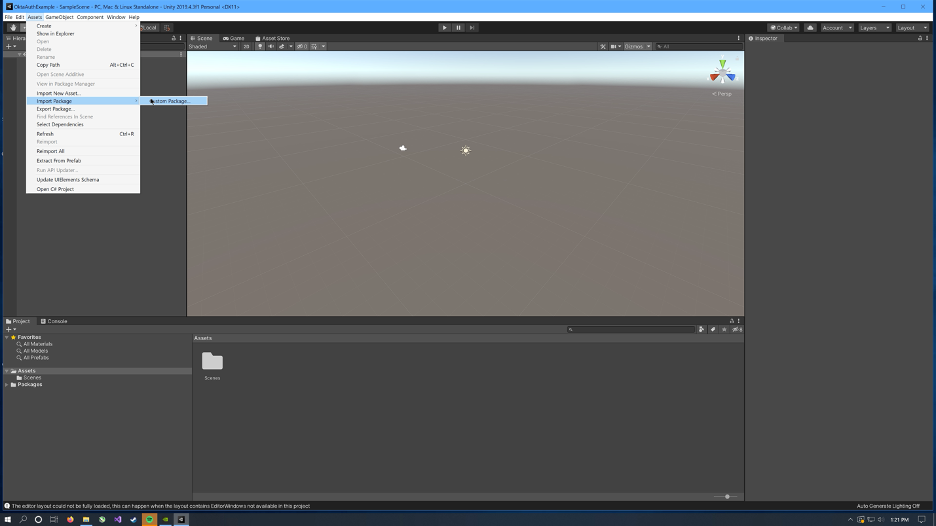
Unity will take a moment to set everything up and open the project. Once open, click Assets > Import Package and select the OktaSDK.unitypackage file. The Okta Auth SDK will be used for the Native UI design. The SDK is not required for OAuth. A Okta SDK Unity Package has been provided with this guide to simplify this process.
Note: The Okta SDK for .NET and the Okta Auth SDK for .NET can be found on GitHub and NuGet. However, Unity does not work well with NuGet and compiling from source should not be necessary. If manual installation is desired, there are numerous dependencies that NuGet would normally add to a project with the SDK. These dependencies will need to be manually downloaded and added to Unity. NuGet Gallery is recommended for this.
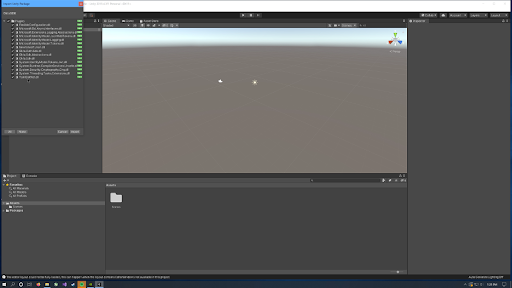
Make sure all libraries are selected and click Import. This will create a Plugins folder inside the Assets folder which is how Unity knows to import the .NET libraries as managed plugins.
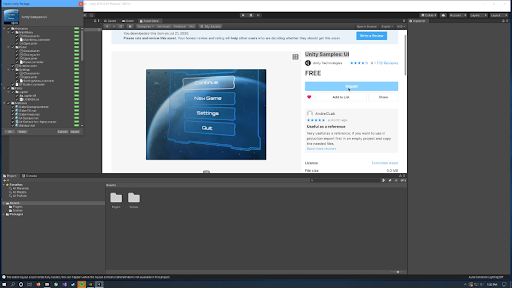
Next, click on the Asset Store tab in the editor and search for Unity Samples: UI. This example asset was created by Unity Technologies as a learning asset, teaching best practices for building UI’s inside of Unity. For this guide, we will leverage this UI to build our login experience.
Click Import and import all of the assets in the package.
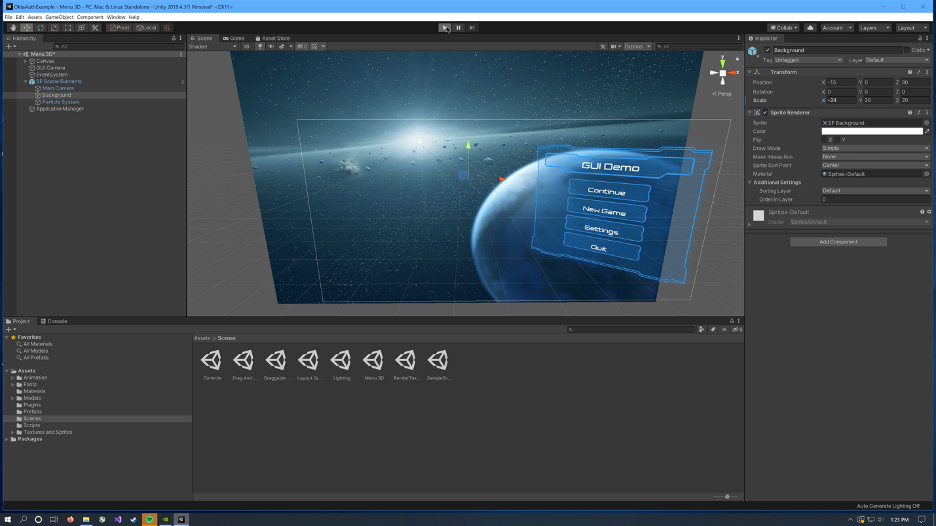
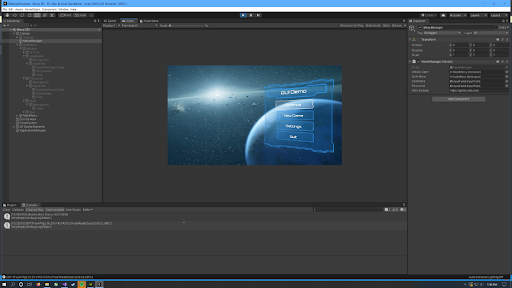
Once the import process is complete, click on the Scenes folder and open the Menu 3D scene. Click Play to run the project and make sure that the UI is properly functioning.
Save 2 copies of this scene, one for Native, and one for OAuth.
Native: Build the Auth Menu
Open the example scene saved for the Native experience.
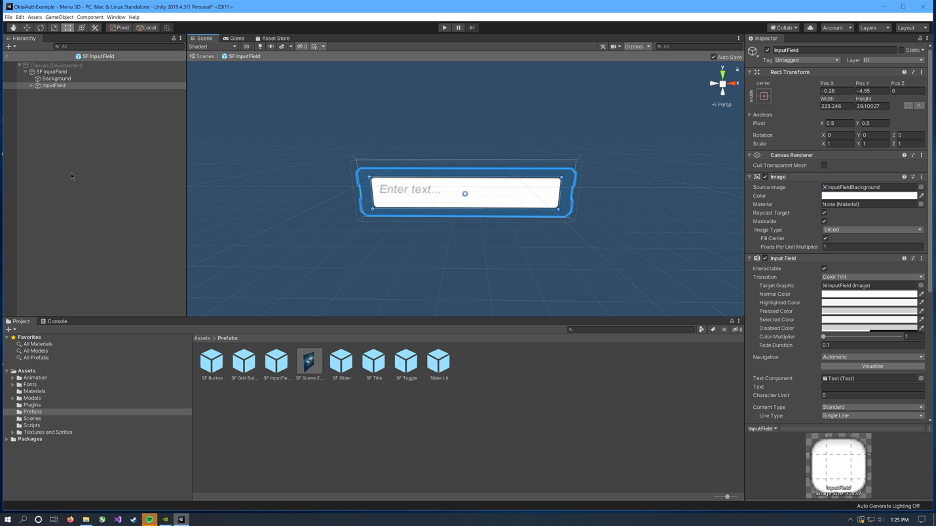
The UI sample asset does not come with any type of input field. We will need input fields for a Username box and a Password box. To create a new Input Field object:
- Open the
Prefabsfolder - Duplicate the SF Button object (Ctrl + D)
- Rename the duplicate object SF InputField
- Delete the label element out of the object
- Click the GameObject menu > UI > InputField
- Position the new InputField where the label element was
- Switch the gizmo to scale and resize the InputField to fill out the box
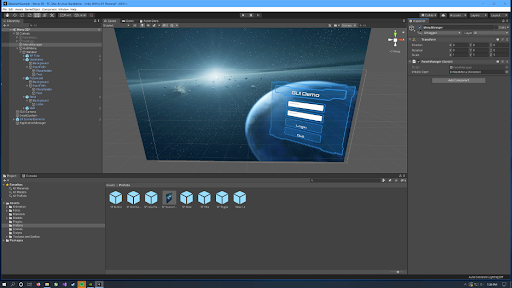
Next, a new menu will be needed for the Auth Menu. The simplest way to create this is to duplicate the existing MainMenu object and customize it. To create the Auth Menu:
- Select
MainMenuand duplicate it (Ctrl + D). - With
MainMenustill selected, click the checkbox in the inspector to disable it. This will make theMainMenuobject disappear. - Rename the duplicated menu to
AuthMenu. - Delete the
ContinueandNew Gameobjects - Rename the
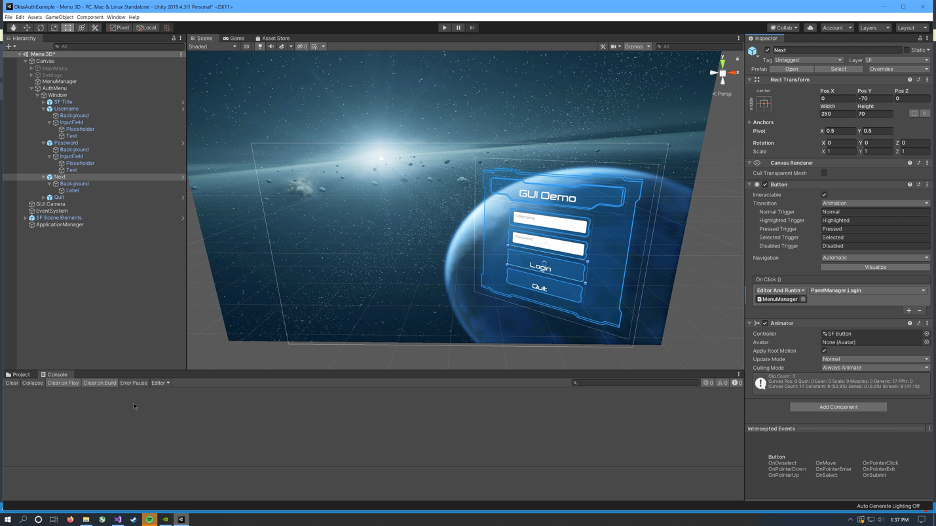
Settingsobject toNext - Drag in 2 of the InputField prefabs and rename them to
UsernameandPasswordrespectively. - Expand the
Passwordobject and click on the InputField object. In the Inspector, scroll down to Content Type and change to Password. - Change
Username'sposition PosY to 70, and changePassword'sPosY to 0. - Expand the
Usernameobject, expand the InputField, select Placeholder, and change the text toUsername. Do this for thePasswordobject next. - With
AuthMenustill selected, click the checkbox in the inspector to disable it. This will make theAuthMenudisappear.
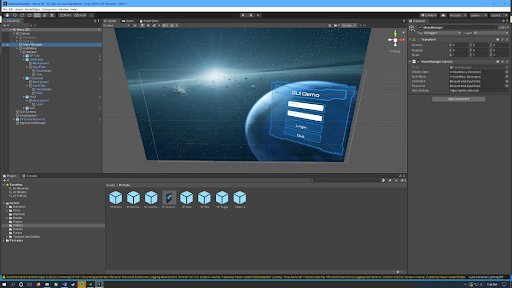
Click MenuManager and make sure it is enabled in the inspector. Find the PanelManager script component attached to the MenuManager object and double click to edit. This will open up the primary IDE configured in Unity.
Okta CLI
Before you begin, you’ll need a free Okta developer account. Install the Okta CLI and run okta register to sign up for a new account. If you already have an account, run okta login.
Then, run okta apps create. Select the default app name, or change it as you see fit.
Choose Web and press Enter.
Select Other.
Then, change the Redirect URI to http://127.0.0.1:51772 and use http://127.0.0.1:51772 for the Logout Redirect URI.
What does the Okta CLI do?
The Okta CLI will create an OIDC Web App in your Okta Org. It will add the redirect URIs you specified and grant access to the Everyone group. You will see output like the following when it’s finished:
Okta application configuration has been written to: /path/to/app/.okta.env
Run cat .okta.env (or type .okta.env on Windows) to see the issuer and credentials for your app.
export OKTA_OAUTH2_ISSUER="https://dev-133337.okta.com/oauth2/default"
export OKTA_OAUTH2_CLIENT_ID="0oab8eb55Kb9jdMIr5d6"
export OKTA_OAUTH2_CLIENT_SECRET="NEVER-SHOW-SECRETS"
Your Okta domain is the first part of your issuer, before /oauth2/default.
NOTE: You can also use the Okta Admin Console to create your app. See Create a Web App for more information.
Native: Authenticate with Okta
Reference the Okta Auth SDK by adding the following to the end of the using statements.
using Okta.Auth.Sdk;
using Okta.Sdk.Abstractions.Configuration;
The login code will need to understand some of the elements in the menu to be able to interact with them. Expose public variables so that these elements can be configured in the editor. After the initiallyOpen Animator on line 11, add:
public Animator authMenu;
public static bool isAuthenticated;

public InputField Username;
public InputField Password;
public string OktaDomain;
authMenu will hold the AuthMenu object that was created earlier. IsAuthenticated will allow the UI to determine what to display. The two InputFields will hold the Username and Password InputField objects that were added to the Auth Menu. The OktaDomain string will hold the Okta Developer Org URL.
At line 38, inside the OpenPanel method, add:
if (!isAuthenticated)
{
   anim = authMenu;
}
In OpenPanel, anim is the variable holding what UI panel to open. If authentication is required or has not been completed, we always want to override whatever panel is in the process of opening and open the Auth Menu instead. This forces the user to log in when needed.
Next, create the Login() function that the Next button will call on click. At line 86 add:
public async void Login()
{
   var client = new AuthenticationClient(new OktaClientConfiguration
   {
      OktaDomain = OktaDomain,
   });

   var authnOptions = new AuthenticateOptions()
   {
         //Explicitly passing UserAgent with the client OS description. Passing UserAgent explicitly is required for Mac/iOS/Android but not for Windows.
         UserAgent = System.Runtime.InteropServices.RuntimeInformation.OSDescription,
         Username = Username.text.ToString(),
         Password = Password.text.ToString(),
   };

   try
   {
      var authnResponse = await client.AuthenticateAsync(authnOptions);

      Debug.Log("Authentication Status: " + authnResponse.AuthenticationStatus);
      if (authnResponse.AuthenticationStatus == "SUCCESS")
      {
         //Store the token
         Debug.Log(authnResponse.SessionToken);
         isAuthenticated = true;

         OpenPanel(initiallyOpen);
      }
      else
      {
         //Handle Errors
         Debug.Log("Authentication Failed...");
      }
   }
   catch (System.Exception ex)
    {
      Debug.Log(ex.Message);
    }
 }
Save PanelManager.cs and switch back to Unity.
Make sure MenuManager is selected and notice the new properties in the PanelManager component attached to the MenuManager object. To configure the PanelManager, do the following:
- Drag the
AuthMenuobject from the project hierarchy to theauthMenuproperty in the inspector. - Drag the InputField from the
Usernameobject in the project hierarchy to theUsernameproperty in the inspector. - Drag the InputField from the
Passwordobject in the project hierarchy to thePasswordproperty in the inspector. - Replace
{yourOktaDomain}with your Okta domain.
Now, wire the Next button’s OnClick event to the Login() method in PanelManager.cs. Click the Next button object in the hierarchy window, find the On Click () section in the inspector windows and change the dropdown to PanelManager > Login().
Click Play to run the project and log in using user credentials for a user in the associated Okta Developer Org.
If Authentication was successful, a session token will appear along with the SUCCESS result coming from the Okta AuthN API.
Now that the client is able to authenticate users via basic auth, more advanced concepts can be added such as support for MFA and user account/profile management. This is done by adding logic to the code described in this guide that handles other authentication states within the Okta AuthN API. The SDK is already able to handle these concepts which means that the additional code is needed only for the UI in Unity. This code is outside the scope of this blog but the AuthN API leveraged for this experience is documented on developer.okta.com
OAuth: Authenticate with Okta
Open the scene that was saved for the OAuth experience.
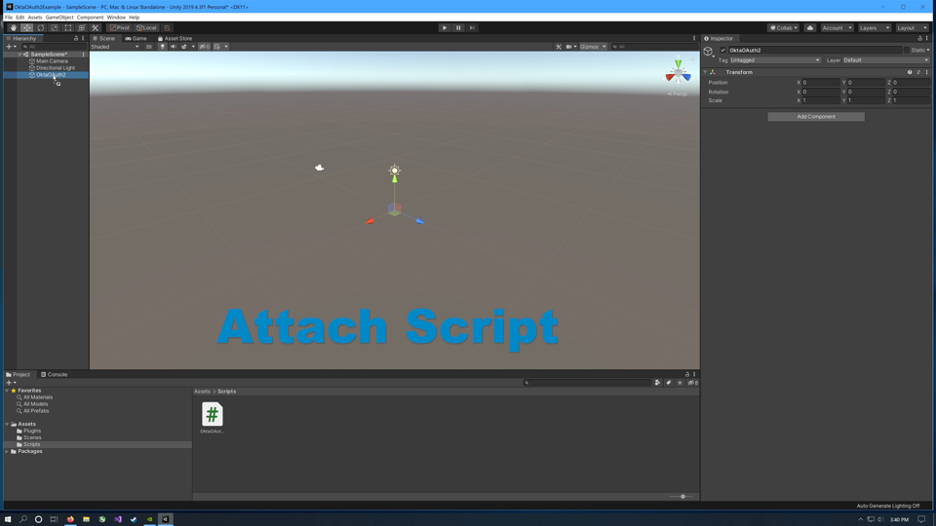
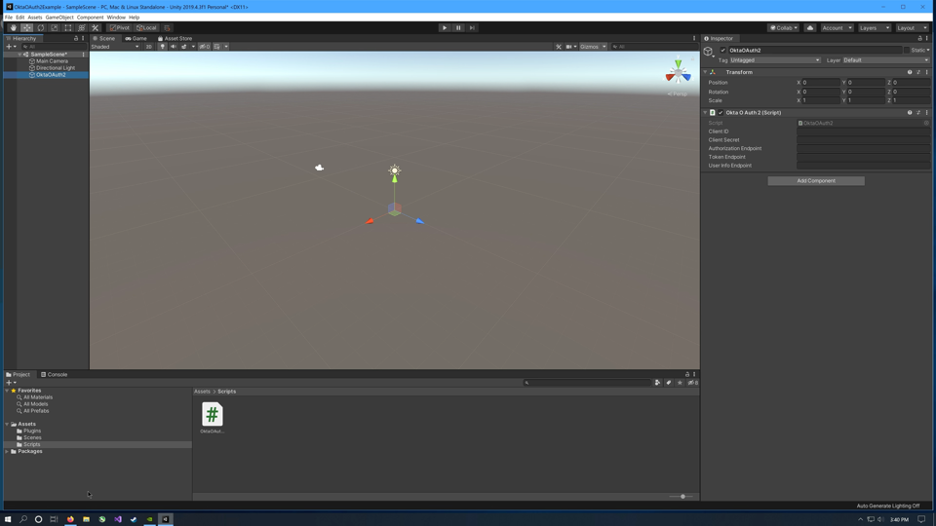
To protect the scene with OAuth, a simple GameObject is all that is needed. Create one by clicking GameObject and then Create New. Name this GameObject OktaOAuth2.
If Assets > Scripts does not exist in the project, create a folder called Assets and a folder inside Assets called Scripts. Create a new cs script within the Scripts folder and name this script OktaOAuth2.cs. This script will be added to the GameObject and will force unauthorized users to authorize before interacting with the scene.
Edit OktaOAuth2.cs.
This example makes use of multiple libraries, all of which are included with .Net with the exception of Newtonsoft.Json. Start by adding the following references:
using System.Collections;
using System.Collections.Generic;
using UnityEngine;
using System;
using System.Text;
using System.Threading.Tasks;
using System.IO;
using System.Net;
using System.Net.Sockets;
using System.Security.Cryptography;
using System.Runtime.InteropServices;
using Newtonsoft.Json;
Newtonsoft.Json is already included with the Okta SDK unity package. If this is already imported into the project, and a Plugins folder already exists with a Newtonsoft.Json.dll file inside, skip the next steps describing the manual installation of Newtonsoft.Json.
Next, go back to Unity and create a folder inside Assets called Plugins.
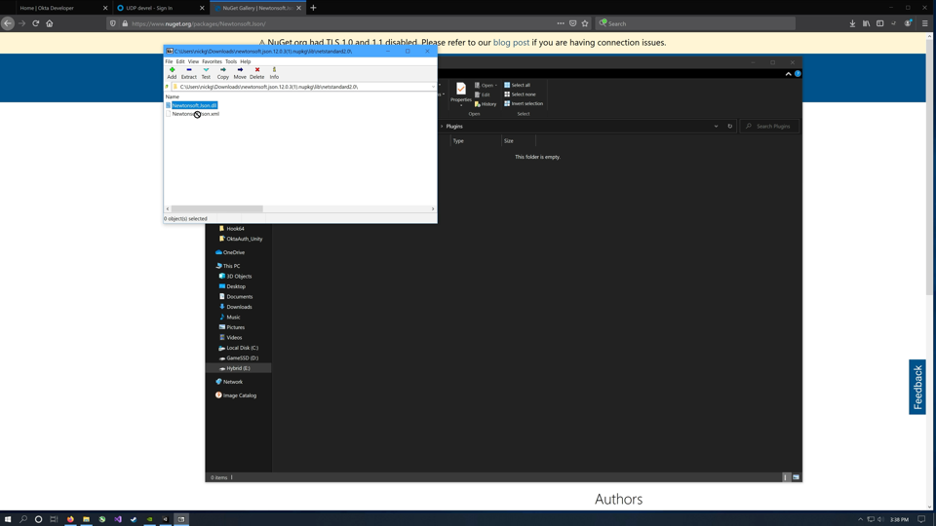
The easiest way to add Newtonsoft.Json to the Unity project is to manually download it and add it to the project. This is because Unity does not support Nuget directly.
Go to nuget.org and search Newtonsoft. https://www.nuget.org/packages/Newtonsoft.Json/ Download the package and open it as a zip file. Open lib > net20 and extract Newtonsoft.Json.dll to the Plugins folder in the Unity project.
Go back to editing OktaOAuth2.cs.
Within the default class generated by Unity, create public variables to hold our Okta configuration information.
// client configuration
public string clientID;
public string clientSecret;
public string authorizationEndpoint;
public string tokenEndpoint;
public string userInfoEndpoint;
In the Start() method, call doOAuth(), which is where we will process the OAuth logic.
// Start is called before the first frame update
void Start()
{
   // Add logic to check current auth state and only doOAuth() when needed.
   doOAuth();
}
doOAuth() will need to handle popping up a browser, redirecting the user for authentication, and receiving/validating access tokens upon return. How to design code in .Net for OAuth2 is a large topic and outside the scope of this blog. You can read more about OAuth2 here on developer.okta.com. For this example, I am providing code that I am using in my own project to help explain the concept.
private async void doOAuth()
{
    // Generates state and PKCE values.
    string state = randomDataBase64url(32);
    string code_verifier = randomDataBase64url(32);
    string code_challenge = base64urlencodeNoPadding(sha256(code_verifier));
    const string code_challenge_method = "S256";
    // Creates a redirect URI using the loopback address.
    int redirectPort = 51772;
    string redirectURI = string.Format("http://{0}:{1}/", IPAddress.Loopback, redirectPort);
    output("redirect URI: " + redirectURI);
    // Creates an HttpListener to listen for requests on that redirect URI.
    var http = new HttpListener();
    http.Prefixes.Add(redirectURI);
    output("Listening..");
    http.Start();
    // Creates the OAuth 2.0 authorization request.
    string authorizationRequest = string.Format("{0}?response_type=code&scope=openid%20profile&redirect_uri={1}&client_id={2}&state={3}&code_challenge={4}&code_challenge_method={5}",
        authorizationEndpoint,
        System.Uri.EscapeDataString(redirectURI),
        clientID,
        state,
        code_challenge,
        code_challenge_method);
    // Opens request in the browser.
    System.Diagnostics.Process.Start(authorizationRequest);
    // Waits for the OAuth authorization response.
    var context = await http.GetContextAsync();
    // Sends an HTTP response to the browser.
    var response = context.Response;
    string responseString = string.Format("<html><head><meta http-equiv='refresh' content='10;url=https://developer.okta.com'></head><body>Please return to the app.</body></html>");
    var buffer = System.Text.Encoding.UTF8.GetBytes(responseString);
    response.ContentLength64 = buffer.Length;
    var responseOutput = response.OutputStream;
    Task responseTask = responseOutput.WriteAsync(buffer, 0, buffer.Length).ContinueWith((task) =>
    {
        responseOutput.Close();
        http.Stop();
        Console.WriteLine("HTTP server stopped.");
    });
    // Checks for errors.
    if (context.Request.QueryString.Get("error") != null)
    {
        output(String.Format("OAuth authorization error: {0}.", context.Request.QueryString.Get("error")));
        return;
    }
    if (context.Request.QueryString.Get("code") == null
        || context.Request.QueryString.Get("state") == null)
    {
        output("Malformed authorization response. " + context.Request.QueryString);
        return;
    }
    // extracts the code
    var code = context.Request.QueryString.Get("code");
    var incoming_state = context.Request.QueryString.Get("state");
    // Compares the receieved state to the expected value, to ensure that
    // this app made the request which resulted in authorization.
    if (incoming_state != state)
    {
        output(String.Format("Received request with invalid state ({0})", incoming_state));
        return;
    }
    output("Authorization code: " + code);
    // Starts the code exchange at the Token Endpoint.
    performCodeExchange(code, code_verifier, redirectURI);
}
async void performCodeExchange(string code, string code_verifier, string redirectURI)
{
    output("Exchanging code for tokens...");
    // builds the  request
    string tokenRequestBody = string.Format("code={0}&redirect_uri={1}&client_id={2}&code_verifier={3}&client_secret={4}&scope=&grant_type=authorization_code",
        code,
        System.Uri.EscapeDataString(redirectURI),
        clientID,
        code_verifier,
        clientSecret
        );
    // sends the request
    HttpWebRequest tokenRequest = (HttpWebRequest)WebRequest.Create(tokenEndpoint);
    tokenRequest.Method = "POST";
    tokenRequest.ContentType = "application/x-www-form-urlencoded";
    //tokenRequest.Accept = "Accept=application/json;charset=UTF-8";
    byte[] _byteVersion = Encoding.ASCII.GetBytes(tokenRequestBody);
    tokenRequest.ContentLength = _byteVersion.Length;
    Stream stream = tokenRequest.GetRequestStream();
    await stream.WriteAsync(_byteVersion, 0, _byteVersion.Length);
    stream.Close();
    try
    {
        // gets the response
        WebResponse tokenResponse = await tokenRequest.GetResponseAsync();
        using (StreamReader reader = new StreamReader(tokenResponse.GetResponseStream()))
        {
            // reads response body
            string responseText = await reader.ReadToEndAsync();
            Console.WriteLine(responseText);
            // converts to dictionary
            Dictionary<string, string> tokenEndpointDecoded = JsonConvert.DeserializeObject<Dictionary<string, string>>(responseText);
            string access_token = tokenEndpointDecoded["access_token"];
            Debug.Log(access_token);
            userinfoCall(access_token);
        }
    }
    catch (WebException ex)
    {
        if (ex.Status == WebExceptionStatus.ProtocolError)
        {
            var response = ex.Response as HttpWebResponse;
            if (response != null)
            {
                output("HTTP: " + response.StatusCode);
                using (StreamReader reader = new StreamReader(response.GetResponseStream()))
                {
                    // reads response body
                    string responseText = await reader.ReadToEndAsync();
                    output(responseText);
                }
            }
        }
    }
}
While the OAuth2 code can vary, so long as it follows spec, the part that is relevant for Unity is how to get the browser to appear and redirect the user to login.
// Opens request in the browser.
System.Diagnostics.Process.Start(authorizationRequest);
Passing a URL to System.Diagnostics.Process.Start() in Unity will launch a browser that can be used to log a user in. This part could be replaced with an embedded browser solution from the asset store to improve the user experience by keeping the user in the engine. However, the interaction with Okta would be the same.
The OAuth2 code provided does rely on a few helper methods around base64 encoding, cryptology, and logging.
/// <summary>
/// Appends the given string to the on-screen log, and the debug console.
/// </summary>
/// <param name="output">string to be appended</param>
public void output(string output)
{
   Debug.Log(output);
}

/// <summary>
/// Returns URI-safe data with a given input length.
/// </summary>
/// <param name="length">Input length (nb. output will be longer)</param>
/// <returns></returns>
public static string randomDataBase64url(uint length)
{
   RNGCryptoServiceProvider rng = new RNGCryptoServiceProvider();
    byte[] bytes = new byte[length];
   rng.GetBytes(bytes);
   return base64urlencodeNoPadding(bytes);
}

/// <summary>
/// Returns the SHA256 hash of the input string.
/// </summary>
/// <param name="inputString"></param>
/// <returns></returns>
public static byte[] sha256(string inputString)
{
   byte[] bytes = Encoding.ASCII.GetBytes(inputString);
   SHA256Managed sha256 = new SHA256Managed();
   return sha256.ComputeHash(bytes);
}

/// <summary>
/// Base64url no-padding encodes the given input buffer.
/// </summary>
/// <param name="buffer"></param>
/// <returns></returns>
public static string base64urlencodeNoPadding(byte[] buffer)
{
   string base64 = Convert.ToBase64String(buffer);

   // Converts base64 to base64url.
   base64 = base64.Replace("+", "-");
   base64 = base64.Replace("/", "_");
   // Strips padding.
   base64 = base64.Replace("=", "");

    return base64;
}
The most important logic still needed is calling out to UserInfo. UserInfo is an Open ID Connect defined endpoint that returns data on a user in exchange for a valid access token. Okta has the ability to add new data as claims to the access token itself so this may not be required, but if the goal is to keep the access token as light as possible, this type of introspection might be desired.
async void userinfoCall(string access_token)
{
   output("Making API Call to Userinfo...");

   // sends the request
   HttpWebRequest userinfoRequest = (HttpWebRequest)WebRequest.Create(userInfoEndpoint);
   userinfoRequest.Method = "GET";
   userinfoRequest.Headers.Add(string.Format("Authorization: Bearer {0}", access_token));
   userinfoRequest.ContentType = "application/x-www-form-urlencoded";
   //userinfoRequest.Accept = "Accept=text/html,application/xhtml+xml,application/xml;q=0.9,*/*;q=0.8";

   // gets the response
   WebResponse userinfoResponse = await userinfoRequest.GetResponseAsync();
   using (StreamReader userinfoResponseReader = new StreamReader(userinfoResponse.GetResponseStream()))
   {
      // reads response body
      string userinfoResponseText = await userinfoResponseReader.ReadToEndAsync();
      output(userinfoResponseText);
   }
}
Save the script and go back to Unity.
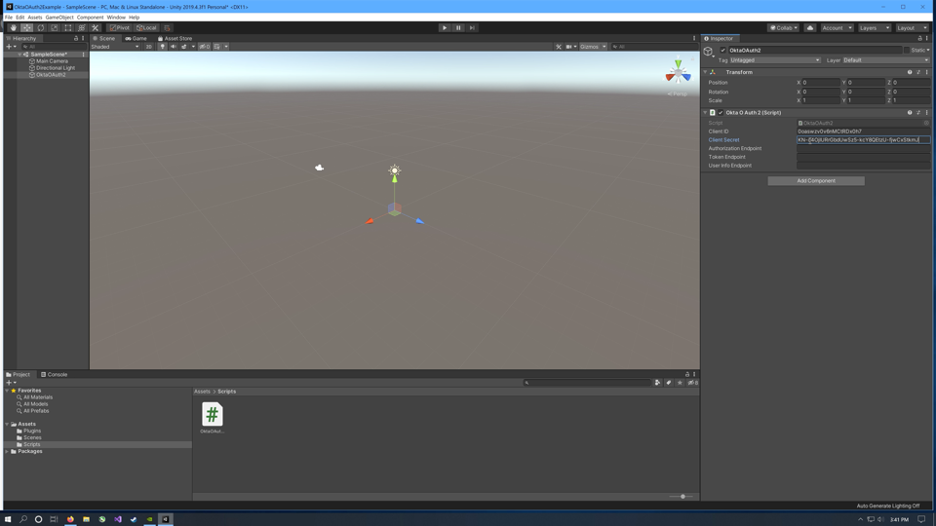
Click the OktaOAuth2 GameObject and notice the public variables from the OktaOAuth2.cs script in the inspector.
From the Okta CLI .okta.env, copy the OKTA_OAUTH2_CLIENT_ID and OKTA_OAUTH2_CLIENT_SECRET into the Client ID and Client Secret variables in the inspector for the OktaOAuth2 GameObject in Unity.
For the three endpoint URLs, go back to Okta (use okta login to get a link in your terminal). In the menu click Security > API > Authorization Servers.
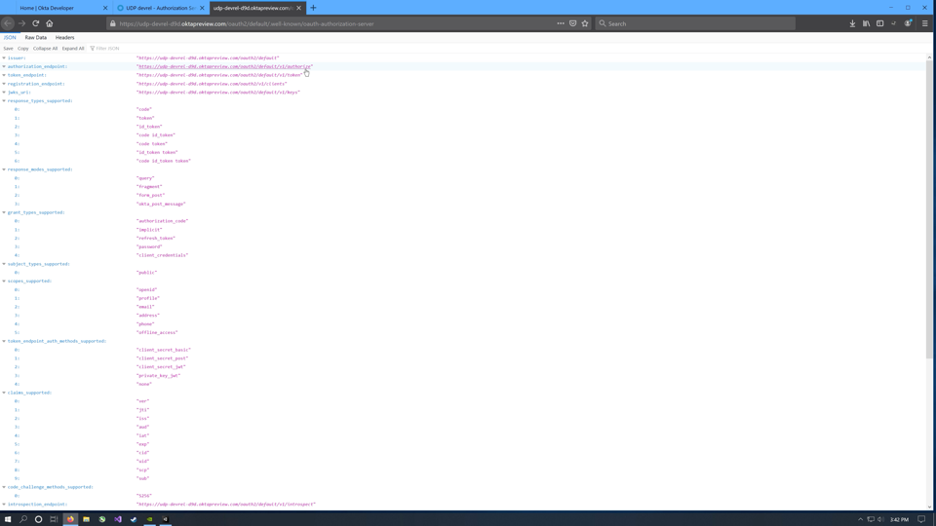
Click default to open the default authorization server. Click the Metadata URI link.
Find the authorization endpoint, token endpoint, and userinfo endpoint urls, copy and paste into the OktaOAuth2 GameObject inspector in Unity.
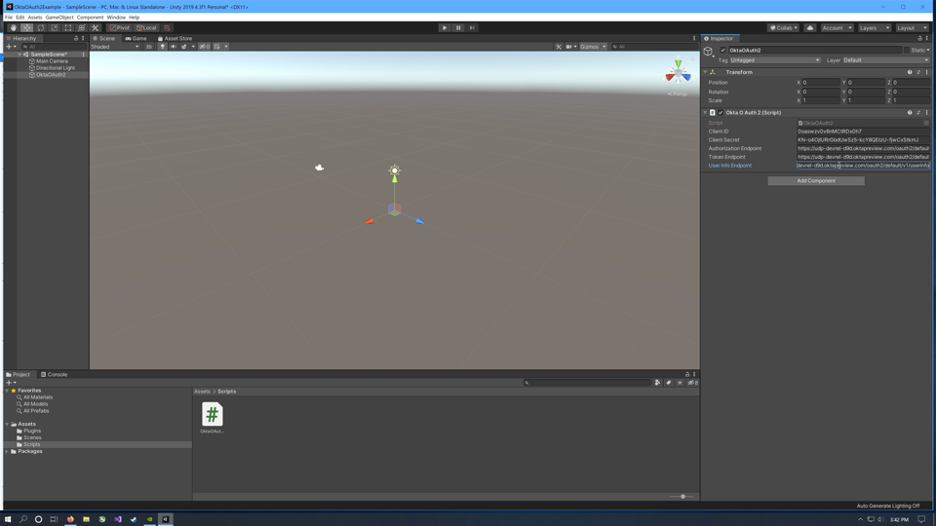
Fully log out of Okta and close the browser if possible before testing. Make sure the project is saved and run it. When the browser appears, log in. Close the browser when prompted and return to Unity. The console will contain tokens and claims for the user.
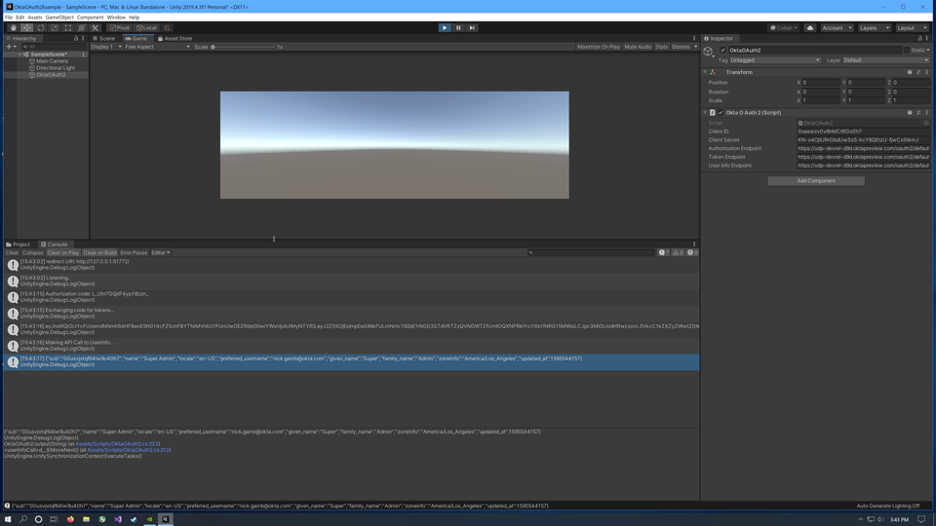
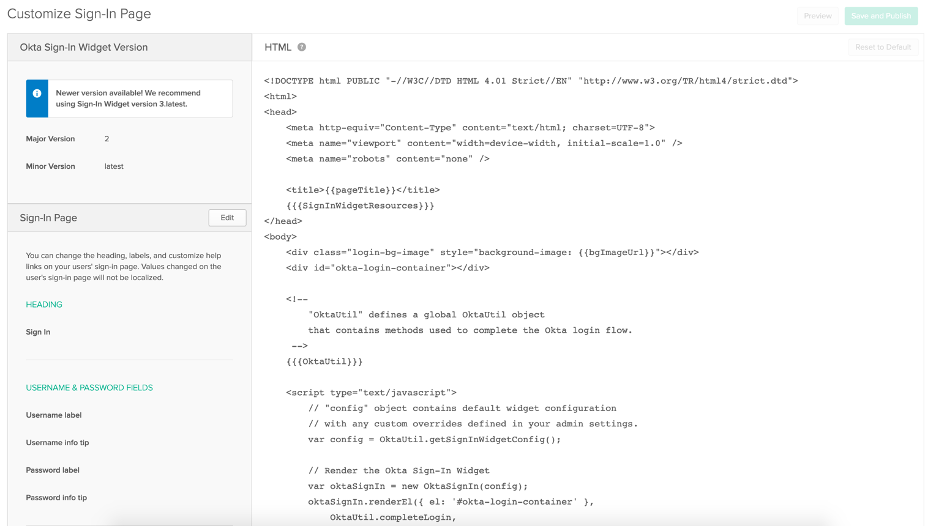
The great thing about authenticating via OAuth2 and Okta’s hosted login widget is that the level of effort to build out the UI to support complex concepts like MFA is no longer required. Okta handles every aspect of authentication freeing up developers to focus on the project itself. Best of all, this hosted login experience can be fully customized. Everything from the domain of the page to its HTML and CSS is exposed within Okta so that users stay within your branded echo system.
To further enhance the example, code could be added to check a user’s authentication state on start of every scene or before secure actions are allowed. This is easily done by calling the userinfoCall() method from the example code. Simply save the access token on the user’s first login to a secure location, such as a vault, and check if there is a token on Start(). If a token exists, send it to the userinfoCall() method from the sample code and act on the results. If there is no token, or if the existing token is not valid, call doOAuth().
Conclusion
Identity security is a very complex, but increasingly required, aspect of most game/XR projects today. The resource commitment required to build out all of the functionality needed, and then maintain and grow that functionality, is massive. When it’s done incorrectly it can be devastating. Leaving identity security to the experts and leveraging the best of breed Okta Identity Platform for all identity security needs in your project will save countless hours and ensure that intellectual property and customer accounts are properly secured.
To expand on the ideas discussed in this blog, I recommend further reading on securely storing access tokens using vaults, such as HashiCorp Vault, and authorizing users to Network Engines such as Photon. Stay tuned to developer.okta.com/blog for further discussions on these topics and more.
Learn More About C# and Okta
If you’d like to learn more about ASP.NET Core, check out some of our other killer content:
- Unity WebGL + PlayFab Authorization in 20 Minutes
- How to Master the Filestream in C#
- How I Learned to Love Default Implementations in C# 8.0
- Decode JWTs in C# for Authorization
- Create a Blockchain Explorer in C#
We are always posting new content. If you like this content, be sure to follow us on Twitter and subscribe to our YouTube Channel.
Okta Developer Blog Comment Policy
We welcome relevant and respectful comments. Off-topic comments may be removed.