Secure Kafka Streams with Quarkus and Java
In this tutorial, you’re going to use Apache Kafka and Quarkus to create a secure, scalable web application. The application will use Kafka Streams and a small Kafka cluster to consume data from a server and push it to a client application as a real-time stream. You will secure the entire application. You will secure the Kafka cluster with SSL and SASL/JAAS password protection. Finally, you’ll secure the Quarkus client application using OAuth 2.0 & OIDC using Okta as the OIDC provider.
The architects of both Apache Kafka and Quarkus designed them for use in scalable clusters. Quarkus is a container-first Kubernetes Java framework that you’ll use to create a scalable, Java-based REST service and client application. It’s a high-performing tool for serverless and microservice environments. The container-first design packages the runtime environment along with the compiled code, allowing you to tightly optimize both and avoid the unwelcome surprises that can come along with operating system updates on servers. Developers build Quarkus apps with Java standard technologies, such as JAX-RS for REST interfaces, JPA for data modeling and persistence, and CDI for dependency injection.
Note: In May 2025, the Okta Integrator Free Plan replaced Okta Developer Edition Accounts, and the Okta CLI was deprecated.
We preserved this post for reference, but the instructions no longer work exactly as written. Replace the Okta CLI commands by manually configuring Okta following the instructions in our Developer Documentation.
Exploring Kafka Streams
Apache Kafka describes itself as a “distributed streaming platform” that has three capabilities:
- publish and subscribe to streams of messages,
- store streams of records, and
- process streams of records.
The creators designed it to do this in a fault-tolerant and scalable fashion. It’s similar to an enterprise message queue or a pub/sub server—functions that it can perform very well—however, it combines elements of both, allowing you to broadcast messages to multiple consumers (a feature of typical pub-sub messaging systems) while also allowing you to divide up processing and distribute it across a collection of processes (a property of the typical queue system). Further, it runs in a cluster and enables real-time processing of data. The cluster uses a fast TCP protocol to communicate between nodes (producers, consumers, stream processors, and brokers).
Typical use cases include (taken from the Apache Kafka docs):
- messaging, message broker
- website activity tracking
- metrics
- log aggregation
- stream processing
- event sourcing
- commit logging
Think of it as a distributed stream processing and storage network that allows clients to publish, subscribe, and transform data in real time.
The Kafka cluster can consist of one or more servers that store records in categories called topics. Each record has a key, a value, and a timestamp. The Kafka cluster does a ton of fancy work on the back end to keep records ordered and replicated across the cluster. Developers can configure the length of time that Kafka retains records.
According to the Kafka docs, Kafka makes the following guarantees regarding message delivery:
- Messages sent by a producer to a particular topic partition will be appended in the order they are sent. That is, if a record M1 is sent by the same producer as a record M2, and M1 is sent first, then M1 will have a lower offset than M2 and appear earlier in the log.
- A consumer instance sees records in the order they are stored in the log.
- For a topic with replication factor N, we will tolerate up to N-1 server failures without losing any records committed to the log.
A producer is a client that publishes records to one or more topics on the cluster.
A consumer is a client that reads records from one or more topics on the cluster.
In this project, you can think of consumers and producers as clients of the Kafka cluster. The Quarkus project will contain both of these roles. The Quarkus client project will contain a REST API and a simple browser template, which itself will be a client for the Quarkus REST API. This is potentially a little confusing, so just realize that the Quarkus REST API is itself a client with respect to the Kafka cluster but also has a client that accesses it from the browser.
Two more terms you’ll see that you need to understand are zookeeper and broker.
A zookeeper is a special process in the Kafka cluster that manages and coordinates the cluster. In this tutorial, you won’t need to do anything other than making sure this process is running.
A broker is a worker node in the cluster. Typically you’ll have many nodes distributed geographically to ensure fail-over and network speed. However, here you’ll just configure one broker that runs locally.
Both the consumers and producers connect to the broker, which is the worker that accepts records to the topics and pushes records to subscribed consumers. In a larger cluster configuration, which may have dozens or hundreds of brokers, the consumers and producers can connect to any of the brokers.
Overview of Tutorial Steps
This tutorial has a lot going on, so I’m going to give you an overview of the steps before you dive in.
You’re going to create a simple, unsecured Quarkus client application. Next, you’re going to use a free Okta developer account to secure the Quarkus client using OAuth 2.0 and OIDC. After that, you’re going to use the Qute templating engine to serve a secure, server-side web template.
Next, you’re going to download and test Apache Kafka running locally on your machine. You’ll then configure the Quarkus client app to send and receive data to and from the unsecured Kafka cluster. Once you have the cluster working with Quarkus unsecured, you’ll move on to securing the cluster.
The next step is to generate the SSL certificates, keystores, and truststores that you need to secure the Kafka cluster and allow the Quarkus client to securely connect to the cluster. Once that’s done, you configure the cluster and the client application to use the keystores and truststores.
Finally, you test the fully secured Kafka Streams client application and Kafka cluster.
In summary:
- Create the simple, unsecured Quarkus client application
- Use Okta to configure an OIDC provider
- Secure Quarkus using OAuth 2.0 & OIDC
- Use Qute templating in Quarkus
- Download and test Apache Kafka
- Configure Quarkus to use Kafka Streams and test unsecured
- Generating SSL certs that you’ll need to secure Kafka cluster
- Secure the Kafa cluster to use SSL and JAAS/SASL
- Test secured Kafka cluster and Quarkus client app
Install Requirements
Java 11: This project uses Java 11. OpenJDK 11 will work just as well. You can find instructions on the OpenJDK website. You can also install OpenJDK using Homebrew. Alternatively, SDKMAN is another great option for installing and managing Java versions.
Maven: You need to install Maven to bootstrap the project using the quarkus-maven-plugin. Install it according to the instructions on the Maven website. Or use SDKMAN or Homebrew. You need Maven version 3.6.2 or greater.
Just a hint, if you run mvn -v, you’ll see your Maven version and the Java version Maven is running on. You’ll need to make sure Maven is using the correct version, not just what java -version gets you from the command line, which could be different.
Okta Developer Account: You’ll be using Okta as an OAuth/OIDC provider to add JWT authentication and authorization to the application. Go to our developer site and sign up for a free developer account.
Create a Simple and Secure Quarkus Java Application
Quarkus has a nice Maven plugin, quarkus-maven-plugin, that makes bootstrapping new projects easy. Open a terminal and cd to an appropriate parent directory for the project. Since you’re going to create both a Kafka cluster and a Quarkus Java application, as well as a bunch of SSL certs and keyfiles, make a parent directory named kafka-quarkus-java for the whole project. I’ll refer to this as the project root path throughout the tutorial.
Run the following Maven command. This bootstraps our starter project with dependencies for interacting with Kafka, OIDC authentication, and the Qute templating engine.
This command creates a new directory for the project: quarkus-client.
mvn io.quarkus:quarkus-maven-plugin:1.3.0.Final:create \
-DplatformVersion=1.3.0.Final -DprojectGroupId=com.okta -DprojectArtifactId=quarkus-client \
-DclassName="com.okta.quarkusclient.SecureResource" \
-Dextensions="quarkus-smallrye-reactive-messaging-kafka,oidc,quarkus-resteasy-qute"
Open the quarkus-client directory with your favorite IDE or editor.
Test the Bootstrapped Quarkus Application
Quarkus at this point doesn’t do much, but the bootstrapped application includes a simple endpoint that you can test. Open a terminal and run the following command to start Quarkus:
./mvnw compile quarkus:dev
The initialization process will fail, and you’ll see terminal output ending with something like the following.
Caused by: io.quarkus.runtime.configuration.ConfigurationException: auth-server-url
and client-id must be configured when the quarkus-oidc extension is enabled
Since you’ve included the OIDC plugin, you need to configure its settings for the application to start.
Create an OIDC Application
You’ll use Okta as your authentication and authorization provider. This leverages two different protocols: Open Authentication 2.0 (OAuth 2.0) and OpenID Connect (OIDC). OIDC is built on top of OAuth 2.0. OAuth 2.0 provides an authorization protocol, while OIDC provides an authentication protocol. Together they provide a complete protocol for securely determining who a client is, what they are allowed to access, and what actions they are allowed to perform.
You’re going to use Okta’s implementation of these protocols as your OAuth 2.0 & OIDC provider.
If you haven’t already, head over to developer.okta.com to sign up for a free account. Once you have an account, open the developer dashboard and create an OpenID Connect (OIDC) application by clicking on the Applications top-menu item, and then click on the Add Application button.
- Select Web and click Next
- Change the Name to be
Quarkus Client - Change the Login redirect URIs to
http://localhost:8080/ - Scroll down and click Done
Leave the page open or take note of the Client ID and Client Secret. You’ll need them below.
Configure Quarkus Application Properties
In your Quarkus client project, open the src/main/resources/application.properties file and copy and paste the following into it.
quarkus.oidc.auth-server-url=https://{yourOktaDomain}/oauth2/default
quarkus.oidc.client-id={yourClientId}
quarkus.oidc.credentials.secret={yourClientSecret}
quarkus.oidc.authentication.scopes=openid,profile
quarkus.oidc.application-type=web-app
quarkus.oidc.authentication.redirect-path=/
You need to fill in three values: your Okta domain in the auth-server-url, your client ID, and your client secret. The client ID and client secret are the values from the OIDC application you just created above.
To find your developer URI, open your Okta developer dashboard and navigate to API > Authorization Servers. Look at the row for the default authorization server where you’ll see the Issuer URI.
That domain is your Okta URI that you’ll need to populate in place of {yourOktaDomain}.
I want to point out one slightly strange thing about how the Quarkus OIDC extension works. The redirect-path value is a relative path that has to be a root path in the context path of the application. This means that if your application uses a path structure like /a/b/c, the redirect-path has to be /a or /a/b, for example. It cannot be a totally different static path, such as /oauth/callback. If you try to use a different path, the extension will just ignore the parameter value and use the full request path. That’s why, in the properties above, you’re setting the redirect-path to /. You need to redirect to an unsecured path that will be able to process the OAuth redirect to receive the code that gets exchanged for JSON web tokens (JWT).
You can read more about it in the Quarkus OIDC extension docs. Search for quarkus.oidc.authentication.redirect-path. Or check out this GitHub ticket.
Create a Secure Quarkus Endpoint
To secure our very simple web endpoint, copy and paste the code below into the SecureResource.java file.
src/main/java/com/okta/quarkusclient/SecureResource.java
package com.okta.quarkusclient;

import javax.annotation.security.RolesAllowed;
import javax.ws.rs.GET;
import javax.ws.rs.Path;
import javax.ws.rs.Produces;
import javax.ws.rs.core.MediaType;

@Path("/secured")
@RolesAllowed({"Everyone"})
public class SecureResource {

    @GET
    @Produces(MediaType.TEXT_PLAIN)
    public String hello() {
        return "secure hello";
    }
}
You secured the resource using the @RolesAllowed annotation.
Because Everyone is the default group the Okta auth server assigned to every authenticated user, specifying Everyone as the role means that any authenticated user is allowed to access the resource. The authorization server passes this from Okta to Quarkus using the groups claim in the JWT, which is not configured by default.
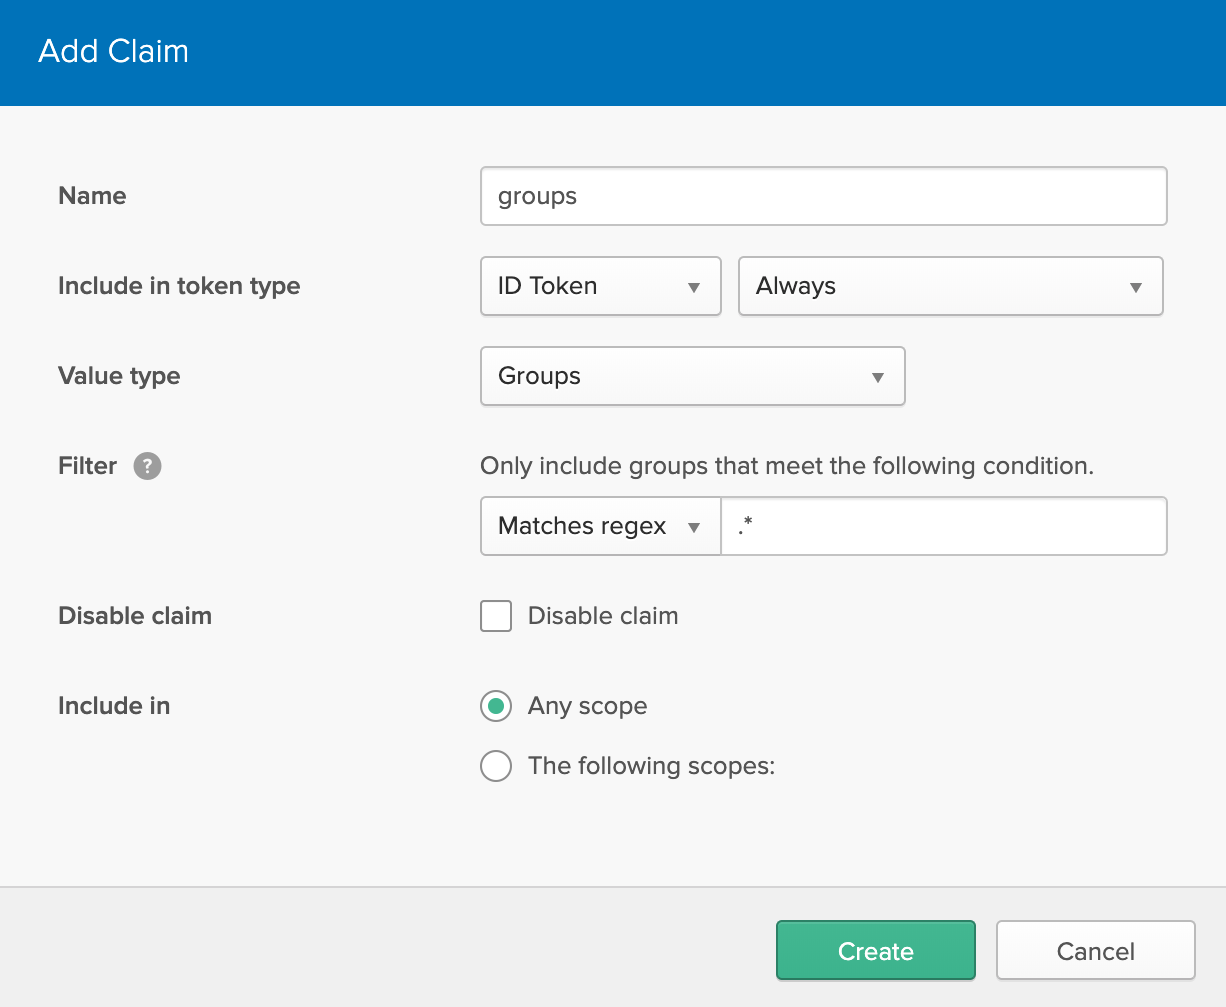
You need to add the groups claim to your Okta default authorization server. Open your Okta developer dashboard and click on API and Authorization Servers from the top menu. Click on the default server. Select the Claims tab.
Click Add Claim. Fill in the values listed below.
- Name: groups
- Include in token type: ID Token
- Value type: Groups
- Filter: Matches Regex
.* - Include in: Any scope
Click Create.
Now it’s time to test out the secured endpoint.
In a browser, open http://localhost:8080/secured. You will need to sign out of the Okta developer panel or use a private browser session. Otherwise, you’ll bypass the sign-in page since you’re already signed into Okta.
This time, Quarkus will redirect you to the Okta login page, which, if successful, will redirect you back to the /secured endpoint.
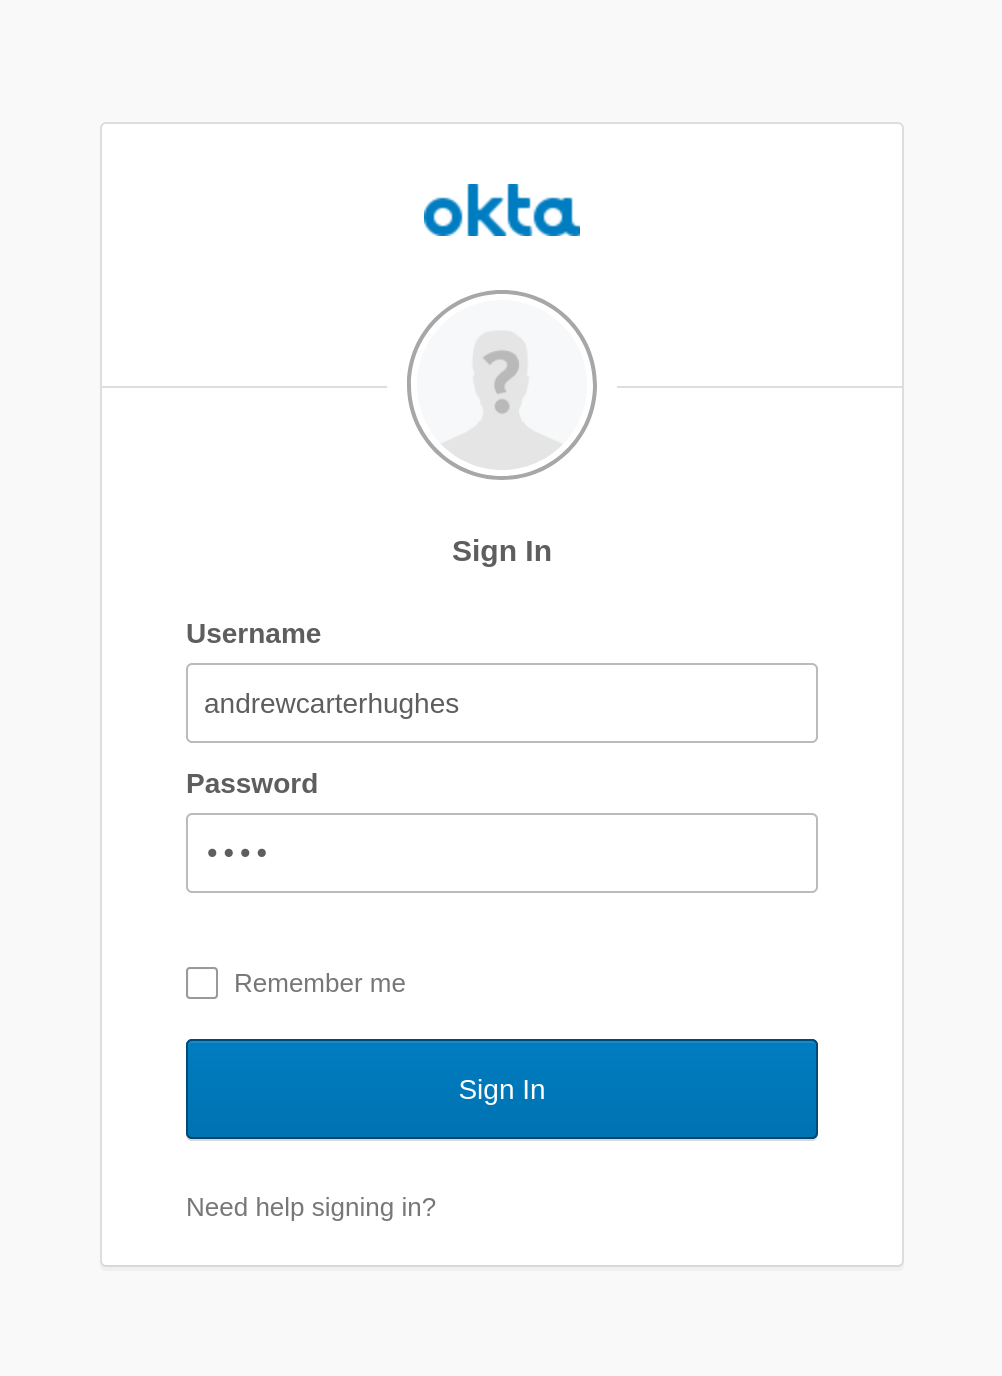
If all goes well, you’ll see “secure hello.”
Use Qute Templating to Display a Template Page
The next step is to use the Qute templating engine to display a template page. You can check out the docs on the Quarkus website for more info later.
Create a template file in the default template directory src/main/resources/templates.
src/main/resources/templates/secured.html
<!DOCTYPE html>
<html lang="en">
<head>
    <meta charset="UTF-8">
    <title>Speech</title>
</head>
<body>
<div class="container">
    <h2>Hello, {name}</h2>
</div>
</body>
</html>
Update SecuredResource.java to return the user’s name.
src/main/java/com/okta/quarkusclient/SecureResource.java
package com.okta.quarkusclient;

import io.quarkus.qute.Template;
import io.quarkus.qute.TemplateInstance;
import org.jboss.logging.Logger;

import javax.annotation.security.RolesAllowed;
import javax.inject.Inject;
import javax.ws.rs.GET;
import javax.ws.rs.Path;
import javax.ws.rs.Produces;
import javax.ws.rs.core.Context;
import javax.ws.rs.core.MediaType;
import javax.ws.rs.core.SecurityContext;
import java.security.Principal;

@Path("/secured")
@RolesAllowed({"Everyone"})
public class SecureResource {

    private static final Logger LOG = Logger.getLogger(SecureResource.class);

    @Inject
    Template secured;

    @GET
    @Produces(MediaType.TEXT_HTML)
    public TemplateInstance get(@Context SecurityContext ctx) {
        Principal caller =  ctx.getUserPrincipal();
        String name = caller == null ? "anonymous" : caller.getName();
        LOG.info("name: " + name);
        return secured.data("name", name);
    }
}
This simple file demonstrates a few things:
- basic logging (‘cause you never know)
- how to use a template file
- how to access user information from the security context
First, the LOG variable creates a logger using the default JBoss logging included with Quarkus.
Second, notice that the method now returns a TemplateInstance and that you injected the template into the resource class using the @Inject annotation. You also marked the template with @Produces(MediaType.TEXT_HTML), which tells Quarkus that it returns HTML.
Finally, you use dependency injection to get the SecurityContext from which you can get the Principal. This allows you to get the name, which you pass on to the template. You can also inject JWT claims or the whole JSON web token.
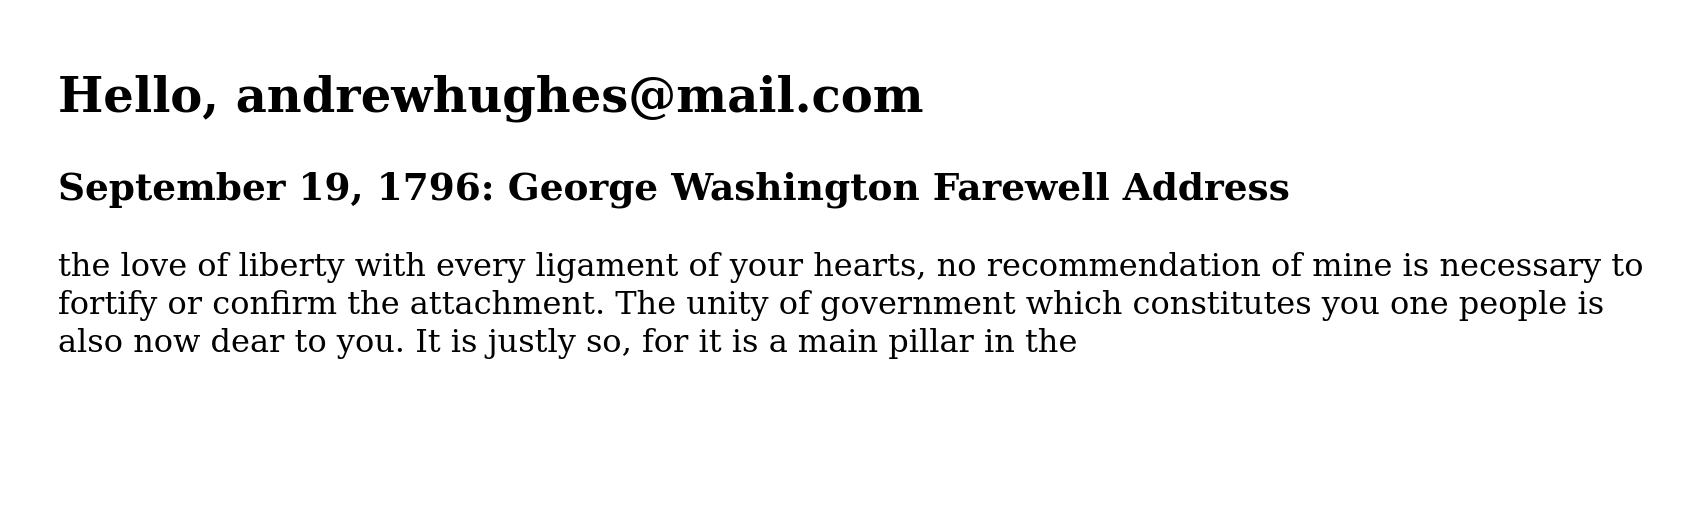
Now, test it out.
In a browser, open http://localhost:8080/secured. Don’t forget to use a private browser session if you want to re-authenticate.
You should now see our new, somewhat fancier secured template page that says something like, “Hello, your@email.com”.
You’ve secured a very simple Quarkus client application. Time to move on to setting up a secure Kafka cluster.
Download Apache Kafka
The Apache Kafka cluster you’re going to create will have two processes: one zookeeper and one broker. As I explained above, a zookeeper is a special process that coordinates tasks and data across the cluster. Every zoo (or cluster) needs one zookeeper. Brokers are the processes that your clients connect to. Clusters can have many brokers.
Download Apache Kafka 2.4.1 from their download page and copy it to your base project directory, kafka-quarkus-java.
Or use curl:
curl http://apache.claz.org/kafka/2.4.1/kafka_2.13-2.4.1.tgz --output kafka_2.13-2.4.1.tgz
Open a new shell. (You’re going to want to have two shells open for Apache Kafka: one for the zookeeper process and one for the broker process).
Untar the downloaded file and cd into the directory using the following commands:
tar -xzf kafka_2.13-2.4.1.tgz
cd kafka_2.13-2.4.1
Start a zookeeper:
bin/zookeeper-server-start.sh config/zookeeper.properties
Open a second shell and start the broker:
bin/kafka-server-start.sh config/server.properties
If you want to test the Kafka cluster, you can use the commands below to create a test topic and list the topic. You need to run them from the kafka_2.13-2.4.1 directory.
You’ll stop and restart the broker throughout this tutorial as you make updates. There’s no reason, however, for you to have to restart the zookeeper. You can just keep that process running in the background.
# Create a topic named 'test'
bin/kafka-topics.sh --create --bootstrap-server localhost:9092 --replication-factor 1 --partitions 1 --topic test
# List the topics on the cluster
bin/kafka-topics.sh --list --bootstrap-server localhost:9092
You should see the test topic listed in the output.
Kafka includes lots of scripts that you can use to test and manipulate the cluster. See the Kafka quickstart docs for more information.
Configure Quarkus to use Kafka Streams
The Kafka Streams application you’re going to create will, just for fun, stream the last few paragraphs from George Washington’s farewell address. You’ll create a producer that sends a new word every 500 milliseconds and a consumer that listens for new words. You’ll also have a web template that uses an EventSource to subscribe to the updates to the topic via the Quarkus client and displays them in real time.
To get Quarkus talking to Kafka, you need to update application.properties and create a couple of new files. The first file is a stream generator that will push data to a Kafka Streams topic.
Create the following new Java file.
src/main/java/com/okta/quarkusclient/SpeechGenerator.java
package com.okta.quarkusclient;

import io.reactivex.Flowable;
import org.eclipse.microprofile.reactive.messaging.Outgoing;
import org.jboss.logging.Logger;

import javax.enterprise.context.ApplicationScoped;
import java.util.concurrent.TimeUnit;

@ApplicationScoped
public class SpeechGenerator {

    private static final Logger LOG = Logger.getLogger(SpeechGenerator.class);

    private Integer index = 0;

    private String[] speech = {"Interwoven","as","is","the","love","of","liberty","with","every","ligament","of","your","hearts,",
            "no","recommendation","of","mine","is","necessary","to","fortify","or","confirm","the","attachment.","The","unity","of",
            "government","which","constitutes","you","one","people","is","also","now","dear","to","you.","It","is","justly","so,","for",
            "it","is","a","main","pillar","in","the","edifice","of","your","real","independence,","the","support","of","your",
            "tranquillity","at","home,","your","peace","abroad,","of","your","safety,","of","your","prosperity,","of","that","very","liberty",
            "which","you","so","highly","prize.","But","as","it","is","easy","to","foresee","that","from","different","causes","and","from",
            "different","quarters","much","pains","will","be","taken,","many","artifices","employed,","to","weaken","in","your","minds","the",
            "conviction","of","this","truth,","as","this","is","the","point","in","your","political","fortress","against","which","the",
            "batteries","of","internal","and","external","enemies","will","be","most","constantly","and","actively","(though","often","covertly",
            "and","insidiously)","directed,","it","is","of","infinite","moment","that","you","should","properly","estimate","the","immense",
            "value","of","your","national","union","to","your","collective","and","individual","happiness;","that","you","should","cherish","a",
            "cordial,","habitual,","and","immovable","attachment","to","it;","accustoming","yourselves","to","think","and","speak","of","it","as",
            "of","the","palladium","of","your","political","safety","and","prosperity;","watching","for","its","preservation","with","jealous",
            "anxiety;","discountenancing","whatever","may","suggest","even","a","suspicion","that","it","can","in","any","event","be","abandoned,",
            "and","indignantly","frowning","upon","the","first","dawning","of","every","attempt","to","alienate","any","portion","of","our","country",
            "from","the","rest","or","to","enfeeble","the","sacred","ties","which","now","link","together","the","various","parts."
    };

    @Outgoing("generated-word")
    public Flowable<String> generate() {
        return Flowable.interval(500, TimeUnit.MILLISECONDS).map(tick -> {
            String nextWord = speech[index];
            index += 1;
            if (index == speech.length) index = 0;
            LOG.info("Next word = " + nextWord);
            return nextWord;
        });
    }
}
The next file is the file that subscribes to the stream and makes the stream available as a REST endpoint. Notice that this resource uses @RequestScoped and @RolesAllowed to secure the stream endpoint.
src/main/java/SpeechResource.java
package com.okta.quarkusclient;

import org.eclipse.microprofile.reactive.messaging.Channel;
import org.jboss.resteasy.annotations.SseElementType;
import org.reactivestreams.Publisher;

import javax.annotation.security.RolesAllowed;
import javax.enterprise.context.RequestScoped;
import javax.inject.Inject;
import javax.ws.rs.GET;
import javax.ws.rs.Path;
import javax.ws.rs.Produces;
import javax.ws.rs.core.MediaType;

@Path("/words")
@RequestScoped
public class SpeechResource {

    @Inject
    @Channel("words")
    Publisher<String> words;

    @GET
    @Path("/stream")
    @Produces(MediaType.SERVER_SENT_EVENTS)
    @RolesAllowed({"Everyone"})
    @SseElementType("text/plain")
    public Publisher<String> stream() {
        return words;
    }
}
Next, add the following to your application.properties.
# Configure the Kafka sink / consumer
mp.messaging.outgoing.generated-word.connector=smallrye-kafka
mp.messaging.outgoing.generated-word.topic=words
mp.messaging.outgoing.generated-word.value.serializer=org.apache.kafka.common.serialization.StringSerializer
# Configure the Kafka source / producer
mp.messaging.incoming.words.connector=smallrye-kafka
mp.messaging.incoming.words.value.deserializer=org.apache.kafka.common.serialization.StringDeserializer
mp.messaging.incoming.words.group-id=kafka-sandbox
Finally, update the Qute template file.
src/main/resources/templates/secured.html
<!DOCTYPE html>
<html lang="en">
<head>
<meta charset="UTF-8">
<style>
body {
margin: 50px auto;
width: 800px;
}
.content {
display: inline-block;
}
</style>
</head>
<body>
<div>
<div>
<h2>Hello, {name}</h2>
<div><h3>September 19, 1796: George Washington Farewell Address</h3></div>
<div><span class="content"></span></div>
</div>
</div>
</body>
<script src="https://code.jquery.com/jquery-3.4.1.min.js"></script>
<script>
var source = new EventSource("/words/stream");
var jQuery = $;
source.onmessage = function (event) {
var word = event.data;
jQuery(".content").last().after('<span class="content">'+word+" "+'</span>');
};
</script>
The most interesting part of this file is this bit:
var source = new EventSource("/words/stream");
This code creates an event source from the /words/stream endpoint you just created in the SpeechResource class. This endpoint is protected. However, because the request for the EventSource will come from the same browser session as the authenticated request, there is no need to manually pass in the JWT and add it to the token header here.
You shouldn’t need to restart your Quarkus application since it detects new files and compiles them for you. If you shut it down for some reason, restart it:
./mvnw compile quarkus:dev
Open a browser and navigate to http://localhost:8080/secured.
You’ll see a new window with your authenticated identity and a stream of words from George Washington’s farewell address.
At this point, you’ve got a working Kafka cluster and a Quarkus client. You secured the Quarkus client using OIDC / OAuth 2.0. However, you haven’t secured the Kafka cluster yet. All communication between the Quarkus client and the Kafka cluster is vulnerable.
Create a Secure Kafka Cluster
Now you’re going to create a secure Kafka cluster. The security relies on two layers: encryption via SSL and a JAAS/SASL authentication mechanism. You are most likely already somewhat familiar with SSL (think HTTPS in your browser, more or less). JAAS is Java Authentication and Authorization Service, which is an implementation of SASL, or Simple Authentication and Security Layer.
I won’t go into detail about JAAS and SASL in this tutorial, but take a look at the Oracle docs on SASL and JAAS for more info. Just understand that they are underlying protocols that Kafka implements to allow for authentication.
Kafka implements the following SASL mechanism:
- GSSAPI (Kerberos)
- PLAIN
- SCRAM-SHA-256
- SCRAM-SHA-512
- OAUTHBEARER
GSSAPI/Kerberos allows Kafka to authenticate using an enterprise authentication server like Active Directory. The next three are password-based authentication mechanisms. PLAIN is a plain text password that Kafka stores in plain text on the broker. SCRAM-SHA allows Kafka to authenticate passwords in a more secure manner using Salted Challenge Response Authentication Mechanism (SCRAM). OAUTHBEARER allows Kafka to use JSON Web Tokens to authenticate both clients and brokers.
You’re going to use SSL + PLAIN in this tutorial. You should use all three of the password-based SASL mechanisms along with TLS/SSL in production. You should probably use all of these with TLS/SSL if you want to be secure, really.
It may also be worth referring to the Apache Kafka security documentation if you want to look deeper. If you’re going to use these technologies in production, you should definitely familiarize yourself with the security documentation.
Kafka also allows you to secure broker-to-broker and client-to-broker connections separately and distinctly. In this tutorial, you’re going to configure broker-to-broker and broker-to-client security the same: TLS/SSL + PLAIN password authentication.
Enable Kafka Encryption and Authentication Using SSL
In this section, you’re going to generate the SSL certificates and keys that you will use to enable encryption and authenticate clients and brokers. This is probably the most complicated and intimidating part of the tutorial (if you’re not already pretty familiar with SSL certs and keytool). I’ve made it as painless as possible. The relevant Apache Kafka docs are actually pretty helpful as well.
The basic idea is that each machine in the cluster (brokers and clients) will have a public and private key pair as well as a certificate. The certificate identifies the machine. These certificates are signed with a root certificate, or Certificate Authority (CA), which machines can use to verify the certificate. Certificates can also be self-signed which means they’re signed by the entity that creates the certificate. In this tutorial, you will create some self-signed certificates.
Each machine’s keystore will contain the root CA certificate as well as the signed certificate that identifies that machine. Each machine’s truststore will contain the root CA certificate. This means that each machine will trust certificates that have been signed with the root CA and will not trust certificates that have not been signed with the root CA. This makes the root CA the keys to the castle, in essence.
In case you don’t know, a keystore is a Java file you can use to store certificates and keys that identify a machine. A truststore is a Java file that you can use to store certificates and keys that the machine should trust (more or less). Thus putting the root CA in the truststore means that the machines will trust all the certs signed with that CA.
Open a shell.
Make a directory to hold all of your SSL certificates. In production on a server, these would generally end up somewhere like /var/private/ssl, but for this tutorial, I suggest you put them under the root project directory, somewhere like kafka-quarkus-java/ssl.
NOTE: All of the commands below assume you’re doing everything locally via localhost. If that’s not the case, you’ll need to update the commands below and/or disable hostname verification in the brokers by placing the config value ssl.endpoint.identification.algorithm= (the value is blank on purpose) in the server.properties, consumer.properties, and producer.properties Kafka config files.
Navigate into the kafka-quarkus-java/ssl using cd.
Step 1: Create the root CA, simply a certificate and public/private key pair, that you will use to sign the broker and client certs.
openssl req -new -x509 -keyout ca-key -out ca-cert -days 365 \
-passout pass:test1234 -batch \
-subj "/C=US/ST=Oregon/L=Portland/O=Okta/CN=CARoot"
Step 2: Add the root CA to the server and client truststores. You’ll get a chance to inspect the root CA before agreeing to trust it. For each, you will need to type Y and press Enter.
keytool -keystore server.truststore.jks -alias CARoot -import -file ca-cert -storepass test1234
keytool -keystore client.truststore.jks -alias CARoot -import -file ca-cert -storepass test1234
At this point, you’ve created two Java truststores that contain the root certificate authority that you will use to sign the certificates on the machines. Next, you’ll create two certificates and sign them with this root CA: one for the client and one for the broker.
Step 3: Create the server keystore with a private key and unsigned certificate.
keytool -keystore server.keystore.jks -alias server \
-validity 365 -keyalg RSA -genkey -storepass test1234 -ext SAN=DNS:localhost \
-dname "CN=localhost,OU=Kafka-Spring,O=Okta,L=Portland,S=Oregon,C=US"
Step 4: Export certificates from the server keystore, sign them with the CA cert, and import the signed cert back into the server keystore with the root certificate.
# Export server cert
keytool -keystore server.keystore.jks -alias server -certreq -file cert-file-server -storepass test1234
# Sign the server cert with the root CA
openssl x509 -req -CA ca-cert -CAkey ca-key -in cert-file-server -out cert-signed-server -days 365 -CAcreateserial -passin pass:test1234
# Import server cert and root CA into server keystore
keytool -keystore server.keystore.jks -alias CARoot -import -file ca-cert -storepass test1234 -noprompt
keytool -keystore server.keystore.jks -alias server -import -file cert-signed-server -storepass test1234 -noprompt
Step 5: Create a client keystore with a private key and unsigned certificate.
keytool -keystore client.keystore.jks -alias client \
-validity 365 -keyalg RSA -genkey -storepass test1234 -ext SAN=DNS:localhost \
-dname "CN=localhost,OU=Kafka-Spring,O=Okta,L=Portland,S=Oregon,C=US"
Step 6: Create a client, export the certificates from the client keystore, sign them with the CA cert, and import the signed cert back into the client keystore with the root certificate.
# Export client cert
keytool -keystore client.keystore.jks -alias client -certreq -file cert-file-client -storepass test1234
# Sign the client cert
openssl x509 -req -CA ca-cert -CAkey ca-key -in cert-file-client -out cert-signed-client -days 365 -CAcreateserial -passin pass:test1234
# Import client cert and CA into client keystore
keytool -keystore client.keystore.jks -alias CARoot -import -file ca-cert -storepass test1234 -noprompt
keytool -keystore client.keystore.jks -alias client -import -file cert-signed-client -storepass test1234 -noprompt
Now your keystores contain the certificates signed with the root CA.
If you had multiple broker machines, you’d need to create multiple certificates and sign them, one for each machine.
Also, notice that the tutorial code set all the passwords to the keystores and truststores to test1234. You’d clearly want to change this to something else in production.
What’s going to happen (to greatly simplify things), is that when the clients or brokers try to talk to each other, they’re going to show each other their signed certificates from their keystores, and they’re going to use the root CA from their truststores to try and verify the other machine’s certificate. If that’s successful, they’ll accept the identity of the other machine and accept the SSL connection, establishing an encrypted connection.
In the project GitHub repository, there’s a script called create_ssl_directory.sh that will generate the contents of the /ssl directory, including all of the certs, keystores, truststores, and client and server JAAS config files for you.
Secure the Kafka Cluster Using SSL and JAAS Password Protection
To configure the Kafka Cluster to use SSL and JAAS security, you need to add some configuration properties to the Kafka server.properties file.
Edit kafka_2.13-2.4.1/config/server.properties. Add the following to the bottom.
# SASL Configuration
listeners=SASL_SSL://localhost:9092
security.inter.broker.protocol=SASL_SSL
sasl.mechanism.inter.broker.protocol=PLAIN
sasl.enabled.mechanisms=PLAIN
# SSL Configuration
ssl.keystore.location={yourSslDirectoryPath}/server.keystore.jks
ssl.keystore.password=test1234
ssl.key.password=test1234
ssl.truststore.location={yourSslDirectoryPath}/server.truststore.jks
ssl.truststore.password=test1234
# JAAS Configuration
listener.name.sasl_ssl.plain.sasl.jaas.config=org.apache.kafka.common.security.plain.PlainLoginModule required \
	username="admin" \
	password="admin-secret" \
	user_admin="admin-secret" \
	user_alice="alice-secret";
In two places, replace {yourSslDirectoryPath} with the absolute path to your kafka-quarkus-java/ssl directory (or wherever you put the SSL files).
These properties do a number of things. The SASL section defines a listener that uses SASL_SSL on port 9092. It also tells Kafka that we want the brokers to talk to each other using SASL_SSL. SASL_SSL is SASL/JAAS using one of the various authentication mechanisms over a secure SSL connection. In this case, you authenticate both the broker-to-broker and client-to-broker connections using SASL PLAIN passwords.
The SSL section tells Kafka where to find the keystore and truststore and what the passwords for each are.
The JAAS section tells Kafka that we are using the plain login module and defines two different usernames and passwords.
Now you need to configure the Kafka producers.
Add the following to the bottom of kafka_2.13-2.4.1/config/producers.properties.
sasl.jaas.config=org.apache.kafka.common.security.plain.PlainLoginModule required username="admin" password="admin-secret";
security.protocol=SASL_SSL
sasl.mechanism=PLAIN
You also need to configure the Kafka consumers.
Add the following to the bottom of kafka_2.13-2.4.1/config/consumers.properties.
sasl.jaas.config=org.apache.kafka.common.security.plain.PlainLoginModule required username="admin" password="admin-secret";
security.protocol=SASL_SSL
sasl.mechanism=PLAIN
Notice that the producer and consumer configurations are the same. They both use SASL_SSL PLAIN. They also use the PlainLoginModule and specify the admin credentials. You could specify different users and producers and consumers if you wanted to.
That’s all the Kafka configuration. You need to Control-C in the broker shell to stop the process and restart it. The broker is the second process. You don’t need to restart the zookeeper process.
bin/kafka-server-start.sh config/server.properties
Verify Kafka SSL Configuration
Just for fun, at this point, you can use openssl to check the SSL configuration on the broker.
openssl s_client -debug -connect localhost:9092
CONNECTED(00000003)
Can't use SSL_get_servername
depth=1 C = US, ST = Oregon, L = Portland, O = Okta, CN = CARoot
verify error:num=19:self signed certificate in certificate chain
verify return:1
depth=1 C = US, ST = Oregon, L = Portland, O = Okta, CN = CARoot
verify return:1
depth=0 C = US, ST = Oregon, L = Portland, O = Okta, OU = Kafka-Spring, CN = localhost
verify return:1
---
Certificate chain
 0 s:C = US, ST = Oregon, L = Portland, O = Okta, OU = Kafka-Spring, CN = localhost
   i:C = US, ST = Oregon, L = Portland, O = Okta, CN = CARoot
 1 s:C = US, ST = Oregon, L = Portland, O = Okta, CN = CARoot
   i:C = US, ST = Oregon, L = Portland, O = Okta, CN = CARoot
---
Server certificate
-----BEGIN CERTIFICATE-----
MIIDQjCCAioCFEtfWH6wgxAR65xslAru21IefJSMMA0GCSqGSIb3DQEBCwUAMFAx
CzAJBgNVBAYTAlVTMQ8wDQYDVQQIDAZPcmVnb24xEDAOBgNVBAcMB1BvcnRsYWQx
DTALBgNVBAoMBE9rdGExDzANBgNVBAMMBkNBUm9vdDAeFw0yMDAyMDcxNzU0NTZa
Fw0yMTAyMDYxNzU0NTZaMGsxCzAJBgNVBAYTAlVTMQ8wDQYDVQQIEwZPcmVnb24x
...
You can even pass openssl s_client the path to your root CA. Replace {pathToRootCa} with the actual path to your root CA cert in the /ssl directory.
openssl s_client -connect localhost:9092 -CAfile {pathToRootCa}/ca-cert
CONNECTED(00000003)
Can't use SSL_get_servername
depth=1 C = US, ST = Oregon, L = Portland, O = Okta, CN = CARoot
verify return:1
depth=0 C = US, ST = Oregon, L = Portland, O = Okta, OU = Kafka-Spring, CN = localhost
verify return:1
---
Certificate chain
 0 s:C = US, ST = Oregon, L = Portland, O = Okta, OU = Kafka-Spring, CN = localhost
   i:C = US, ST = Oregon, L = Portland, O = Okta, CN = CARoot
 1 s:C = US, ST = Oregon, L = Portland, O = Okta, CN = CARoot
   i:C = US, ST = Oregon, L = Portland, O = Okta, CN = CARoot
---
Server certificate
-----BEGIN CERTIFICATE-----
MIIDQjCCAioCFEtfWH6wgxAR65xslAru21IefJSMMA0GCSqGSIb3DQEBCwUAMFAx
CzAJBgNVBAYTAlVTMQ8wDQYDVQQIDAZPcmVnb24xEDAOBgNVBAcMB1BvcnRsYWQx
DTALBgNVBAoMBE9rdGExDzANBgNVBAMMBkNBUm9vdDAeFw0yMDAyMDcxNzU0NTZa
Fw0yMTAyMDYxNzU0NTZaMGsxCzAJBgNVBAYTAlVTMQ8wDQYDVQQIEwZPcmVnb24x
ETAPBgNVBAcTCFBvcnRsYW5kMQ0wCwYDVQQKEwRPa3RhMRUwEwYDVQQLEwxLYWZr
Notice that in the first instance, without the root CA, you get this error:
verify error:num=19:self signed certificate in certificate chain
But in the second instance, you don’t get this error. That’s because you gave openssl s_client the root CA to use to verify certificates (in the exact same way that you’re giving all of the Kafka clients and brokers the root CA in their truststores).
Update the Quarkus Client for SSL
At this point, you’ve secured your Kafka cluster using SSL and SASL/JAAS PLAIN passwords. If you had multiple brokers, they would communicate with each other using SSL and passwords (however, you only have one broker in this case).
You still need to update the Quarkus client. You can try and start (or re-start) the Quarkus client and you’ll see that you get an error.
To fix this, you need to configure the Kafka client to use SASL SSL.
Add the following lines to your Quarkus client’s application.properties.
# SASL Configuration for Kafka client
mp.messaging.incoming.words.security.protocol=SASL_SSL
mp.messaging.incoming.words.sasl.mechanism=PLAIN
mp.messaging.outgoing.generated-word.security.protocol=SASL_SSL
mp.messaging.outgoing.generated-word.sasl.mechanism=PLAIN
mp.messaging.outgoing.generated-word.ssl.key-password=test1234
mp.messaging.outgoing.generated-word.ssl.keystore.location={sslDirPath}/client.keystore.jks
mp.messaging.outgoing.generated-word.ssl.keystore.password=test1234
mp.messaging.outgoing.generated-word.ssl.truststore.location={sslDirPath}/client.truststore.jks
mp.messaging.outgoing.generated-word.ssl.truststore.password=test1234
mp.messaging.incoming.words.ssl.key-password=test1234
mp.messaging.incoming.words.ssl.keystore.location={sslDirPath}/client.keystore.jks
mp.messaging.incoming.words.ssl.keystore.password=test1234
mp.messaging.incoming.words.ssl.truststore.location={sslDirPath}/client.truststore.jks
mp.messaging.incoming.words.ssl.truststore.password=test1234
# JAAS Configuration for Kafka client
mp.messaging.outgoing.generated-word.sasl.jaas.config=org.apache.kafka.common.security.plain.PlainLoginModule required \
	username="alice" \
	password="alice-secret";
mp.messaging.incoming.words.sasl.jaas.config=org.apache.kafka.common.security.plain.PlainLoginModule required \
	username="alice" \
	password="alice-secret";
Note that you need to replace {sslDirPath} four times in the properties above with the absolute path to the /ssl directory where your keystores and truststores are located. Also, be aware that you specified the password and username for your Kafka connector in this file in plain text. In production, you should move these out of this file for security reasons.
You can now run the Quarkus client app configured to connect to Kafka via SSL using the following command. As you did for the broker, you’re providing the path to the JAAS config file using a Java property. Maybe this seems like a lot of hoopla, but that file contains a plain-text password, so it’s best to keep it somewhere safe and out of version control.
Run the client app:
./mvnw compile quarkus:dev -Djava.security.auth.login.config=$SSL_DIR_PATH/kafka_client_jaas.conf
Open a browser to http://localhost:8080/secured.
You’ll see your browser streaming the now-familiar speech using a secured cluster and client application.
Discover More About Kafka and Java
Great job! You really accomplished a lot on this one. You created a Quarkus Java client application that used Qute templating and Kafka Streams to deliver a stream of real-time data to a browser. You installed and configured a local Apache Kafka cluster. You also secured the Quarkus application using OAuth 2.0 and OIDC with Okta as the OAuth provider. On top of all that, you also secured the Kafka cluster using SSL and SASL/JAAS.
That’s a lot of pretty exciting technologies—and all of them are scalable, fault-tolerant, and performant.
You can find the source code for this example on GitHub at oktadeveloper/okta-kafka-streams-quarkus-example.
If you liked this tutorial, you might enjoy these ones too:
- Communicate Between Microservices with Apache Kafka
- Build a REST API Using Java, MicroProfile, and JWT Authentication
- How to Develop a Quarkus App with Java and OIDC Authentication
- Kafka with Java: Build a Secure, Scalable Messaging App
If you have any questions, please leave a comment below. You can also follow us on Twitter @oktadev and subscribe to our YouTube channel.
Okta Developer Blog Comment Policy
We welcome relevant and respectful comments. Off-topic comments may be removed.